We originally planned on renovating the downstairs first and the upstairs last, but because we had to move into the house earlier than planned, we switched it up and decided to get our bedroom done so we could move our bed and belongings upstairs as quick as possible.
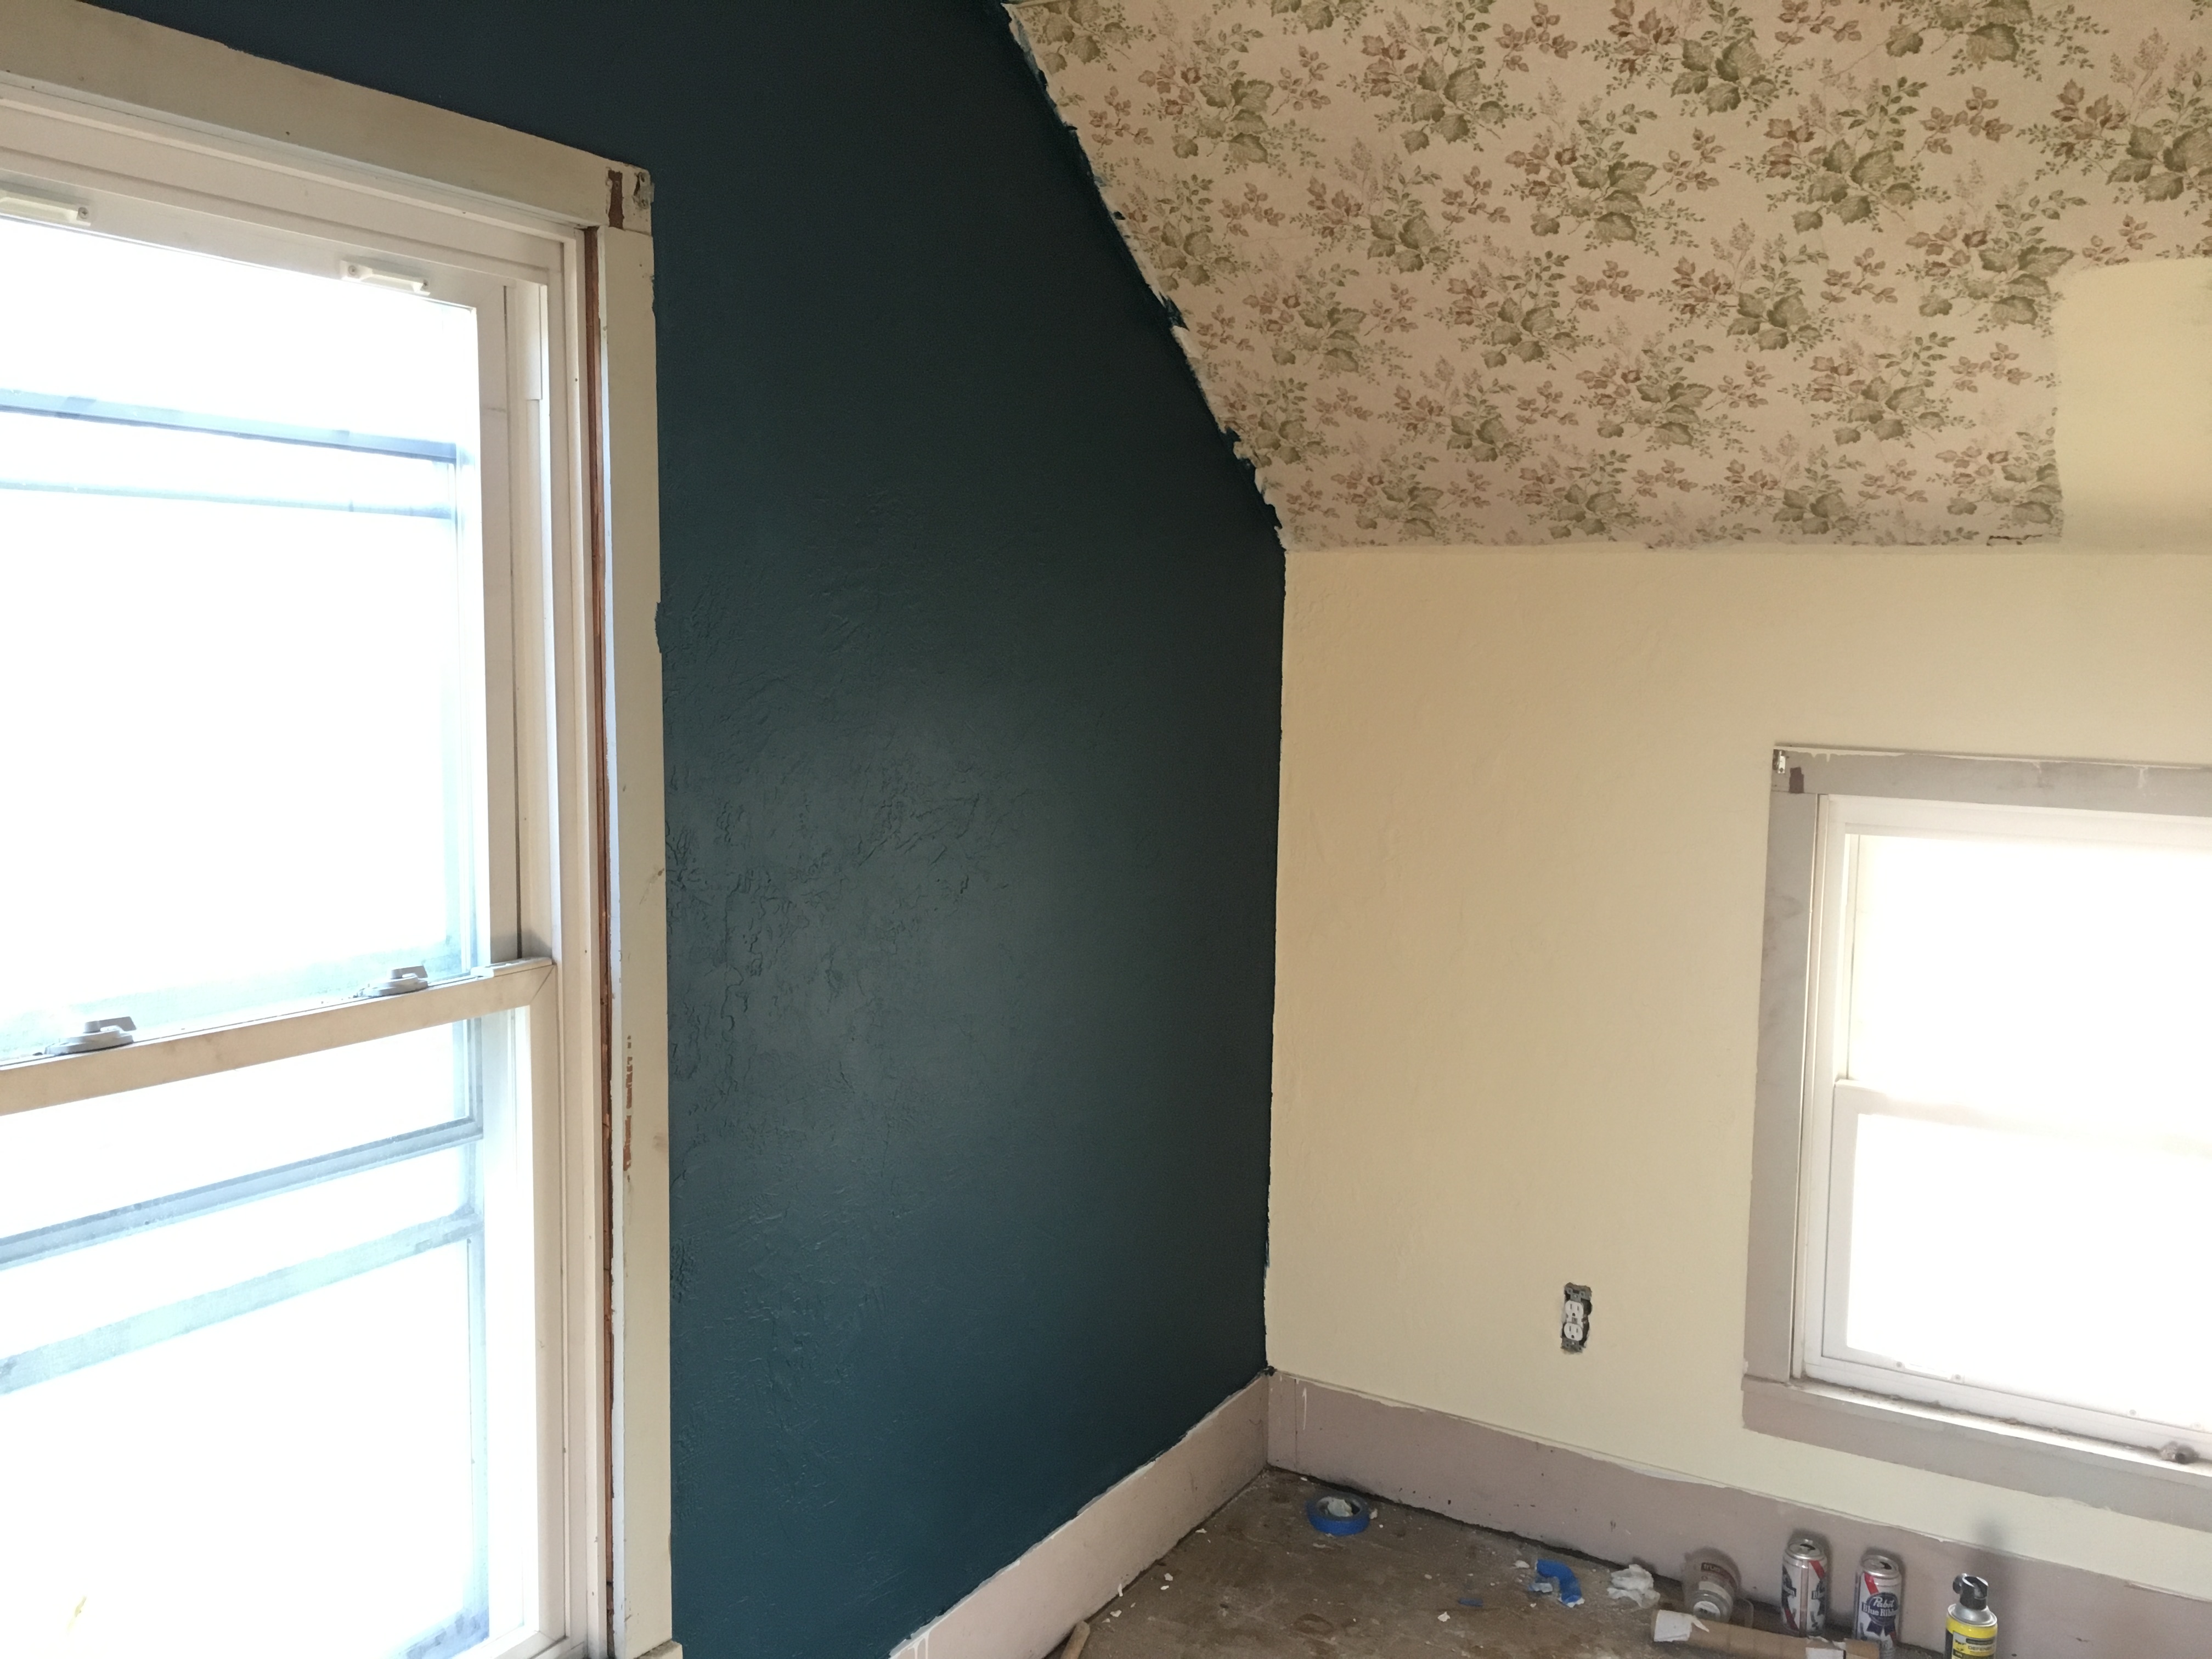
Here's the before pic. Actually, it's after we tore down a wall and starting ripping wall paper off the walls, but it wasn't much better looking before that.
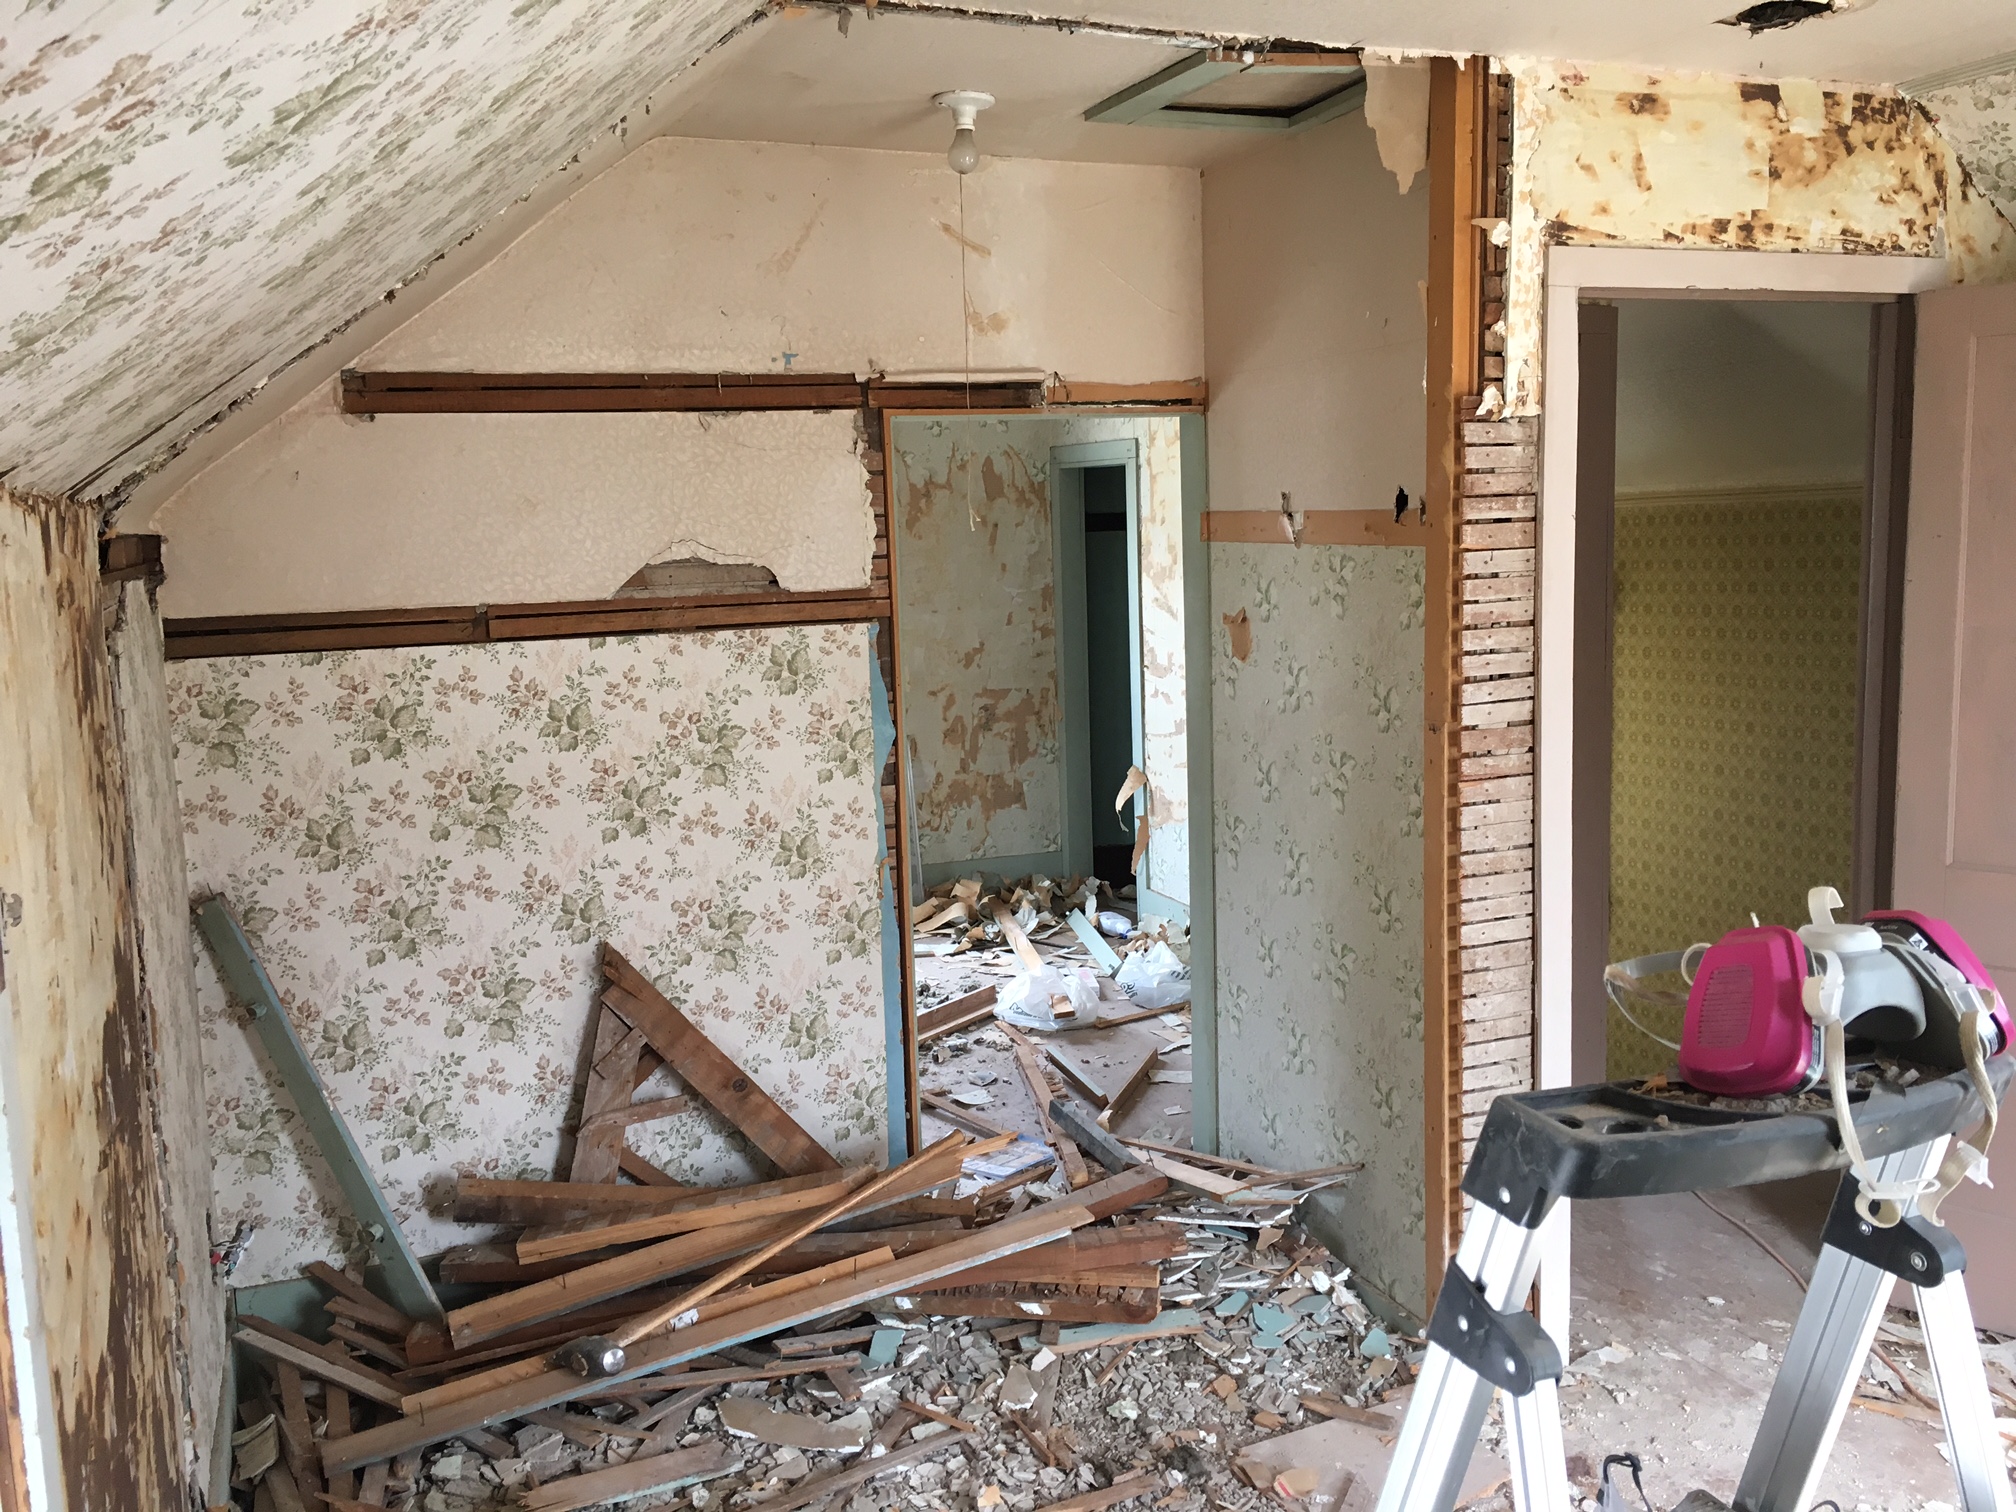
If you look closely, you can see where Trent Reznor found his inspiration for the album art for The Downward Spiral.

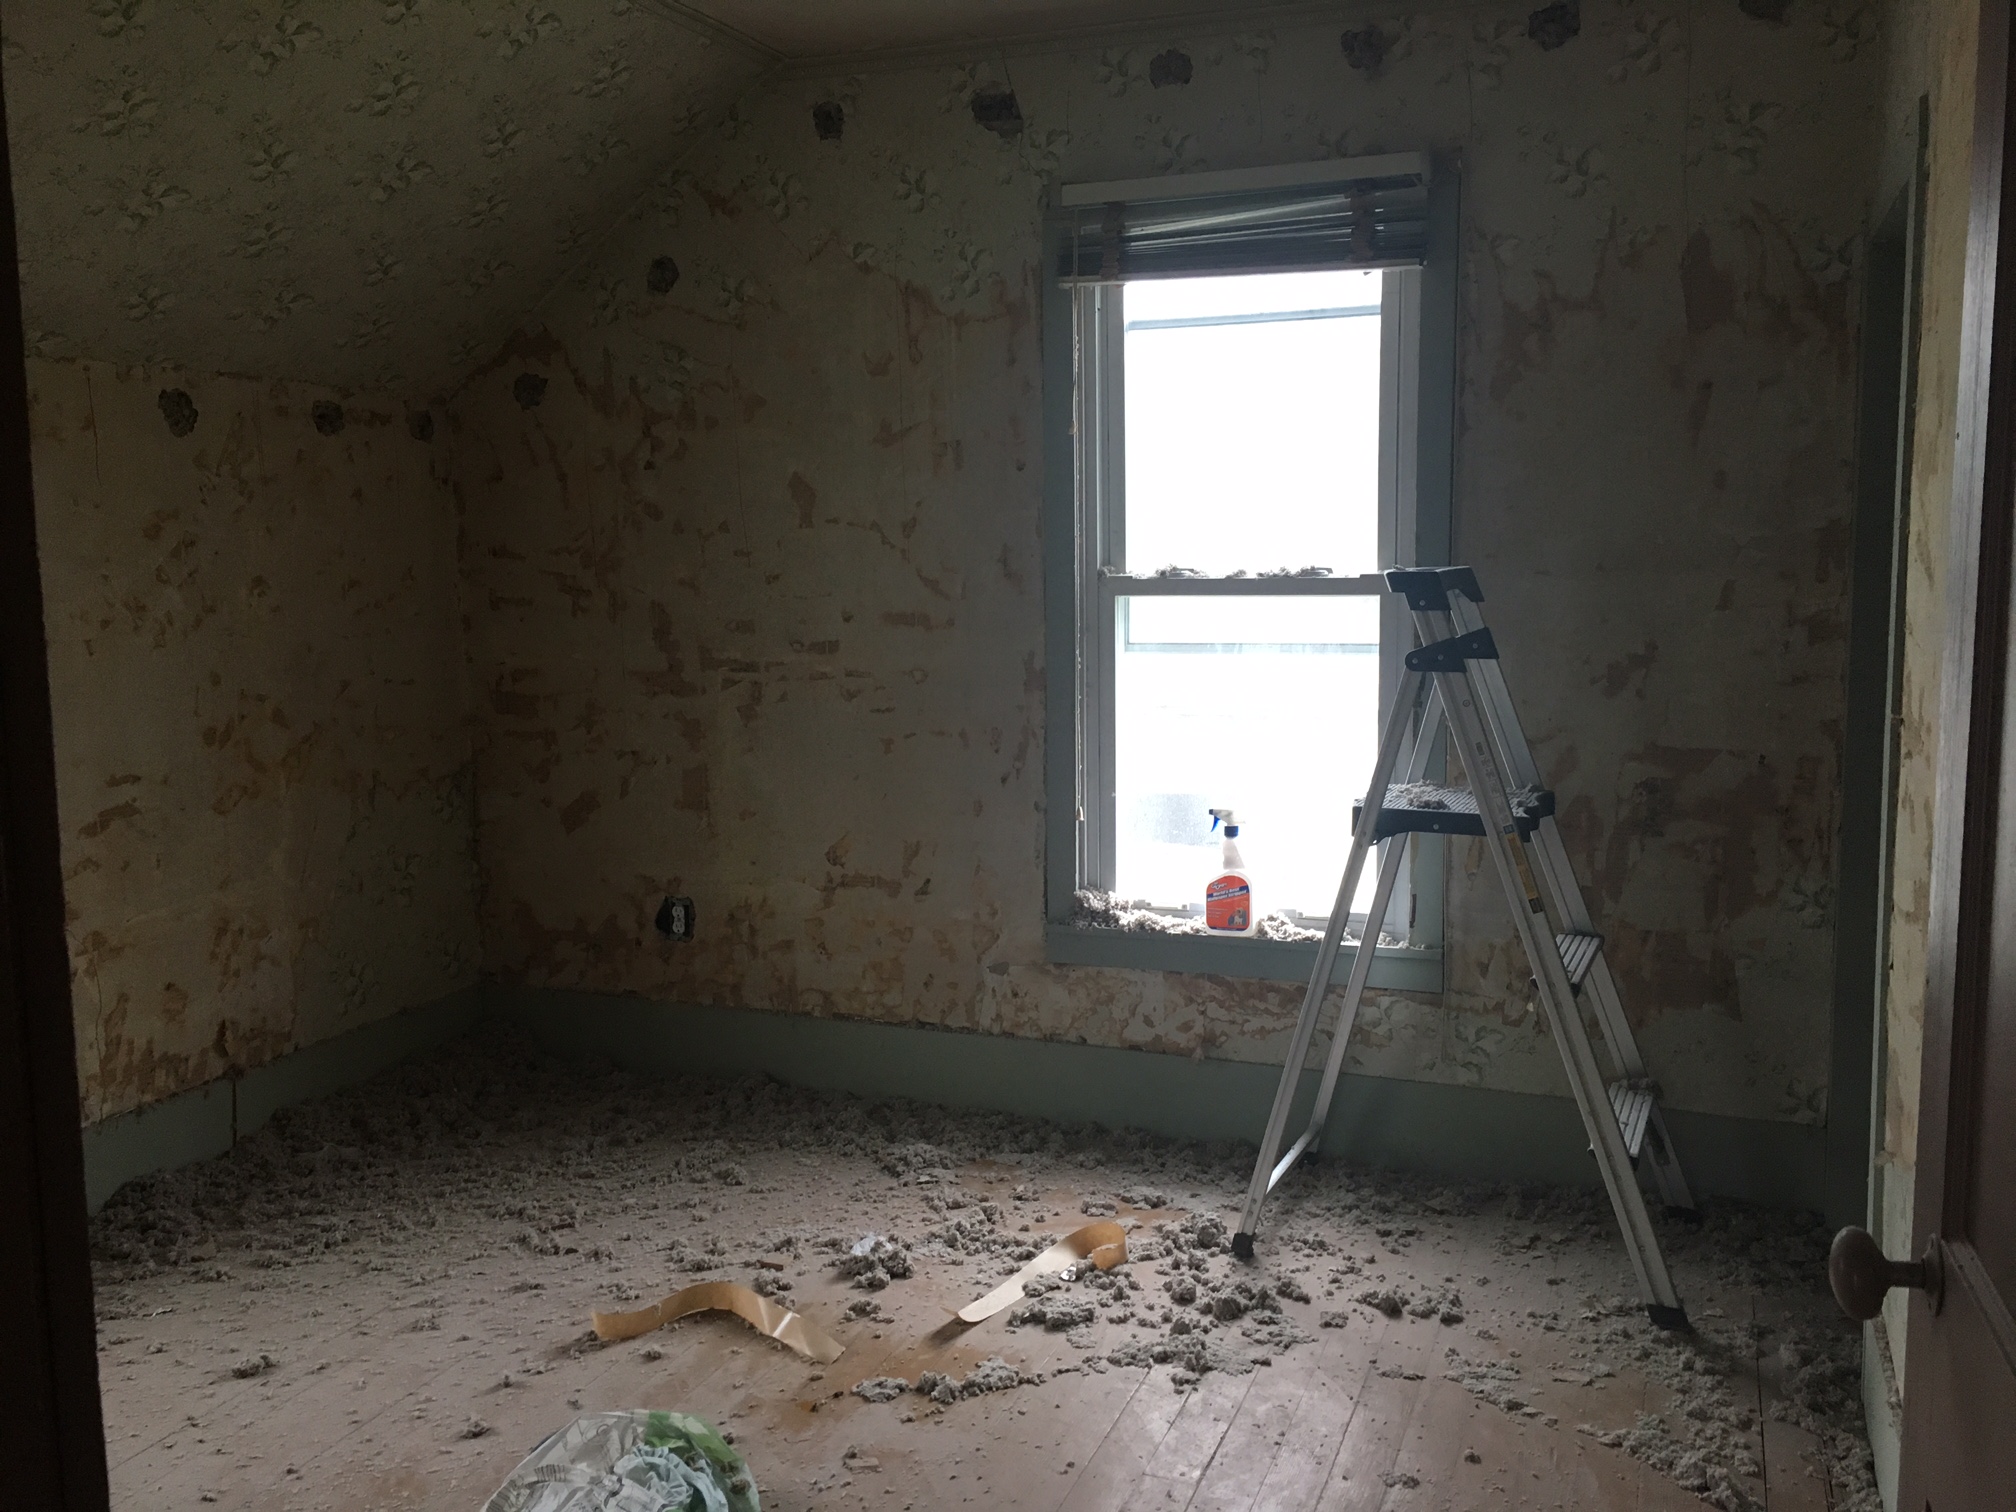
Then we did the blown-in insulation. See all the holes at the top of the stud bays? That's where the cellulose was blown in. Before that, no insulation at all.
Restoring the Old Plaster Walls
Each one of those holes had to be patched with plaster. We used a product called StructoLite. It was my first time working with plaster! Then we hired a painter buddy to go over the entire upstairs walls with drywall mud which had to be done because there was a million little scrapes and gouges in the plaster from the razor blade tool we used to peel off the wall paper. And I figured while we're covering all the walls we might as well put a texture on them - which is what we did - or, what the paint contractor did, he did a great job except he couldn't do the last wall as we were still closing off the door opening with drywall (see below). When I went in later to do the texture myself, it was way different and not as good! Oh well..
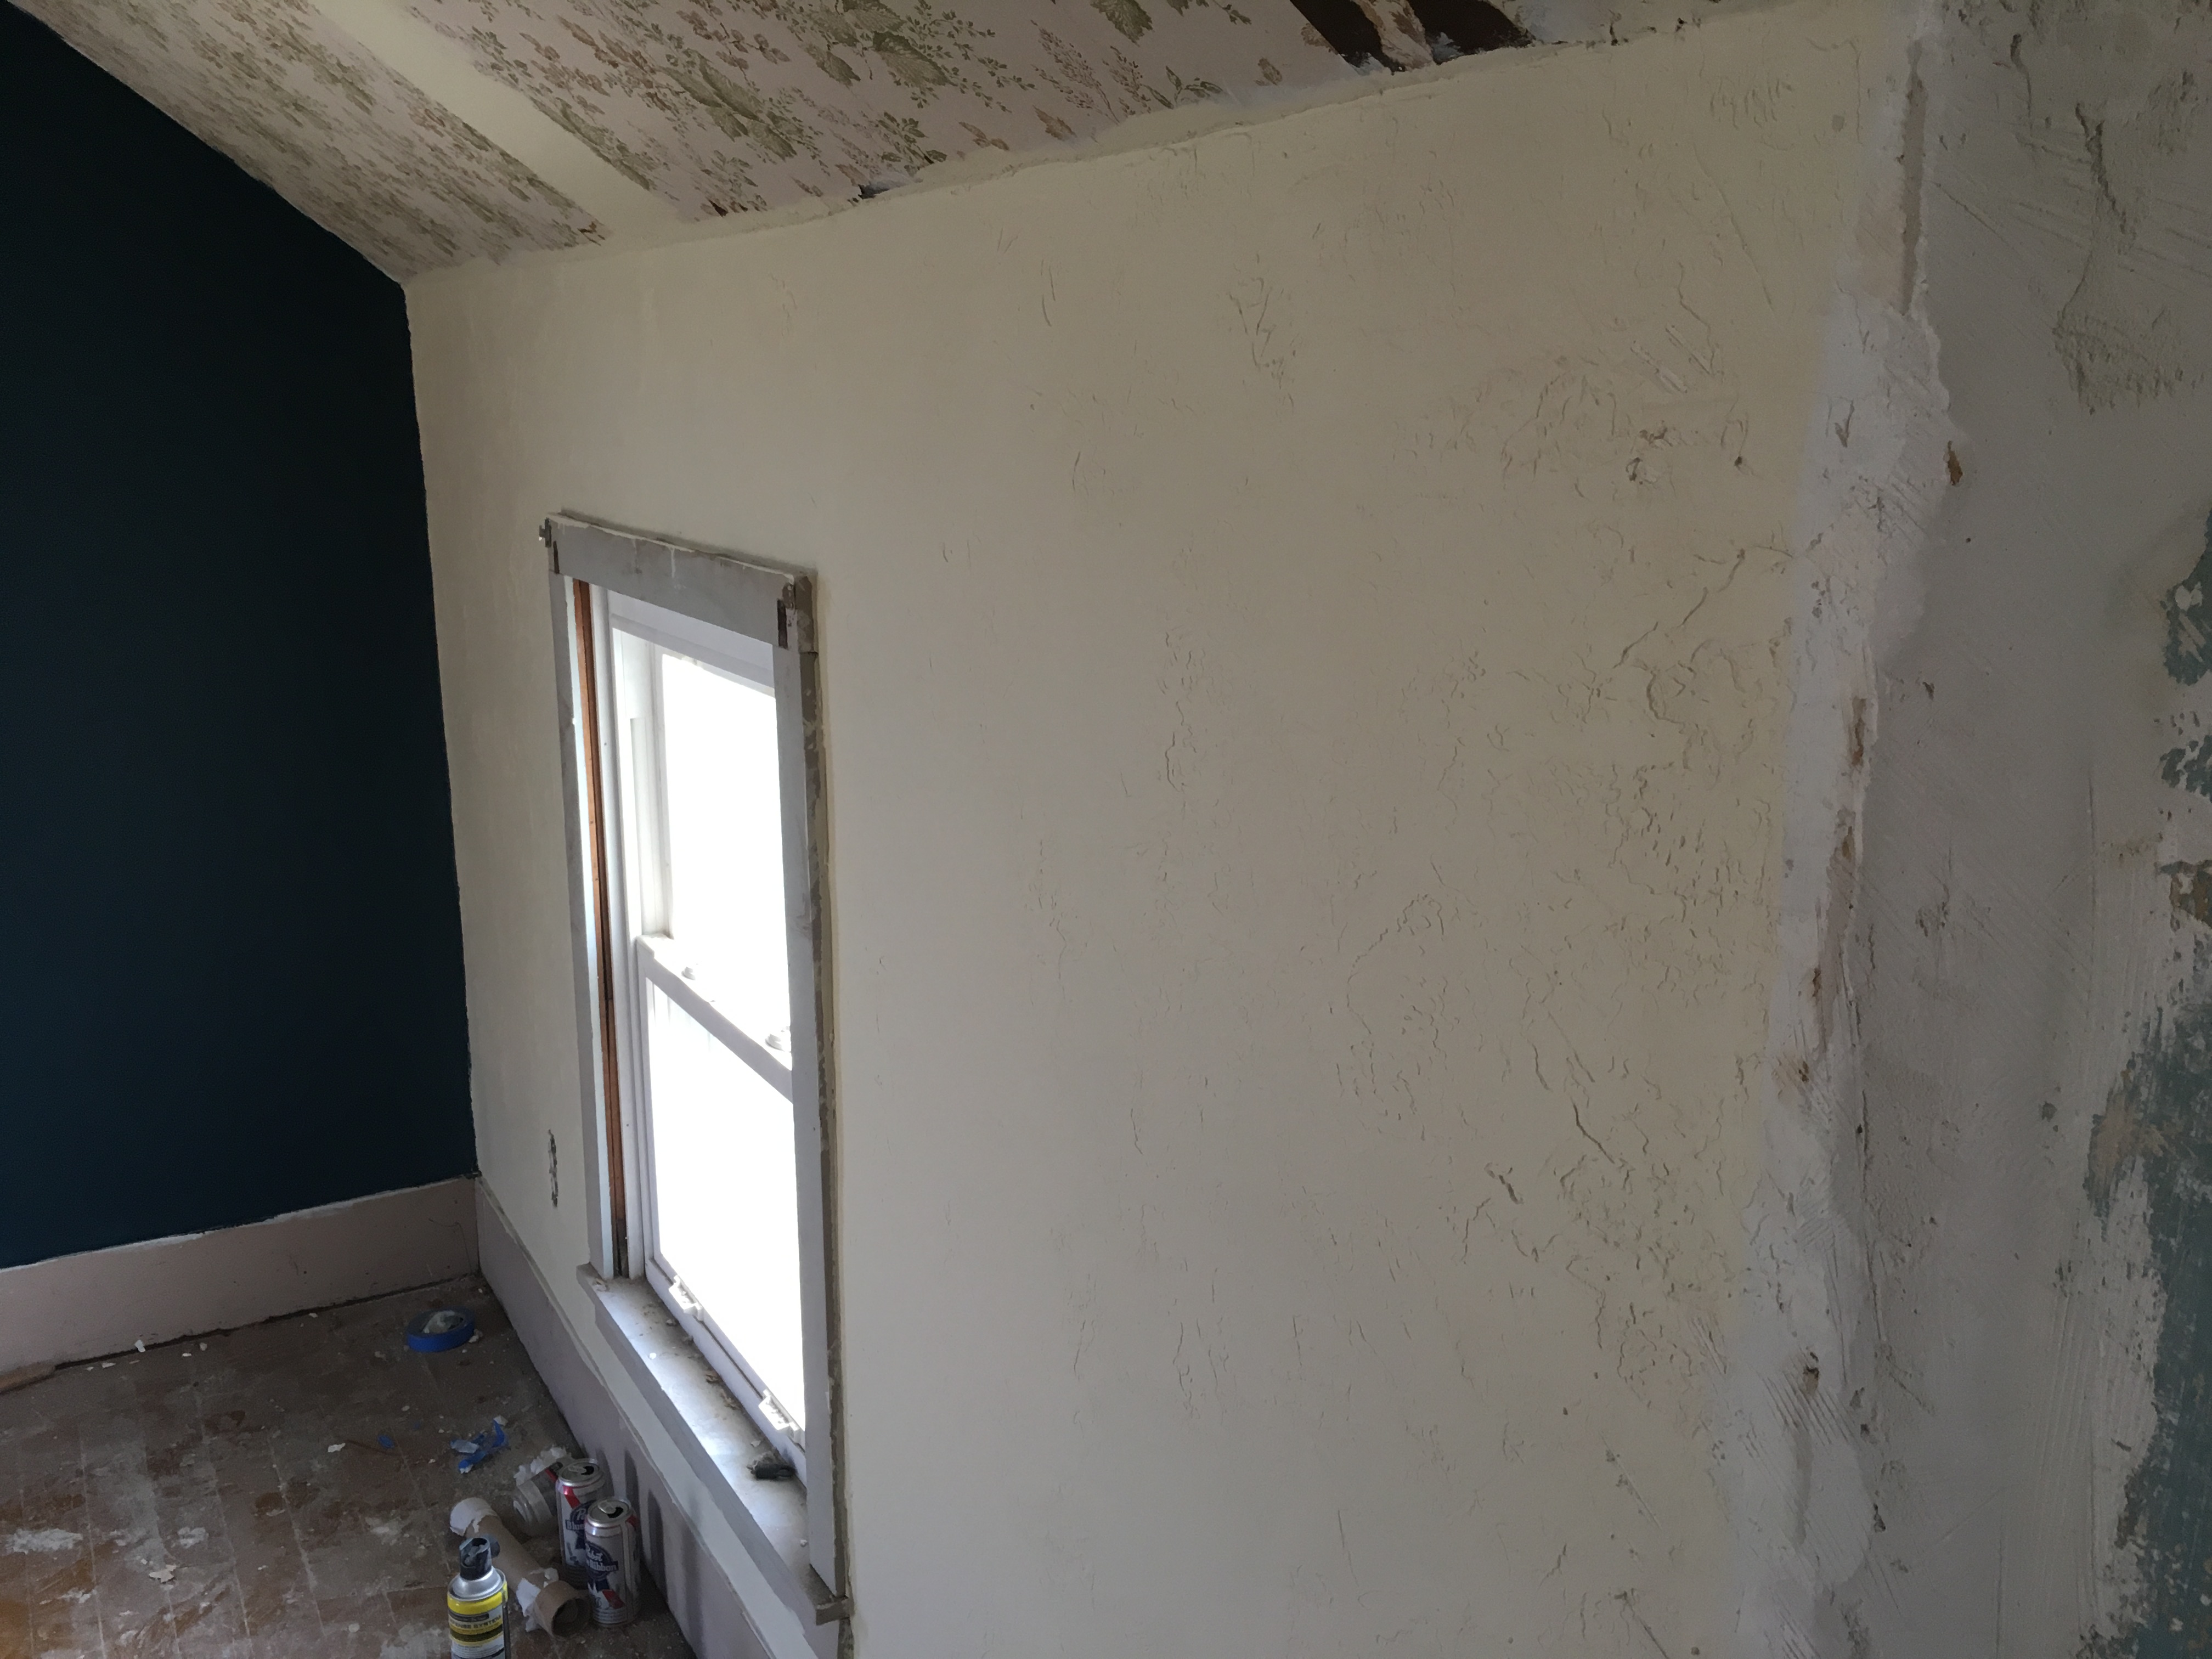
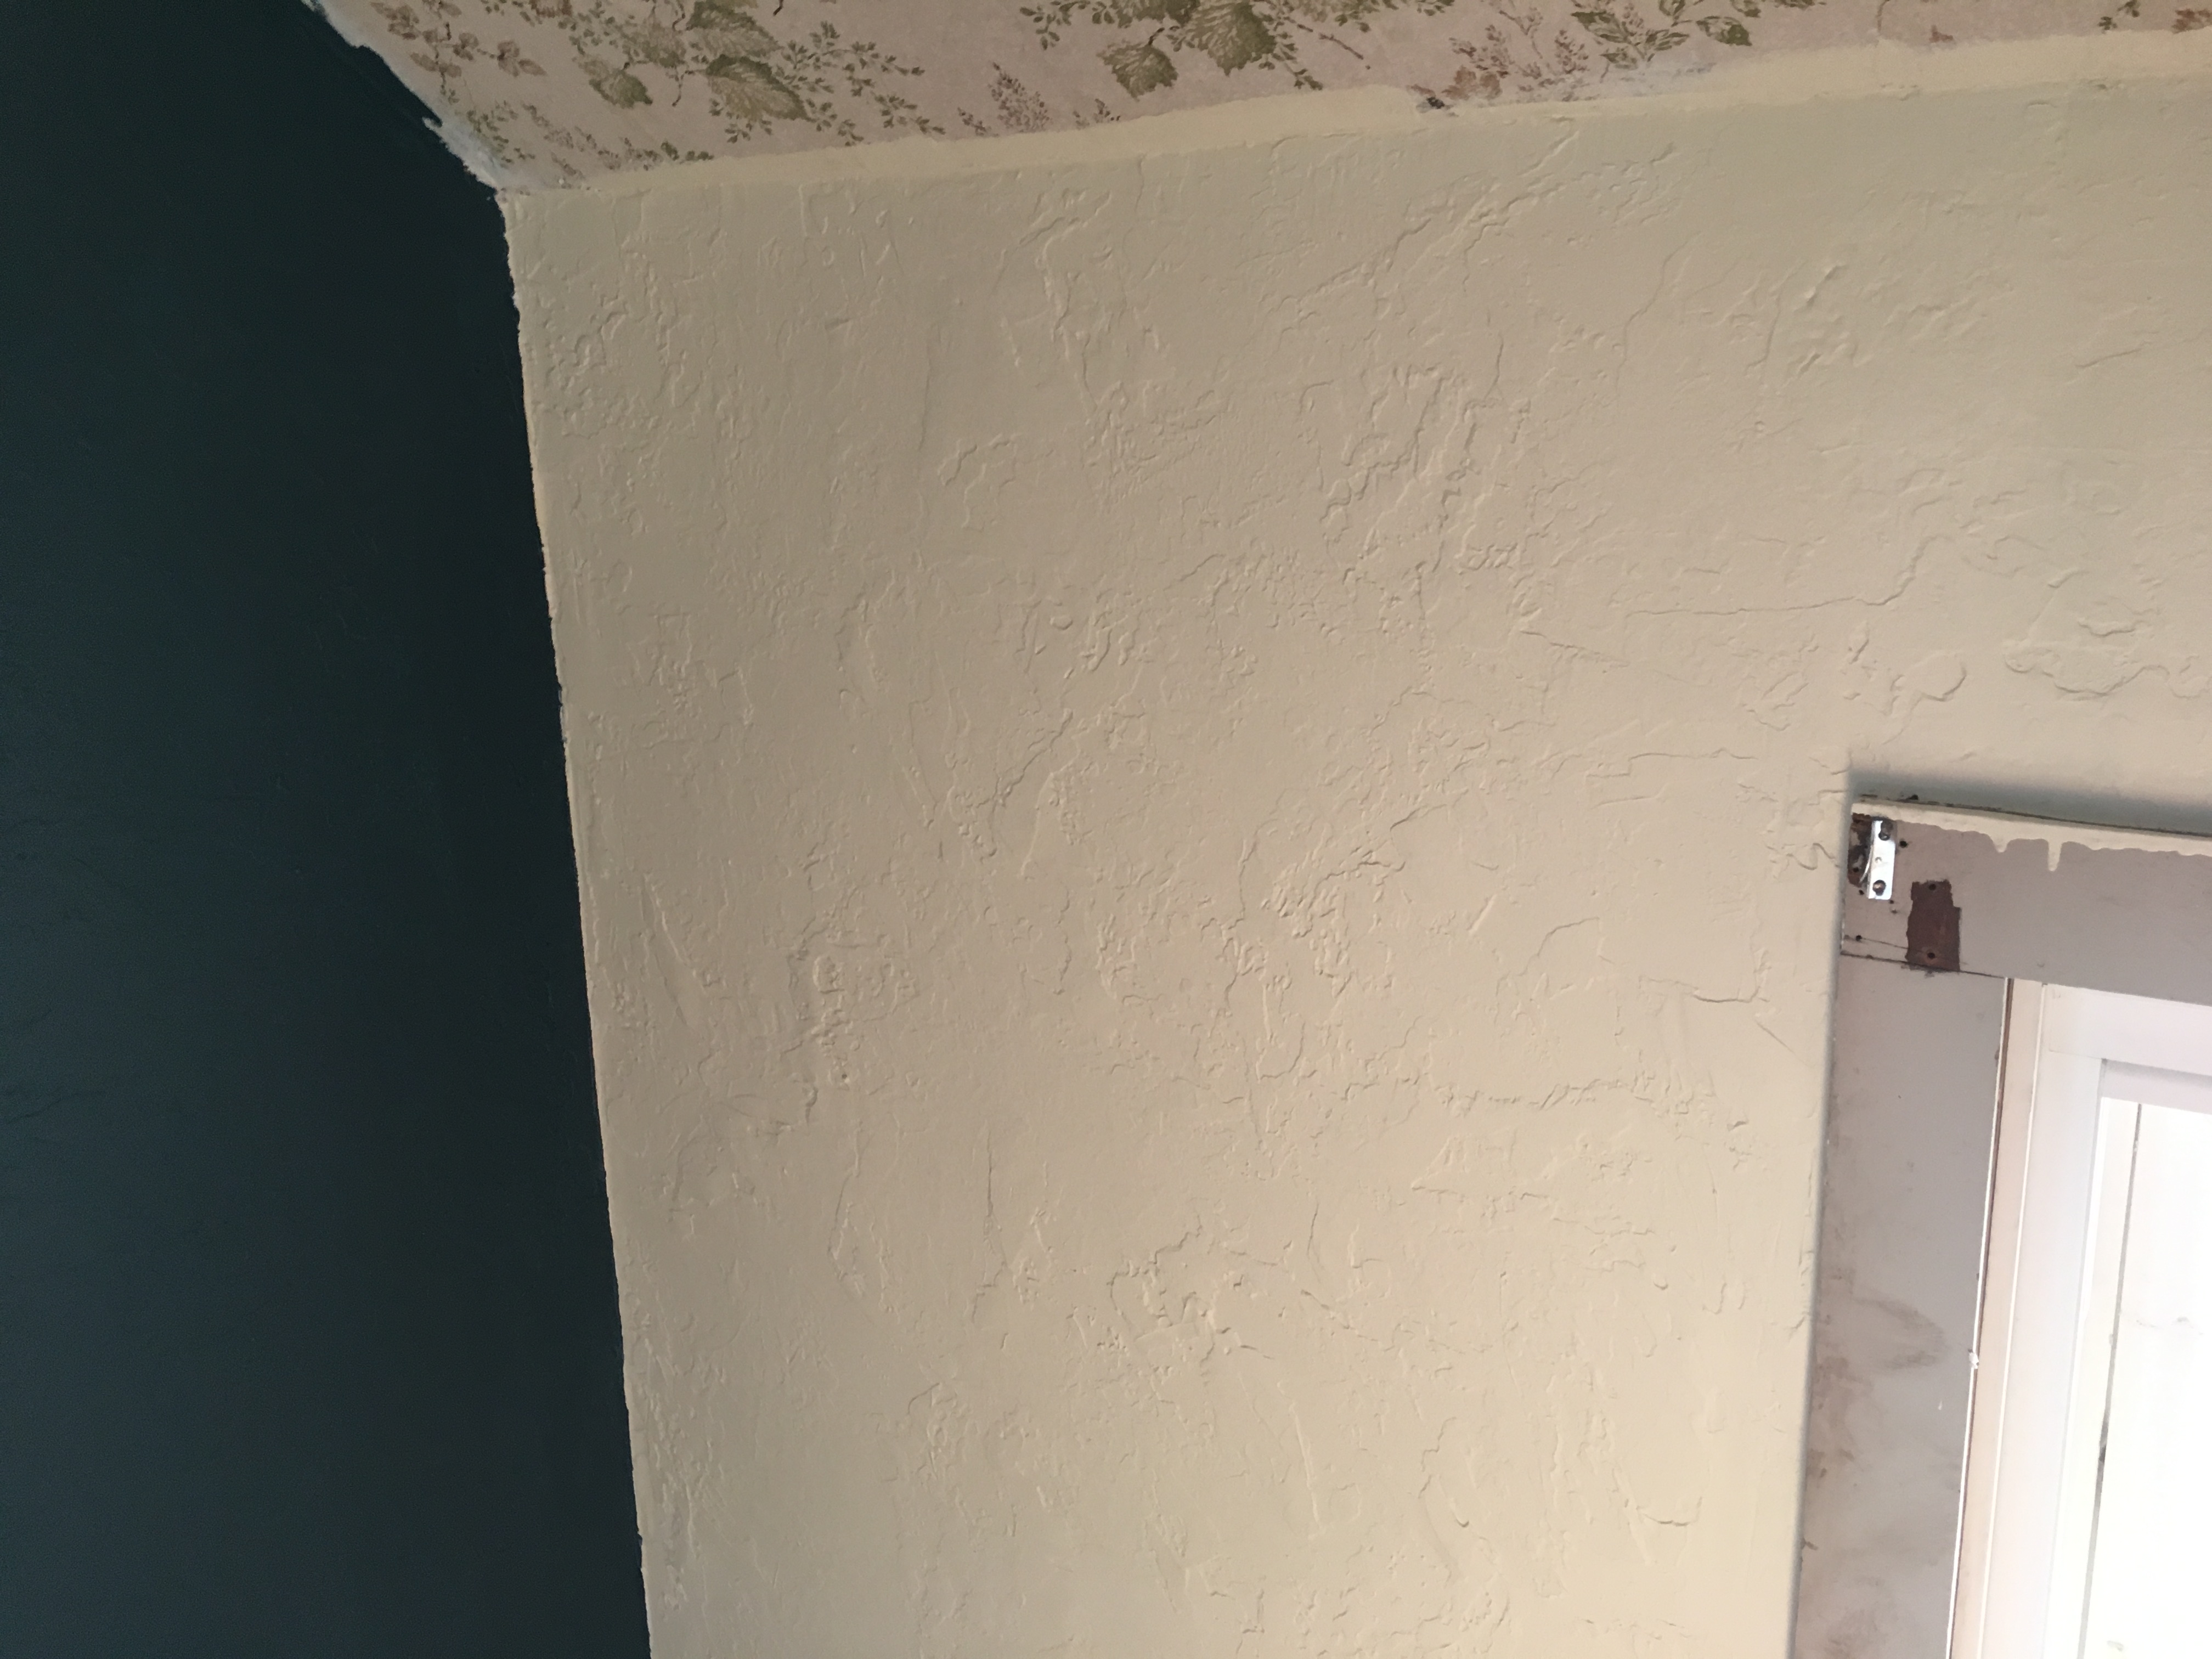
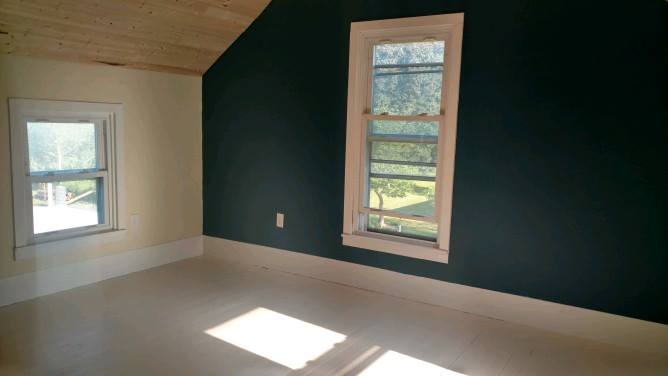
Before I could stop her, Logan painted the walls. I don't blame her though - those old walls were ugly! Yes there was many touchups that had to be performed after doing the ceiling and stuff, but it turned out great and we like the colors. One wall got a dark blue and the others got a creamy color.
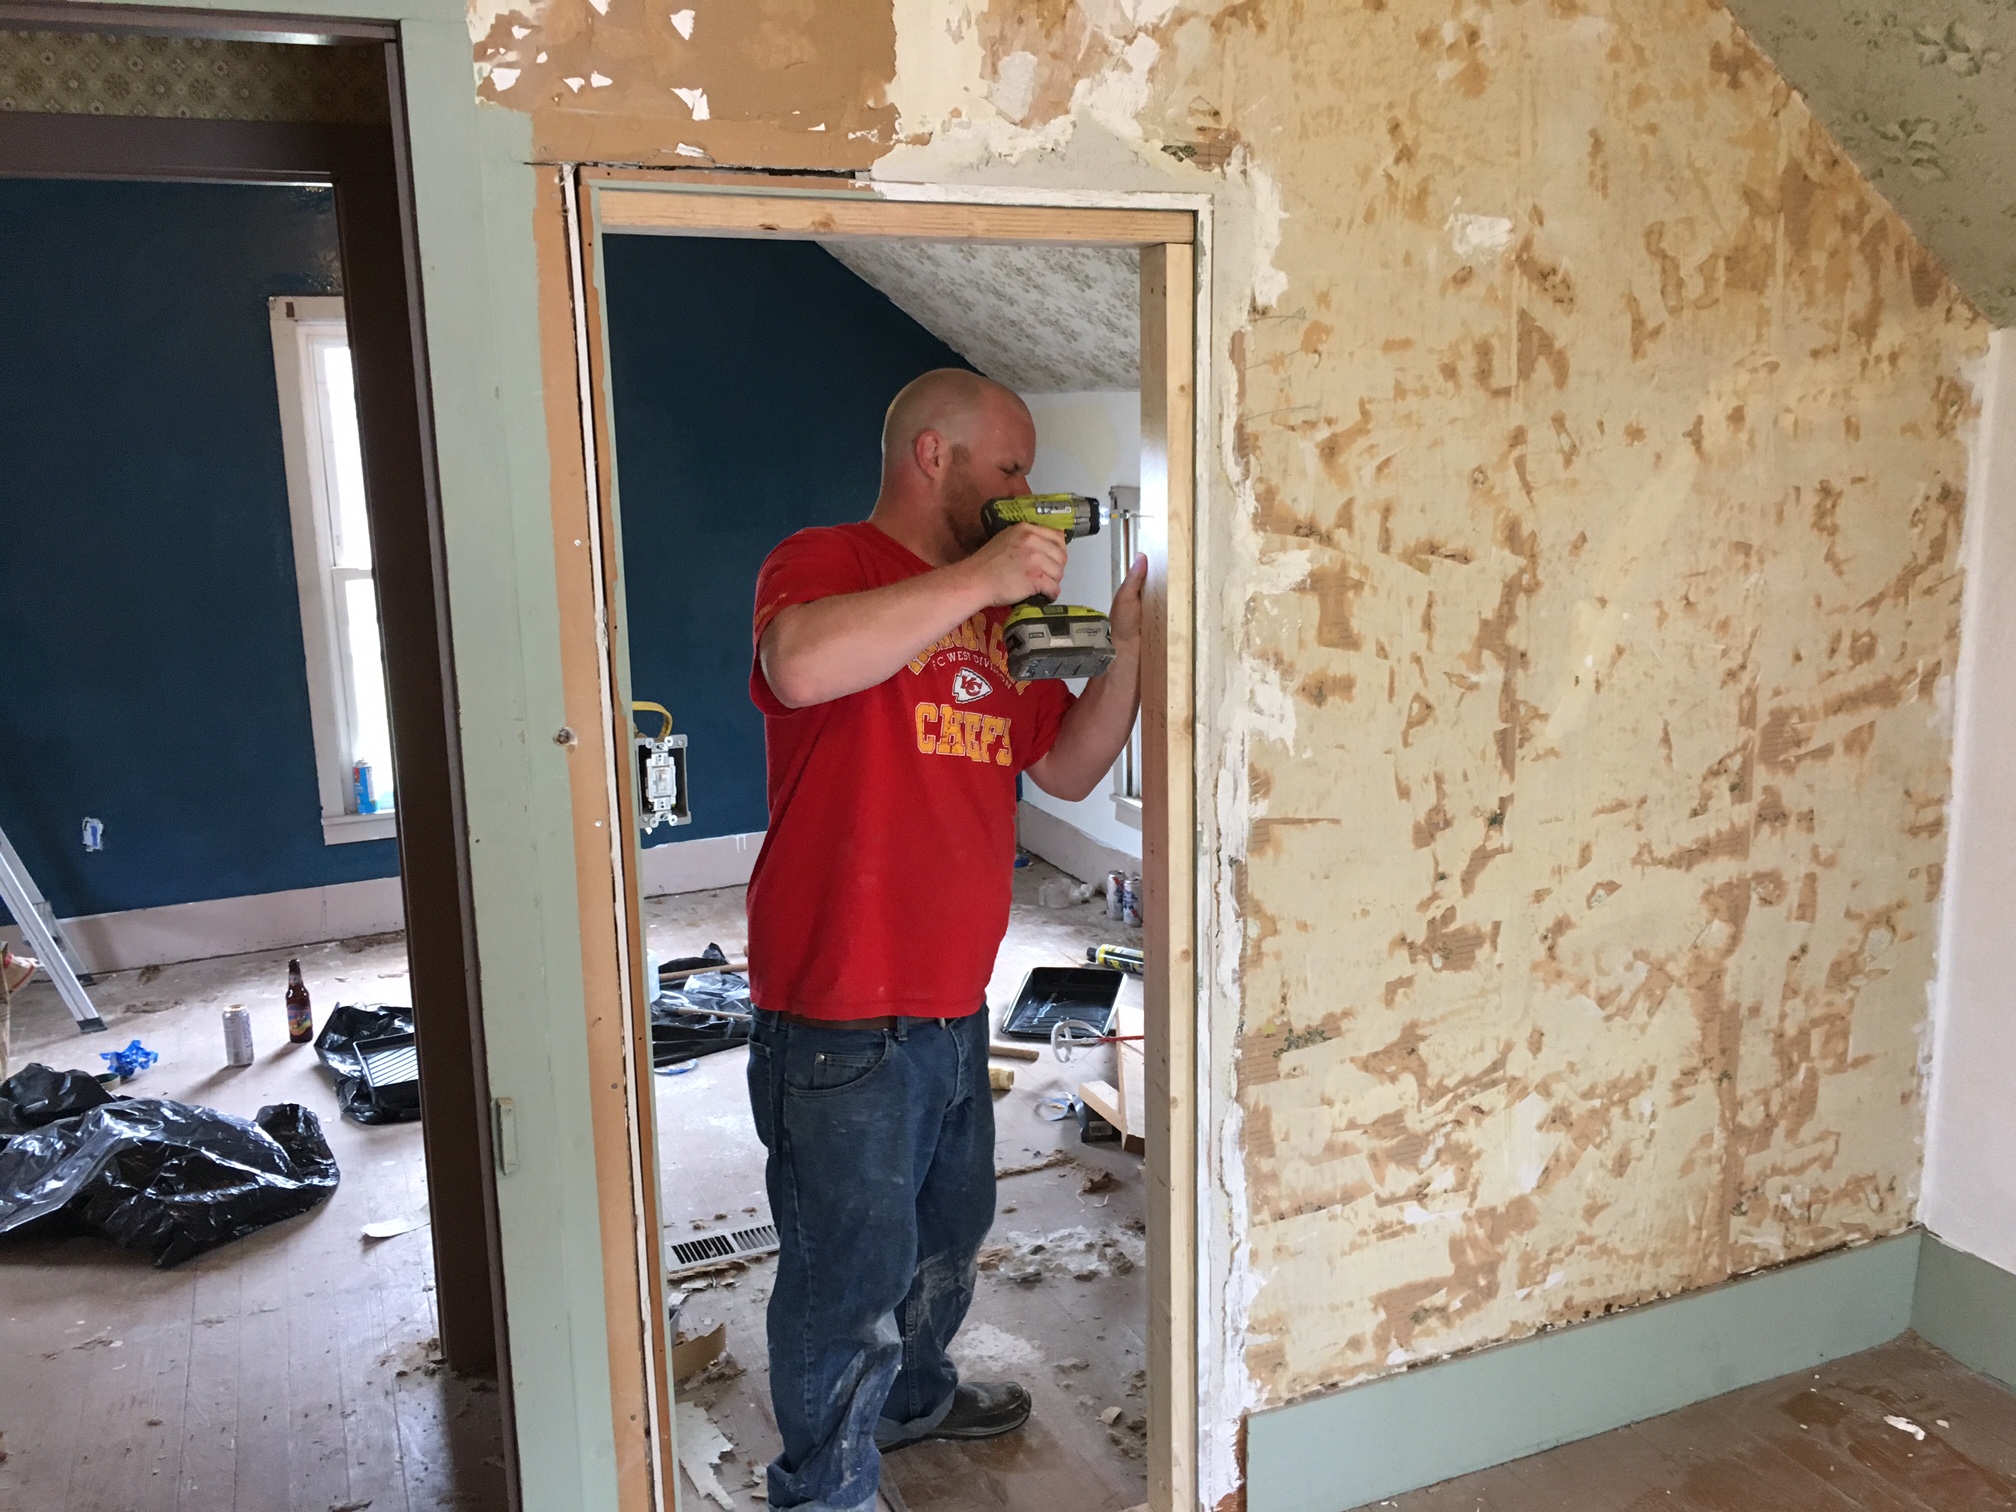
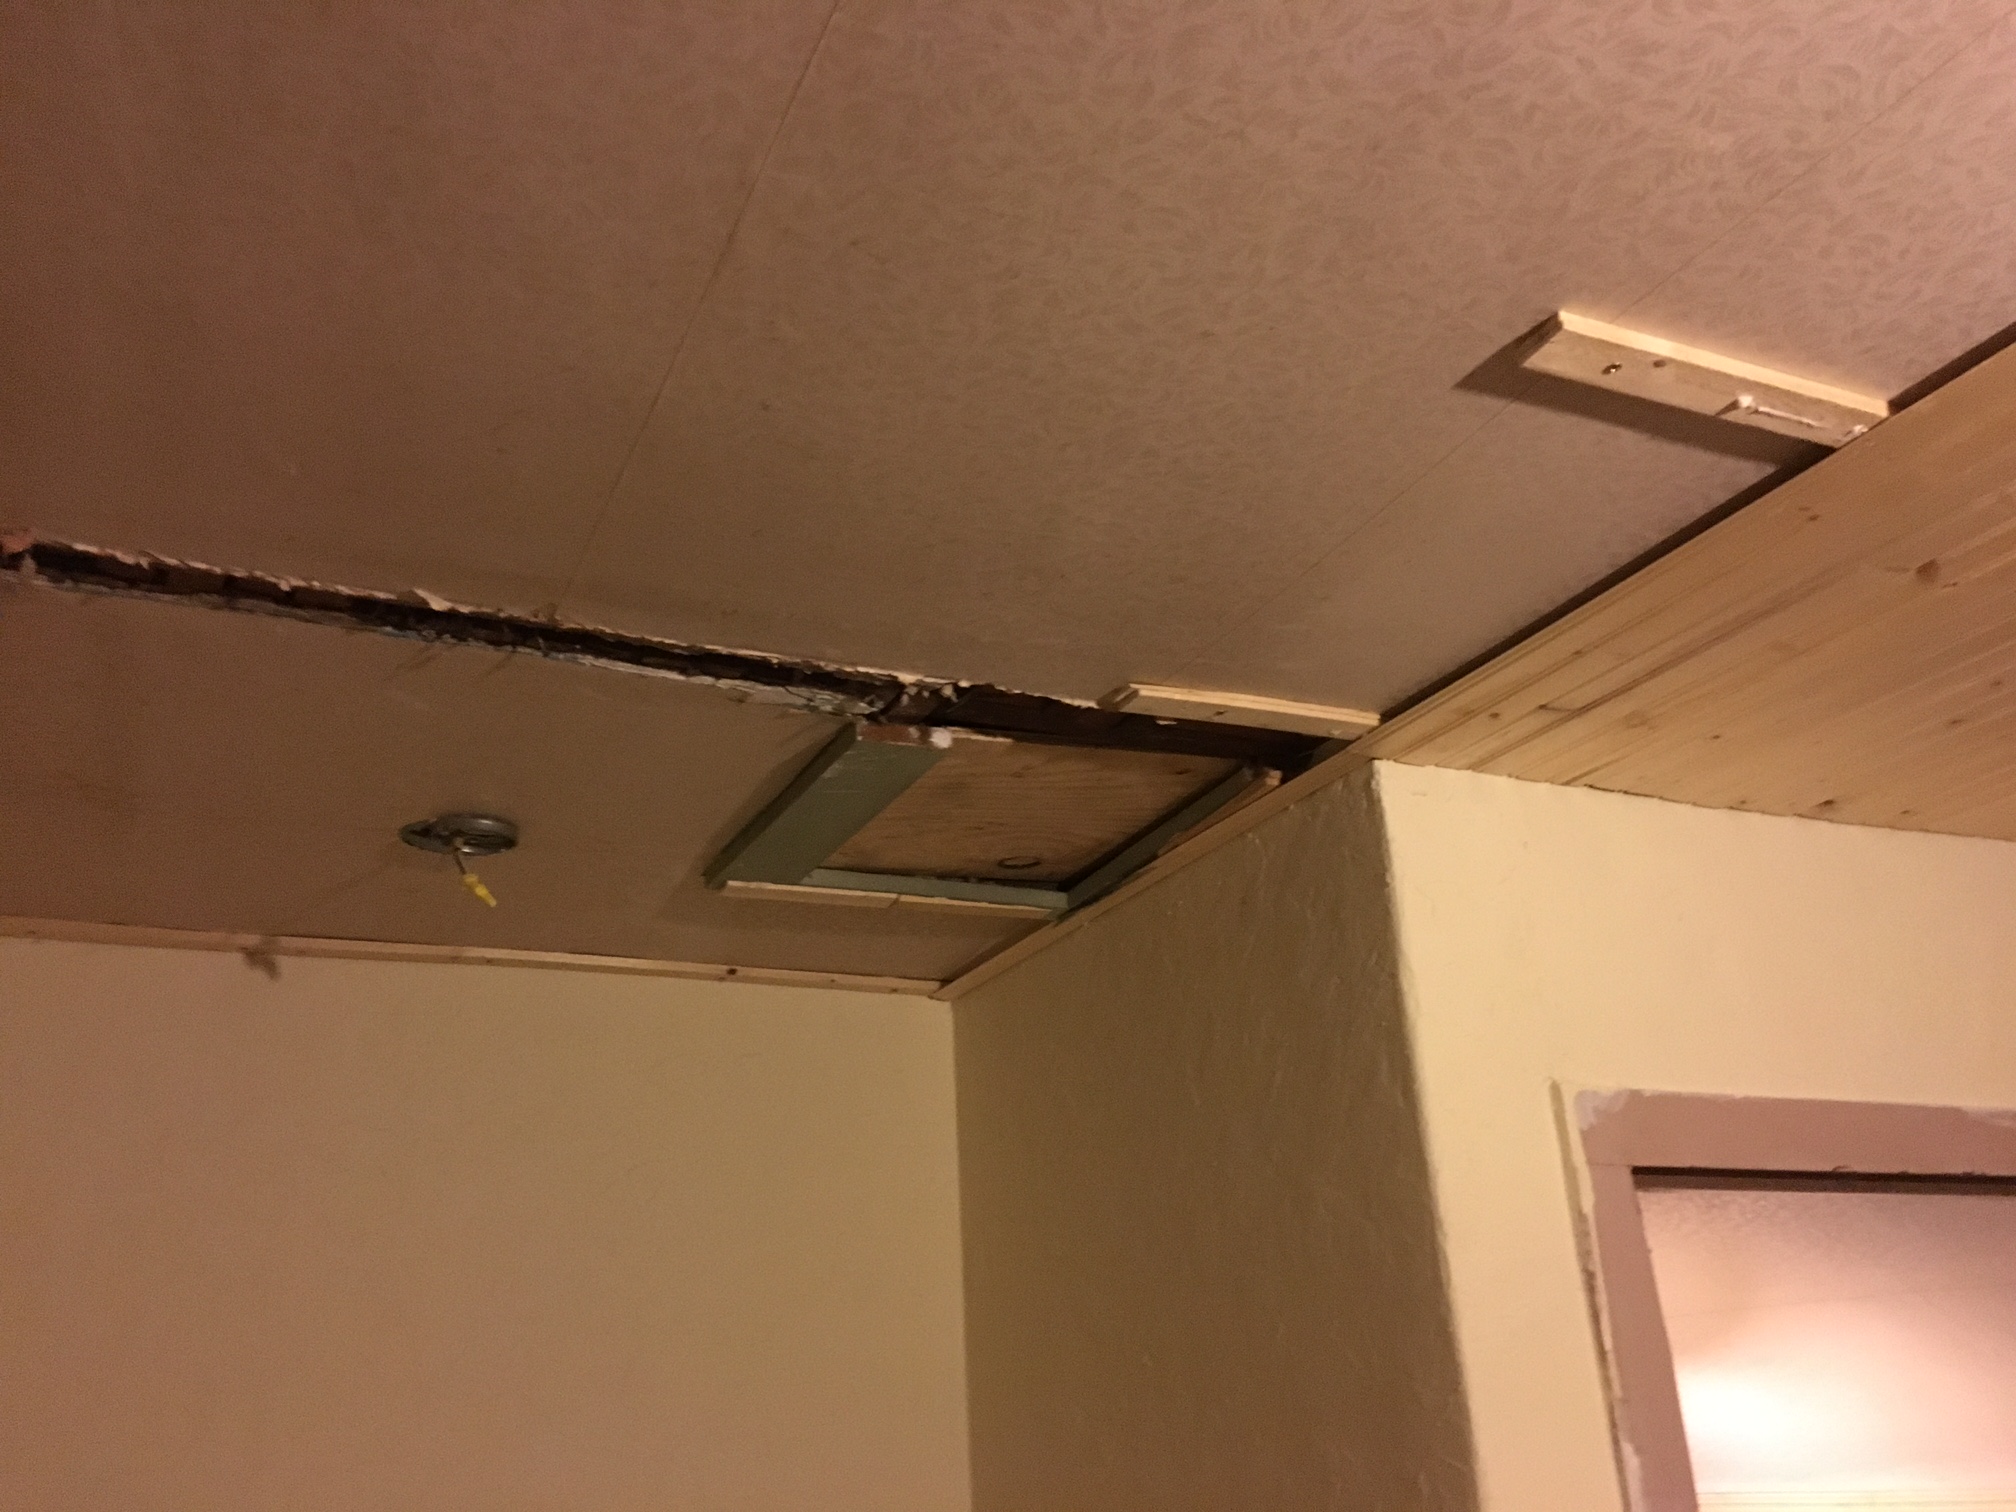
In between the two bedrooms was a closet that had doors leading to both rooms. Kinda odd. We knocked down the wall of the closet on the master bedroom side to make that room a lot bigger. And on the other wall we filled in the door opening with drywall. Here's Carl helping us with that:

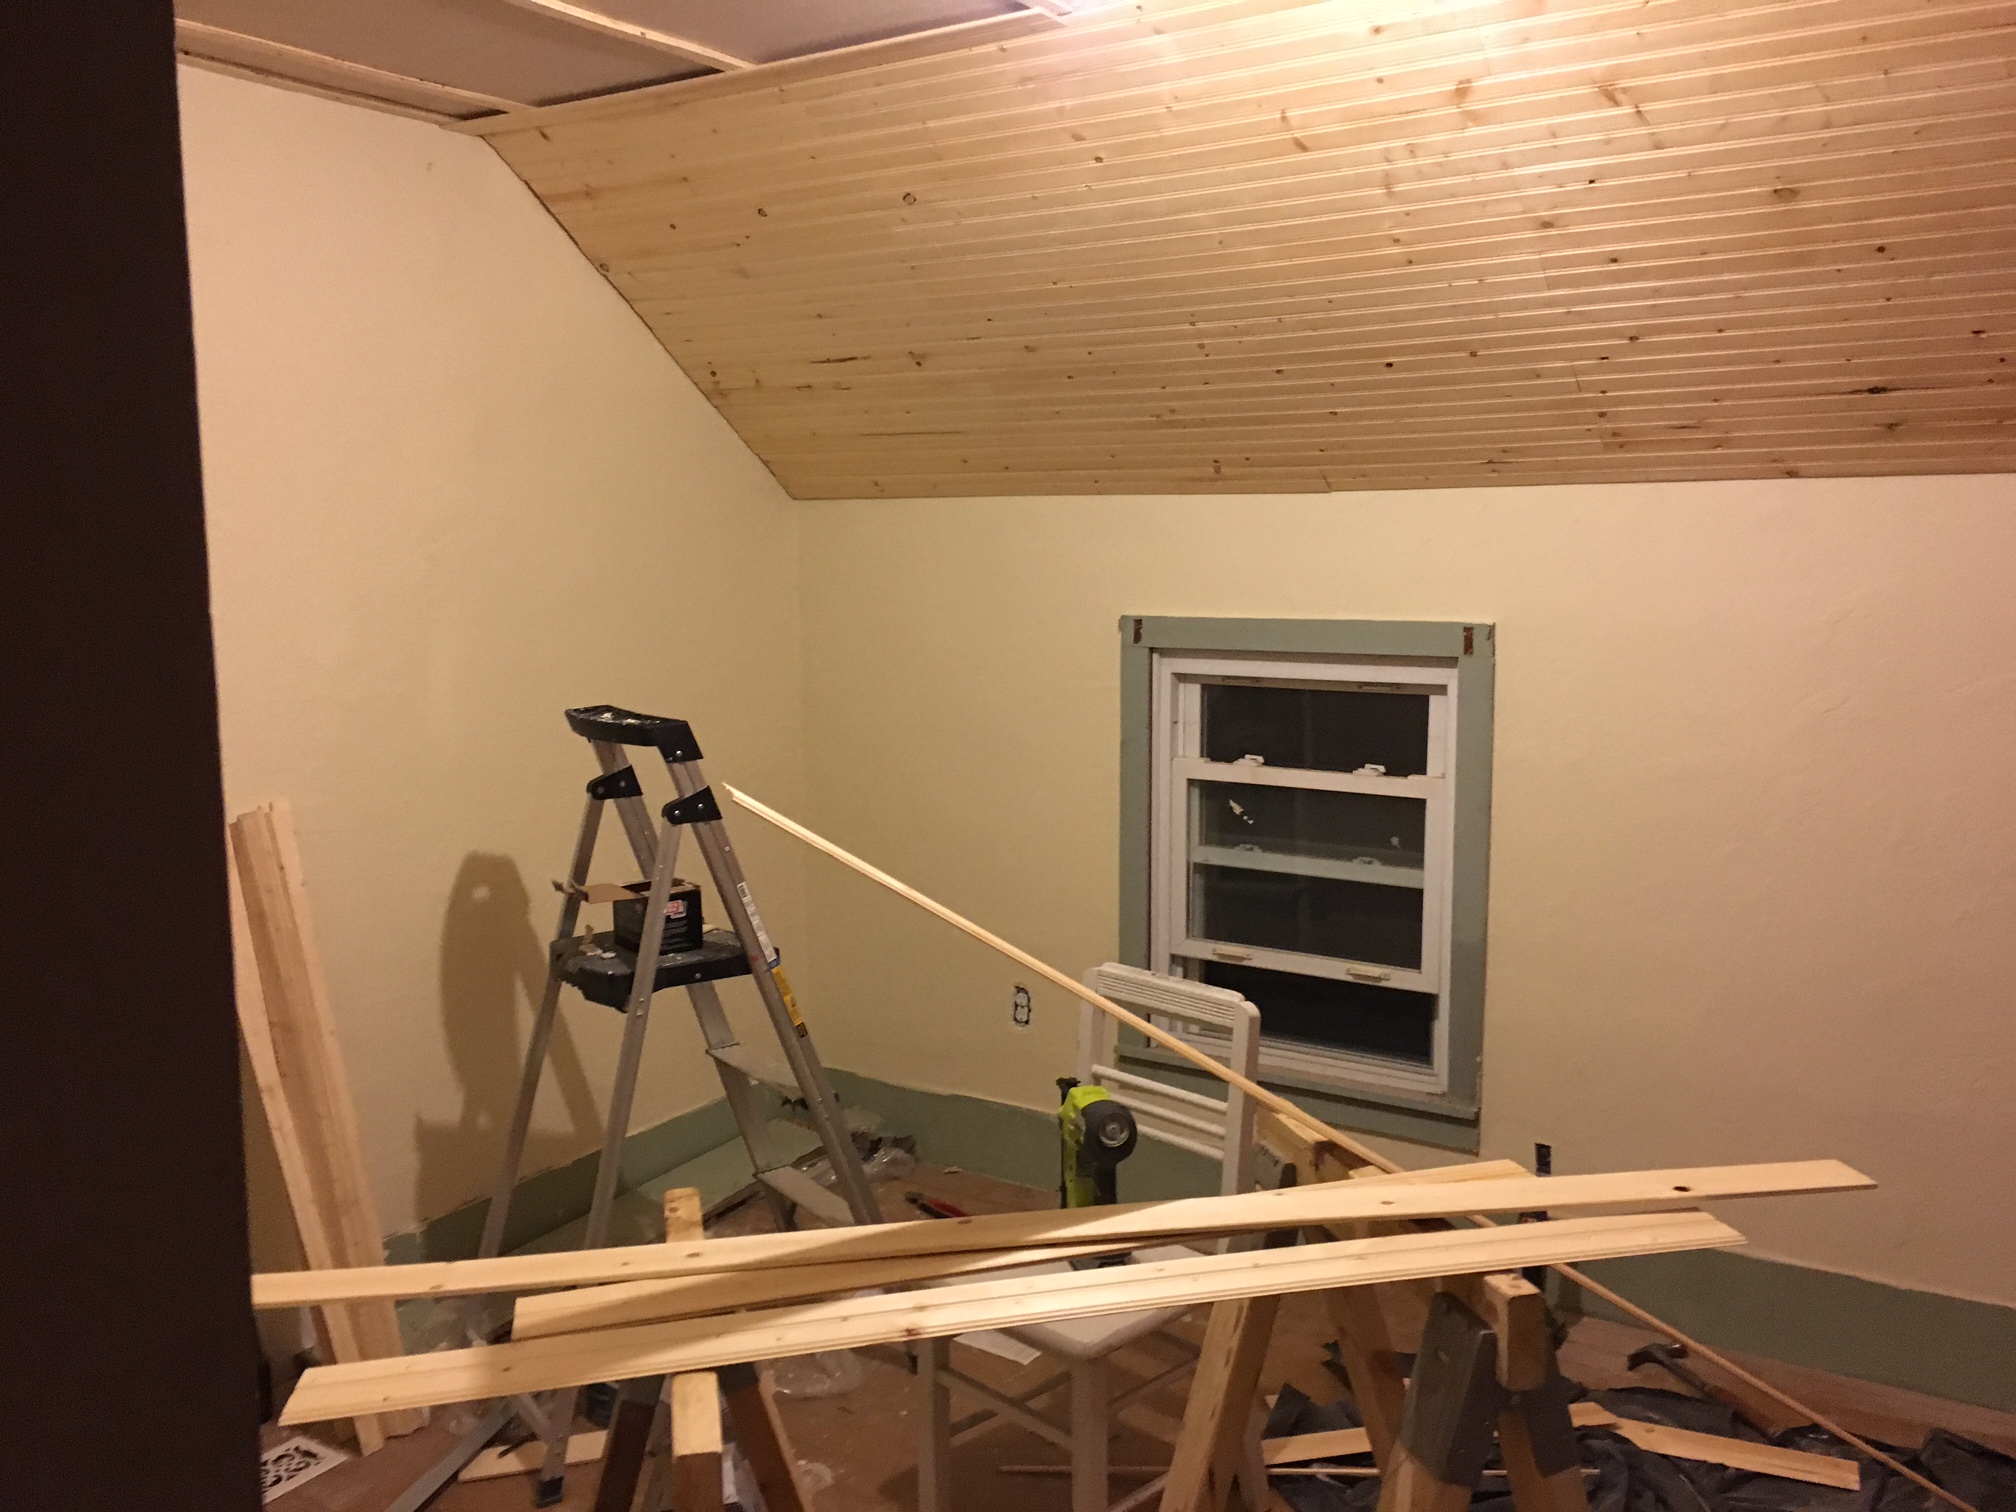
The Ceiling: Tongue & Groove Planks
Then it was time to do the ceilings.
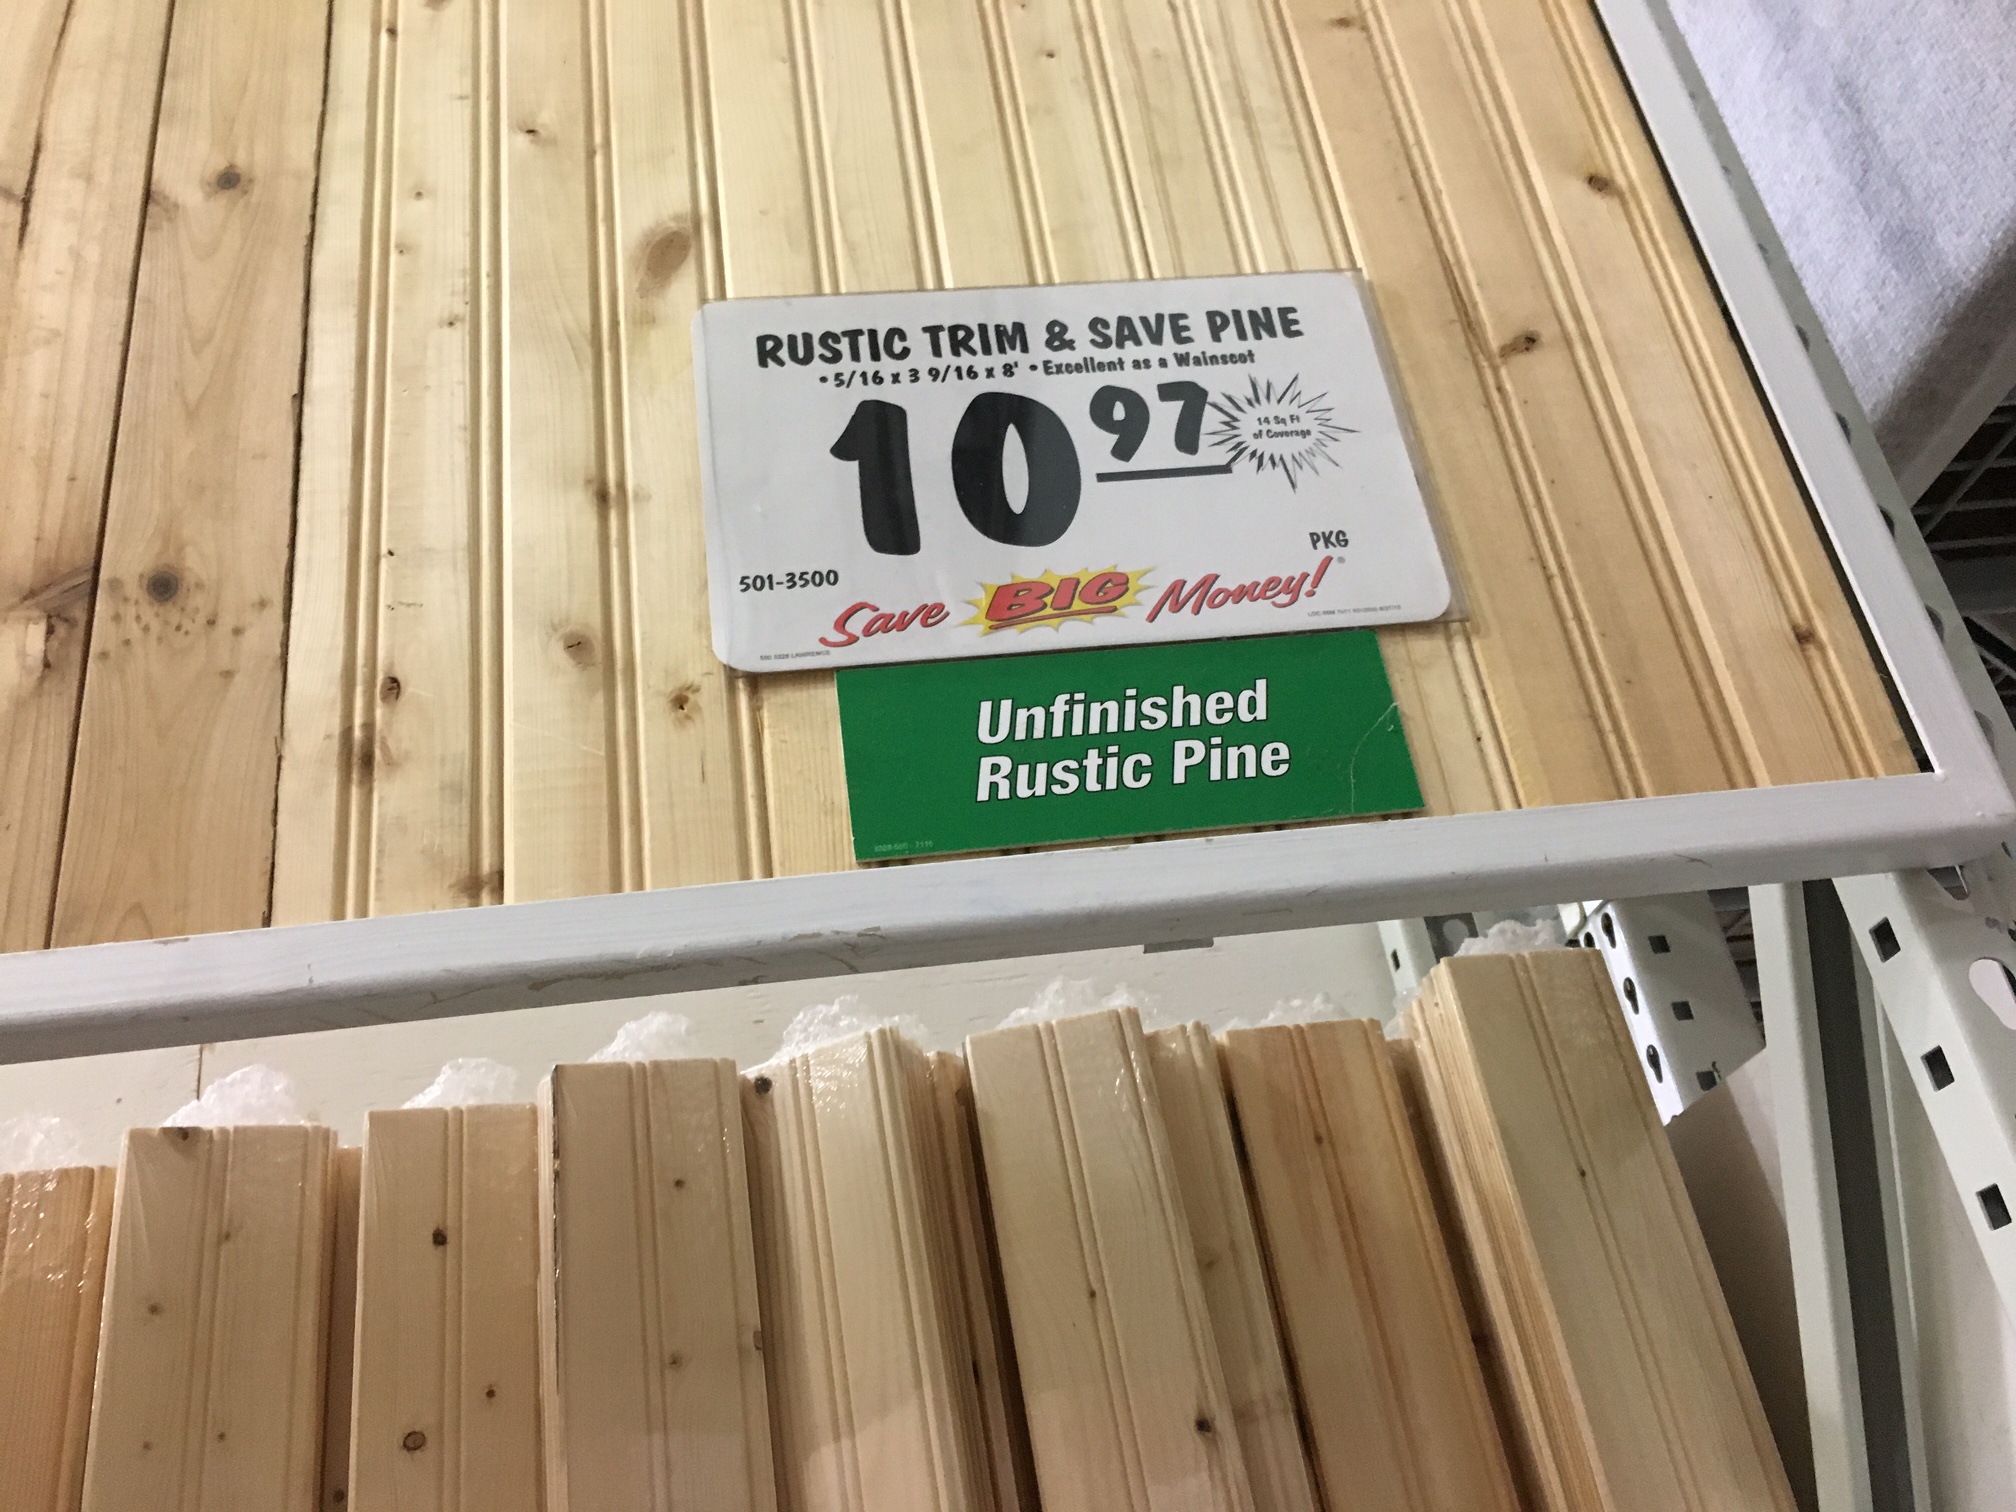
For my This Old Fixer-Upper project, we decided to cover the plaster ceiling with pine tungue-and-groove panels rather than try to scrape off the wallpaper and paint the ceiling.
The original plan was to use 4' x 8' panelling sheets that looked like tongue-and-groove boards painted white, but we found the actual stuff at Menards for only a little bit more money per square foot (no particle board or similar sawdust+glue products allowed in my house!!). A pretty good deal I thought. All of the materials cost me a little over $400, including the brad nails (using a Ryobi lithuim-battery-powered brad nailer, I love it!), paneling adhesive, polyurathane, etc.
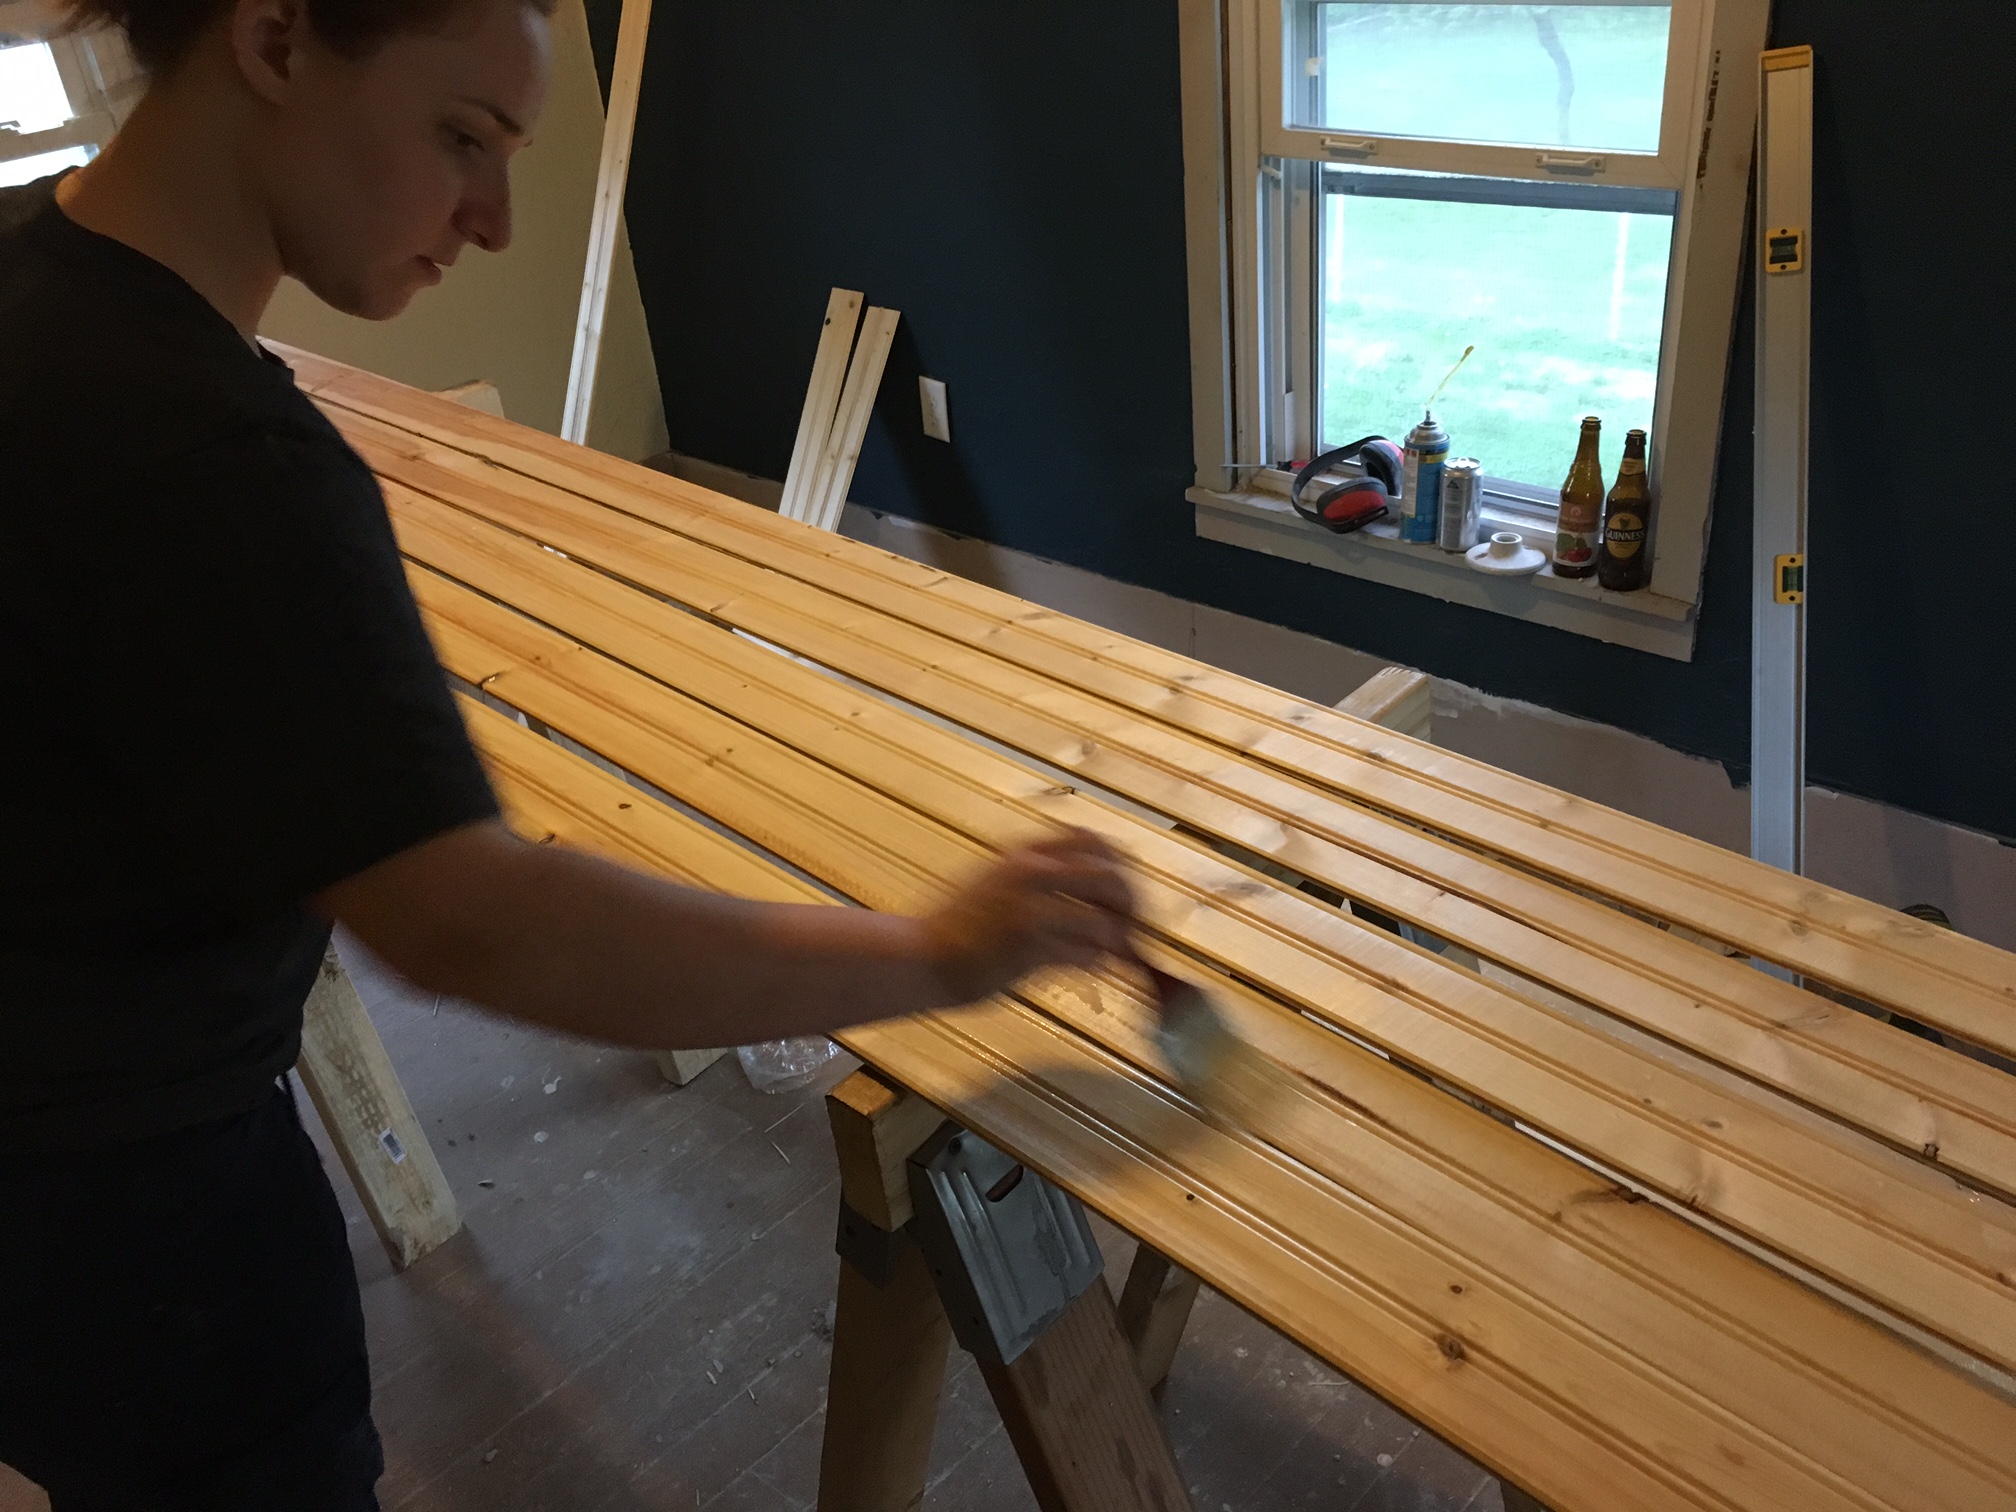
The boards are very knotty (bad boards! bad!!) and I knew that if we tried to paint them white there would be a few knotts that would bleed through no matter how much B-I-N primer we used. So we didn't paint them at all and instead we simply put a single coat of polyurethane on them. I chose a water-based polyurethane so that the pine wouldn't be yellowed at all - trying to avoid the "unle teddy's creepy cabin" look. It worked really well and I love water based polyurethane now because it didn't stink at all in the slightest. If it was regular ol' oil based, the ceiling would stink for weeks. If I had to do if over again I wouldn't change a thing except I would have gone with a higher gloss finish. We went with a satin sheen and it looks like we didn't put any treatment on the wood at all. But it will not absorb liquids (there's a coffee stain on the ceiling of my old rental house, no one knows how it got there!), make it easy to clean and dust off, etc.
The first step was to give the boards something to be nailed to. Our ceiling was covered in plaster and it would have been a disaster if we tried to knock it all out of there because it would be a huge heavy mess, and it was also holding up all the insulation we just installed.
You can't nail into plaster, it won't hold the nails, so we screwed in furring stips into the rafters and rafter ties behind the plaster. Finding them behind the plaster was a pain - I used a concrete drill bit a series of holes through the plaster, then a wood drill bit to drill through the lathe behind it, then if the drill bit kept drilling into wood then we just located the rafter. Had to do this for almost every rafter as they weren't evenly spaced out!
With the rafter locations marked with a big red sharpie, I used long wood screws to screw the furring strips to the rafters, parrallel and directly bellow them. We actually used this lathe boards stacked on top of each other as the furring stips, this way we could stack two or three or use only one stip to adjust the thickness of them to account for any unevenness in the ceiling.
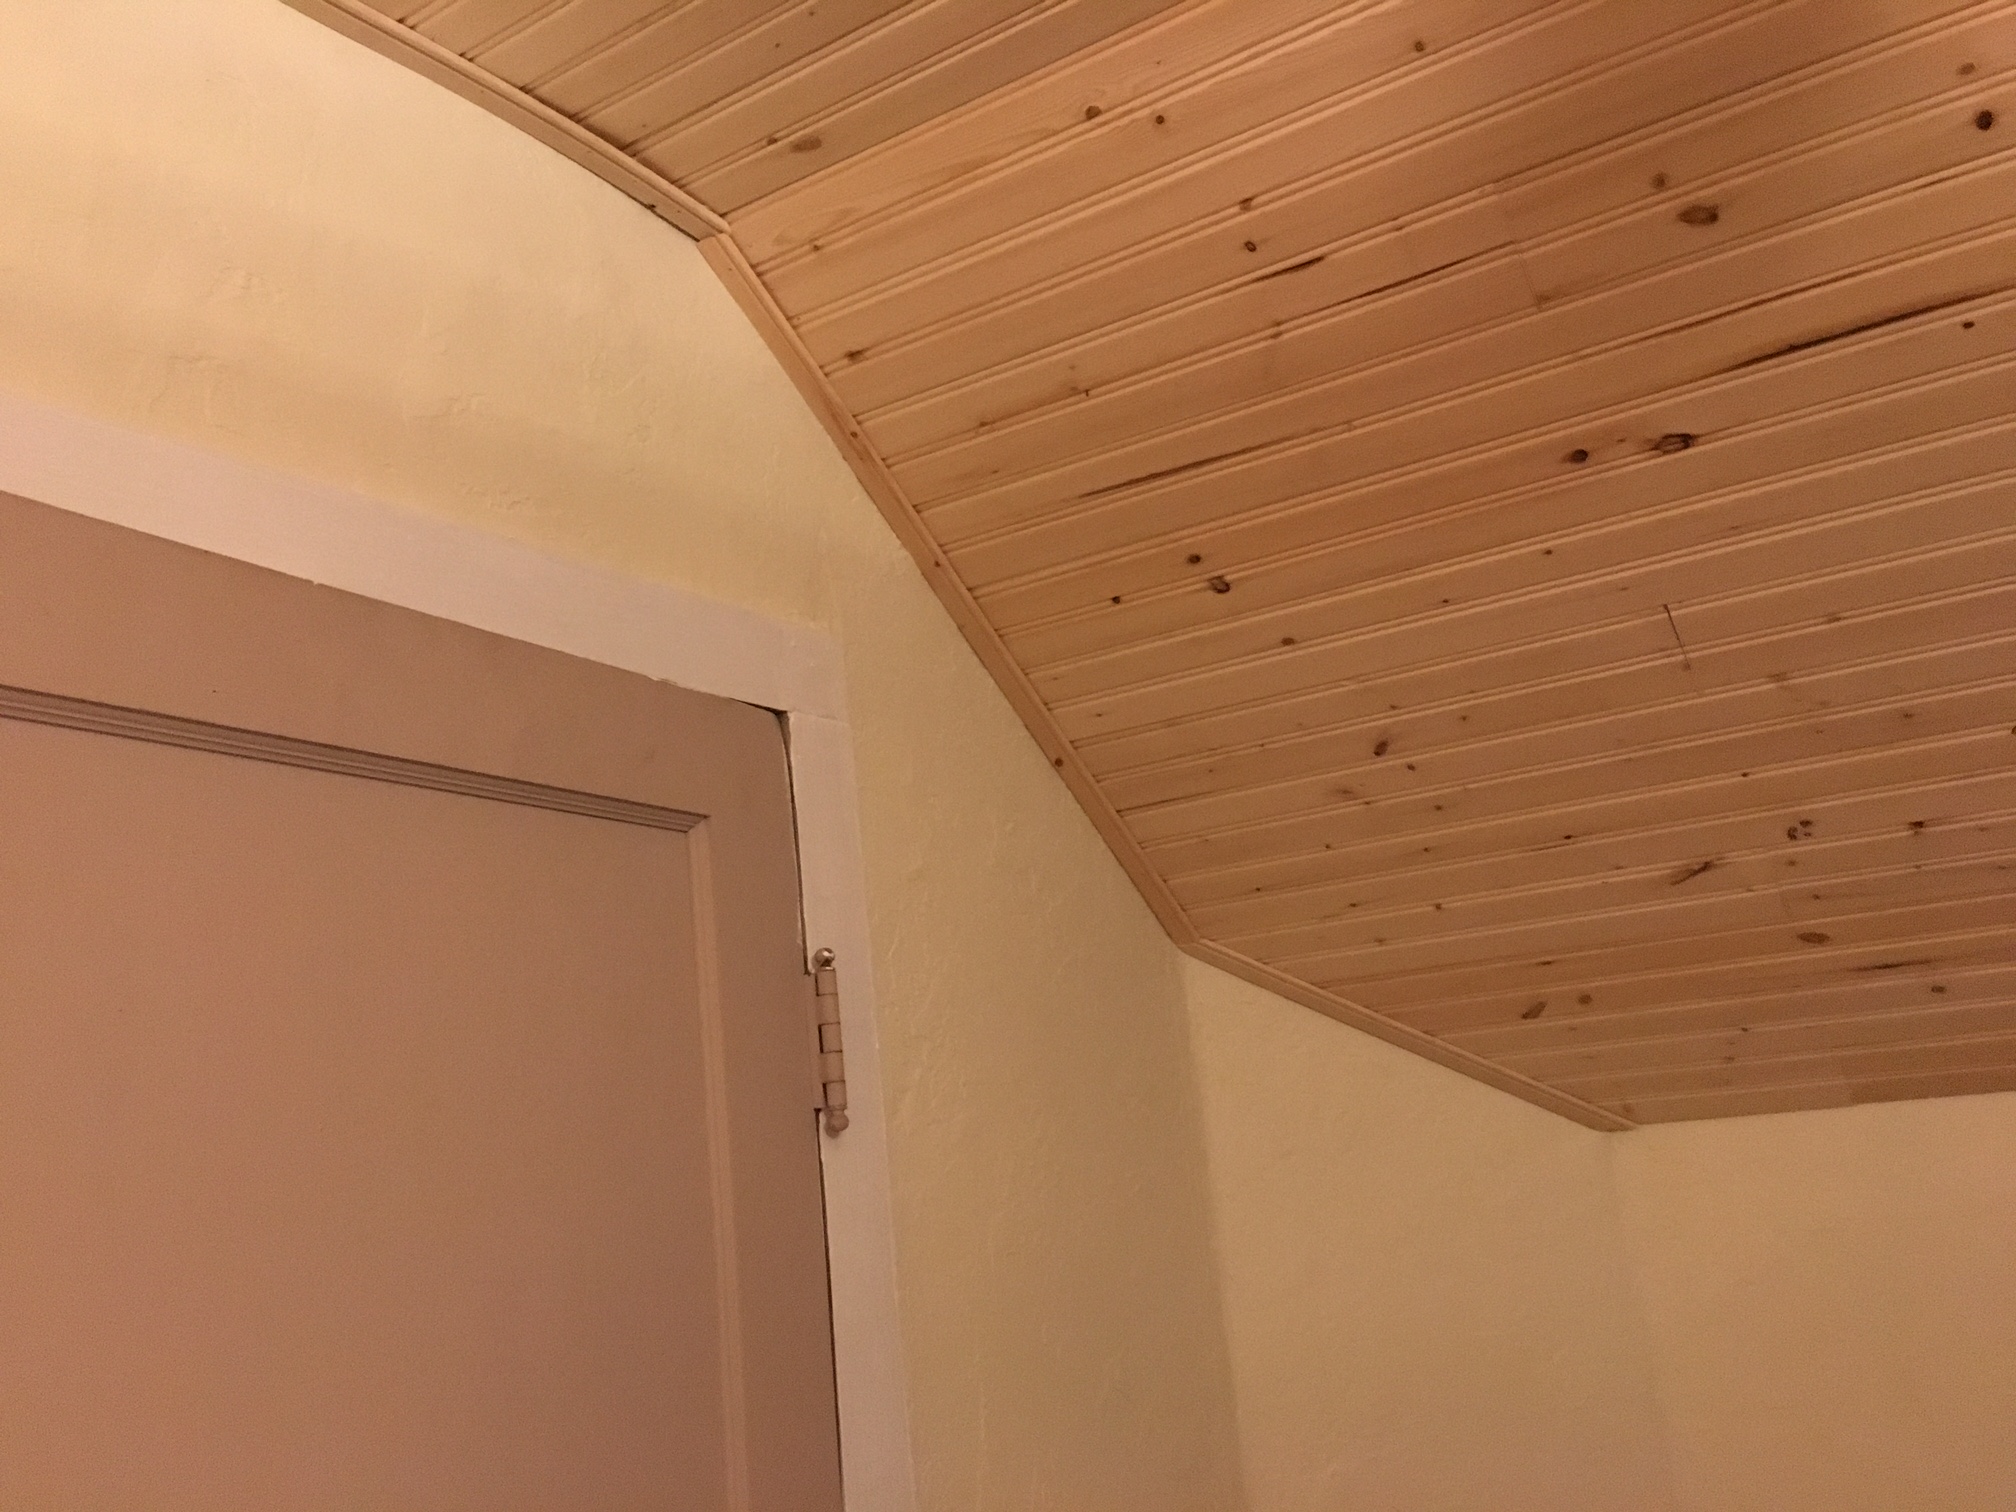
Then the tungue-and-groove boards could be nailed perpendicular to the furring strips. Used 1" #8 brad nails.

It was like installing a floor, only on the ceiling. We had to cut the boards to be the correct length such that the end that wasn't against the wall would meet at a furring stip. Then the next board would complete the length to the other wall, with the joint between the two boards in the middle of the furring strip. This way the ends of the boards would always get nailed to a furring stip to make it good and secure. We also used panneling adhesive since we were only using small brad nails, and the tongues and grooves also helped of course.
Here's some more tips:
- We also made sure to stager the joints randomly and spaced as far away as possible as to not catch the eye.
- We sent all the nails through the tongue, so that way when the groove of the next board slid of ther tongue of the previous board, it would hide the nail. Or, at least that was the plan, but most of the nails are still visible because the wood was just too small. Bigger boards with bigger tongues and grooves it would have worked better. At least the little brad nails we used are small (#8, 1" long).
- We face-nailed the ends of the boards where they would be covered by trim.
- Using a miter saw to cut the boards was an absolute must. We first tried cutting the boards with a 45* bevel so that the joint would be much cleaner. However, this made the cut much less accurate and we abandonded that idea. It wasn't until later that I learned that we should have tried it with something like a 20* bevel. Next time!
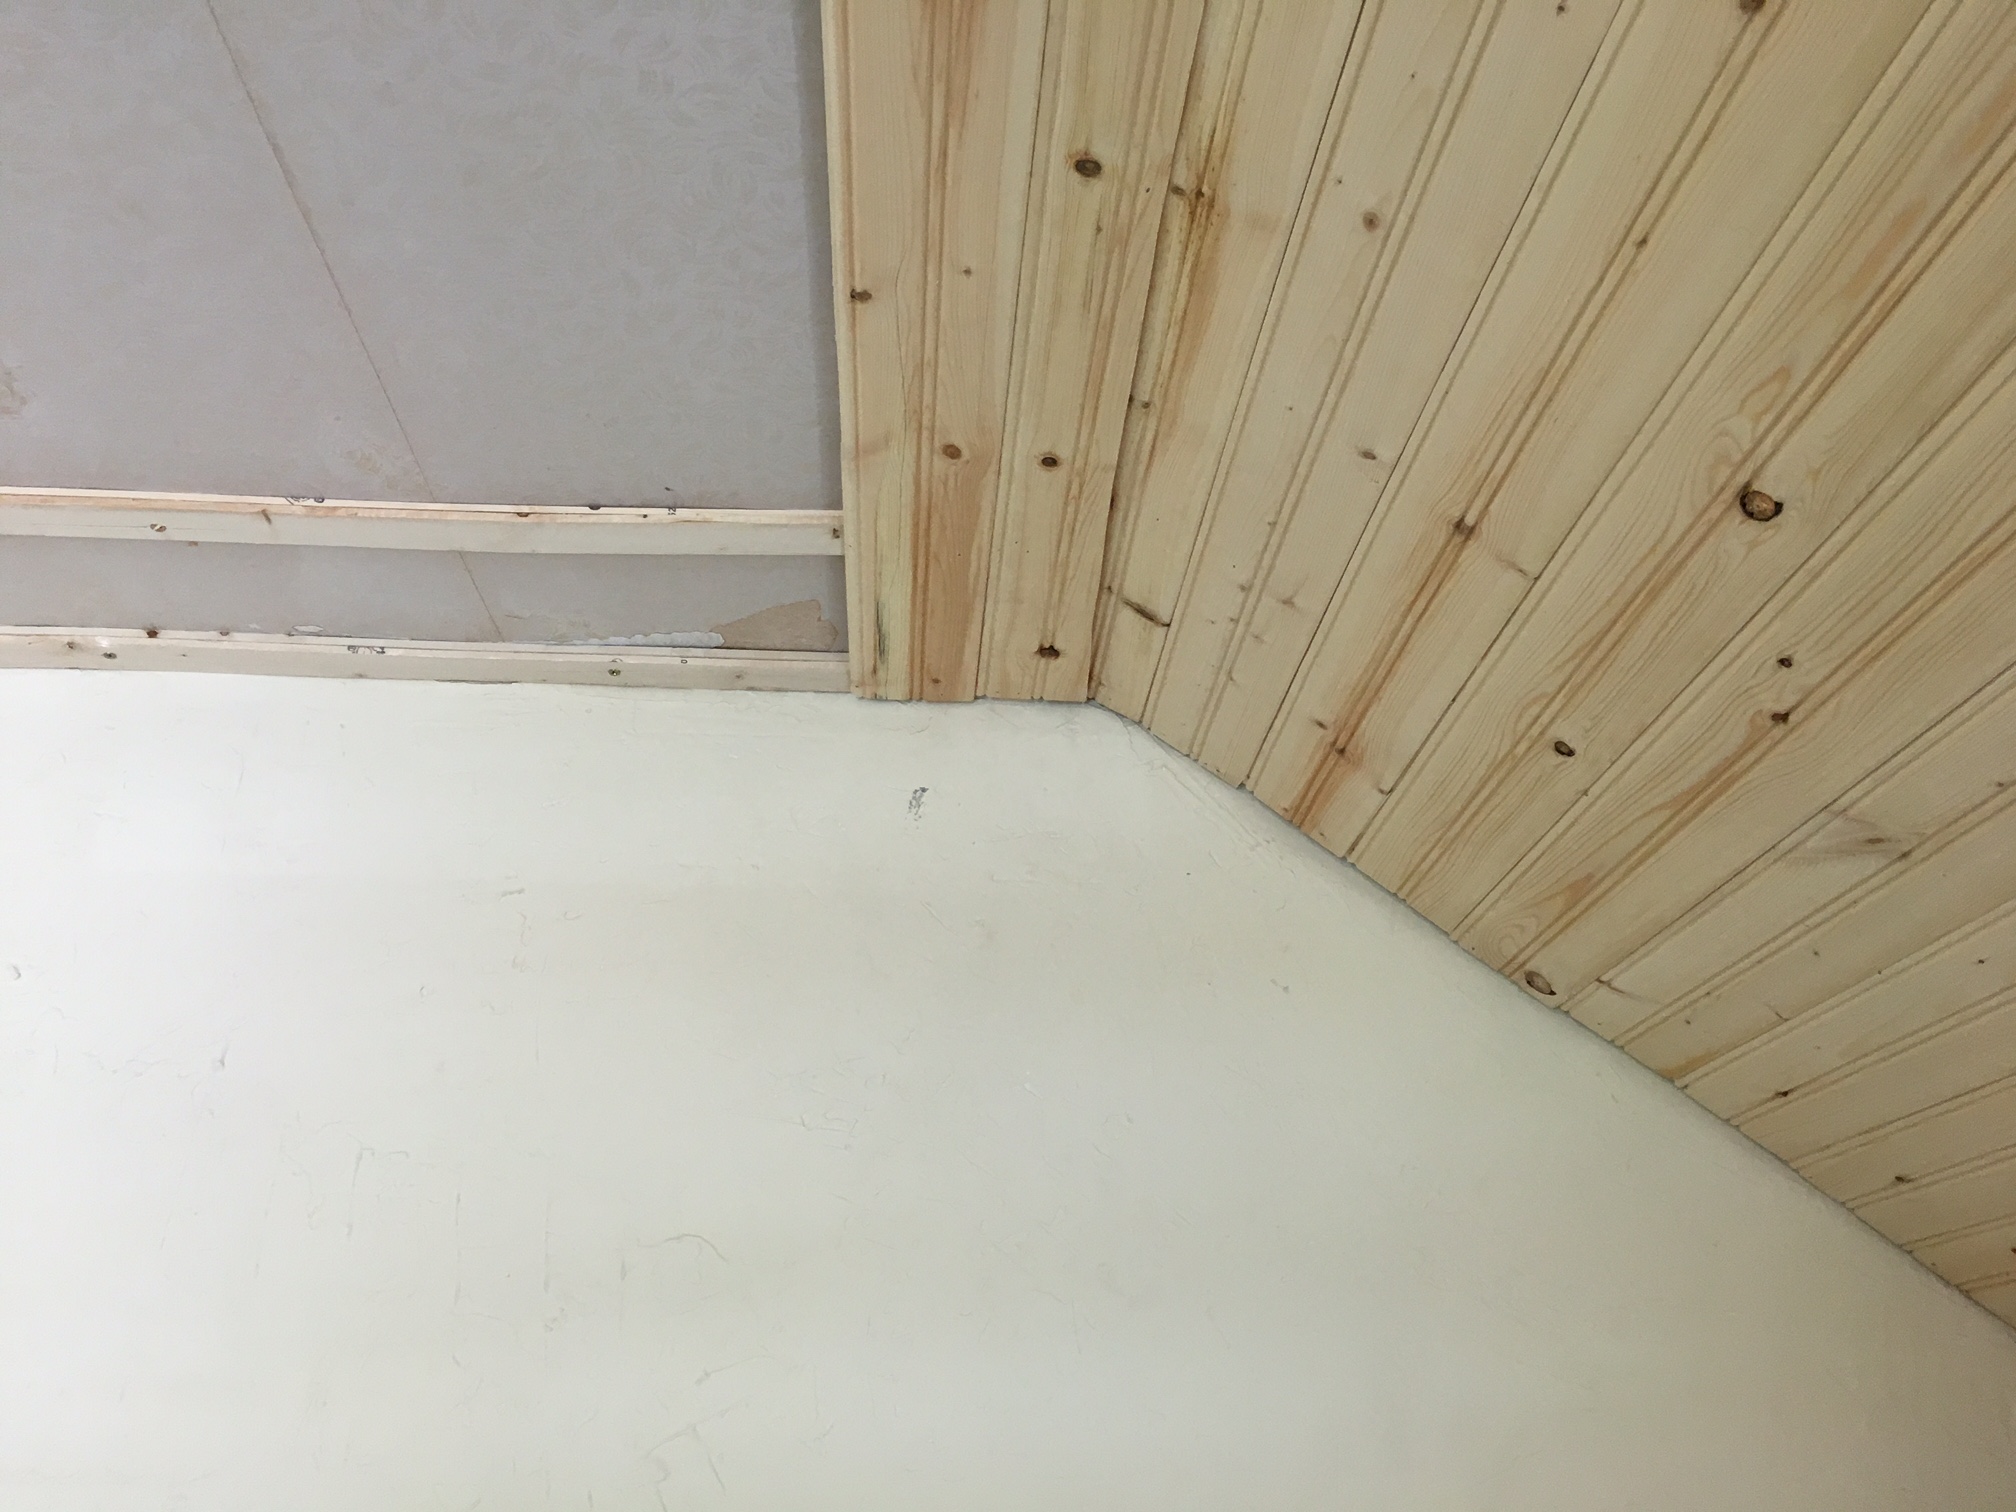
I ran into a problem trying to go around the first corner.
I had to rip the board going into the ceiling corner so that it would fit.
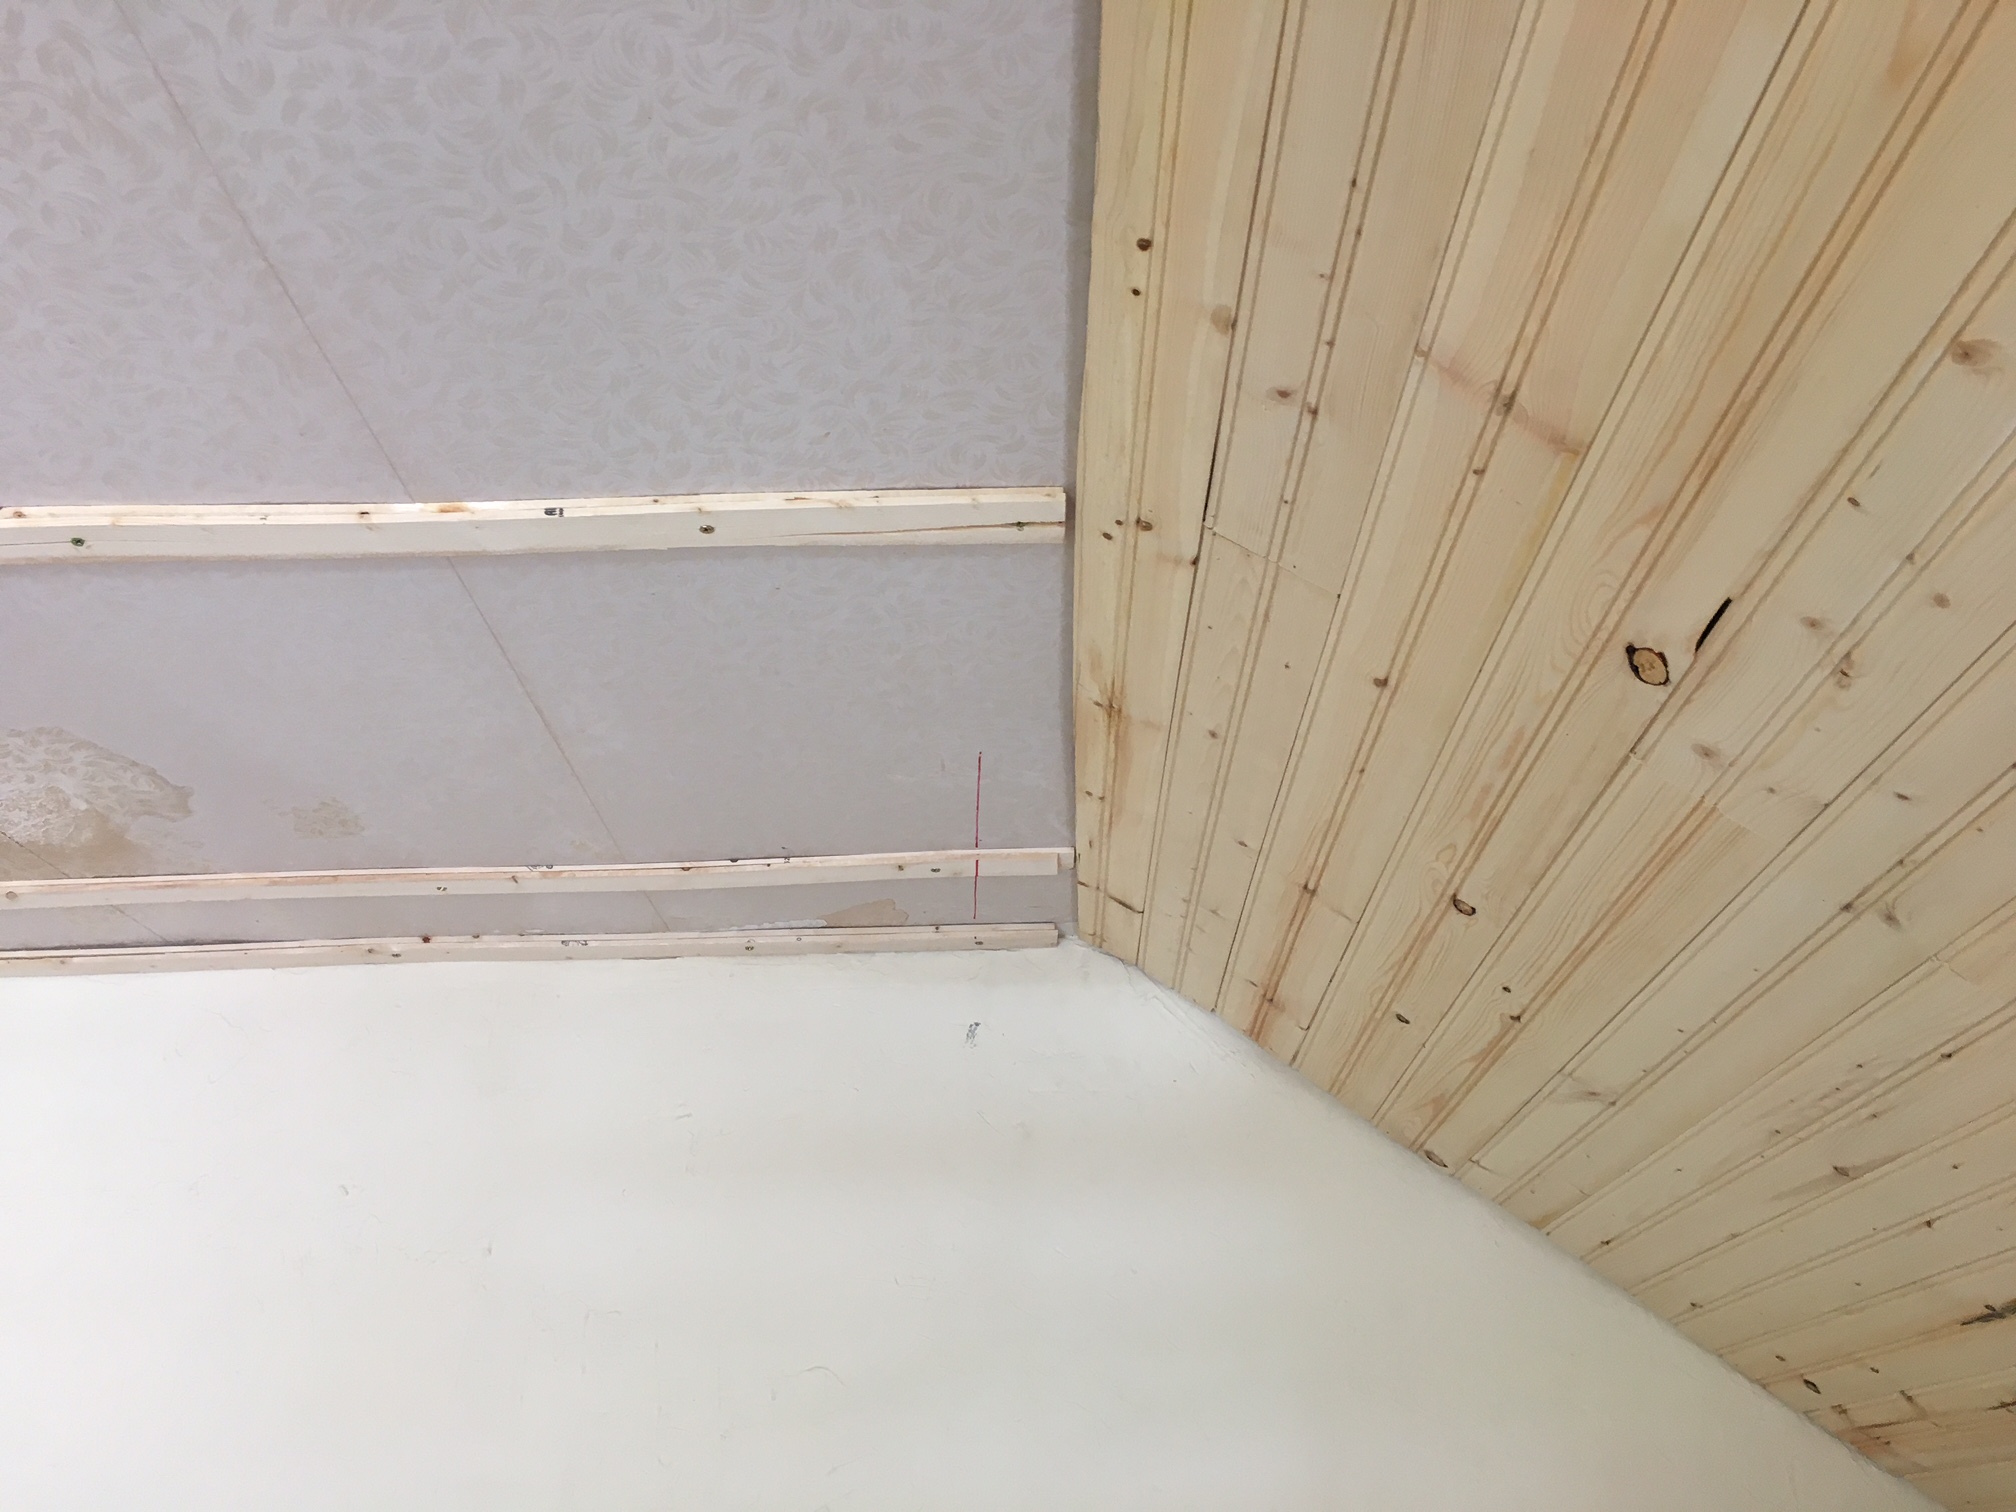
Then I tried to use a scribe to transer to the line to another board and to keep everything as square with the walls as possible.
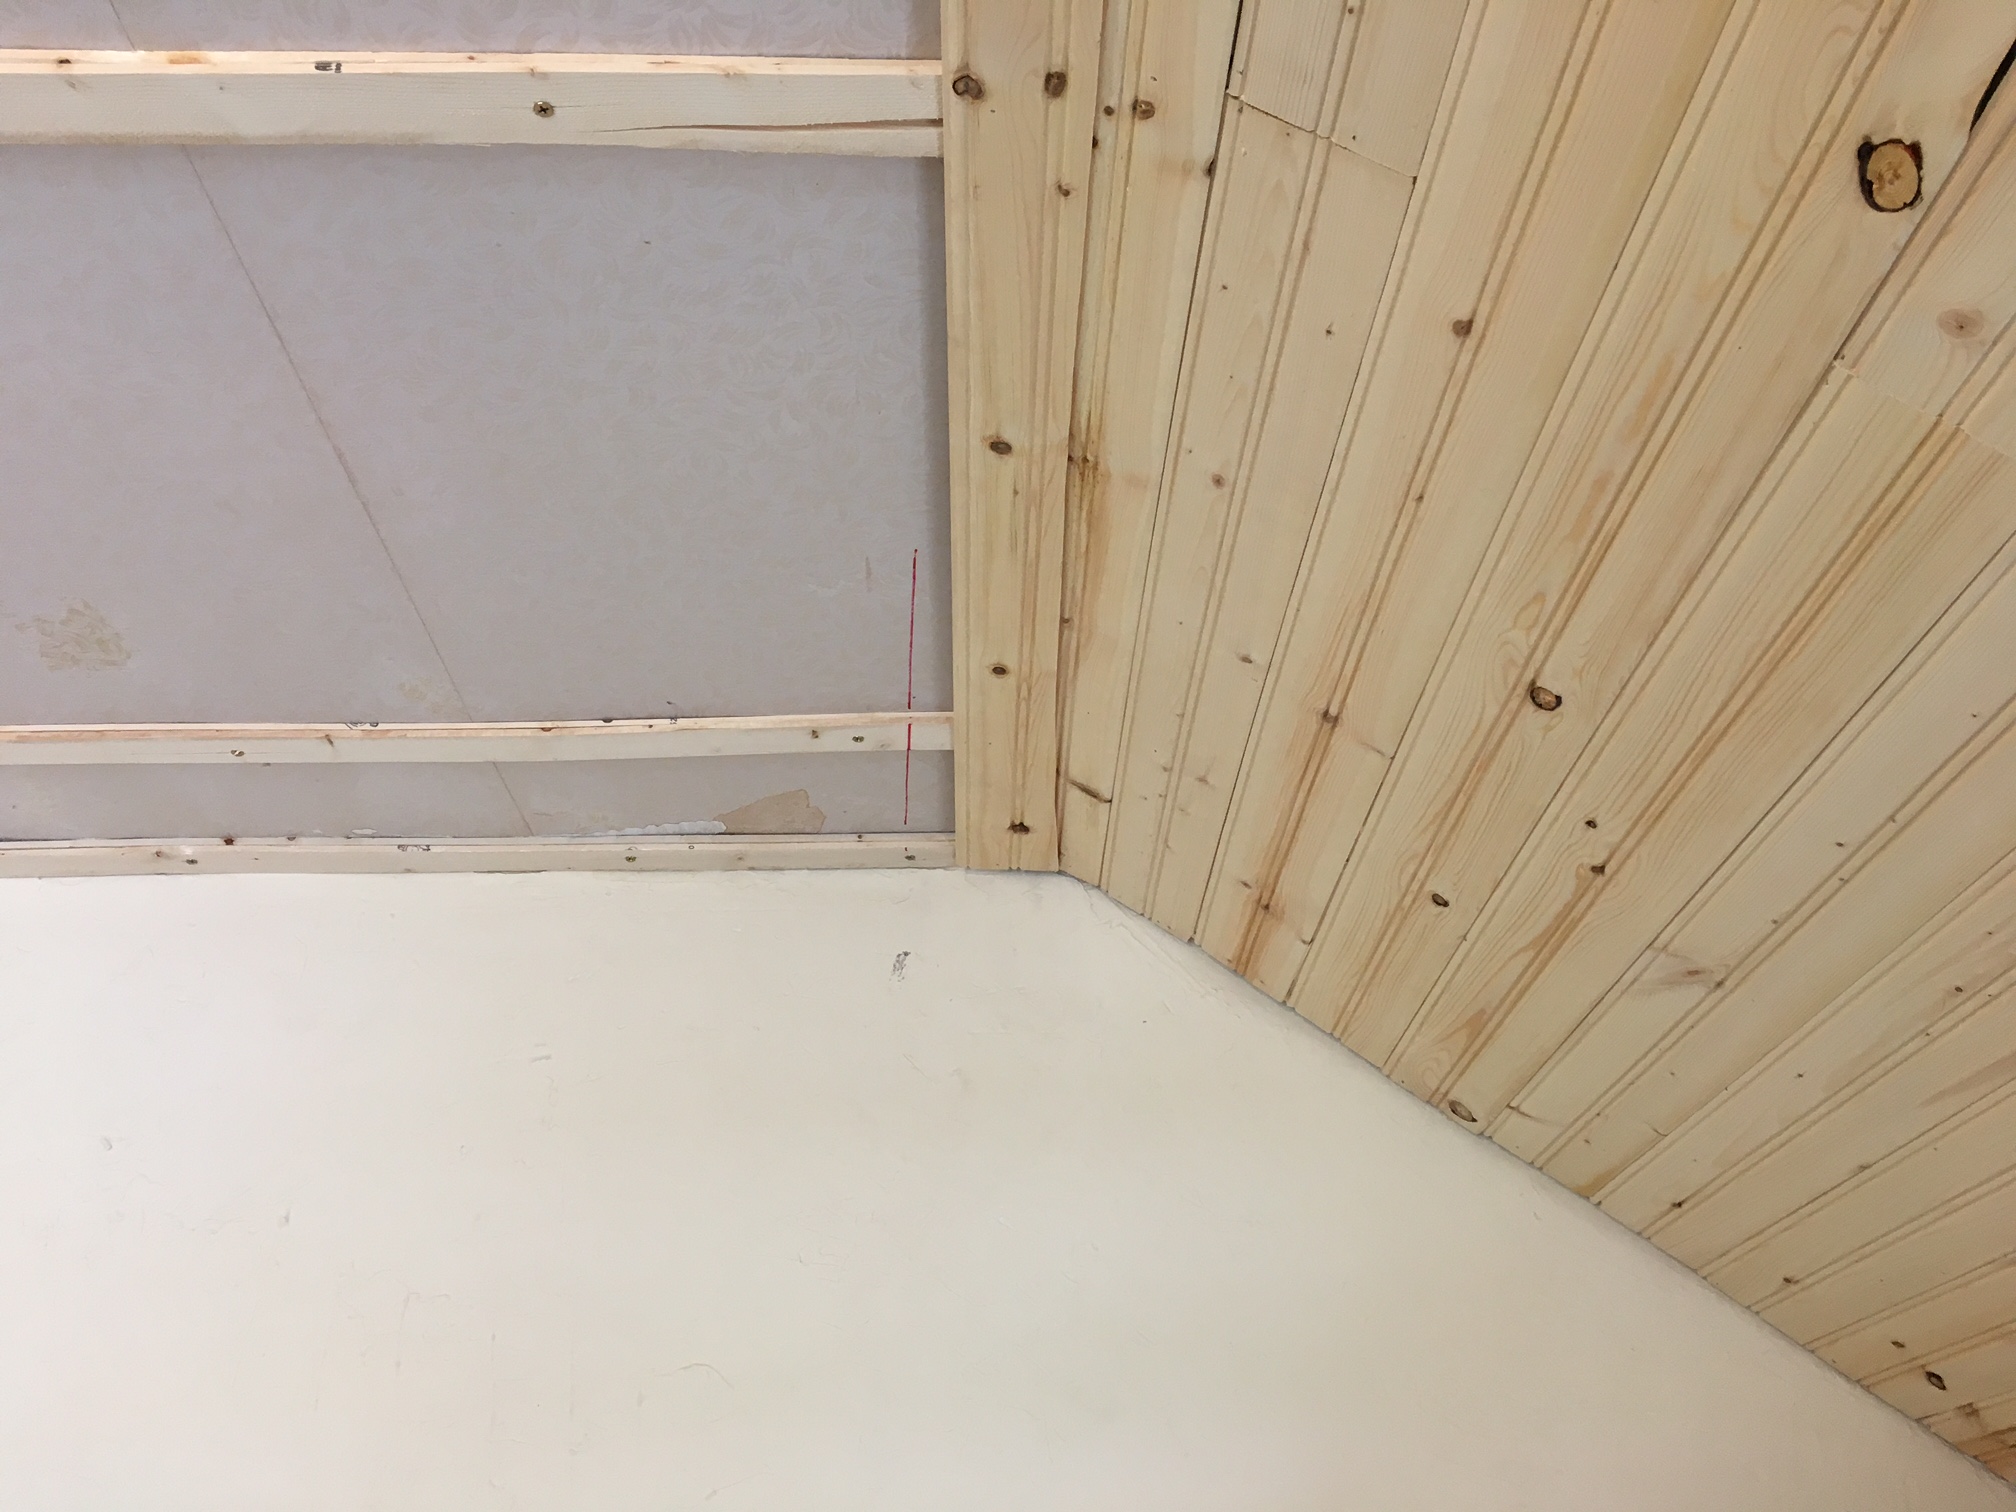
It looks kind of funny but it worked. For the other ceiling corners like this, we abandoned this method and just made the tongue of one board go into the grove of the other even if that meant it would be at an angle rather than cut the boards and try to geth them to meet like a really long butt joint. It was way easier.
DON'T DO IT THIS WAY!
Used a jig saw to go around any obsticles like this one:

Trim was needed to hide the gaps between the ends of the boards and the walls. I made the trim myself by taking unused peices of the tongue and groove boards and ripping them with my table say. I cut off the tongues and grooves, and cut them into 1" strips such that they had a profile'd edge that would face the outside.
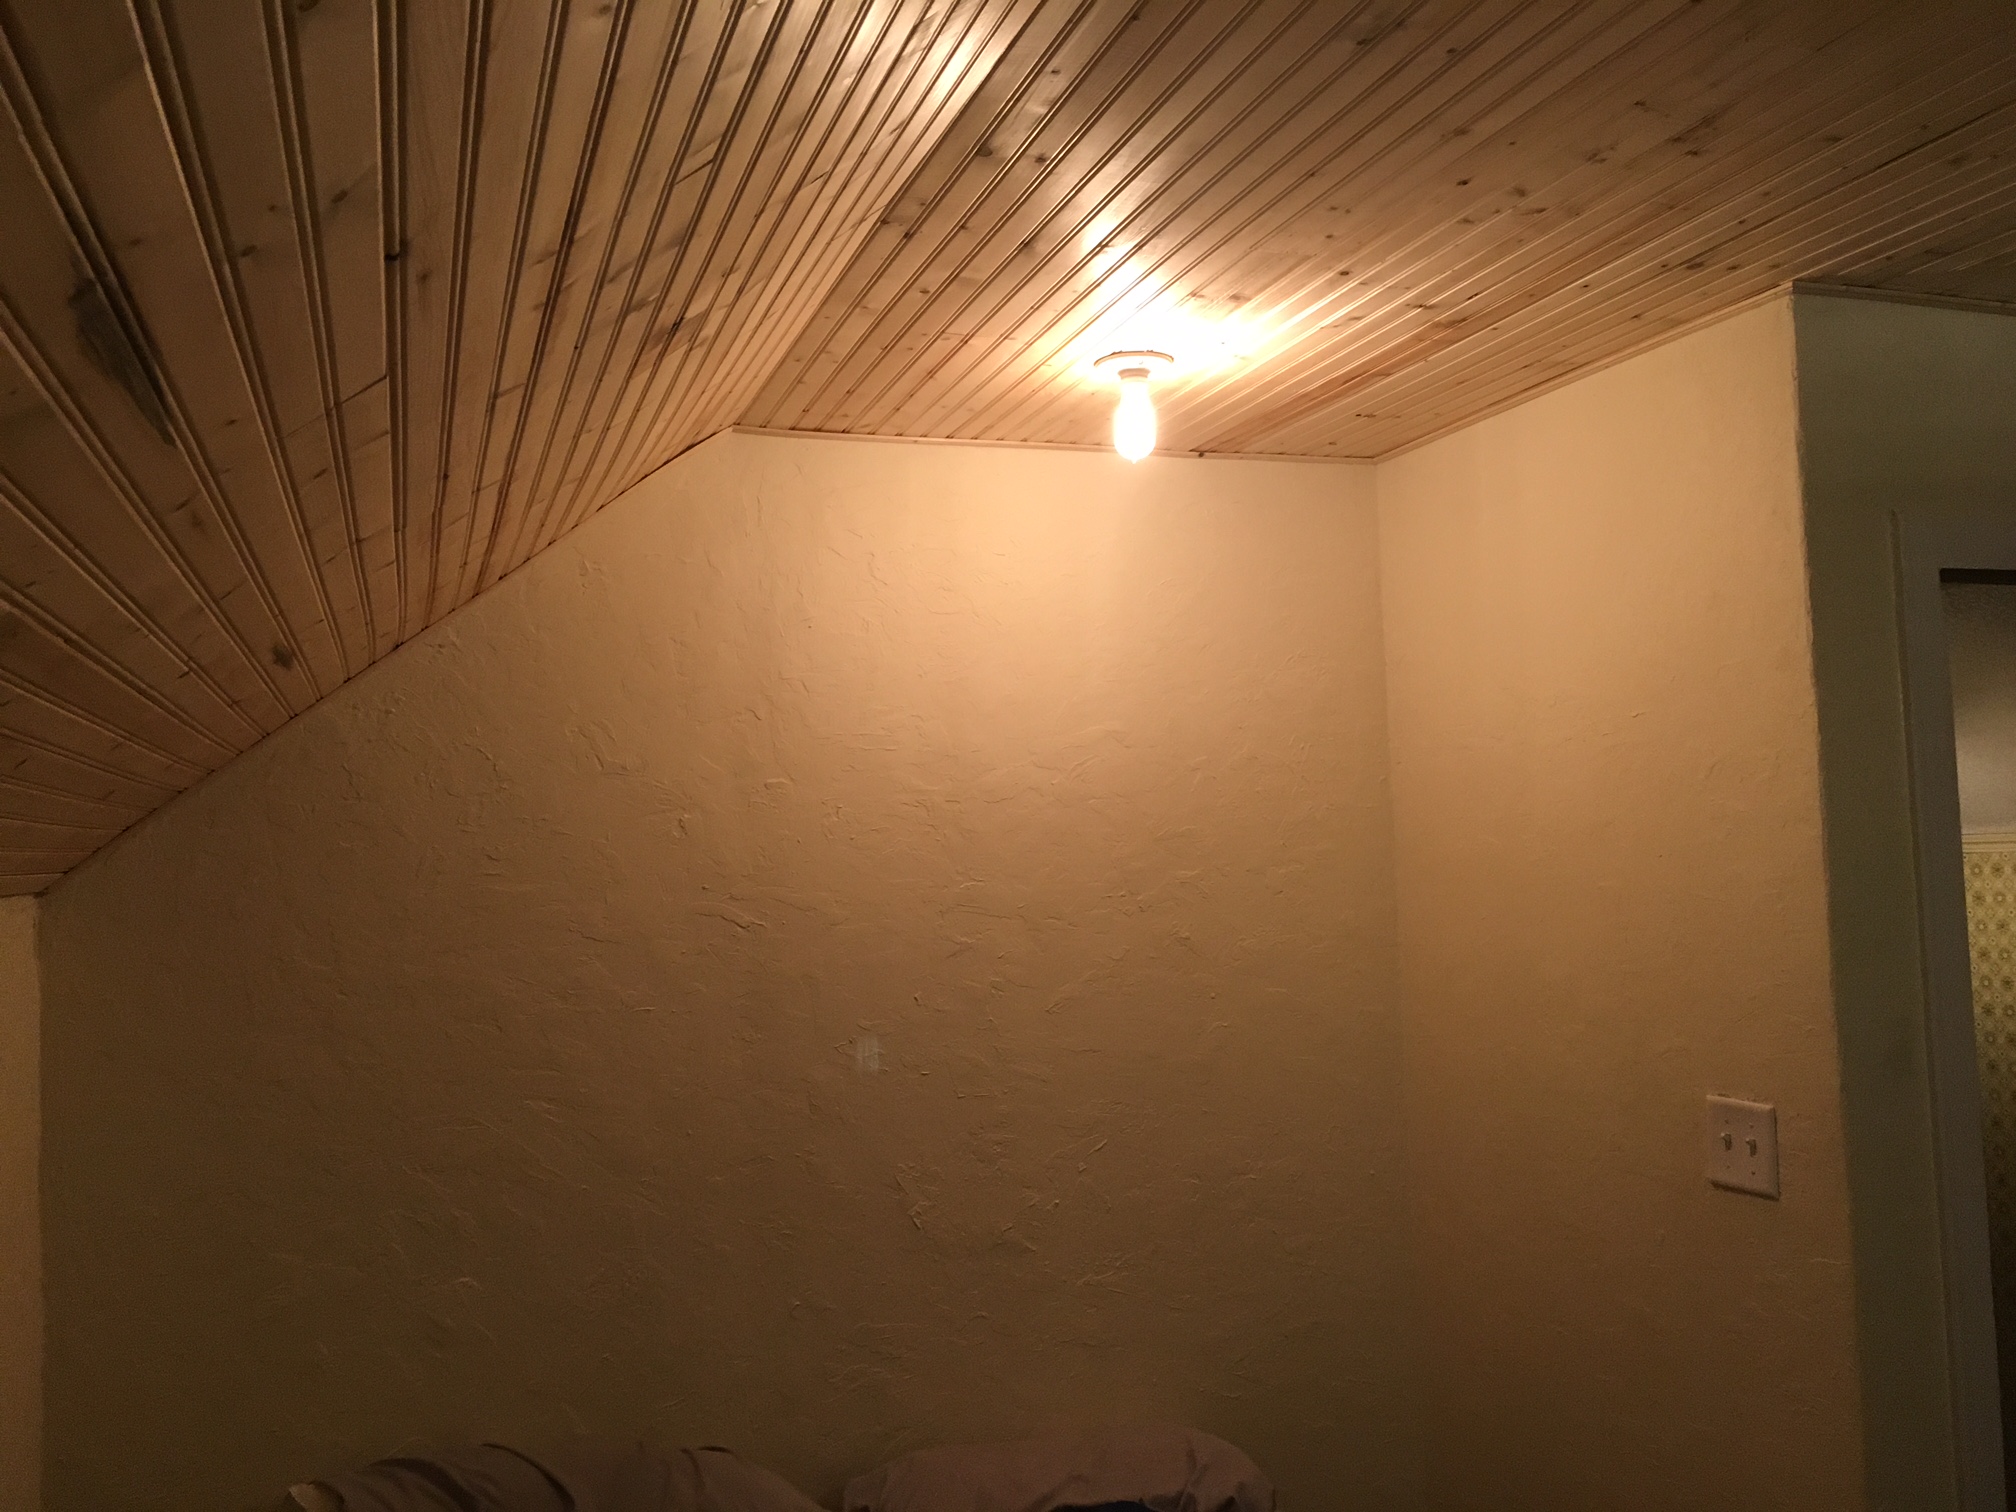
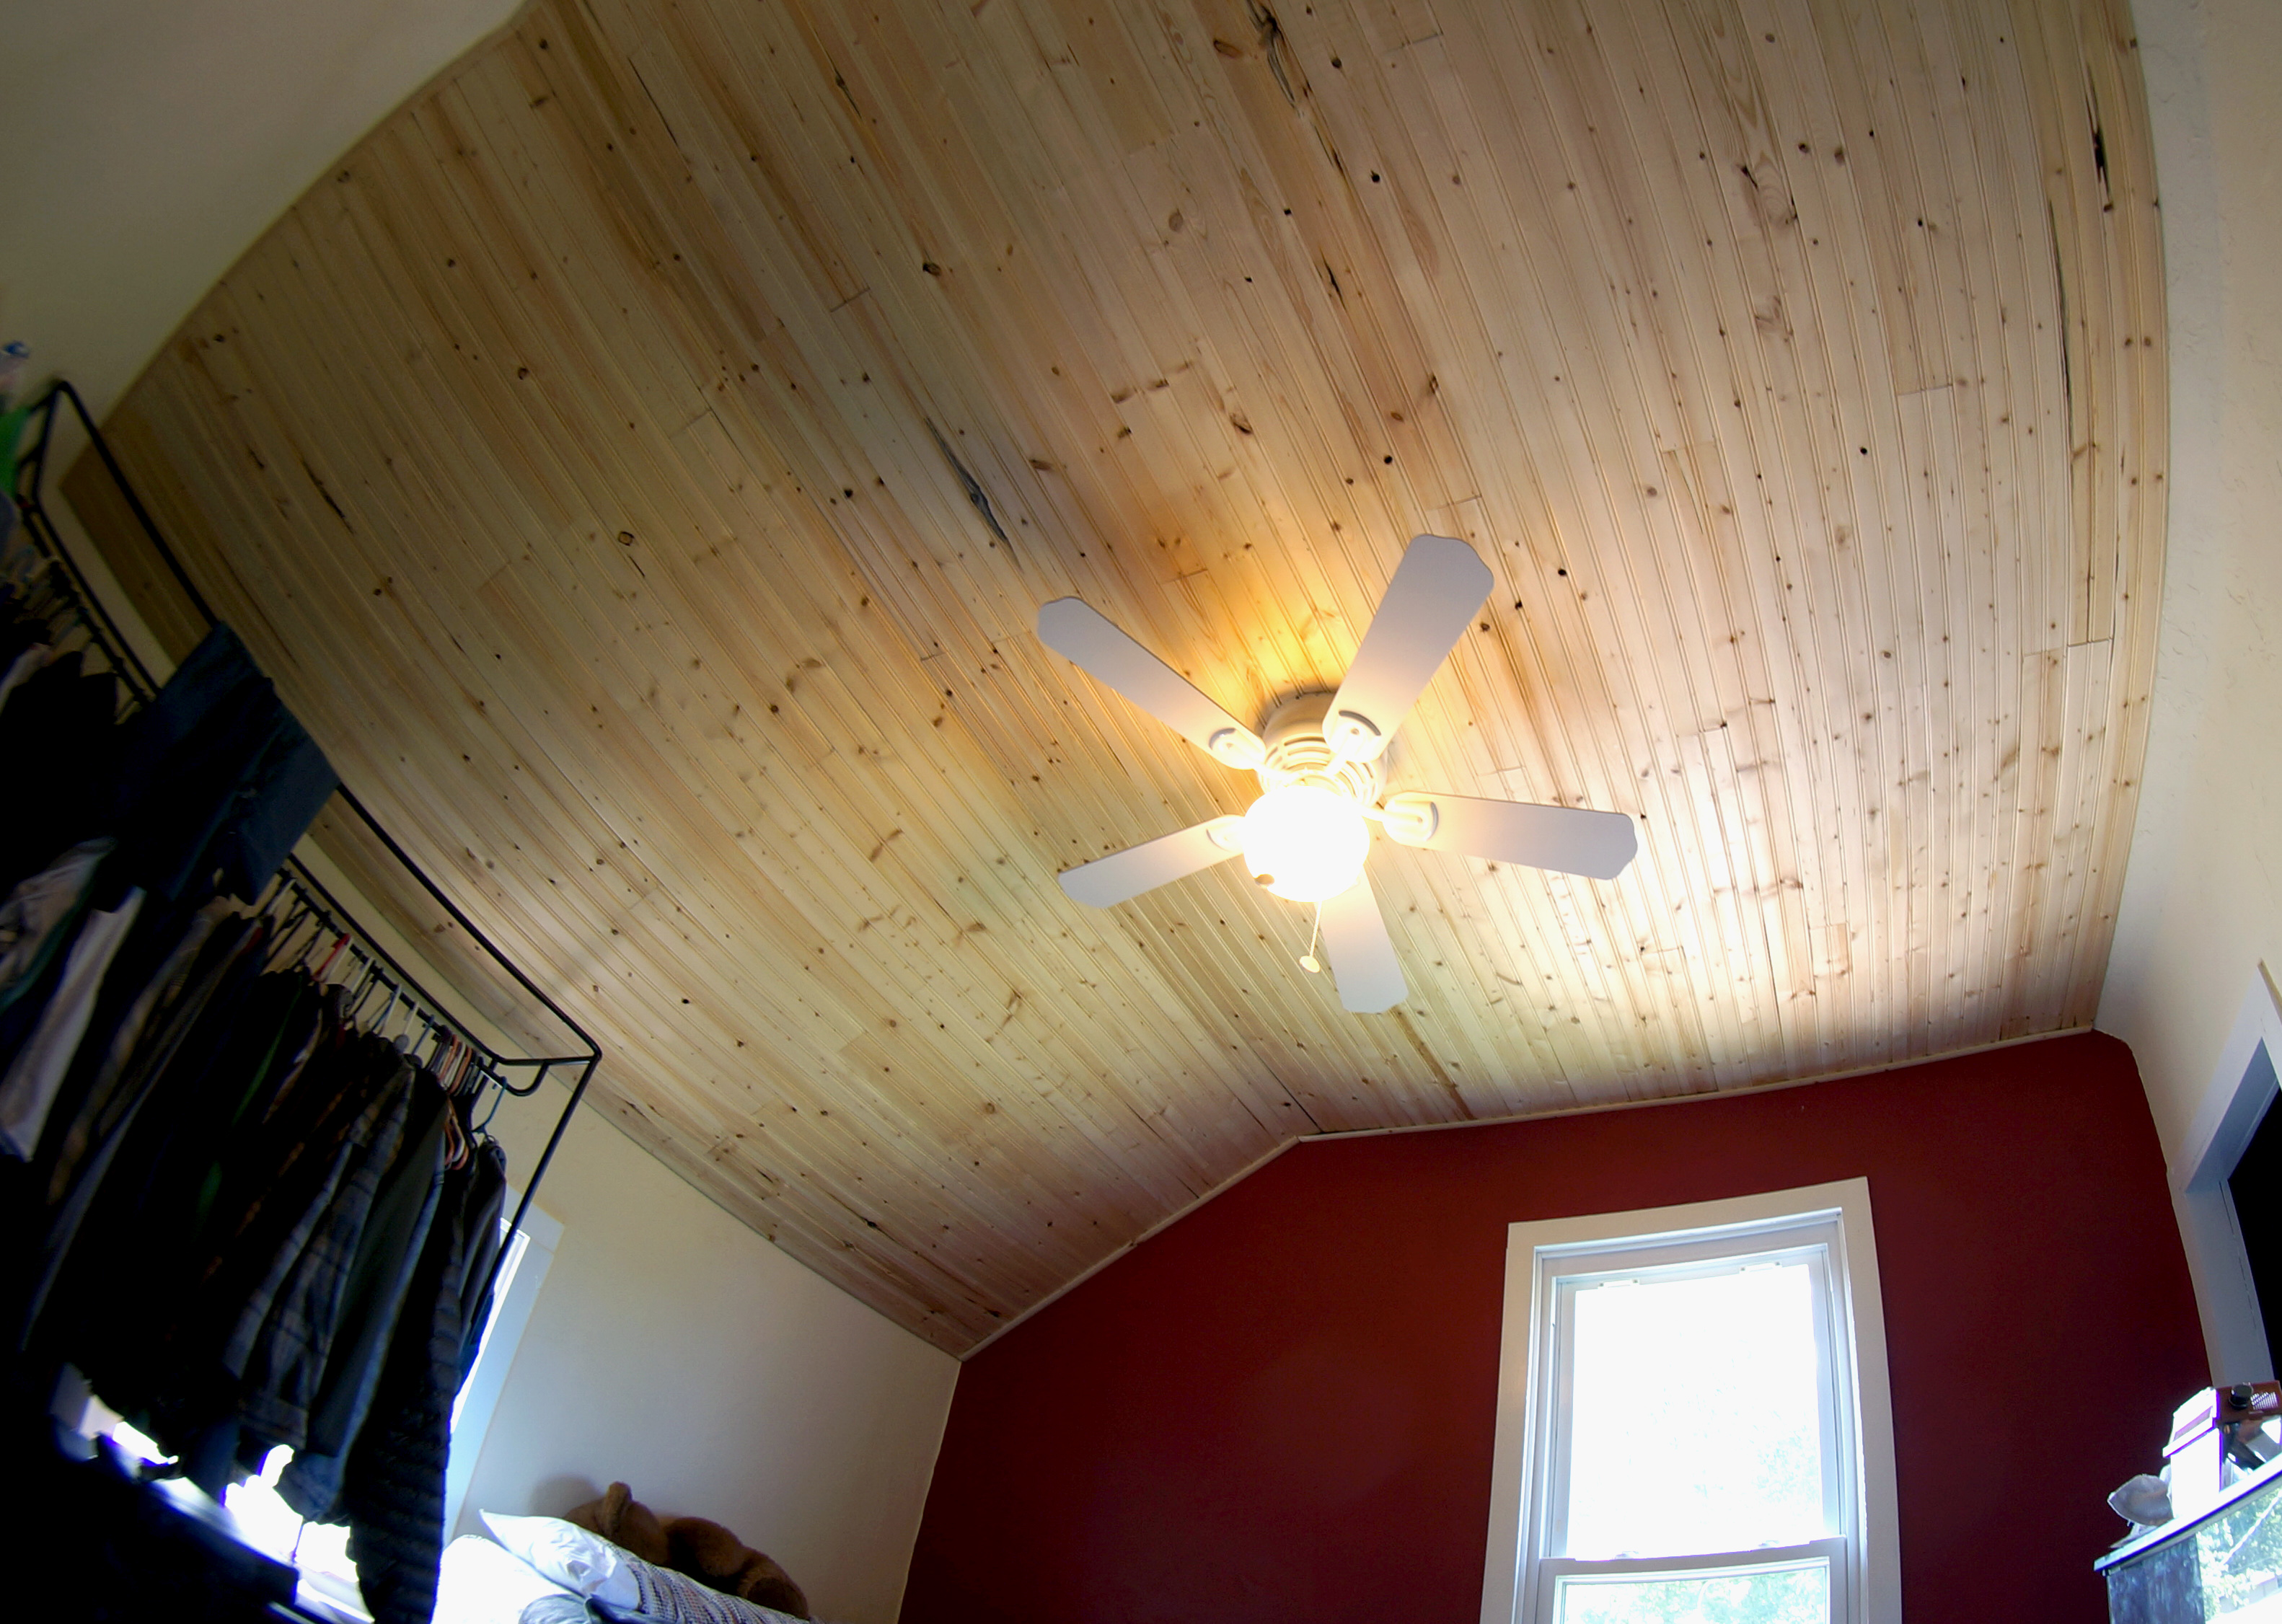
It looks great! We love the ceiling!
It took a very long time! Like, two weeks. It wasn't very much fun at all. If I had to do it all over again, I might just try to scrape off the old wall paper and paint over anything that couldn't be reasonable scrapped off. Wouldn't look nearly as good though!!
The Floors: Painting them White
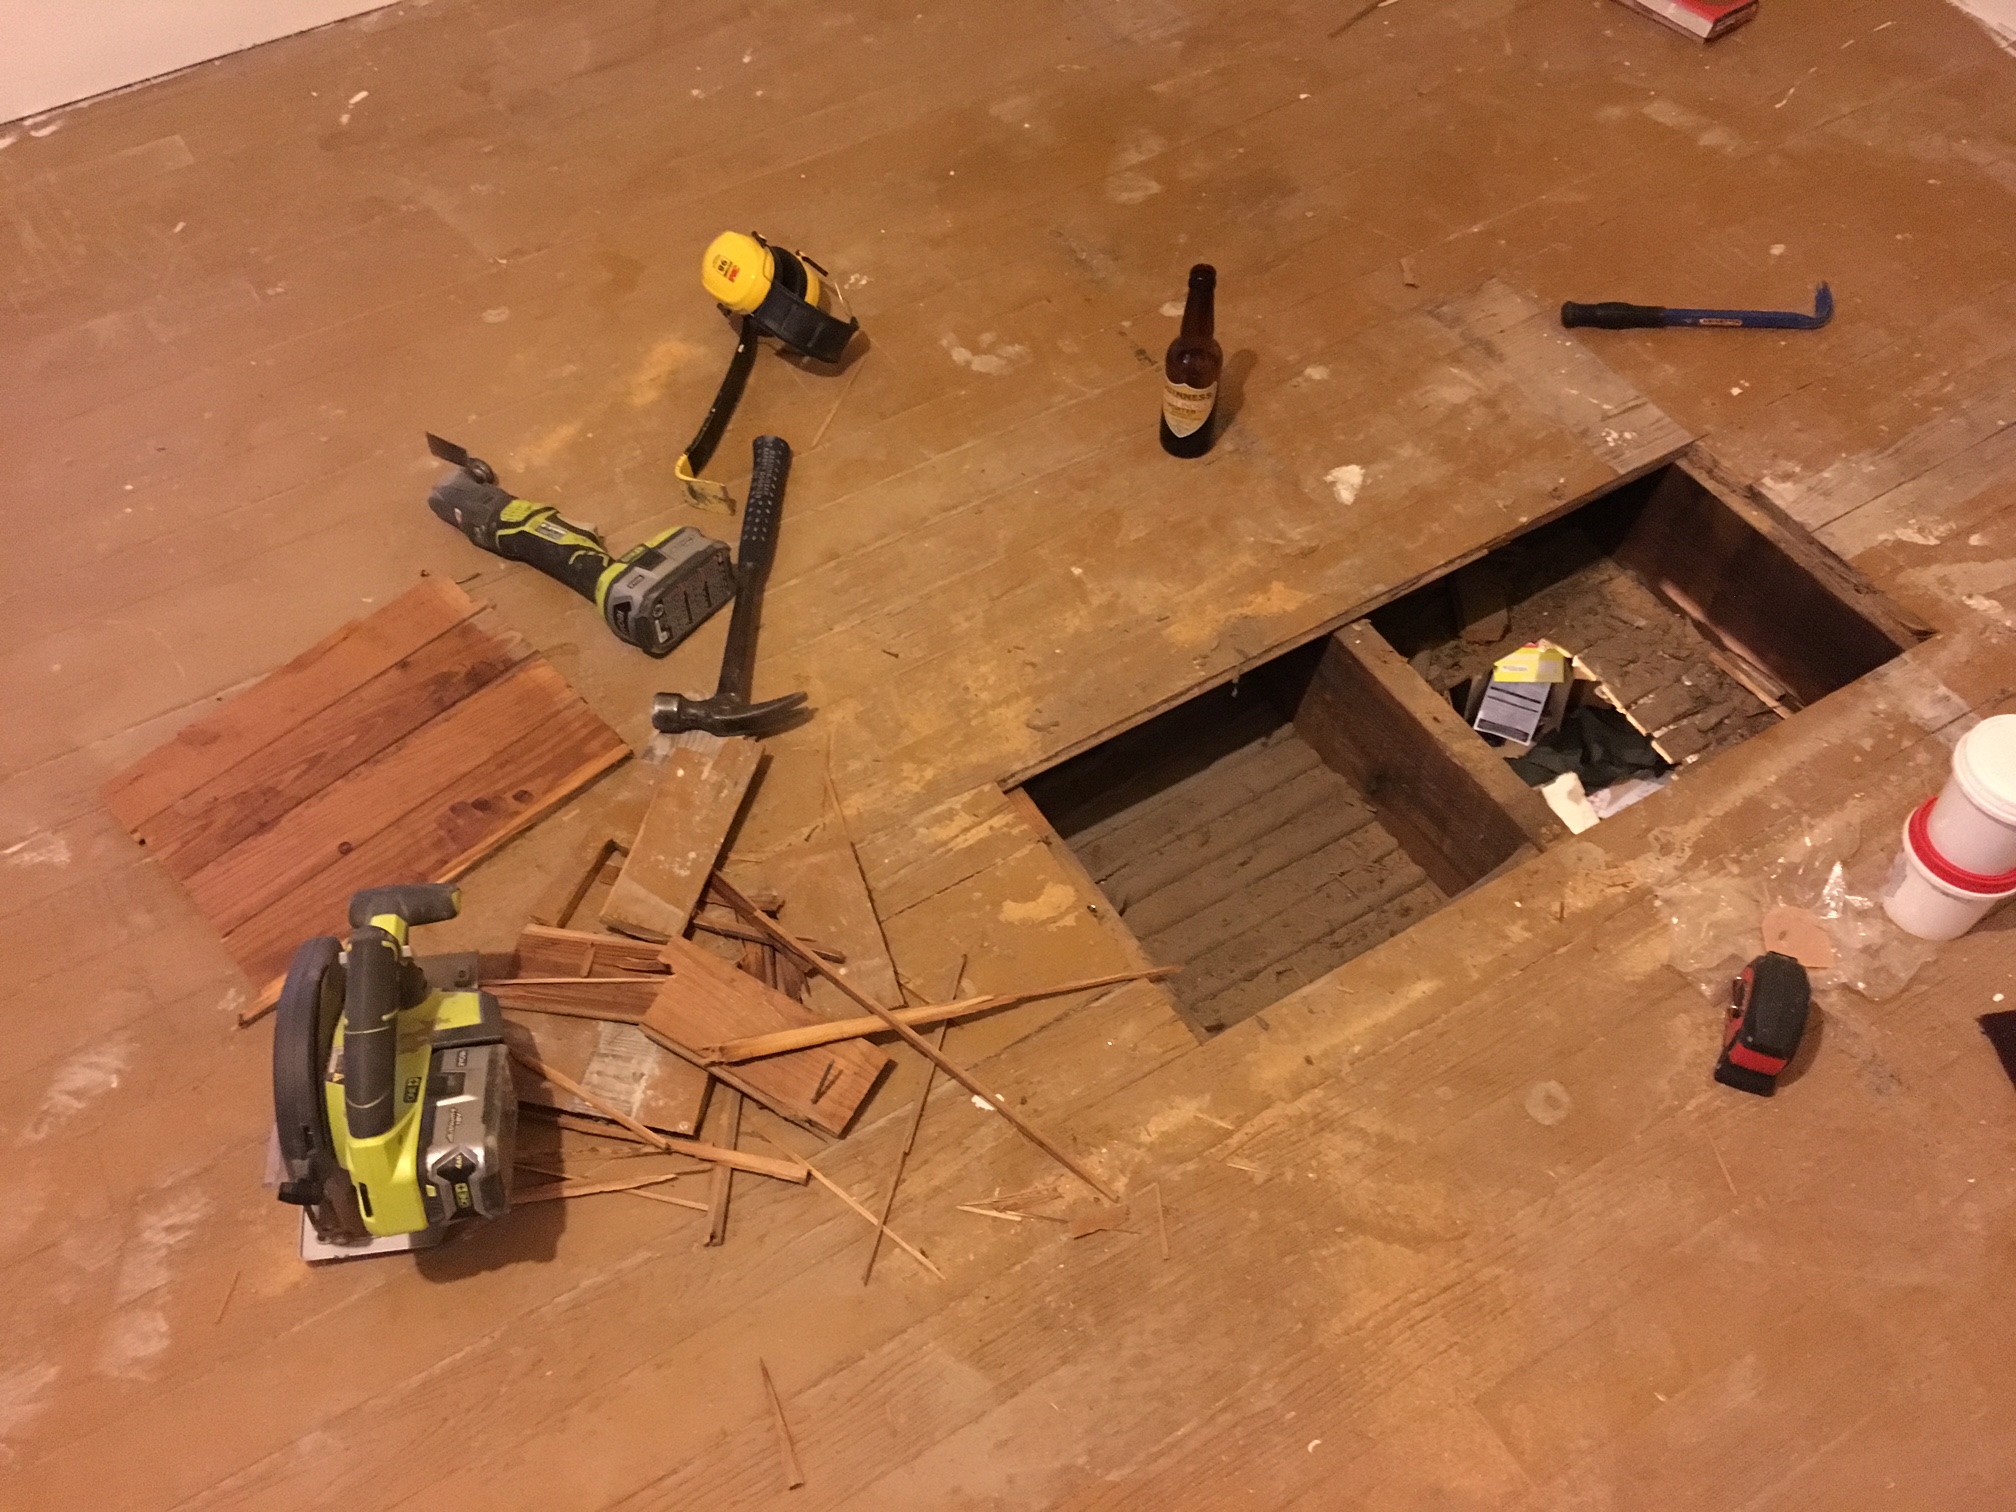
Before we could work on the floors, I had to patch a few holes. This was where the old vent register used to be located. I re-routed the vent to the other side of the room so that the pipe wasn't in the middle of the living room ceiling (used to be a drop ceiling down there but that had to go!).
Butters waited patiently for us to finish working on his new bedroom, lol....

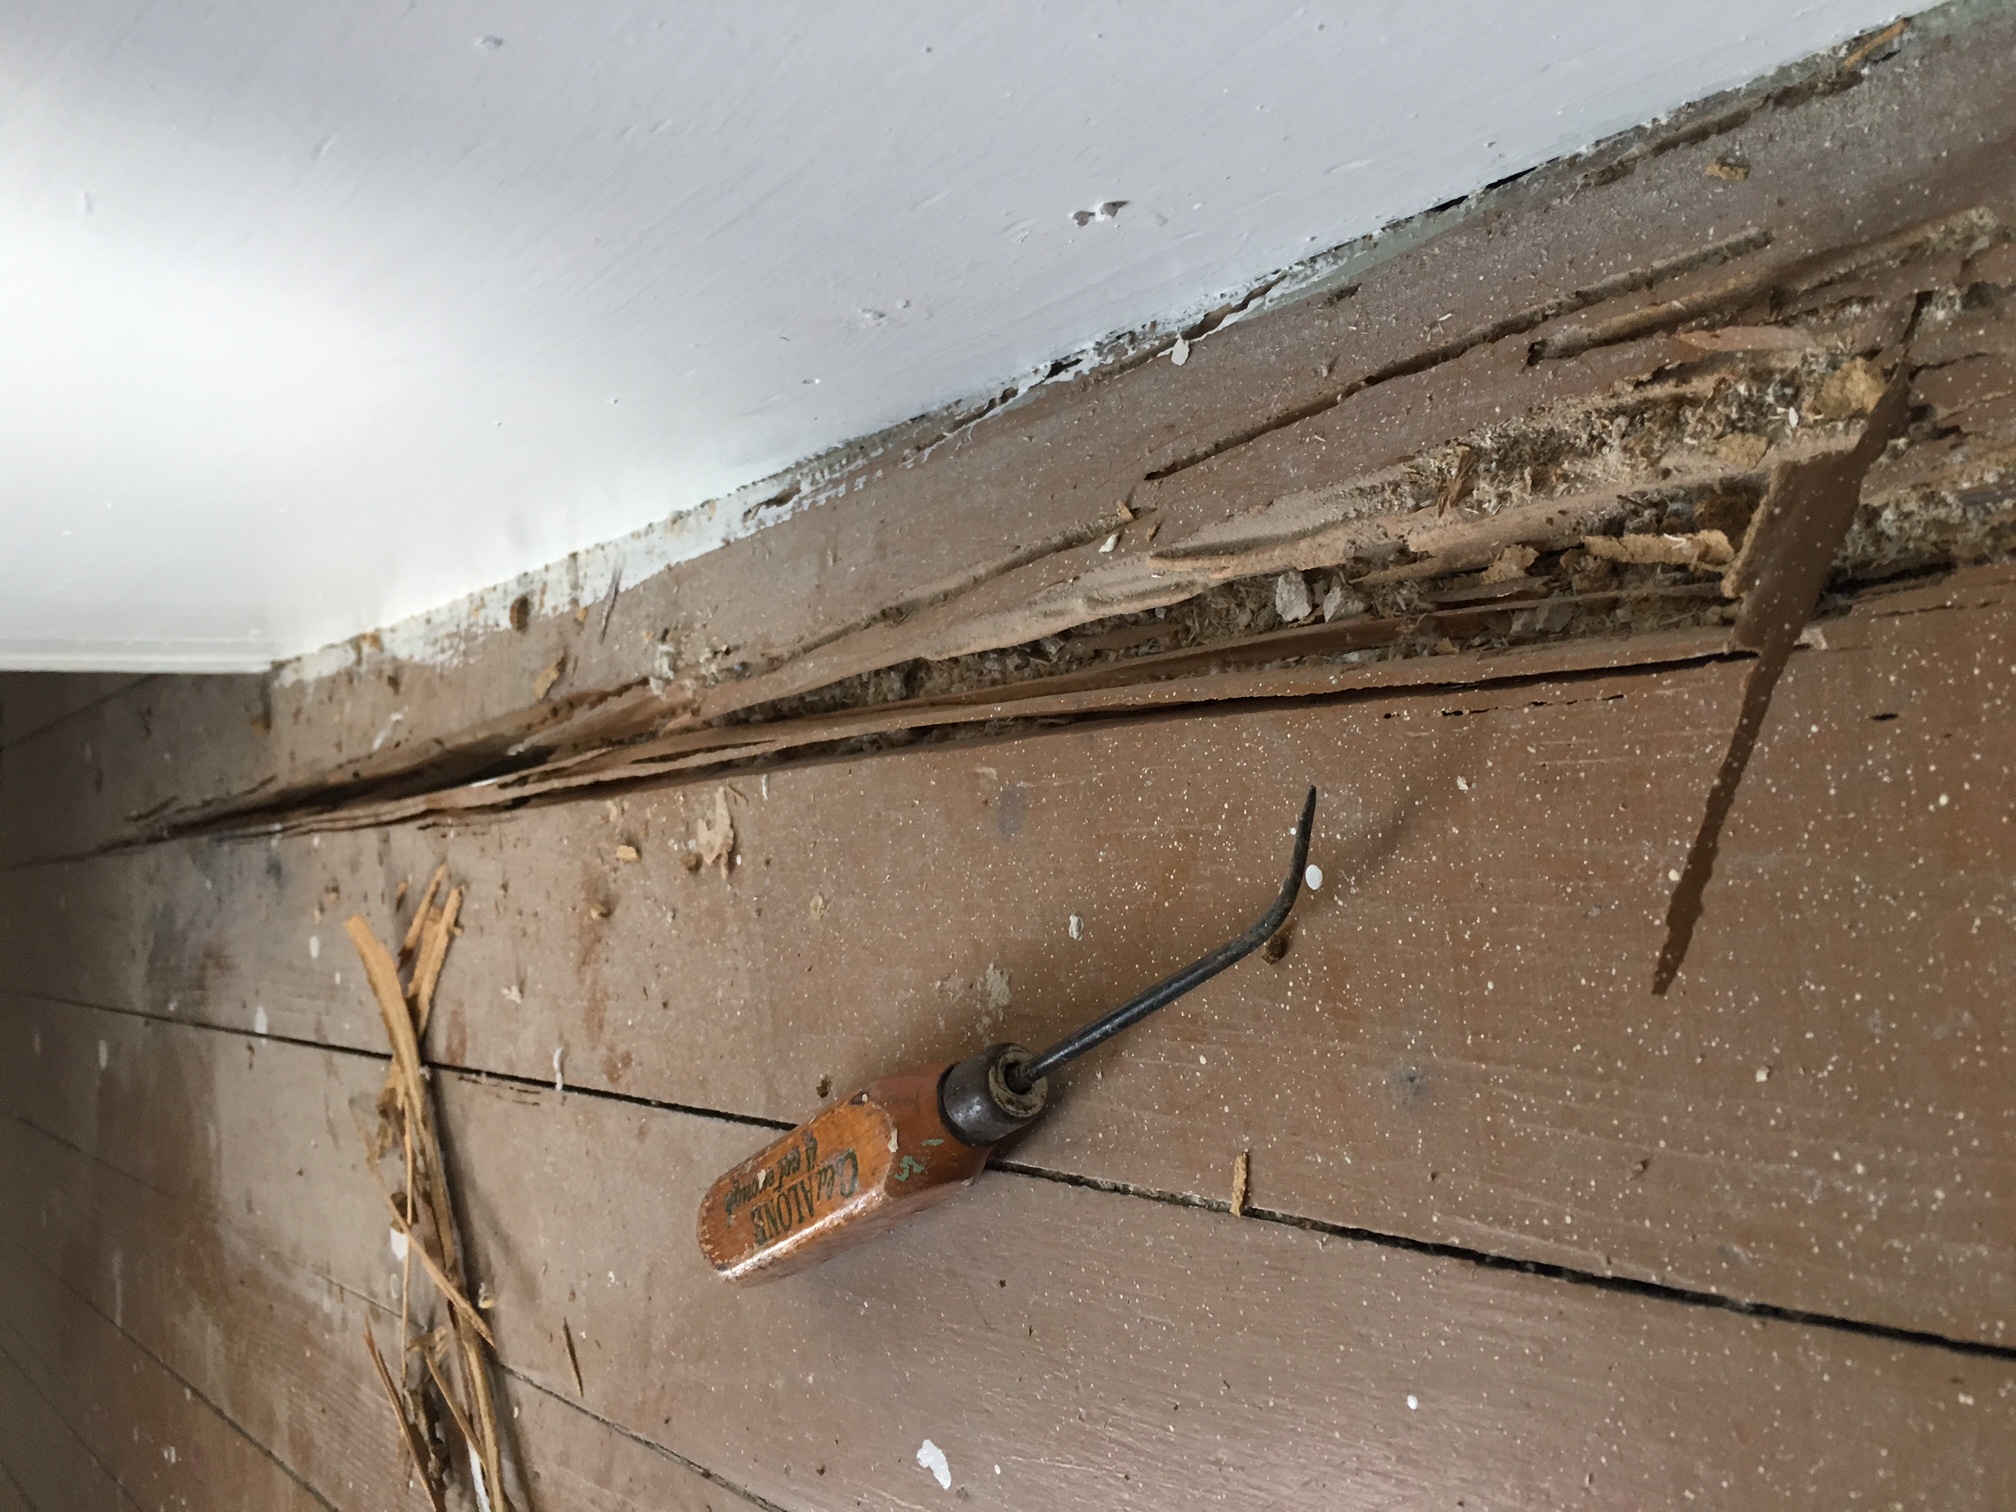
And there was some termite damage to repair on one of the floor boards. Evil termites! We cheated; instead of replacing the floorboard, we dug out all the soft, damaged wood and filled it in with epoxy wood putty. The board was along the wall and half-way under the floorboard so that it would have been very difficult to replace.
Then we painted the floor. We chose to paint the floor boards instead of refinish them for a few reasons:
- they were already painted
- the douglas fir boards weren't spectacular or anything special
- it was easier, quicker, and cheaper than refinishing
- even with another thick coat of paint, you could still make out the grain pattern of the wood because they weren't sanded perfectly flat. This was a feature I deemed essential, and to keep this raised wood pattern we chose to use Scotch Brite adhesive pads rather than sand paper to rough up the old paint surface
We used a very expensive floor paint from Sherwin William's "pro industrial line" called ArmorSeal Tread-Plex. It's a water-based product, one of their new water based acrylic enamels, a great new technology. Did I mention it was expensive?
After much time looking at different shades of white (yes, different shades of white! Benjamine Moore has 300 different shades of white...), we chose Sherwin Williams's Porcelain. It didn't need any primer but the old floor had to be scrubbed very well with brown Scotch Brite abrasive pads. I didn't want to use sand paper because that could have flattened the boards too much and we'd loose the wood grain texture raising up.
We rolled on two coats. A little more than half a gallon was needed for about 350 square feet per coat. The edges around the perimeter of the room was applied with a brush. Easy! Oh, one last thing, all the trim around the baseboards and windows and doors was painted pure white with a cheap latex paint. I'm waiting to paint the doors and I'm going to use a tougher, more expensive water-based enamel from SW. Pure white.


Then it was time to start moving in!
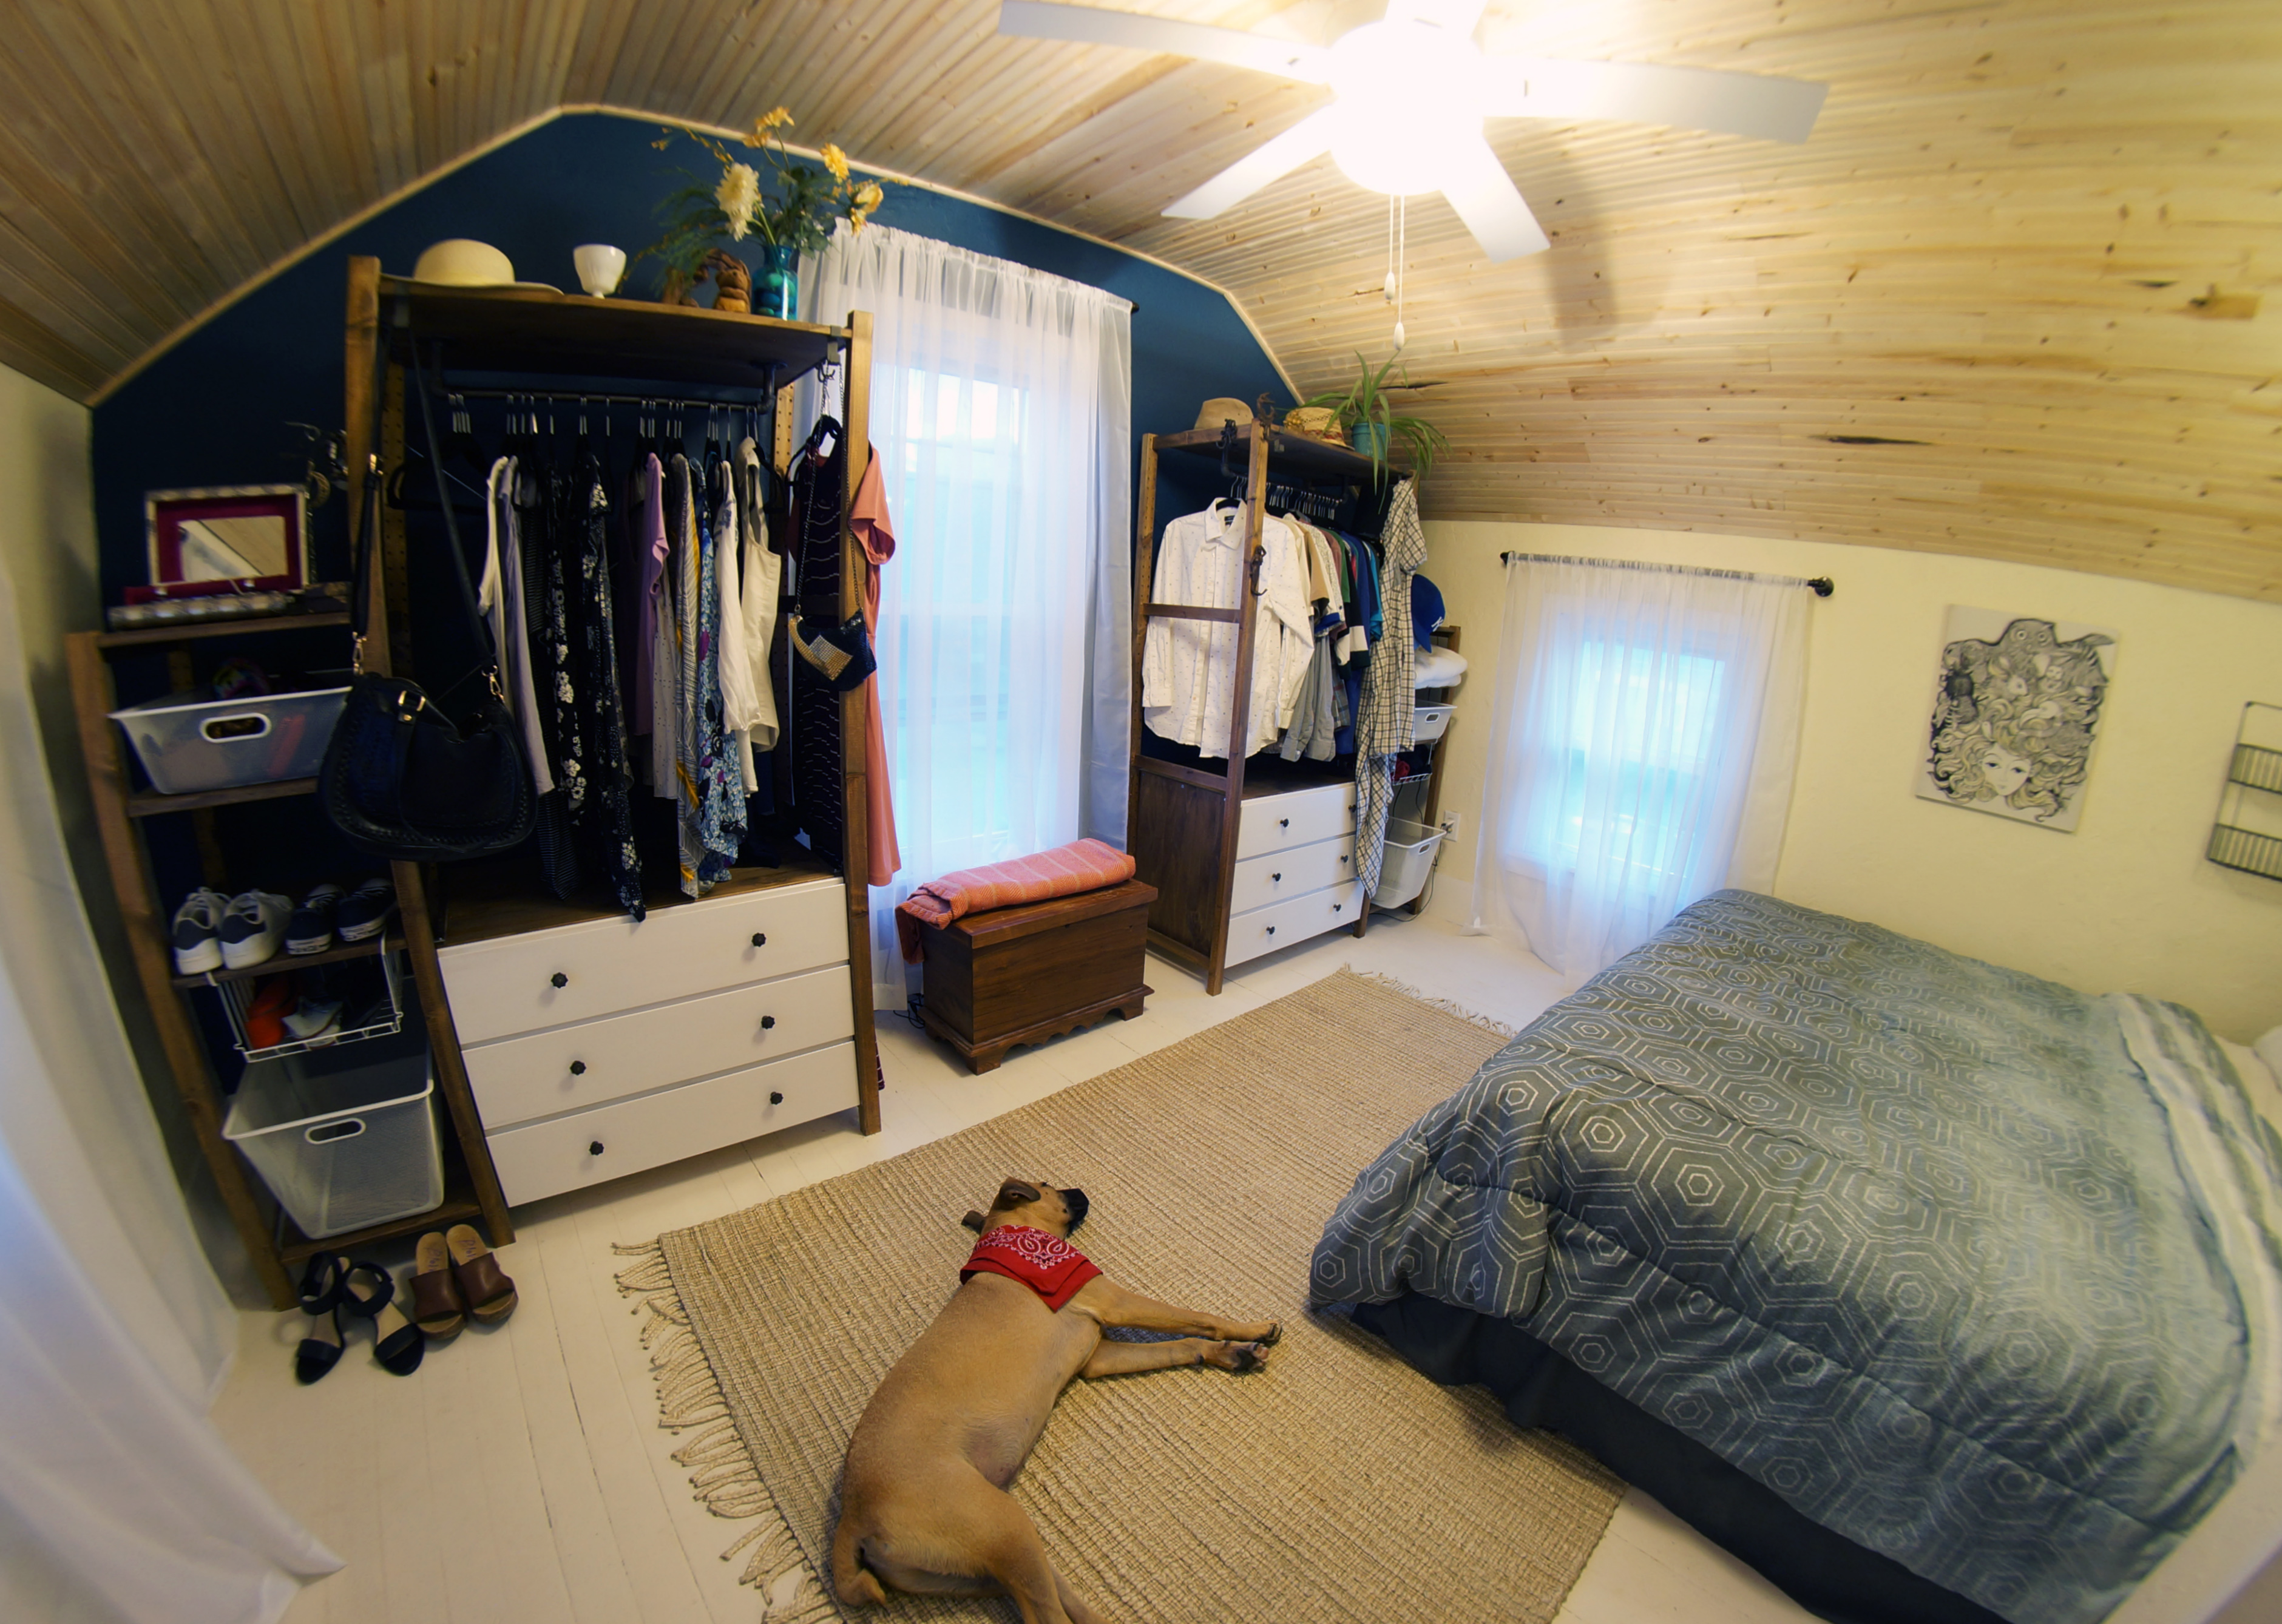
Master Bedroom Makeover
We had no closet after knocking down the wall, so we built an open wardrobe system. We went to IKEA and picked up two IVAR sets, and you can read all about it here. We stained and painted it ourselves, which added at least a week of work. I love them though.

We installed a ceiling fan too. All white to break up the solid pine ceiling.
Almost done!!
 A king size mattress perfectly fit in the space where the closet used to be. So doing just that was a no-brainer.
We built our own headboard out of edge-glued spruce with a coat of Watco danish oil in black walnut followed by 2 or 3 coats of spar urethane. I chose spare urethane instead of regular polyurethane just in case water spills on it or anything, it will never get sticky and rub off onto our heads or something lmao. Actually, it was water based urethane witch meant that a coat of Zinser Seal Coat needed to go between the danish oil and the urethane. It's hard to tell in the photo but the headboard is at a slight angle too, to make it a little more comfortable to lean against.
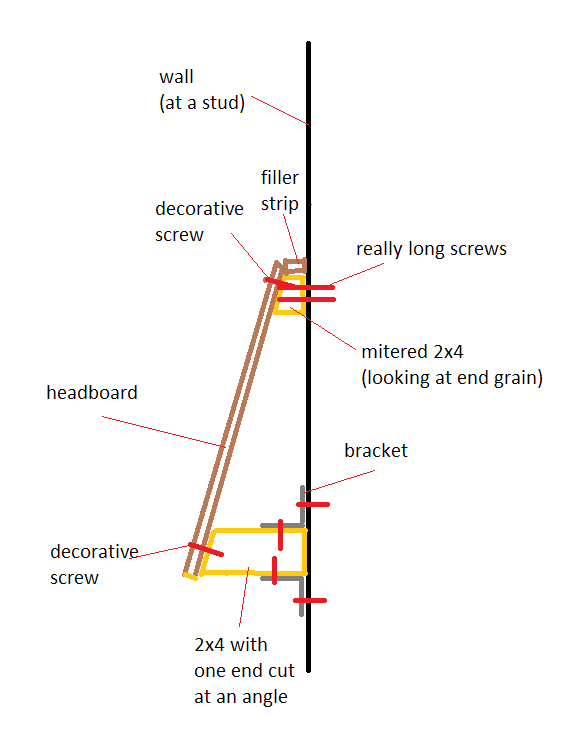
It was fastened to the wall by first screwing a mitered 2x4 horizontally to where the top of the headboard is. Then a little filler piece went on (also stained and urethaned) with brad nails, then the the headboard was screwed to the mitered 2x4 with decorative bronze screws. At the bottom, 2x4s extending away from the wall were fasted to the wall with brackets, and the other end of the 2x4s where cut at the angle to match the headboard angle. Finally the headboard was screwed to these with more decorative screws. There were four of these 2x4 support braces. Very strong! See the diagram for a visual.
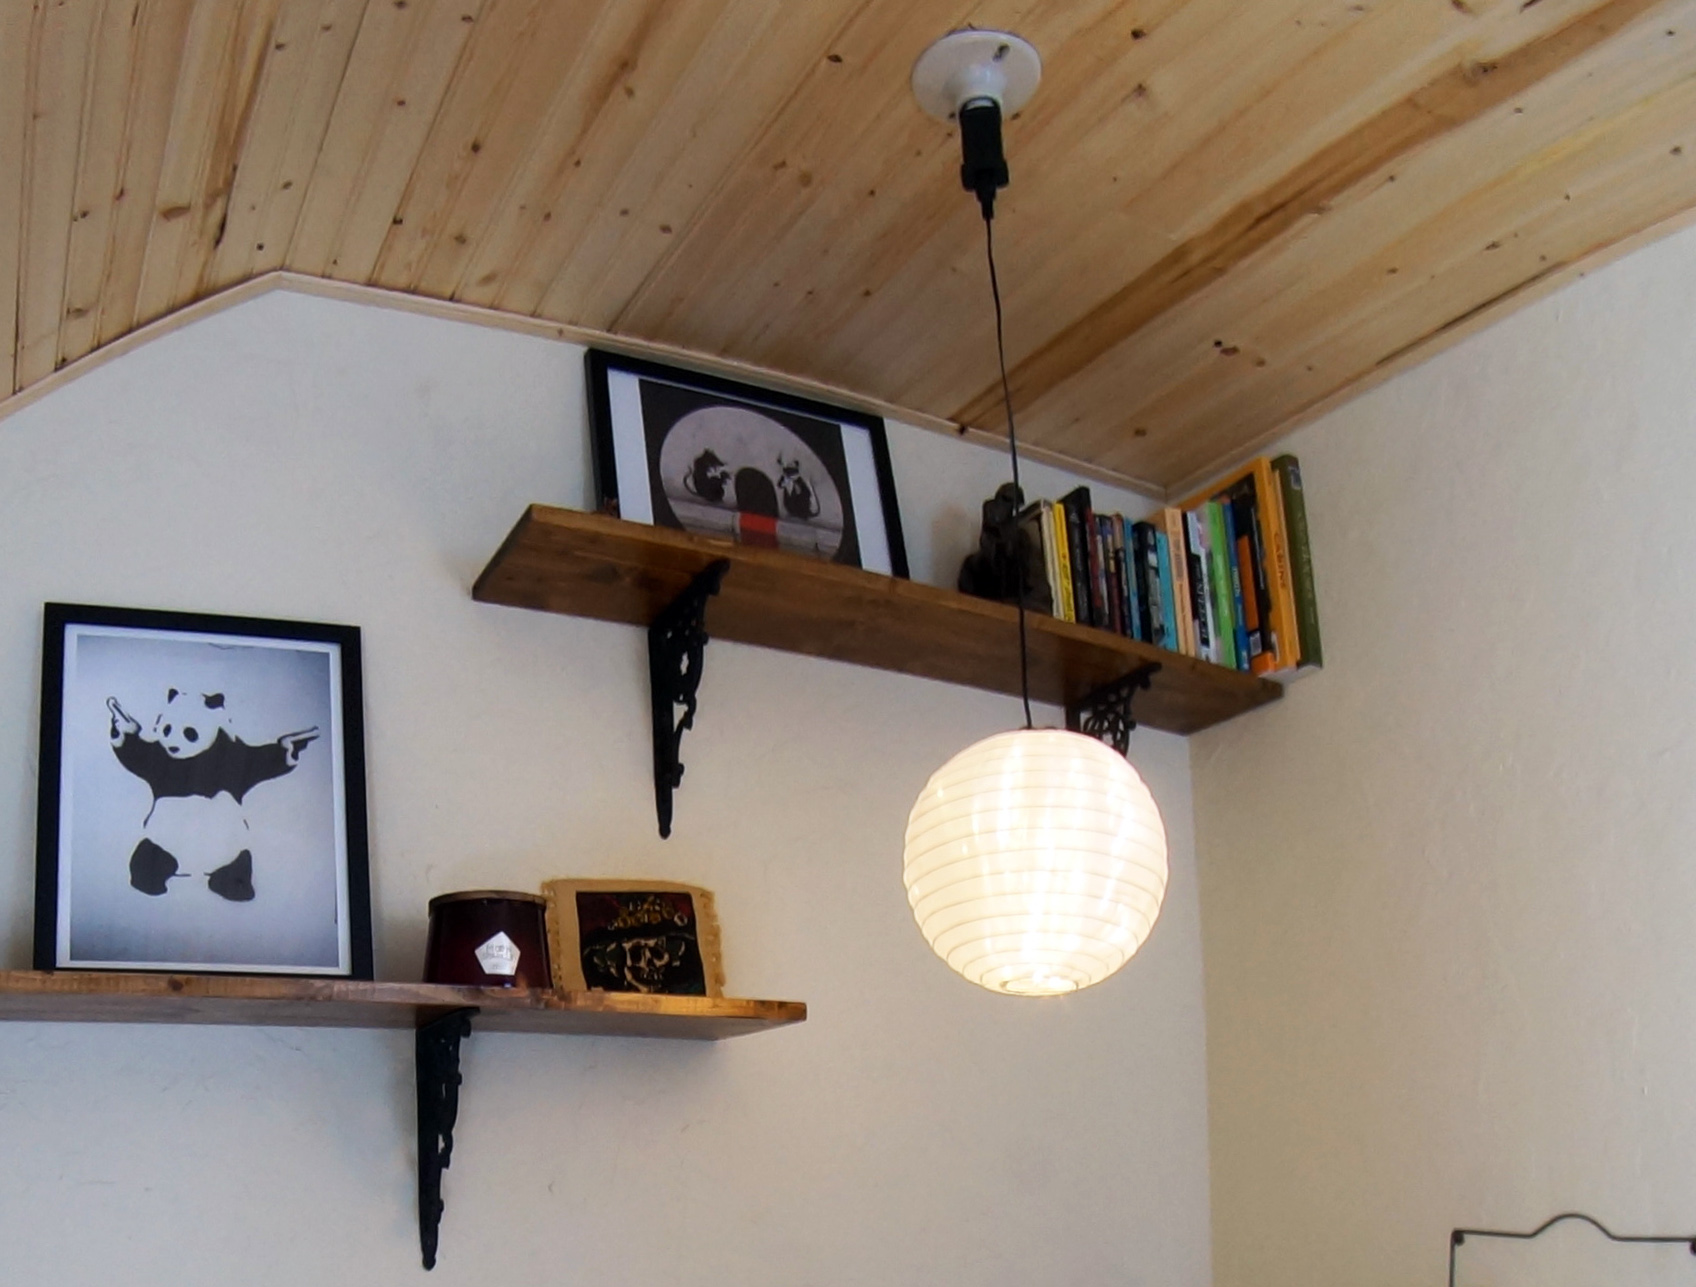
The same treatment -- danish oil + seal coat + urethane -- was applied to the shelves which were the same edge-glued spruce material. A bit overkill but if candle wax or water ever gets on them they'll be fine. In my head
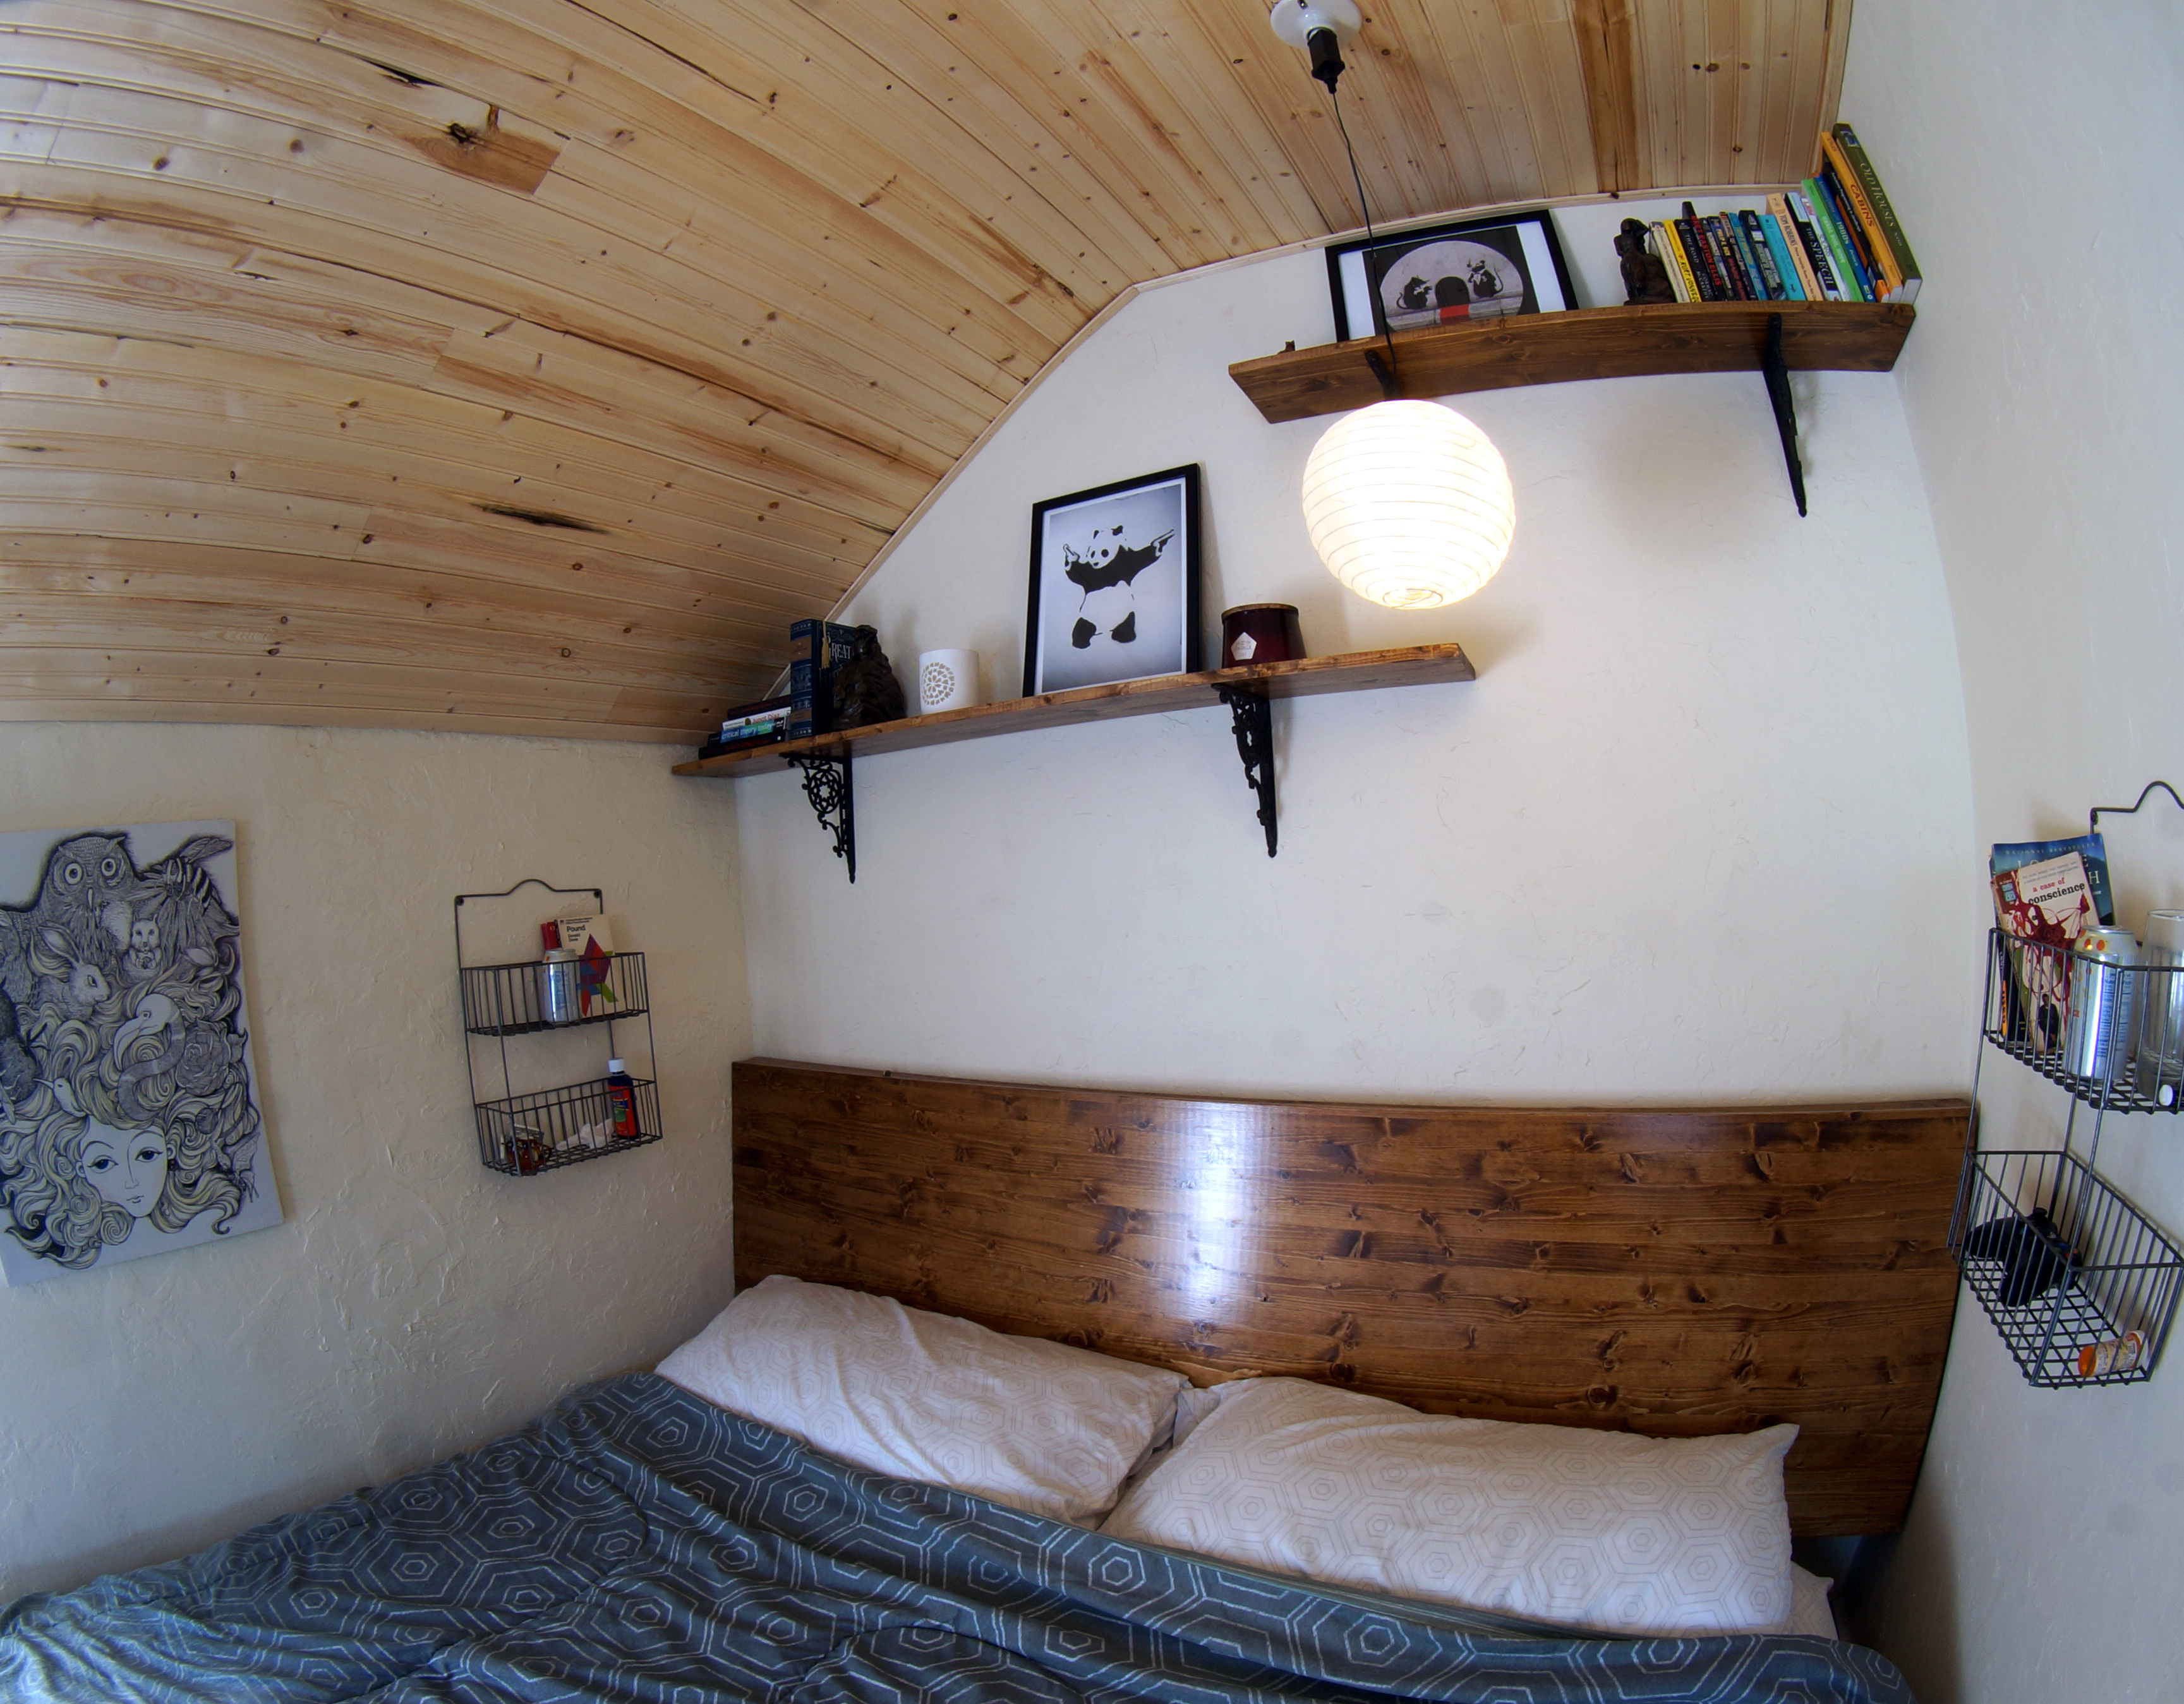
I love the black walnut Watco danish oil on the edge-glued spruce! It looks so good. We also used it on the Ikea wardrobe systems.
Here's a close-up of the light we made above the bed. I ordered some fairy lights from Amazon and I found a Chinese paper lantern too, and I simply stuffed the fairy lights into the paper lantern and tied the power cord in such a way that it would hang from the power cord at the perfect height. Then, with a socket to outlet adapter screwed into the porcelain light socket I installed above the ceiling when doing the electrical many months early, it simply just plugs in and hangs! It's controlled by a wall switch and it's the perfect intimate lighting we were looking for.
Doesn't Butters really tie the room together??
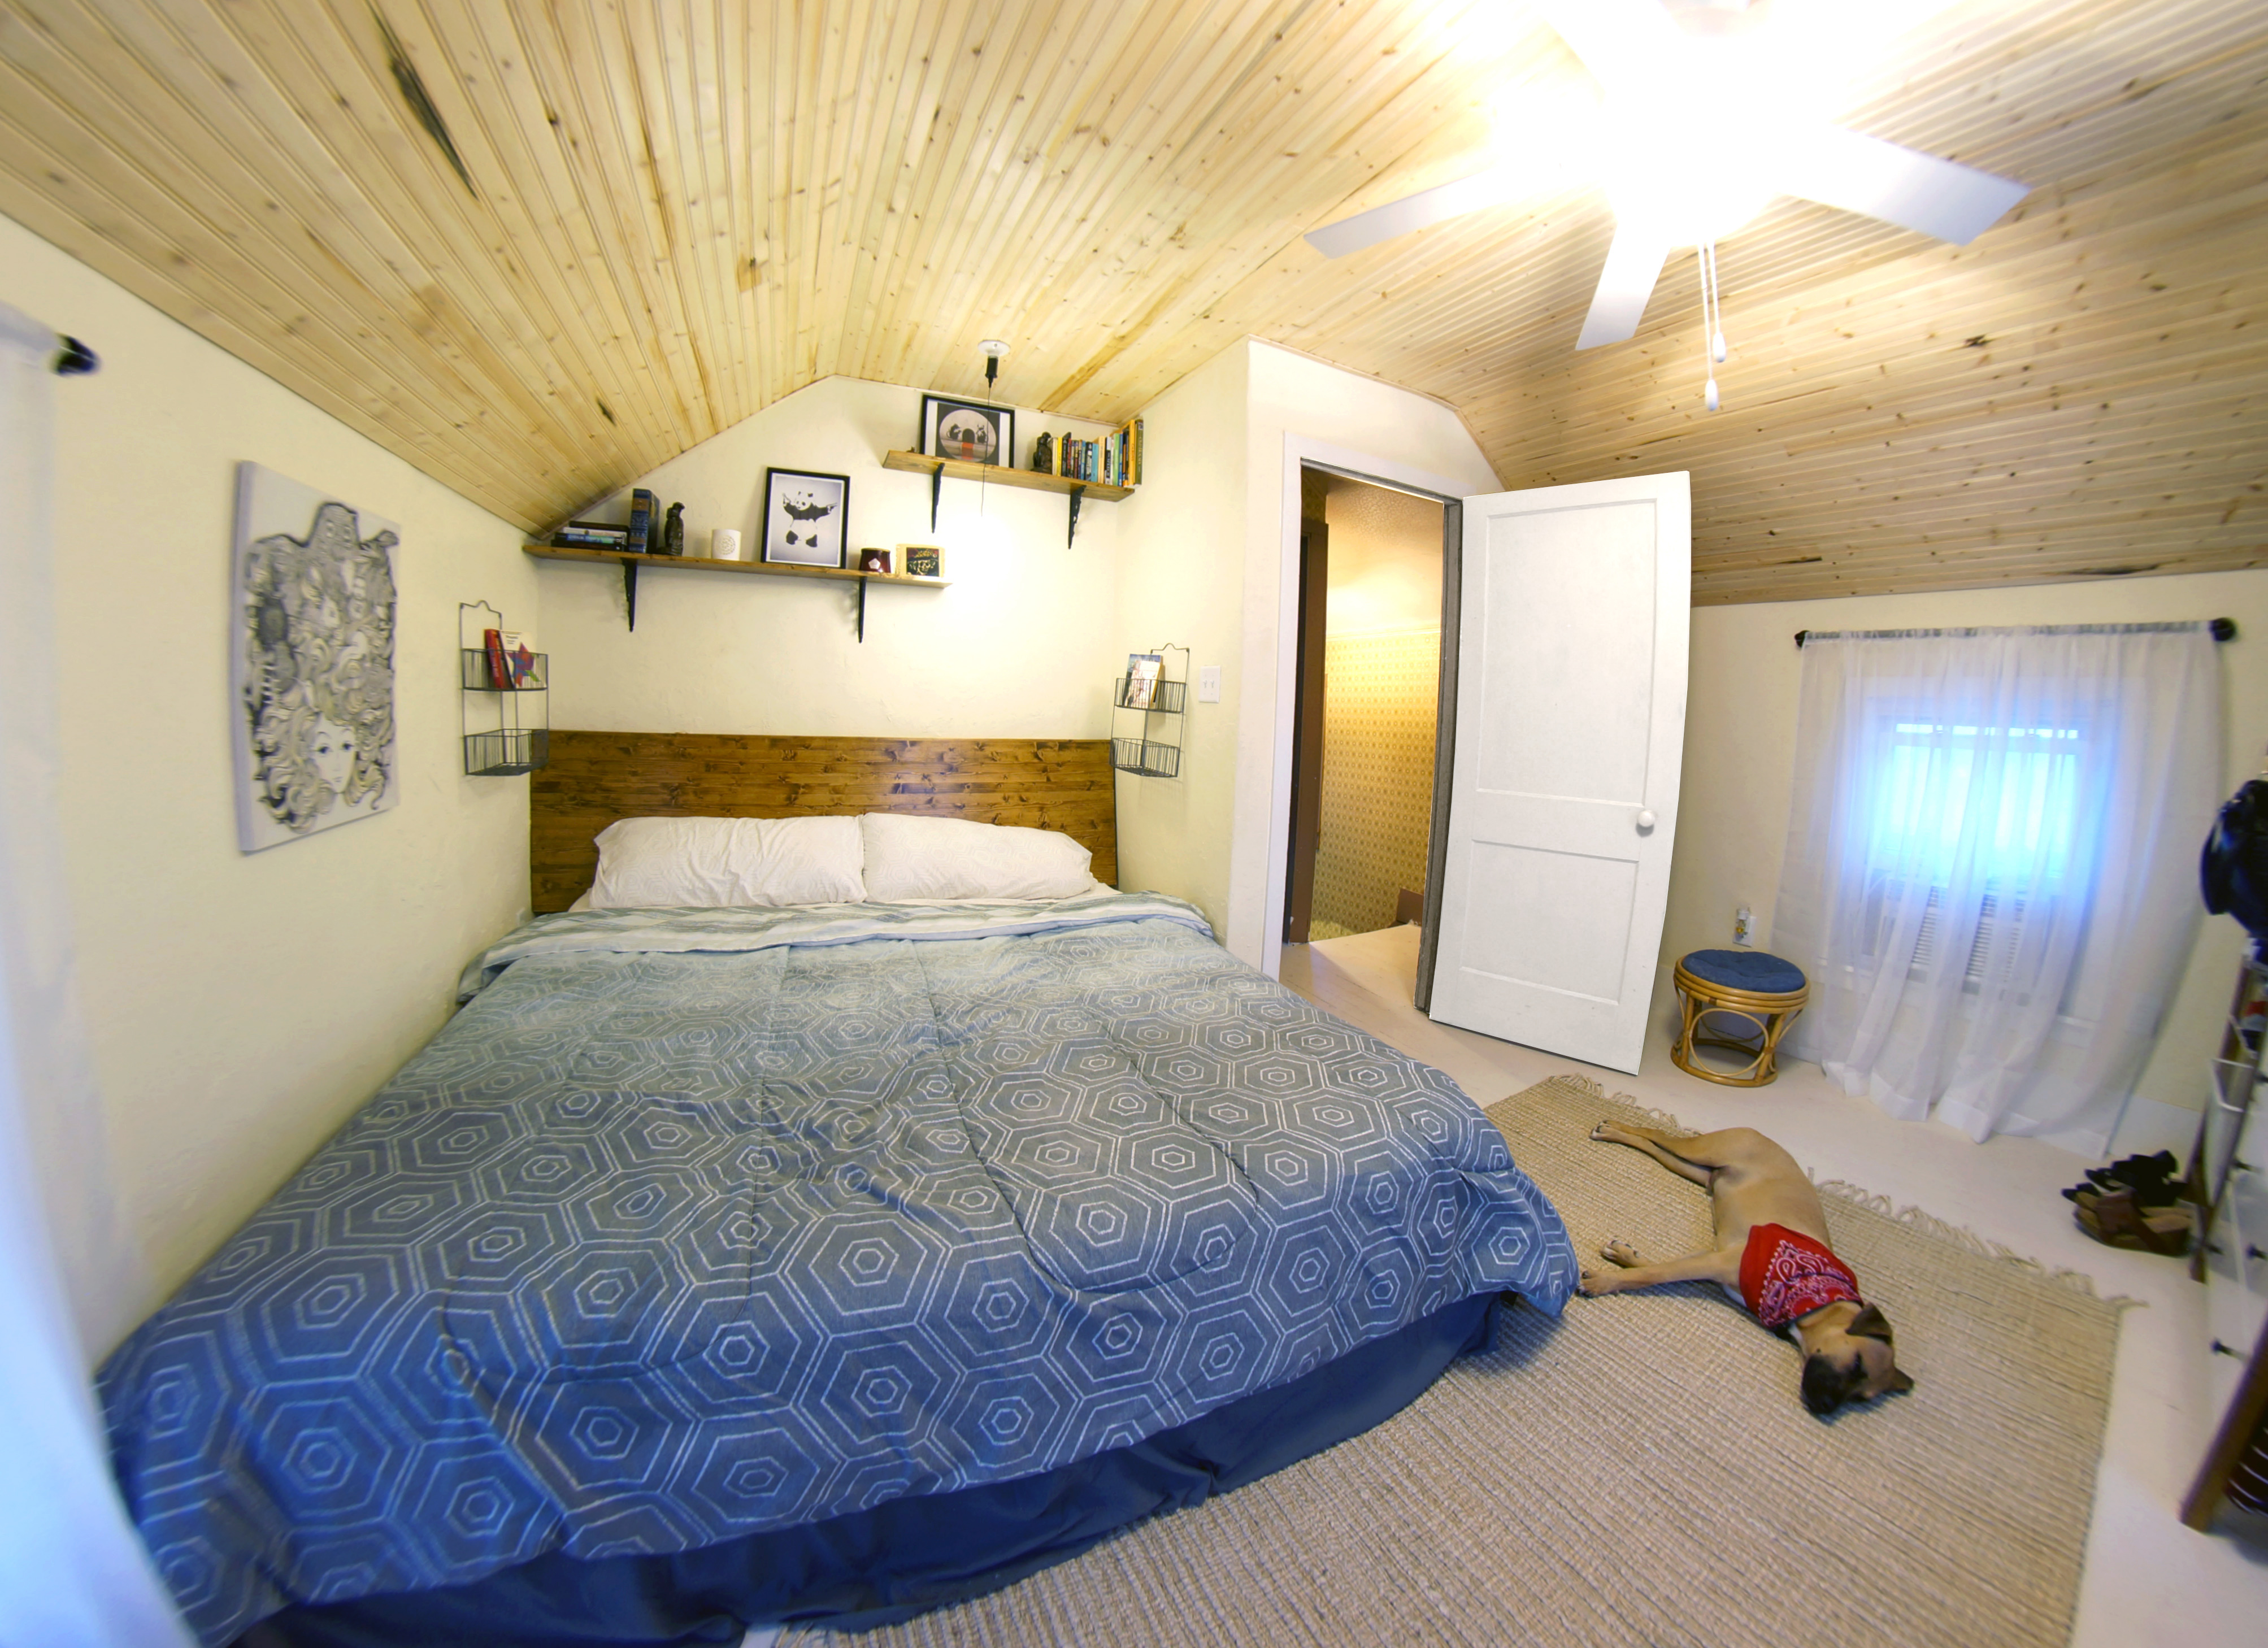
I think I would call the style modern farmhouse.
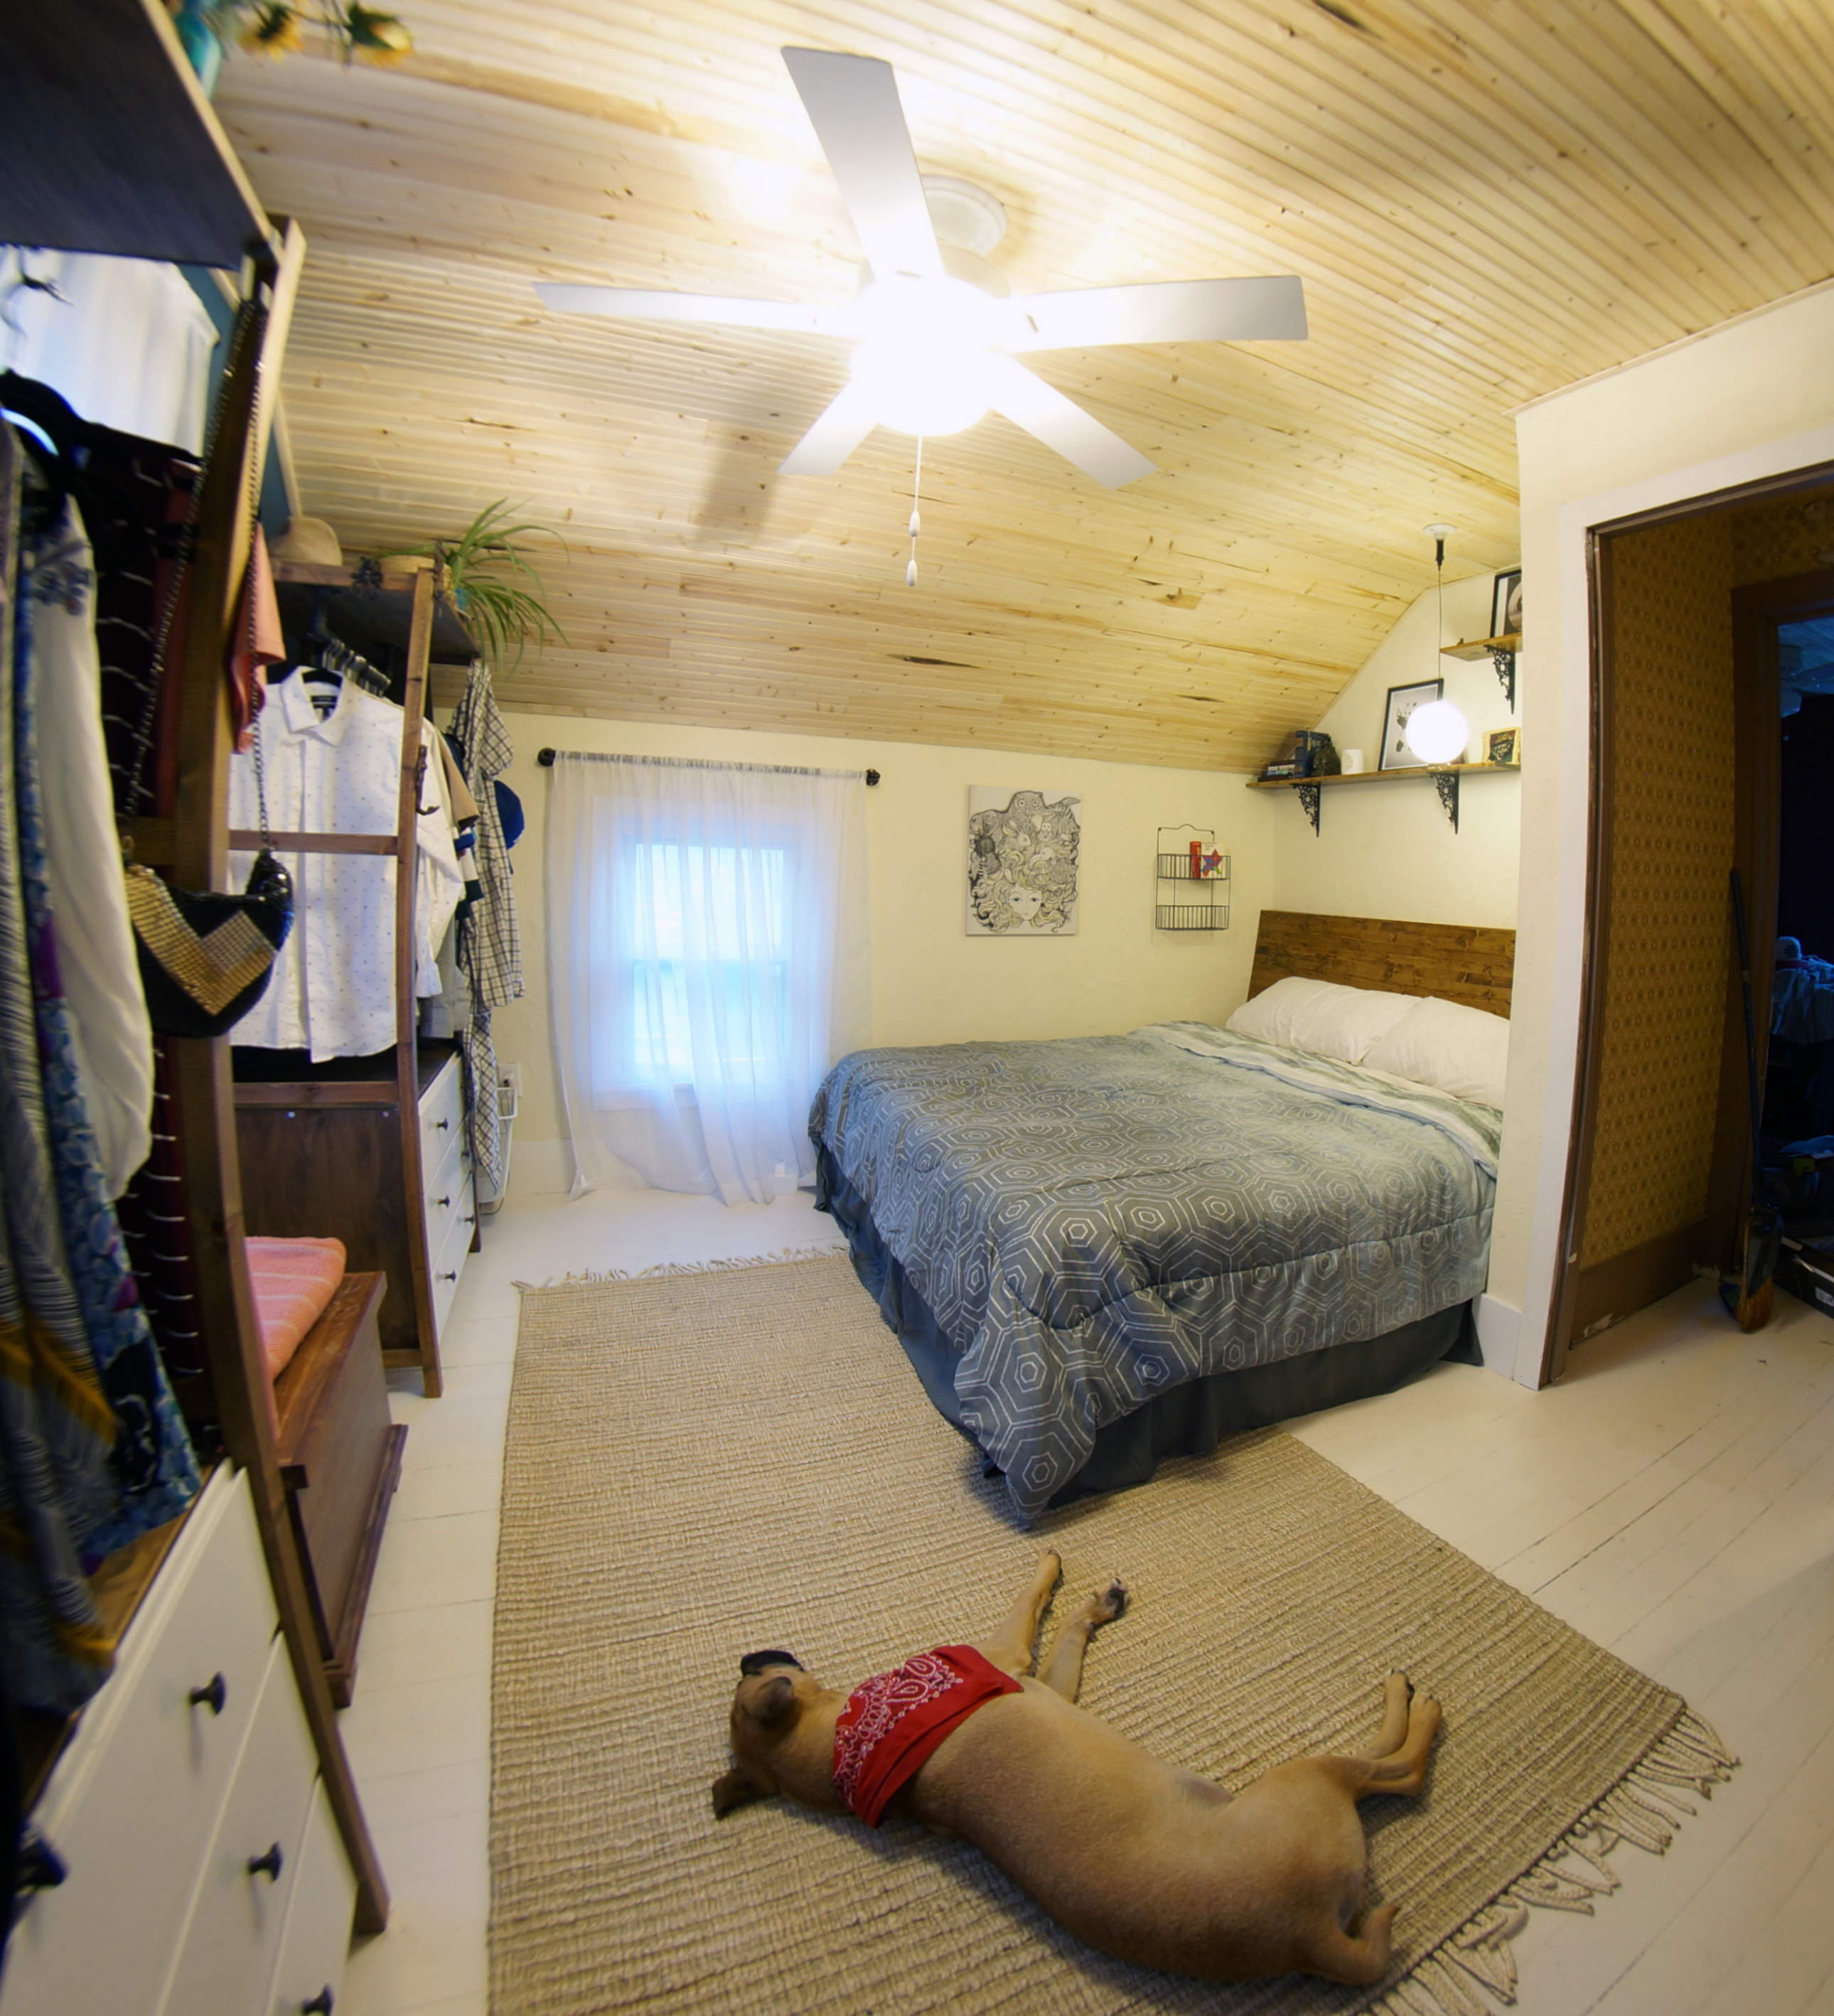
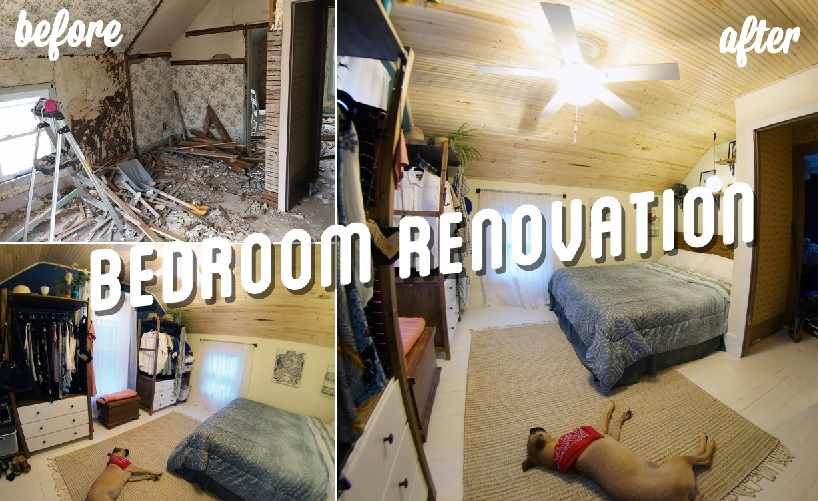
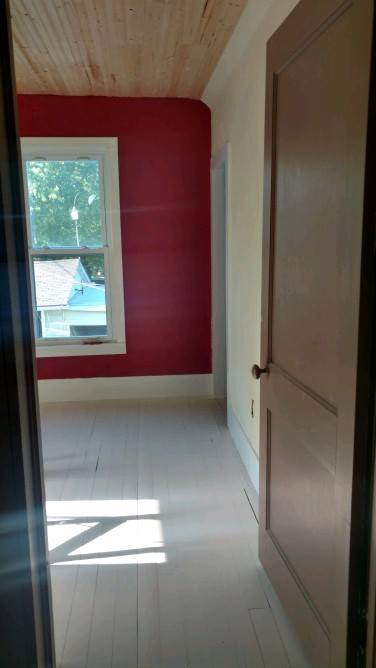
That's it! Our master bedroom is complete! The other bedroom is simply a guest room and/or bonus room.
The entire upstairs is done, aside from the tiny hallway. Yay! Now it's time to work on the downstairs...