Warning: this is not a tutorial and I am not an expert!
Bellow is the foundation that I built in Operation Tool Temple - Part 1: The Foundation
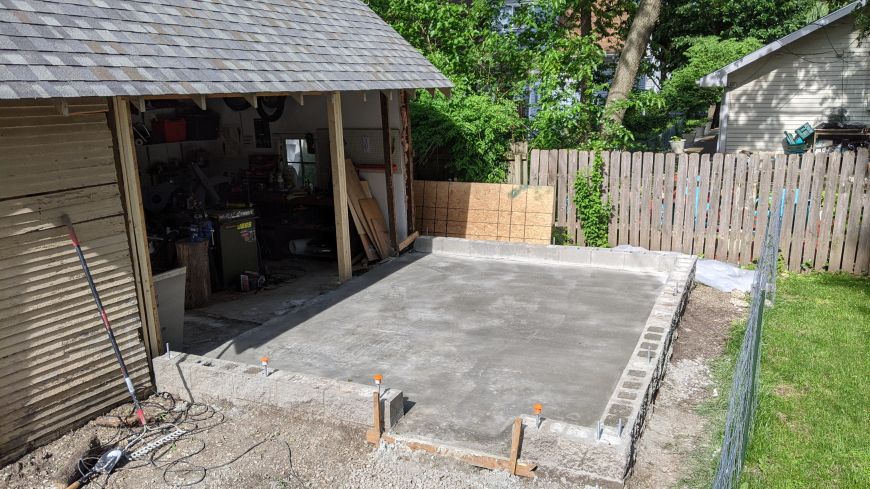
I think I will find that building the foundation was the hard part, and that the framing will go pretty quickly!
Here's my TODO list so far:
- remove tree & grind away stumps ✅
- remove old fence and put in something temporary ✅
- repair old garage foundation ✅
- get approval from city ✅
- rent a mini excavator ✅
- dig footing trench and move driveway material around to correct the grade ✅
- install footing forms, rebar, etc. ✅
- dig holes for footings for posts that are holding up the header beam ✅
- FOOTING INSPECTION ✅
- poor footings ✅
- get a dumpster from the city ✅
- demo the south wall and the garage interior and throw everything in the dumpster ✅
- pour footers to support the new beam and posts ✅
- replace South wall with 14’ header beam ✅
- get dumpster removed by the city ✅
- build cinder block walls on top of footing ✅
- back fill with dirt from digging the tenches, and get rid of the rest ✅
- get the gravel, rebar, and sand for the slab ✅
- SLAB INSPECTION ✅
- pour the slab ✅
- build stud walls
- attach the trusses
- build the roof fill to connect to old roof
- roof sheathing
- roof underlayment roof shingles shingles
- wrap the walls directly to studs
- wall sheathing/siding
- install windows & door
- rent a ditch witch
- dig a small trench for the underground electrical conduit
- rough electrical
- ROUGH ELECTRICAL INSPECTION } at the same time
- FRAMING INSPECTION }
- replace old door with new garage door w/ opener
- fascia boards, soffits, rafter ties
- paint
- HISTORIC INSPECTION
- FINAL INSPECTION
- interior drywall and insulation
- floor epoxy paint?
- workbench and shelves
- move everything in!
- build permanent fence
- plant a tree
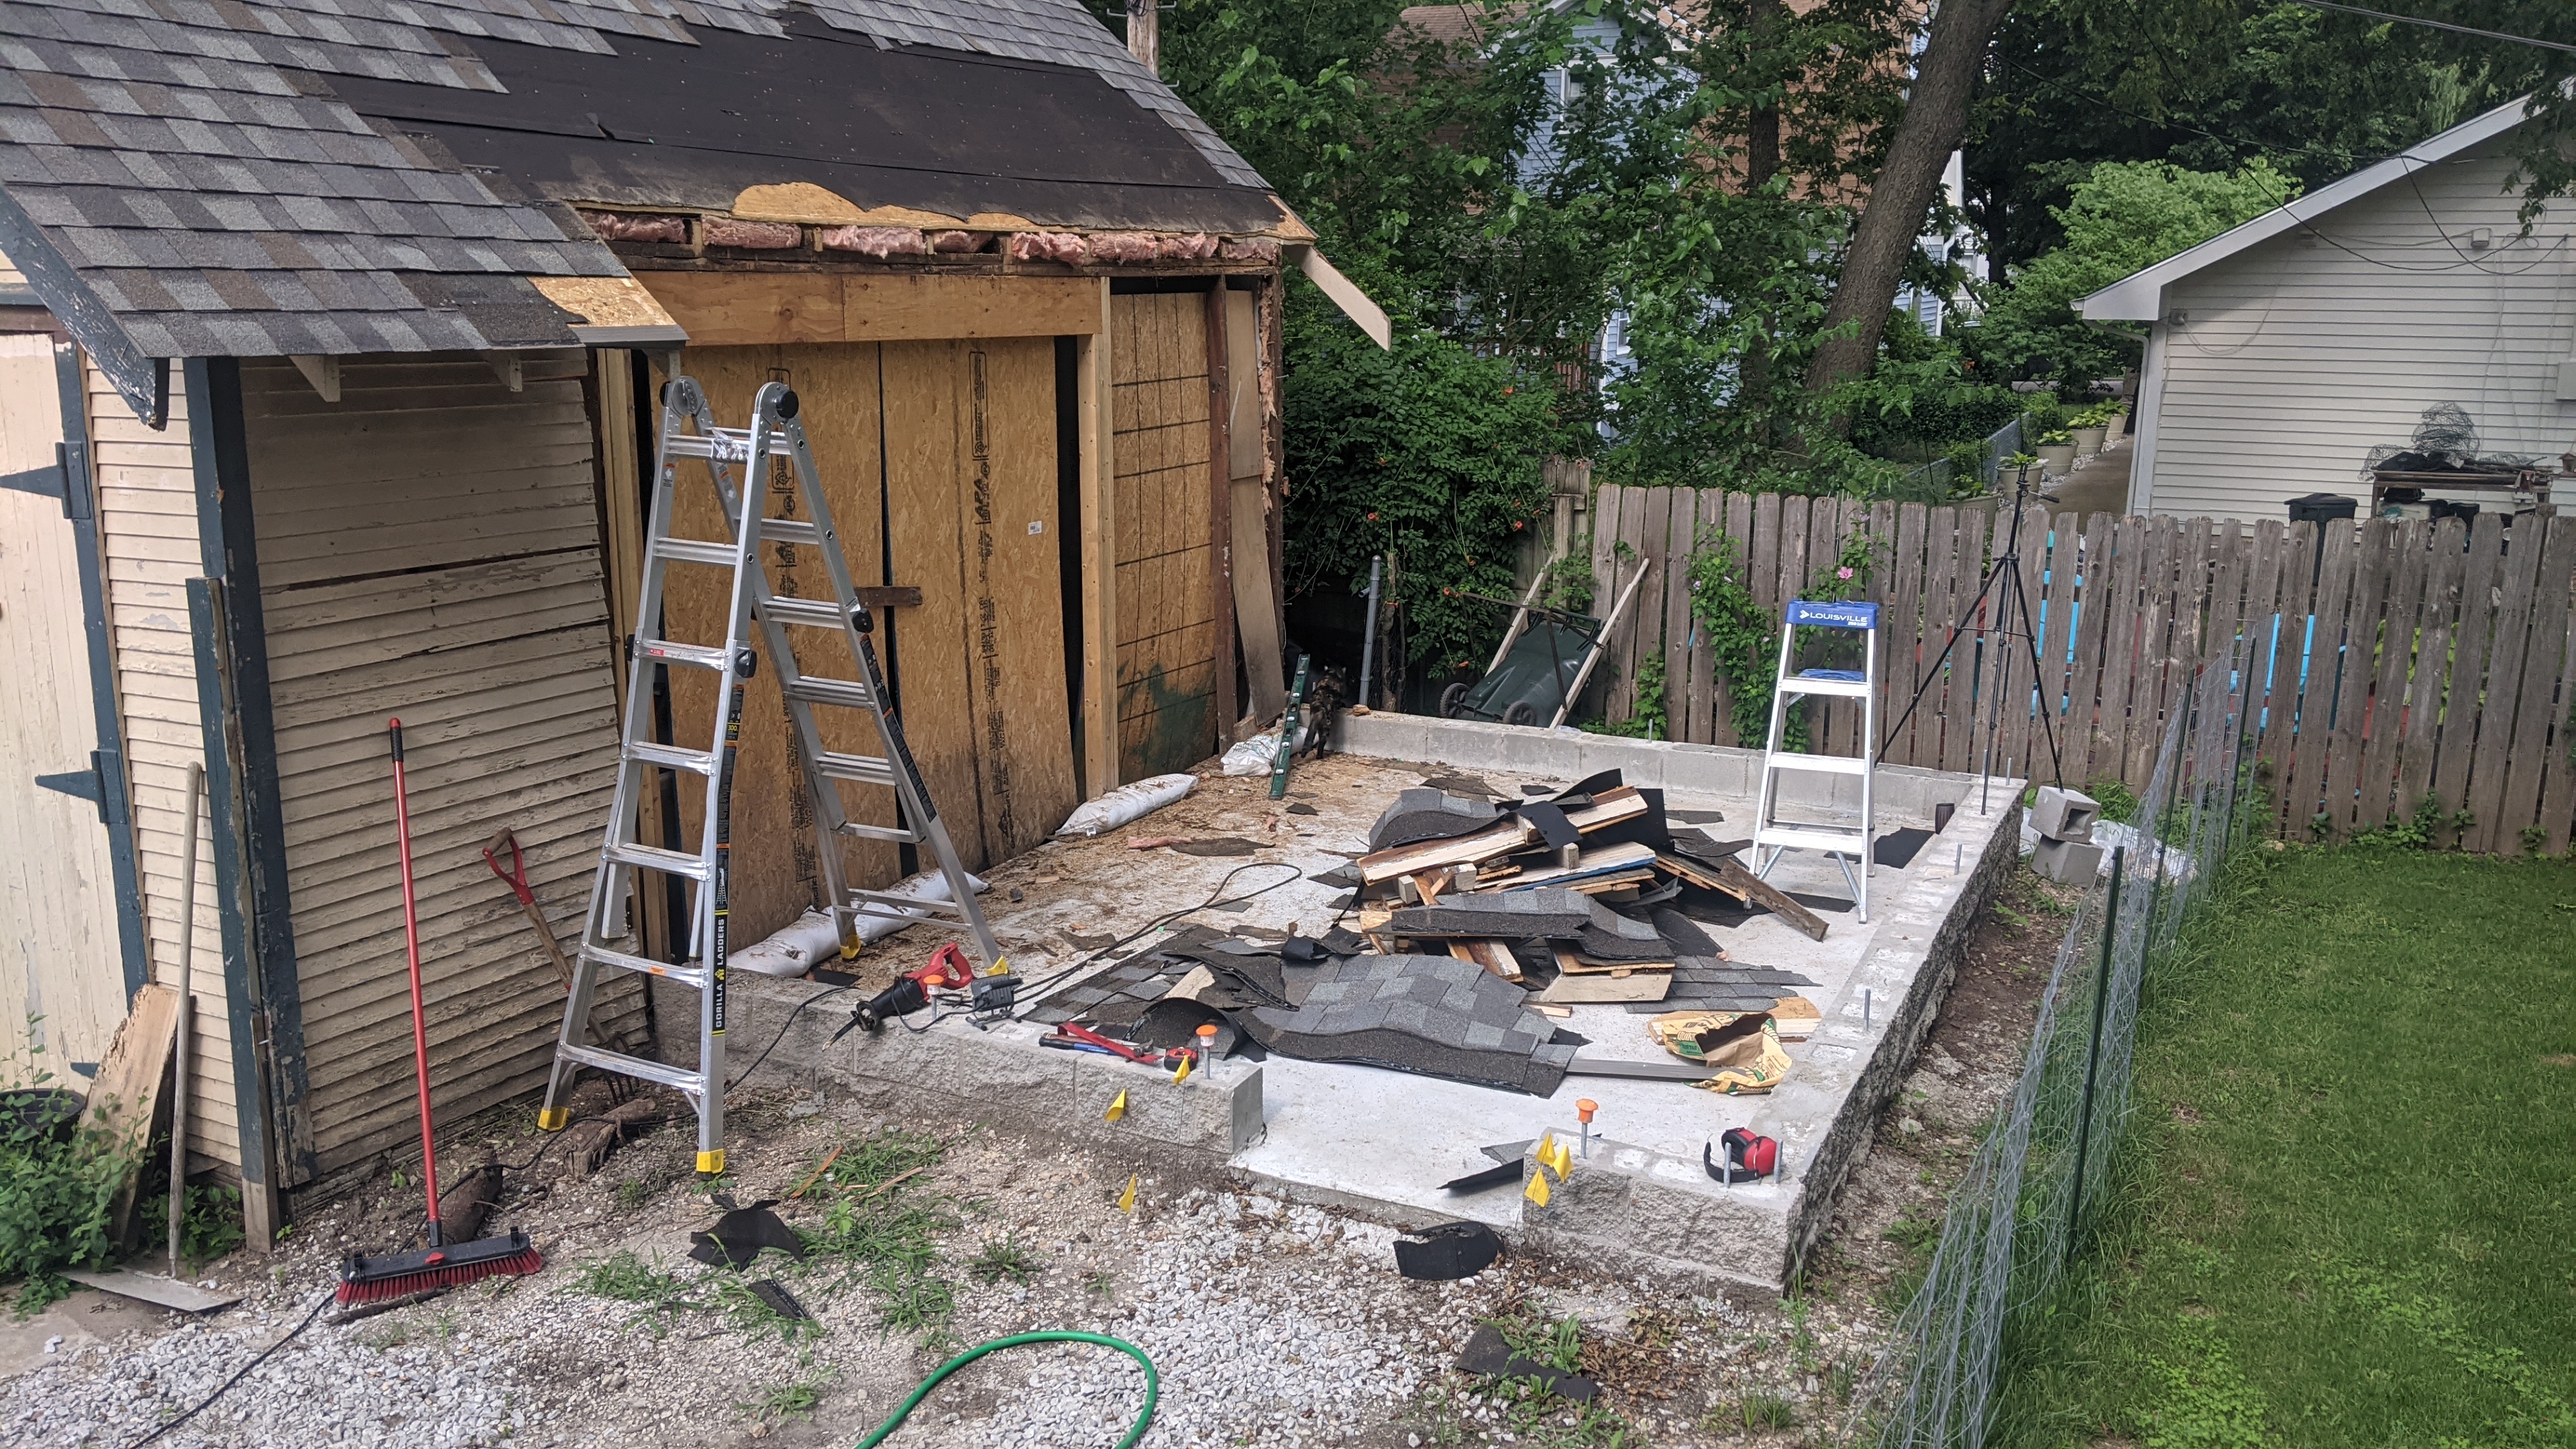
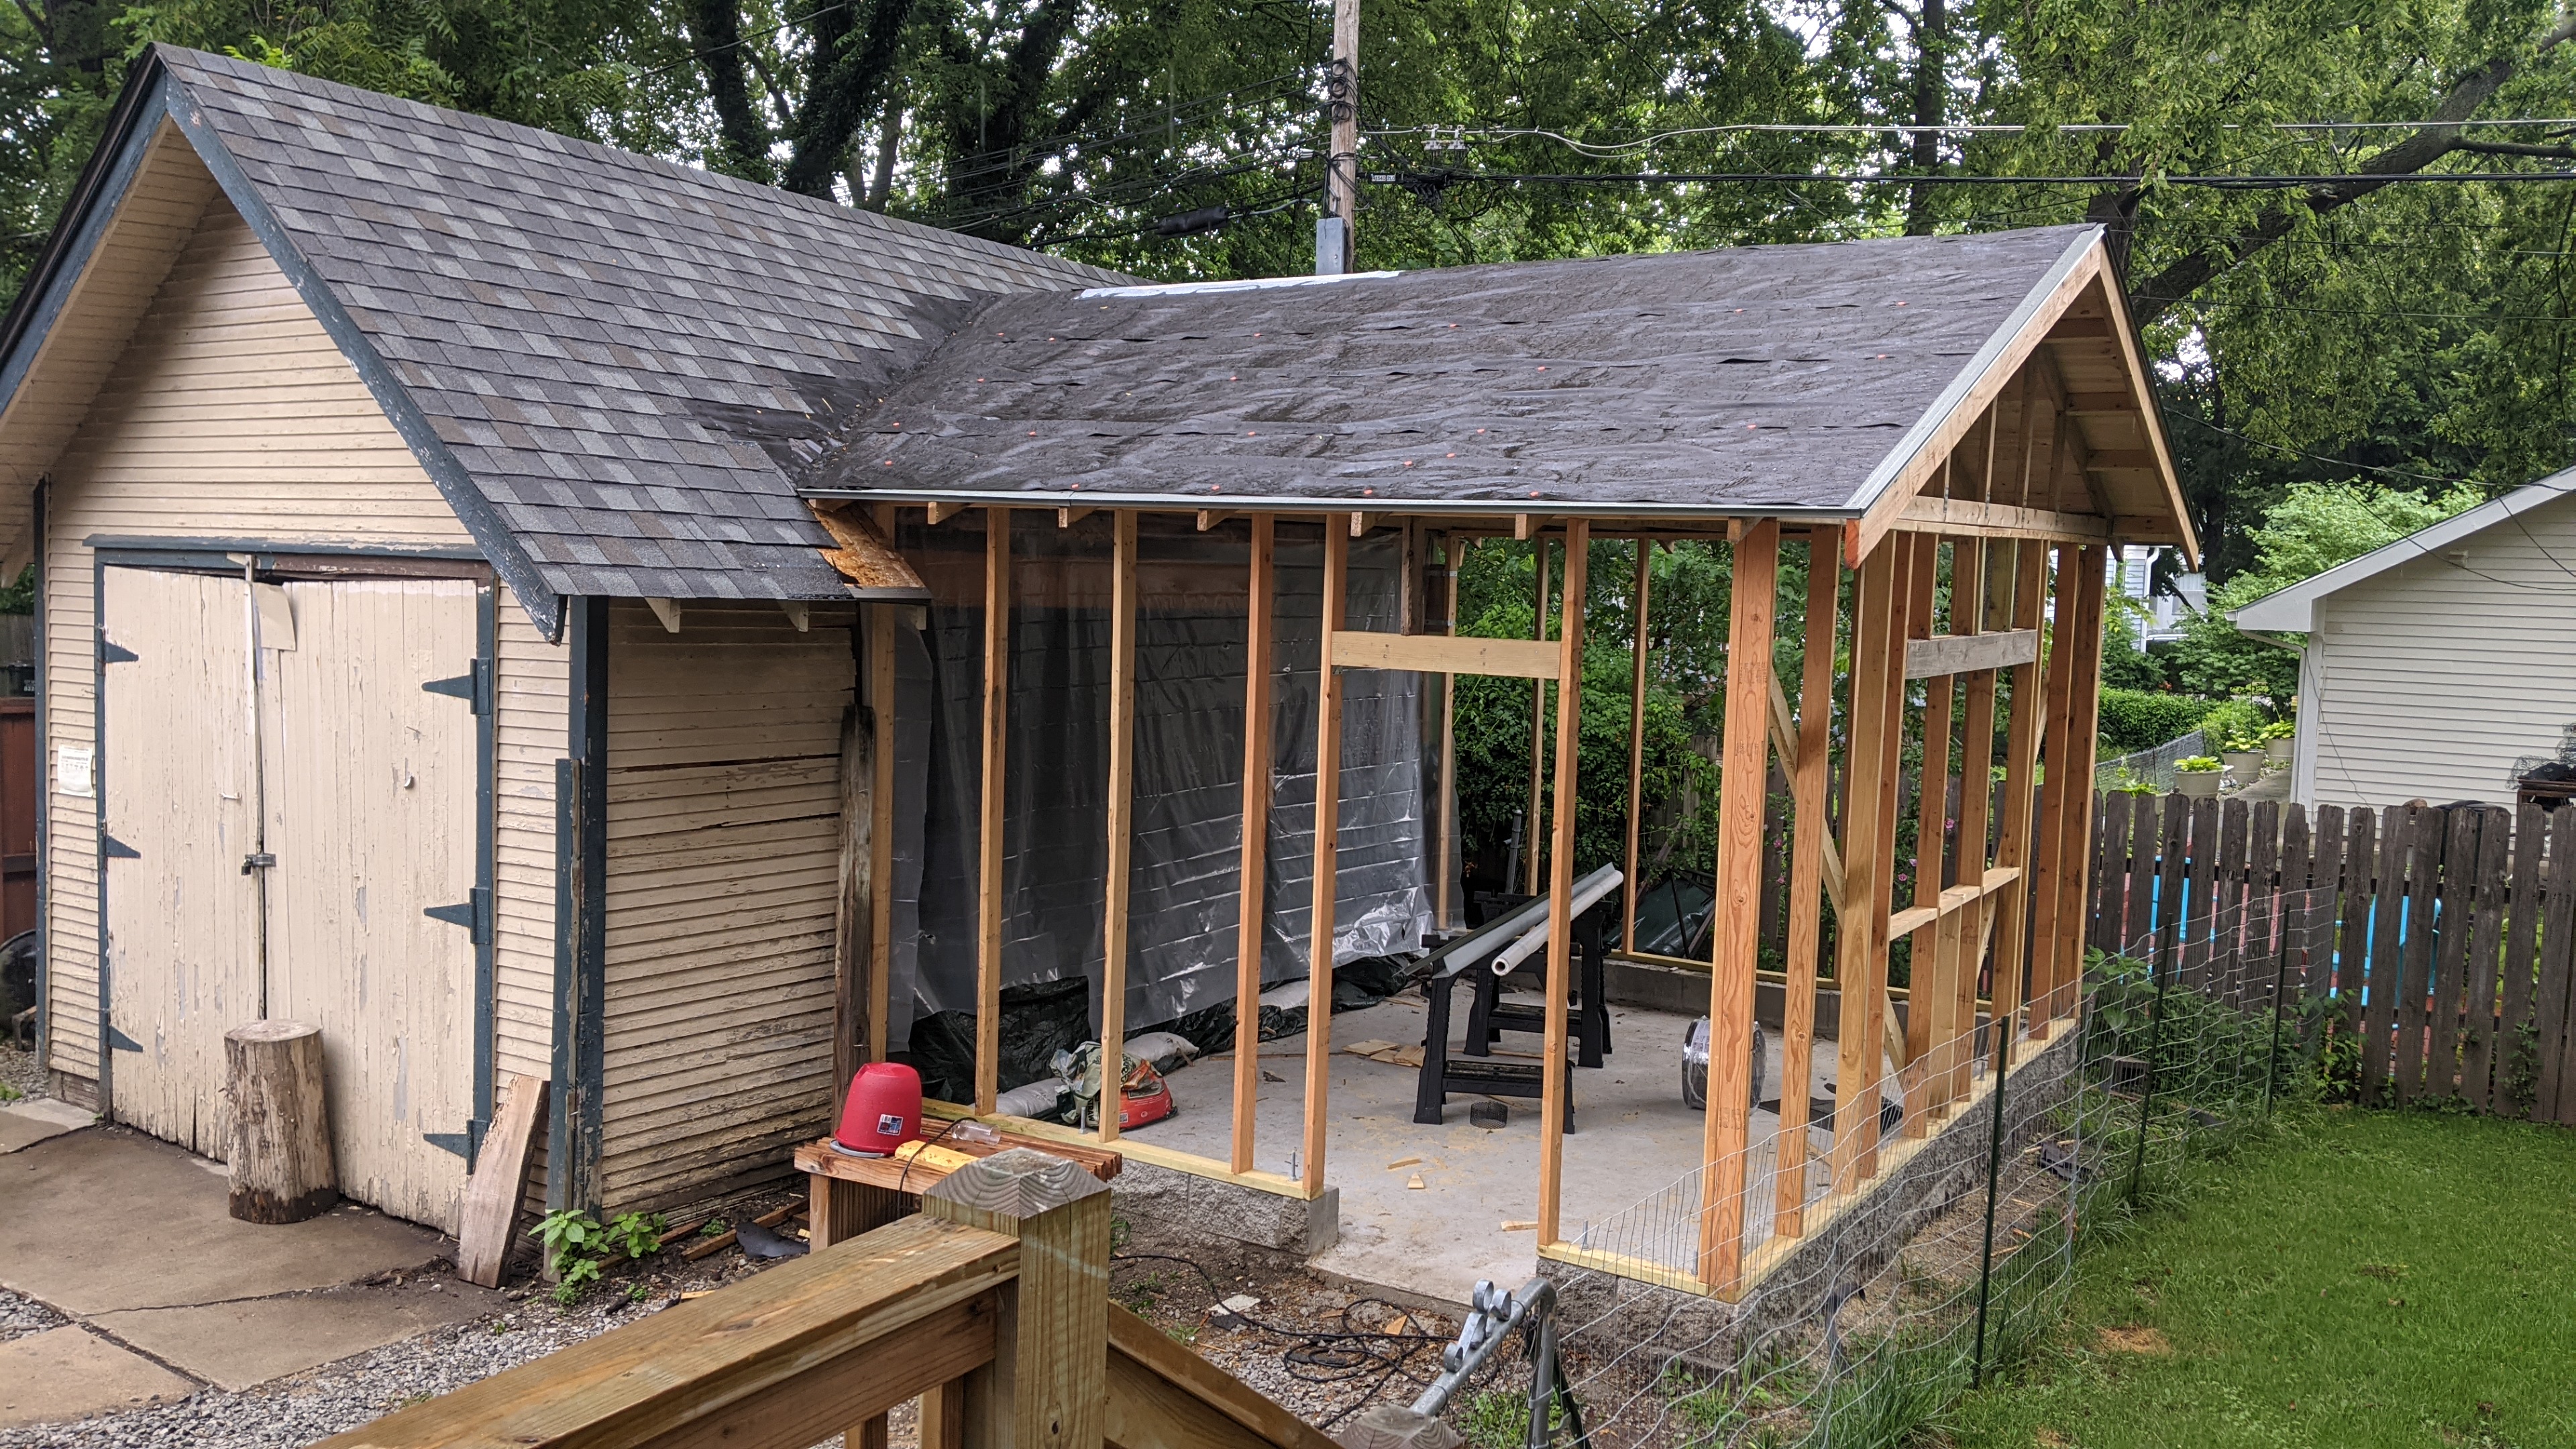
Before I could build and raise the walls, I had to remove some of the garage's roof:
First wall up:
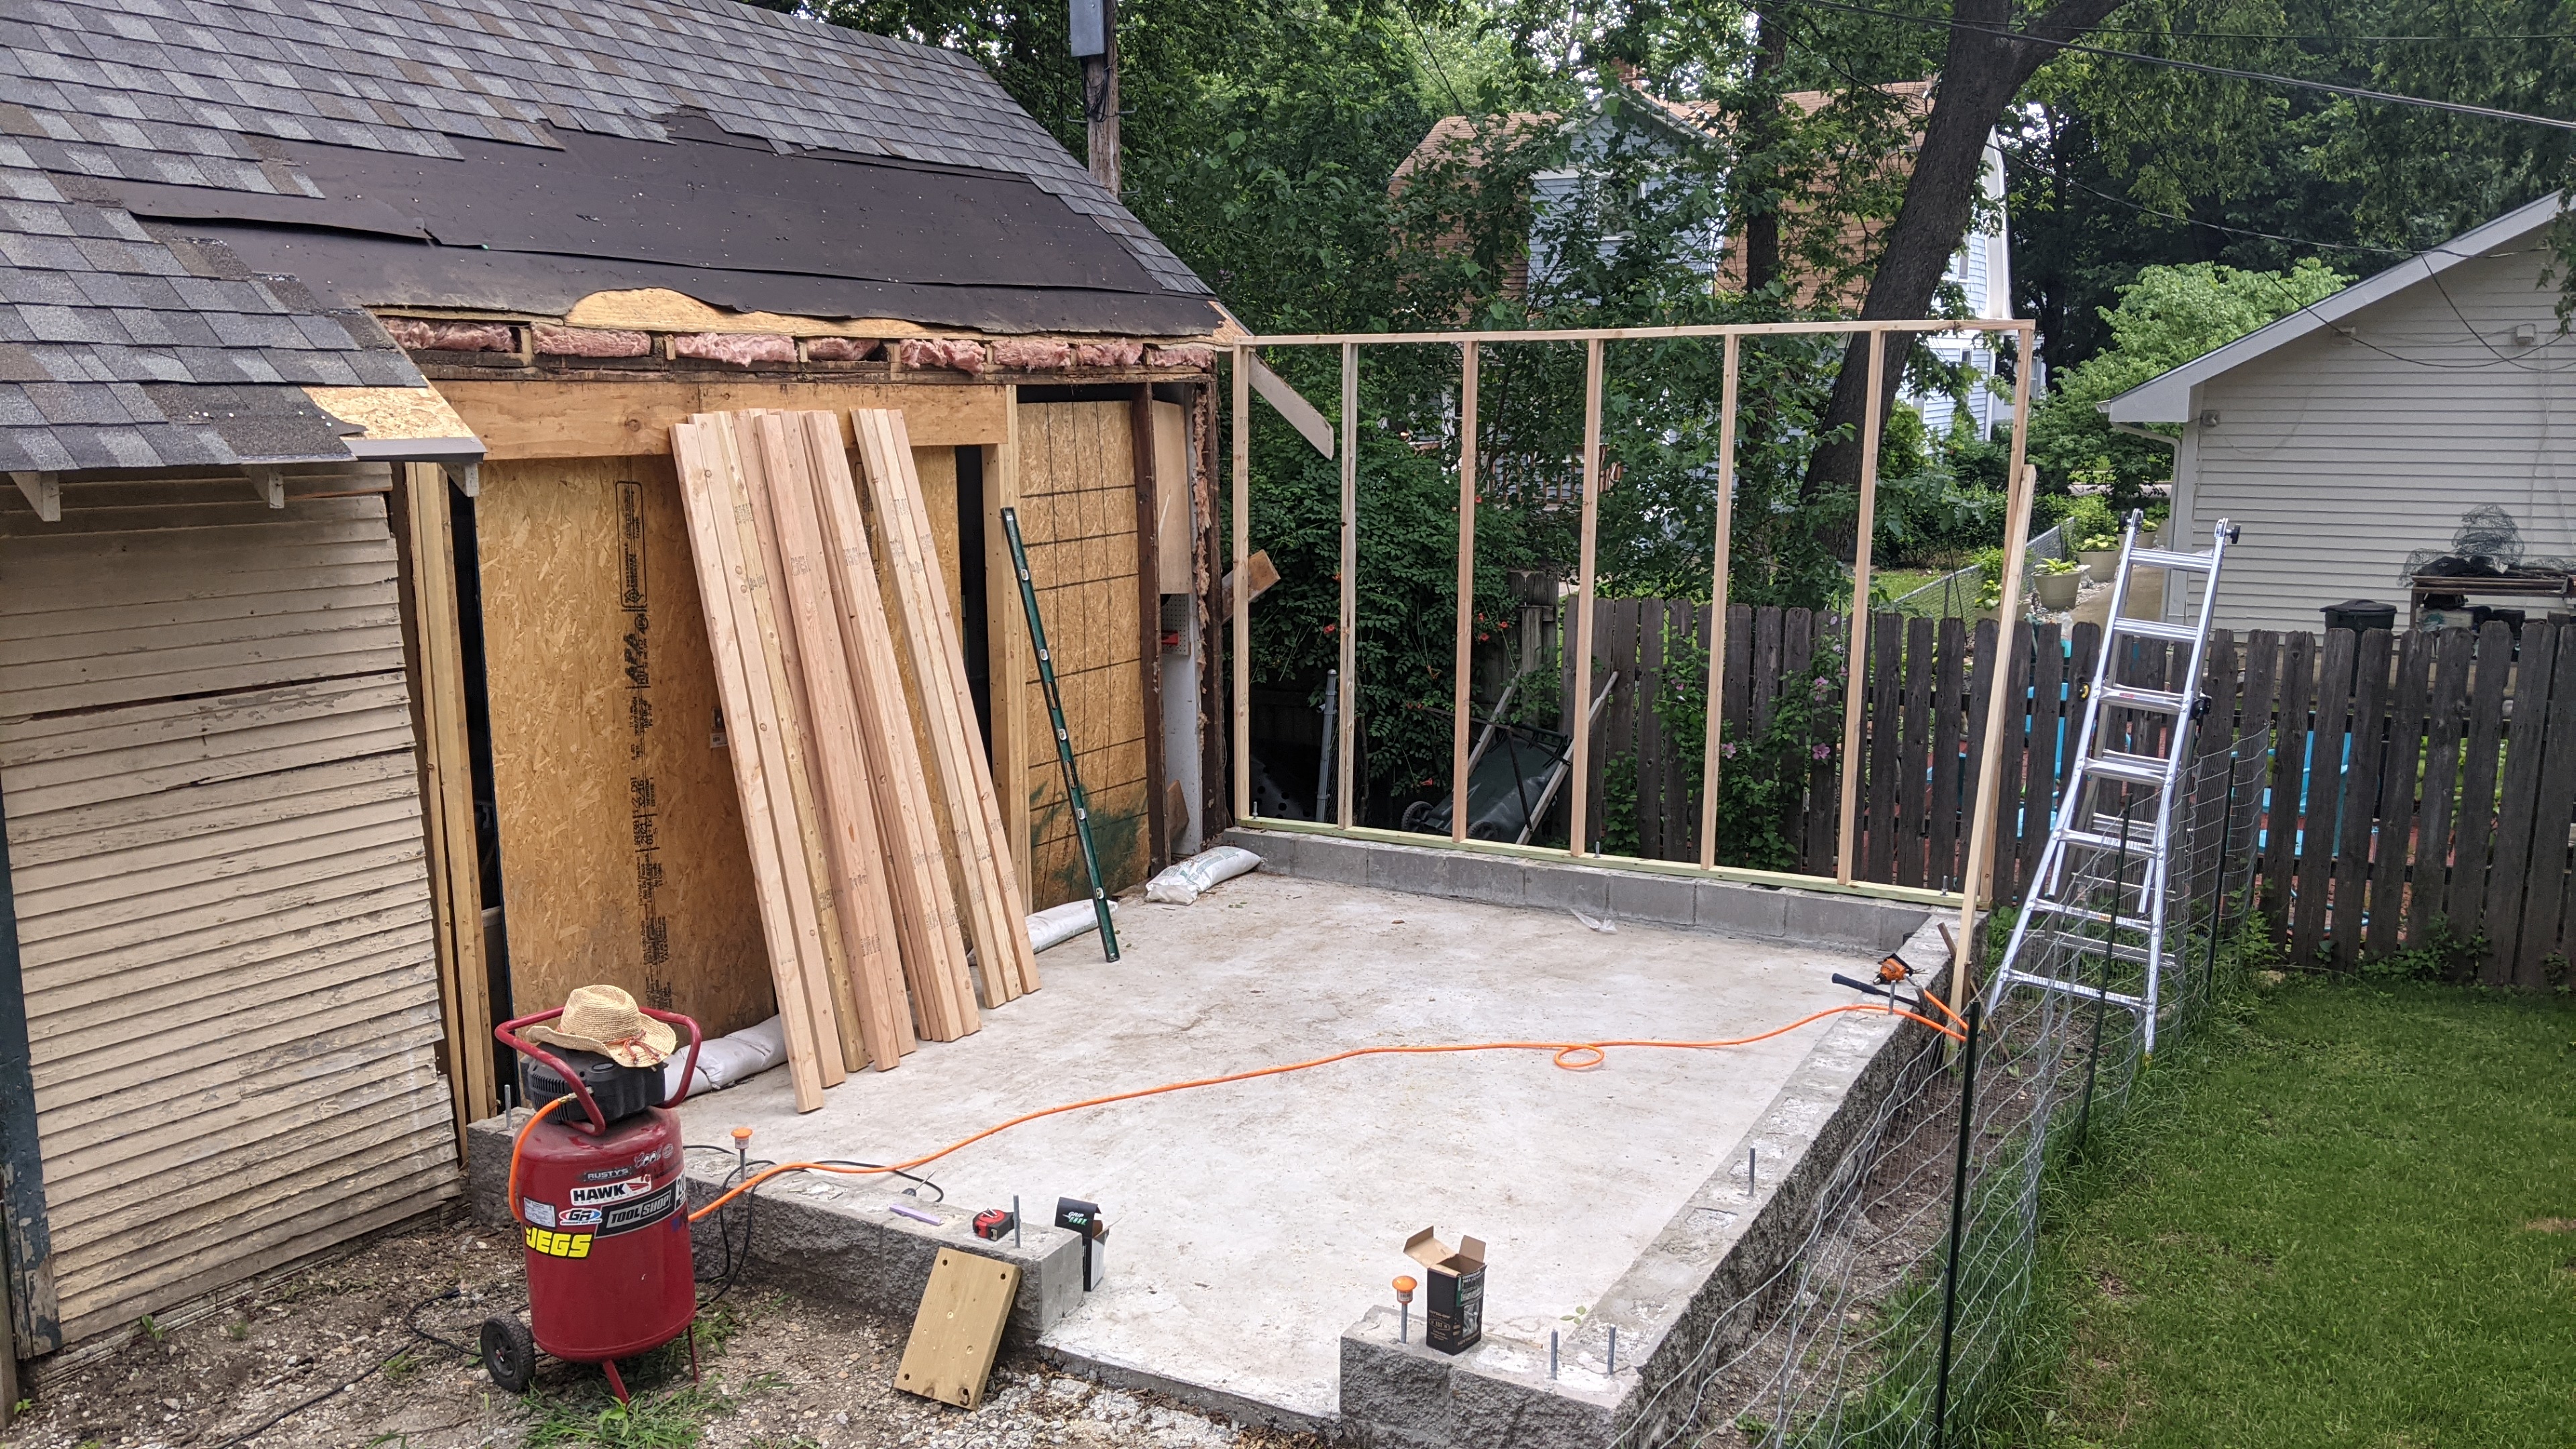
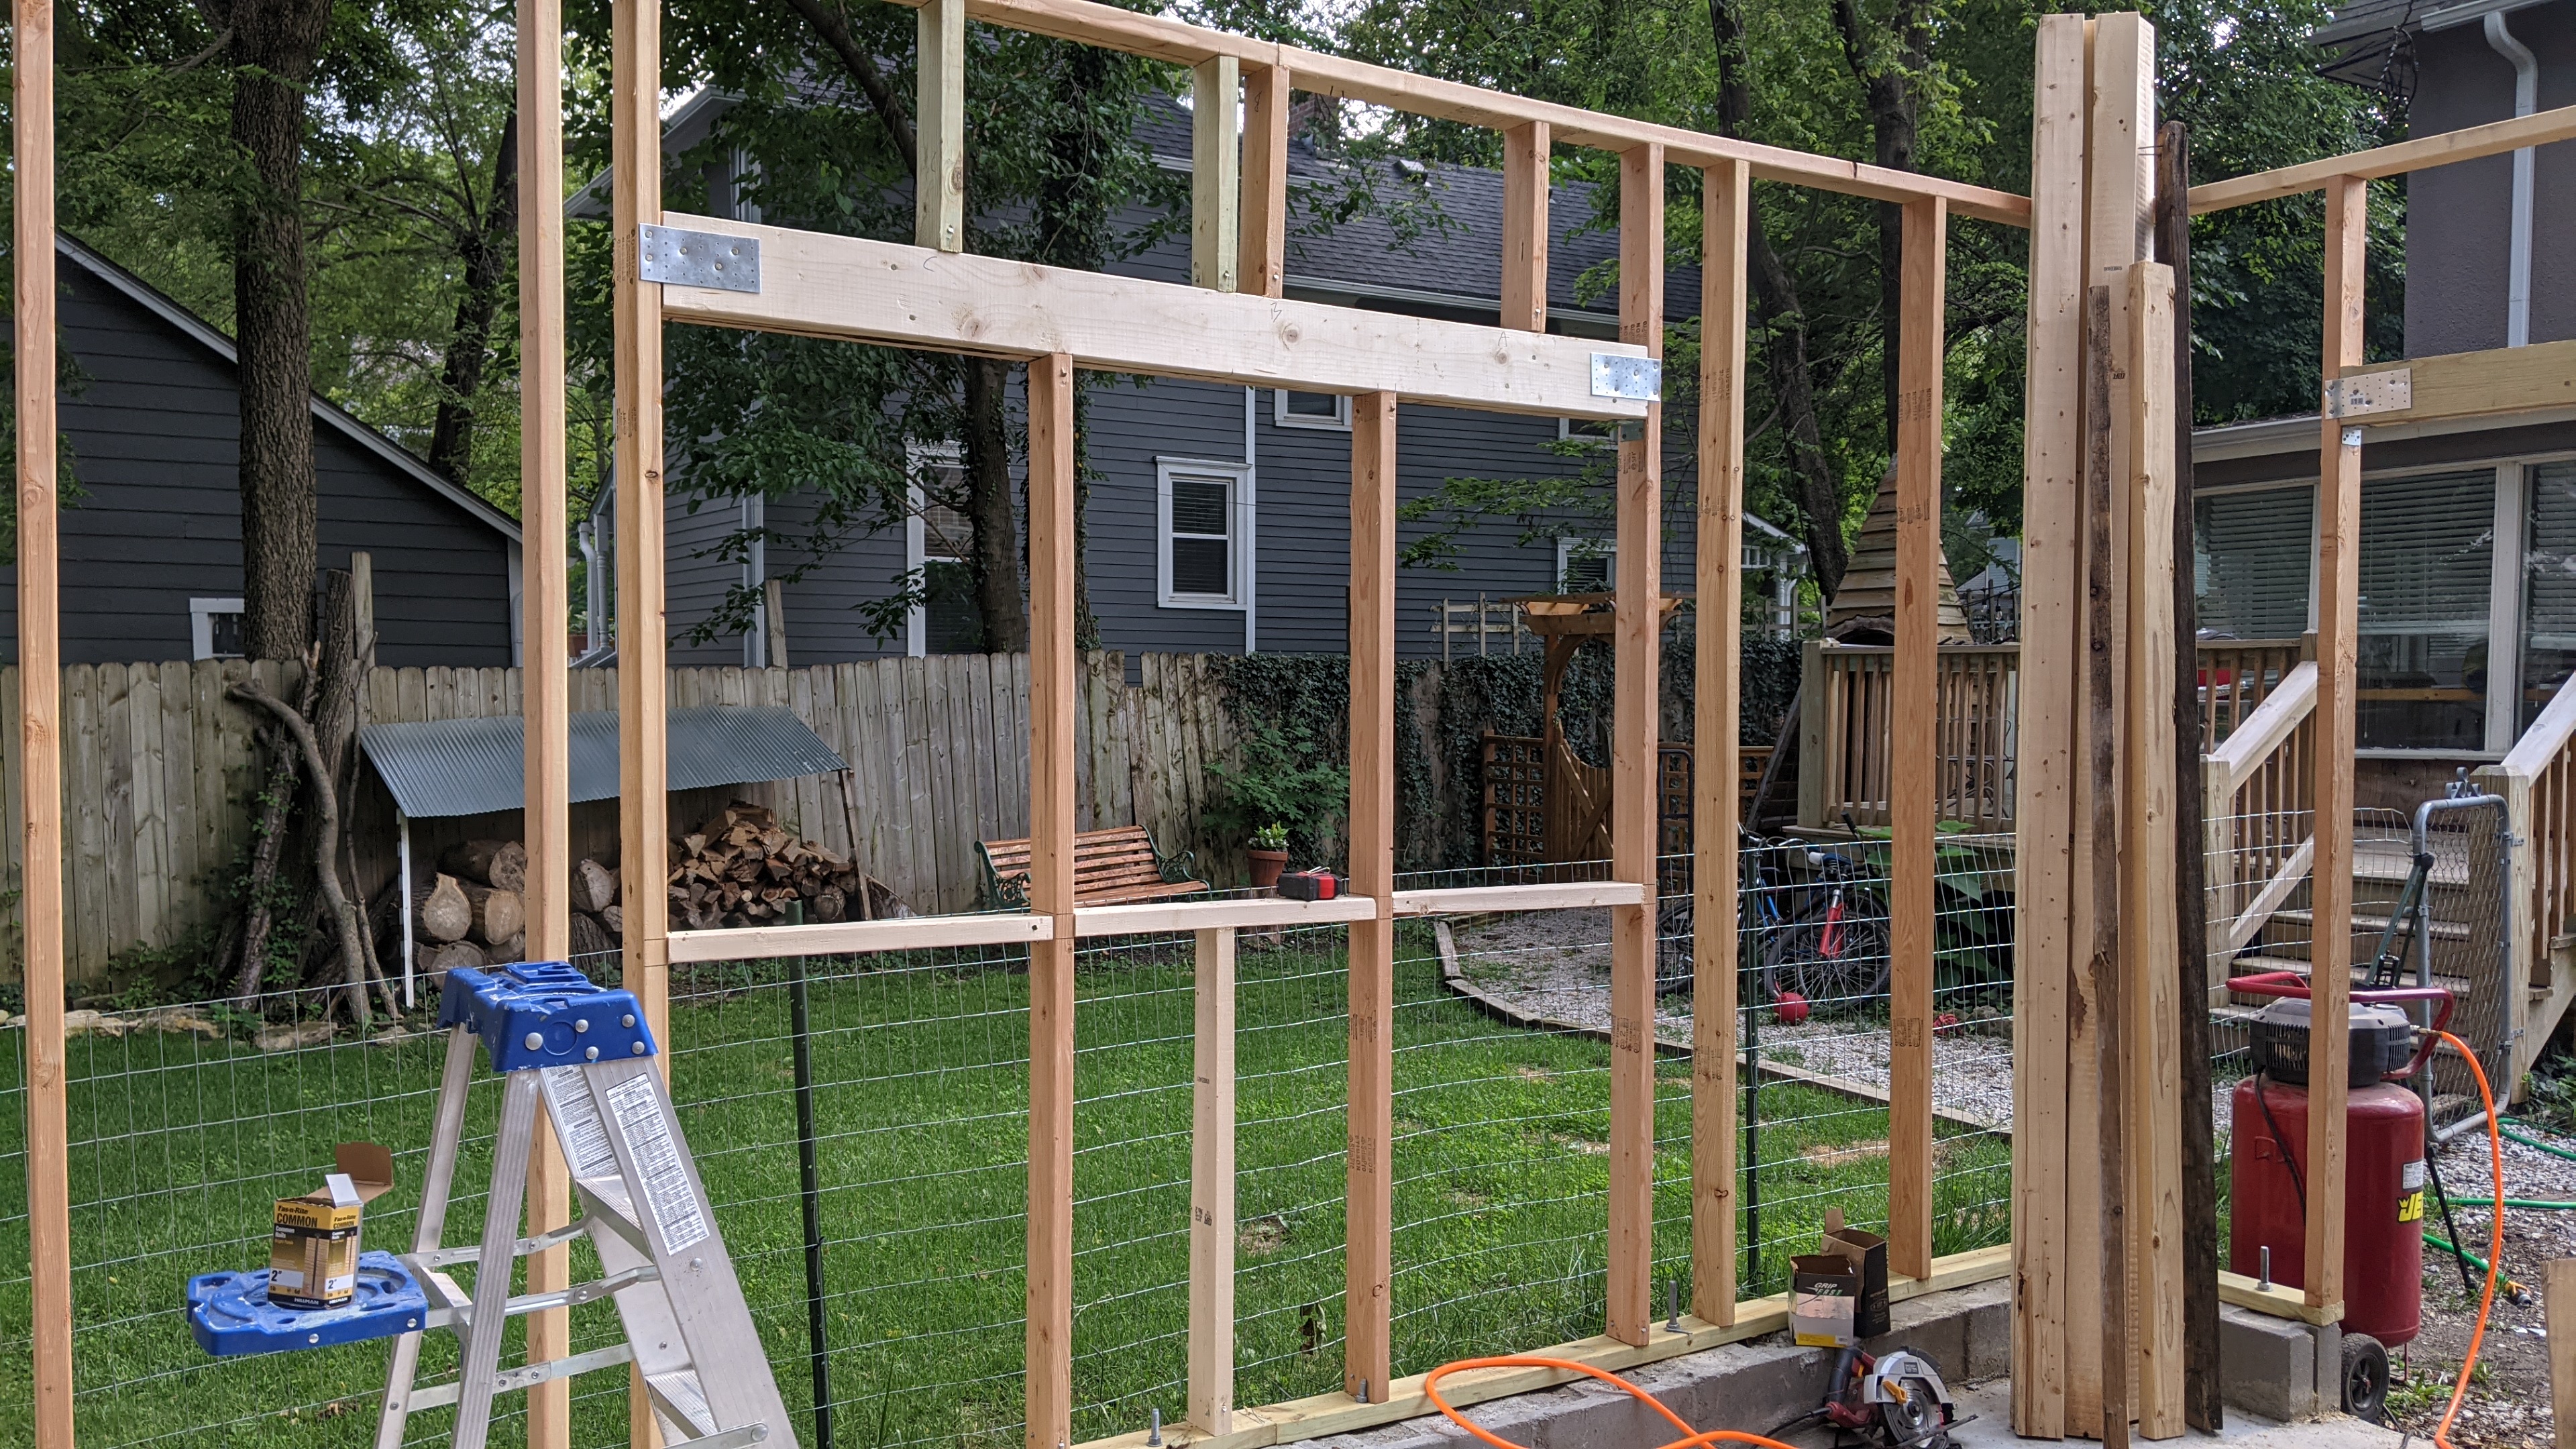
I had to pick the wall up off the floor and tilt it upright, and then pick the entire wall up and lift it up and onto the foundation anchor bolts, and get the bolts to slide into the pre-drilled holes in the PTW bottom plate. This job required two people, but with only 2x4s on 24"oc spacing, my pregnant wife and I could do each 12' wall, no problem!
I put up the 2nd wall in two parts, with the window framing yet to be figured out:
I'm using a building method called "advanced framing" - it allows for fewer studs be used. 24" oc stud spacing, no jack headers (metal header hangers used instead), no 2nd top plate or tie plate (metal straps used instead), fewer cripple studs under windows, and other lumber saving techniques. I'm doing this because the price of lumber more than doubled in 2021, the year I'm building this. A 8ft 2x4 was over $11! It's already come down a little but not a lot since then, when I bought the wood.
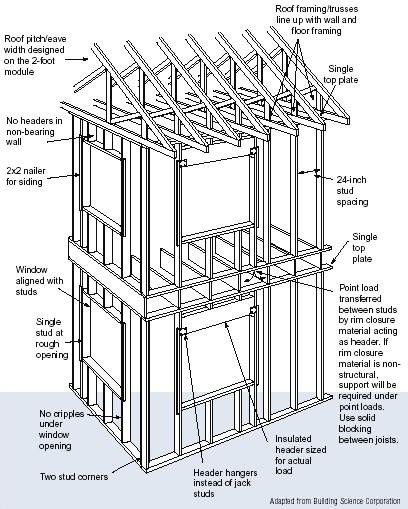
Here's how I ended up framing the windows. I have three windows. They'll all share one header, with only one stud between them. I've never seen anybody else do it this way but I don't see why it wouldn't work!
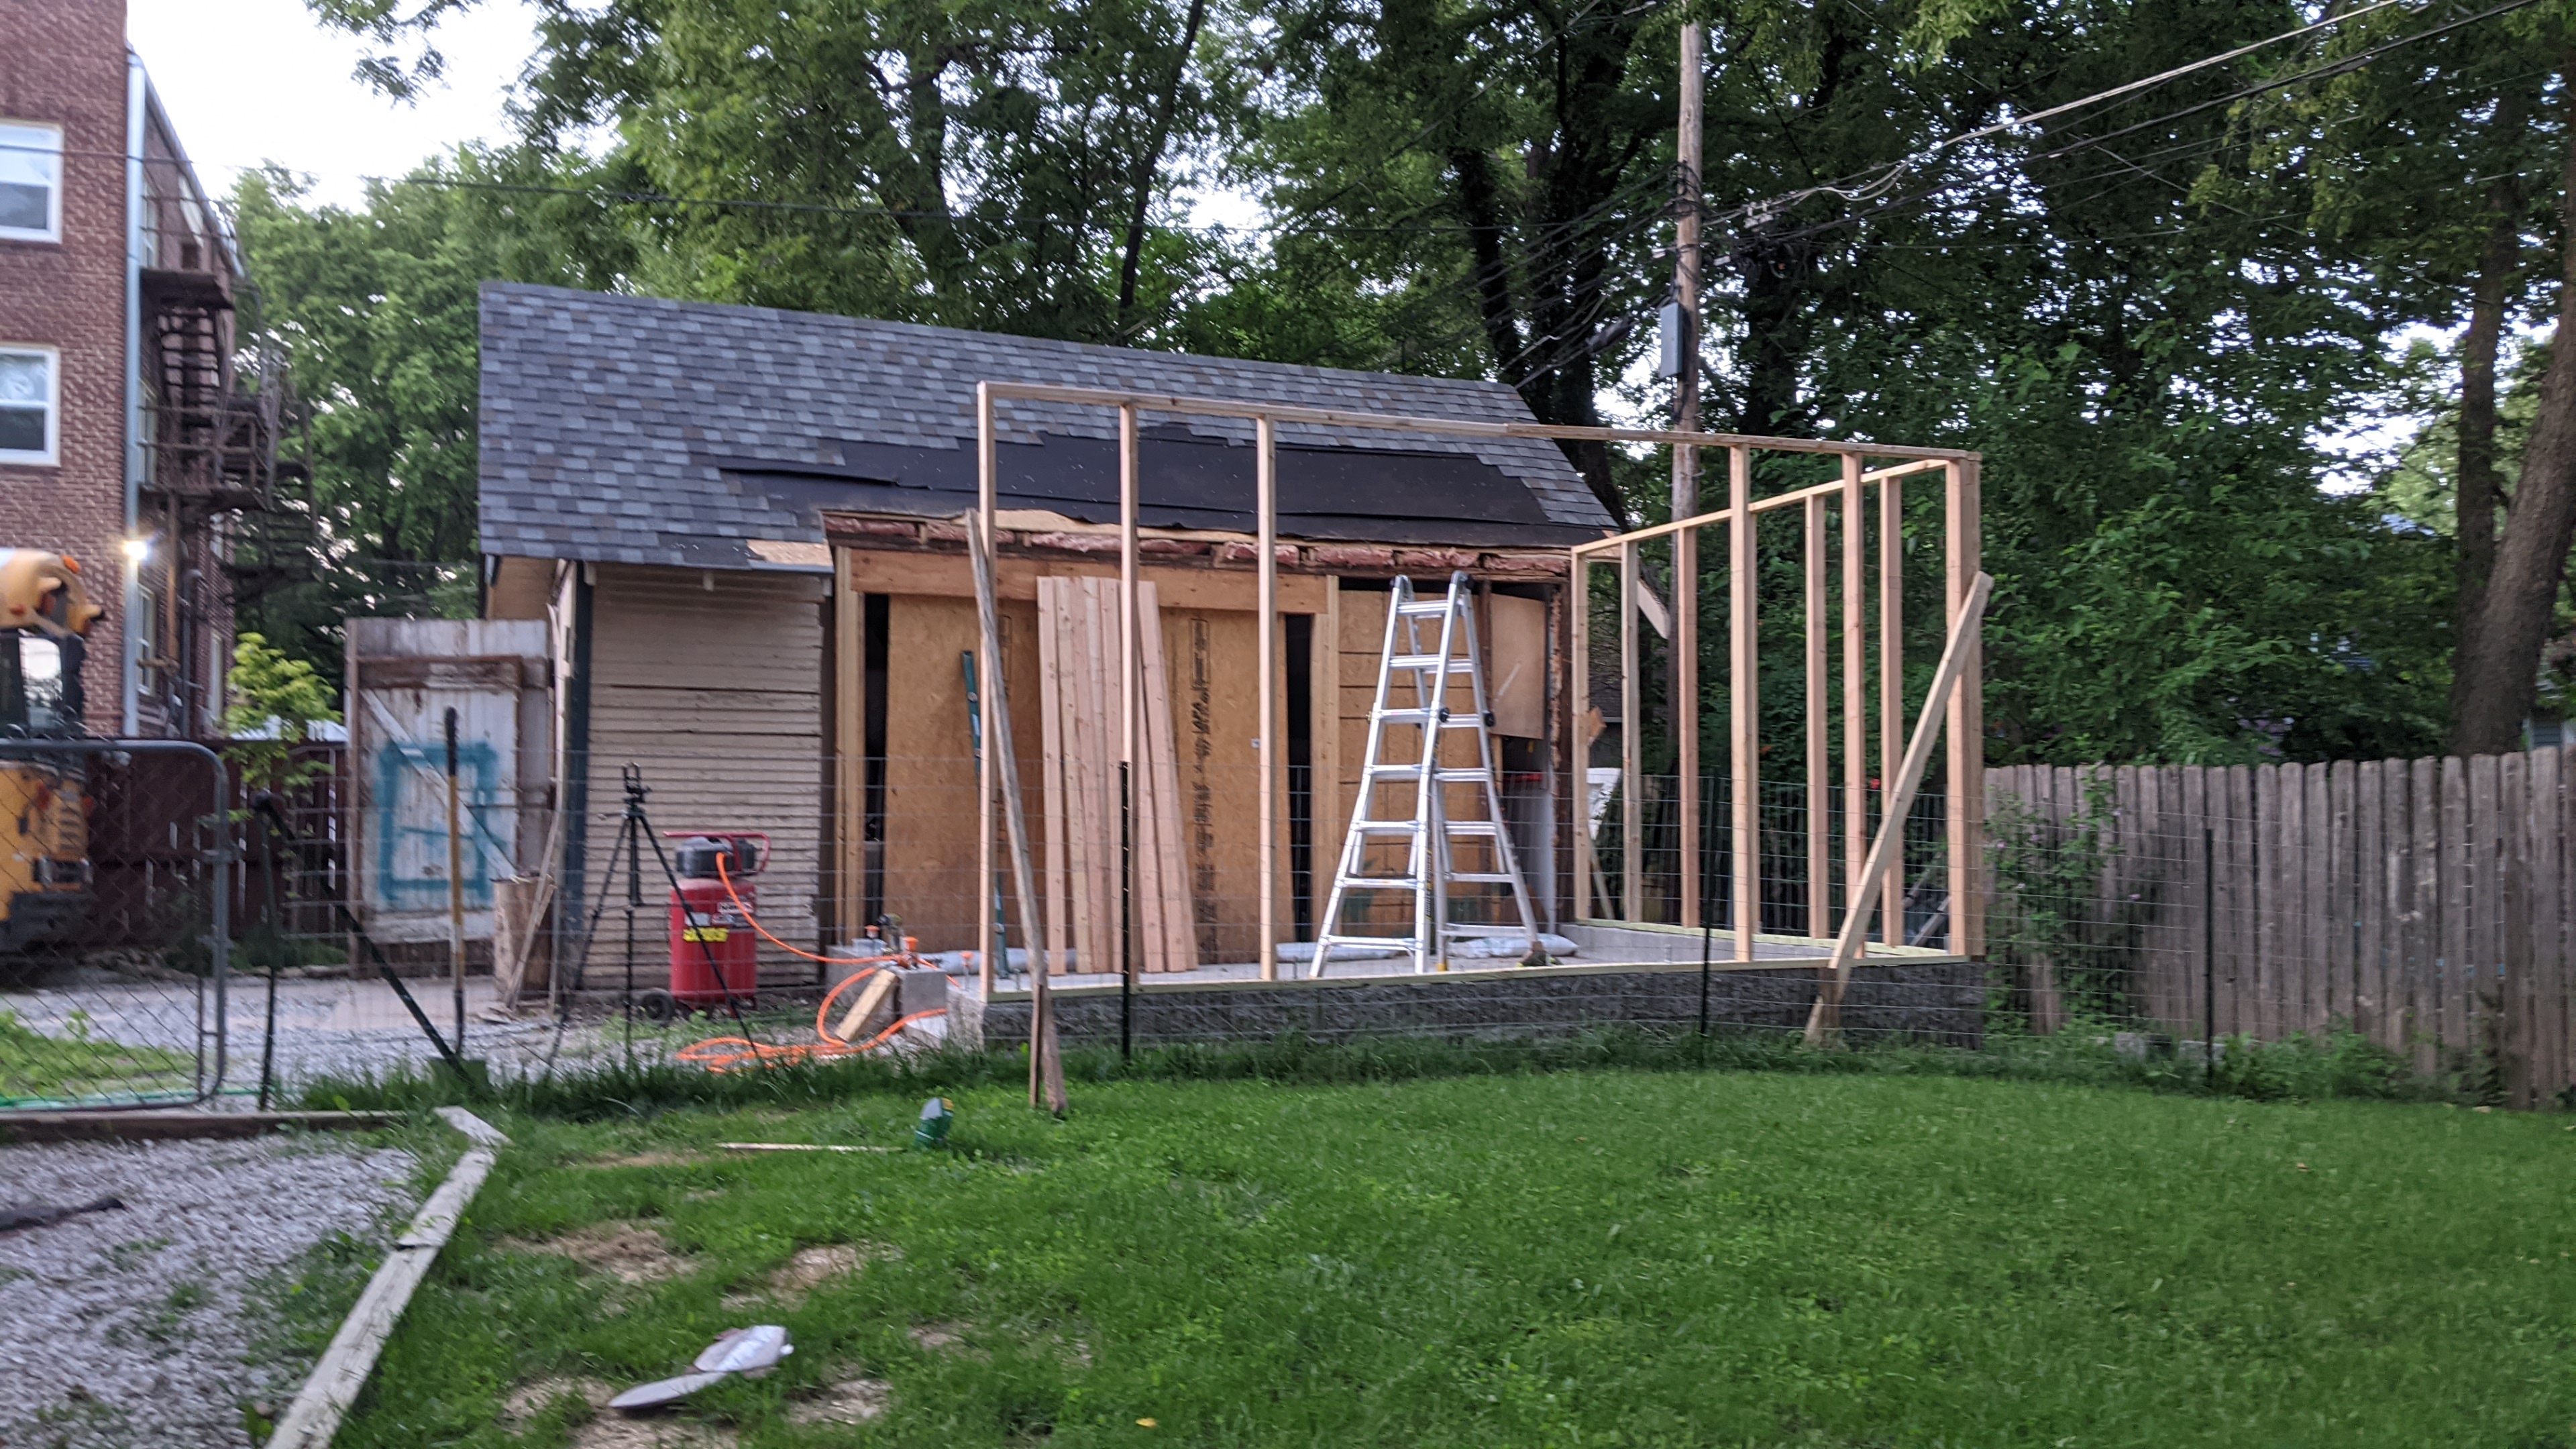
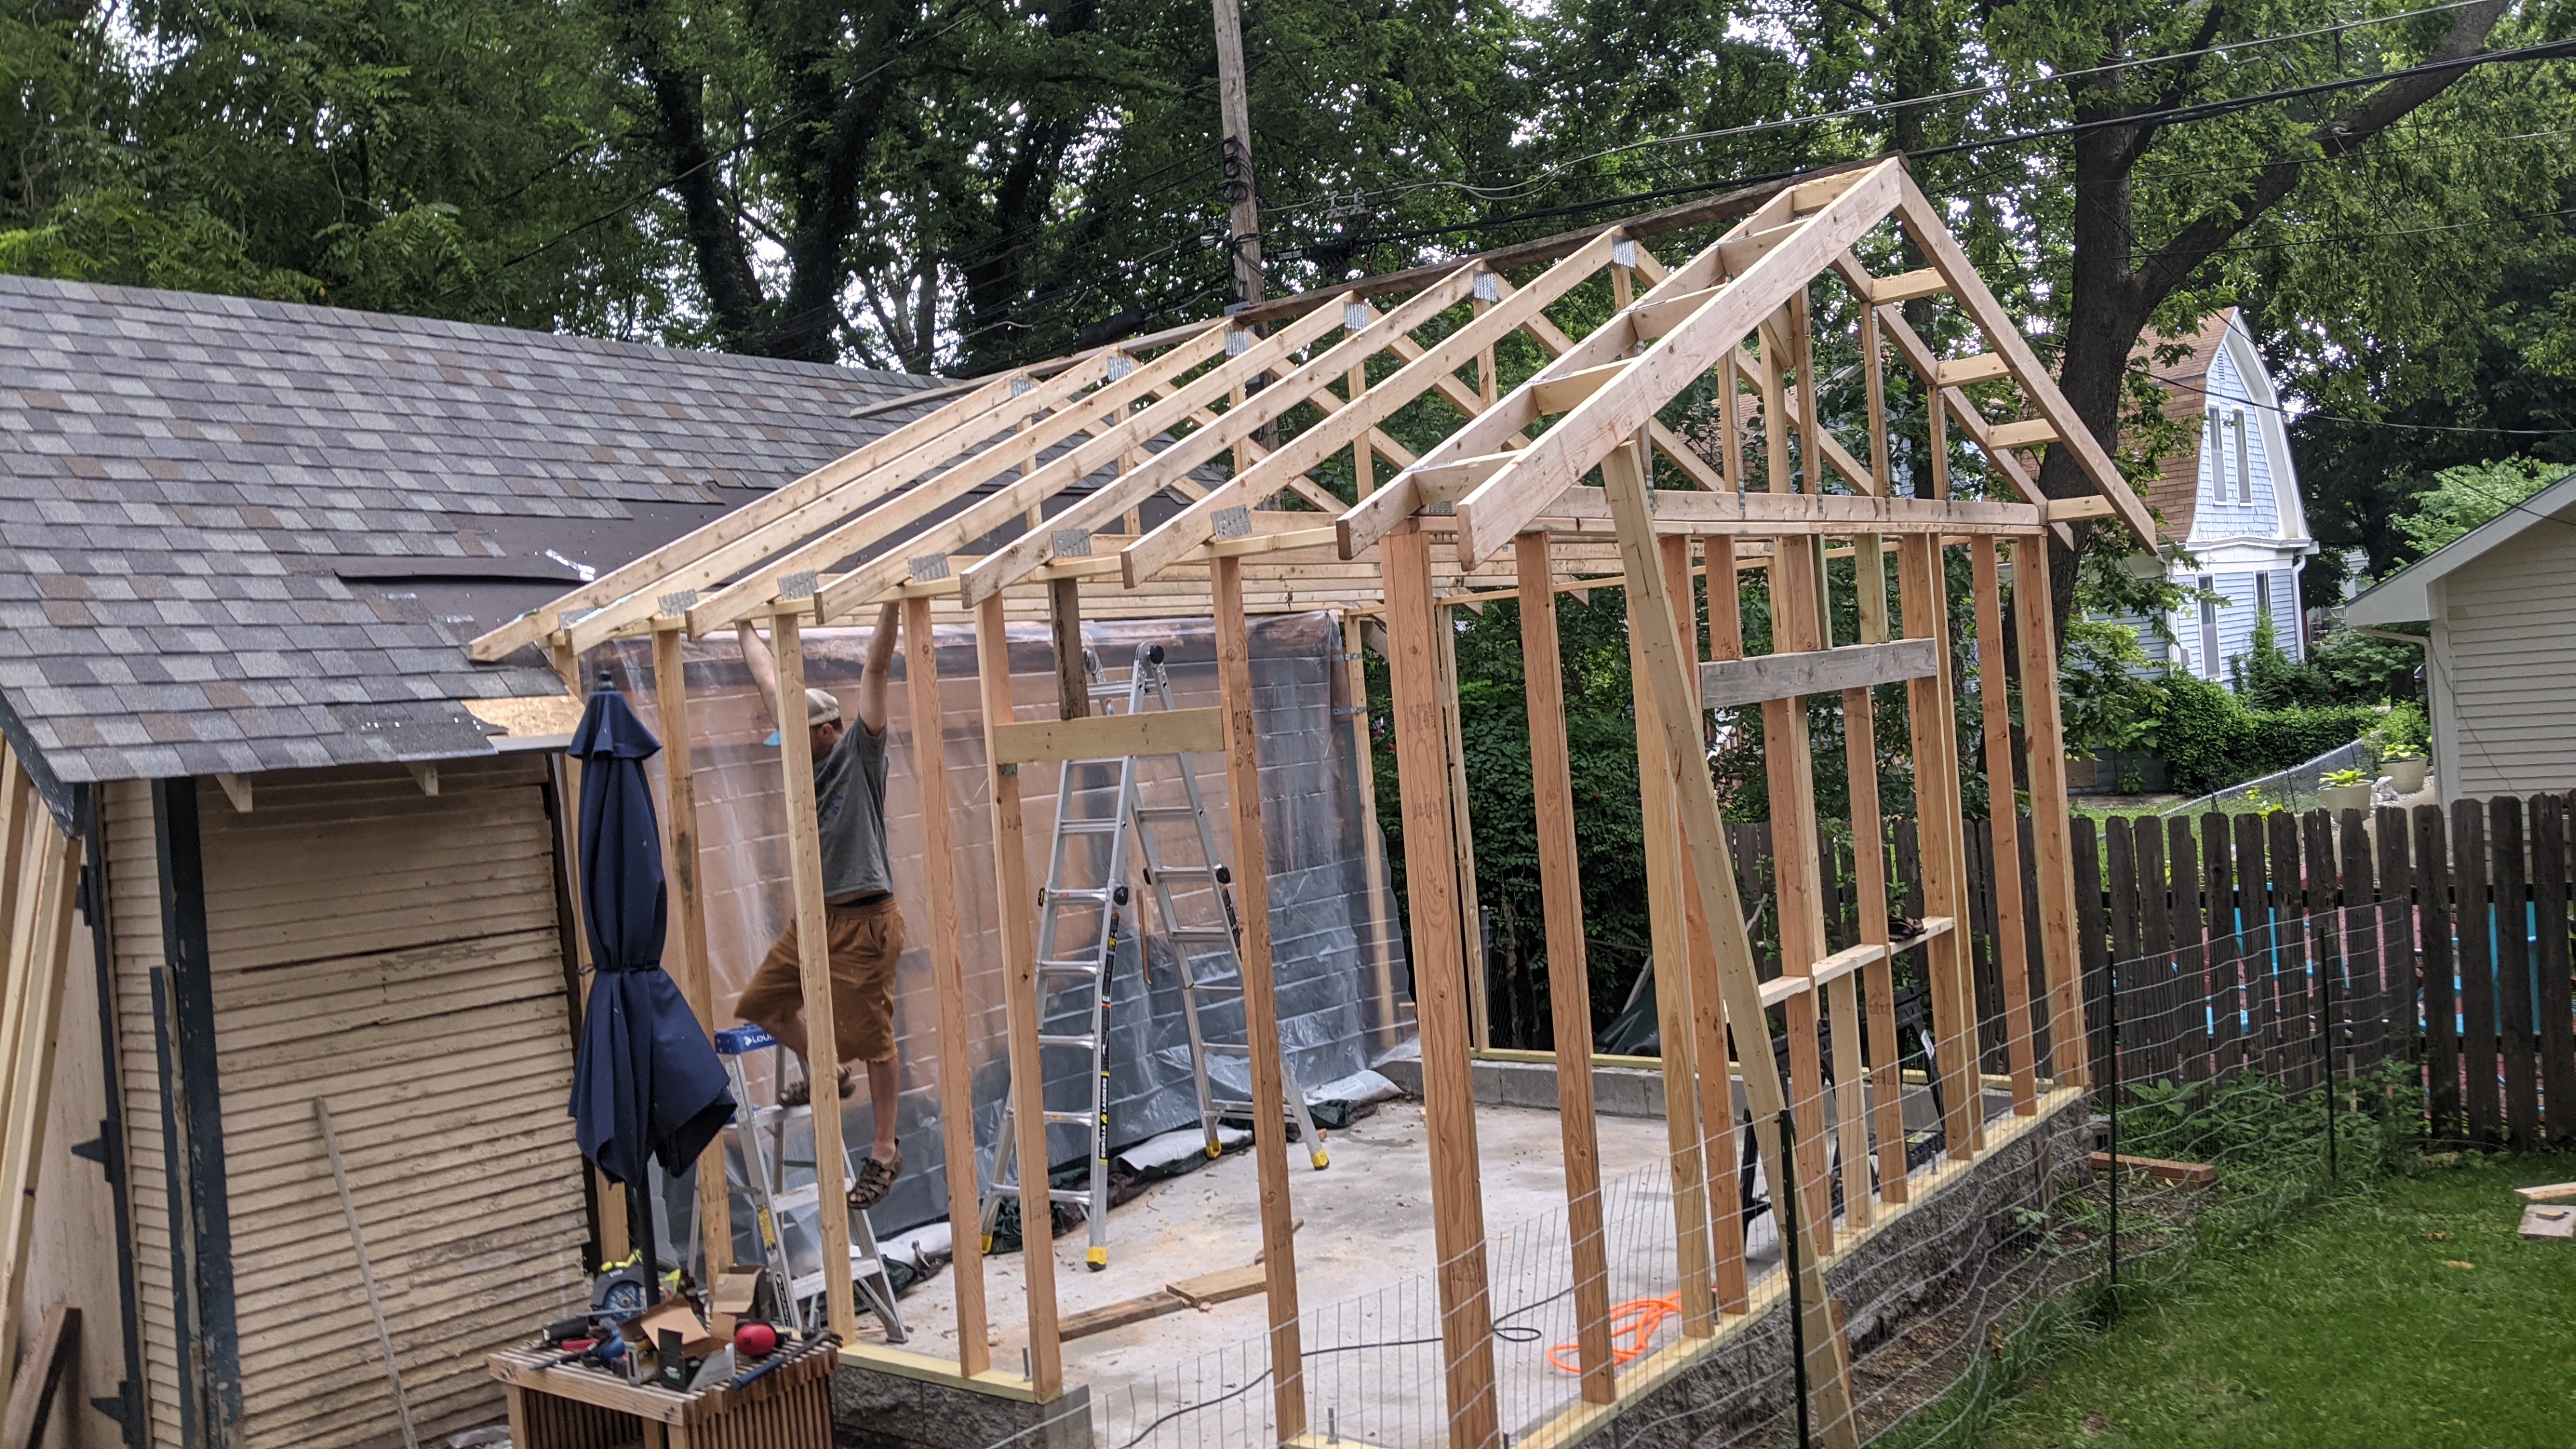
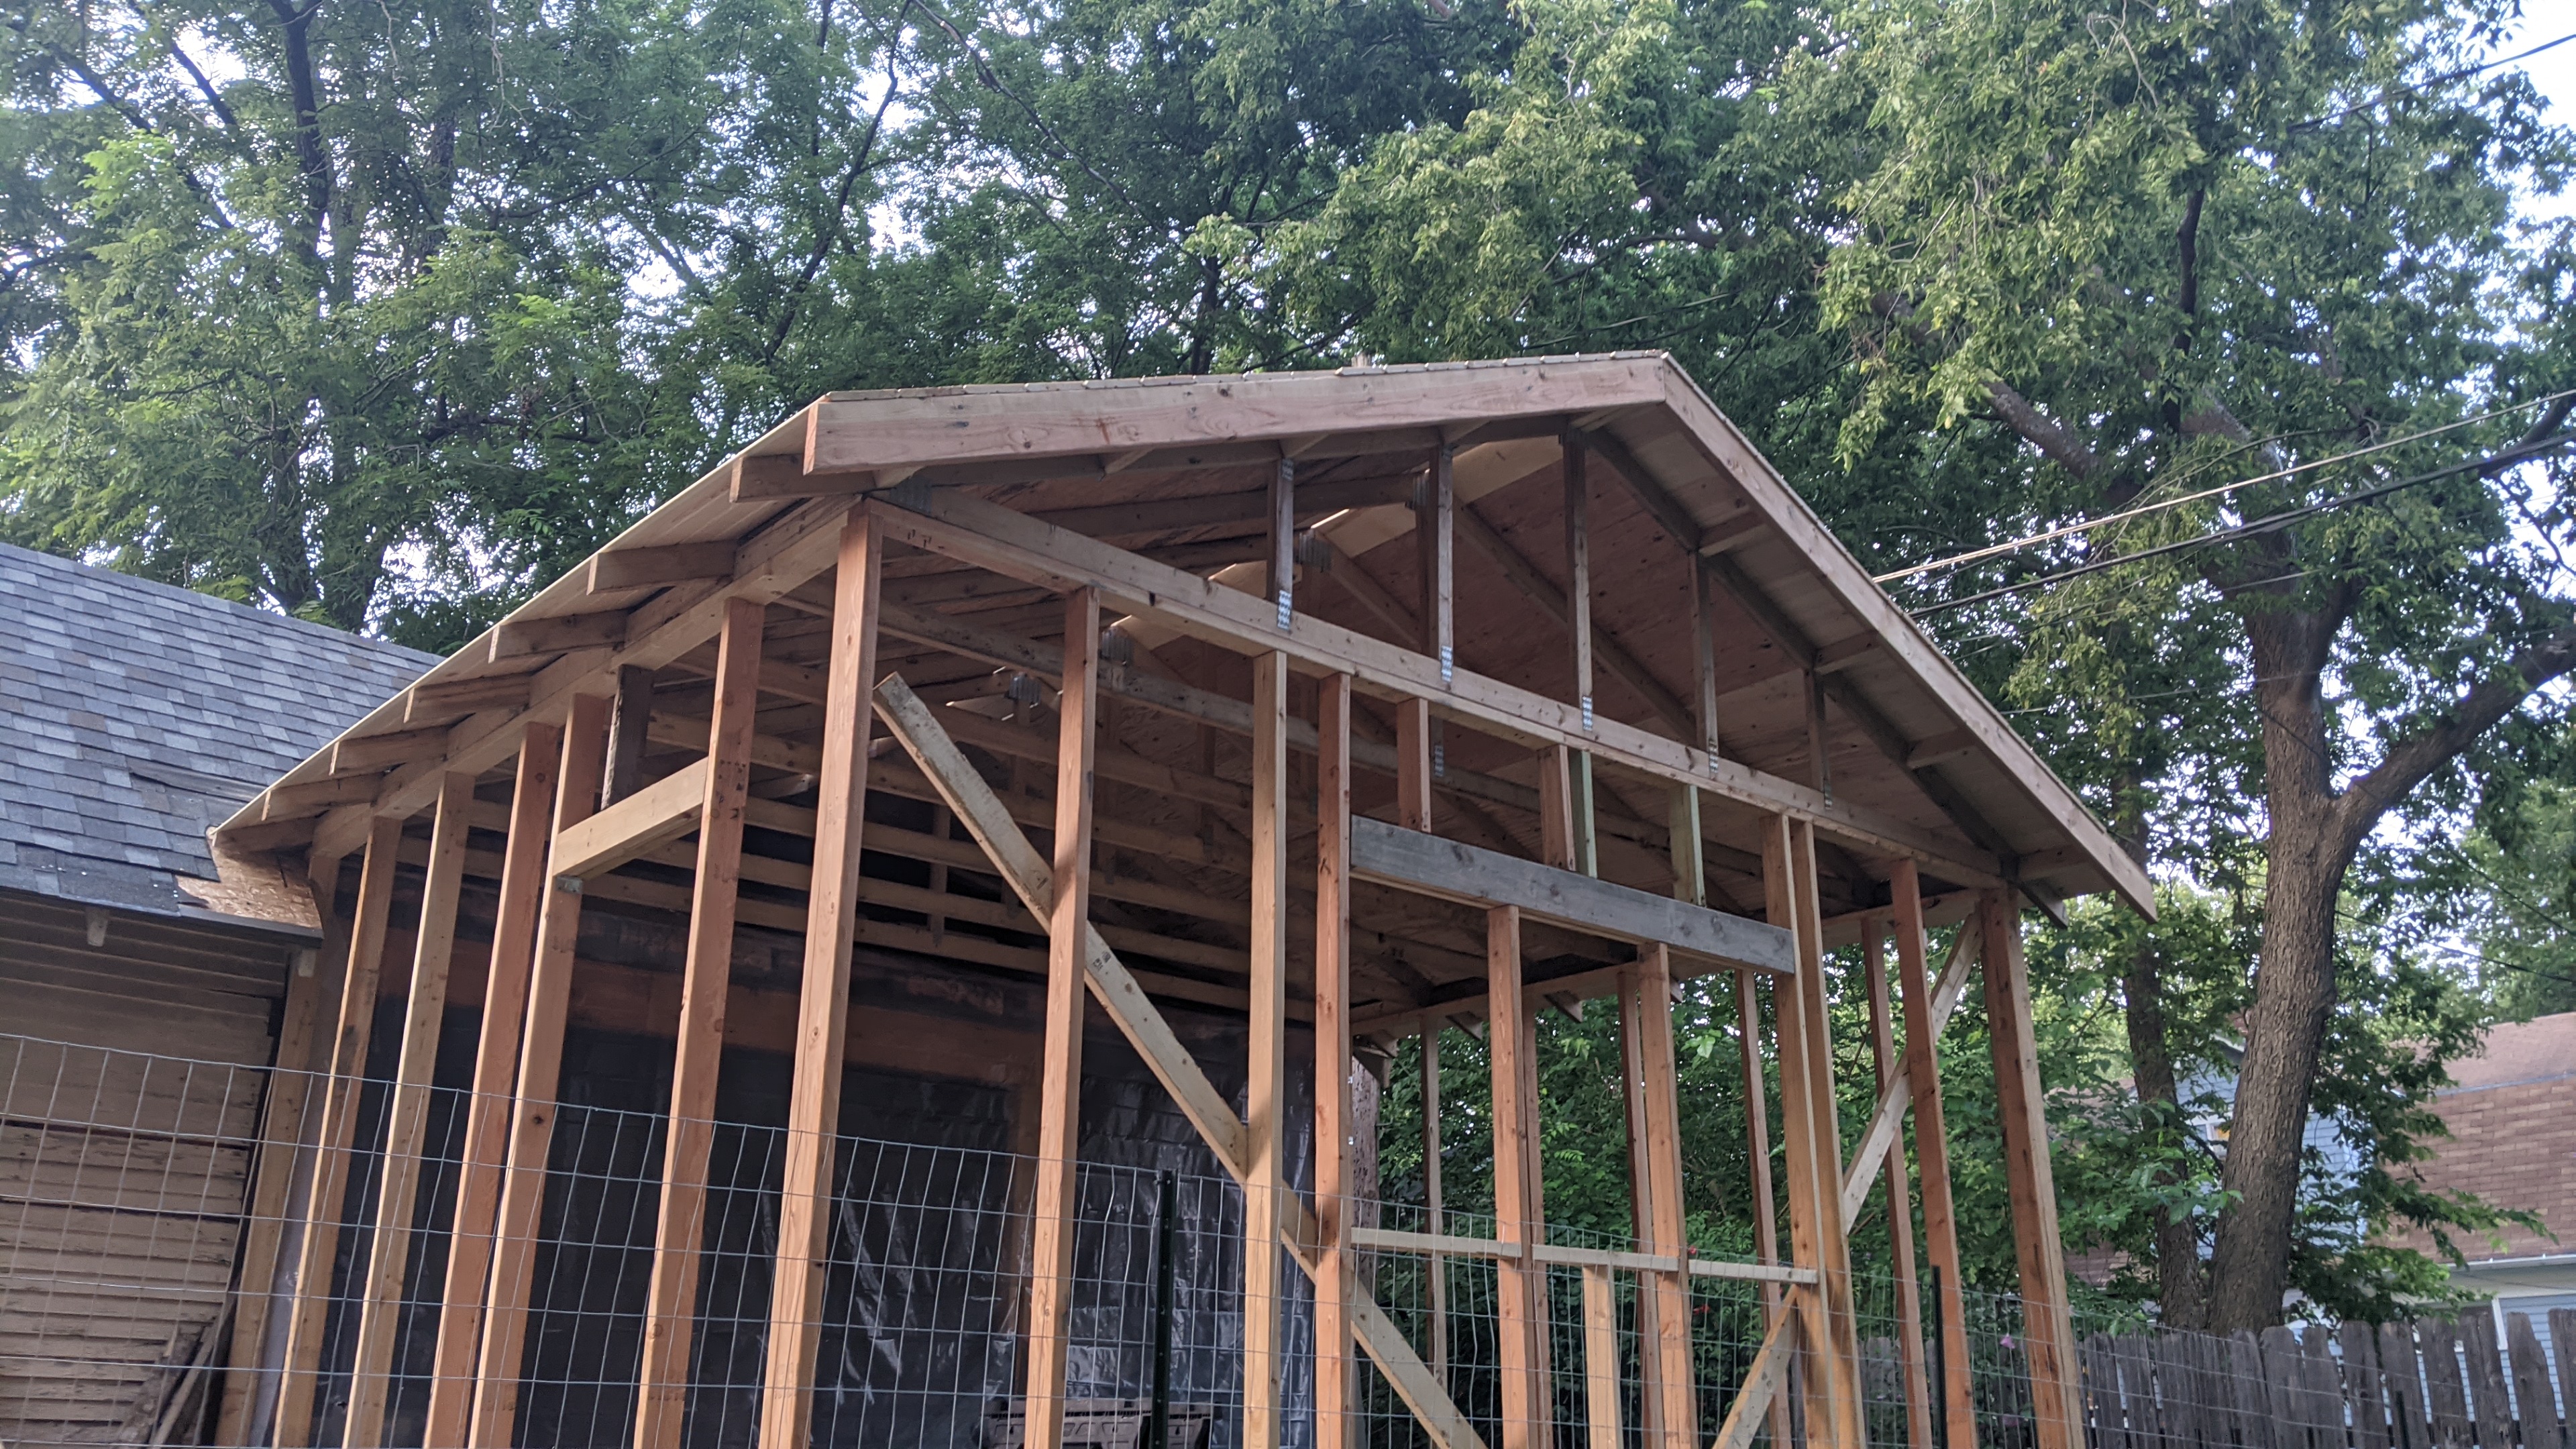
The last wall is up an I'm nearly finished with the framing!
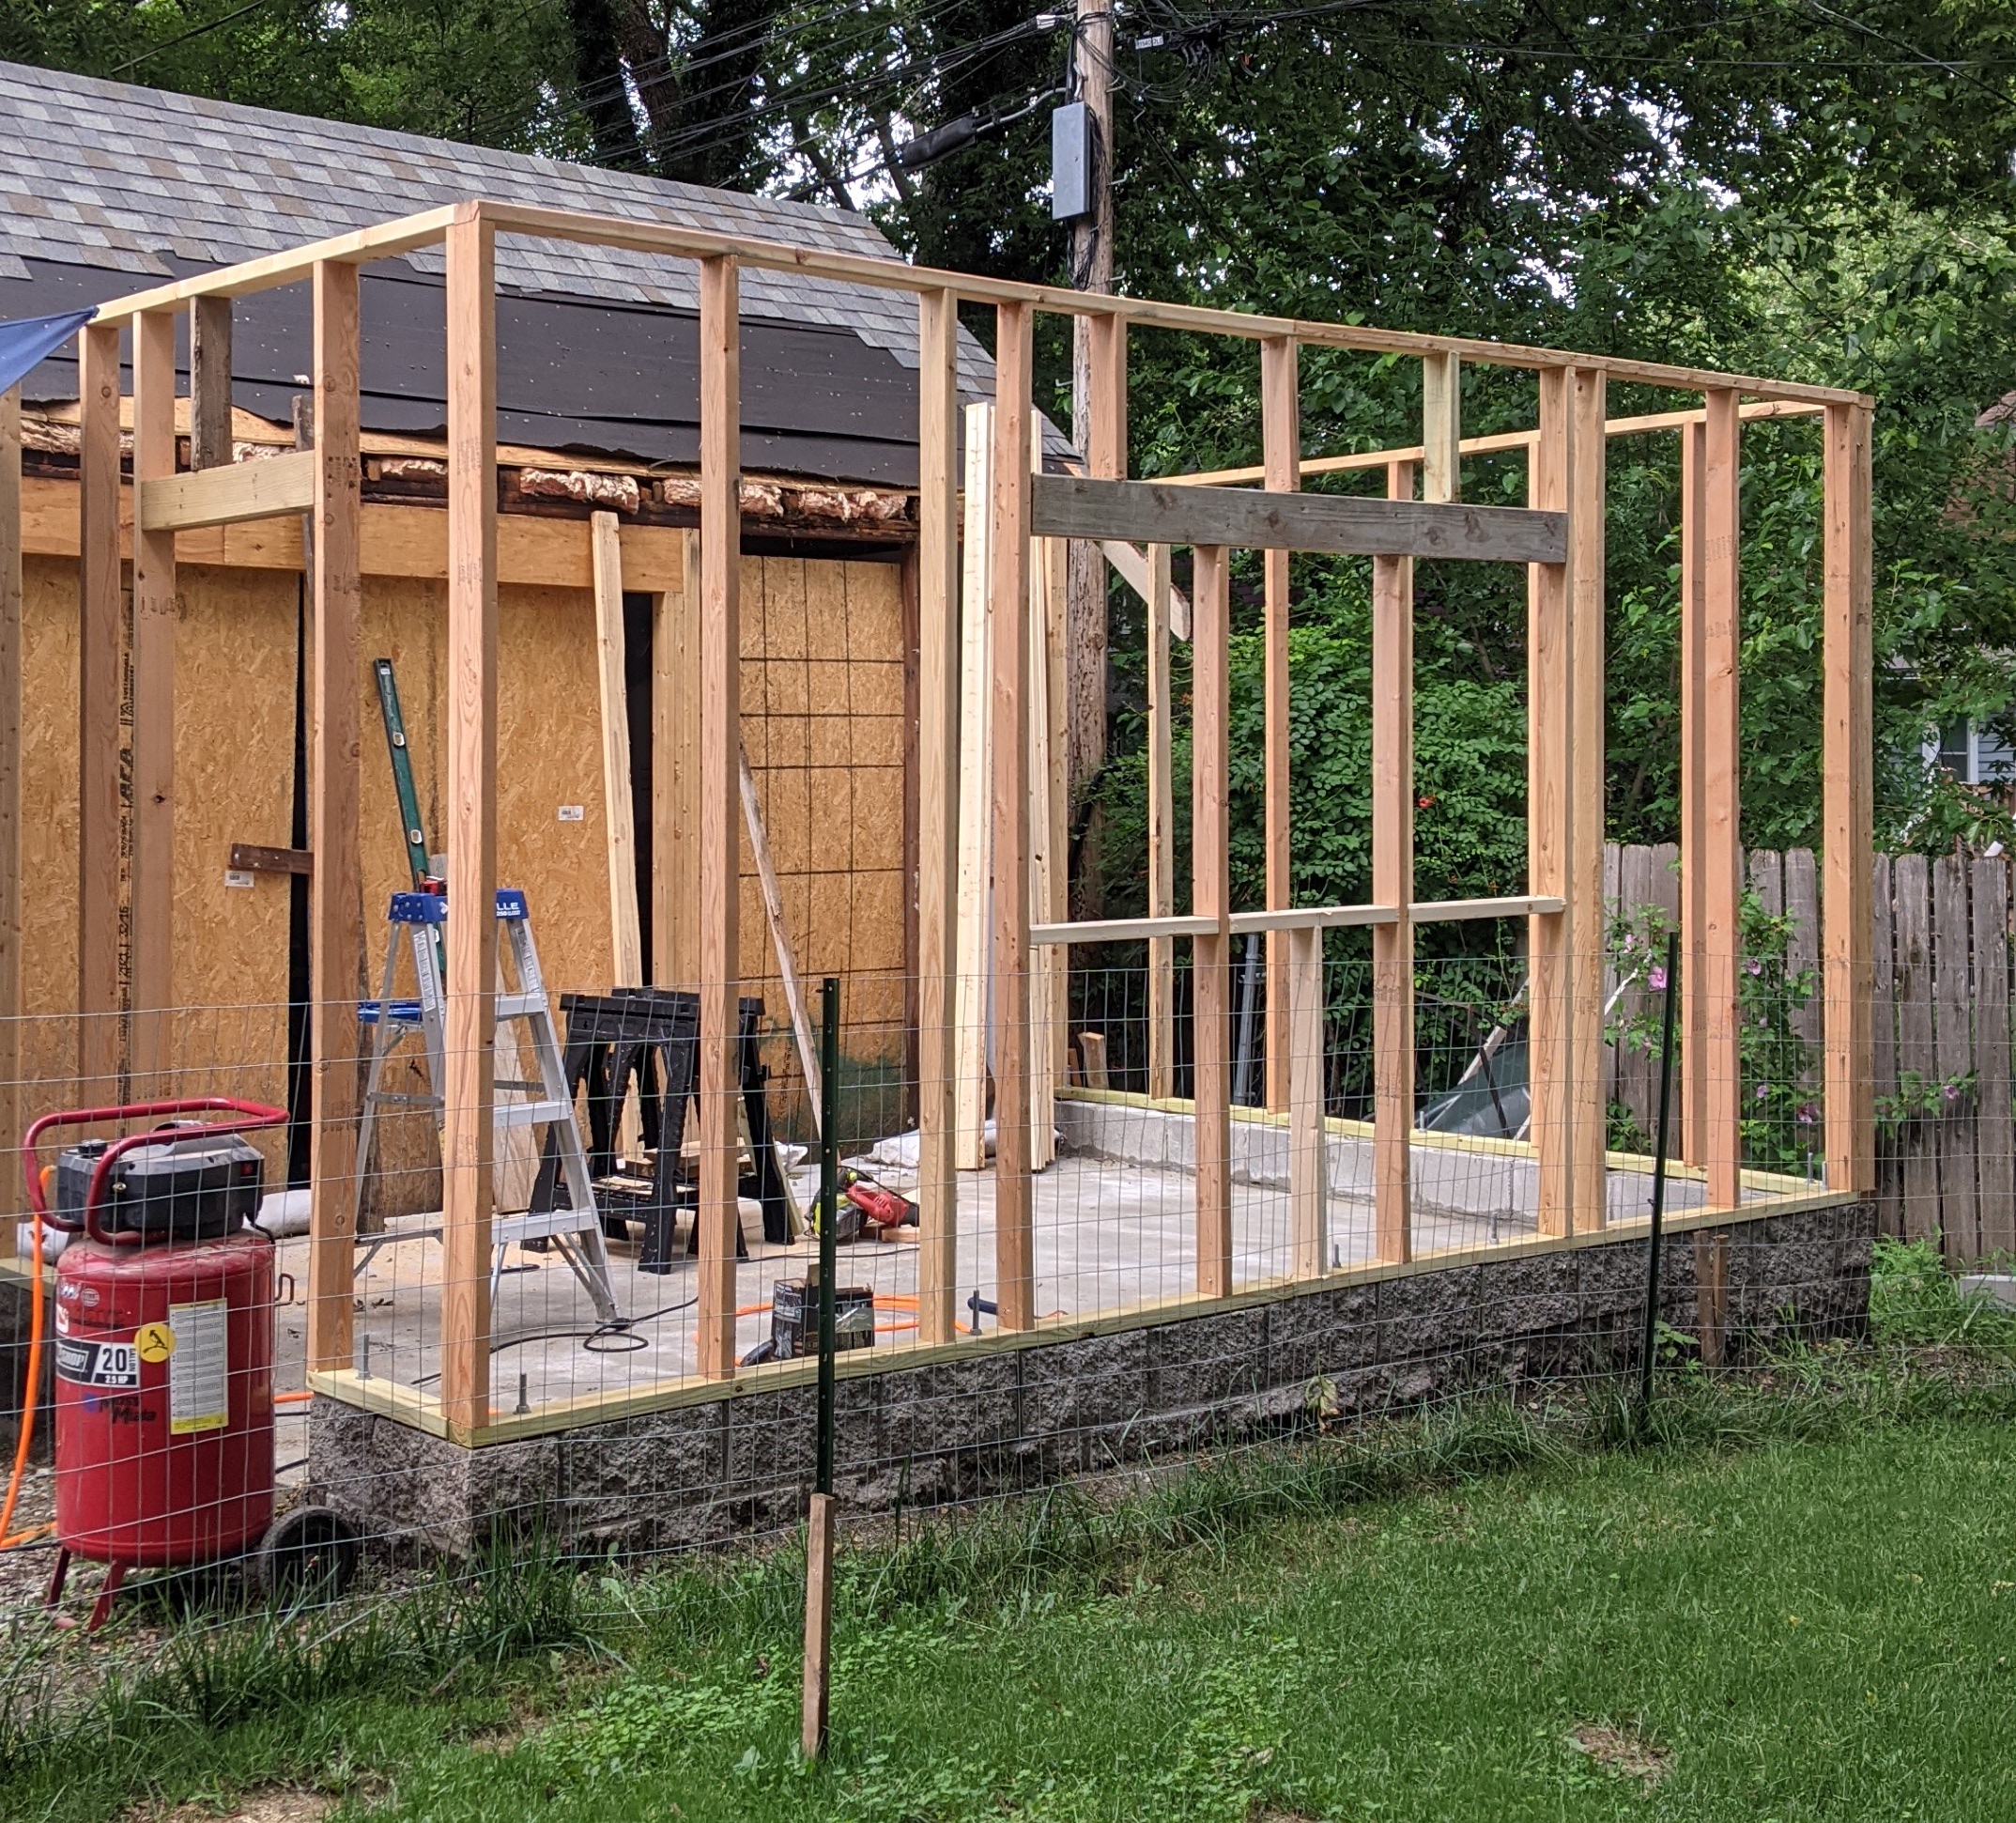
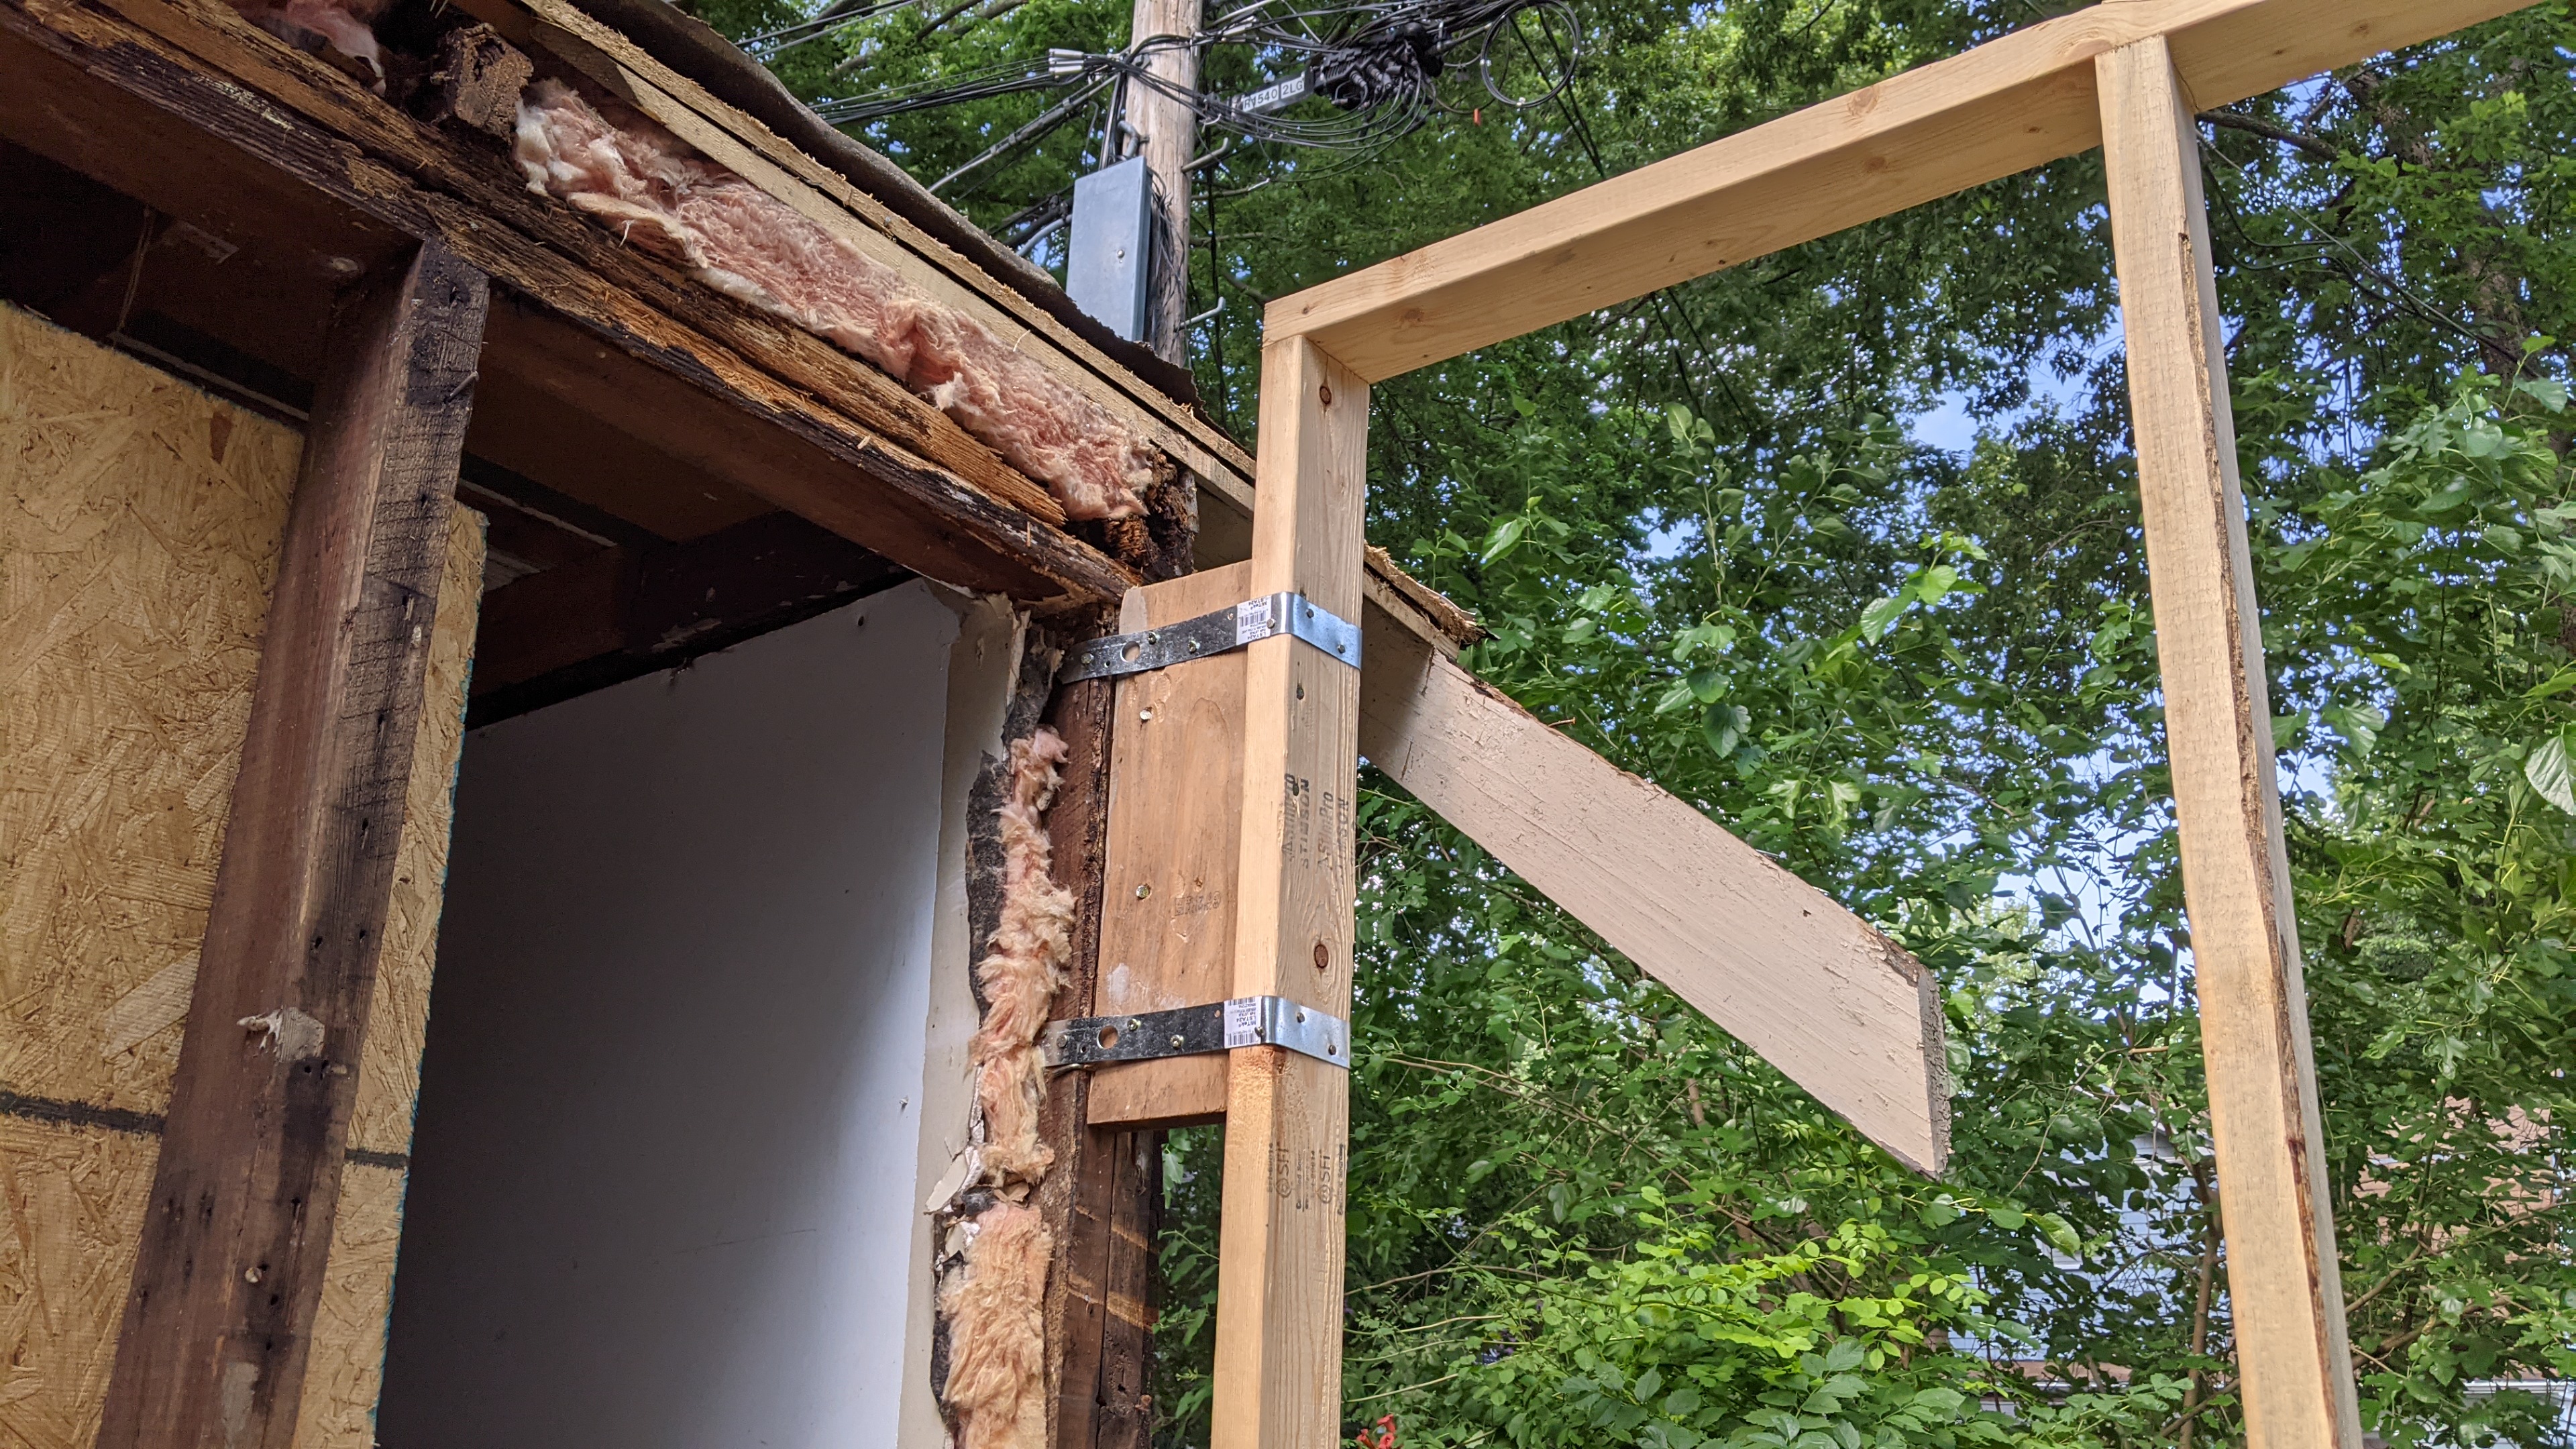
Here's how I tied the new wall to the old wall. Straps go all the way around. It is very stiff! Once the exterior sheathing goes on, it will be perfectly solid.
My friend Johnny came over to help me with the trusses and we got them up there really quickly! The first one we did was the one on the far right, the gable-end truss, and before we got it up there we nailed the overhang onto it. Normally, "lookouts" are used to attach the overhang to the gable-end truss by putting notches into the truss's top piece for 2x4s to go from the overhang to the 1st non-gable-end truss. But I wasn't comfertable putting 2" notches into wood that was only 3.5" wide. So I went with what you see bellow, and I used metal traps to keep the overhang from pulling away from the truss. It is very strong and I don't think the overhang will sag, but it could after a few years. I can always add corbels (architectural wooden brackets).
Because it was the first one, and the heavies, and the weight was very un-balanced, we almost dropped it! It would have crashed to the ground if it didn't catch onto the ladder. I have it on video, so stay tuned for the youtube episode!
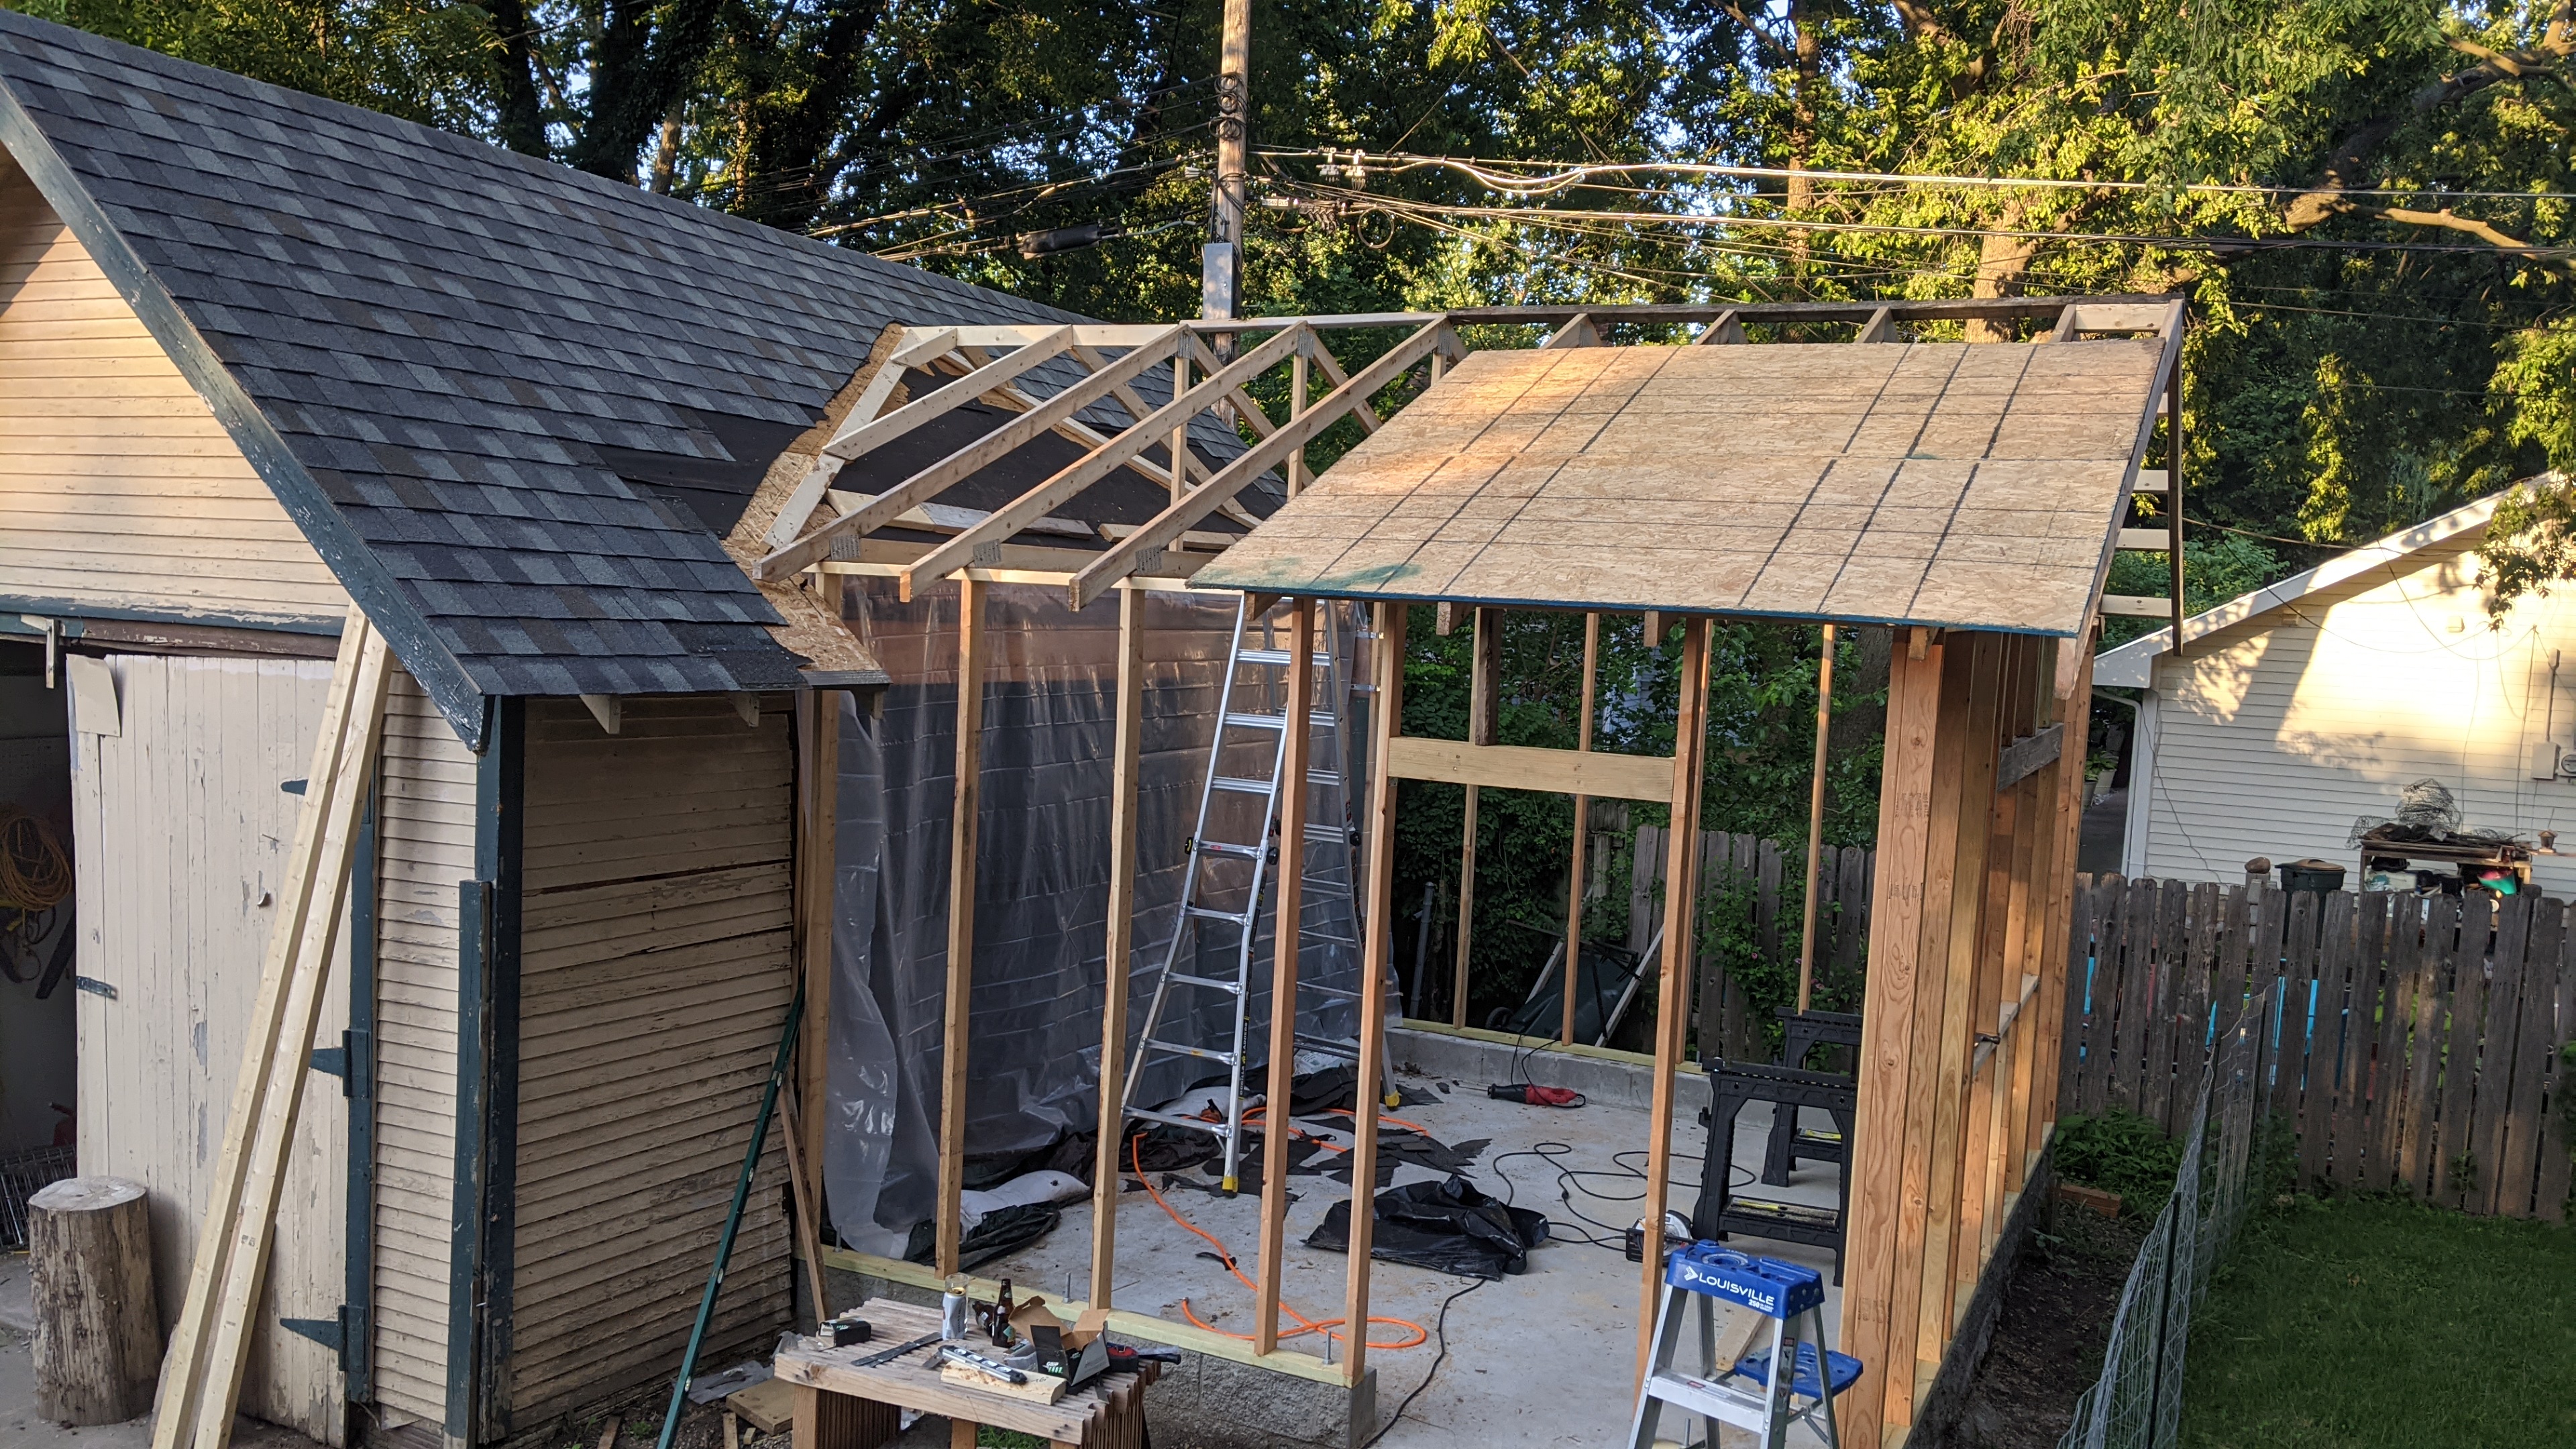
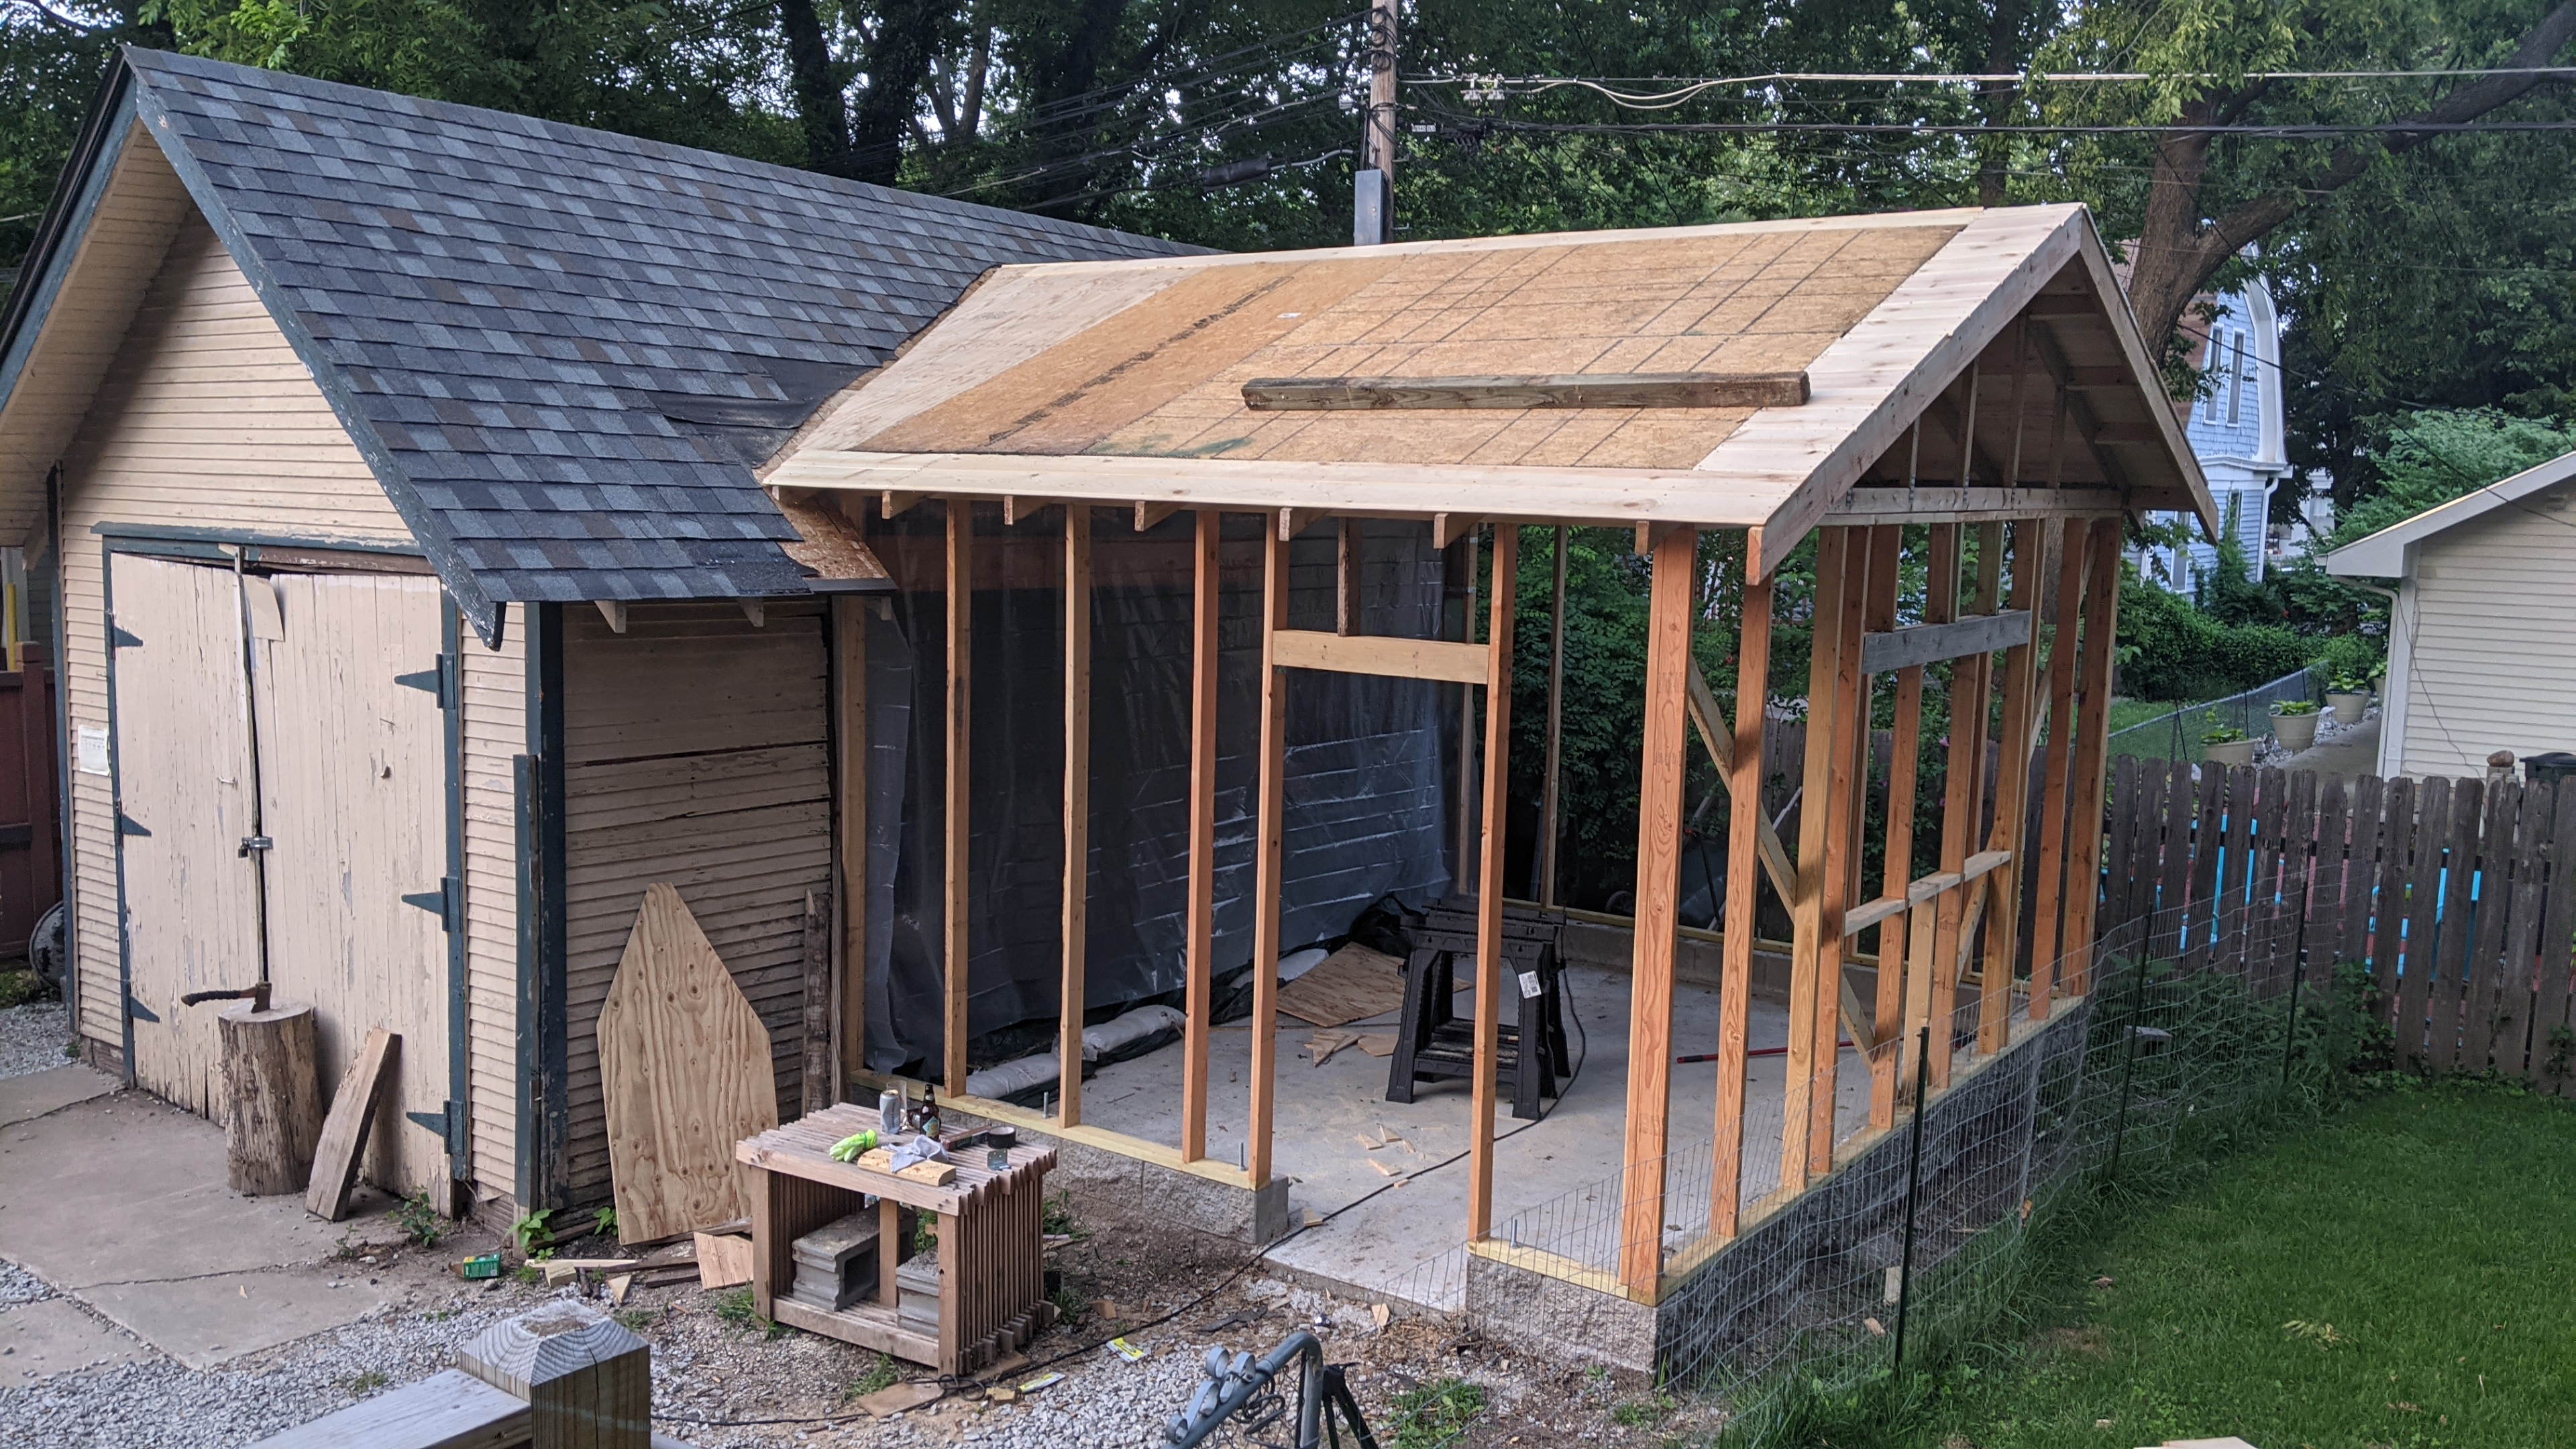
For the roof sheathing, I used 1/2" OSB except for above the overhangs. For those areas, I used t&g carsiding, which will look a lot better because I'm using exposed soffits/eaves.
I finished installing the tar paper on the roof yesterday morning, then went to the lake for the rest of the day. The "feels-like" temp was 105°F with the humidity, so it was a good opportunity to put the hammer down and drink some beer while floating in water.
This morning it rained, so the tar paper was installed just in time!
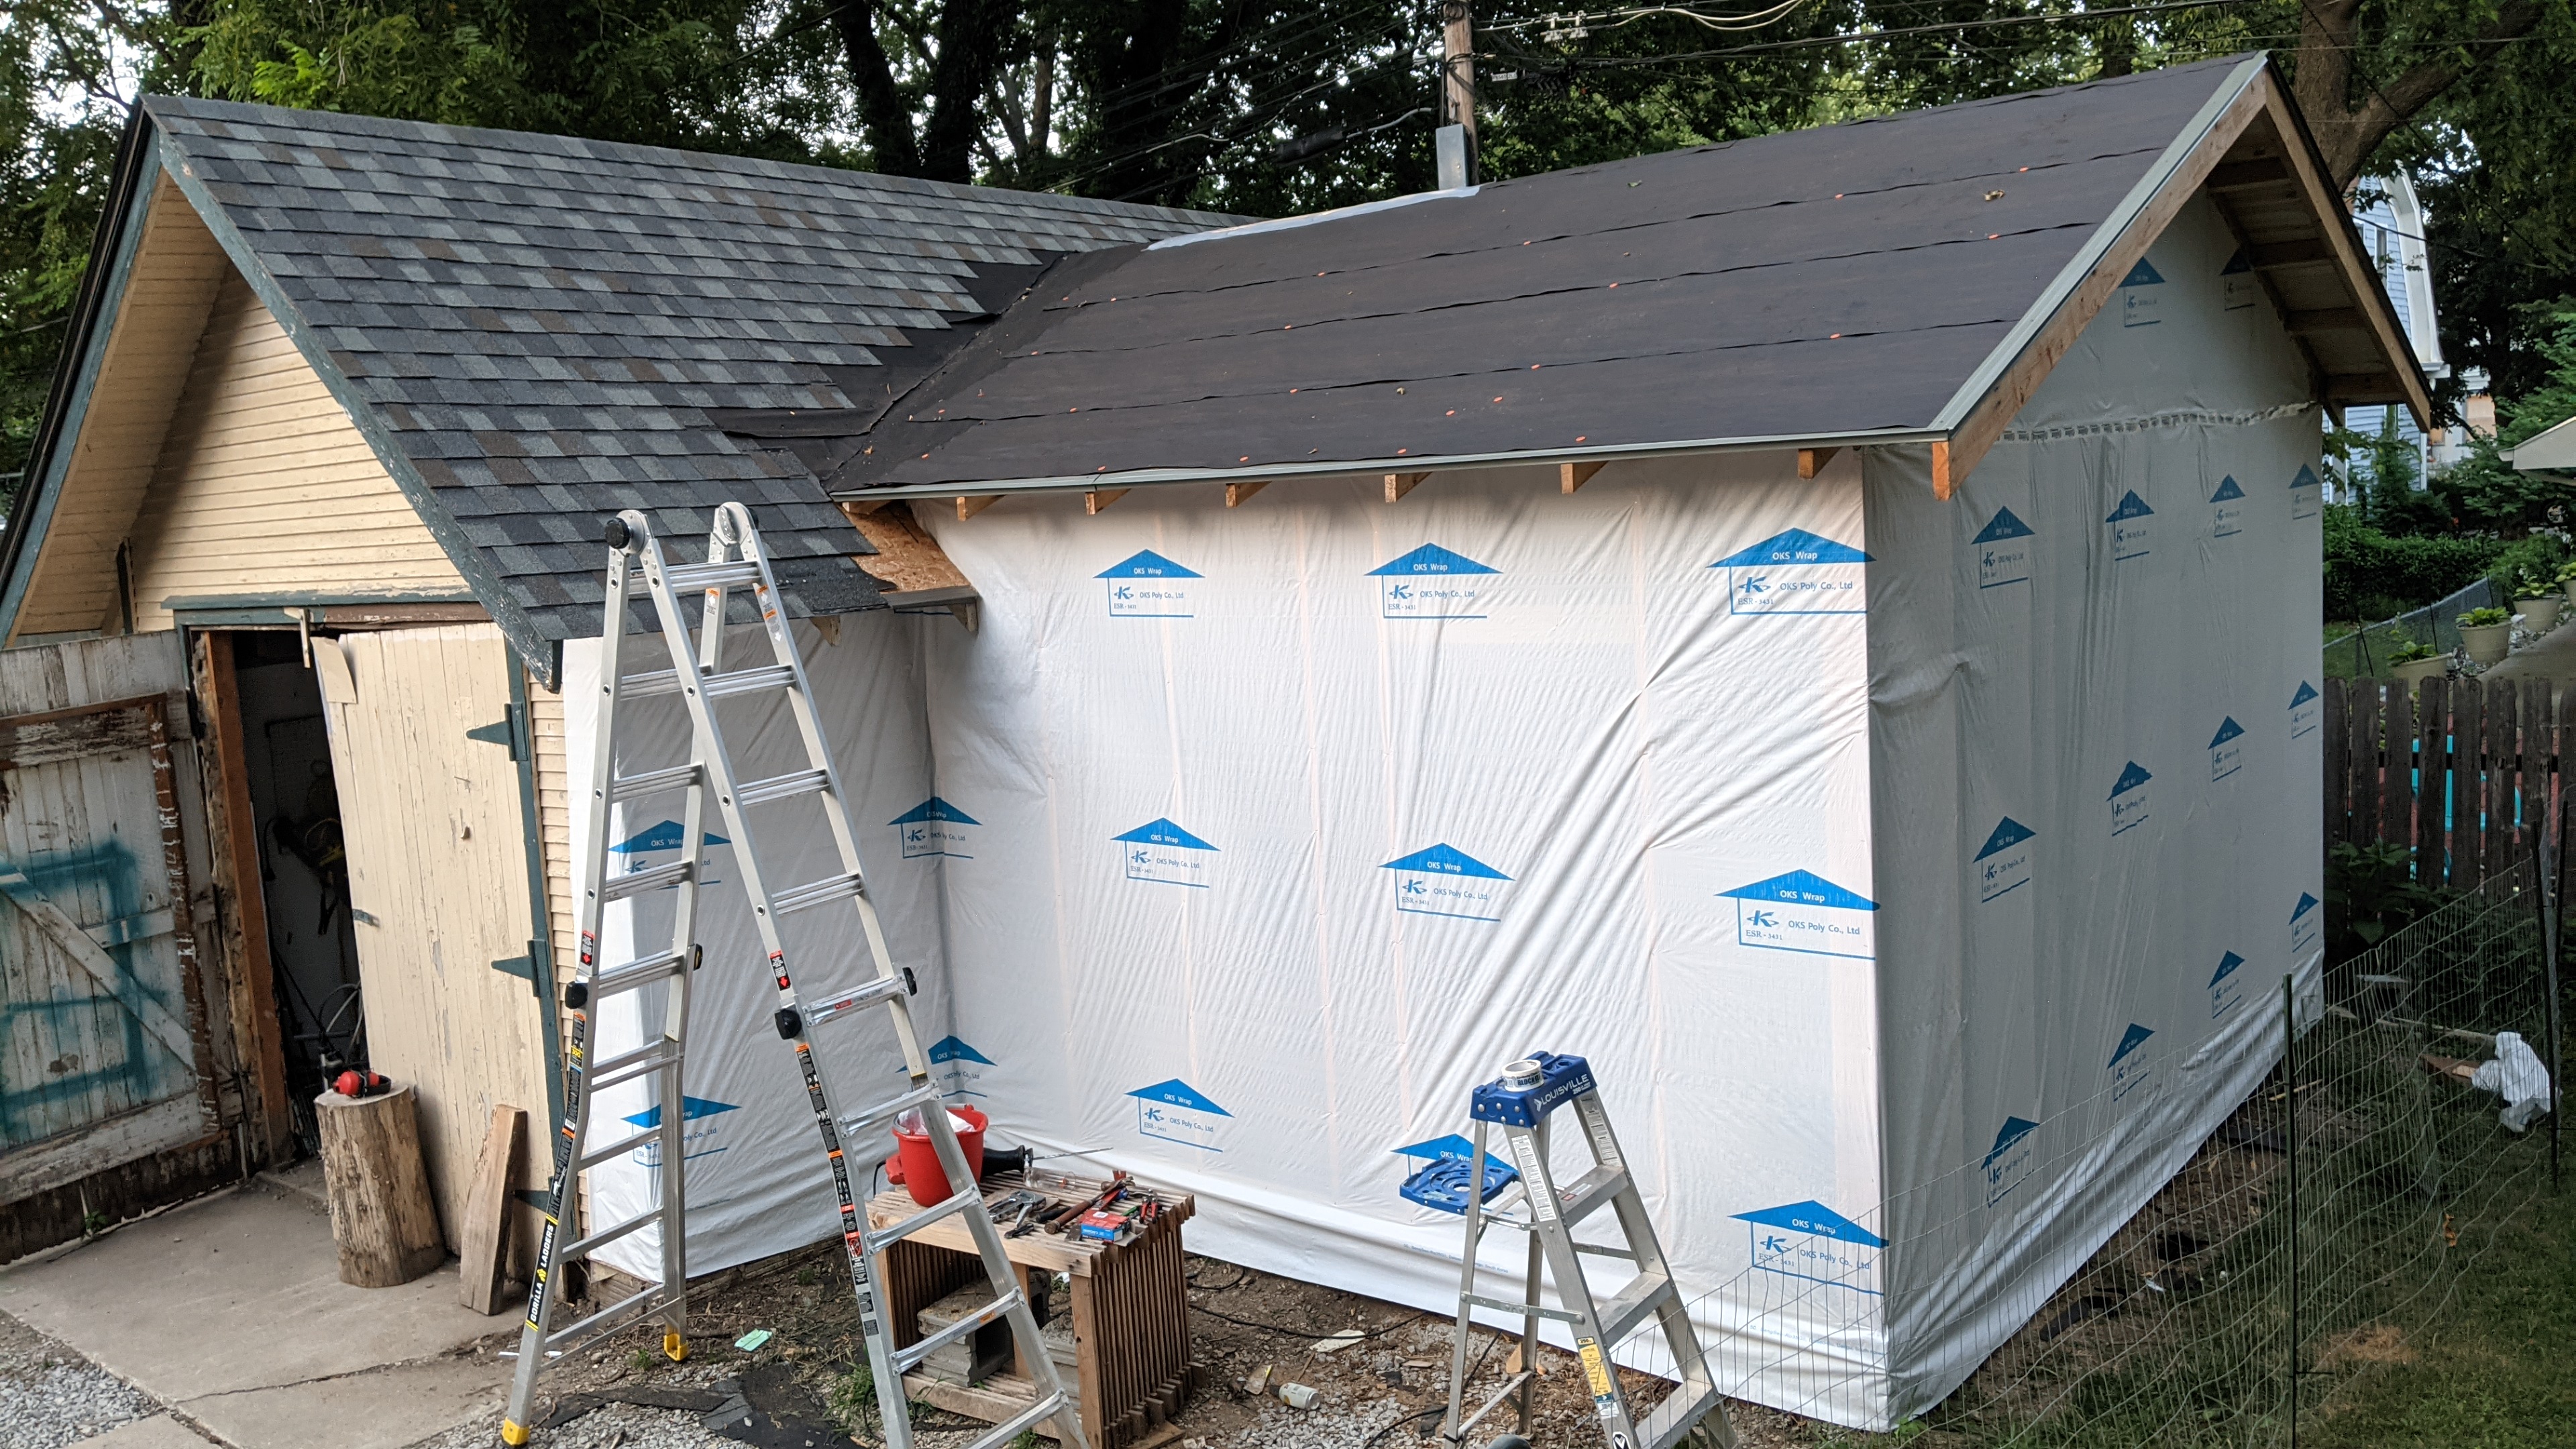
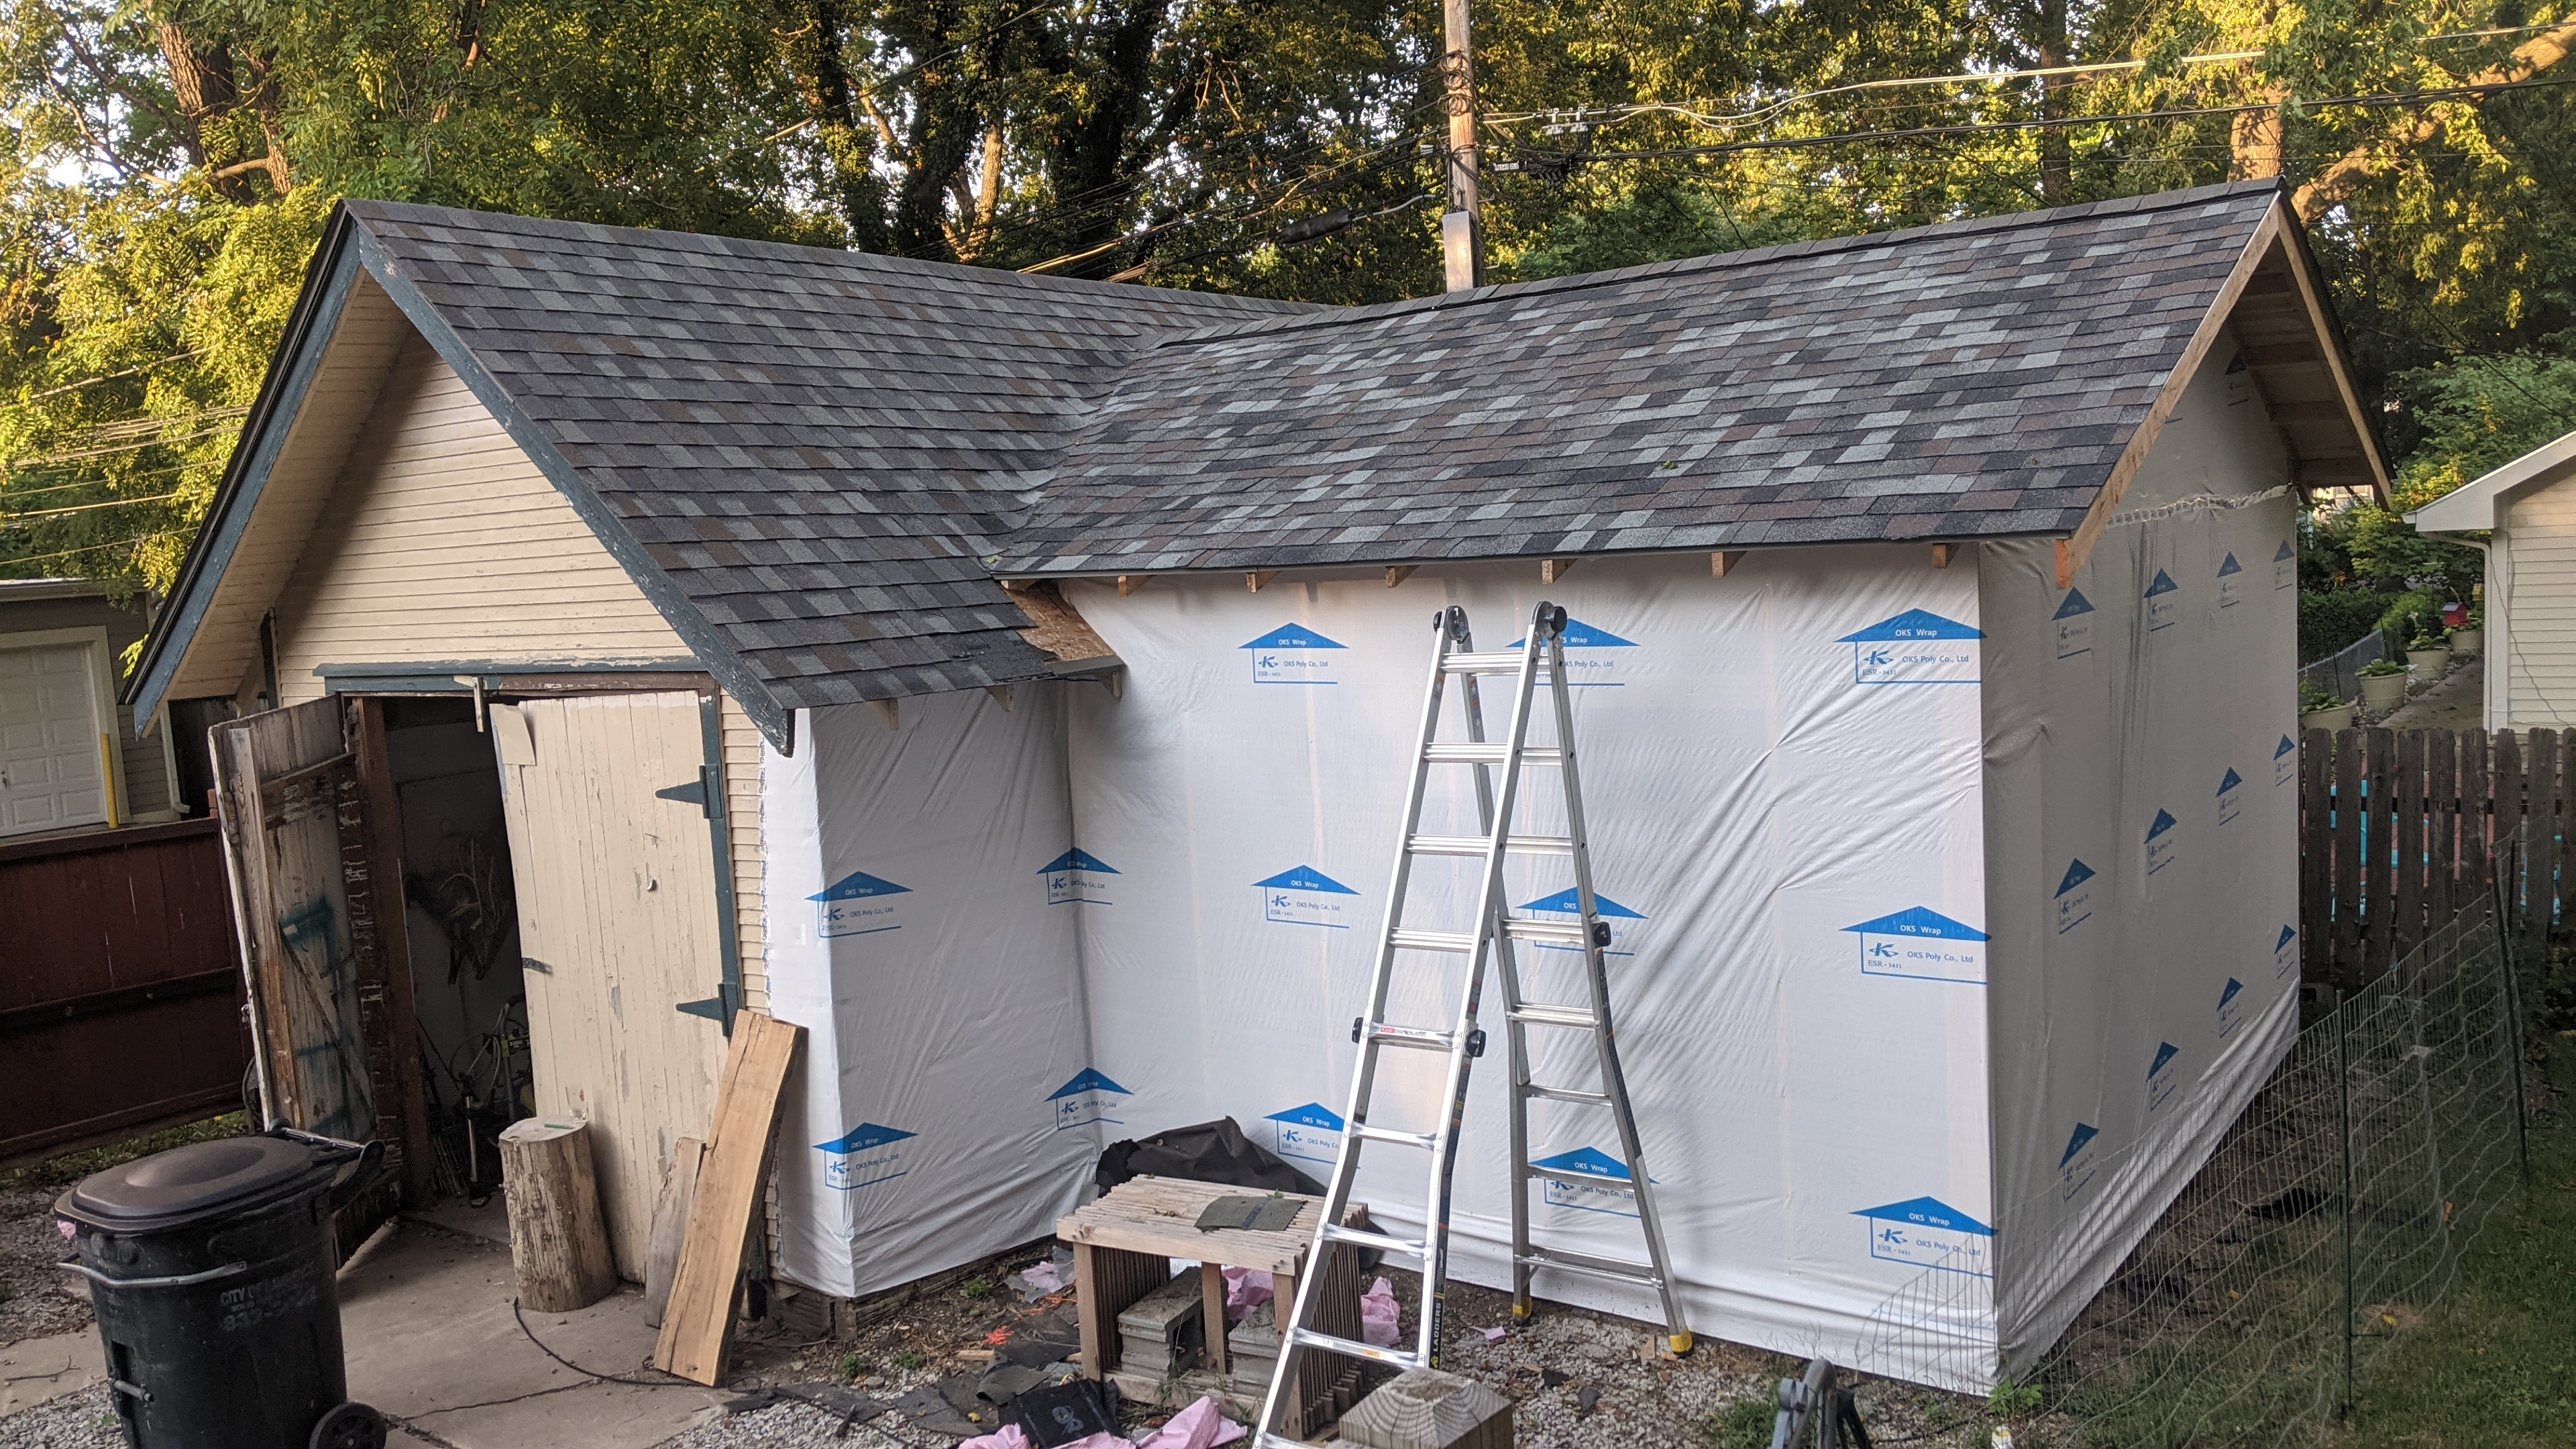
House wrap applied directly to the studs because I'm using structural plywood siding instead of OSB sheathing + normal siding.
The tar paper was not holding up as well as expected and when it rained 4" in one night, the garage floor was less than dry. So I decided to do the roof shingles before moving on to the siding.
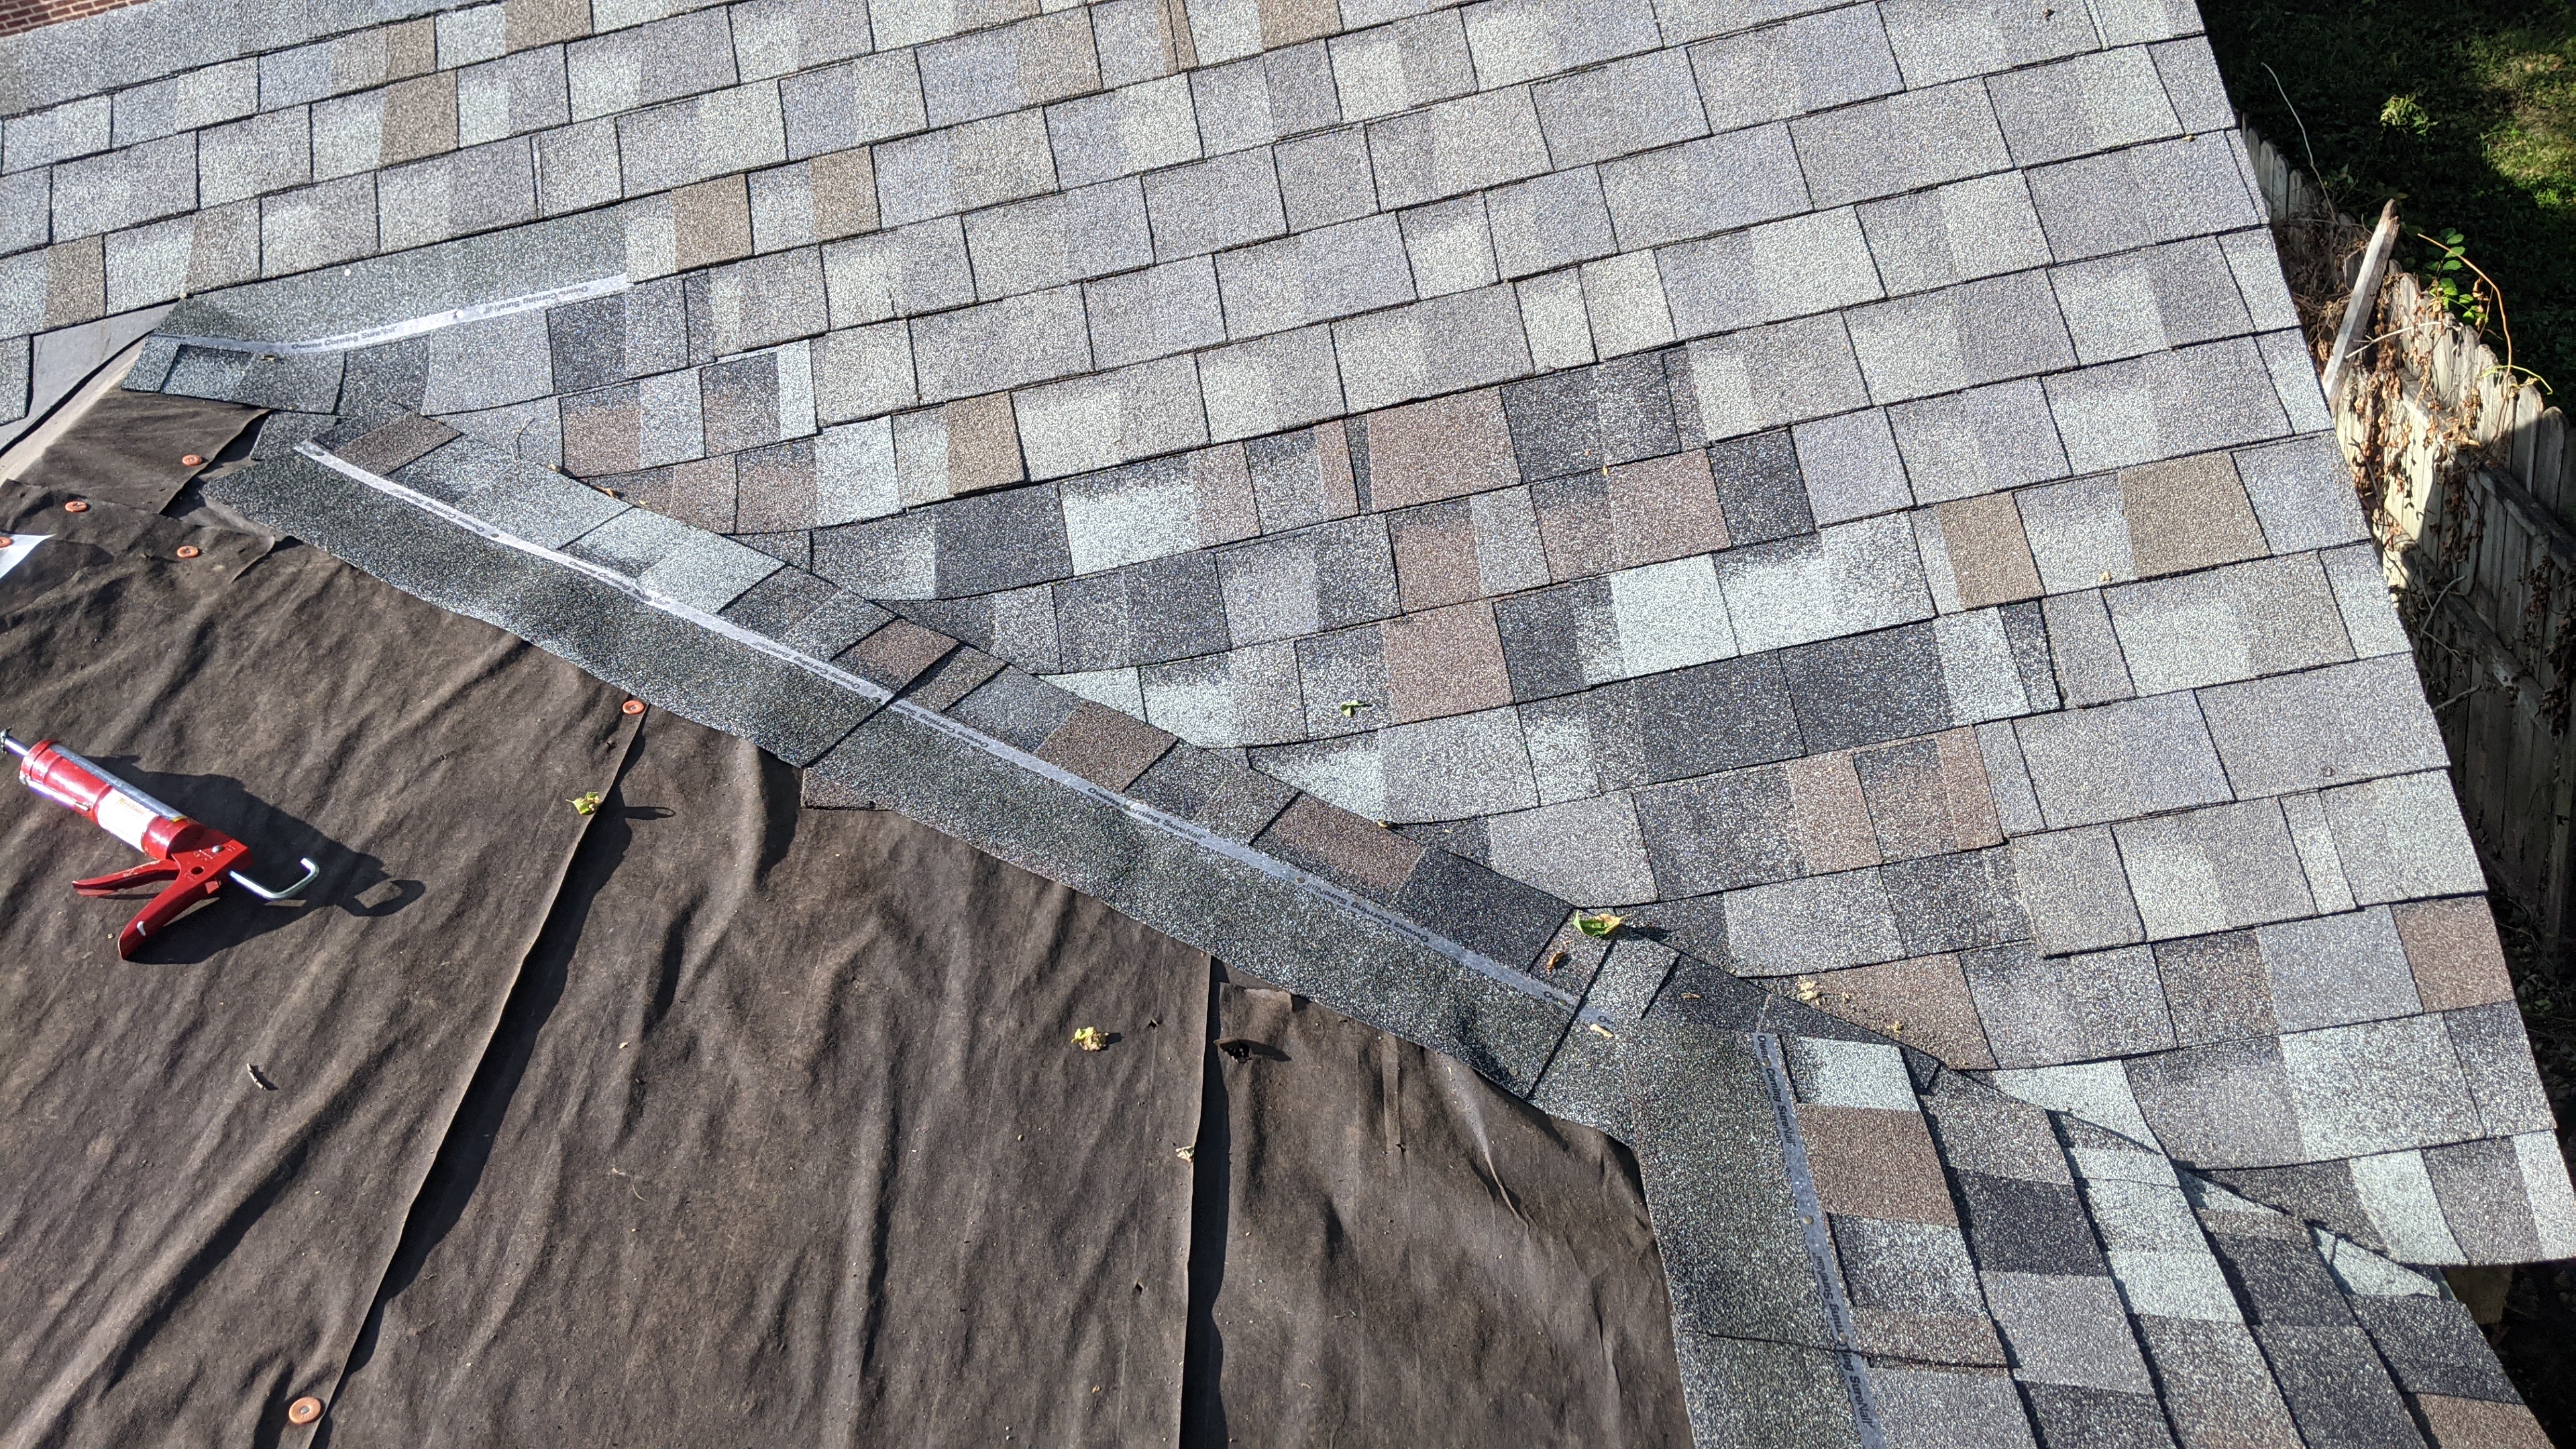
Here's how I built the valley, I used a closed valley pattern, and I just followed along to some youtube videos that made it pretty easy. Probably not perfect though.
Outside temps were only in the upper 80's yet when the sun was out that roof got hot!
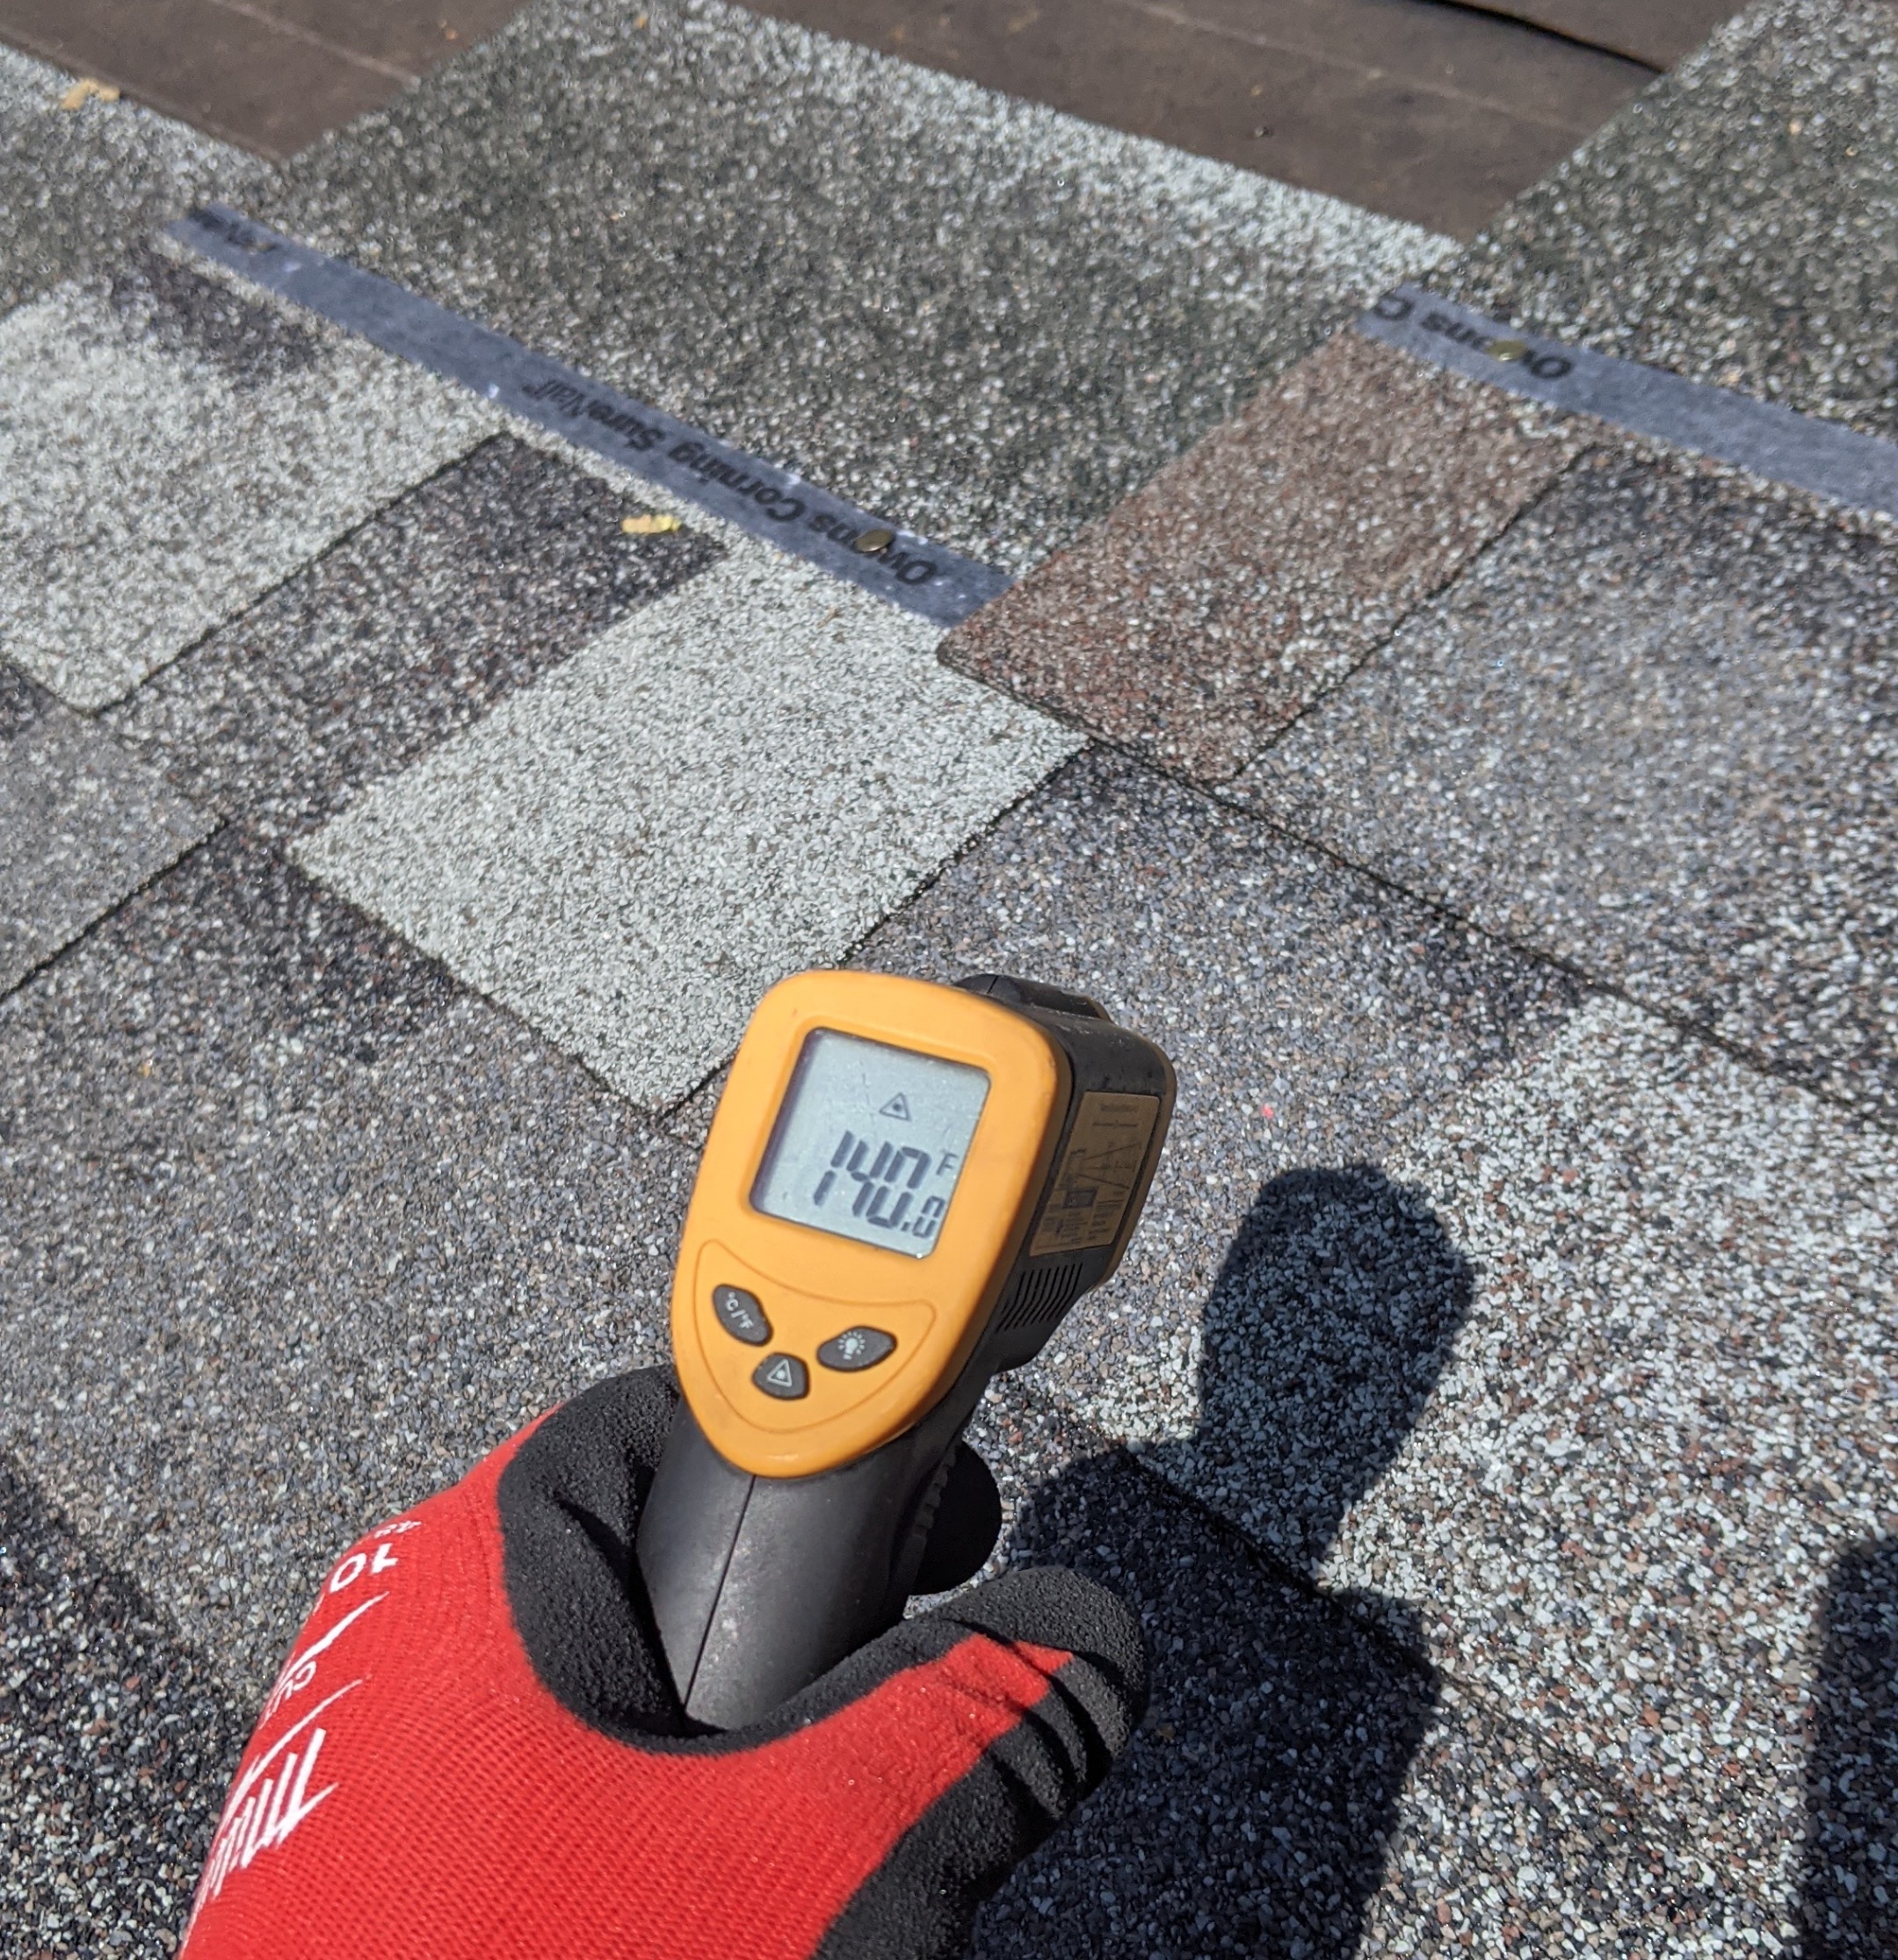
After three days I finally was finished. I only worked in the mornings before the sun was over the trees, or when a cloud was out.
You can see I used a ridge vent. You might also be able to see a lump in the lower corner of the valley on the new roof, that is because my sheathing and framing wasn't perfect. I hoped it wouldn't be noticable with the shingles on but I can see it. And I also tried to match the new shingles with the old ones but they're not a perfect match, however my wife says they are so that is good enough for me.
The next time it rains hard, I will definitely be under the new roof with a flashlight and crossed fingers!
Up next for Operation Tool Temple: finishing the exterior.