I'm building a 12' b 16' addition to my garage and I'm building it with my own bare hands. I could not find a contractor that would do it for me without putting me on a 6+ month waiting list.
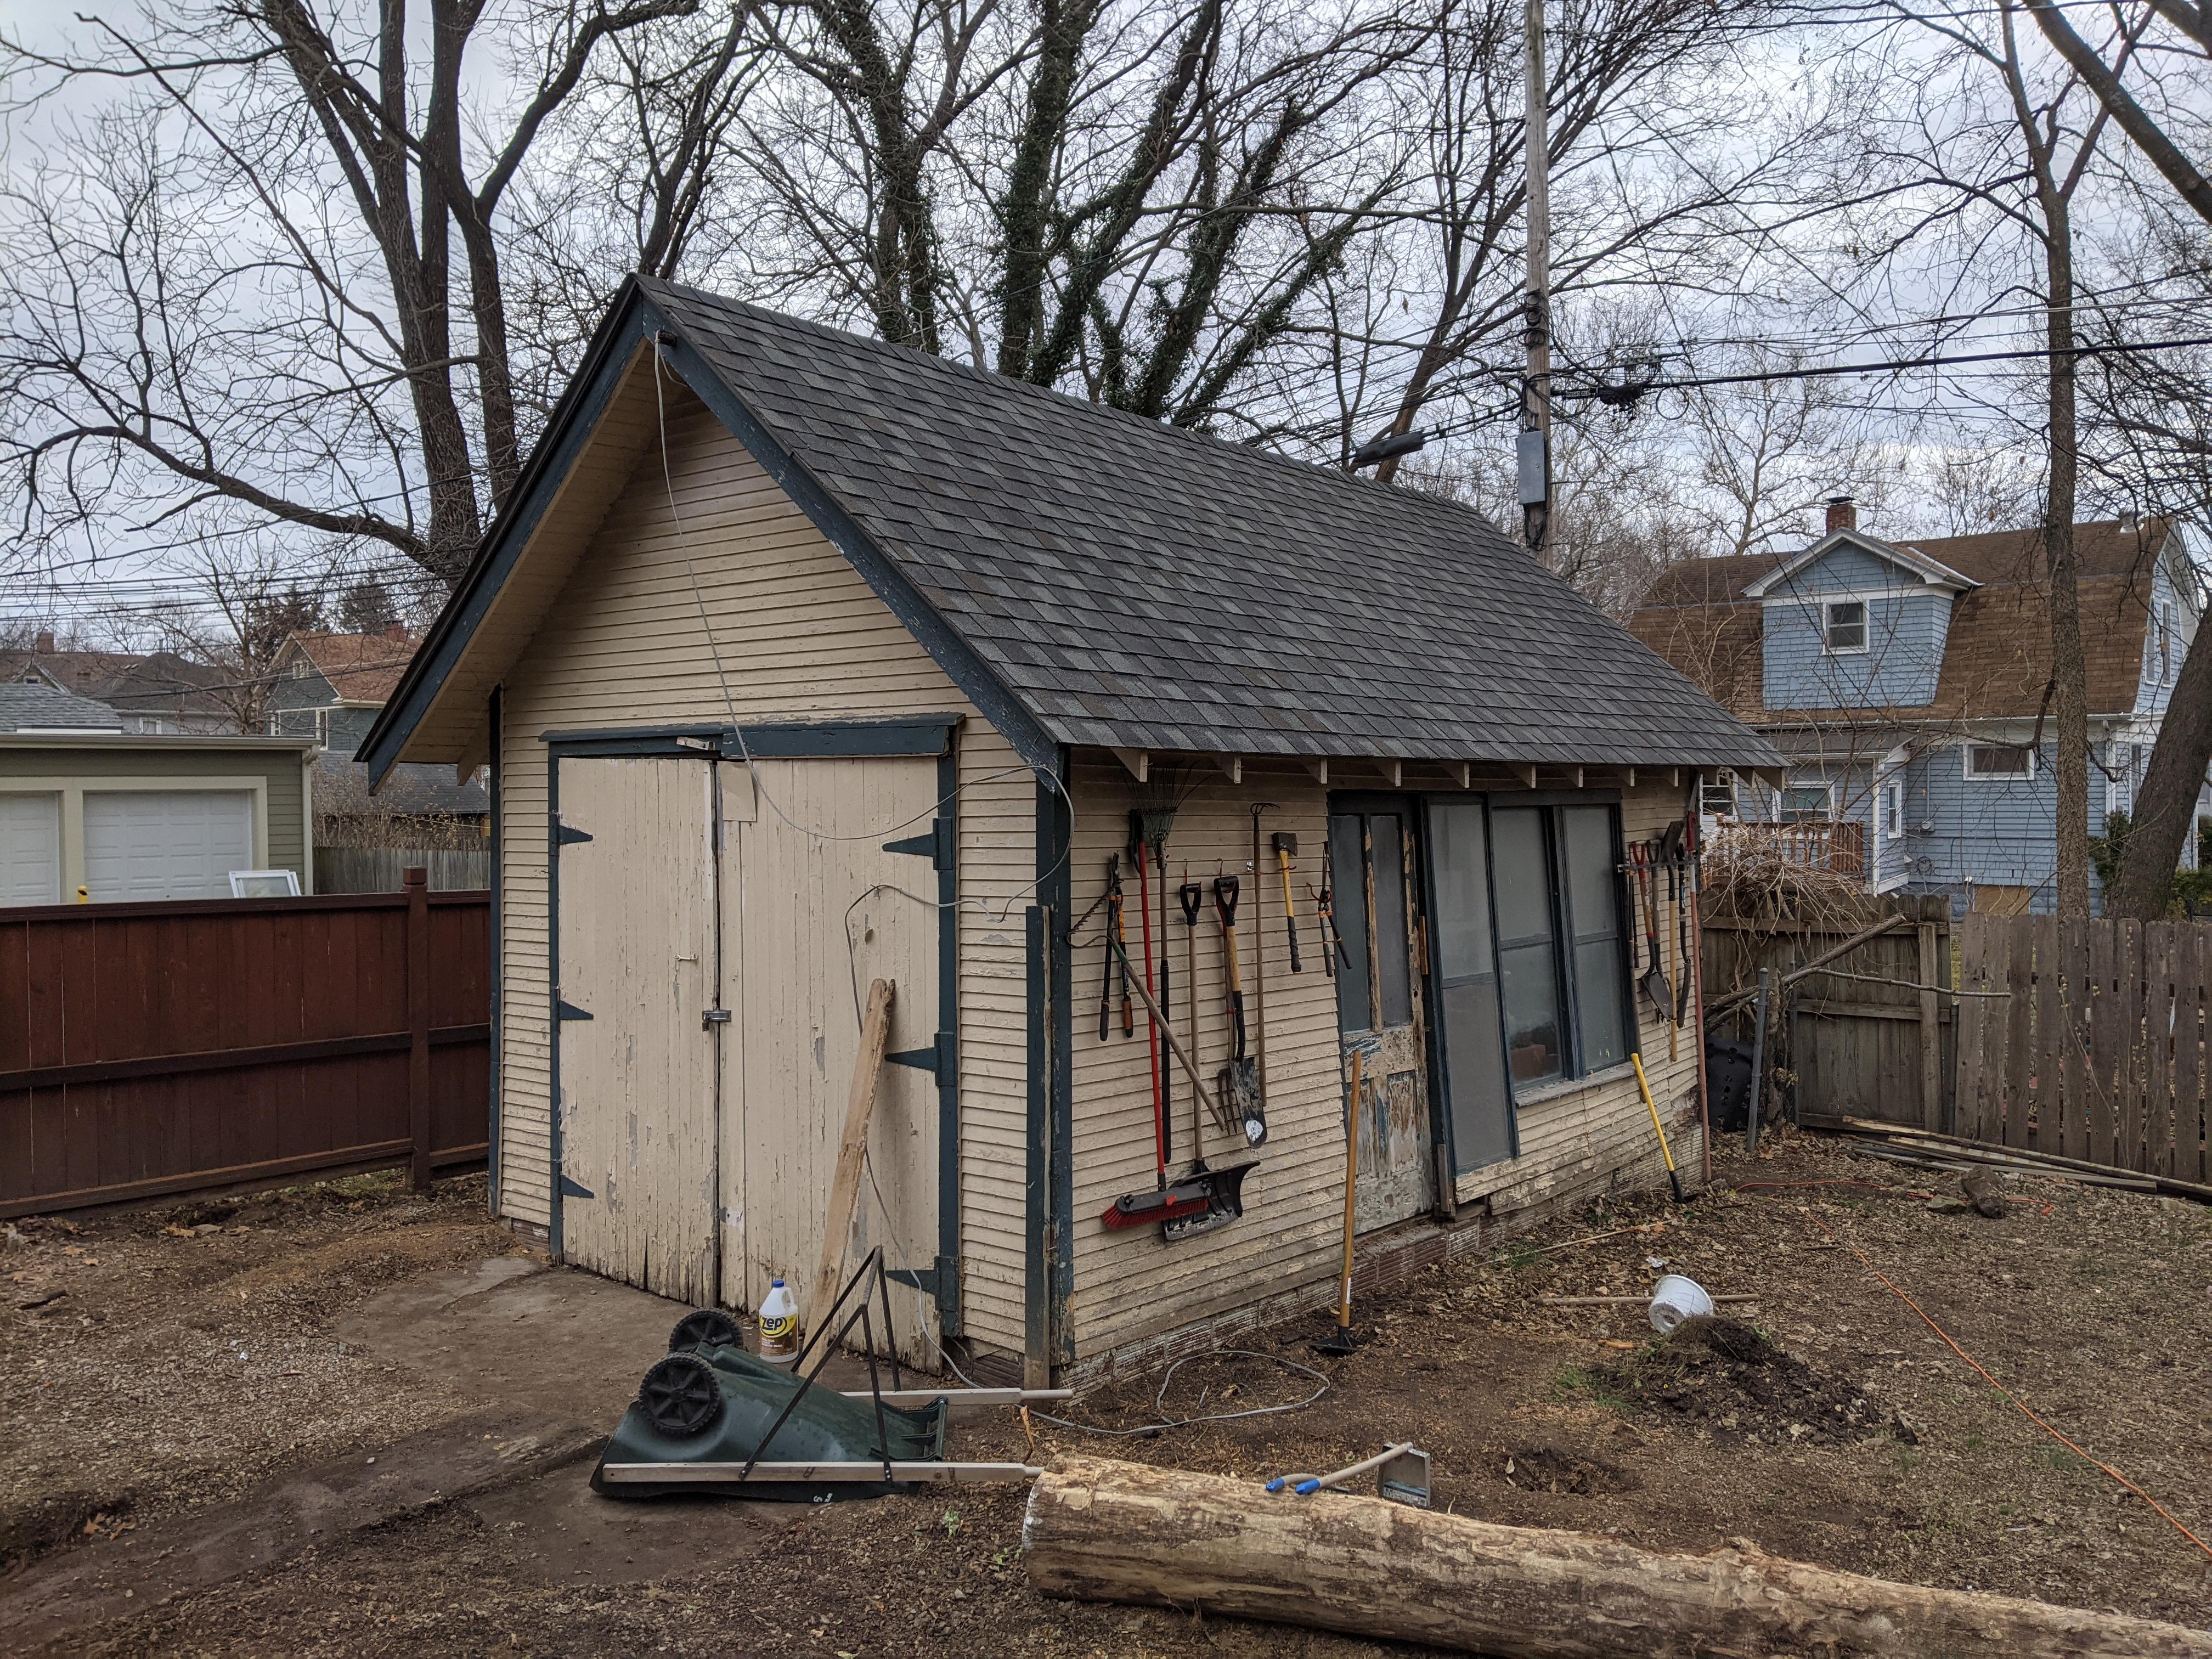
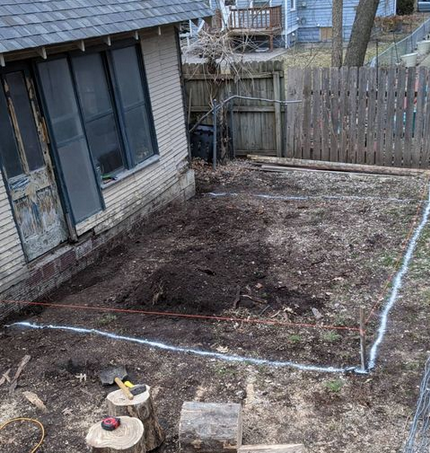
The "Before" Photos
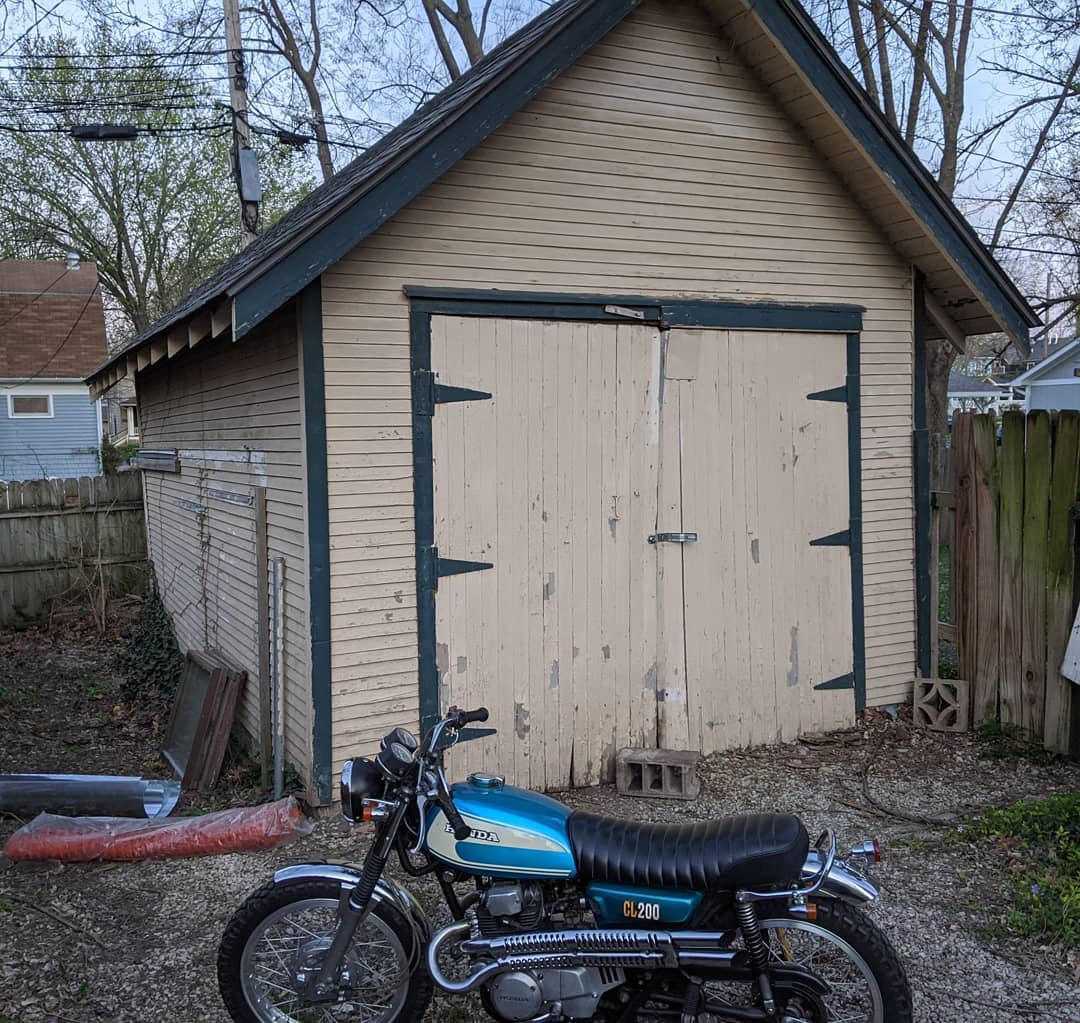
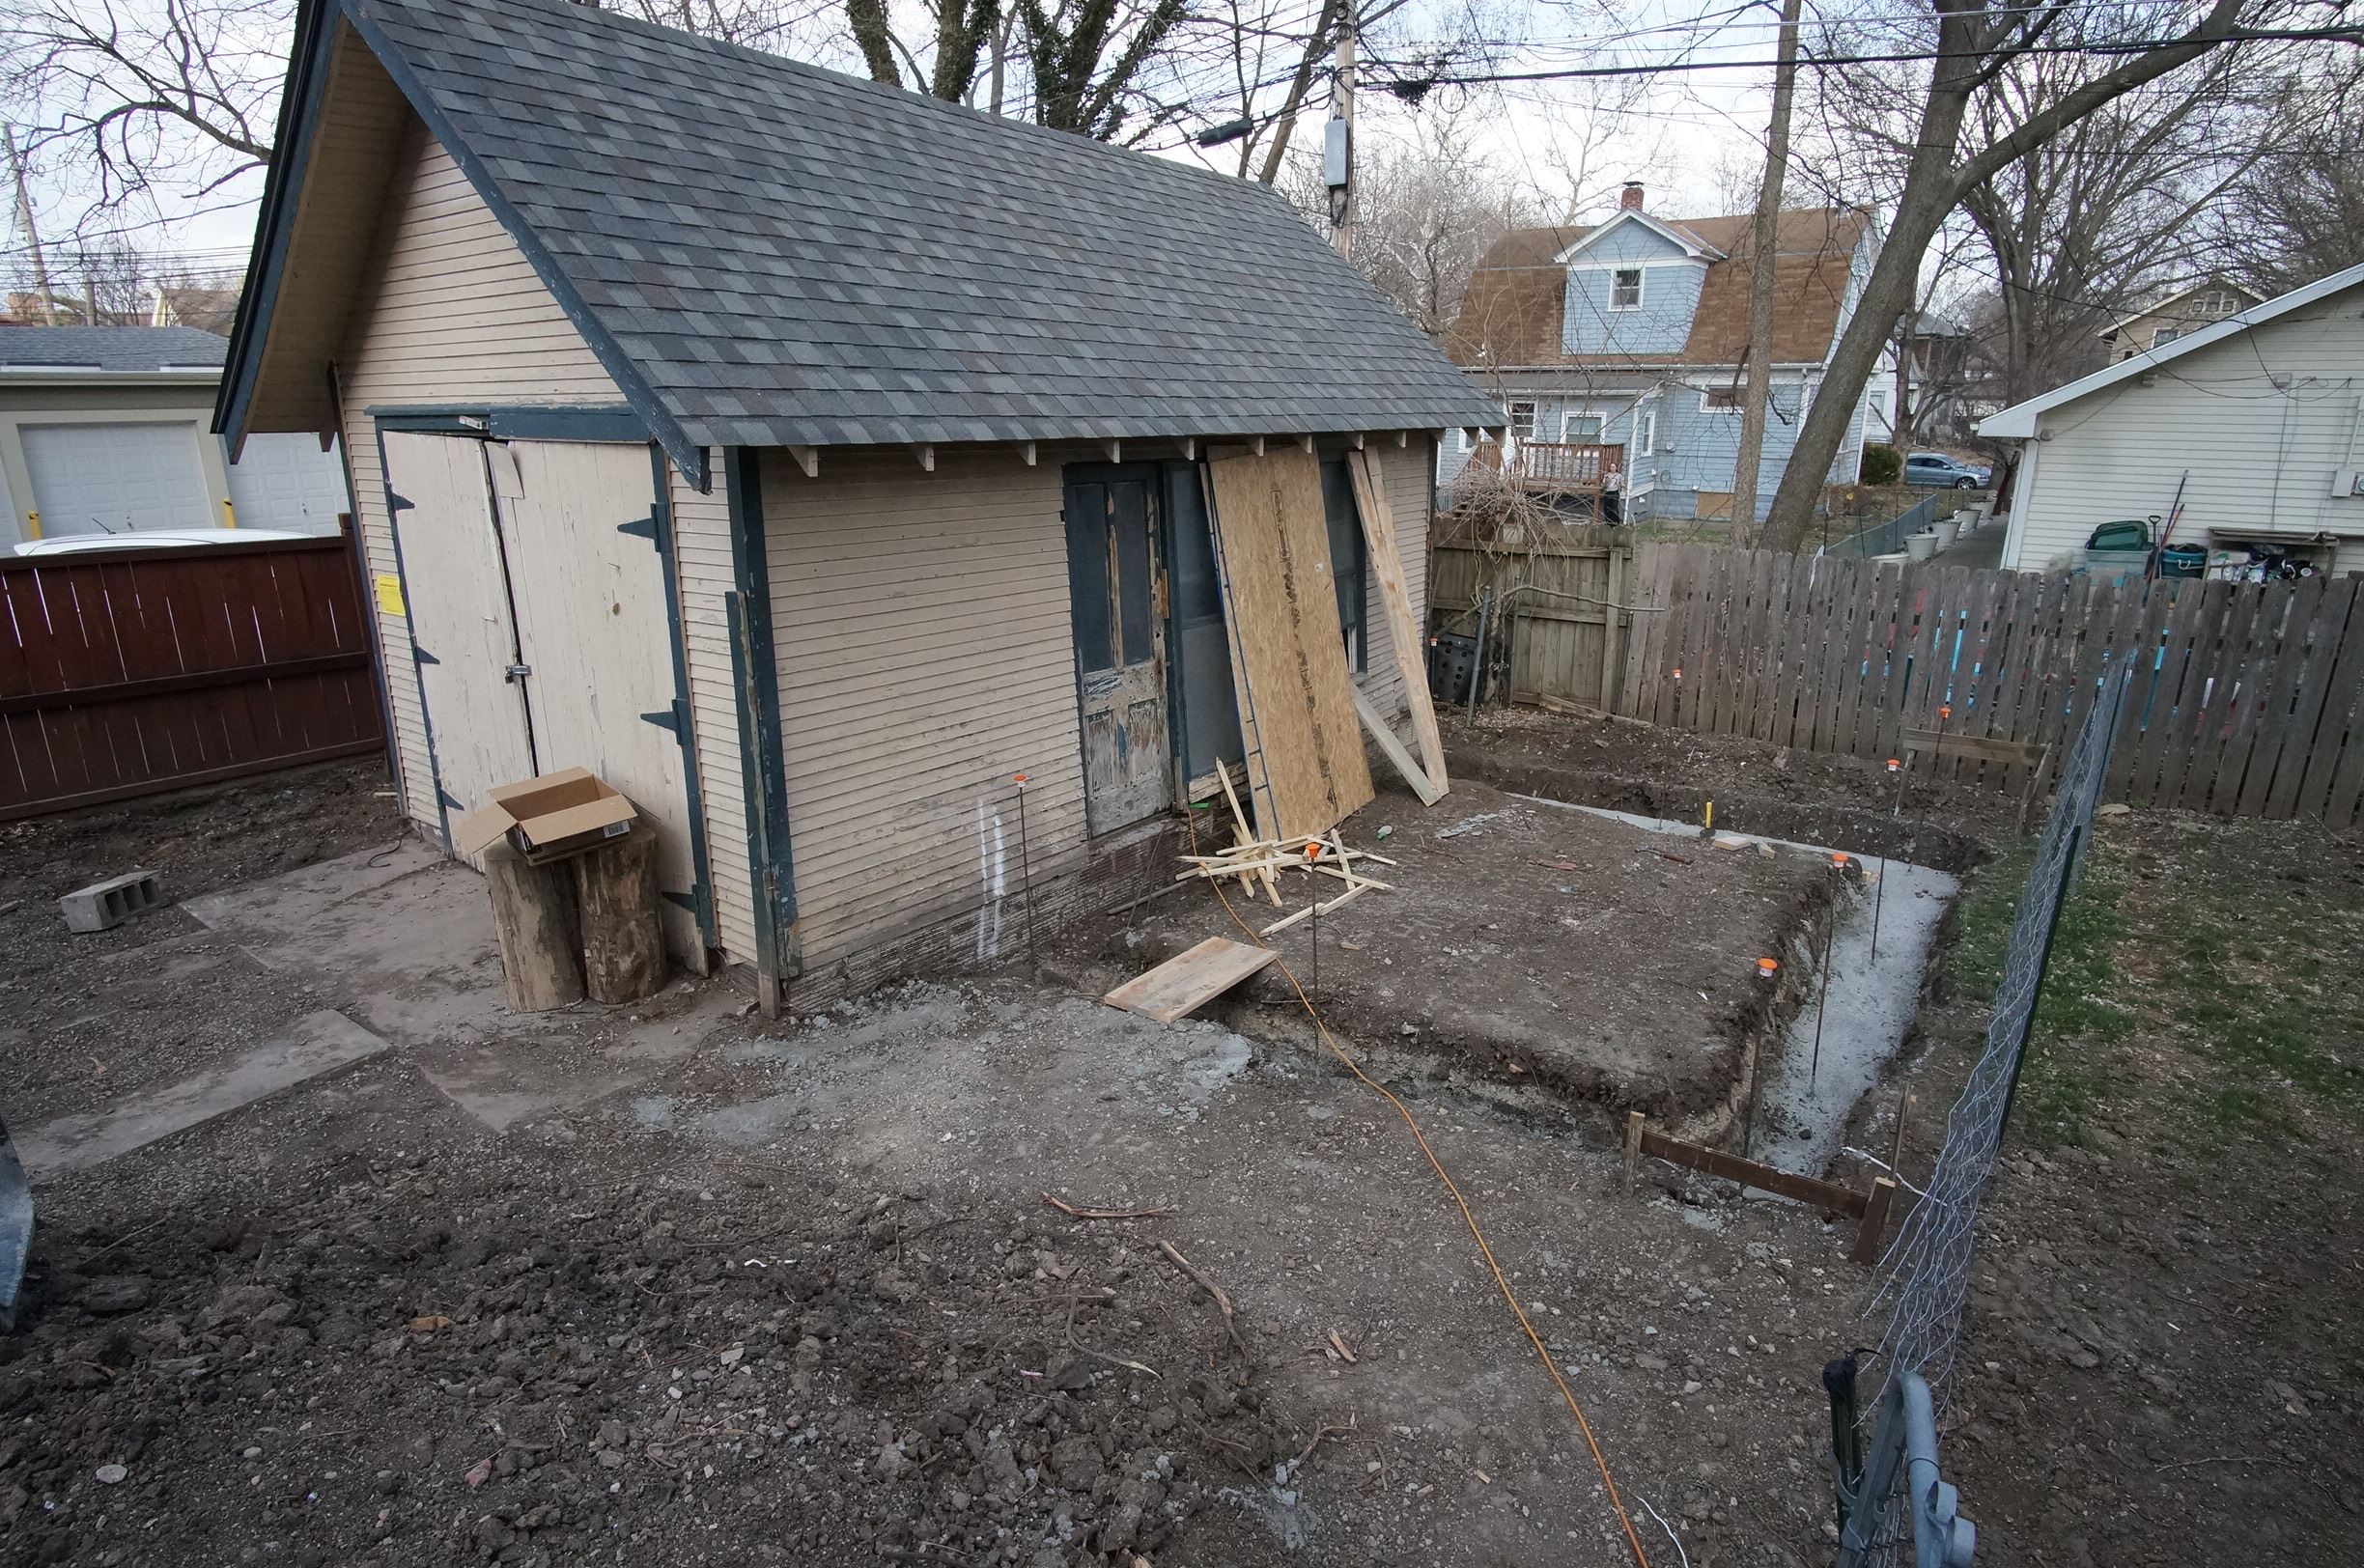
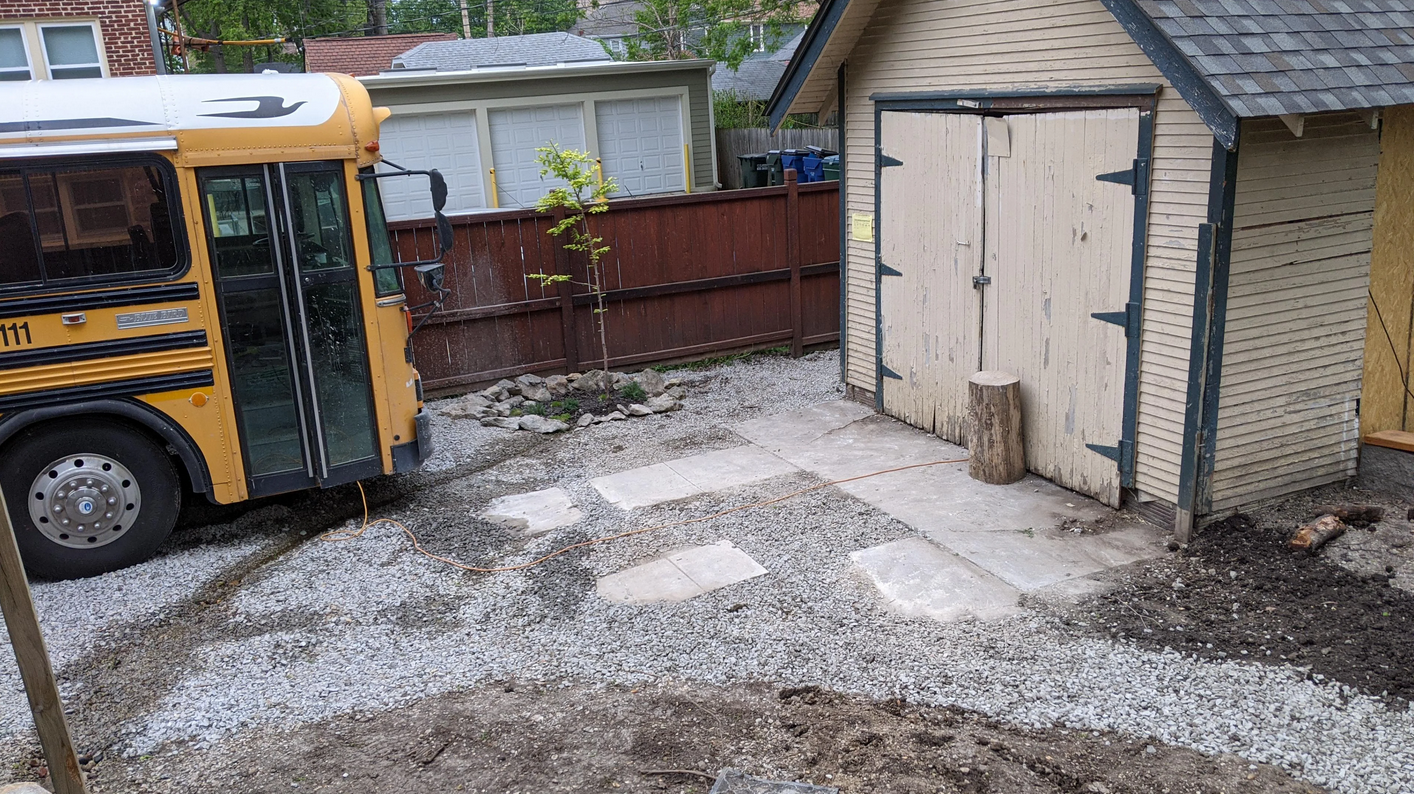
Here is the old garage, it is 12' by 20':
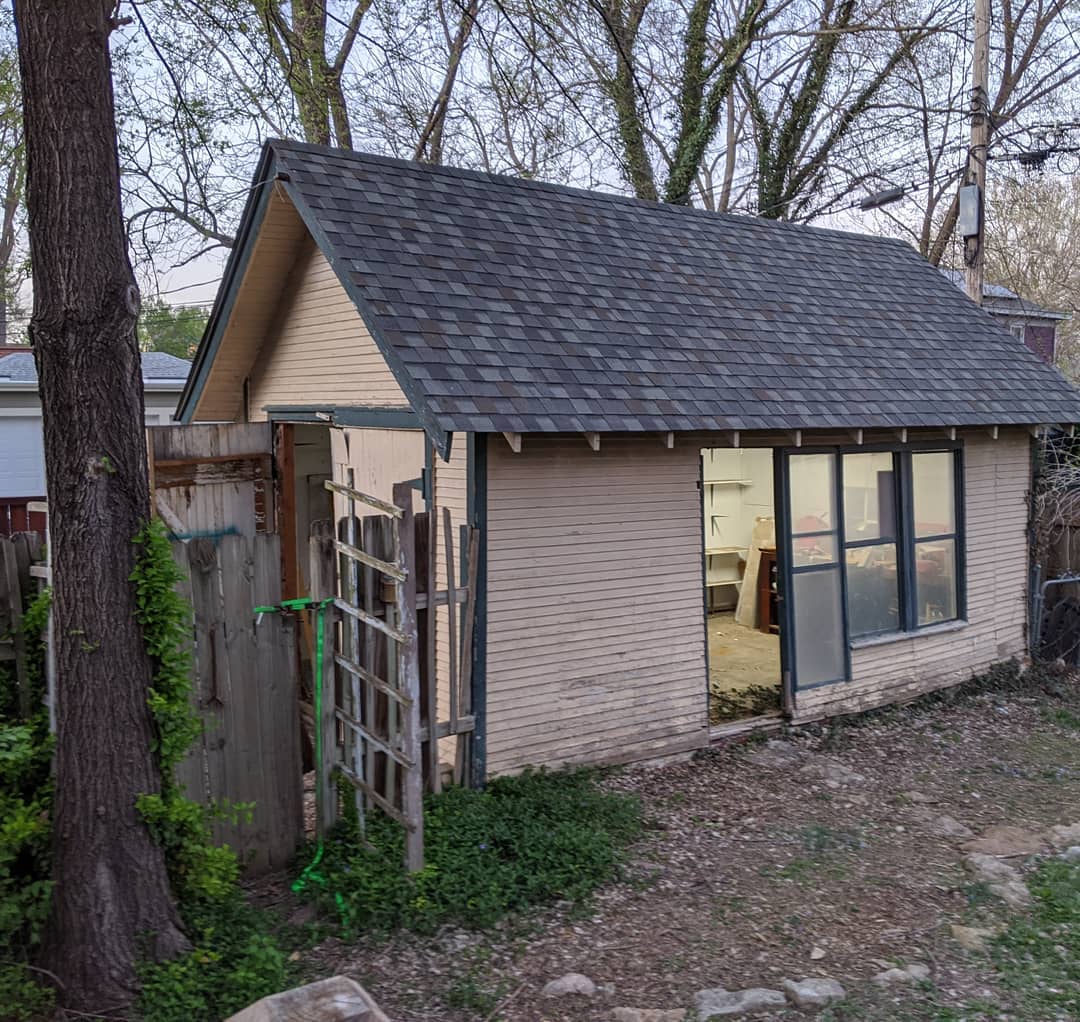
After tearing down the fence and removing the Siberian Elm tree:
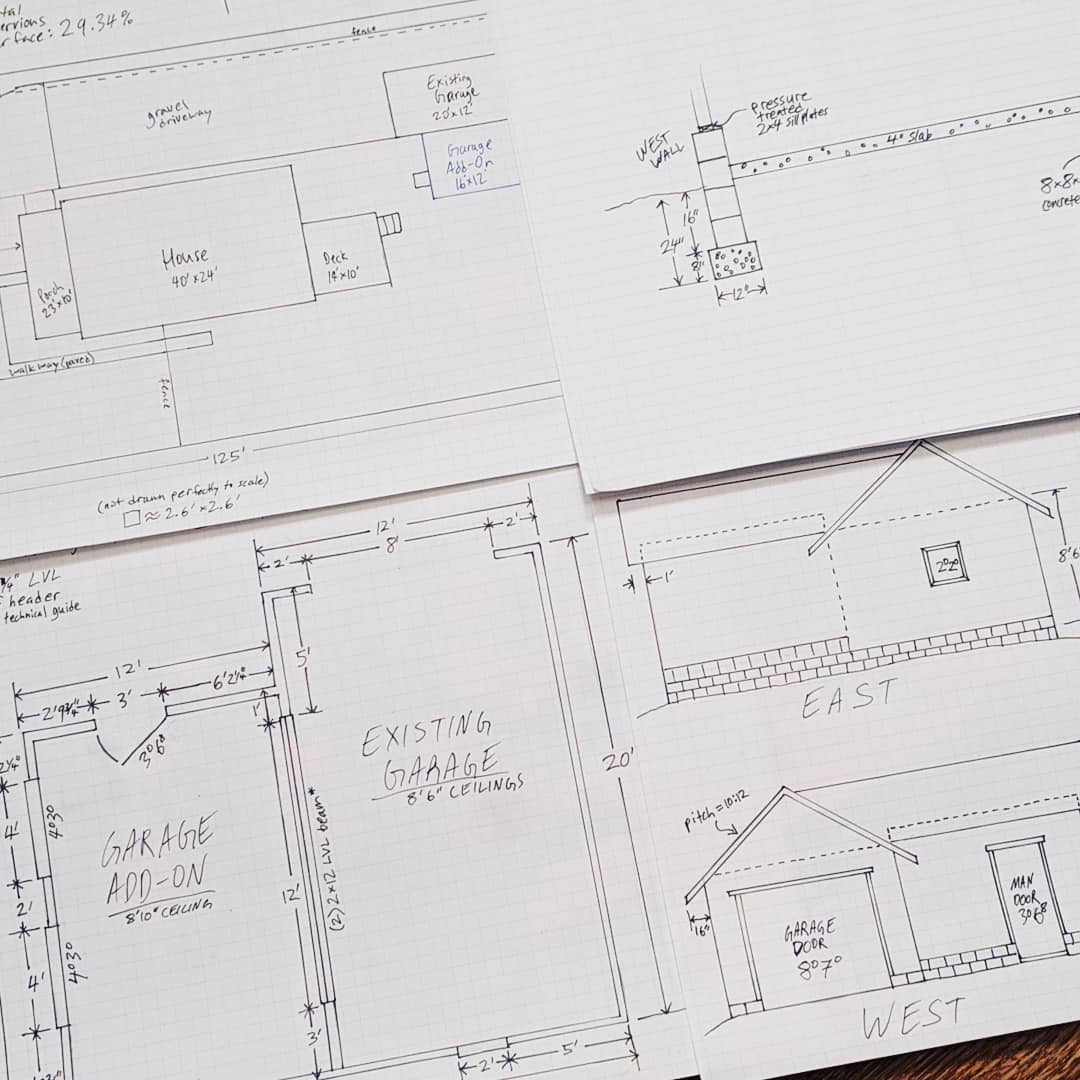
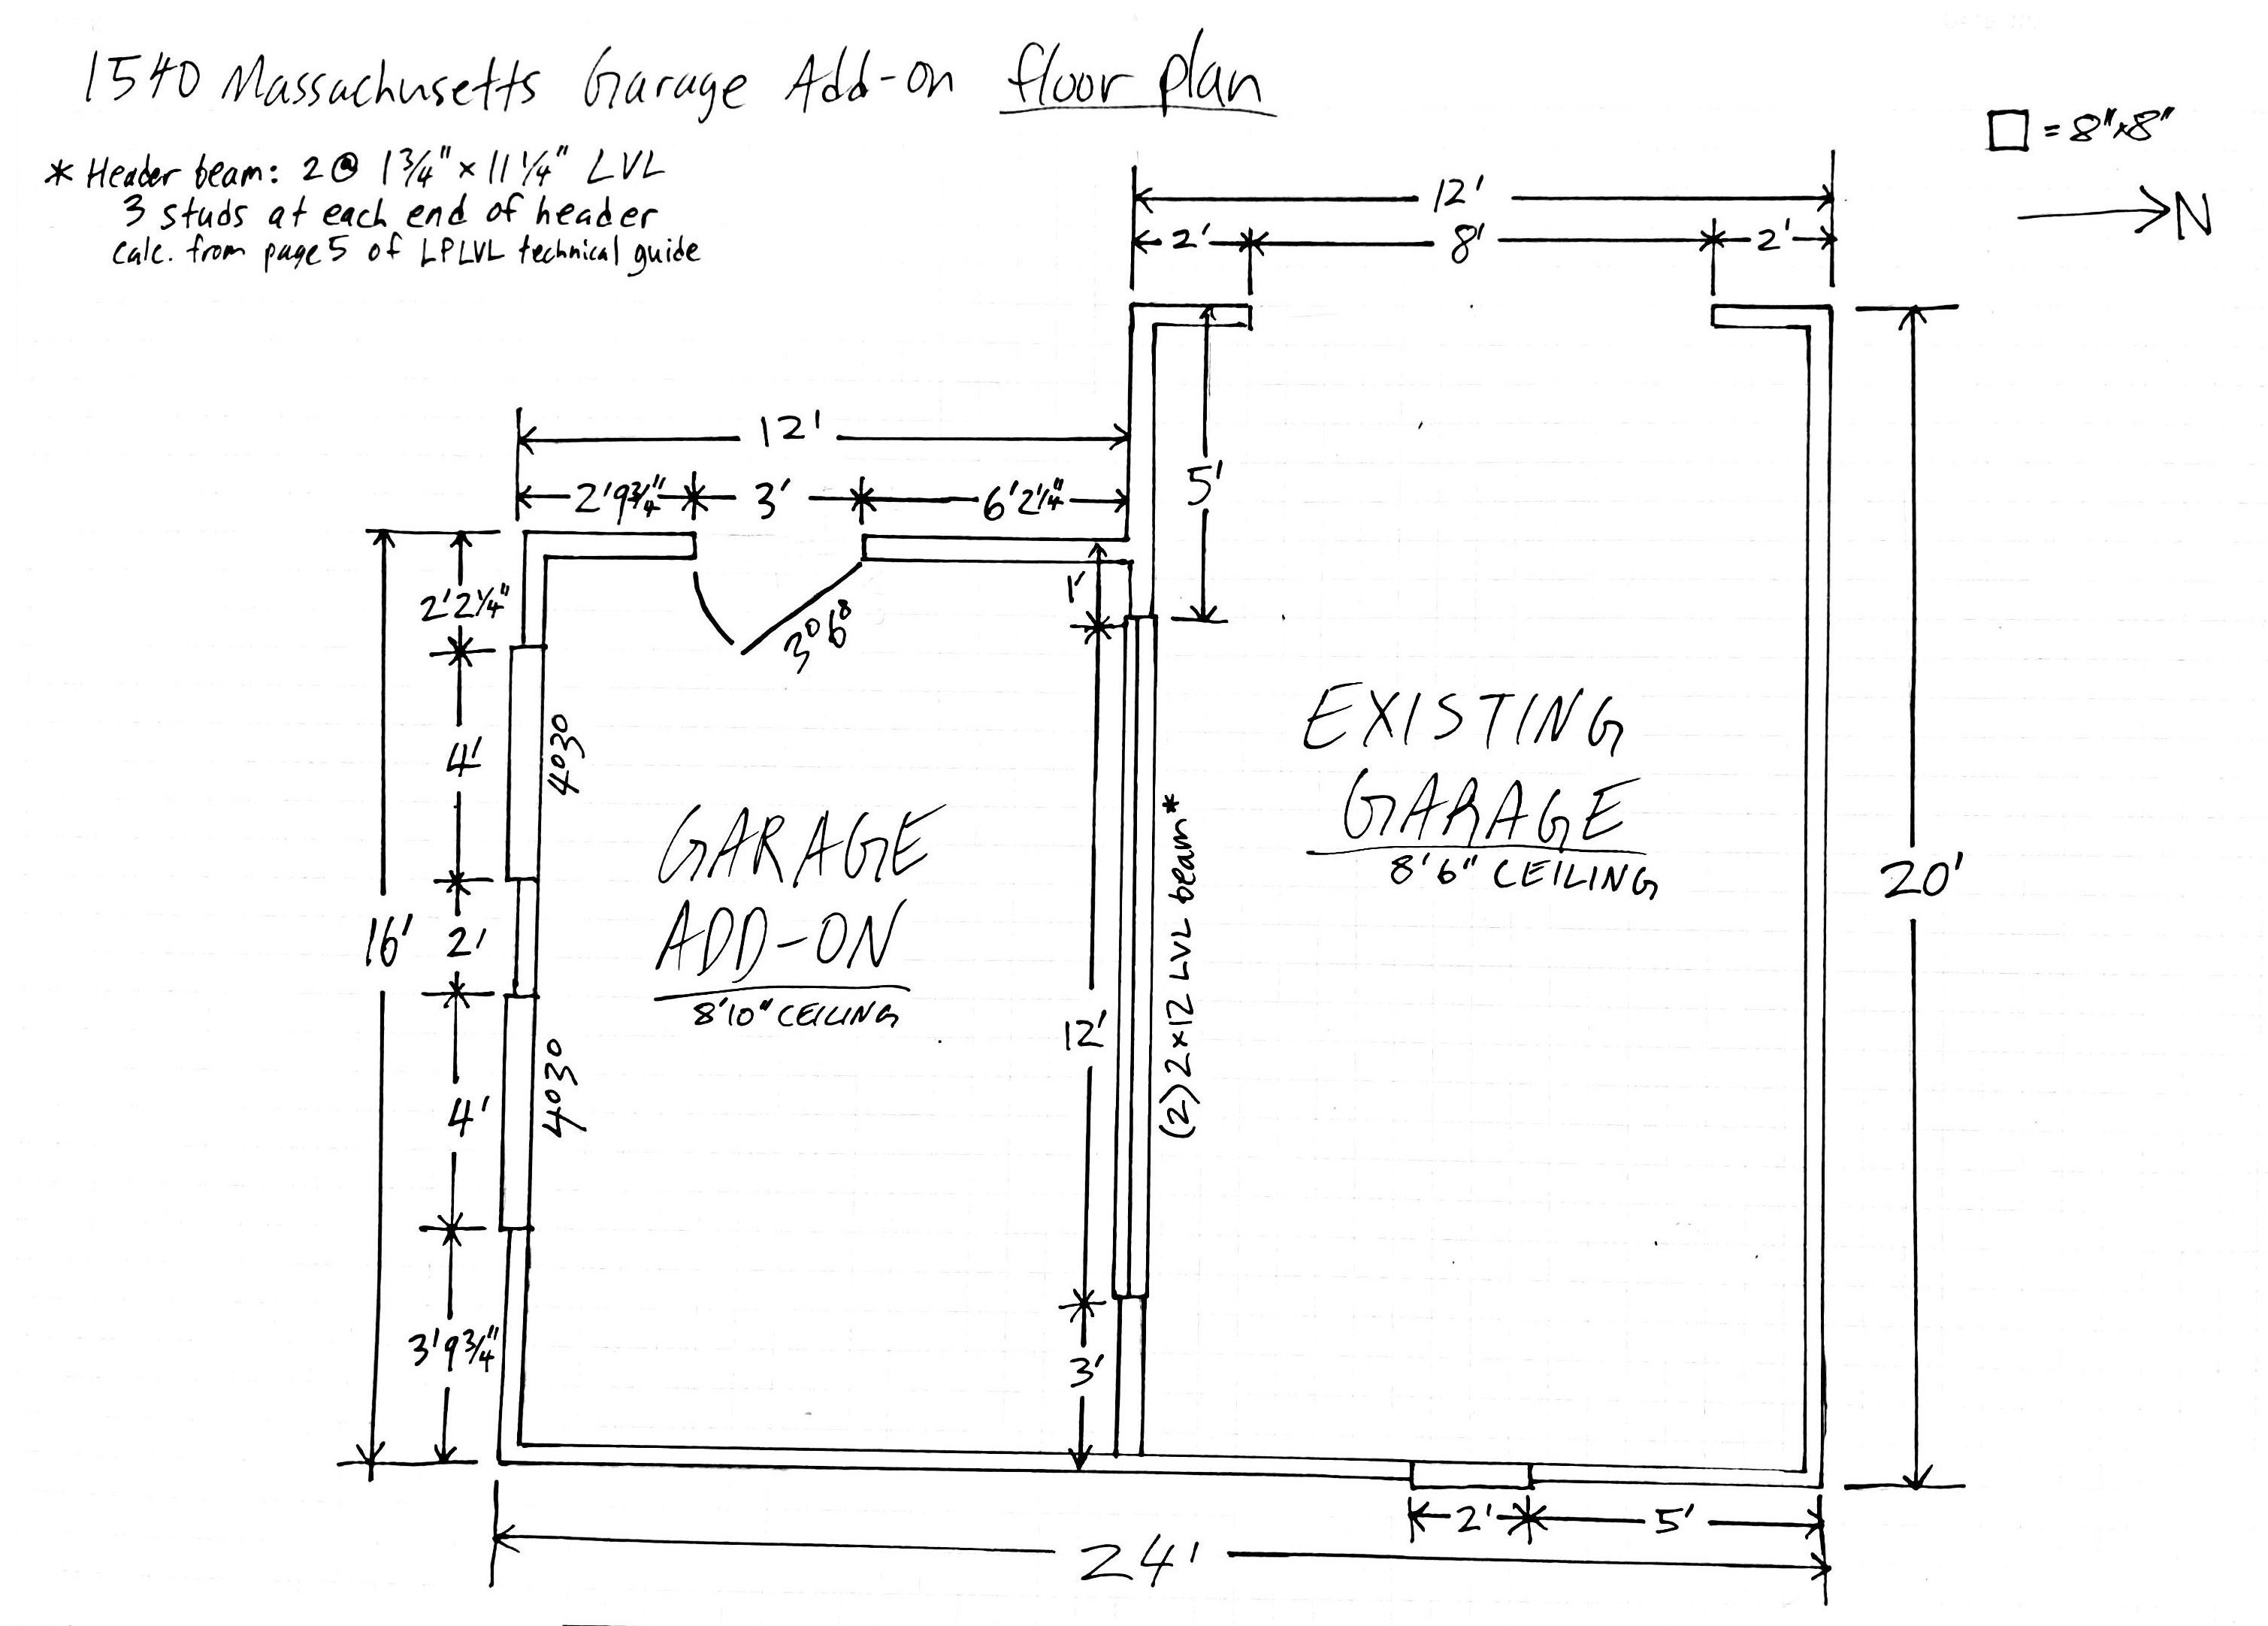
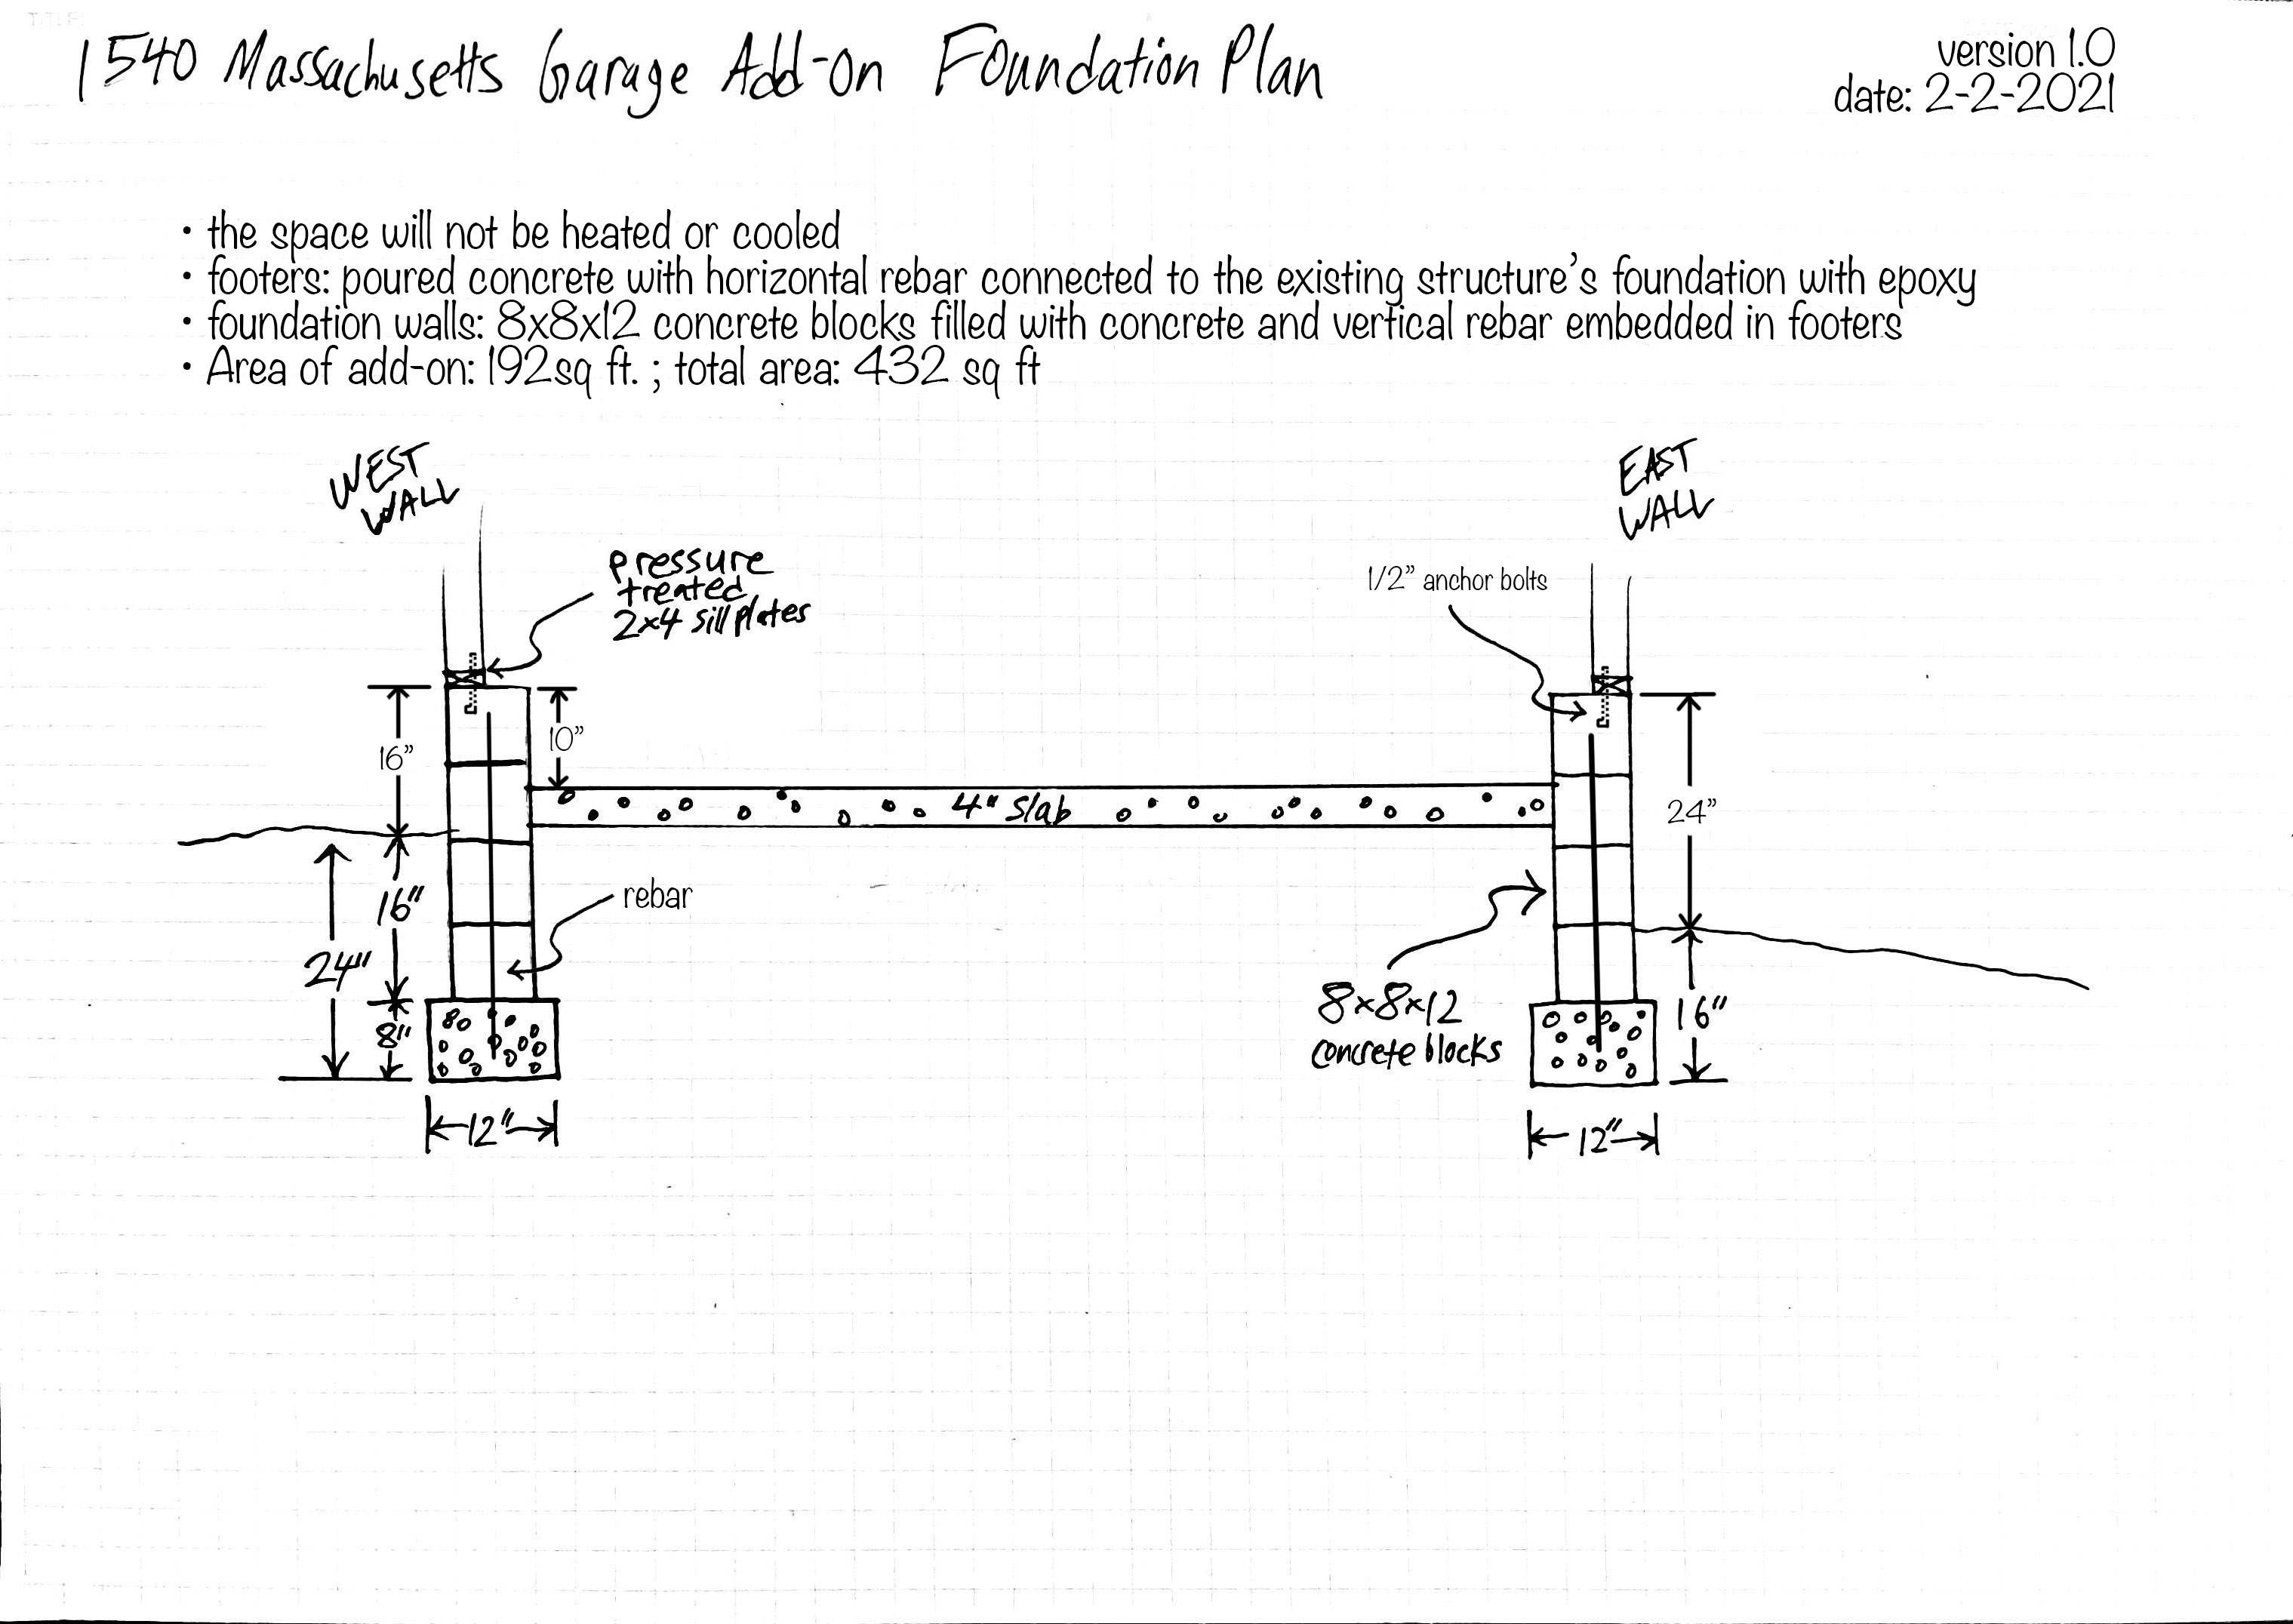
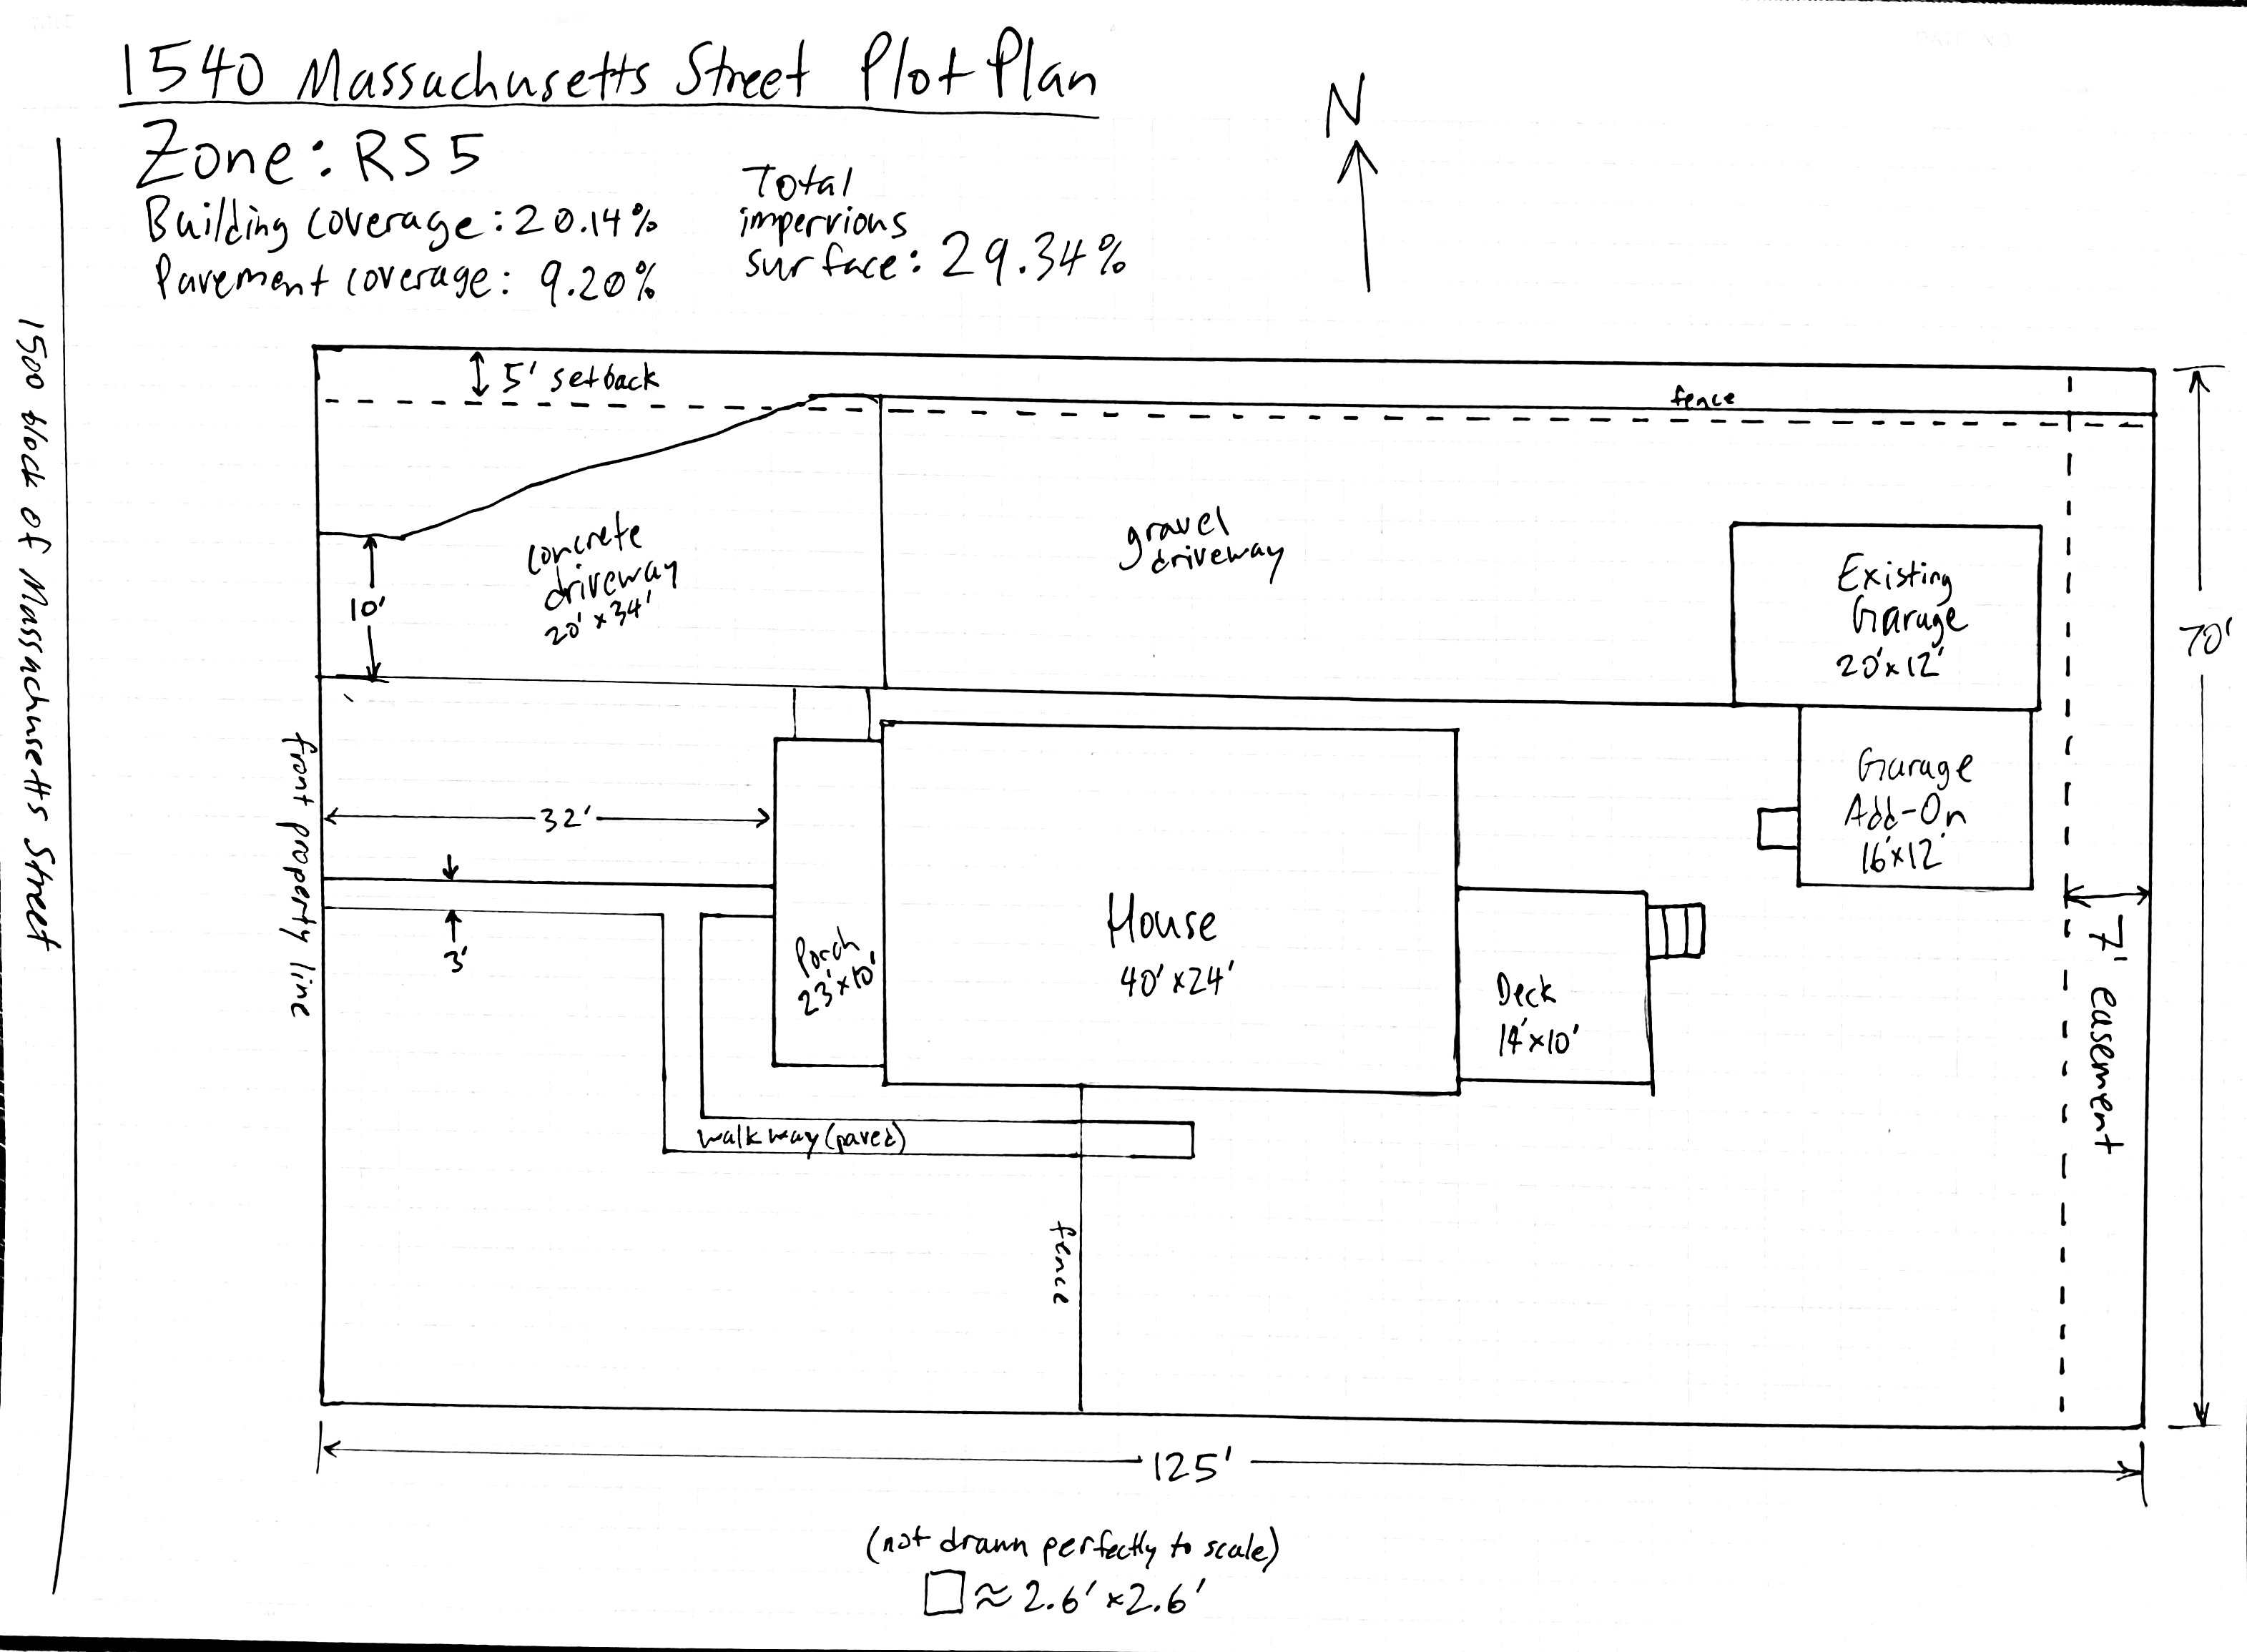
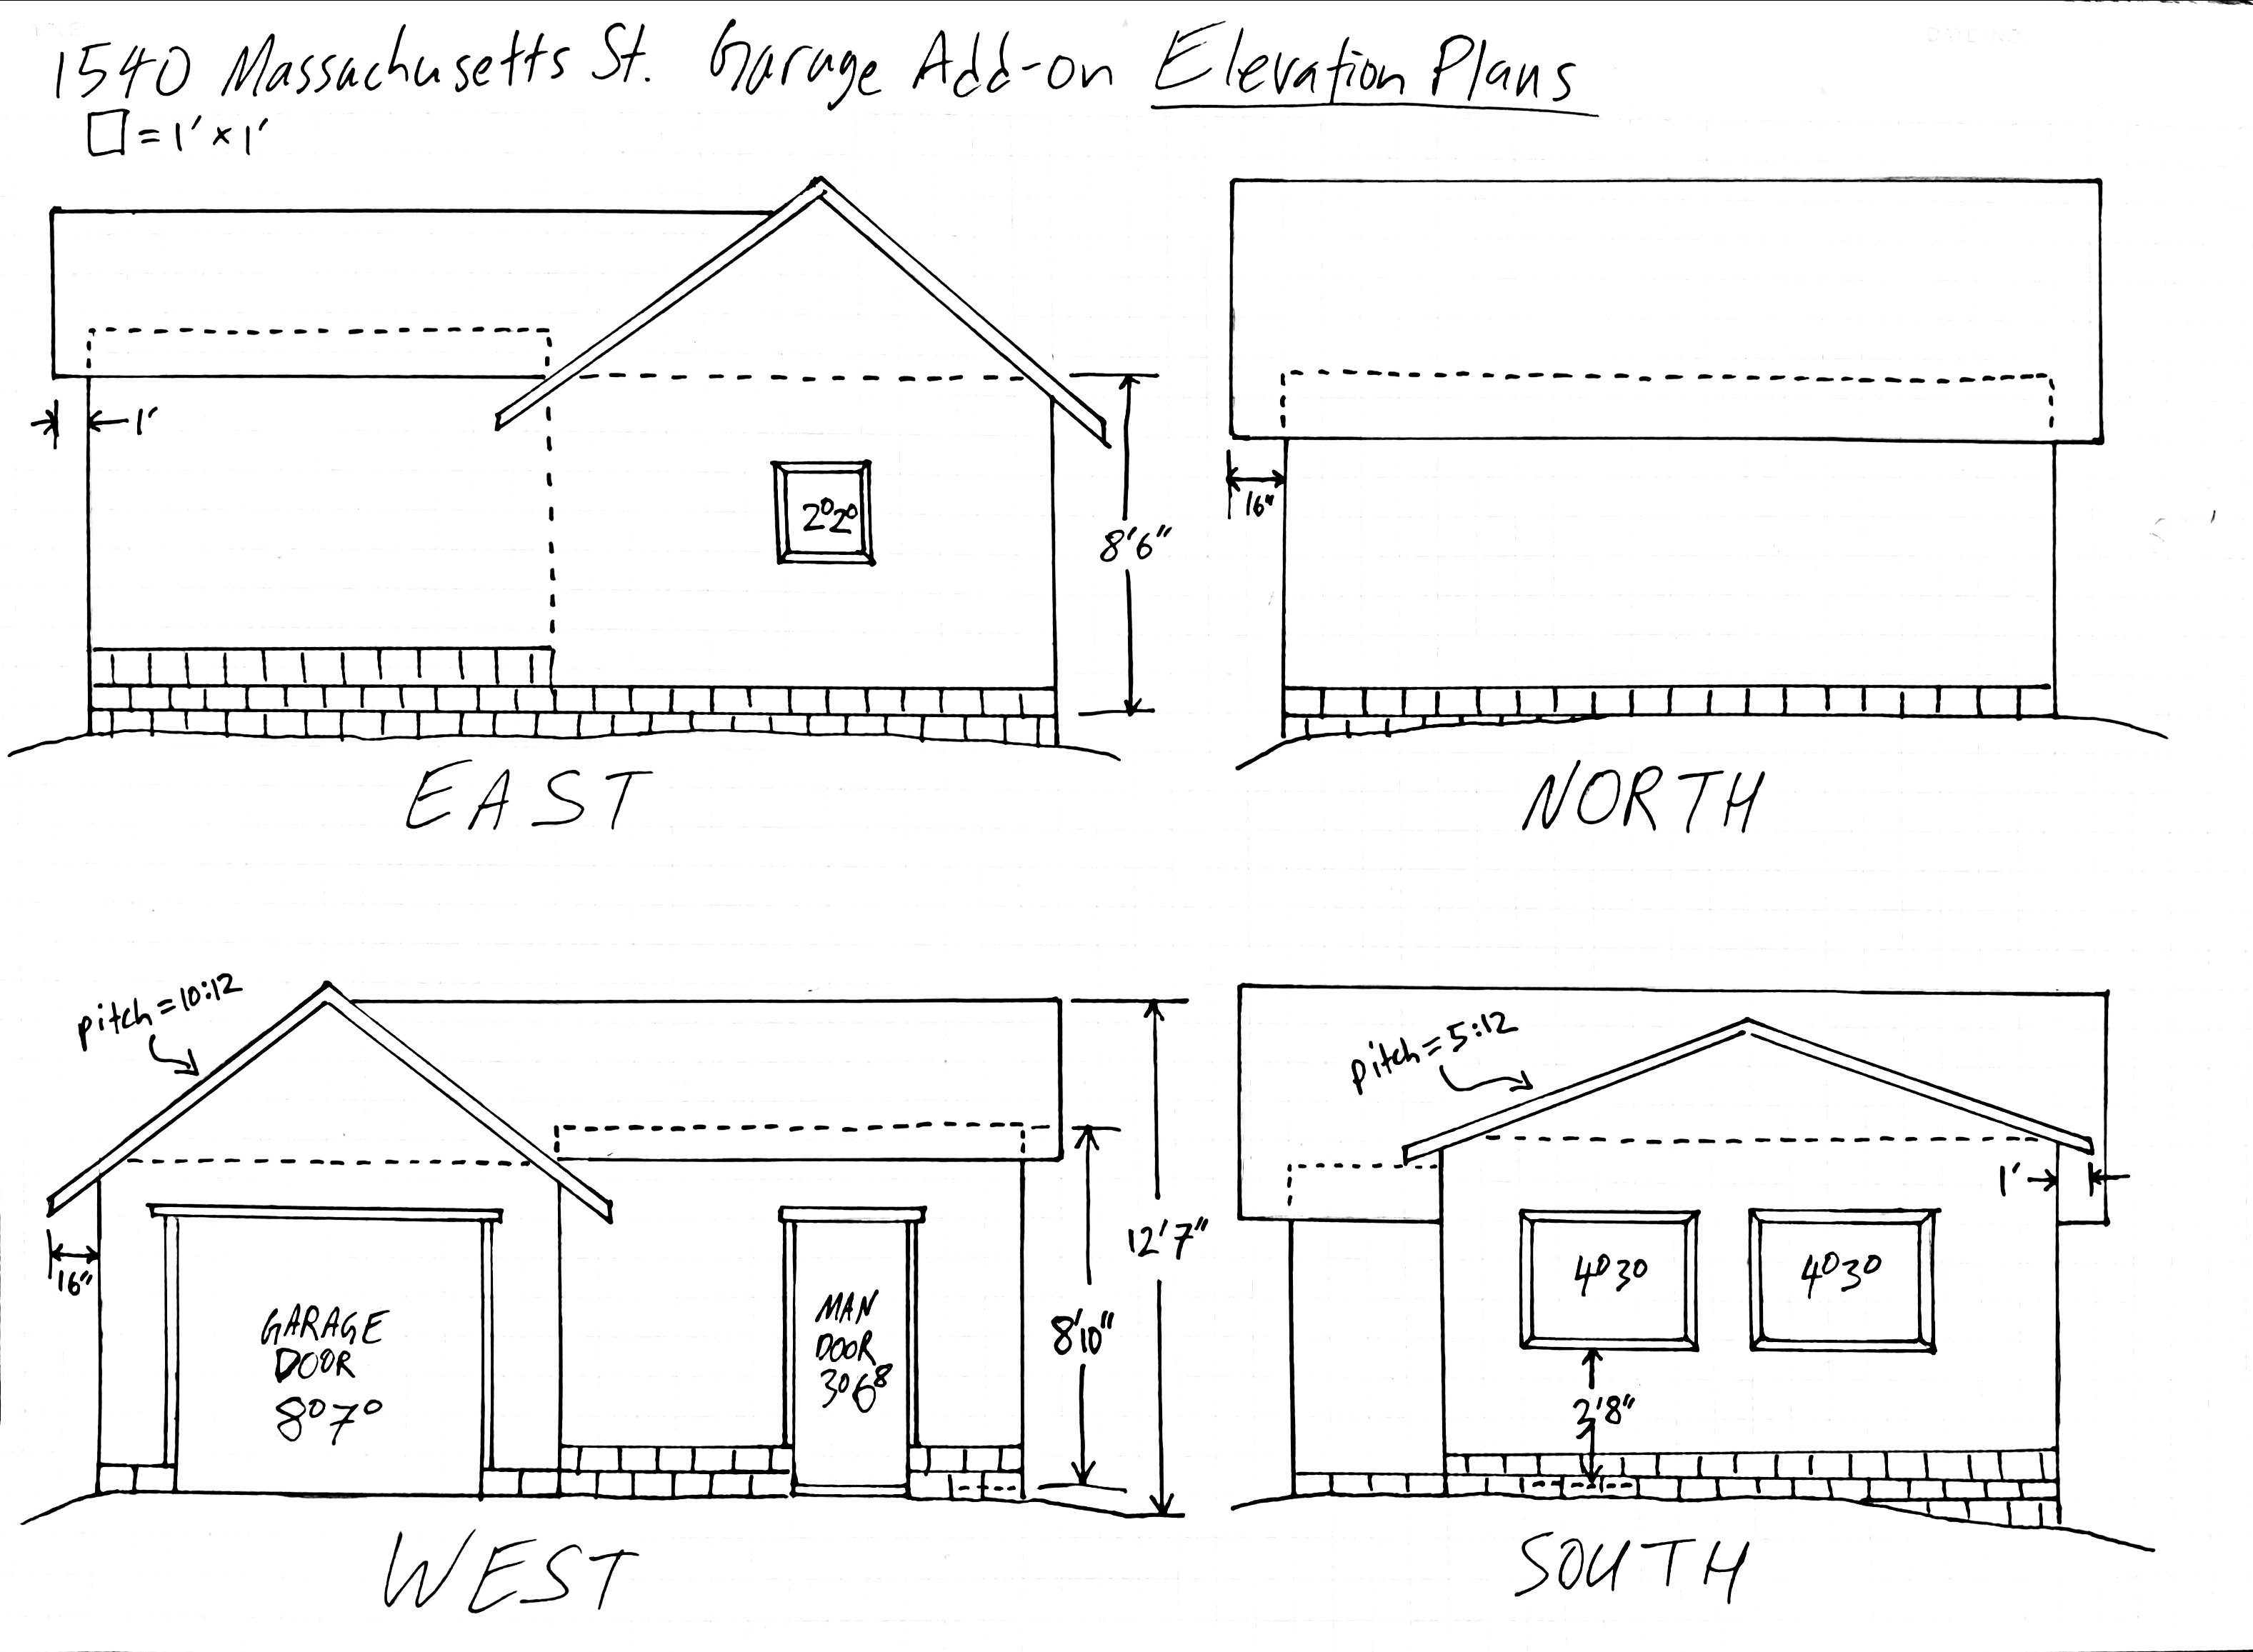
The Plans
Here's the plans that I drew myself and submitted to the city to get the permit:
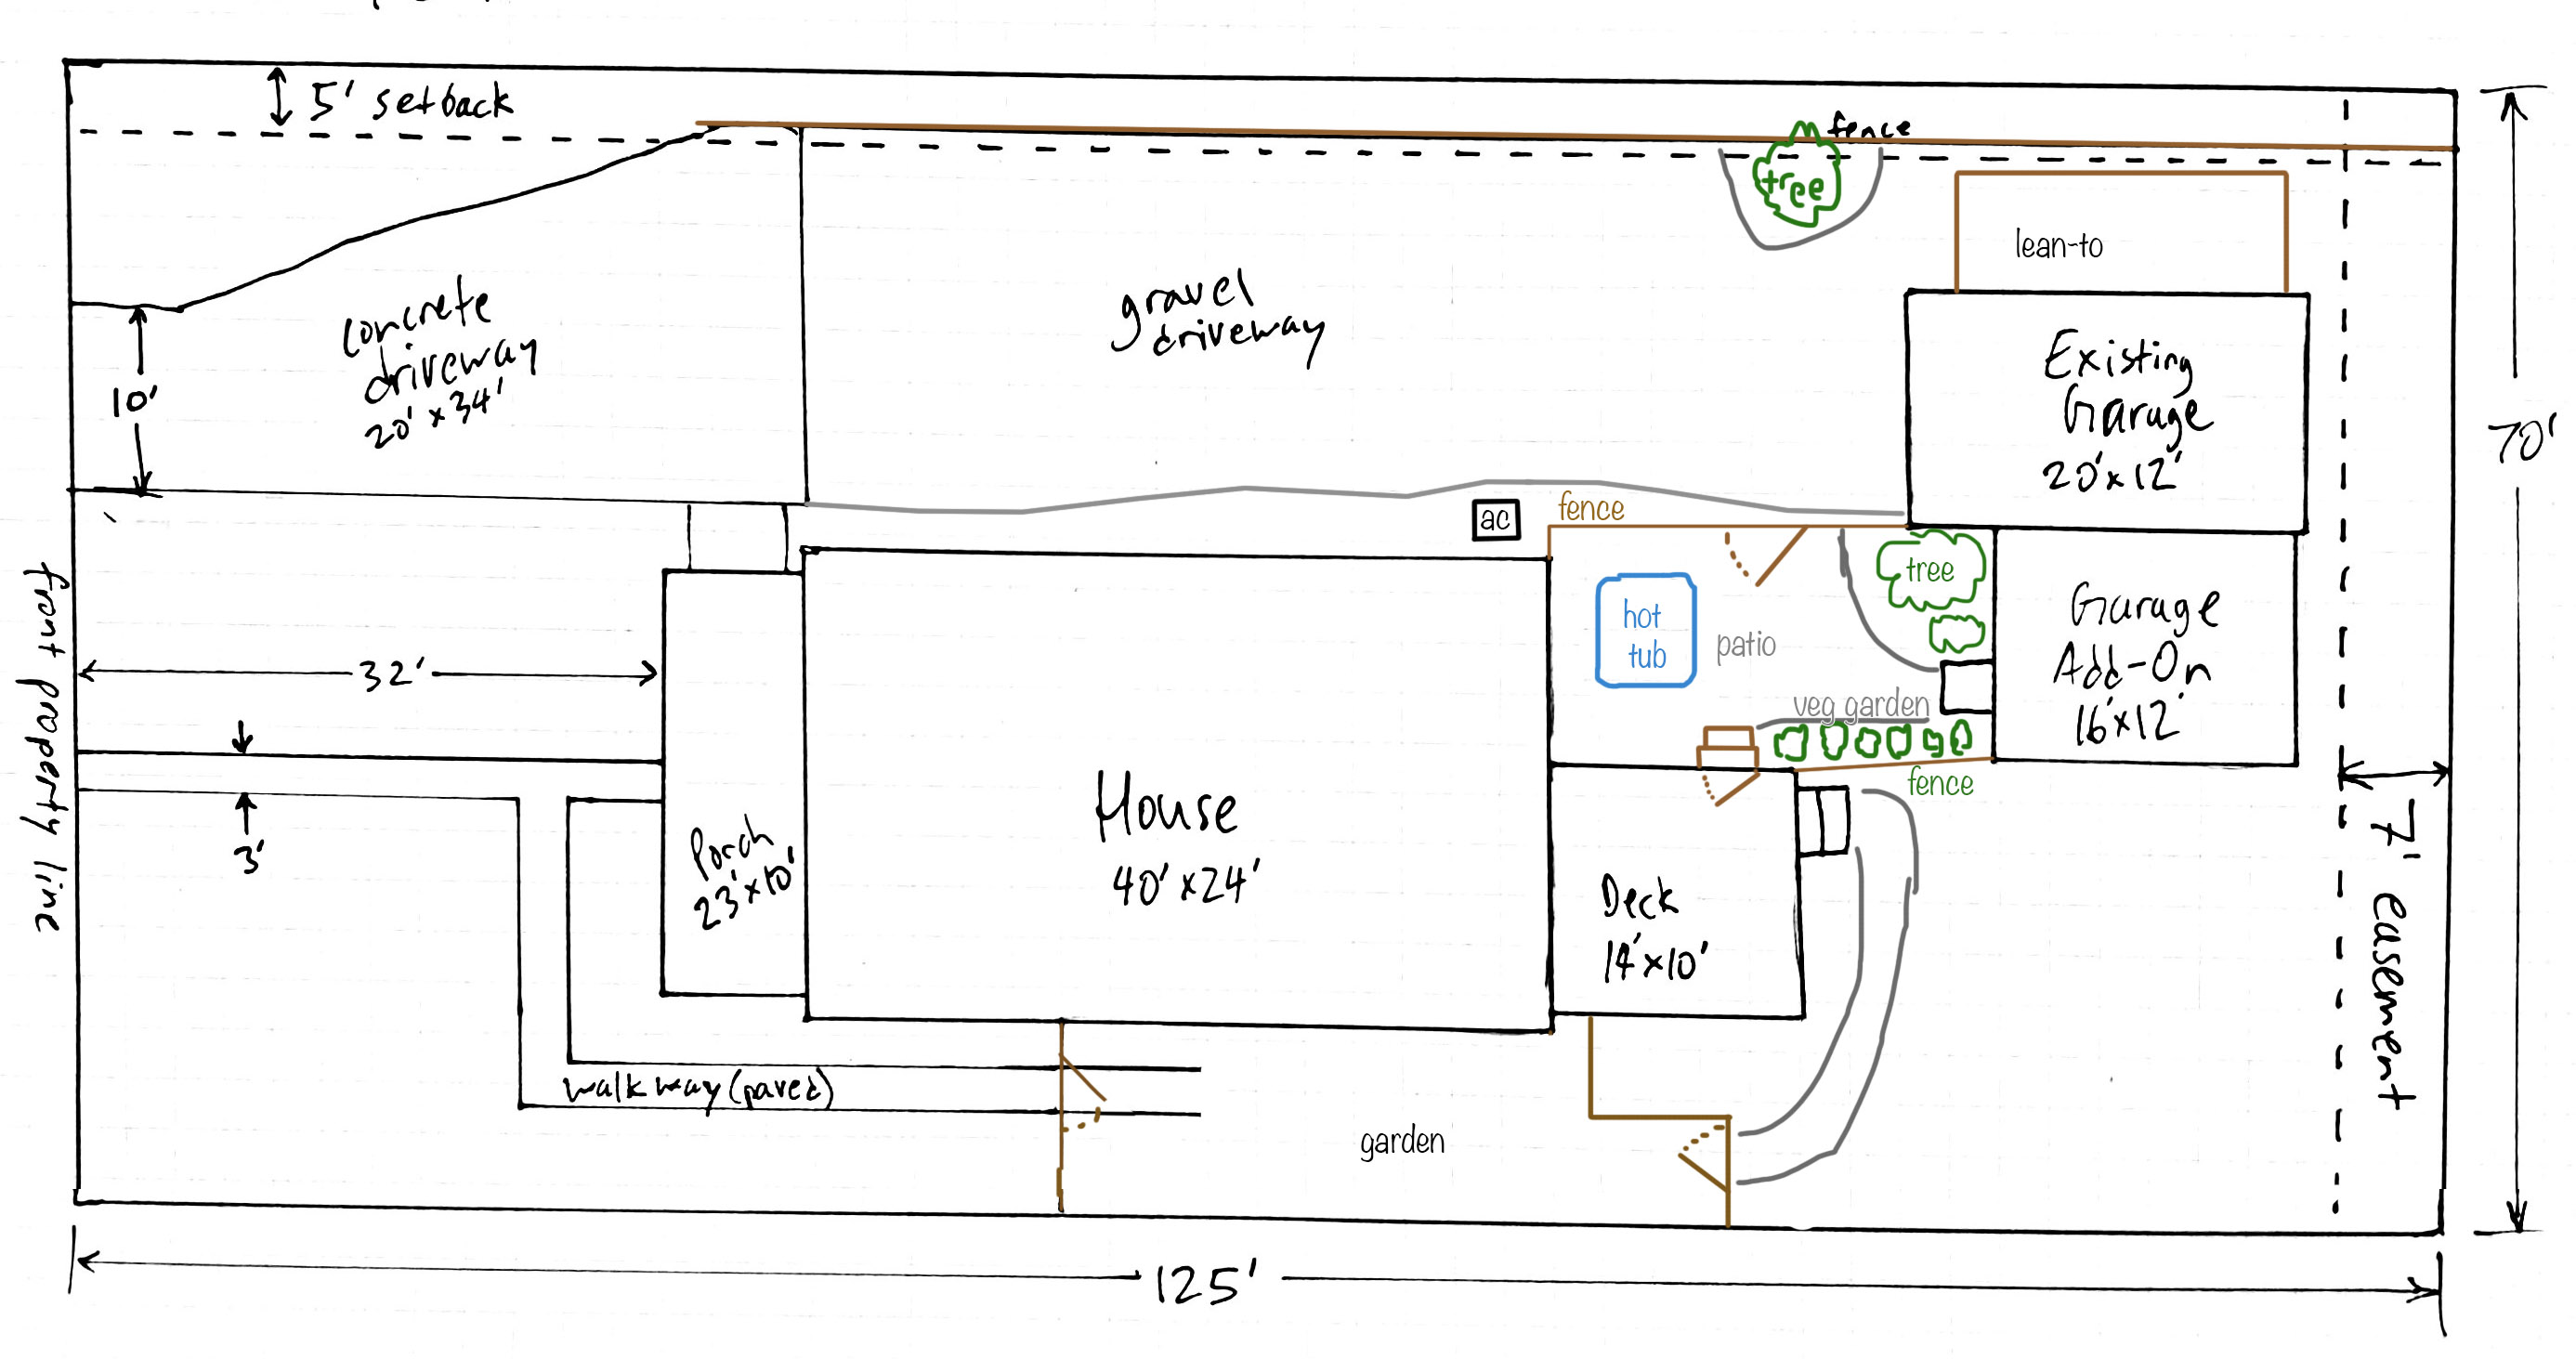
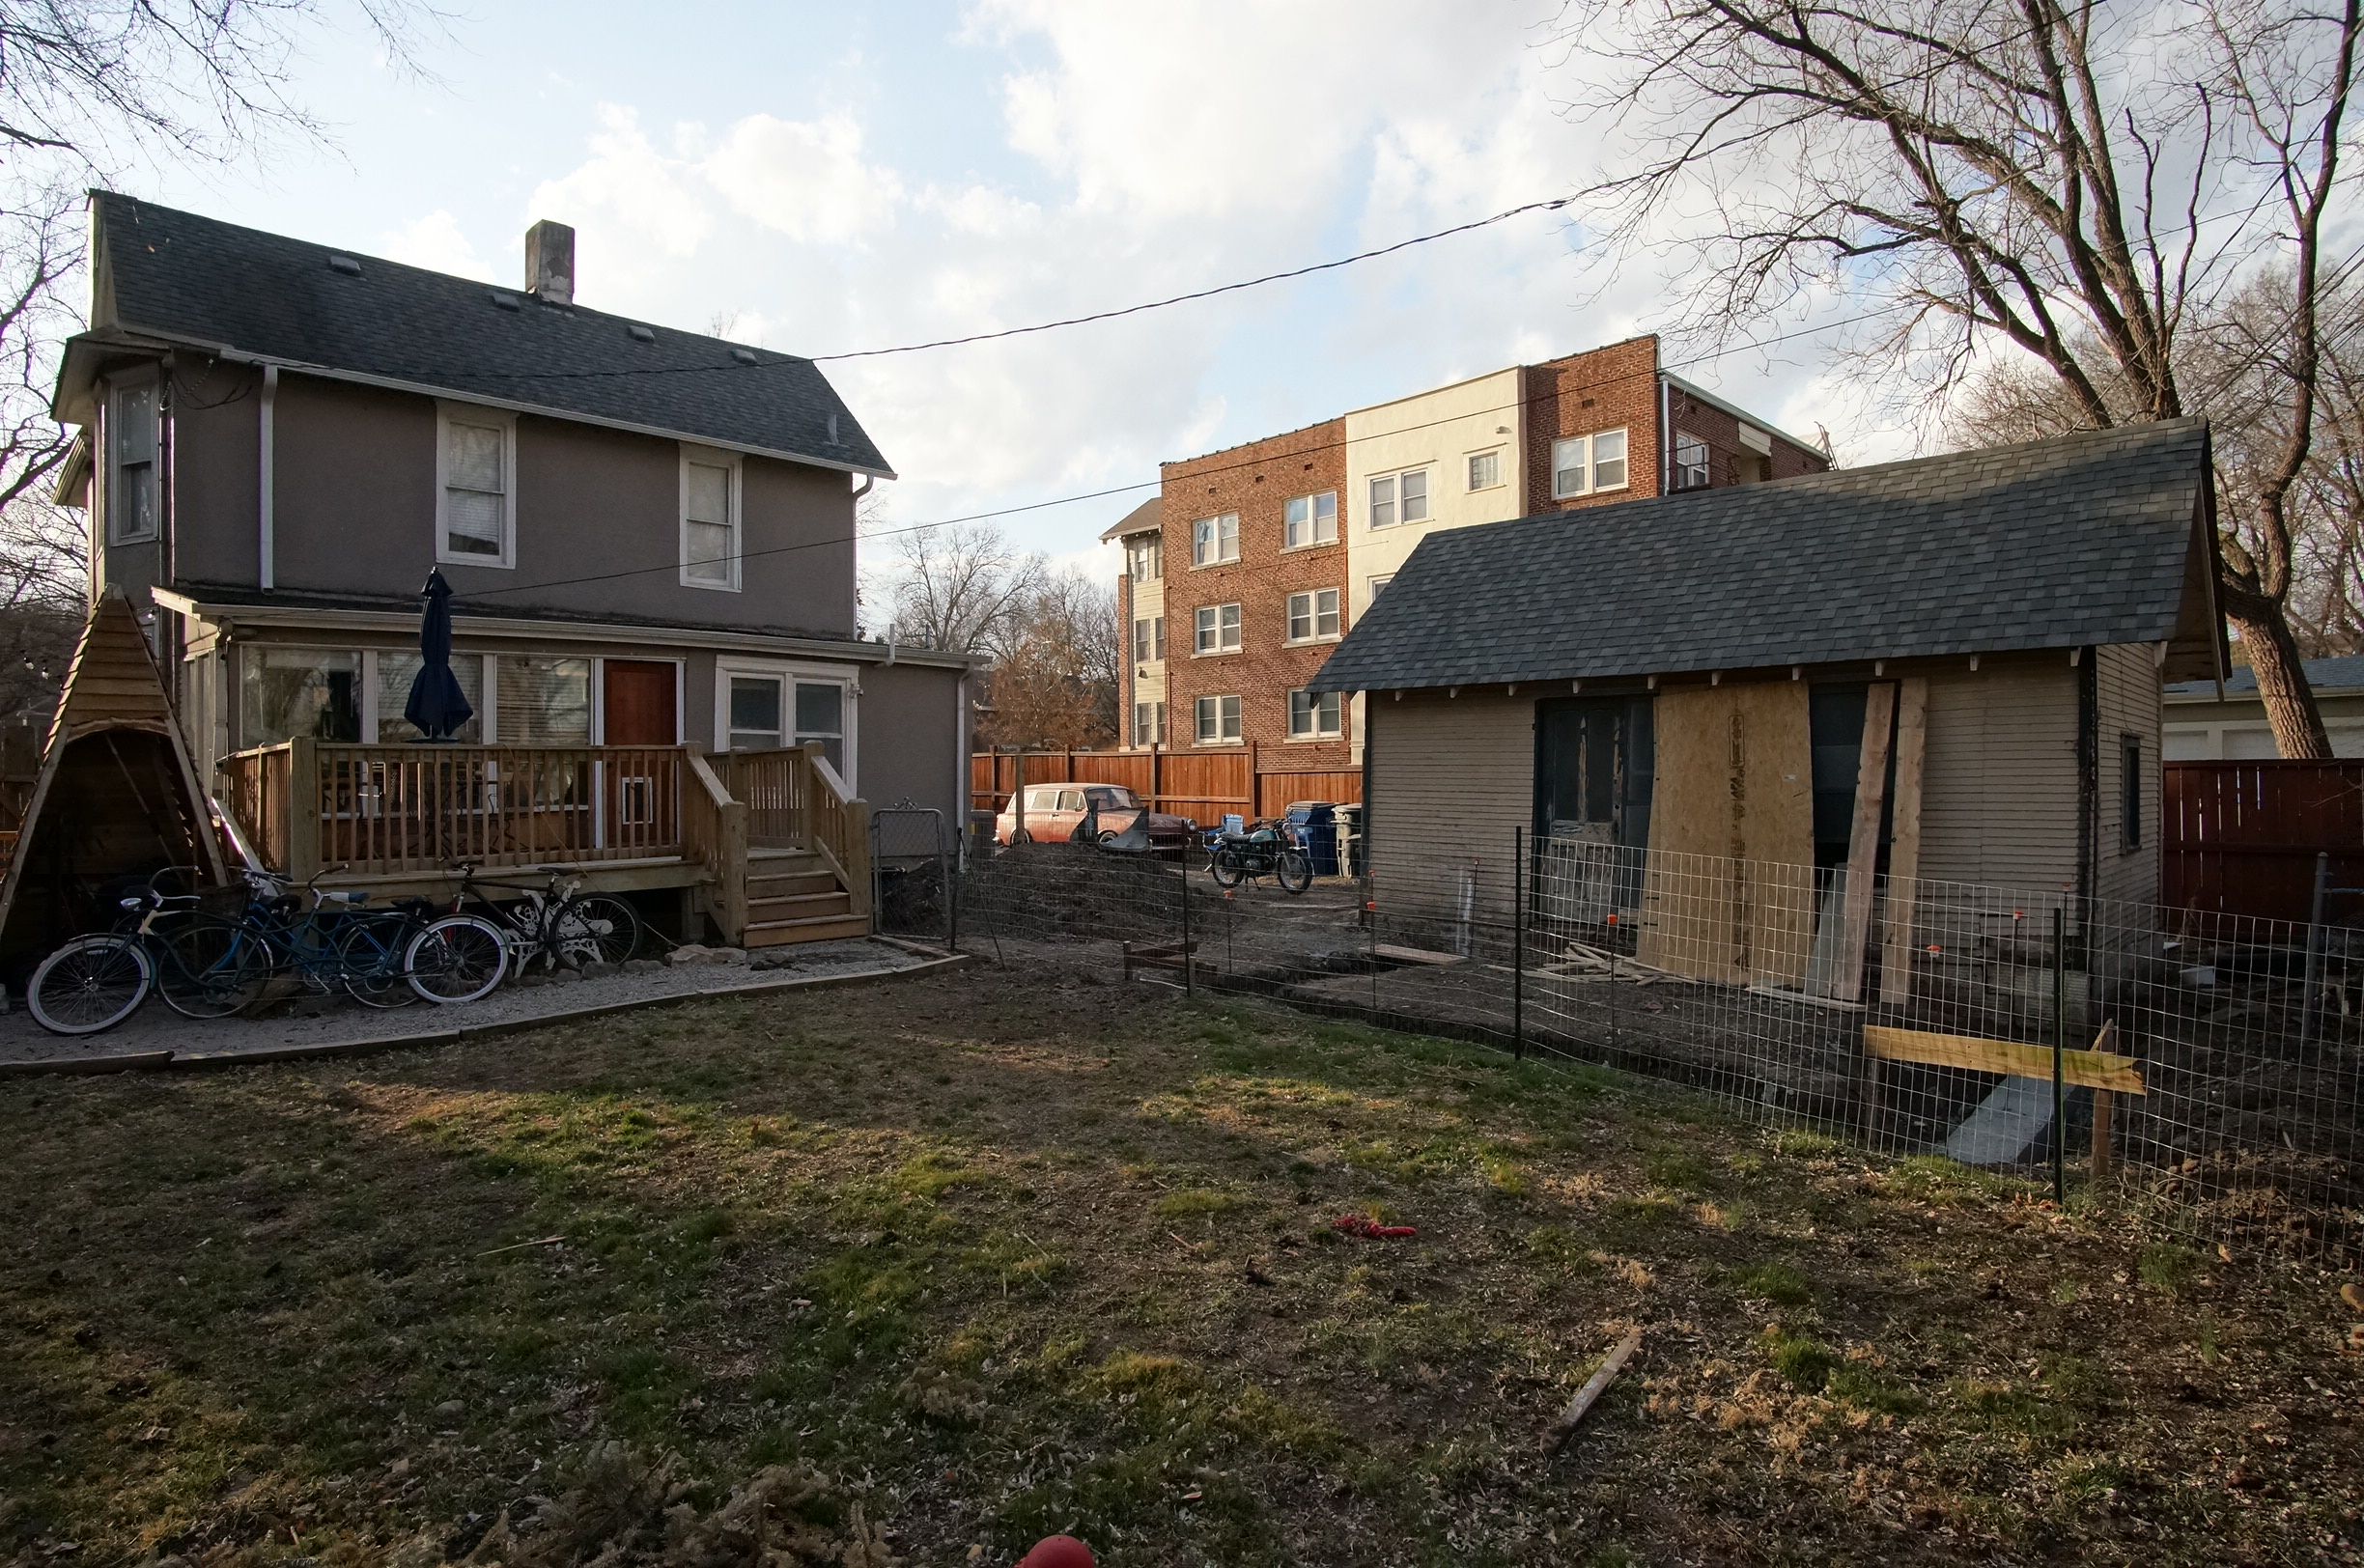
All finished, the property could look something like this:
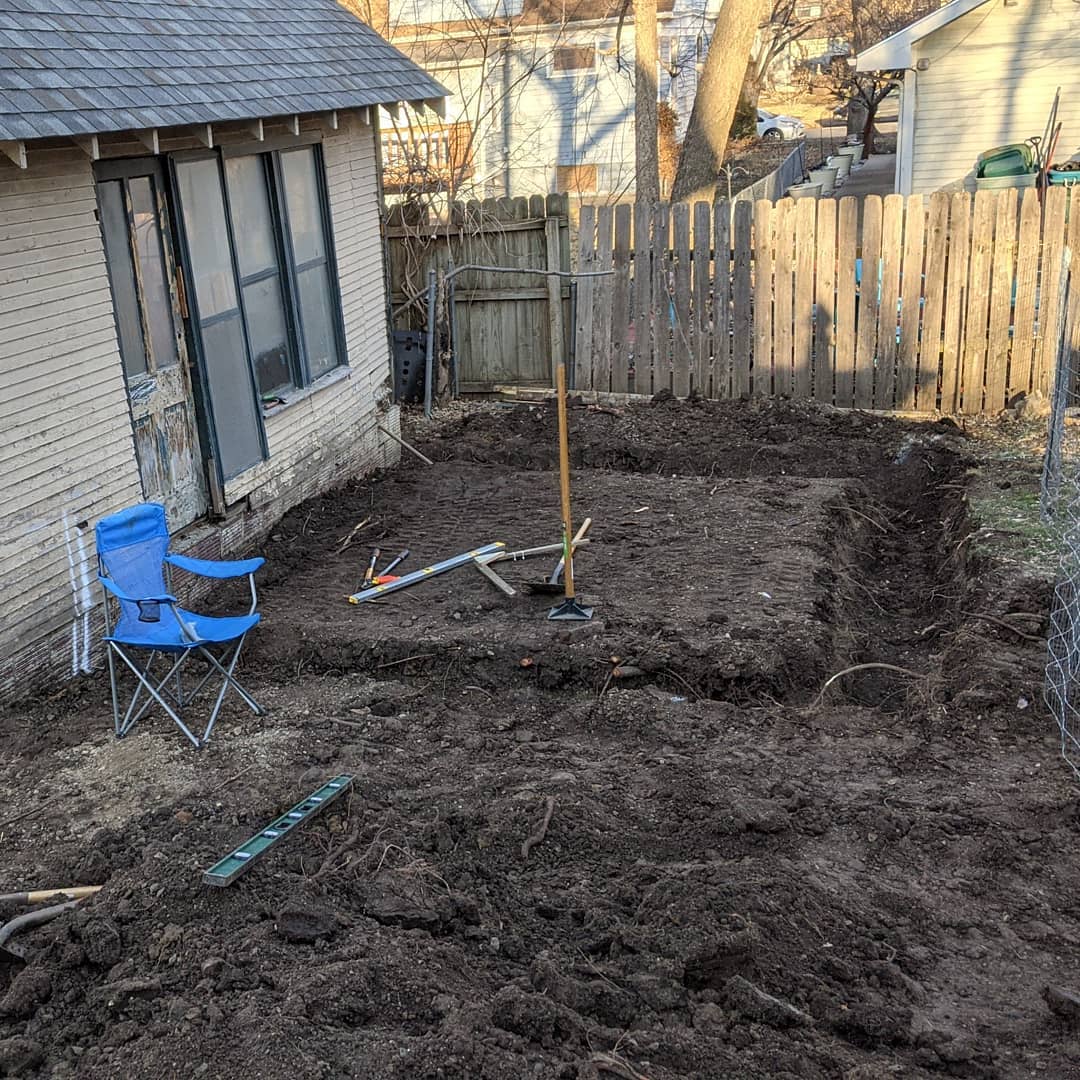
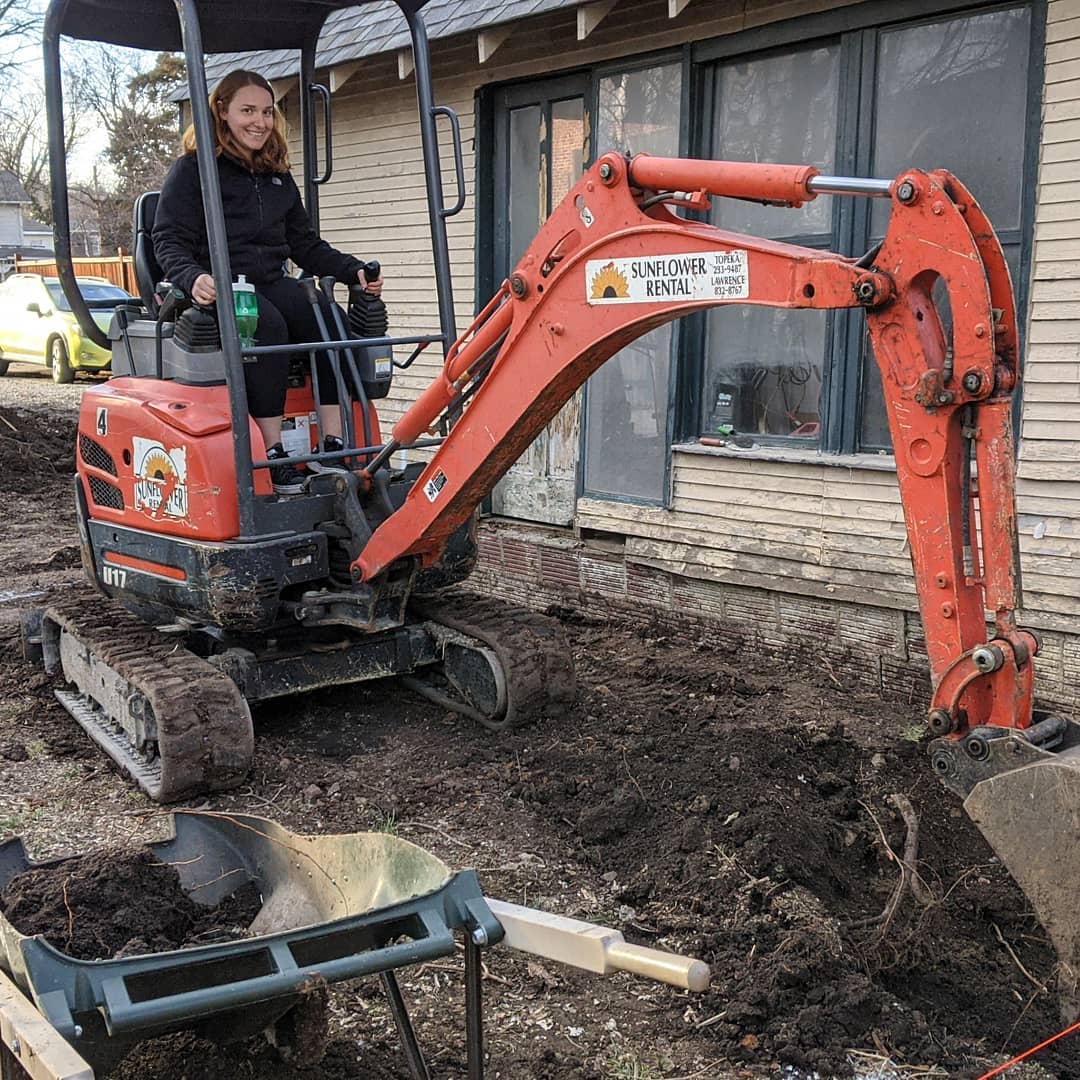
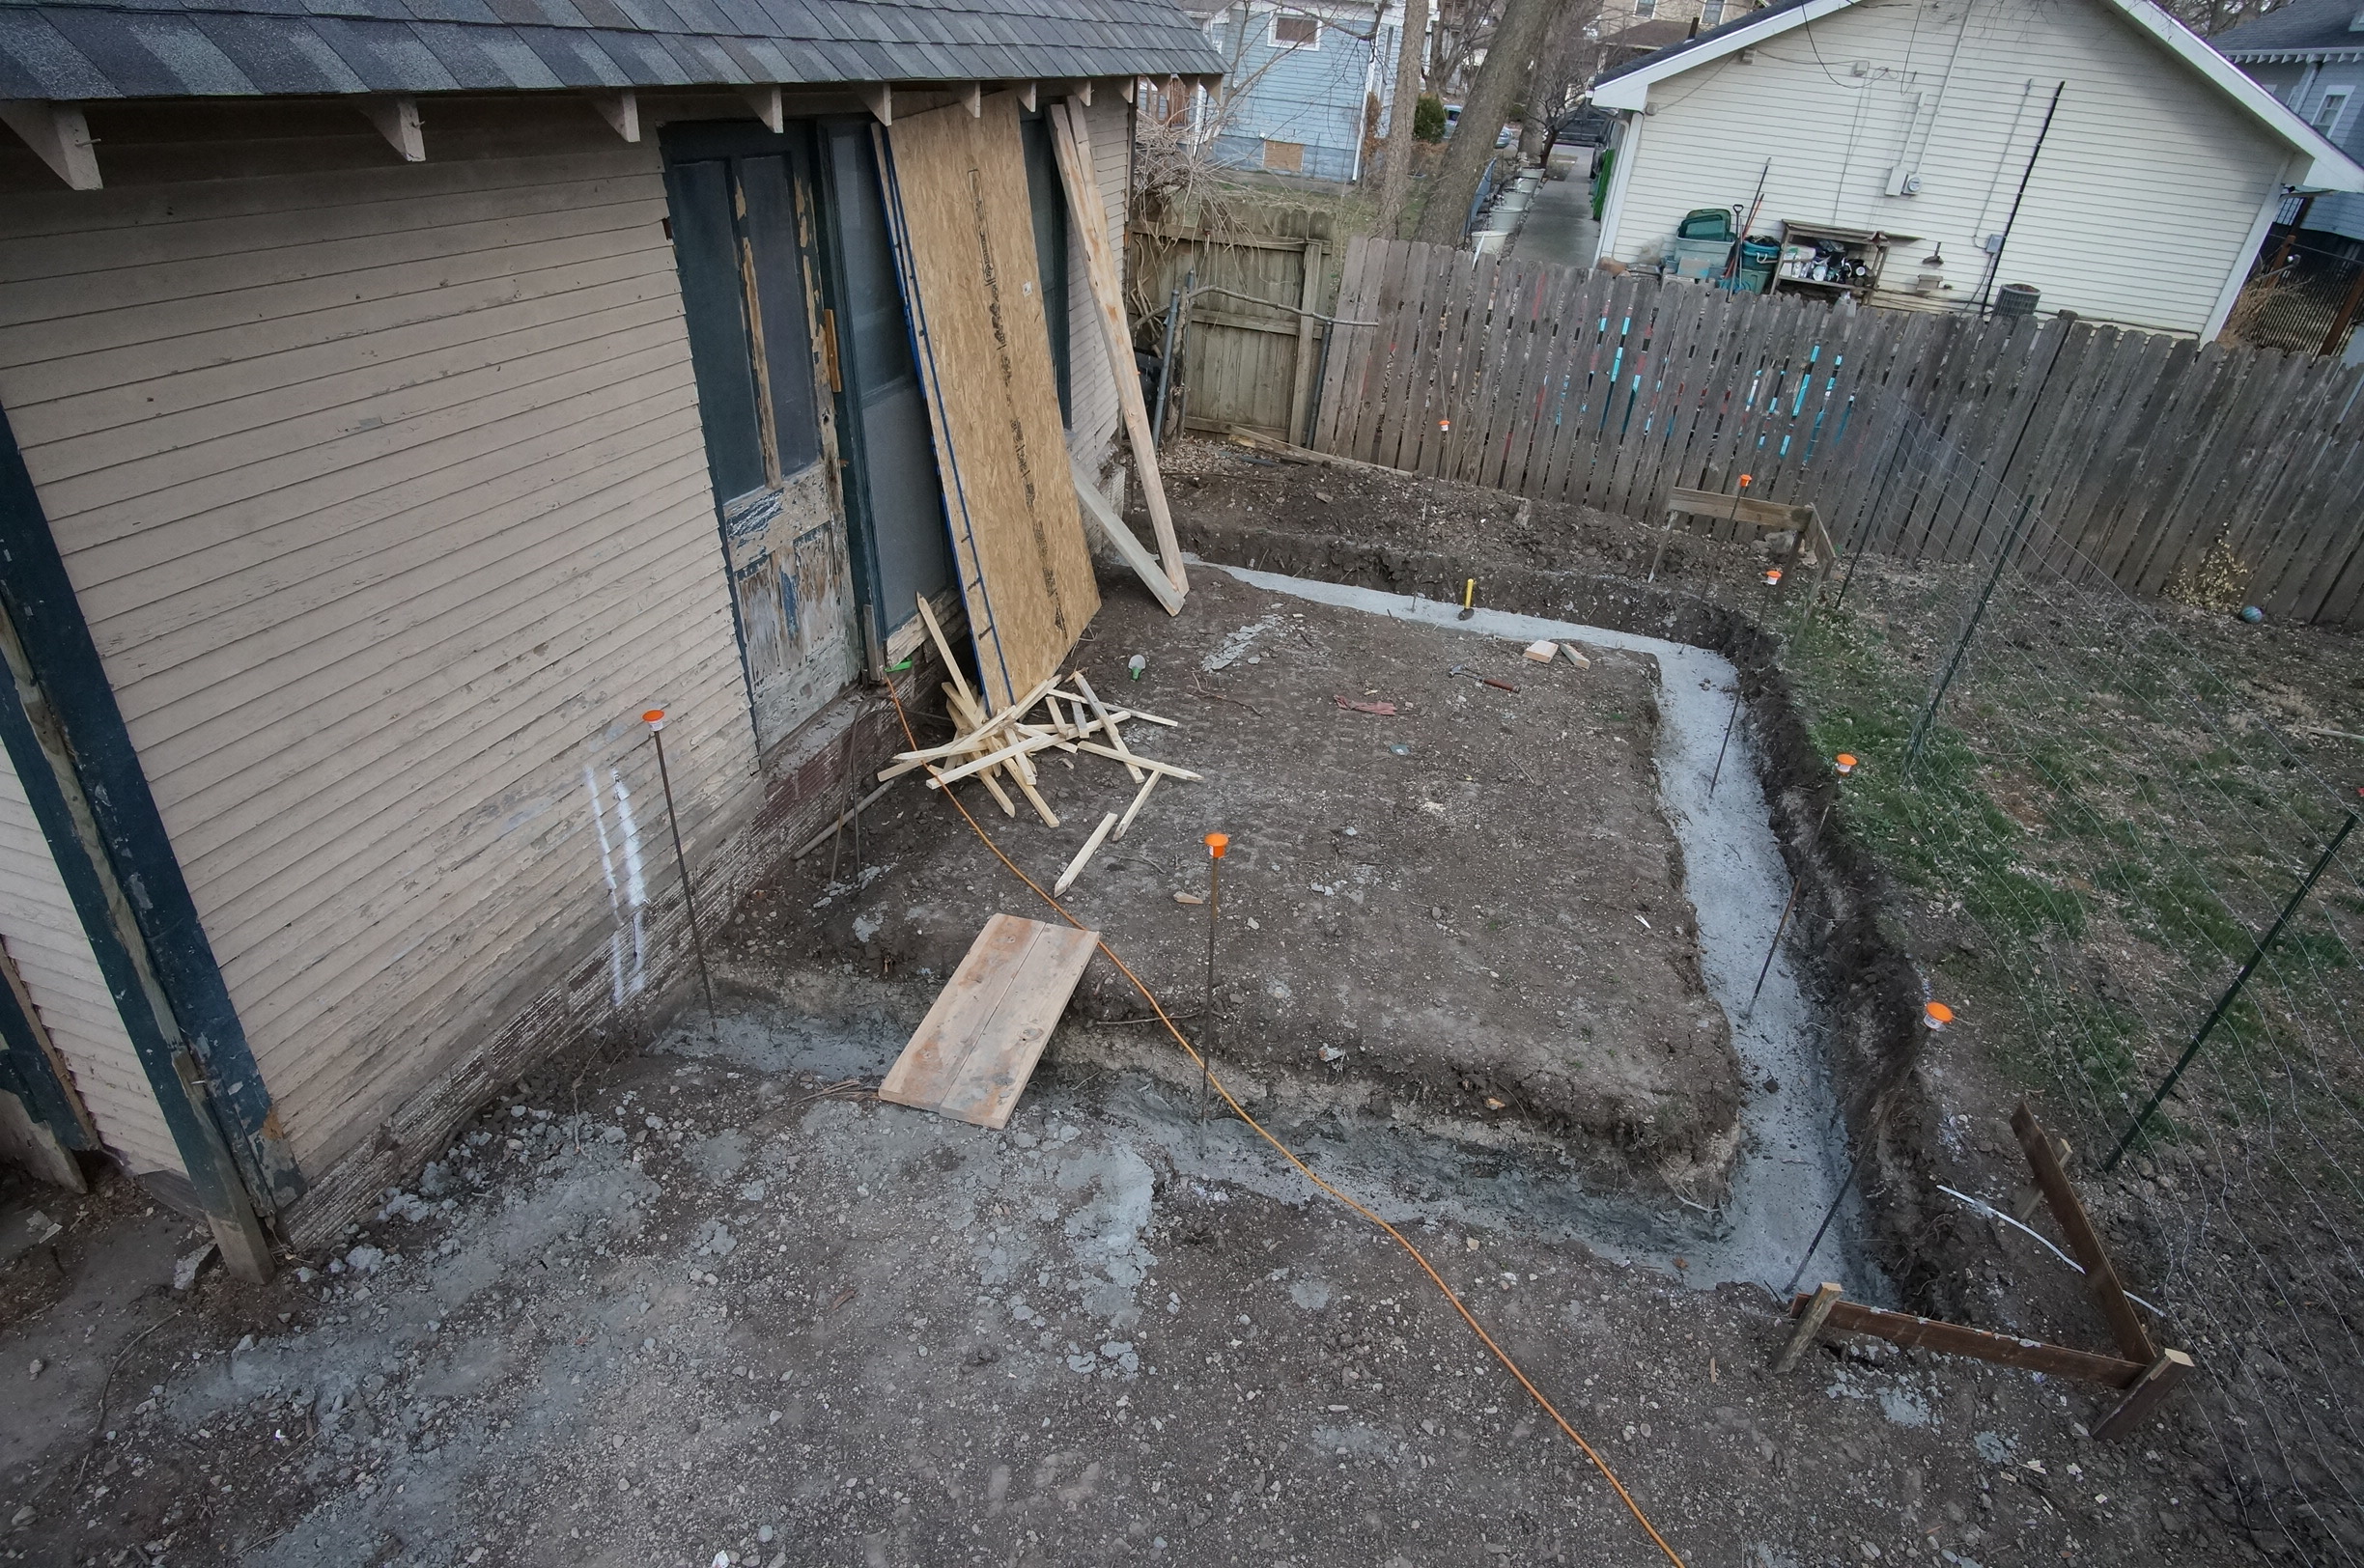
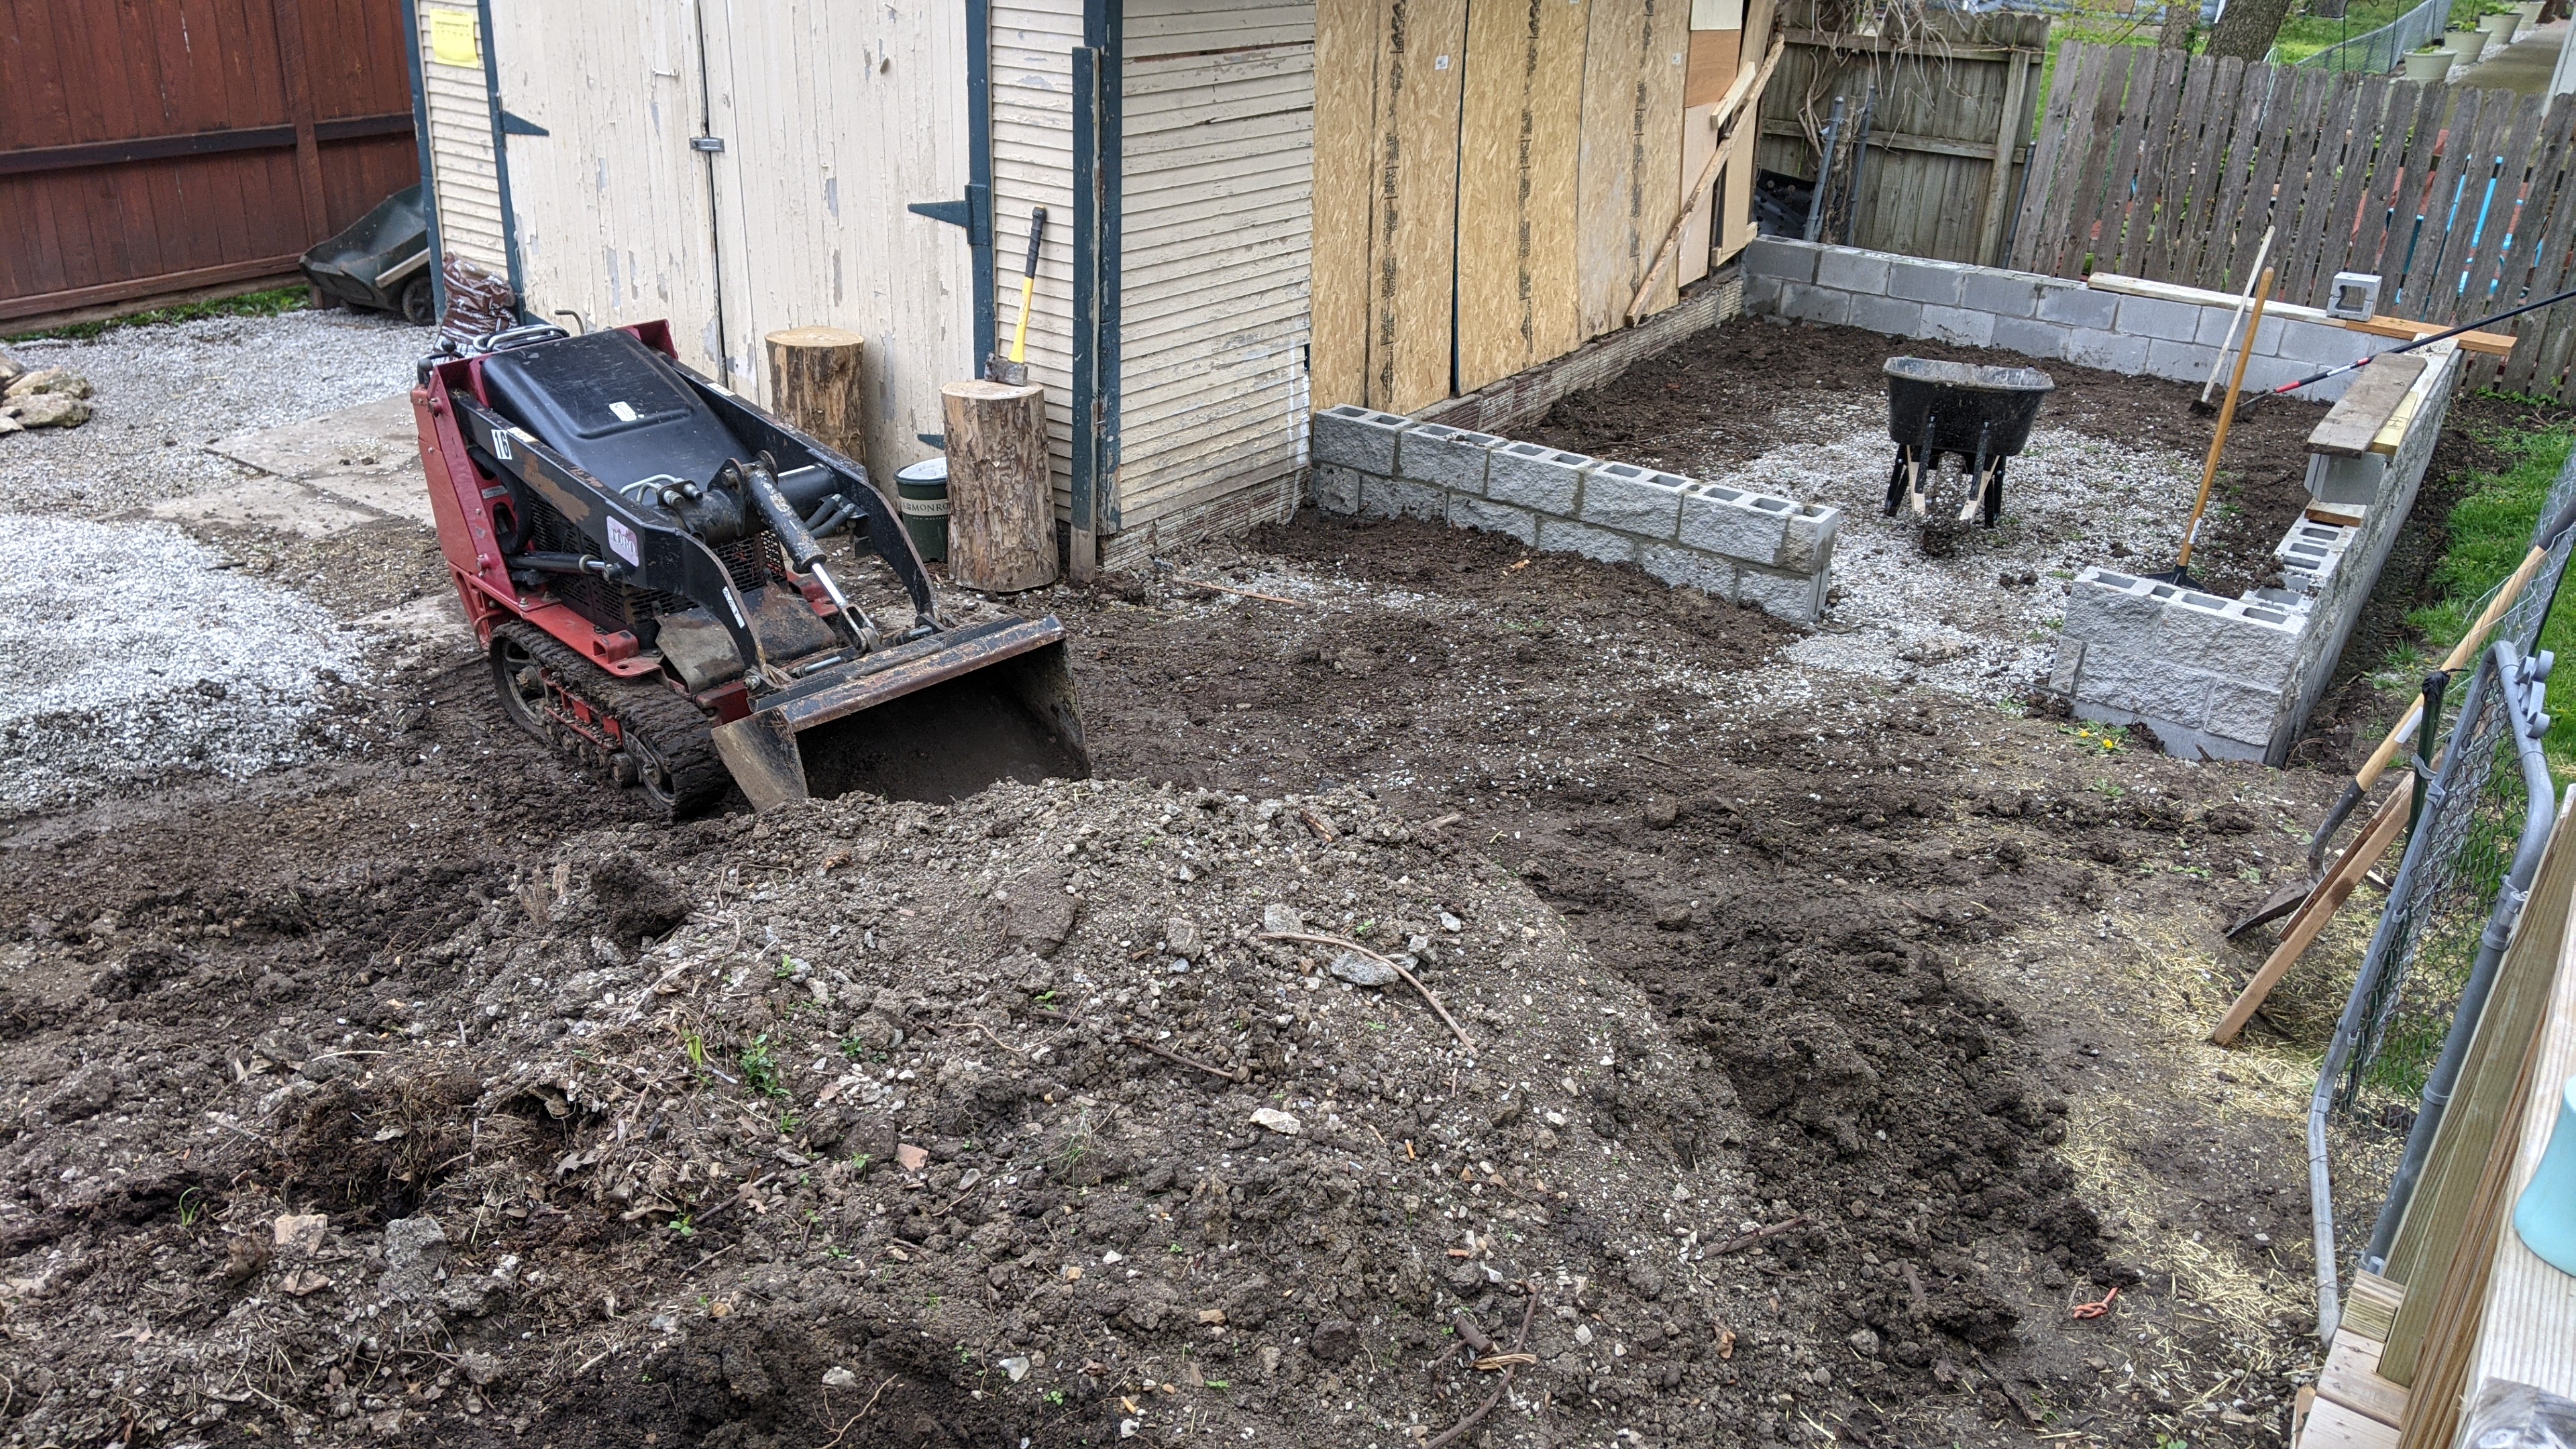
Digging the Footers
Ready to start construction!
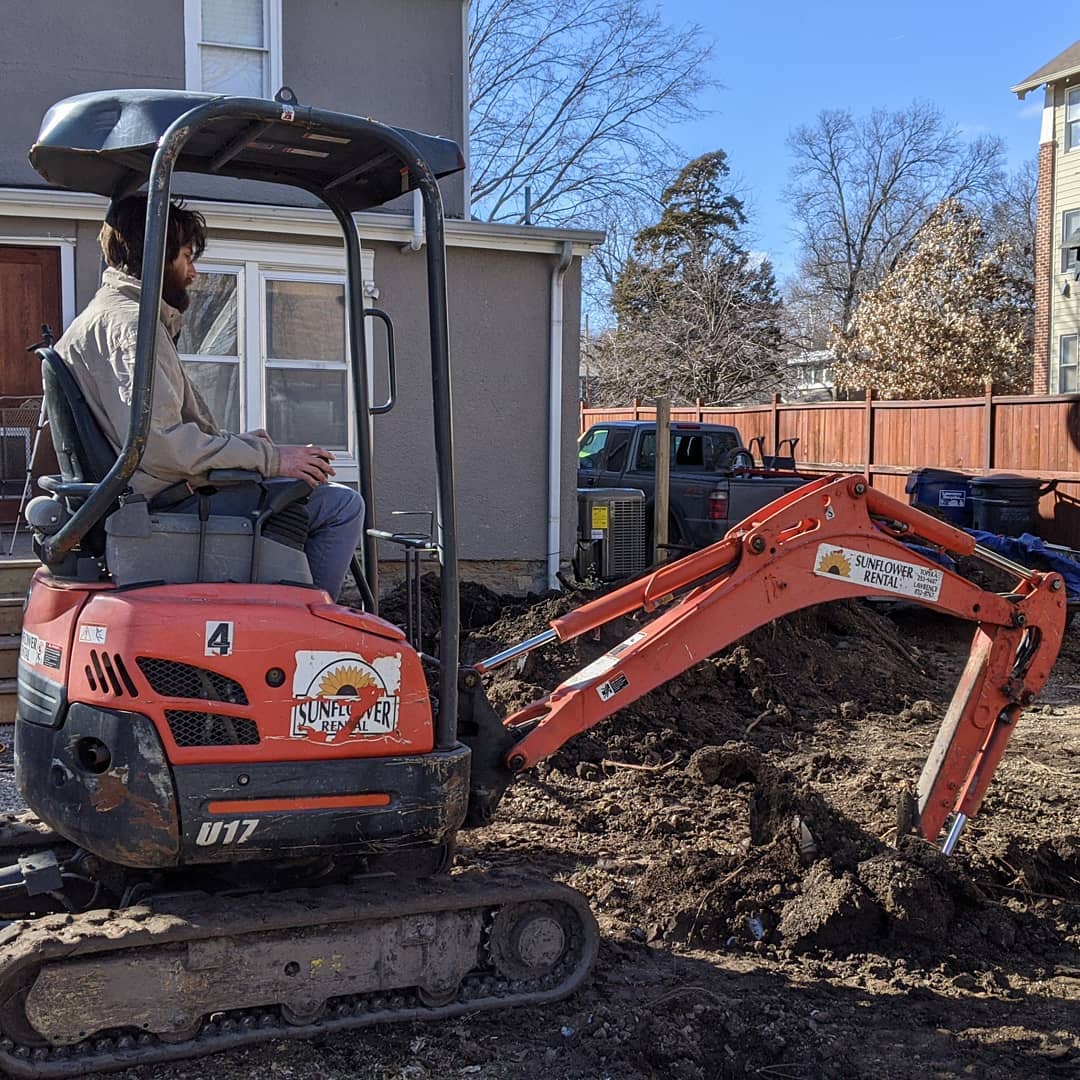
I rented an excavator to dig the foundation trenches. It wasn't too much to pull with my '66 F100 but it was probably too much for the old brakes! Never again.

We dug the foundation trenches in two day, and most of day 1 was spent practicing using the machine by lowering and leveling the land in front of the garage so that the garage was no longer the lowest point in the hard.
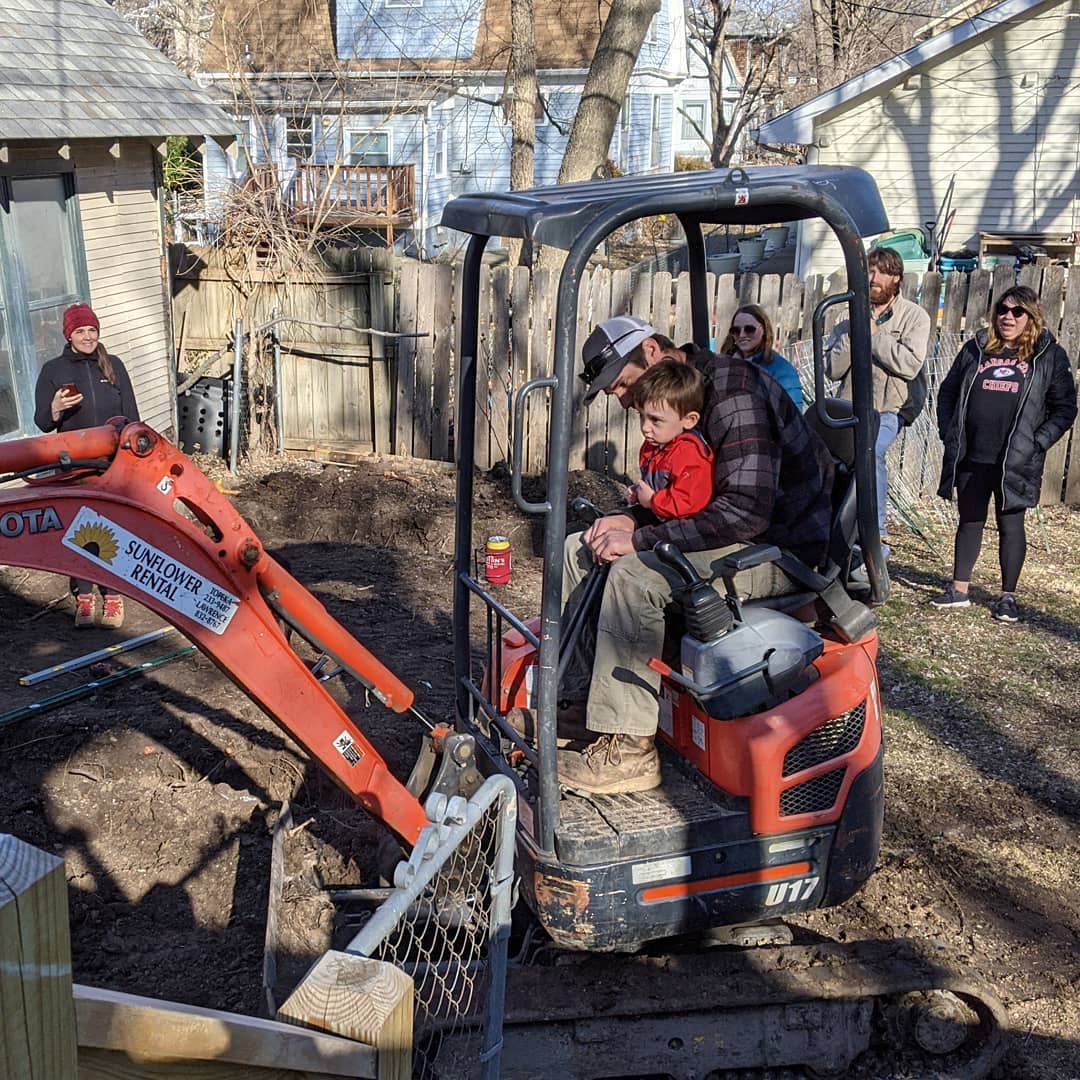
Everybody came out to help and get a turn on the big toy
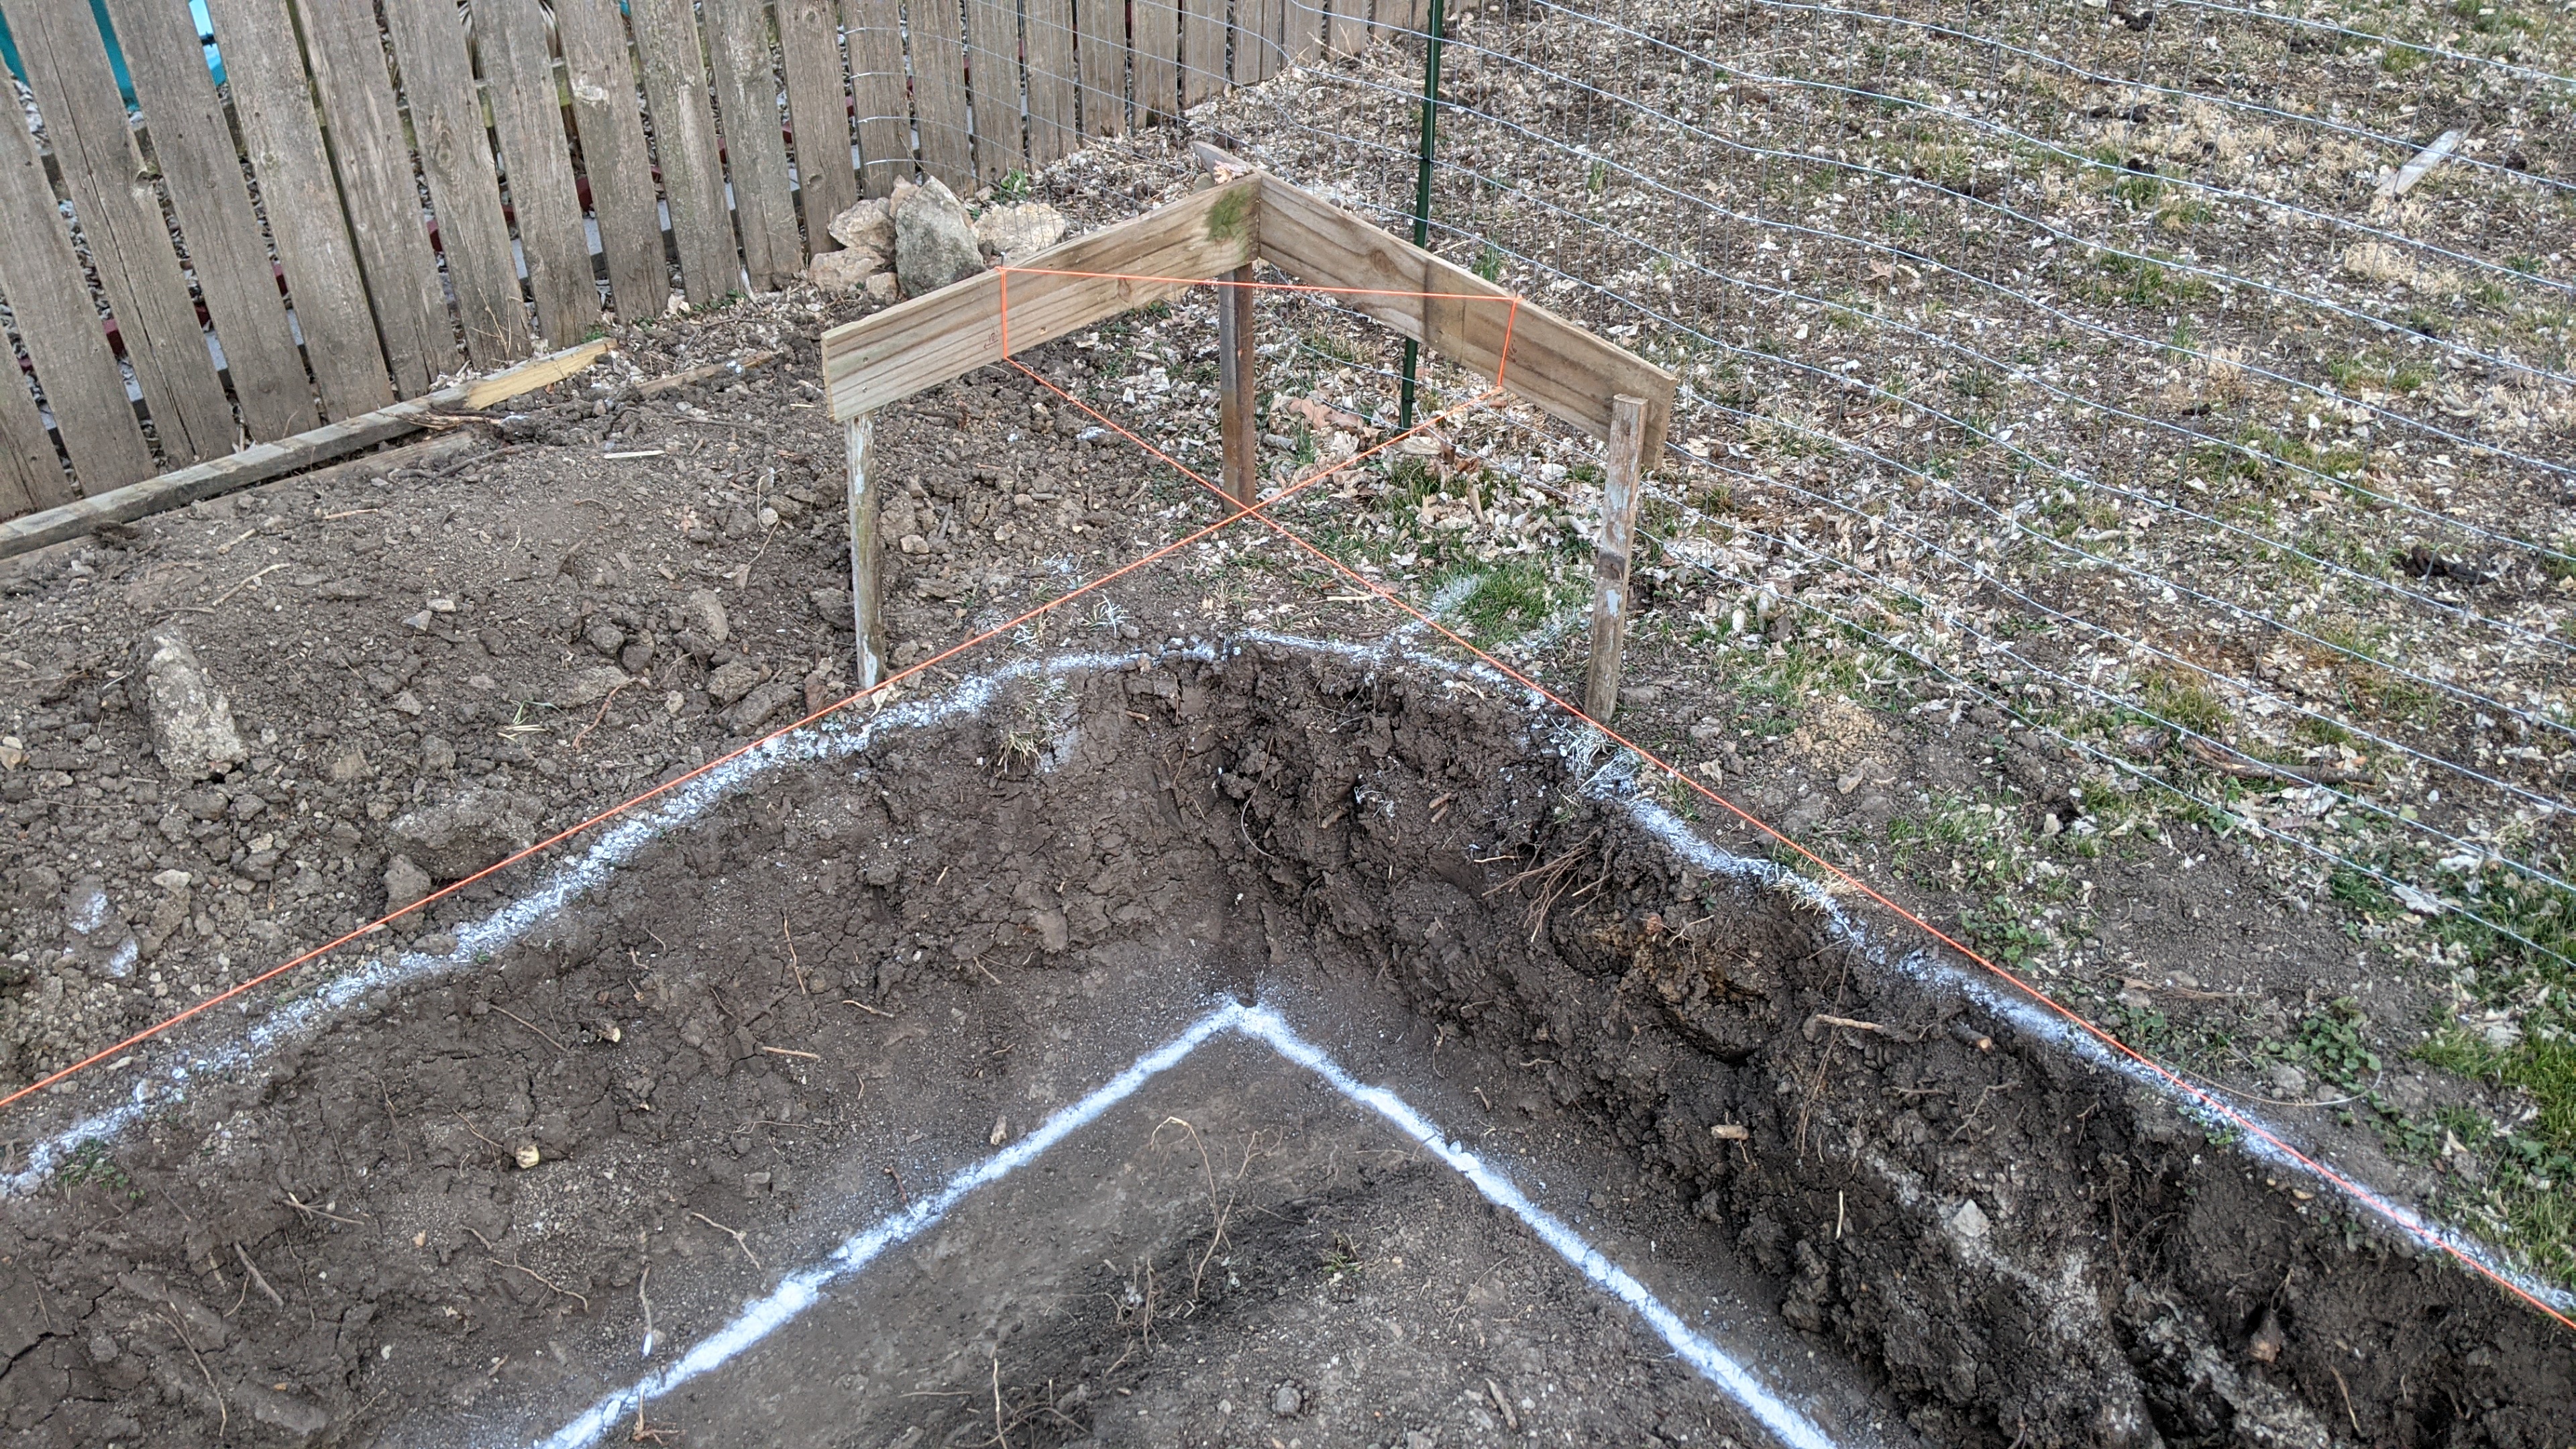
The next day it looked like this:
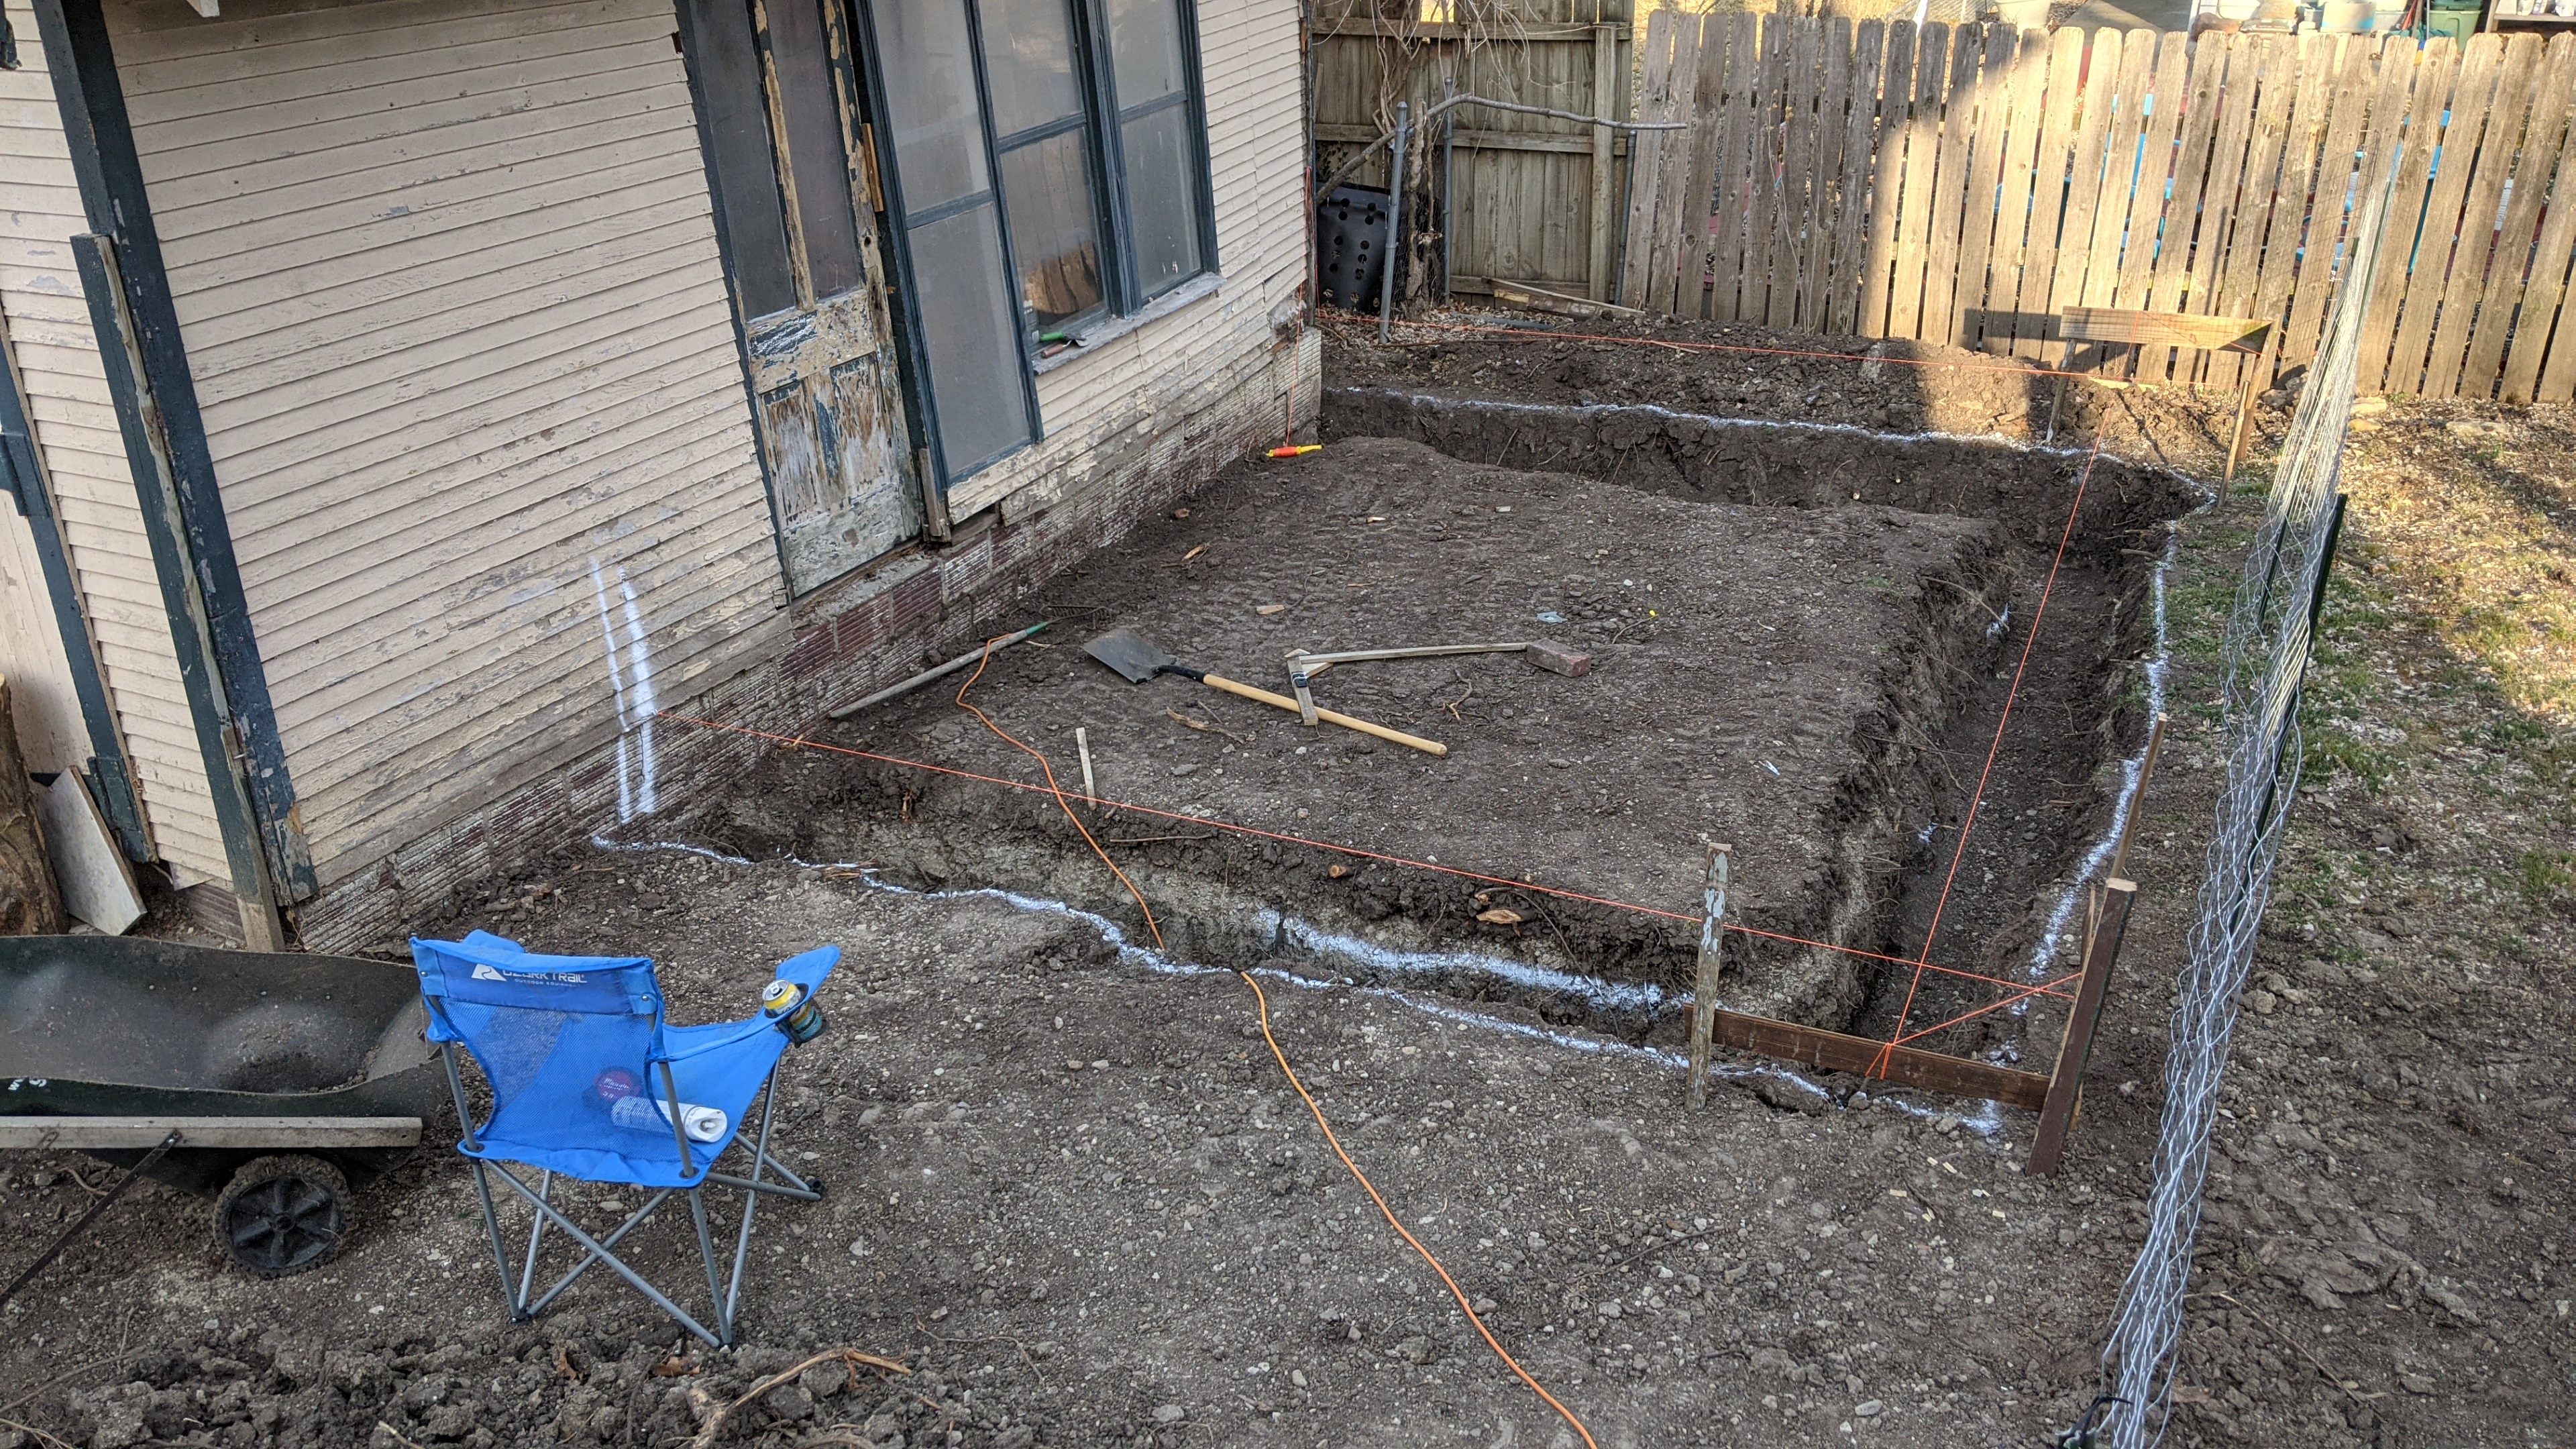
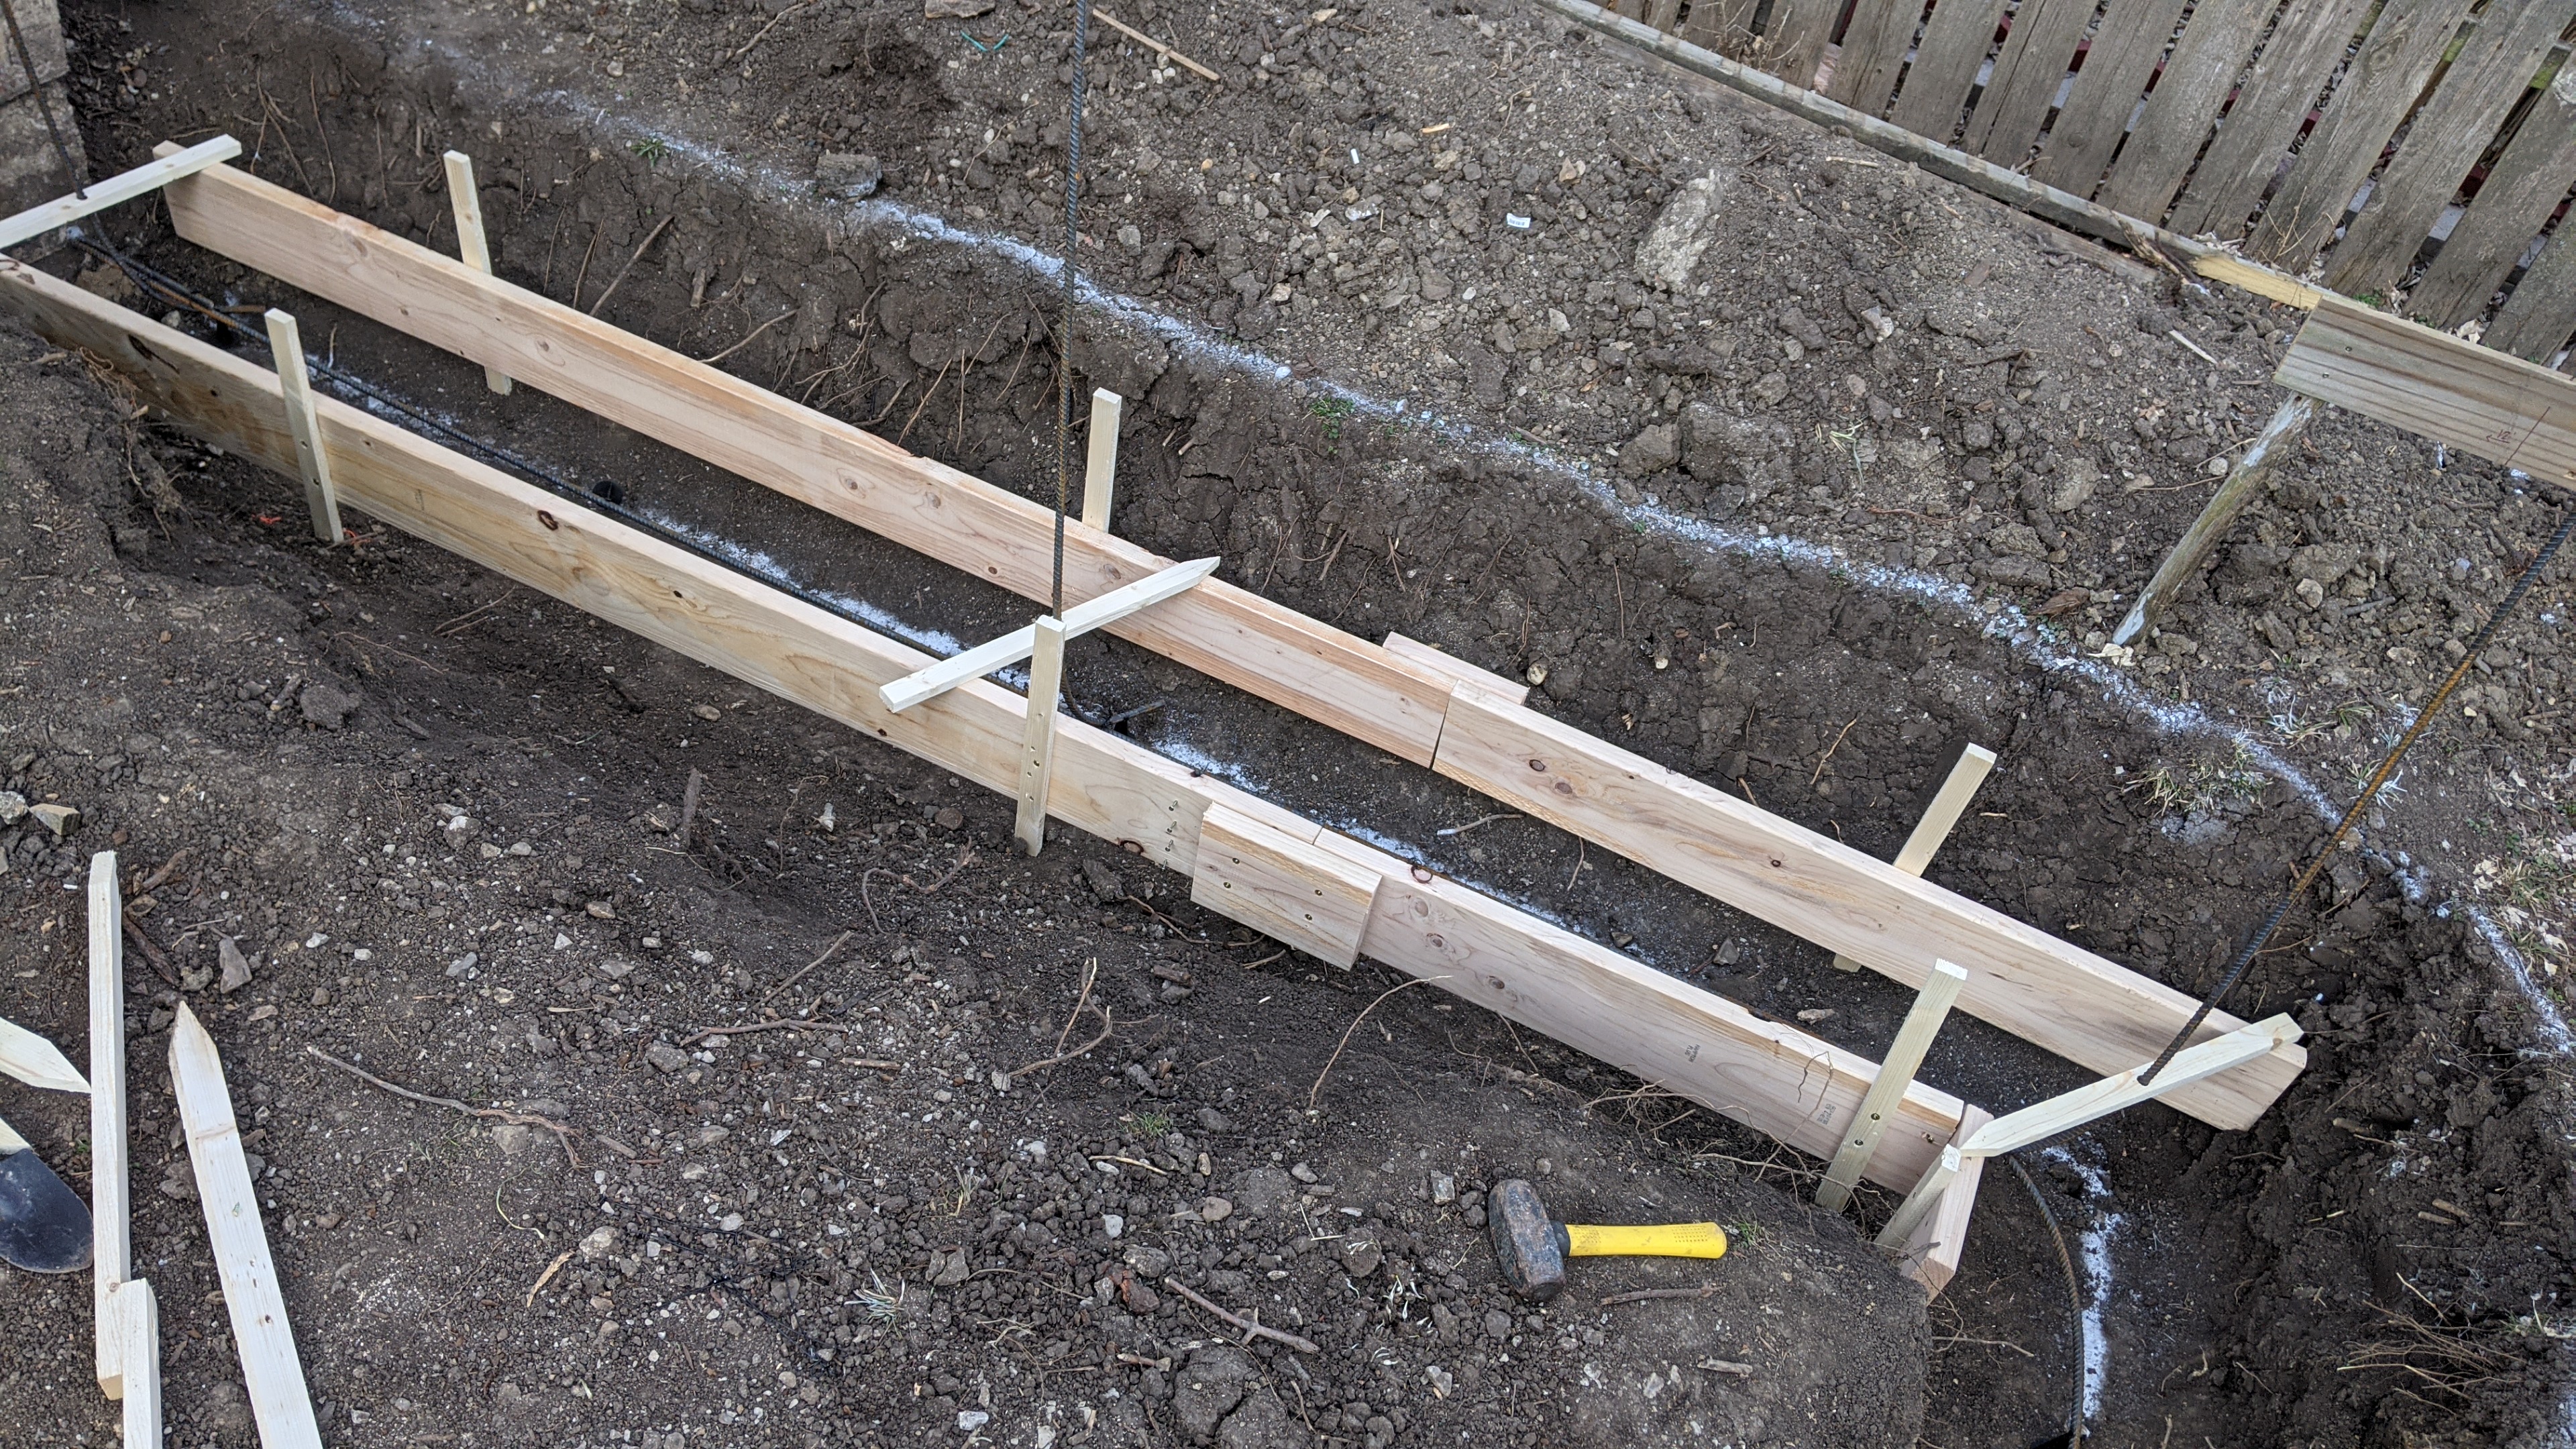
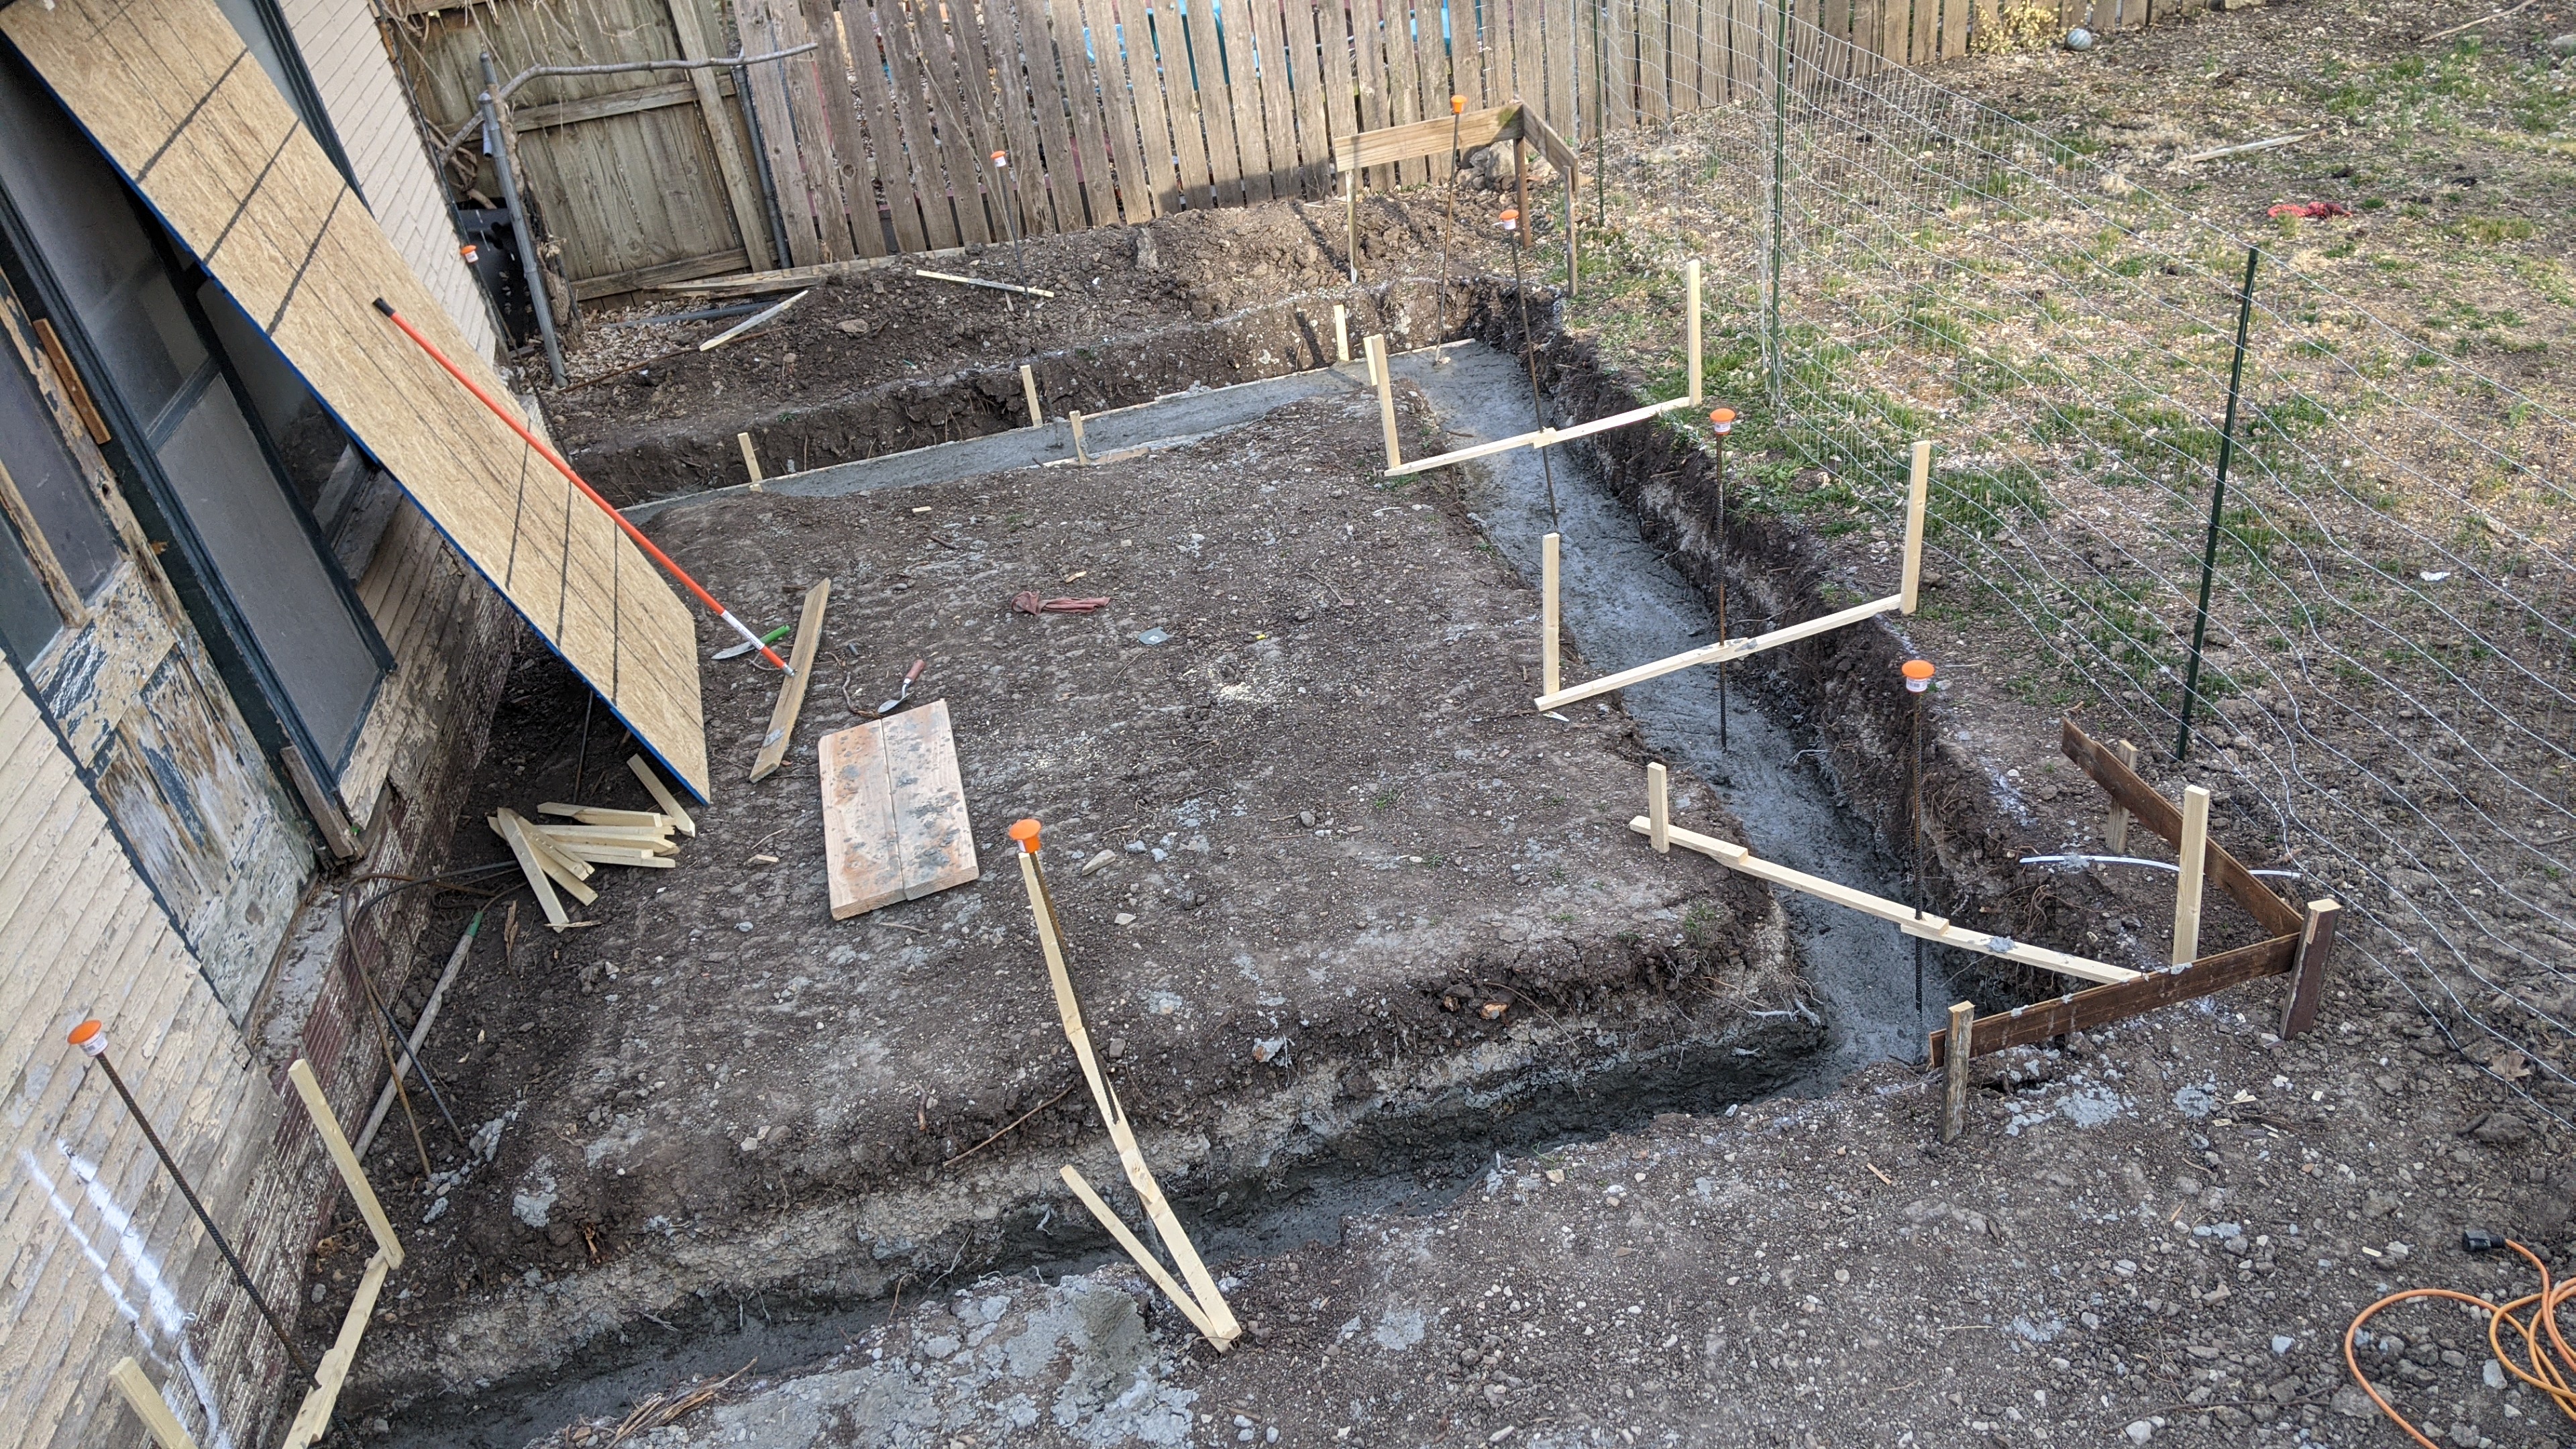
I didn't have a fancy laser leveling system, I just used baton boards, twine, line levels, a plumb bob, and a tape measure.
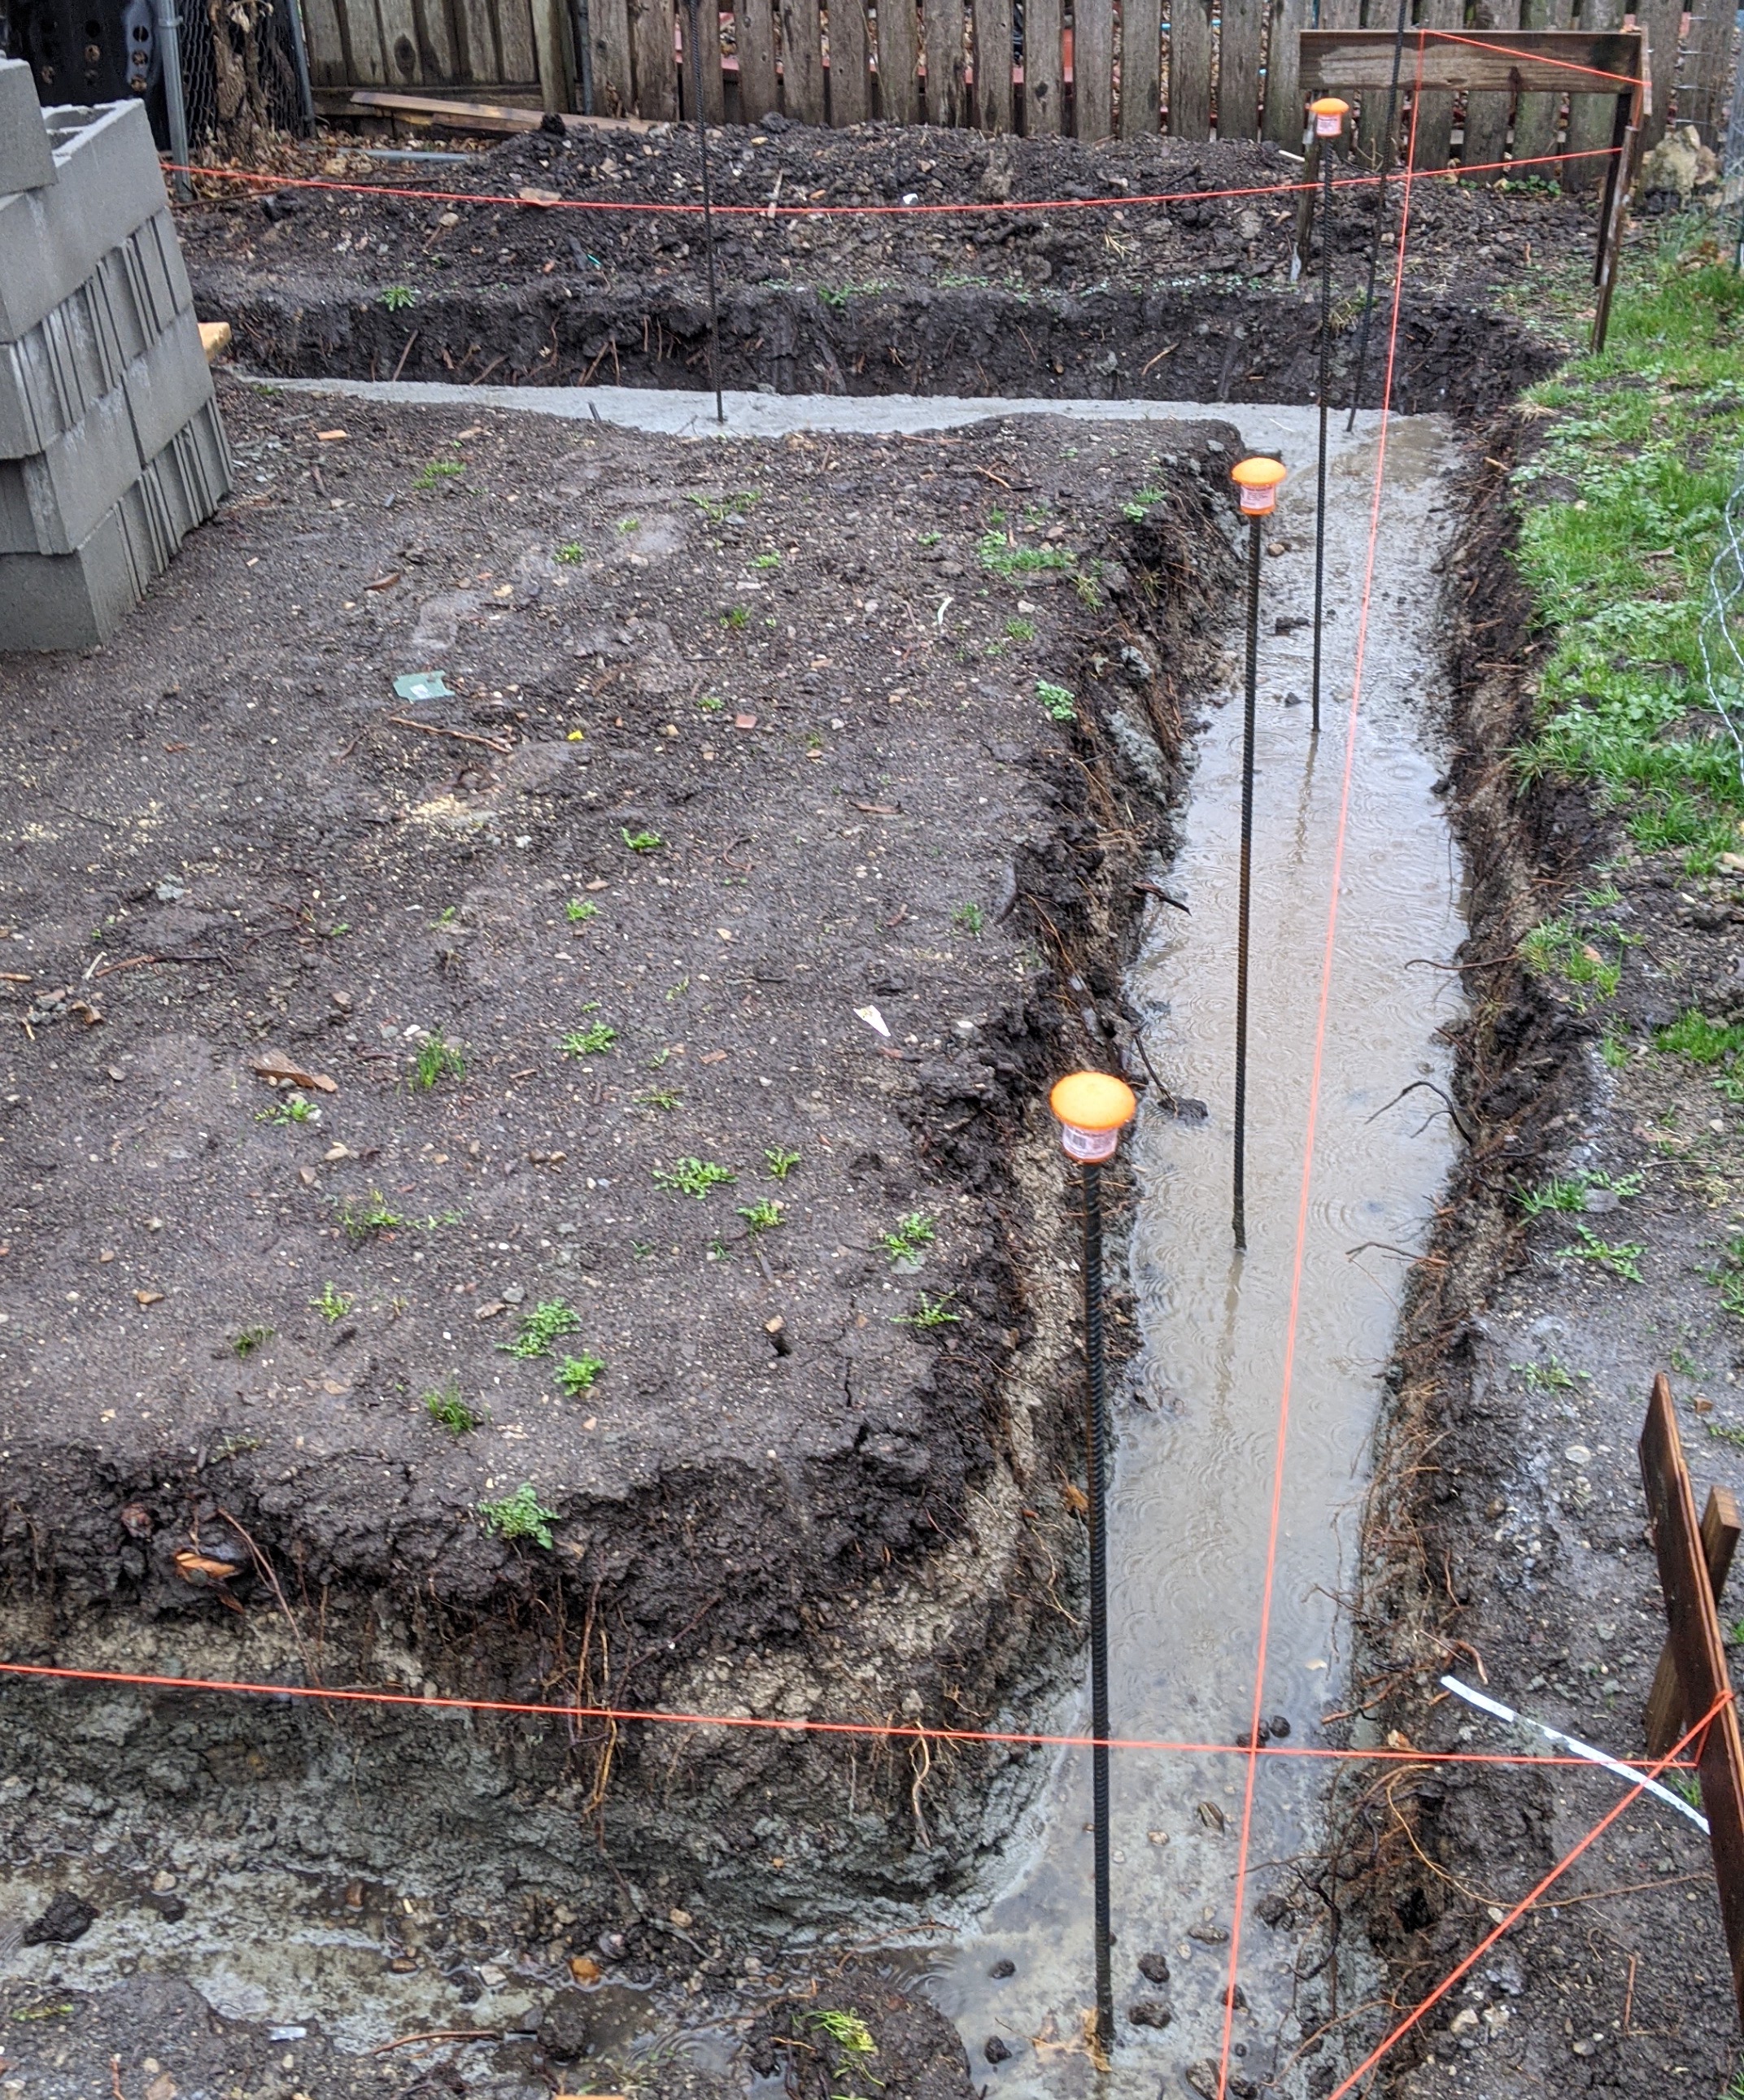
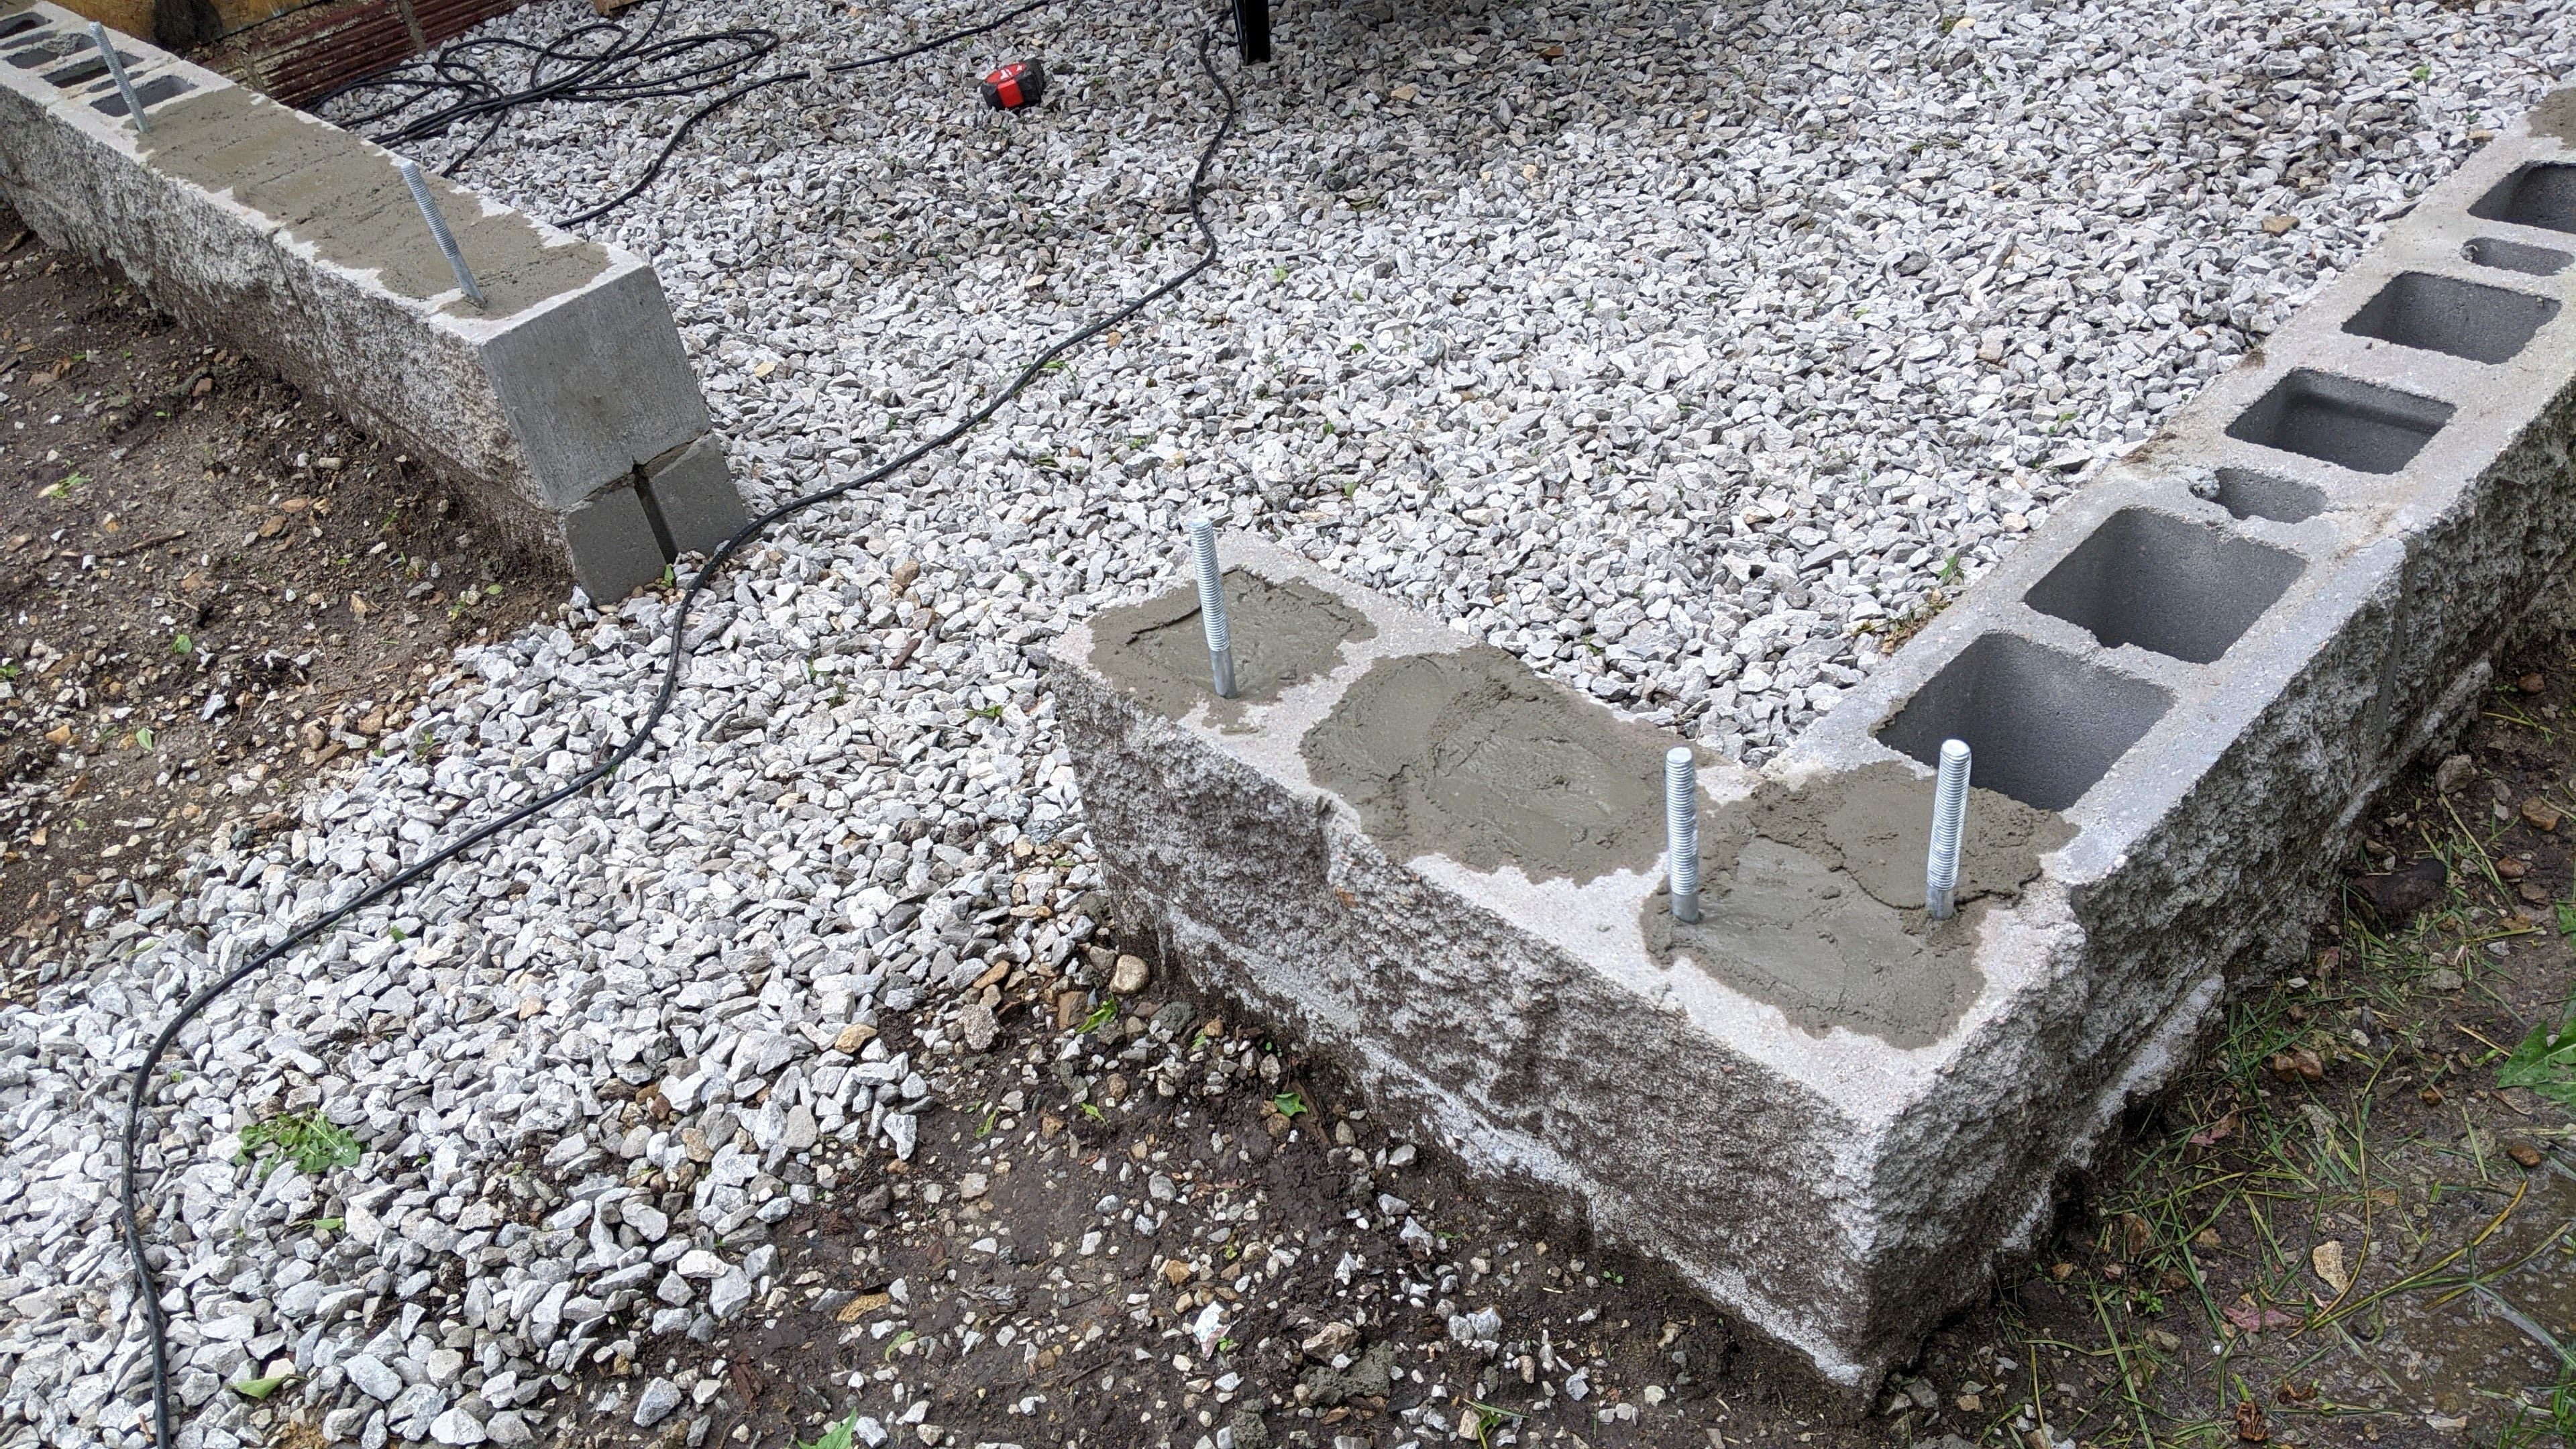
Installing the vertical and horizontal rebar:
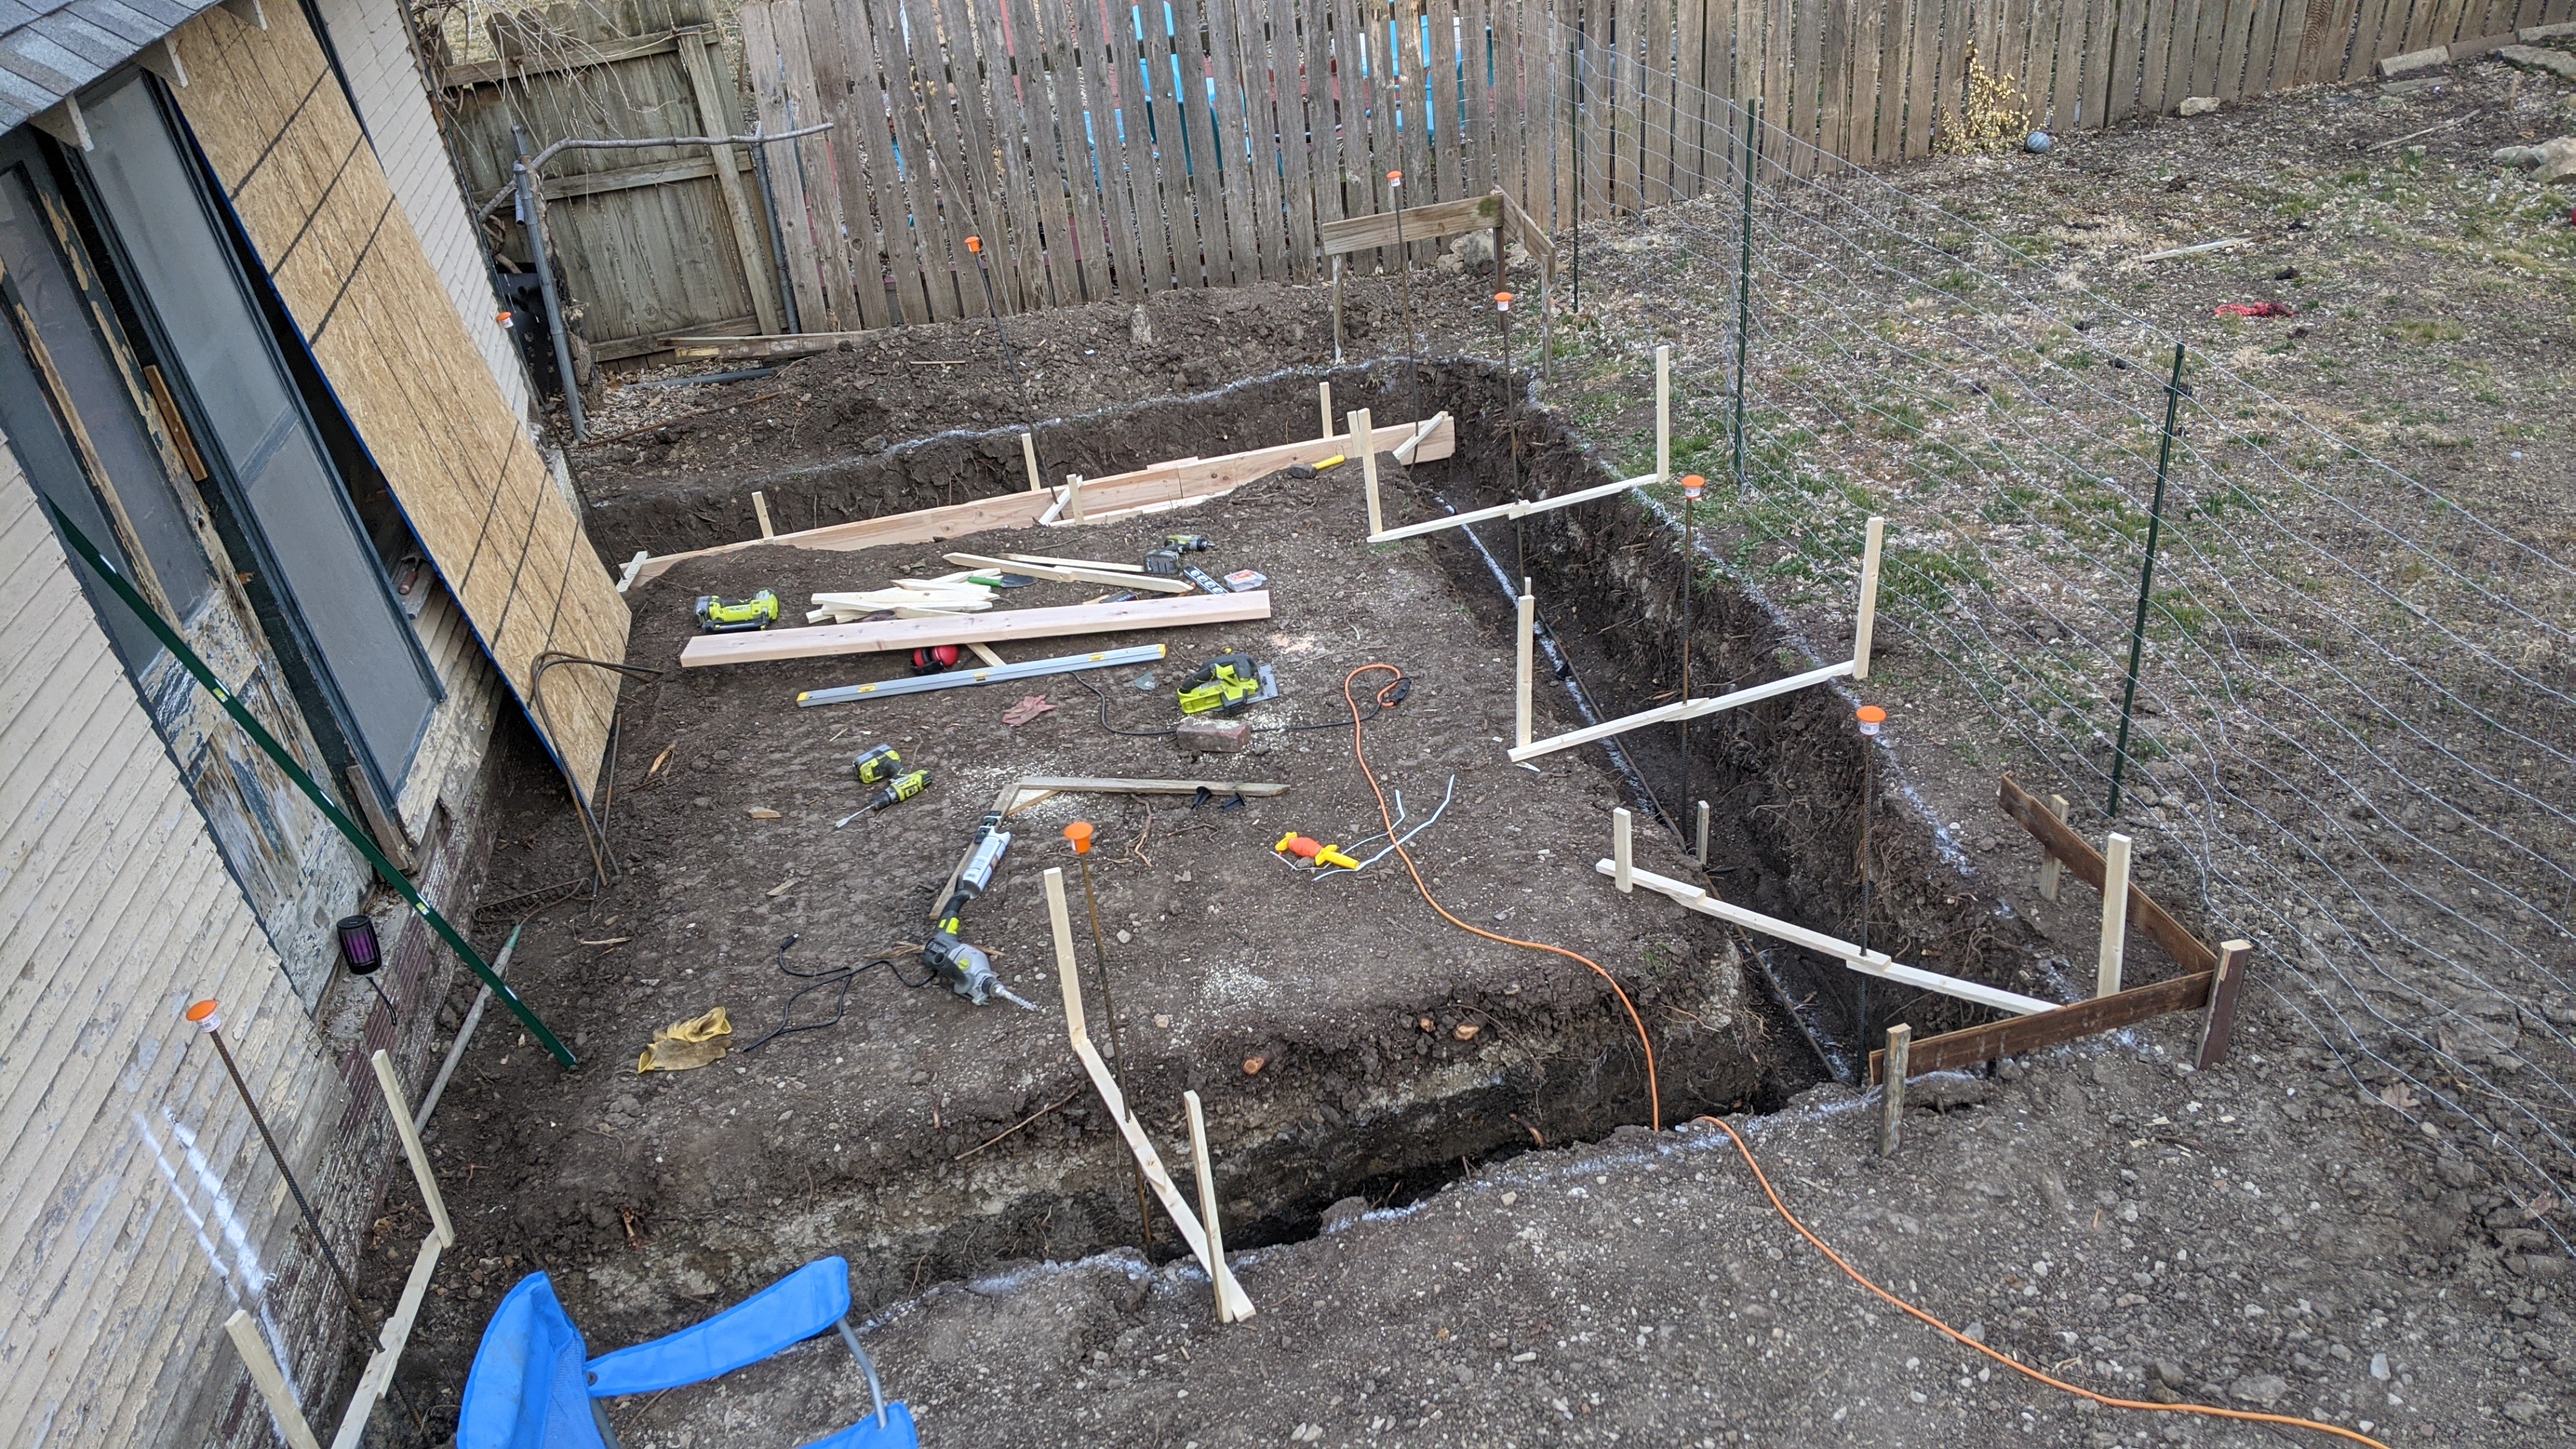
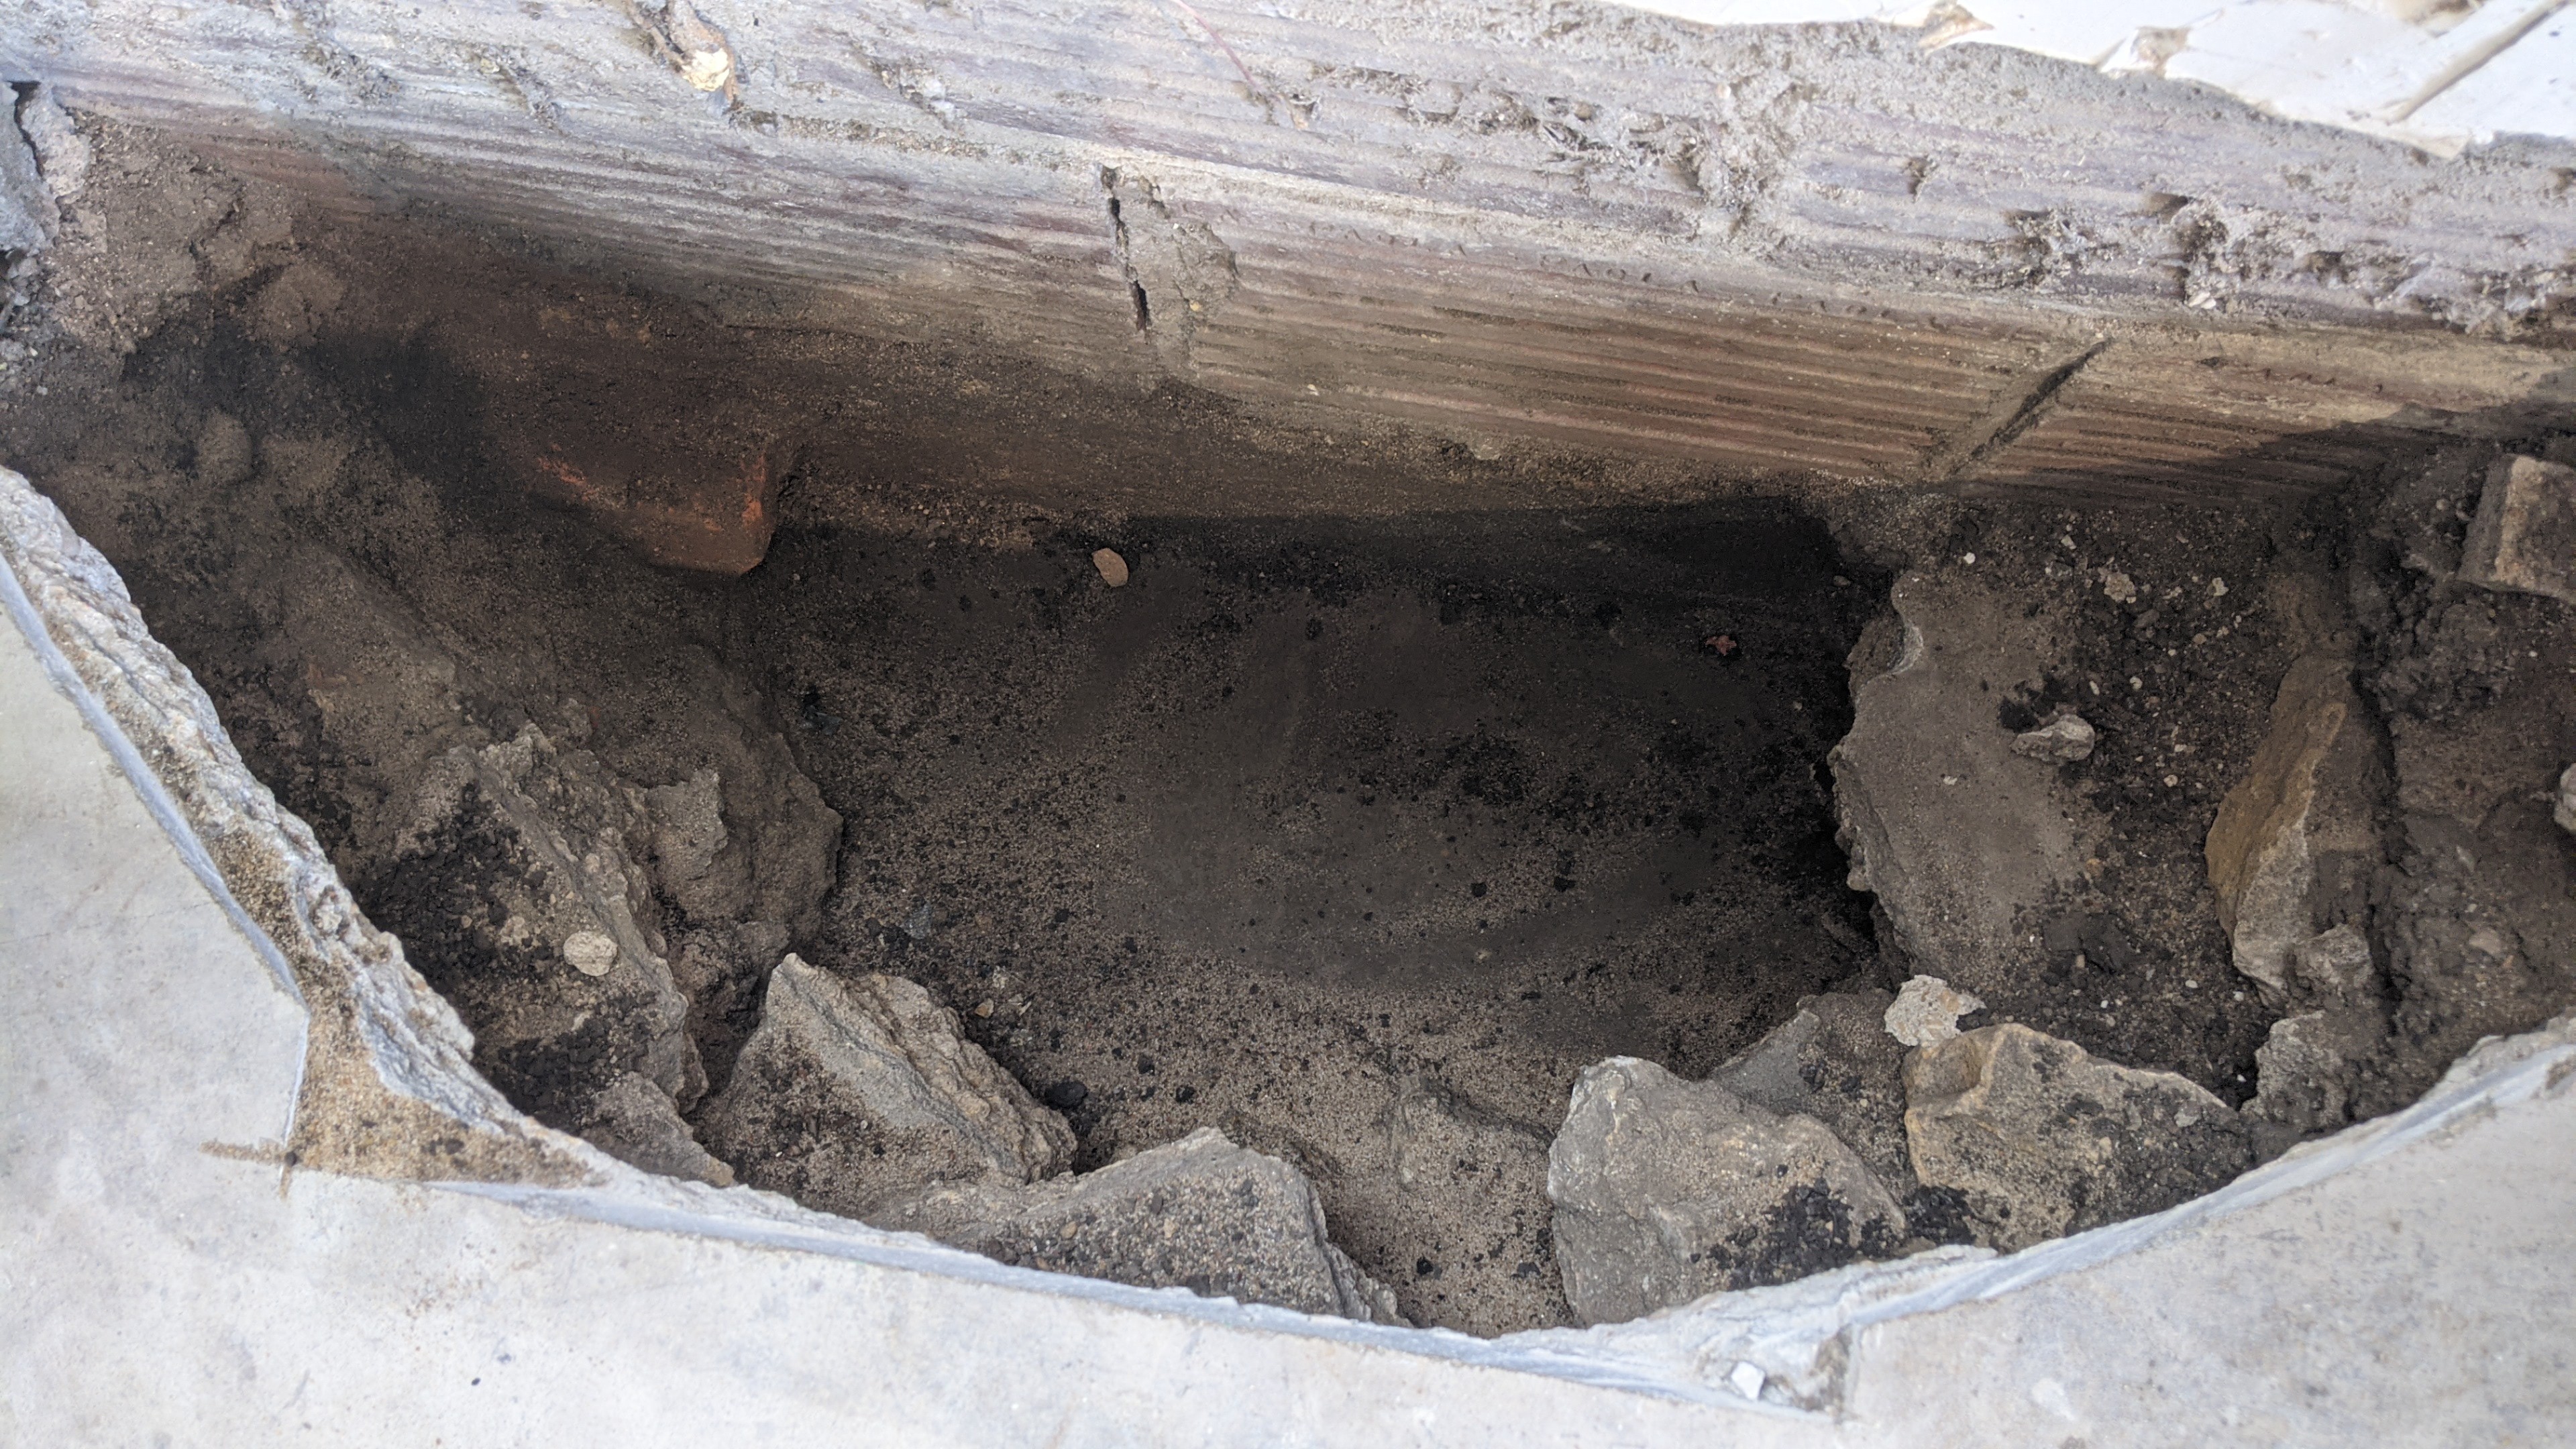
Between the addition and the old structure, I'm removing the wall and replacing it with a header beam. Two posts will support the header beam and each one needs a solid footing, so I had to dig that too. I broke the concrete floor insdide the old garage with a sledge hammer, and below it I found old concrete rubble and 18" below that I found another concrete slab. I asked the inspector about it and he said I just just pour the footing onto the old slab.
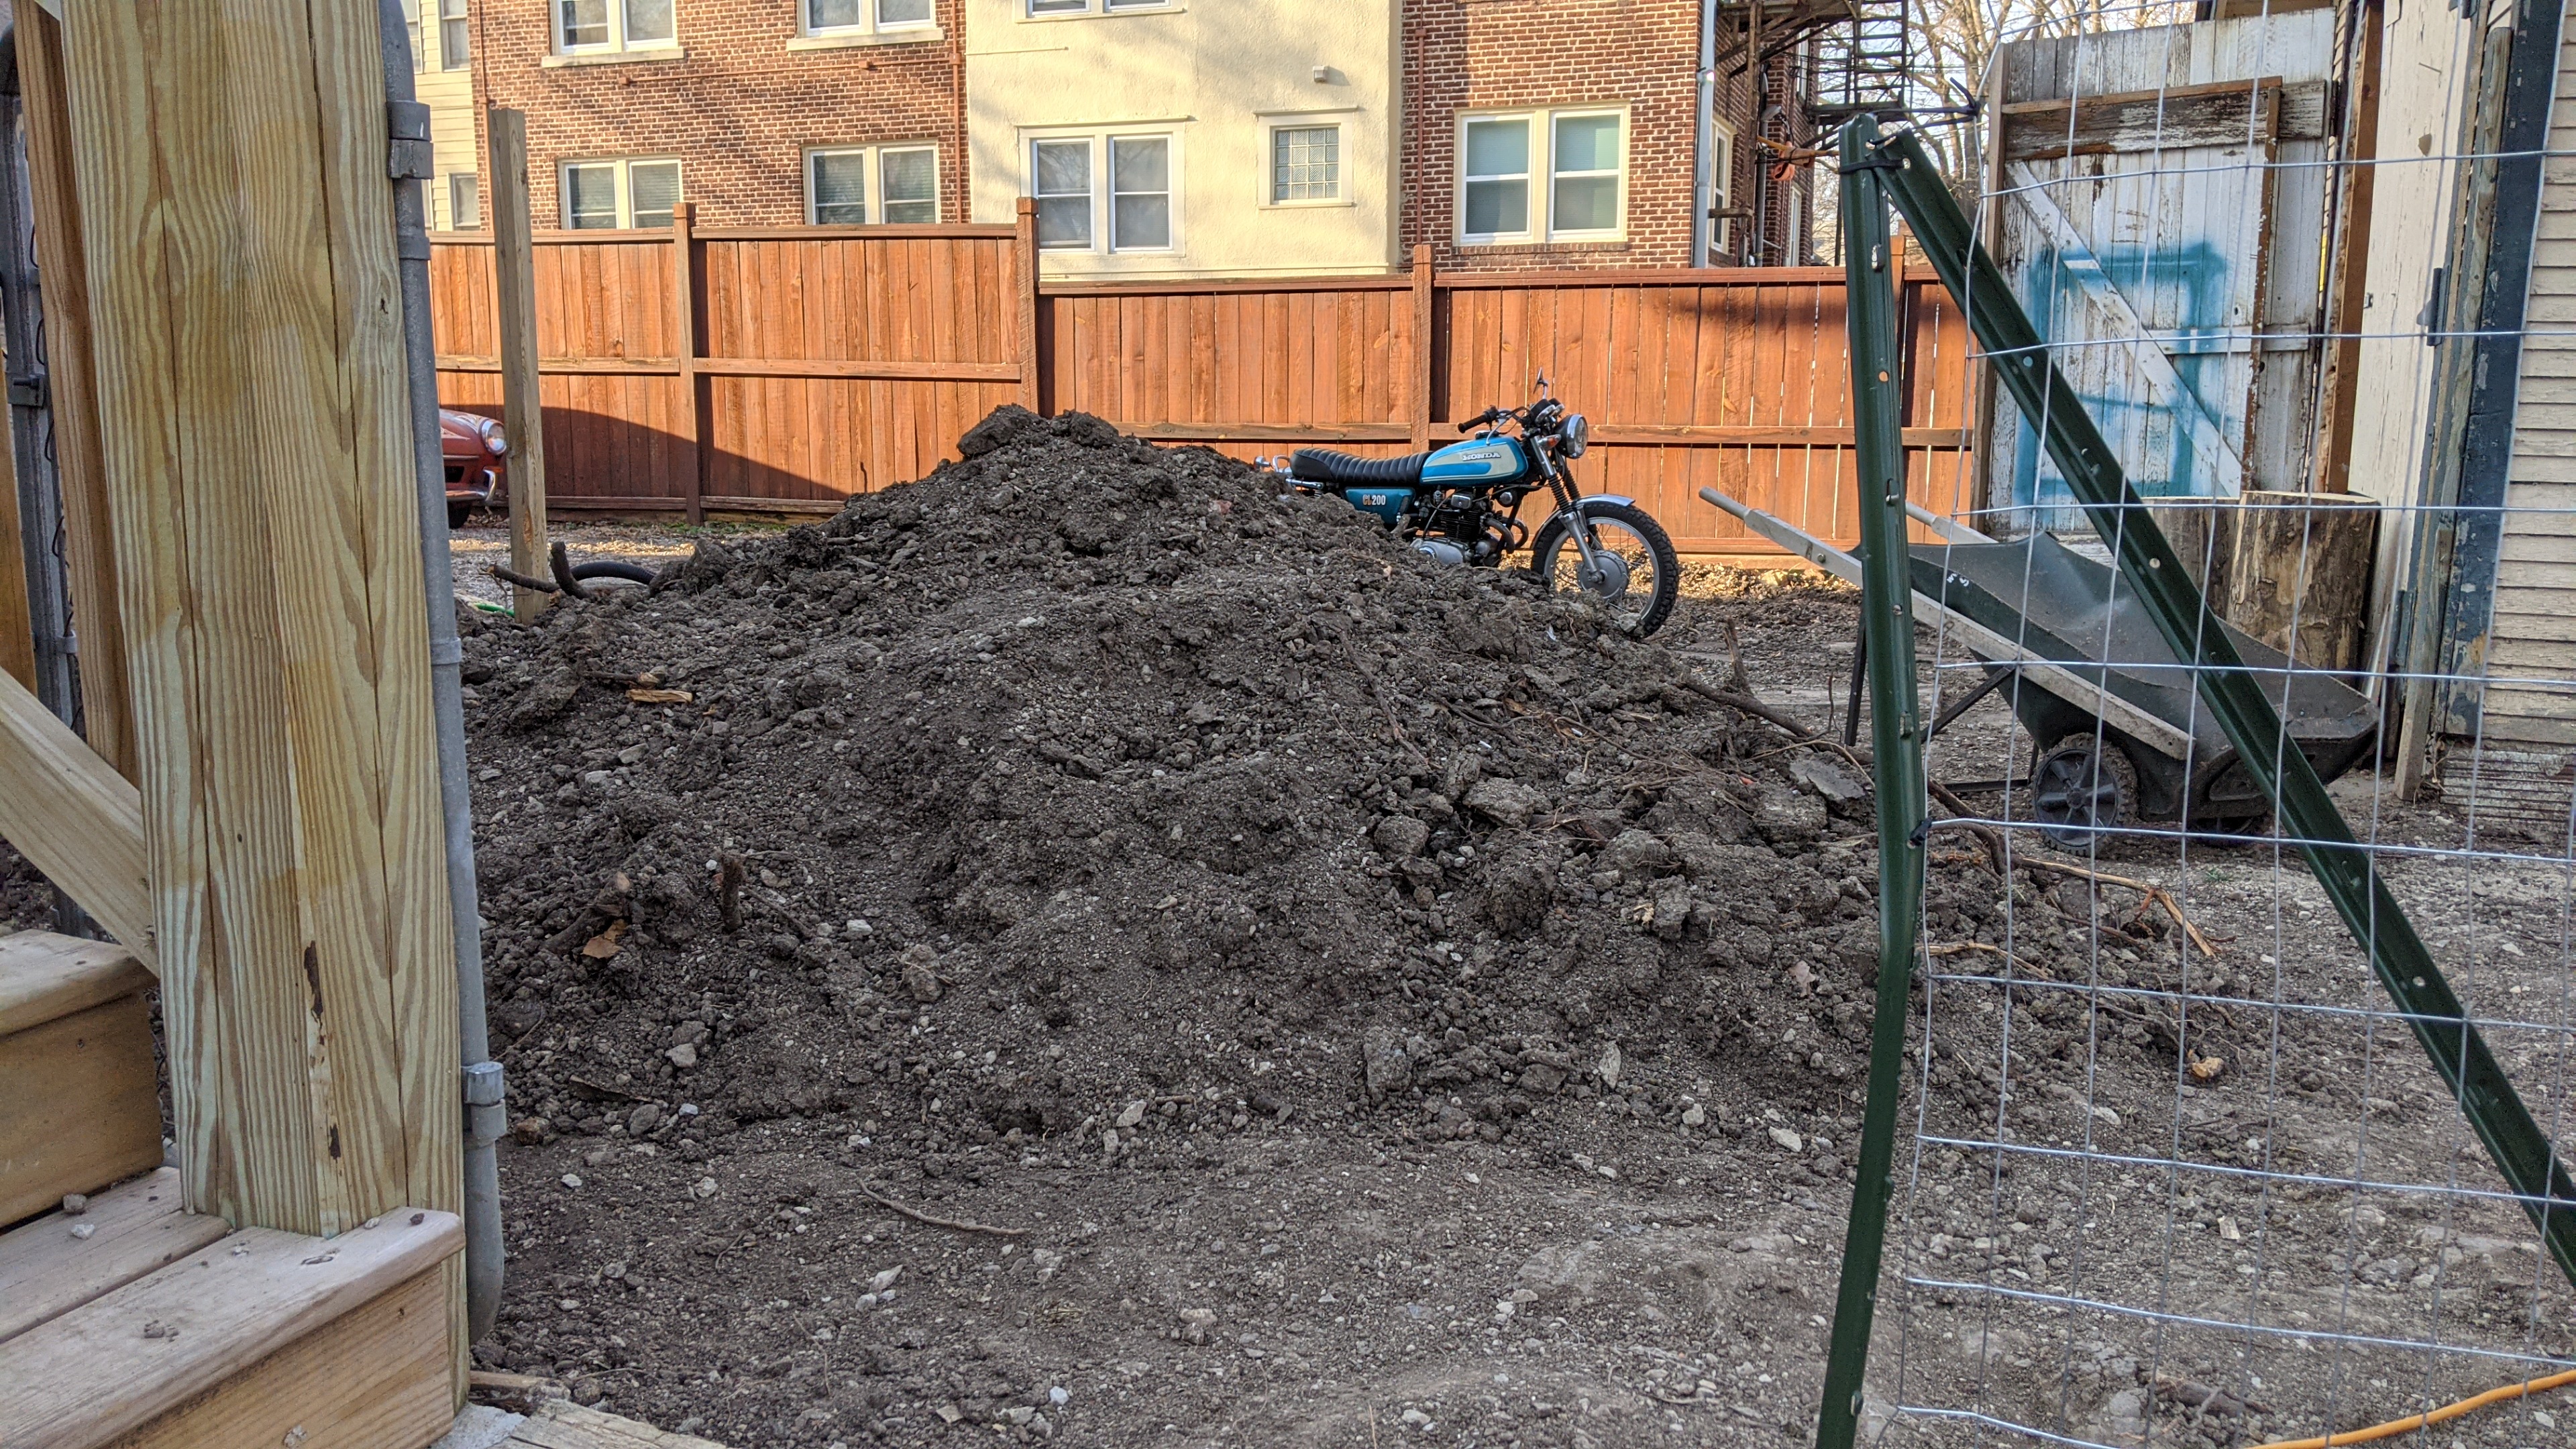
The dirt pile got very big:
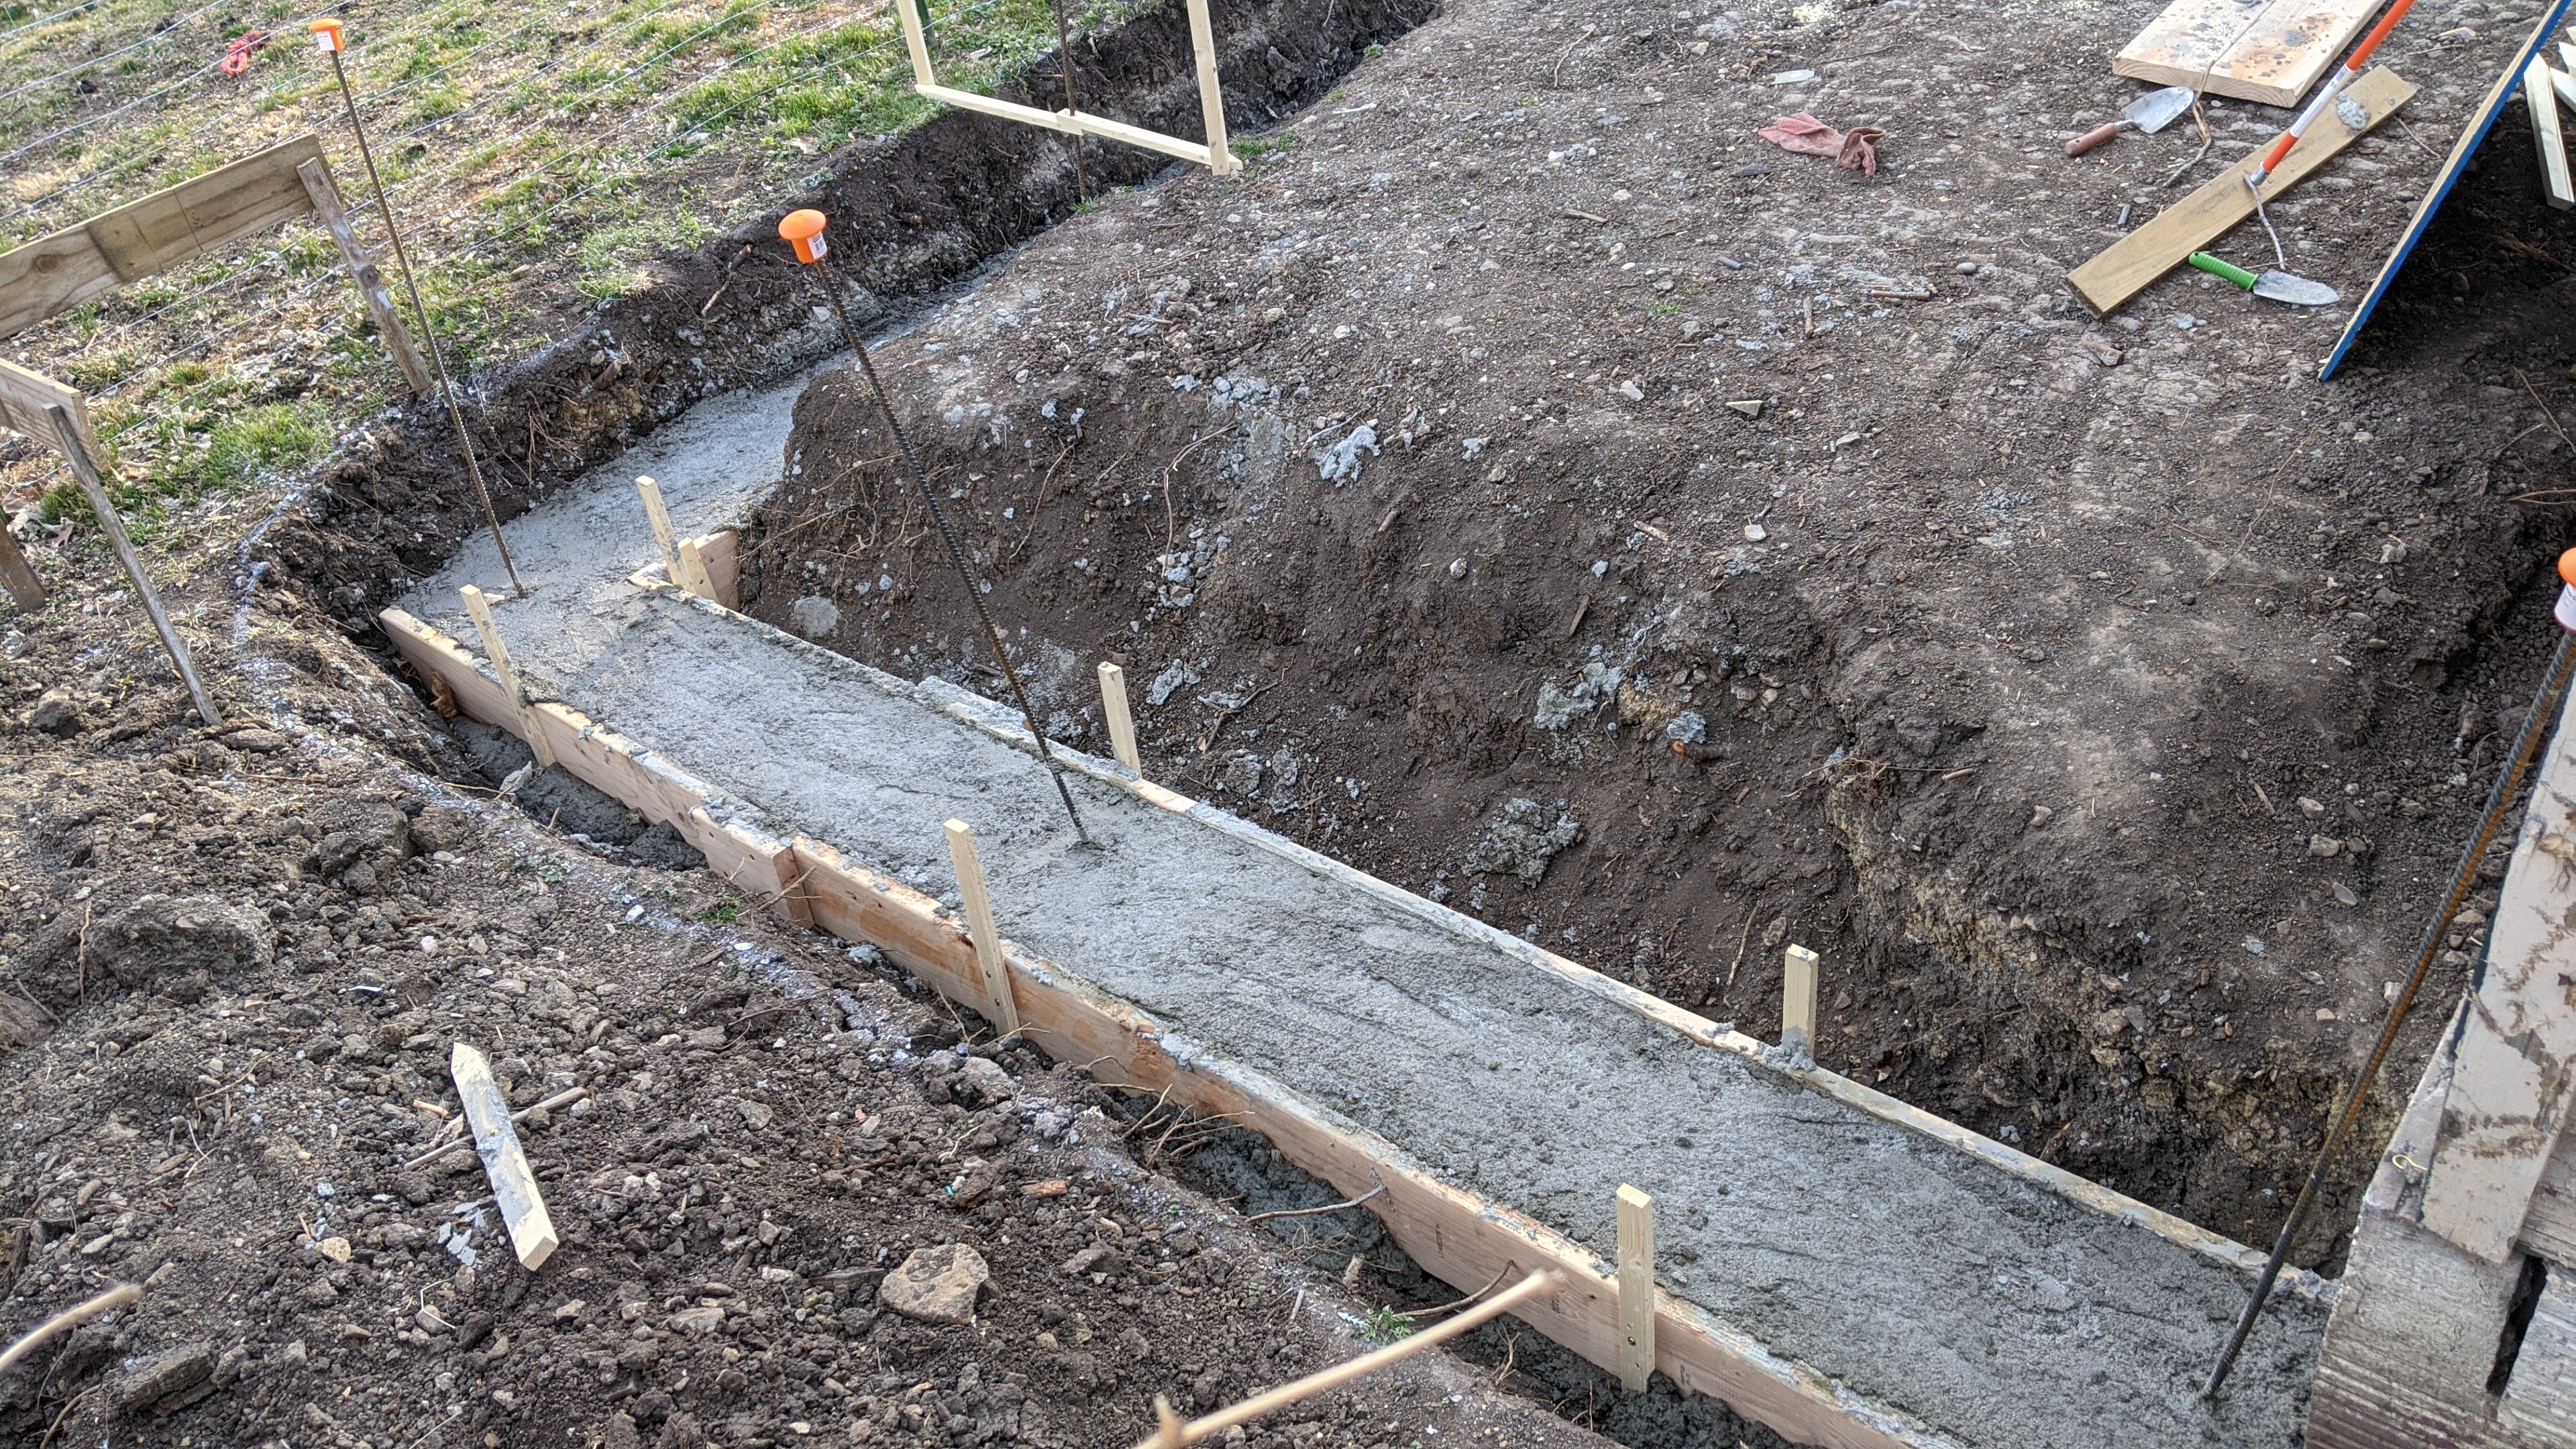
The concrete truck showed up and we were ready to pour the footers. I didn't get any photos of this because I was too busy running around! Except for this photo of Johnny:
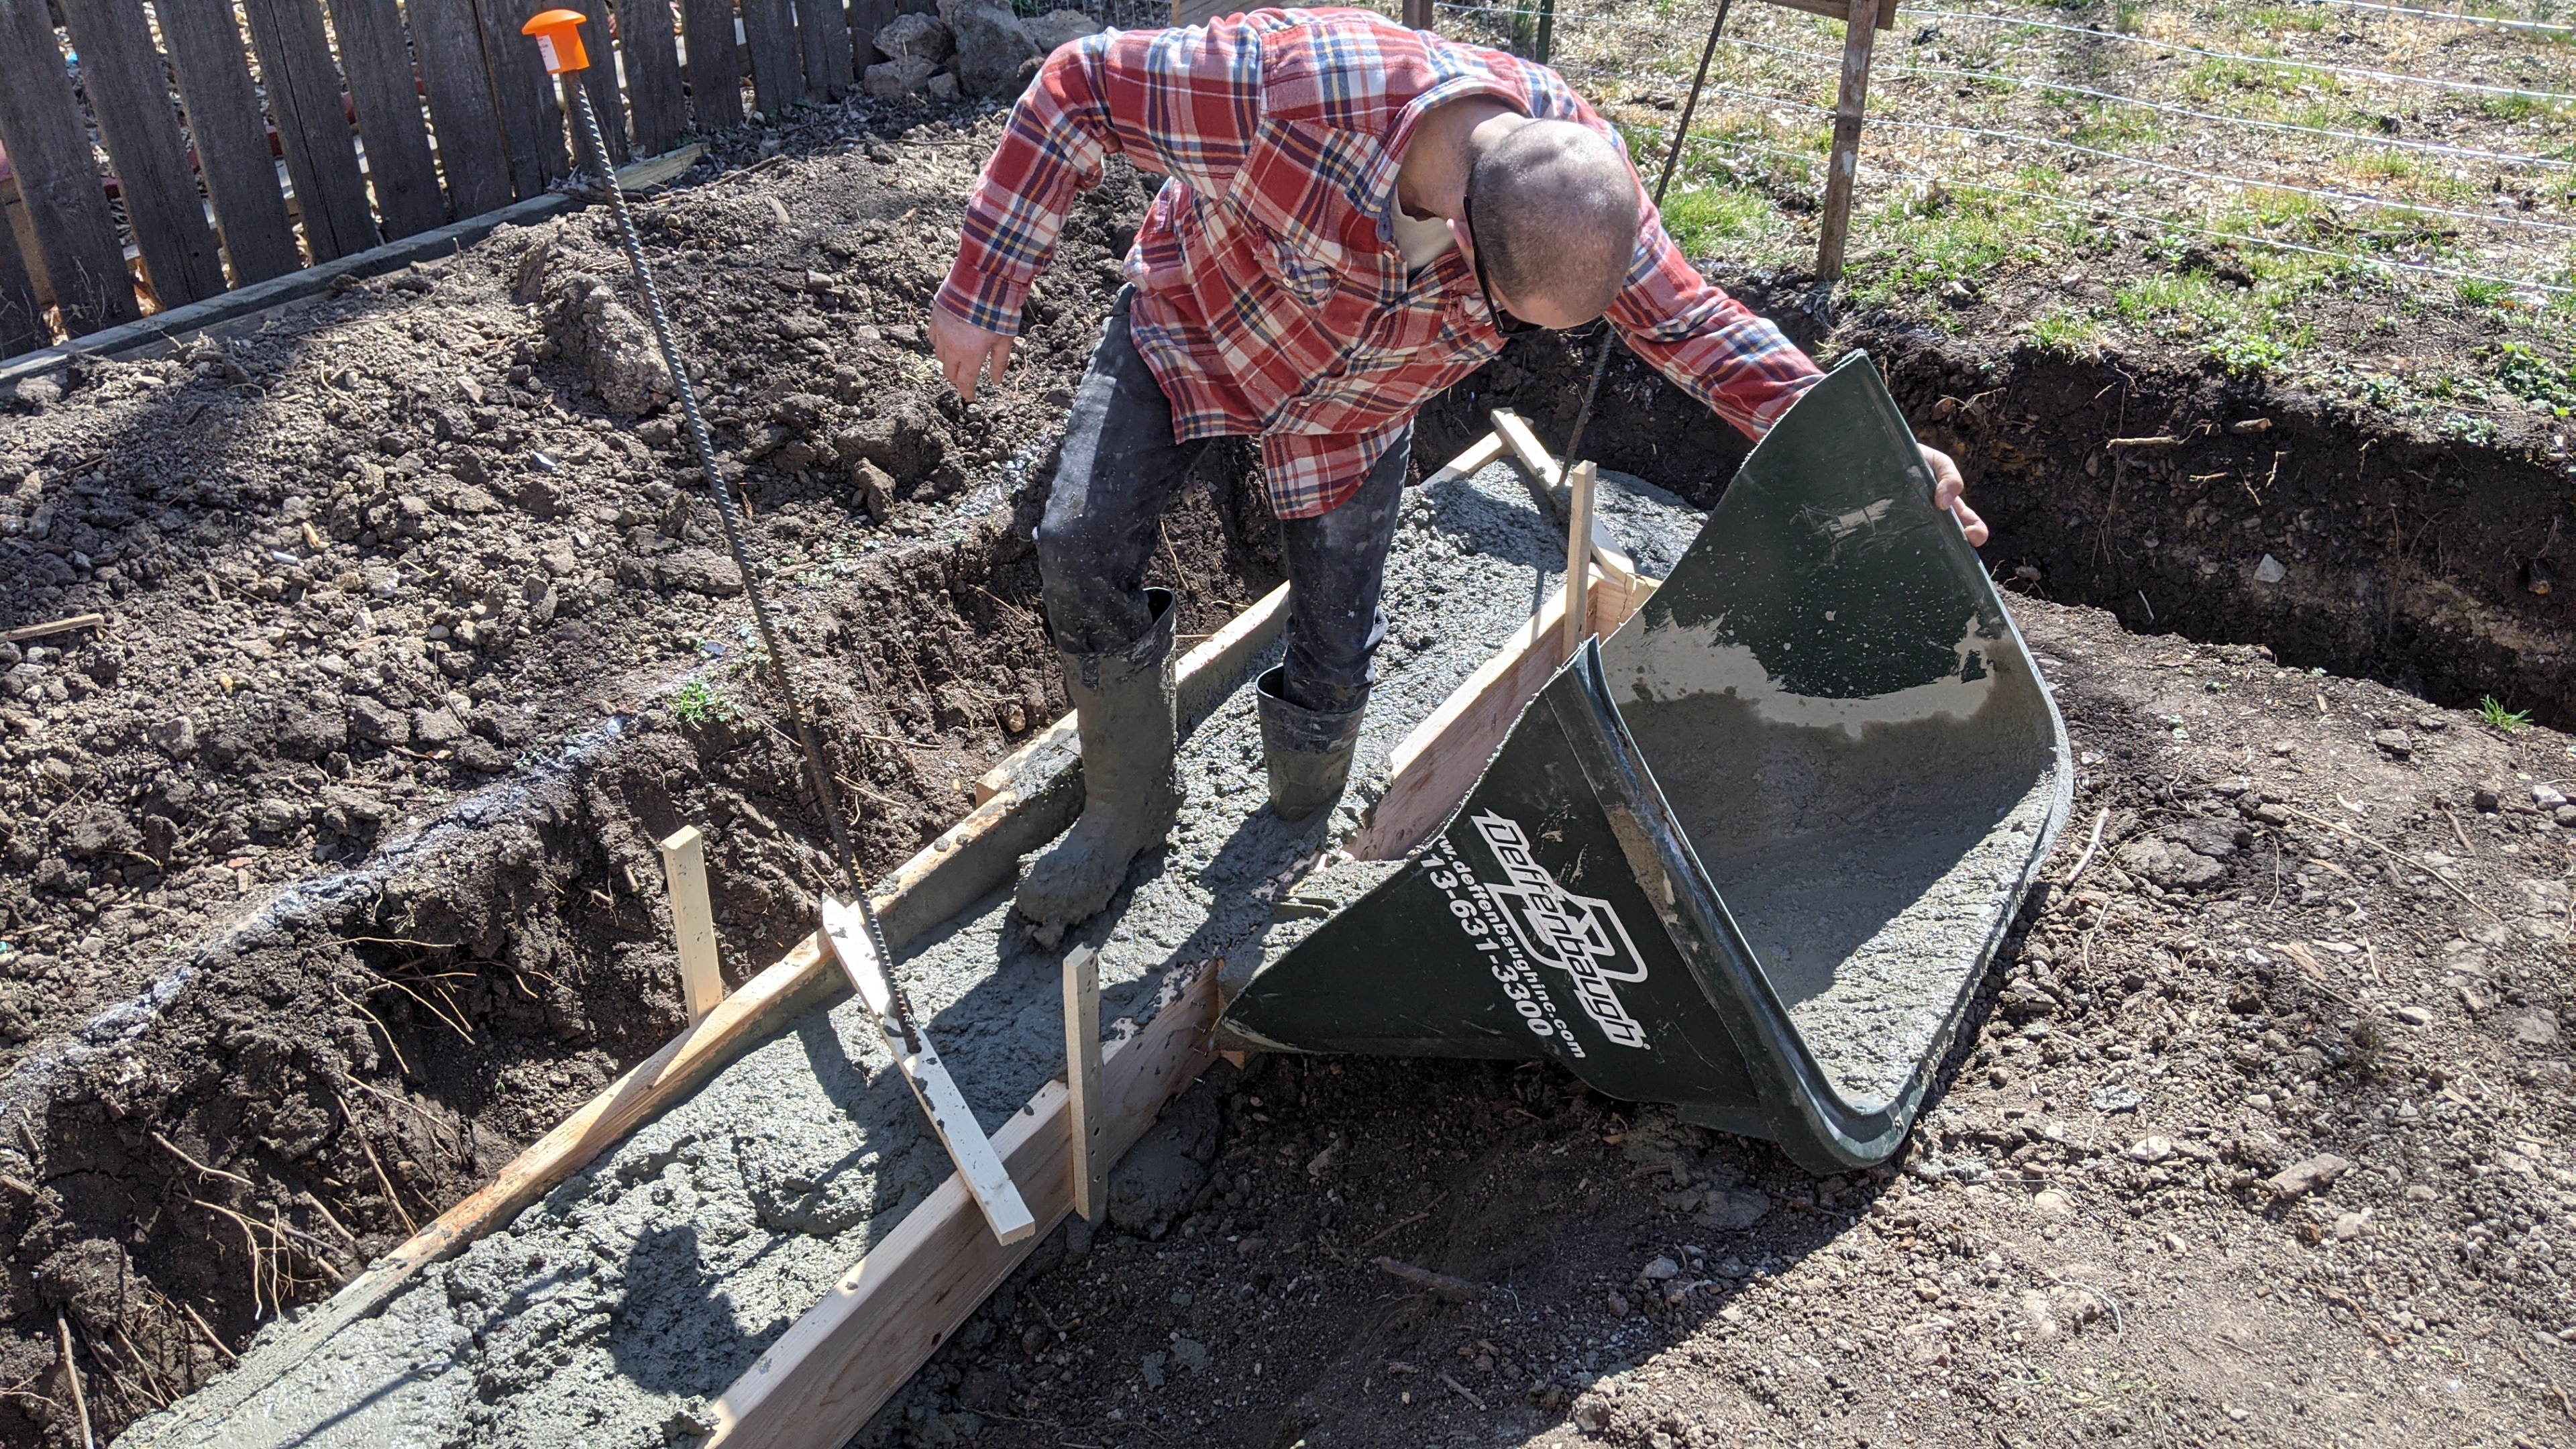
Footers poured and leveled to the best of my abilities.
Building a Rain Garden
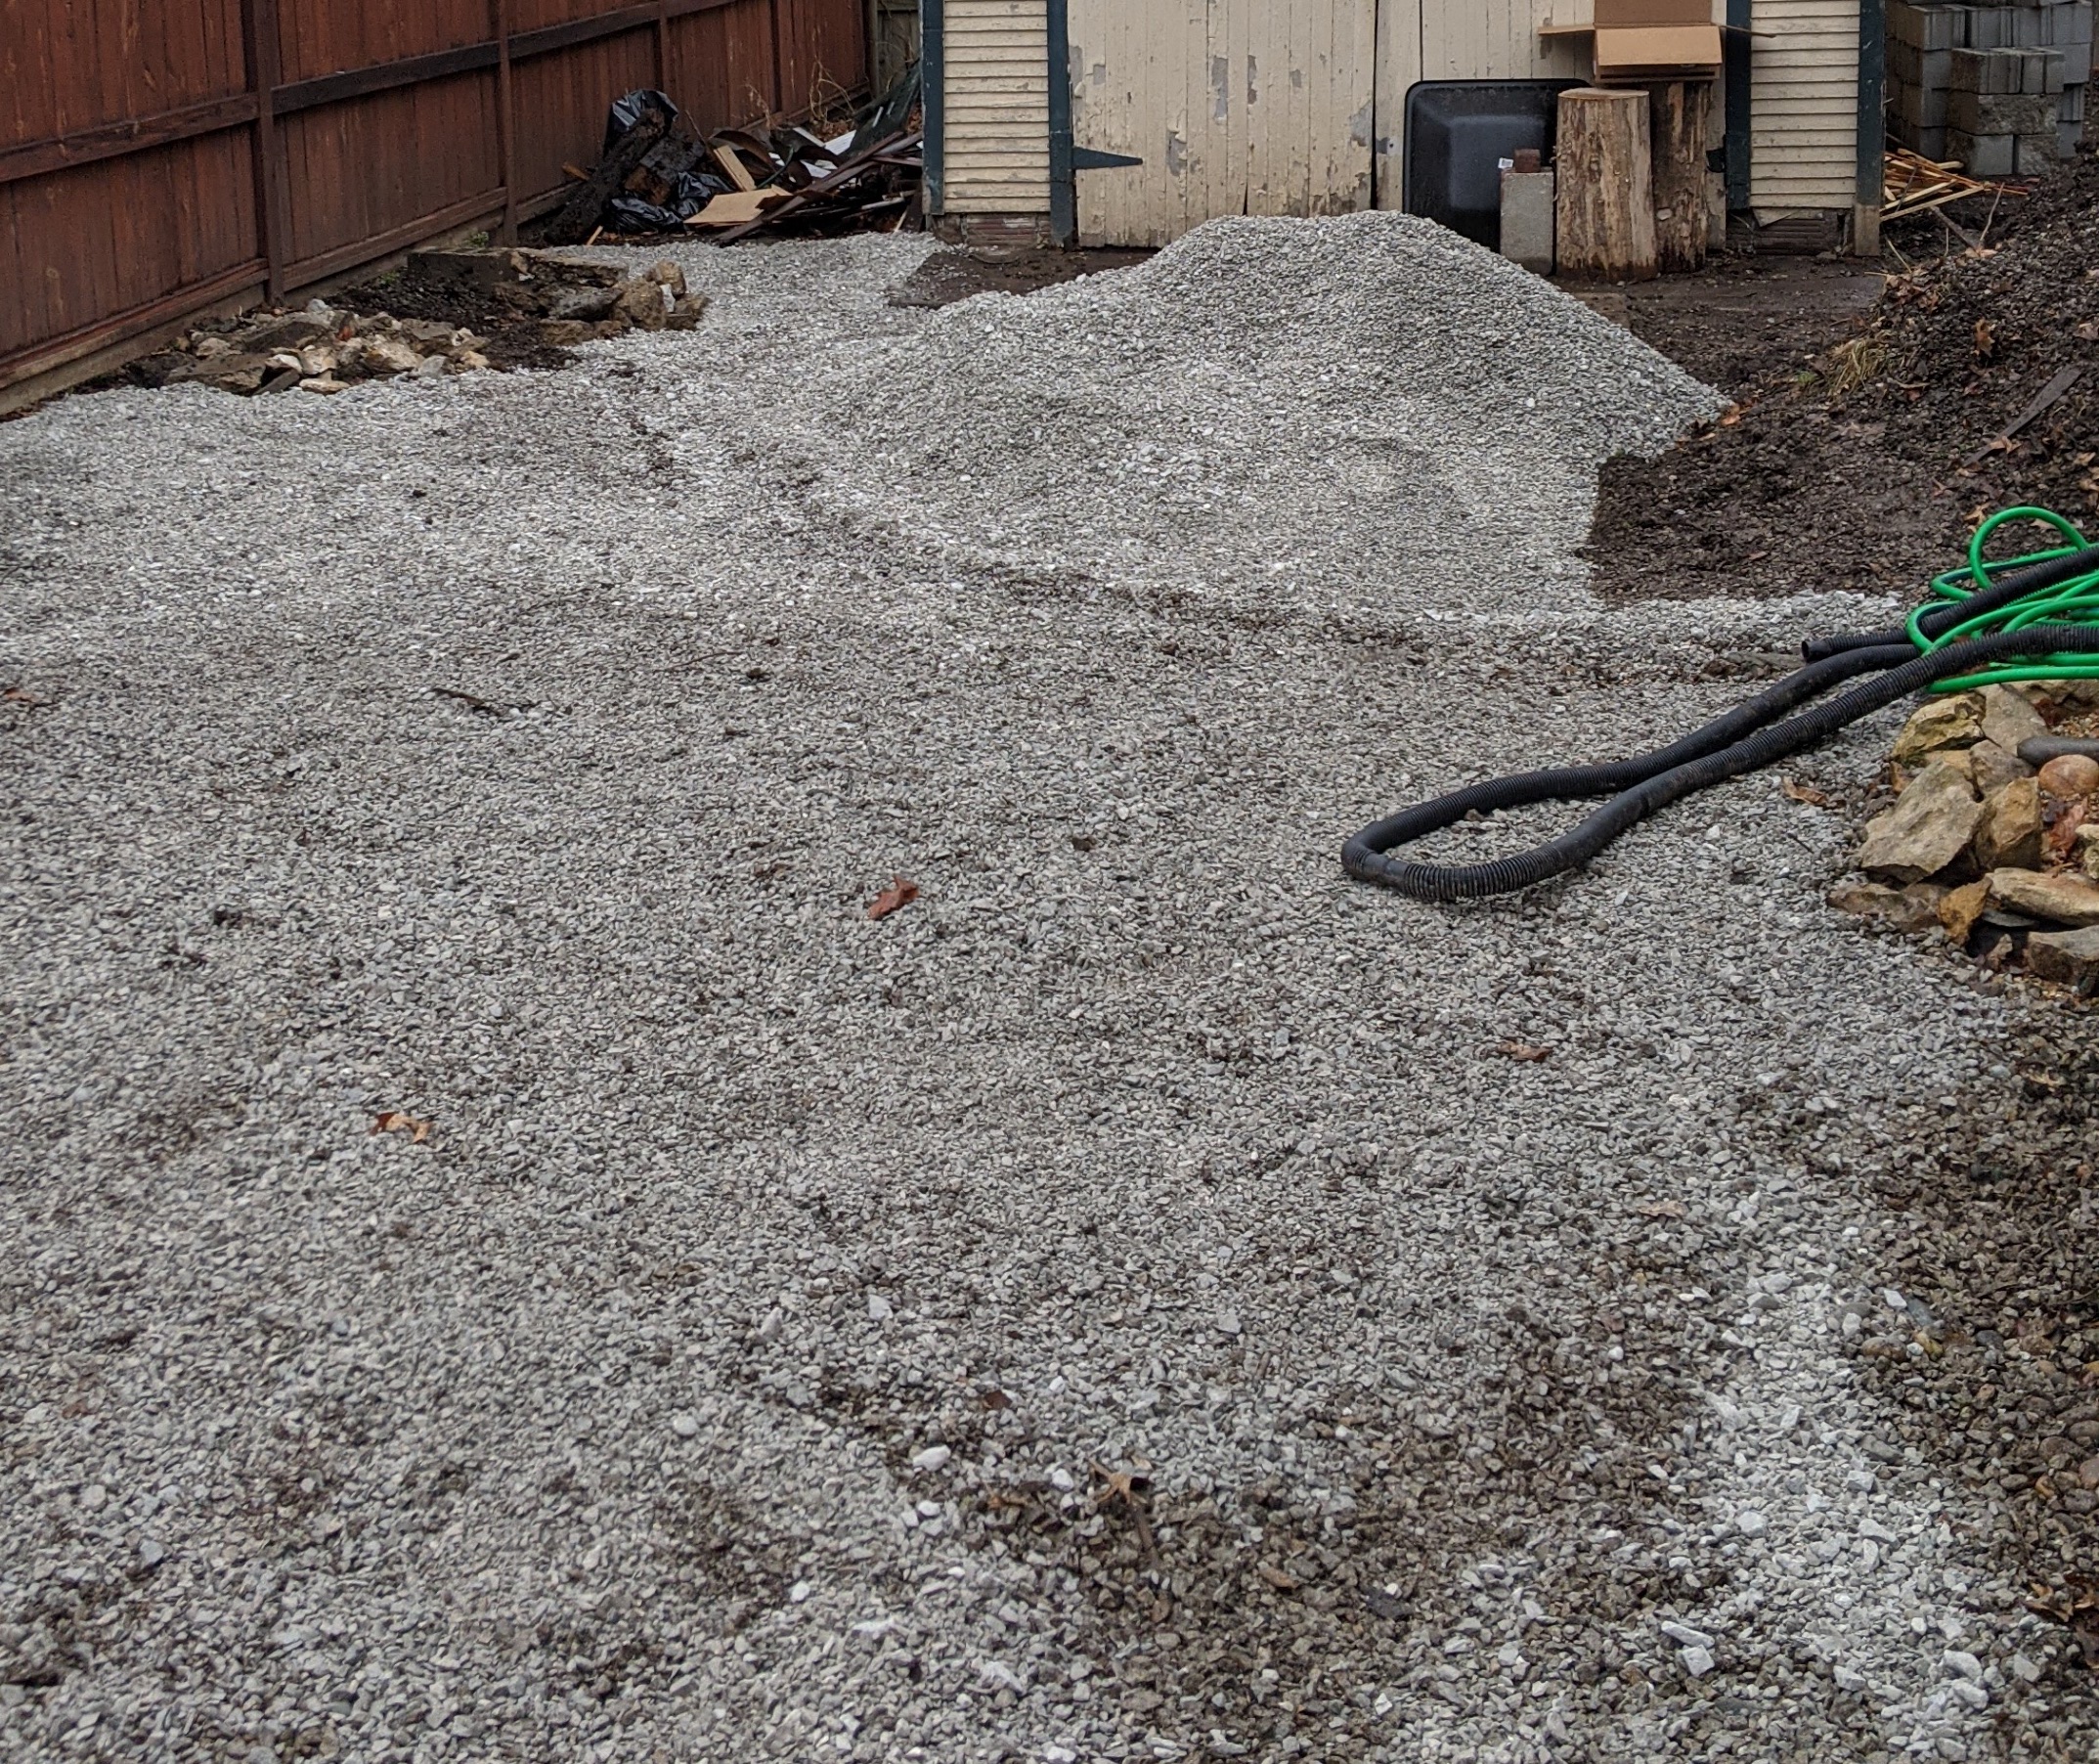
I had about 2.5 tons of gravel delivered
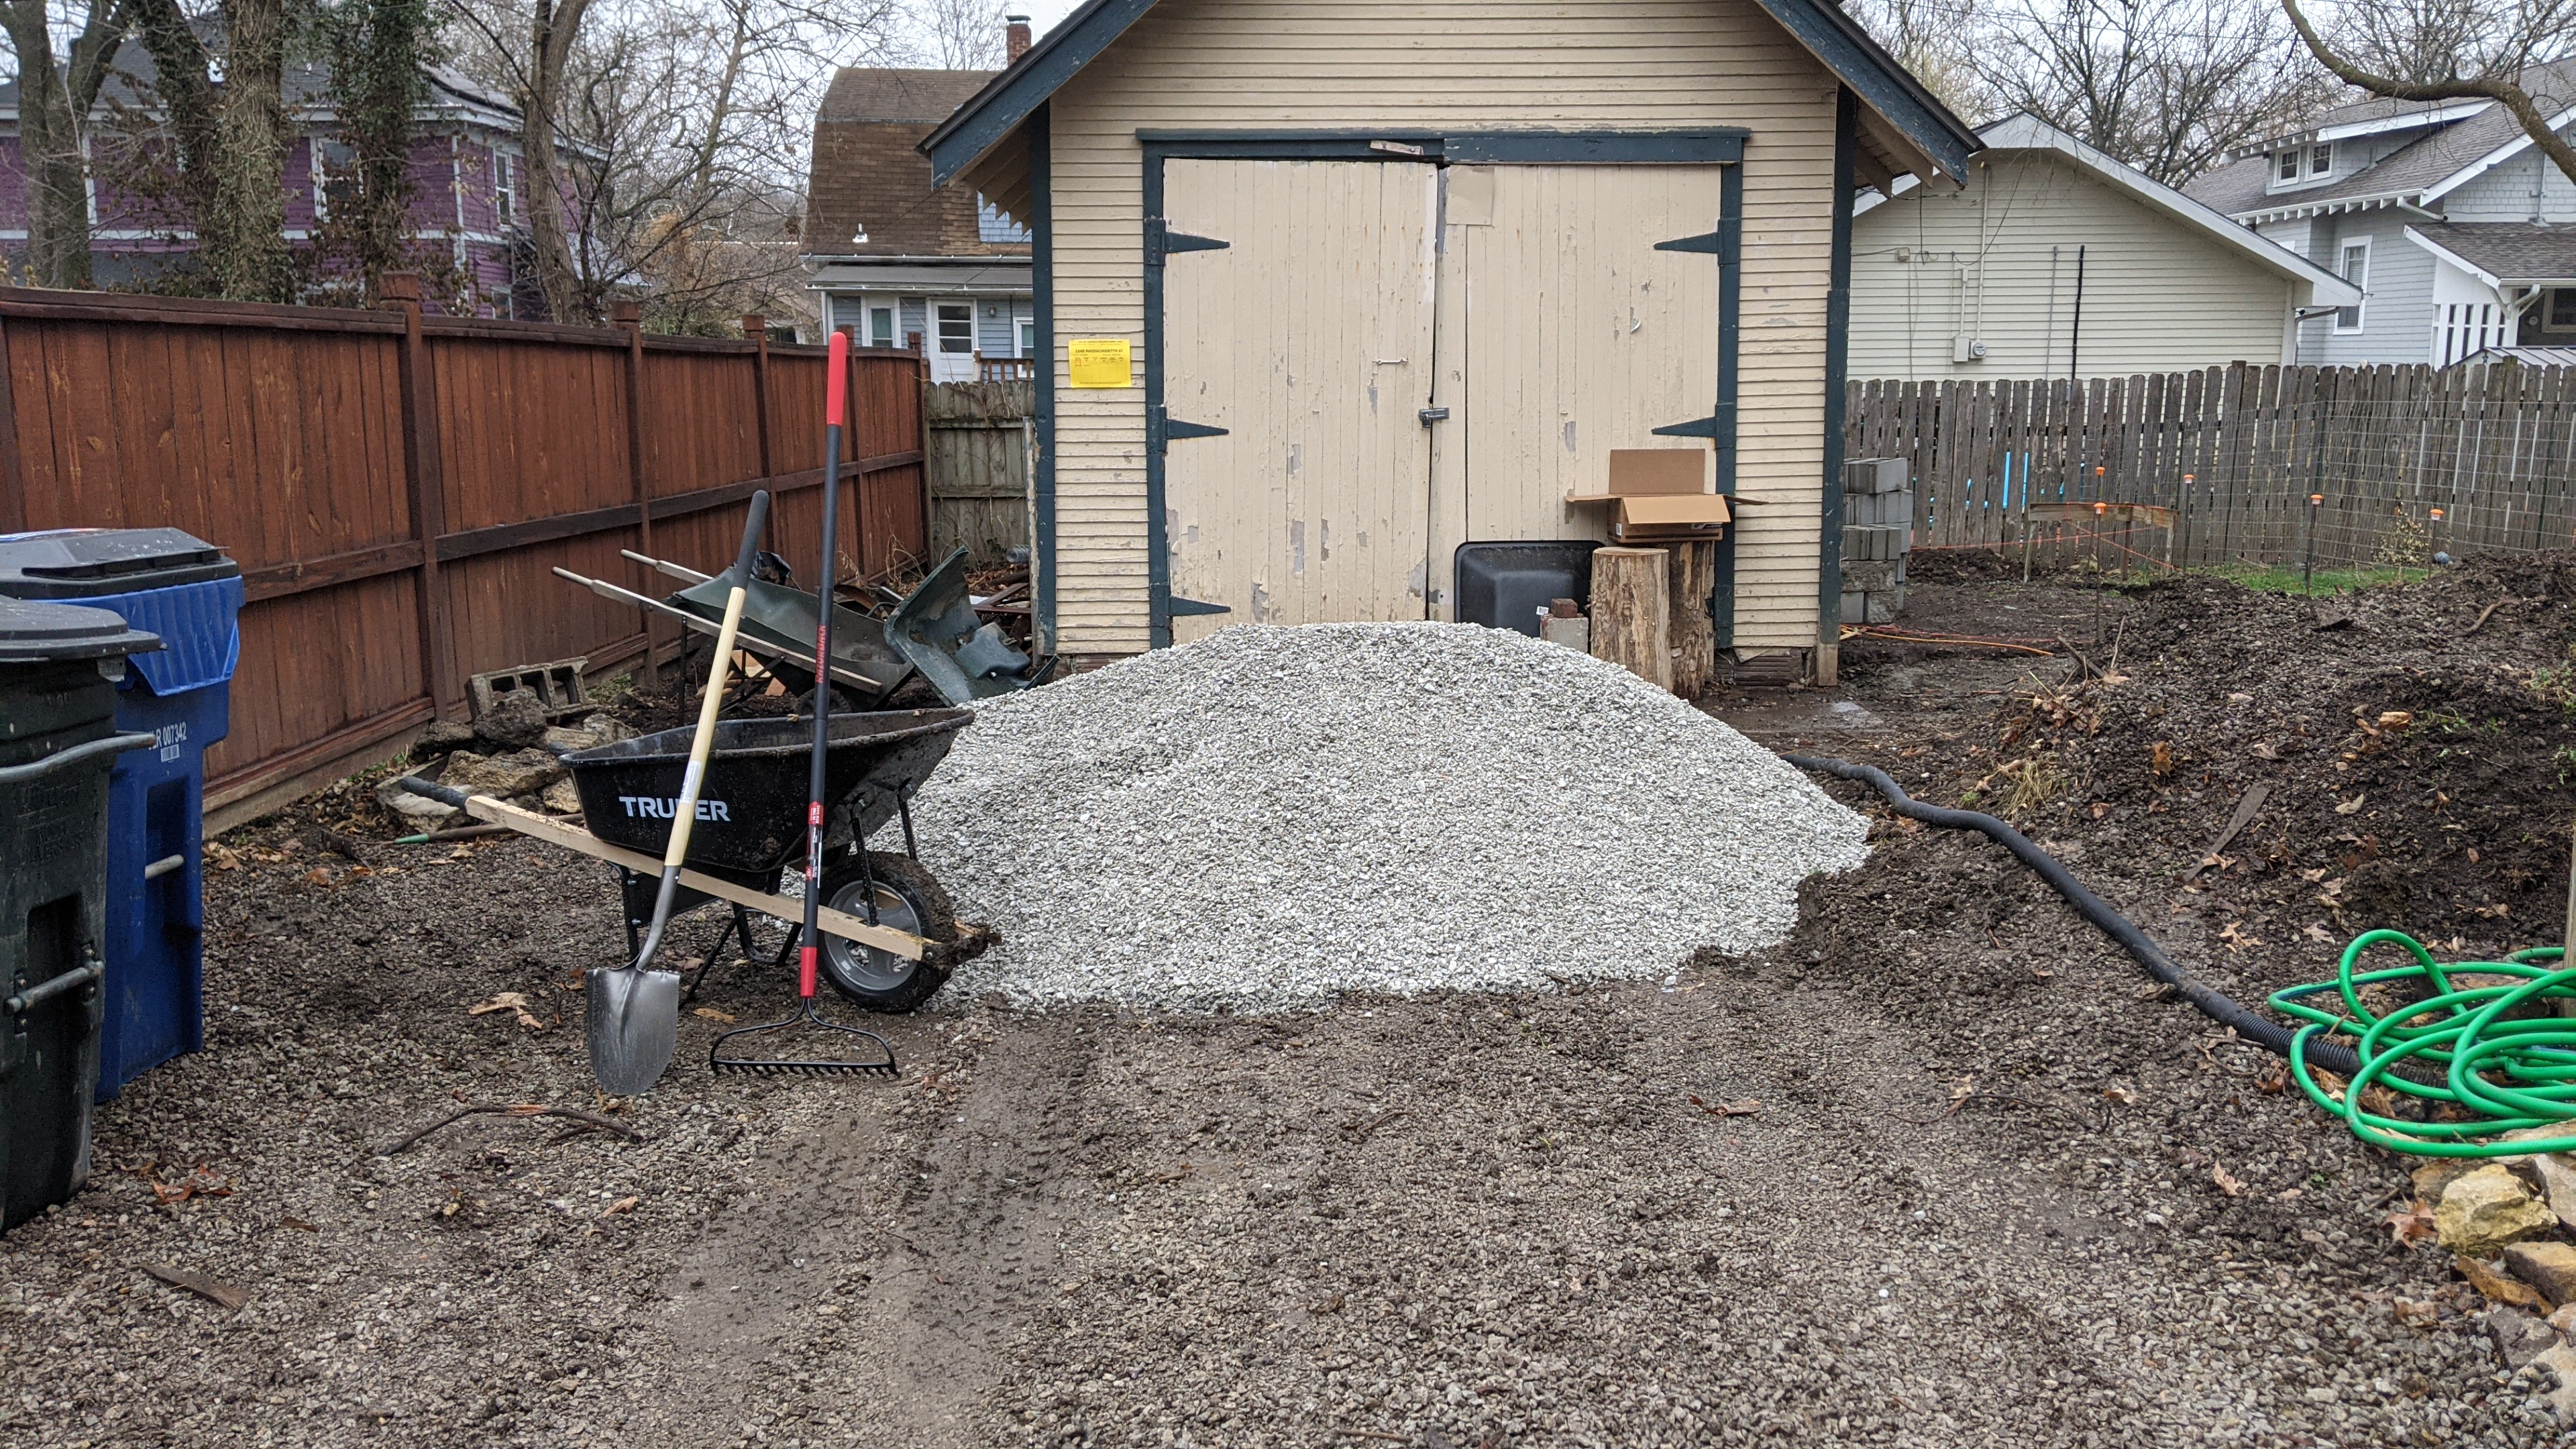
I spread it around by hand. So clean! For now...
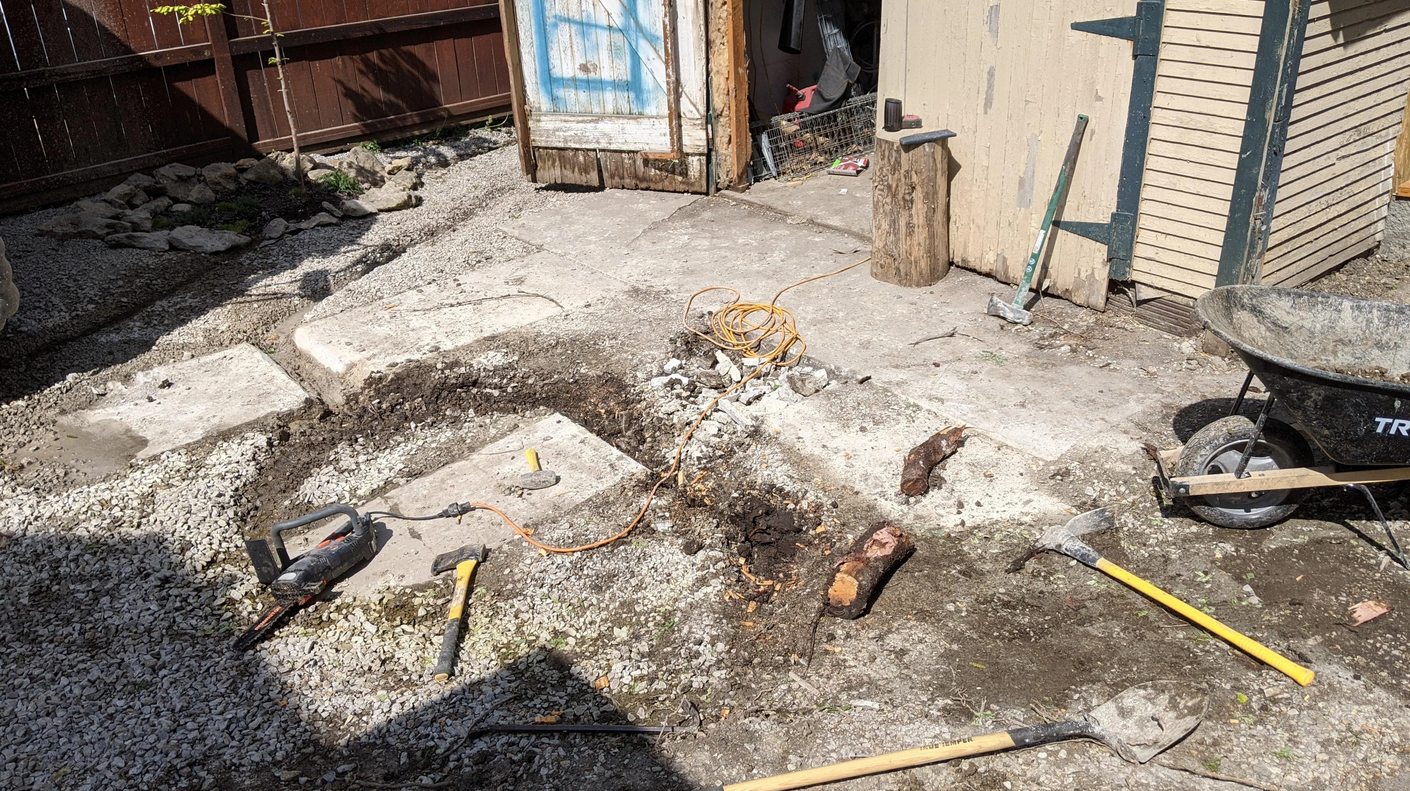
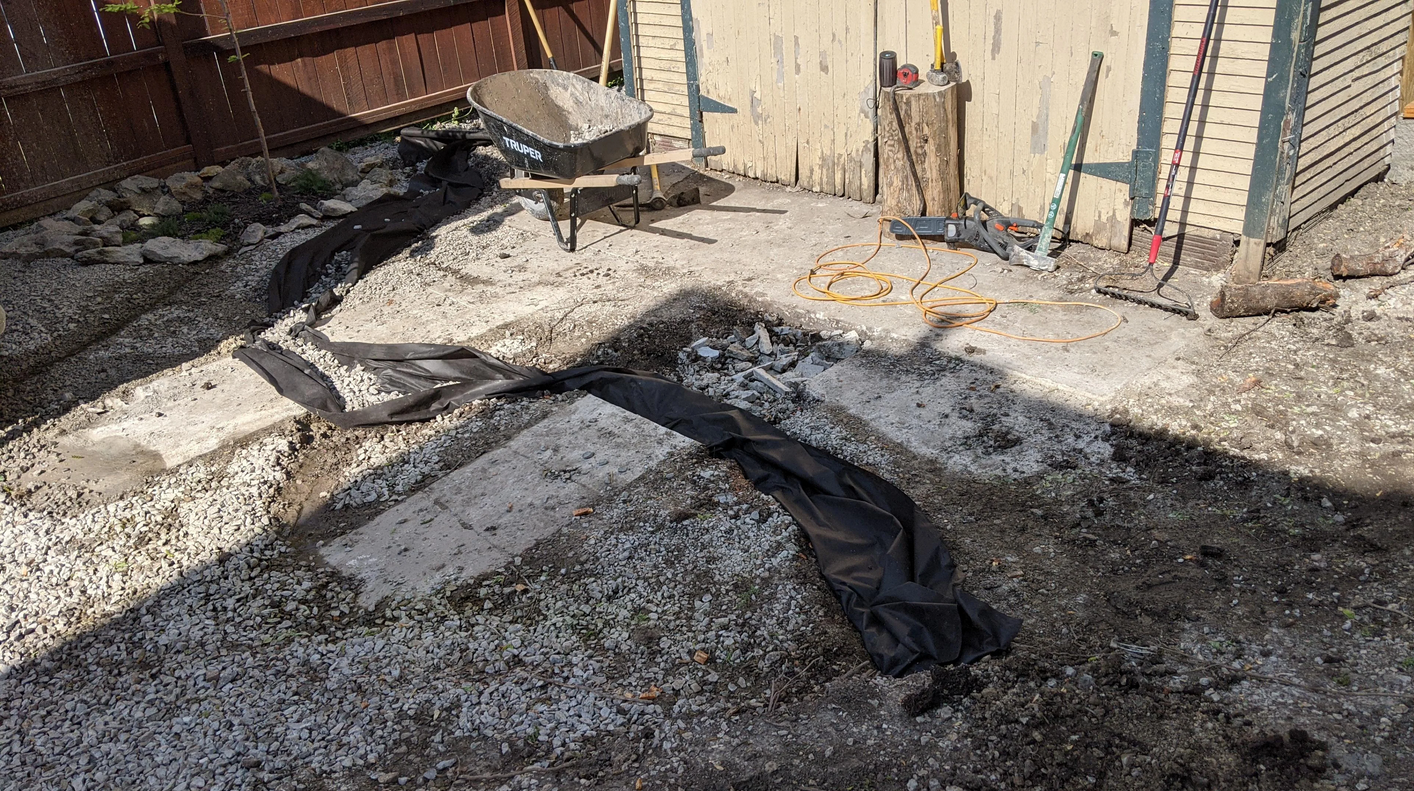
I made a ditch so that when it rained, the rain would go towards a little rain garden area rather than towards the garage or house. The sump pump also discharges into this drain. Seems like it goes off every 10 minutes.
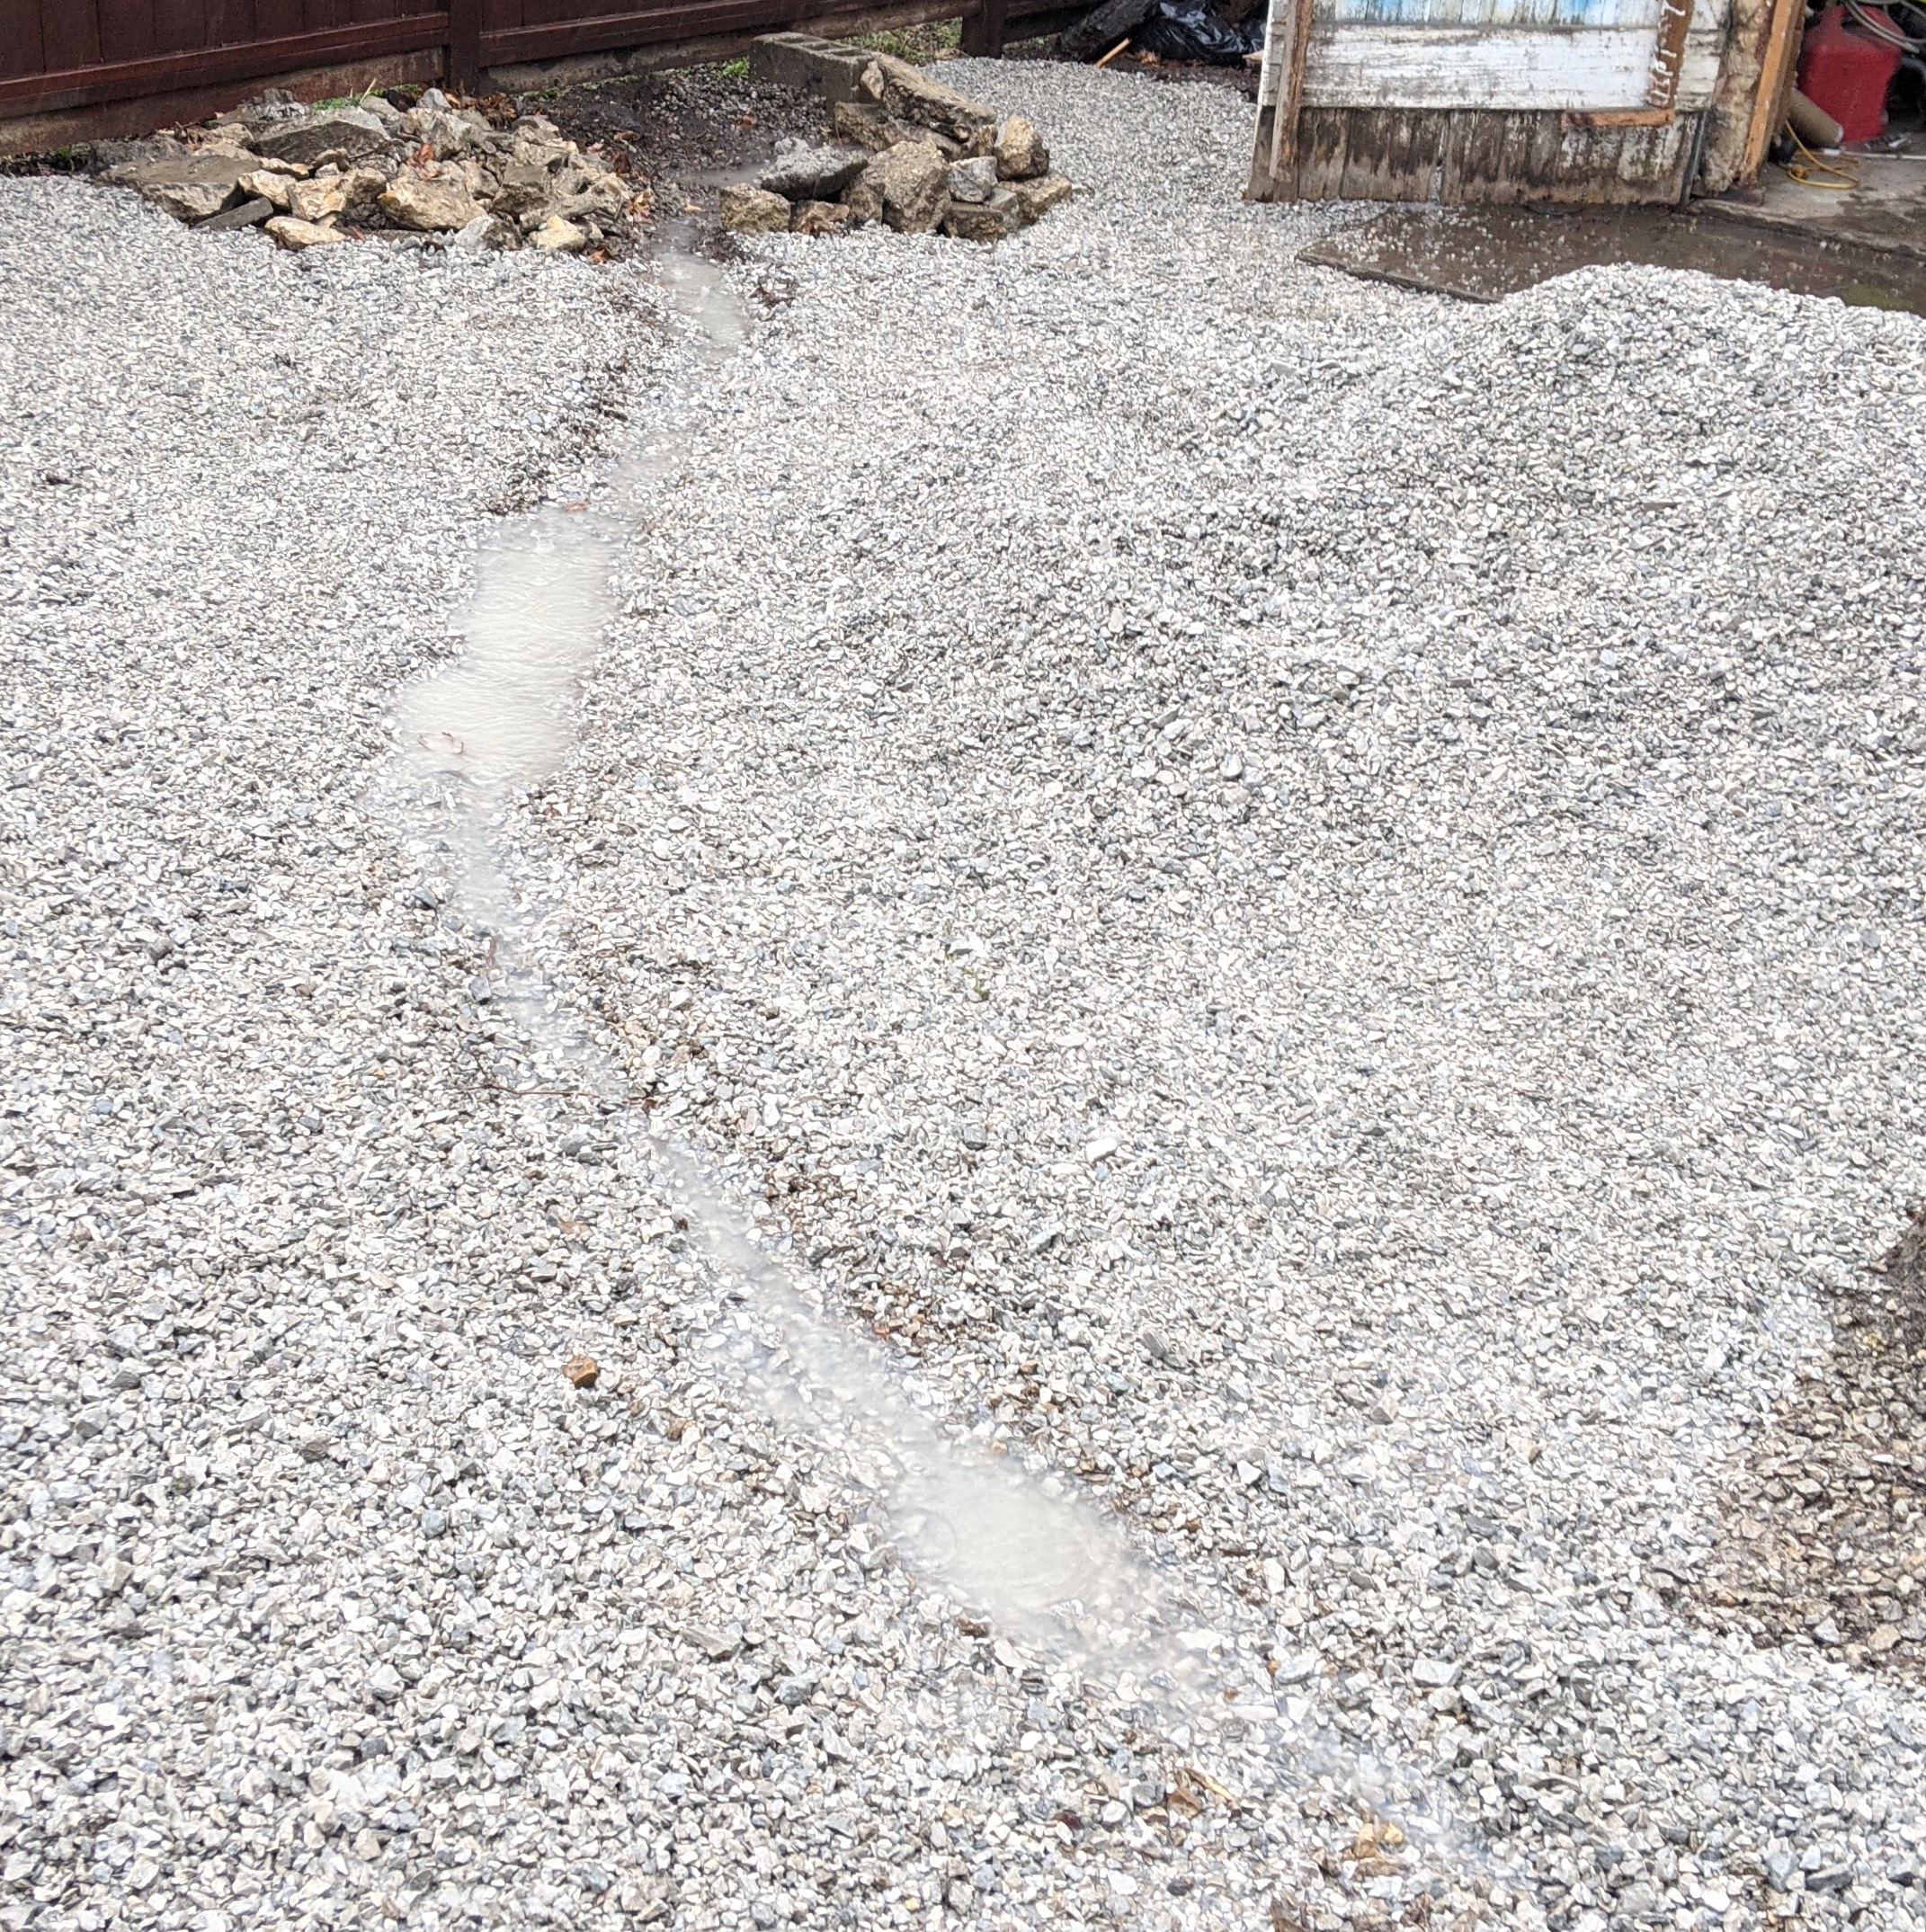
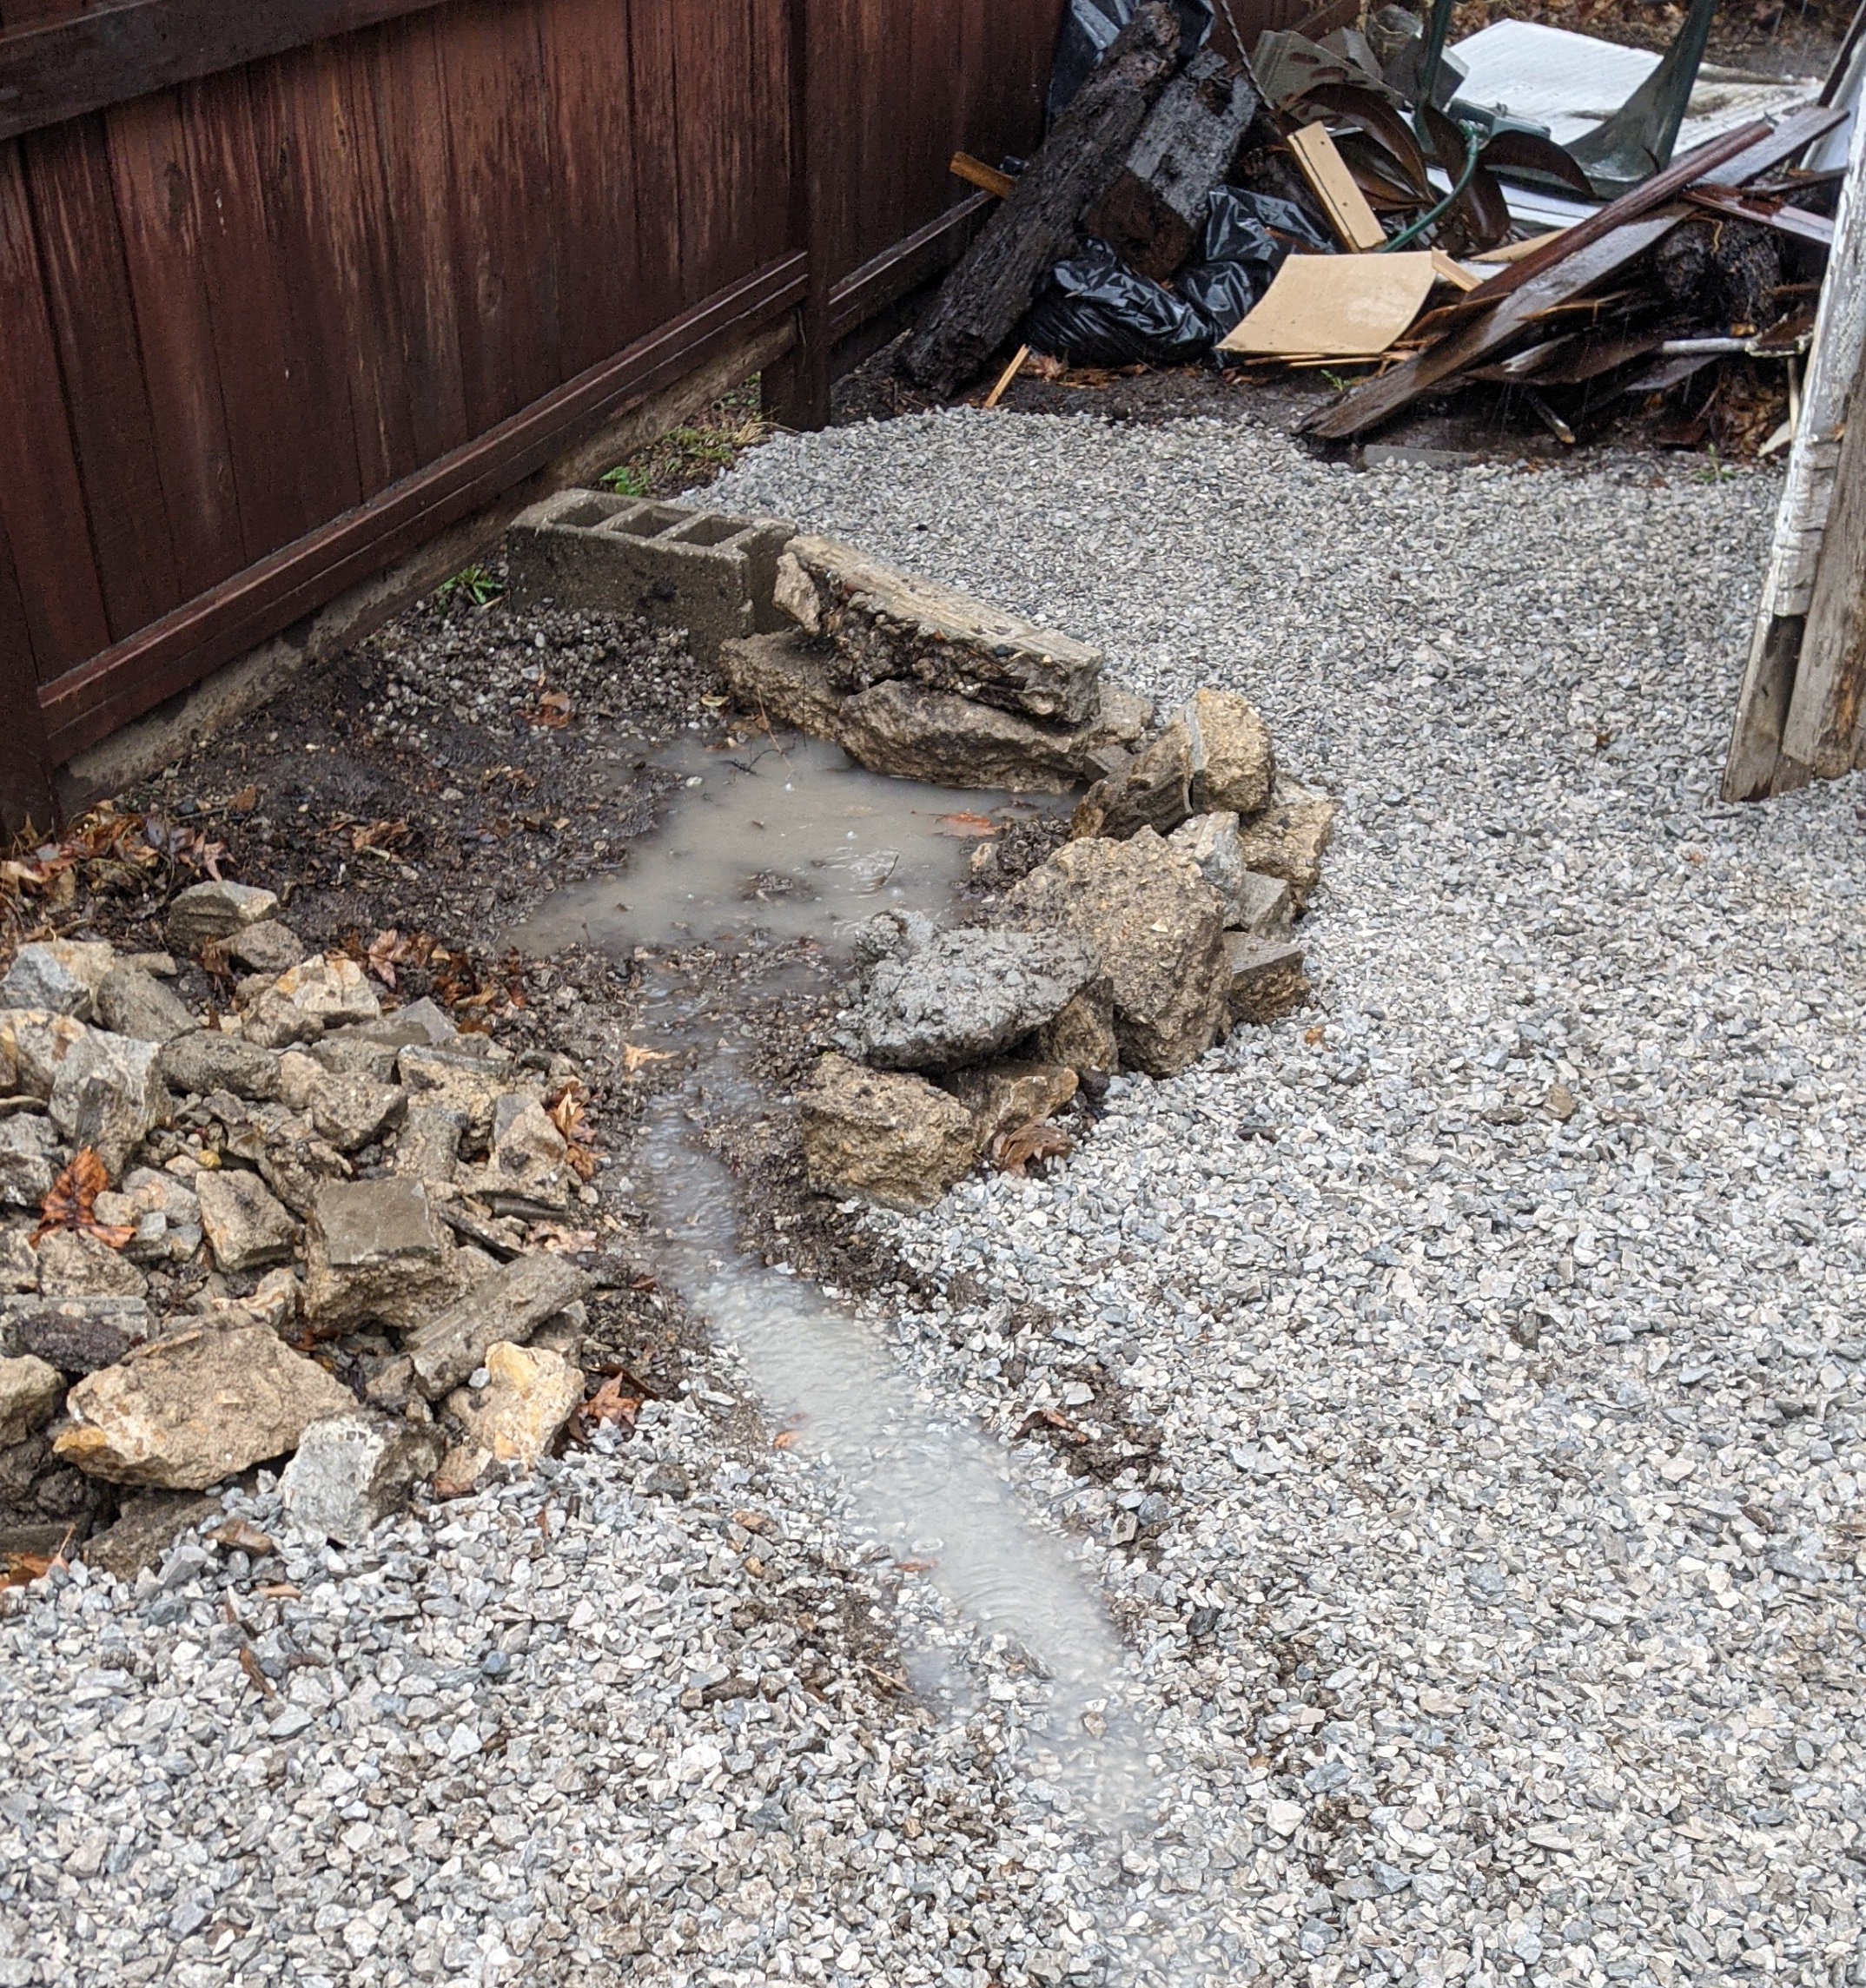
This is the rain garden, I dug it a lot deeper after taking this photo and will fill it up with compost and sand, and will plant a bald cypress and some swamp loving plants. The sump pump water will drain into this so it will probably never dry out.
And then my friend came over to get some of the dirt he needed for a job, he used a stand-behind skid steer. It made a huge muddy mess and I'm still no happy about it, but I can't complain really.

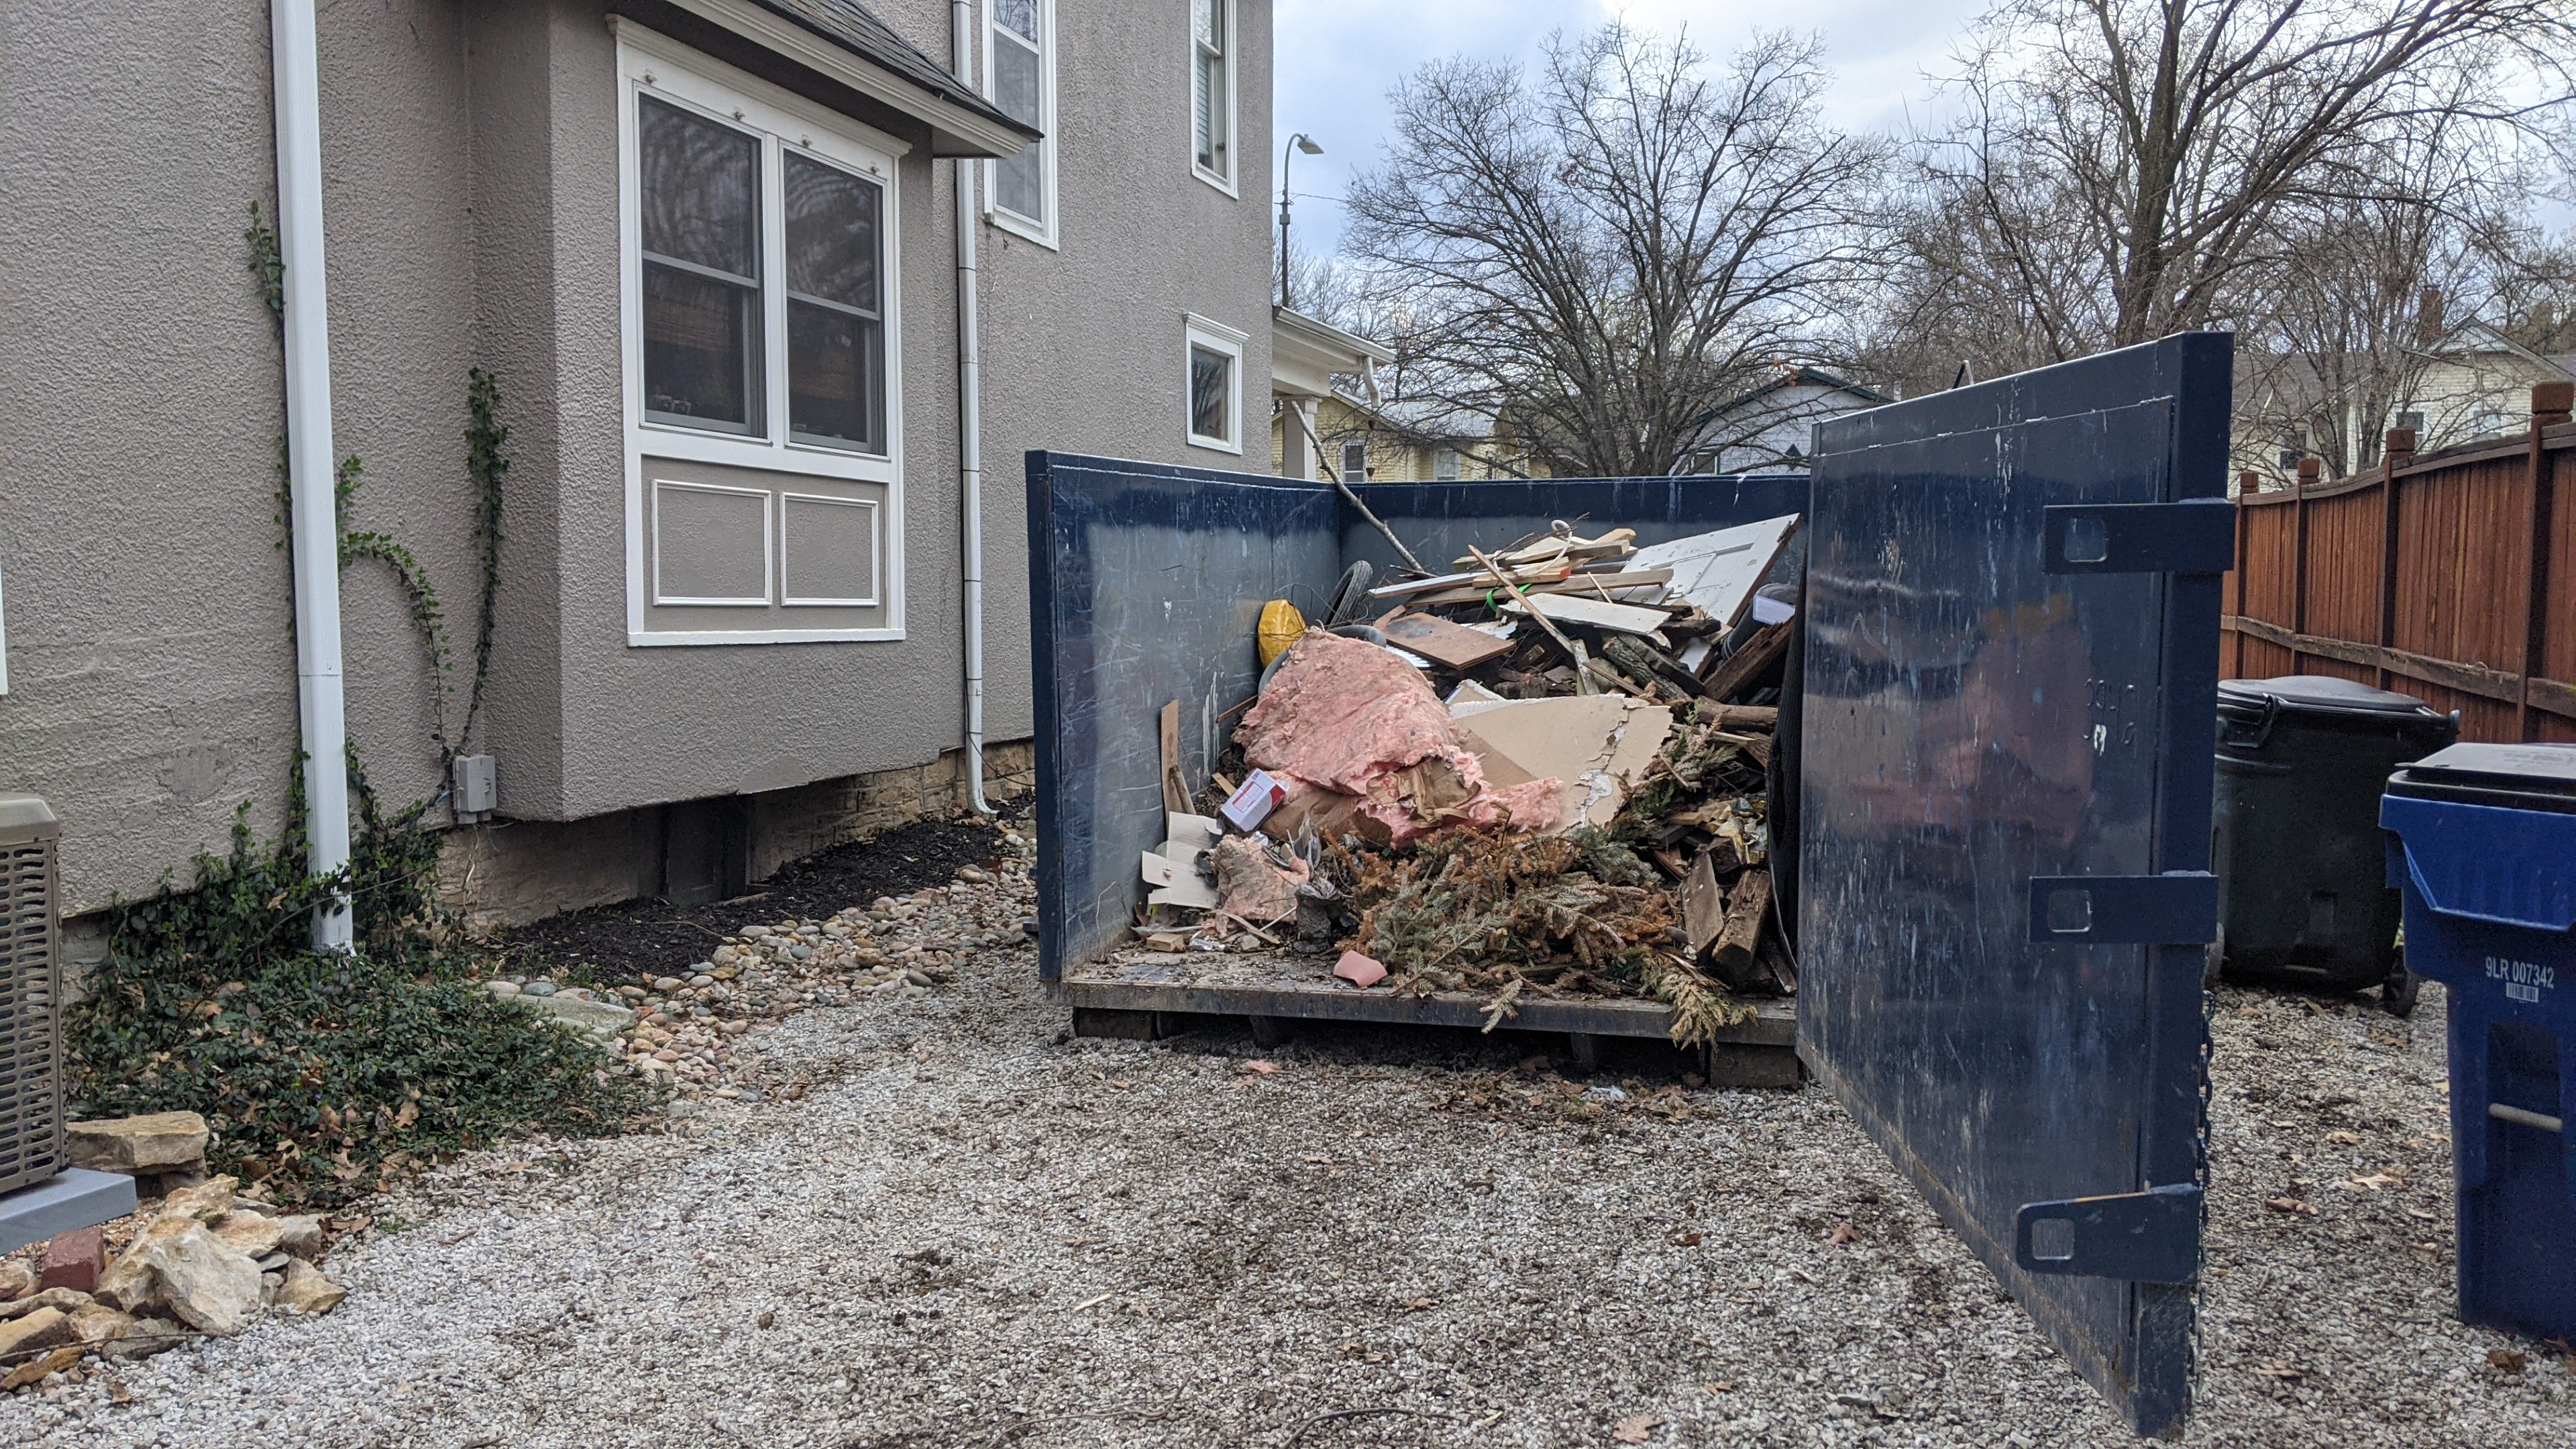
I got a dumpster for all the trash that was piling up behind the garage, you can see some of it in the above photos. It's about half full and I didn't even start on demolishing the wall that I'm replacing with a header beam.
It rained...
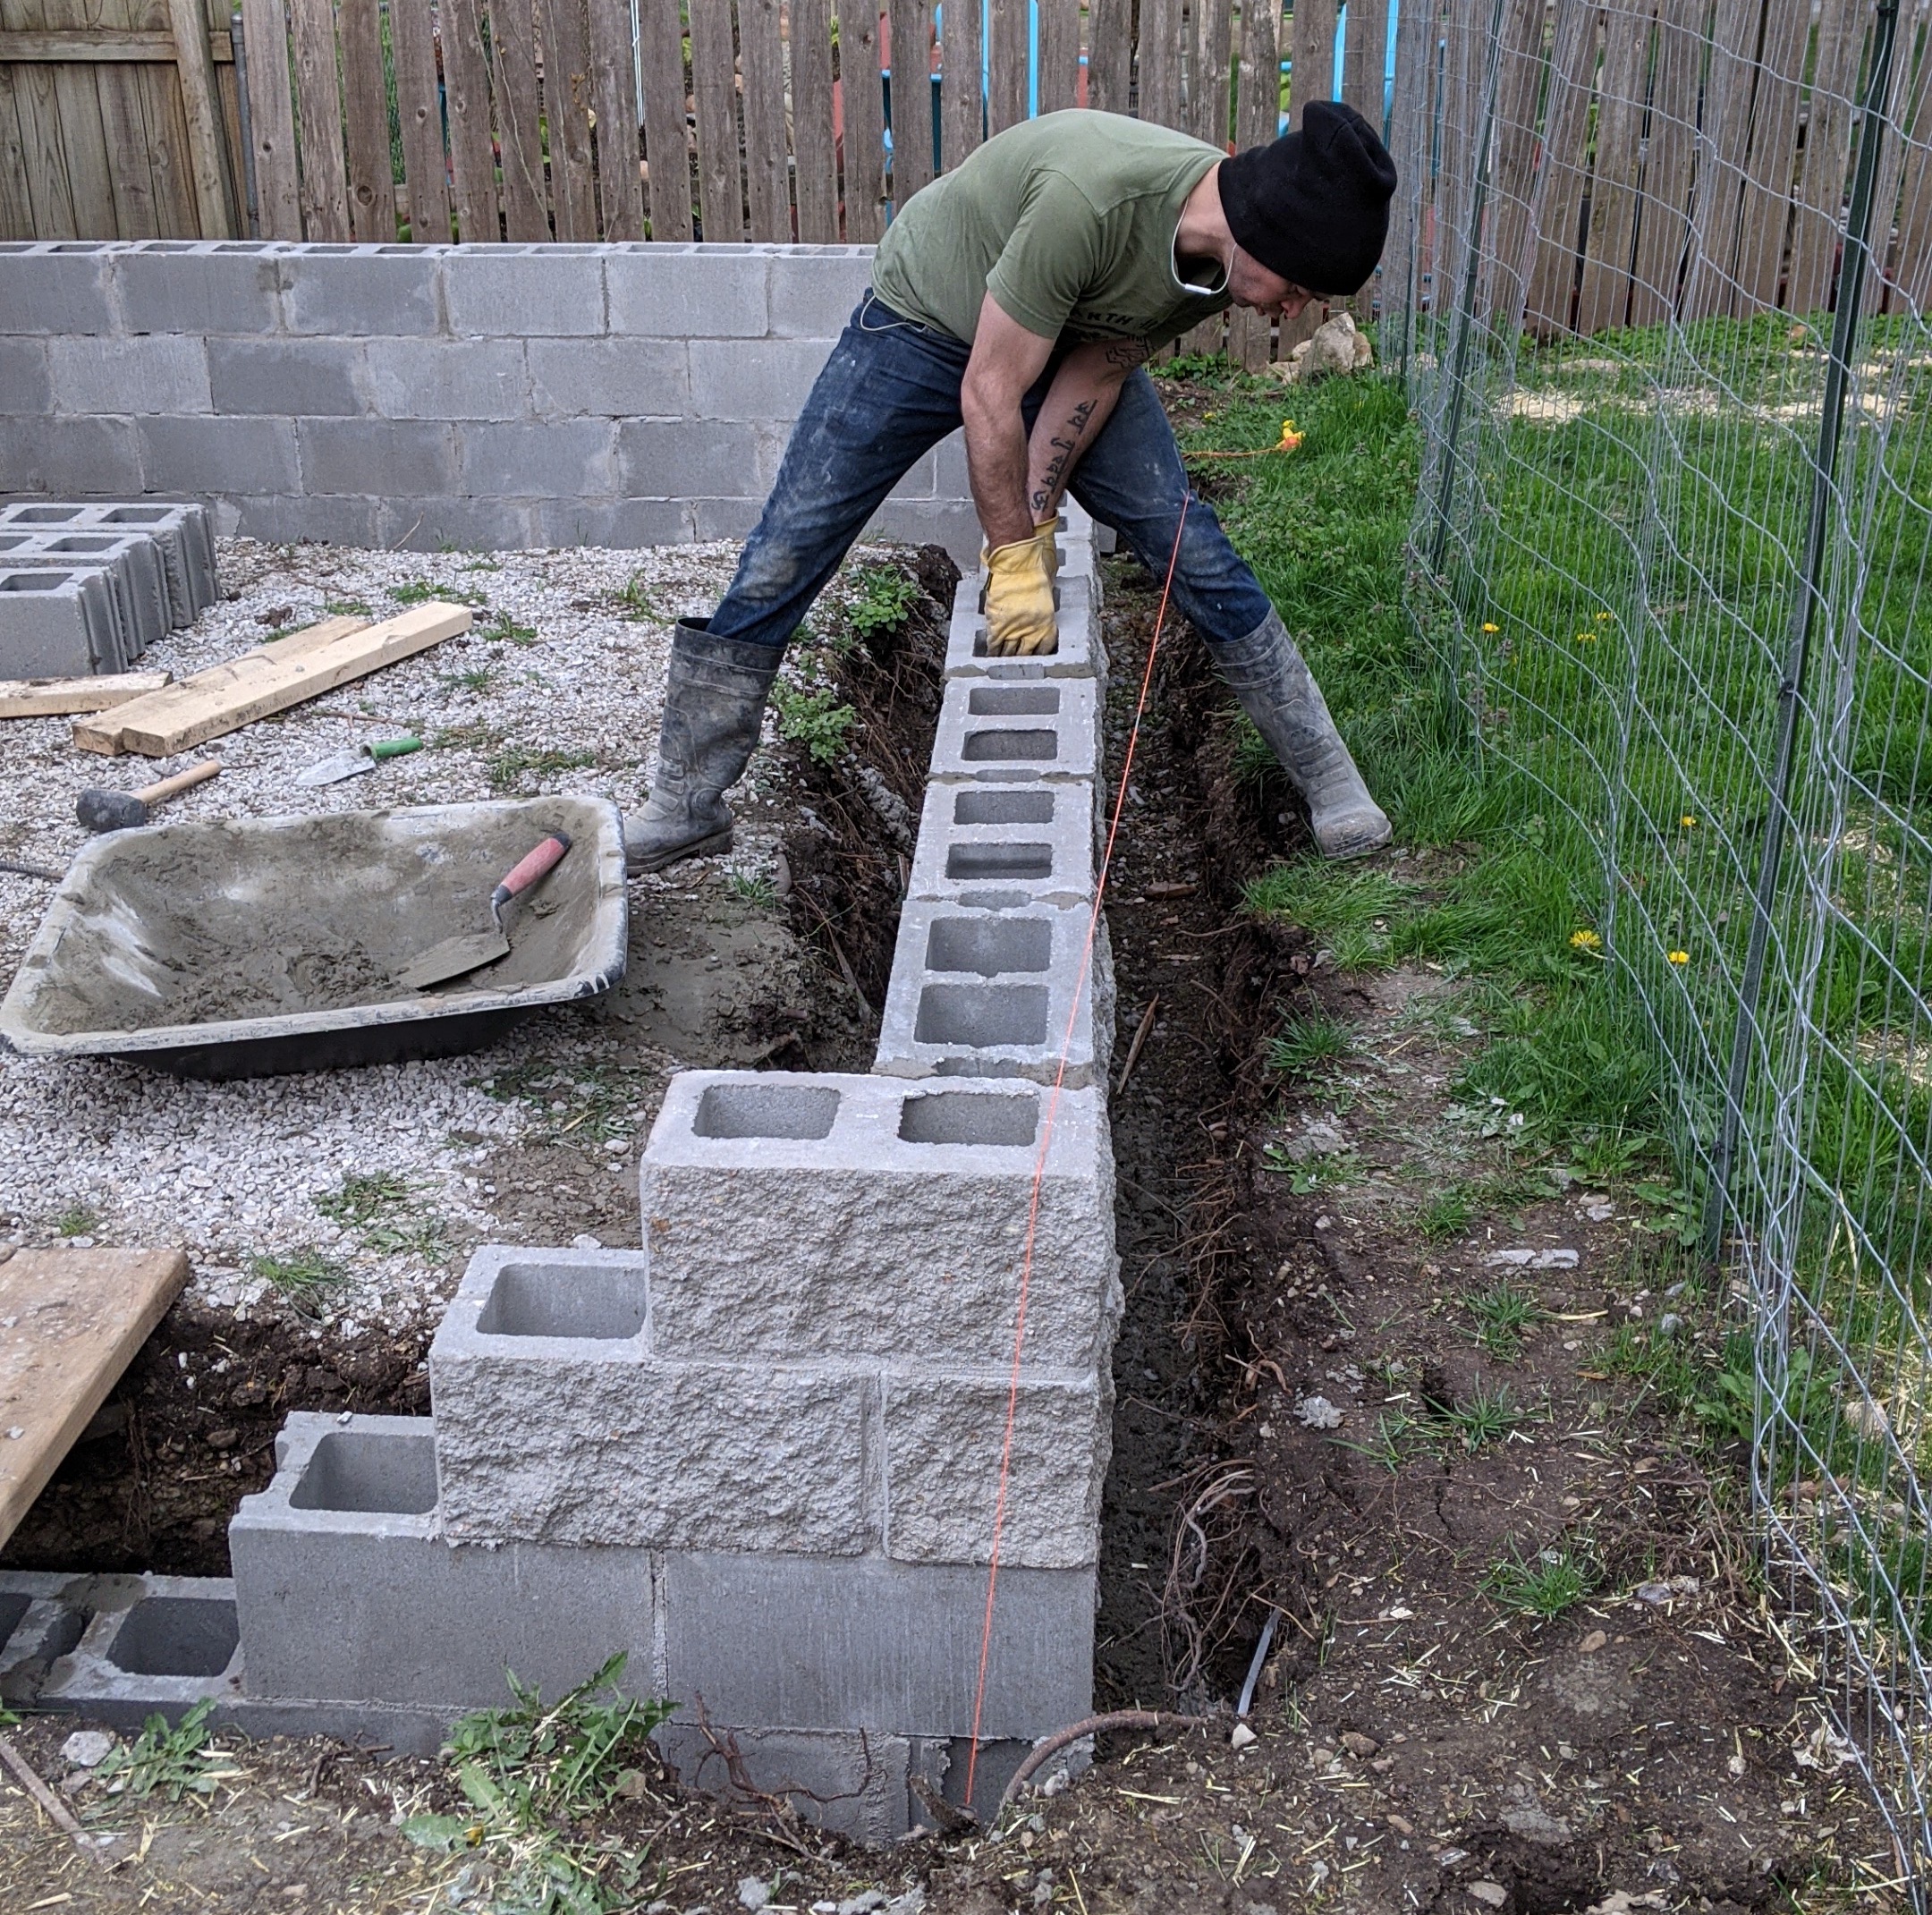
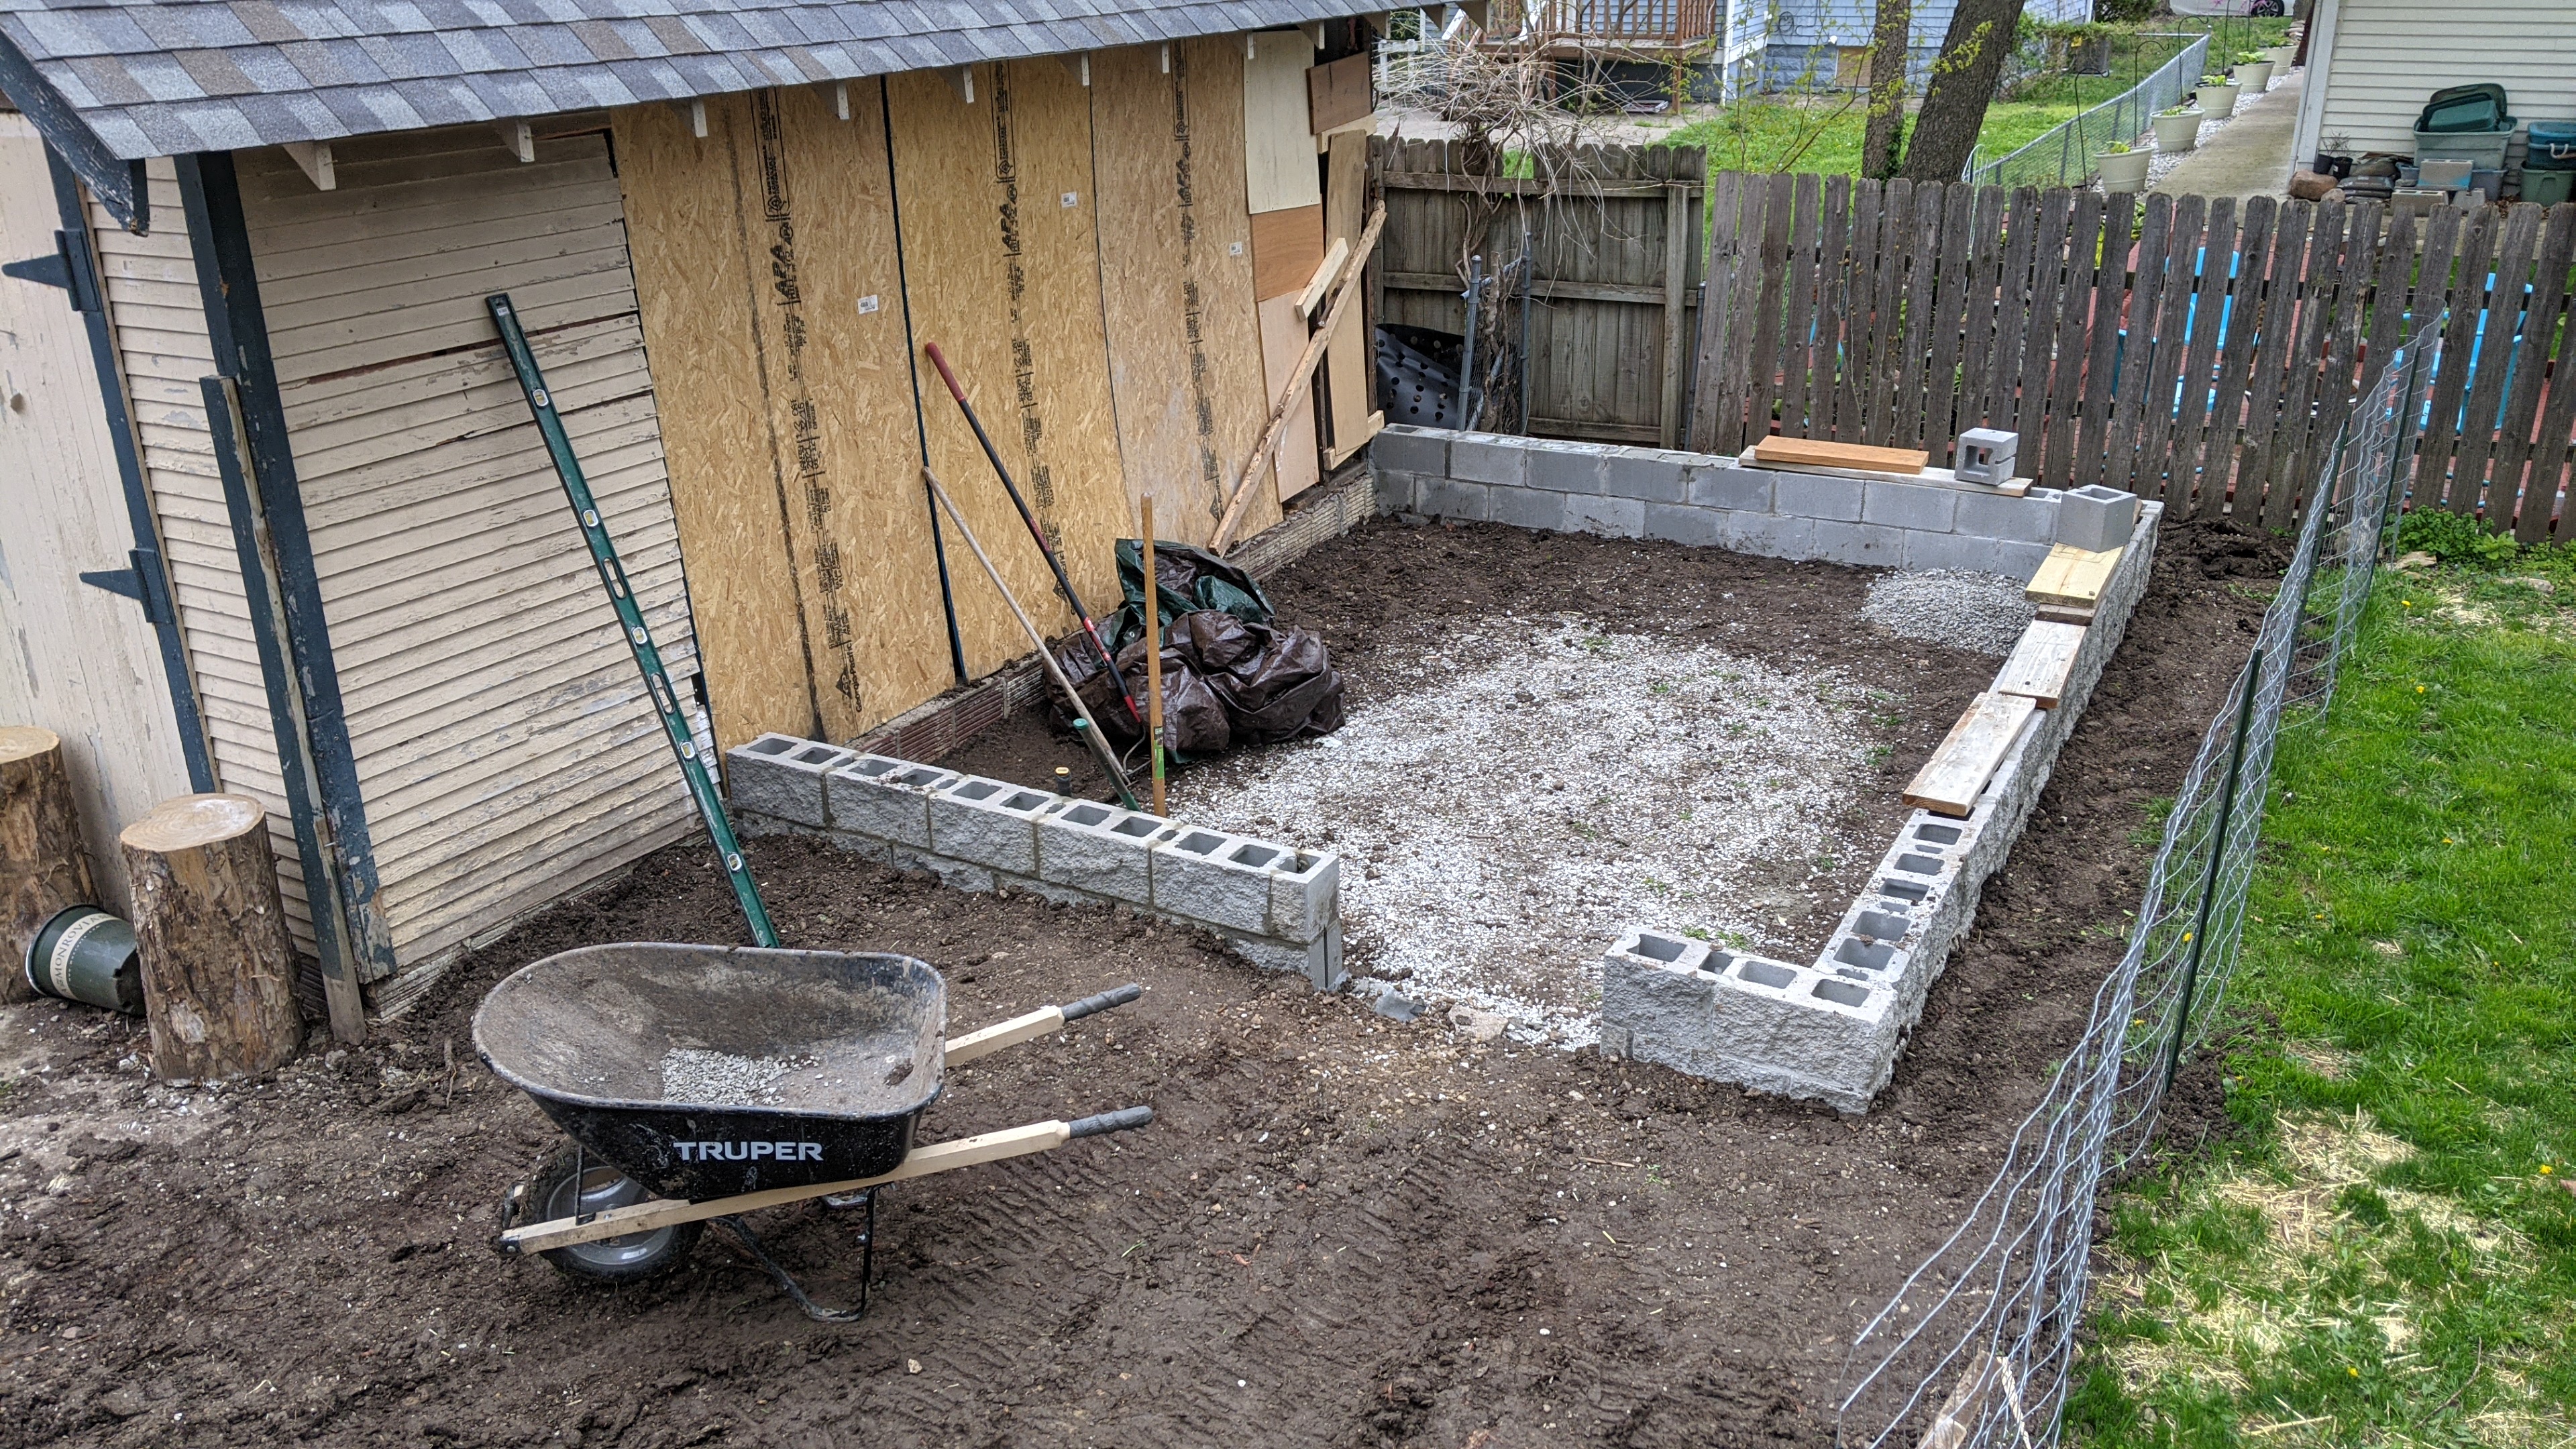
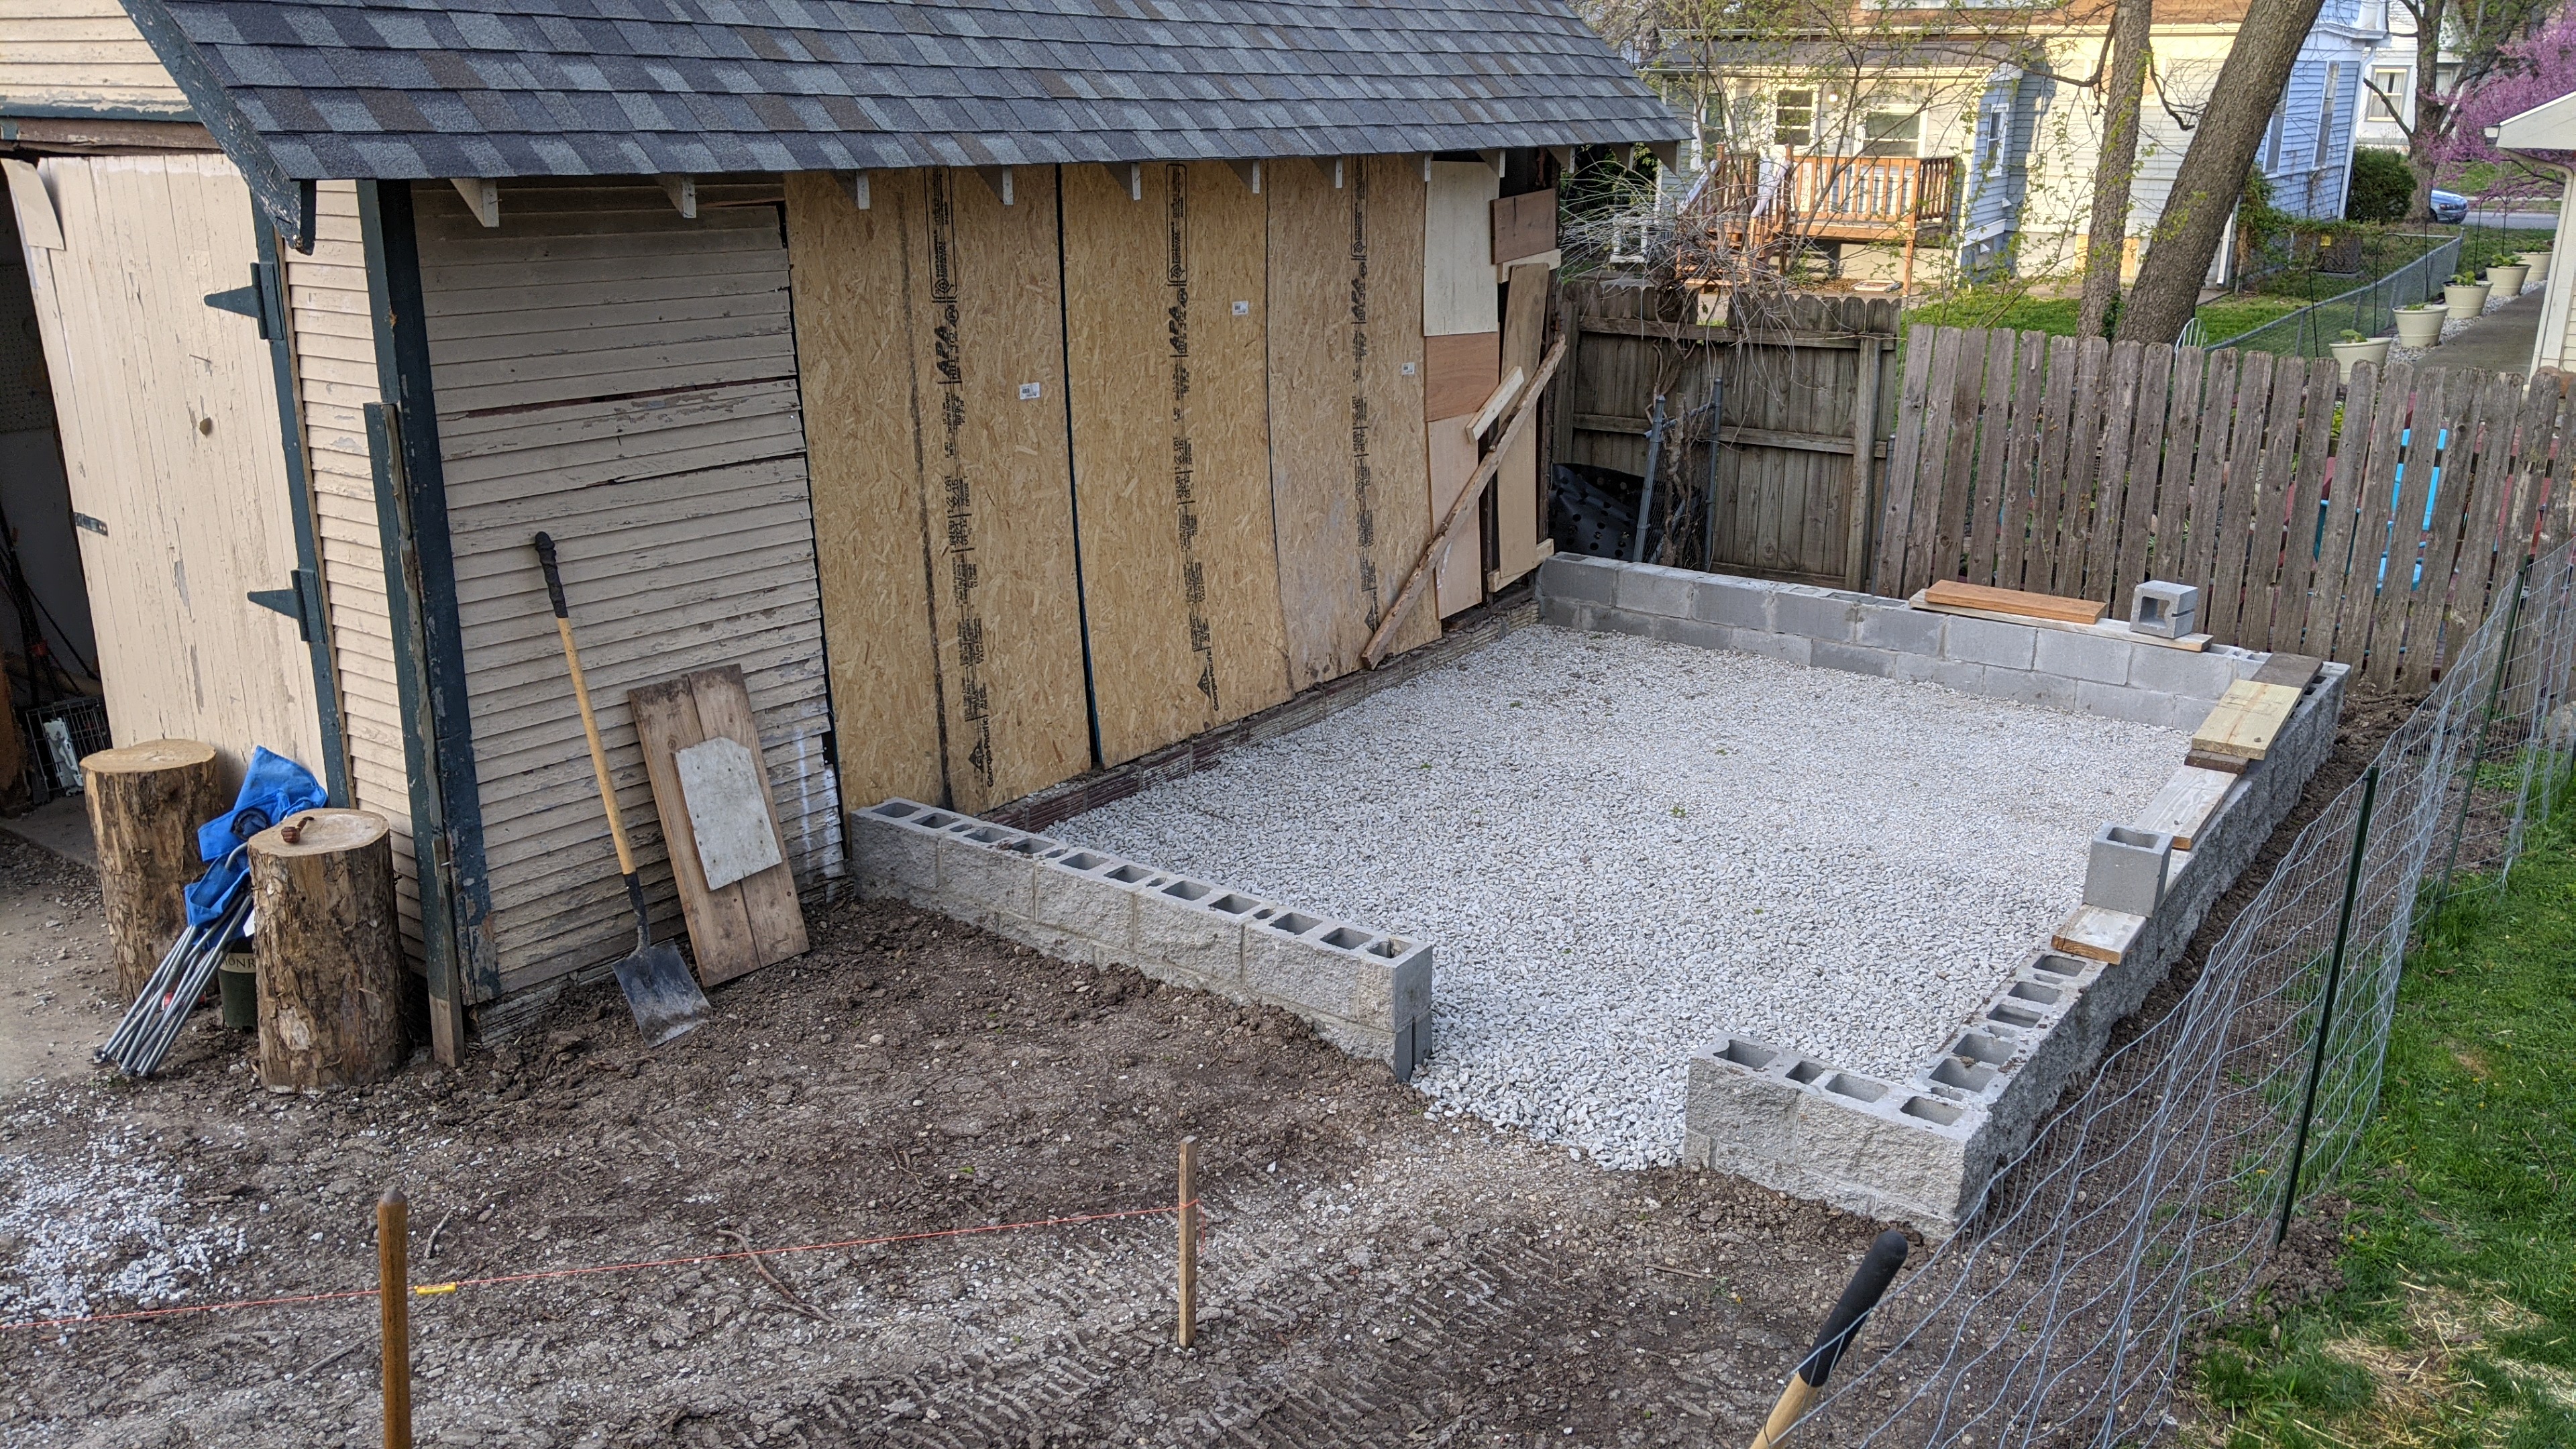
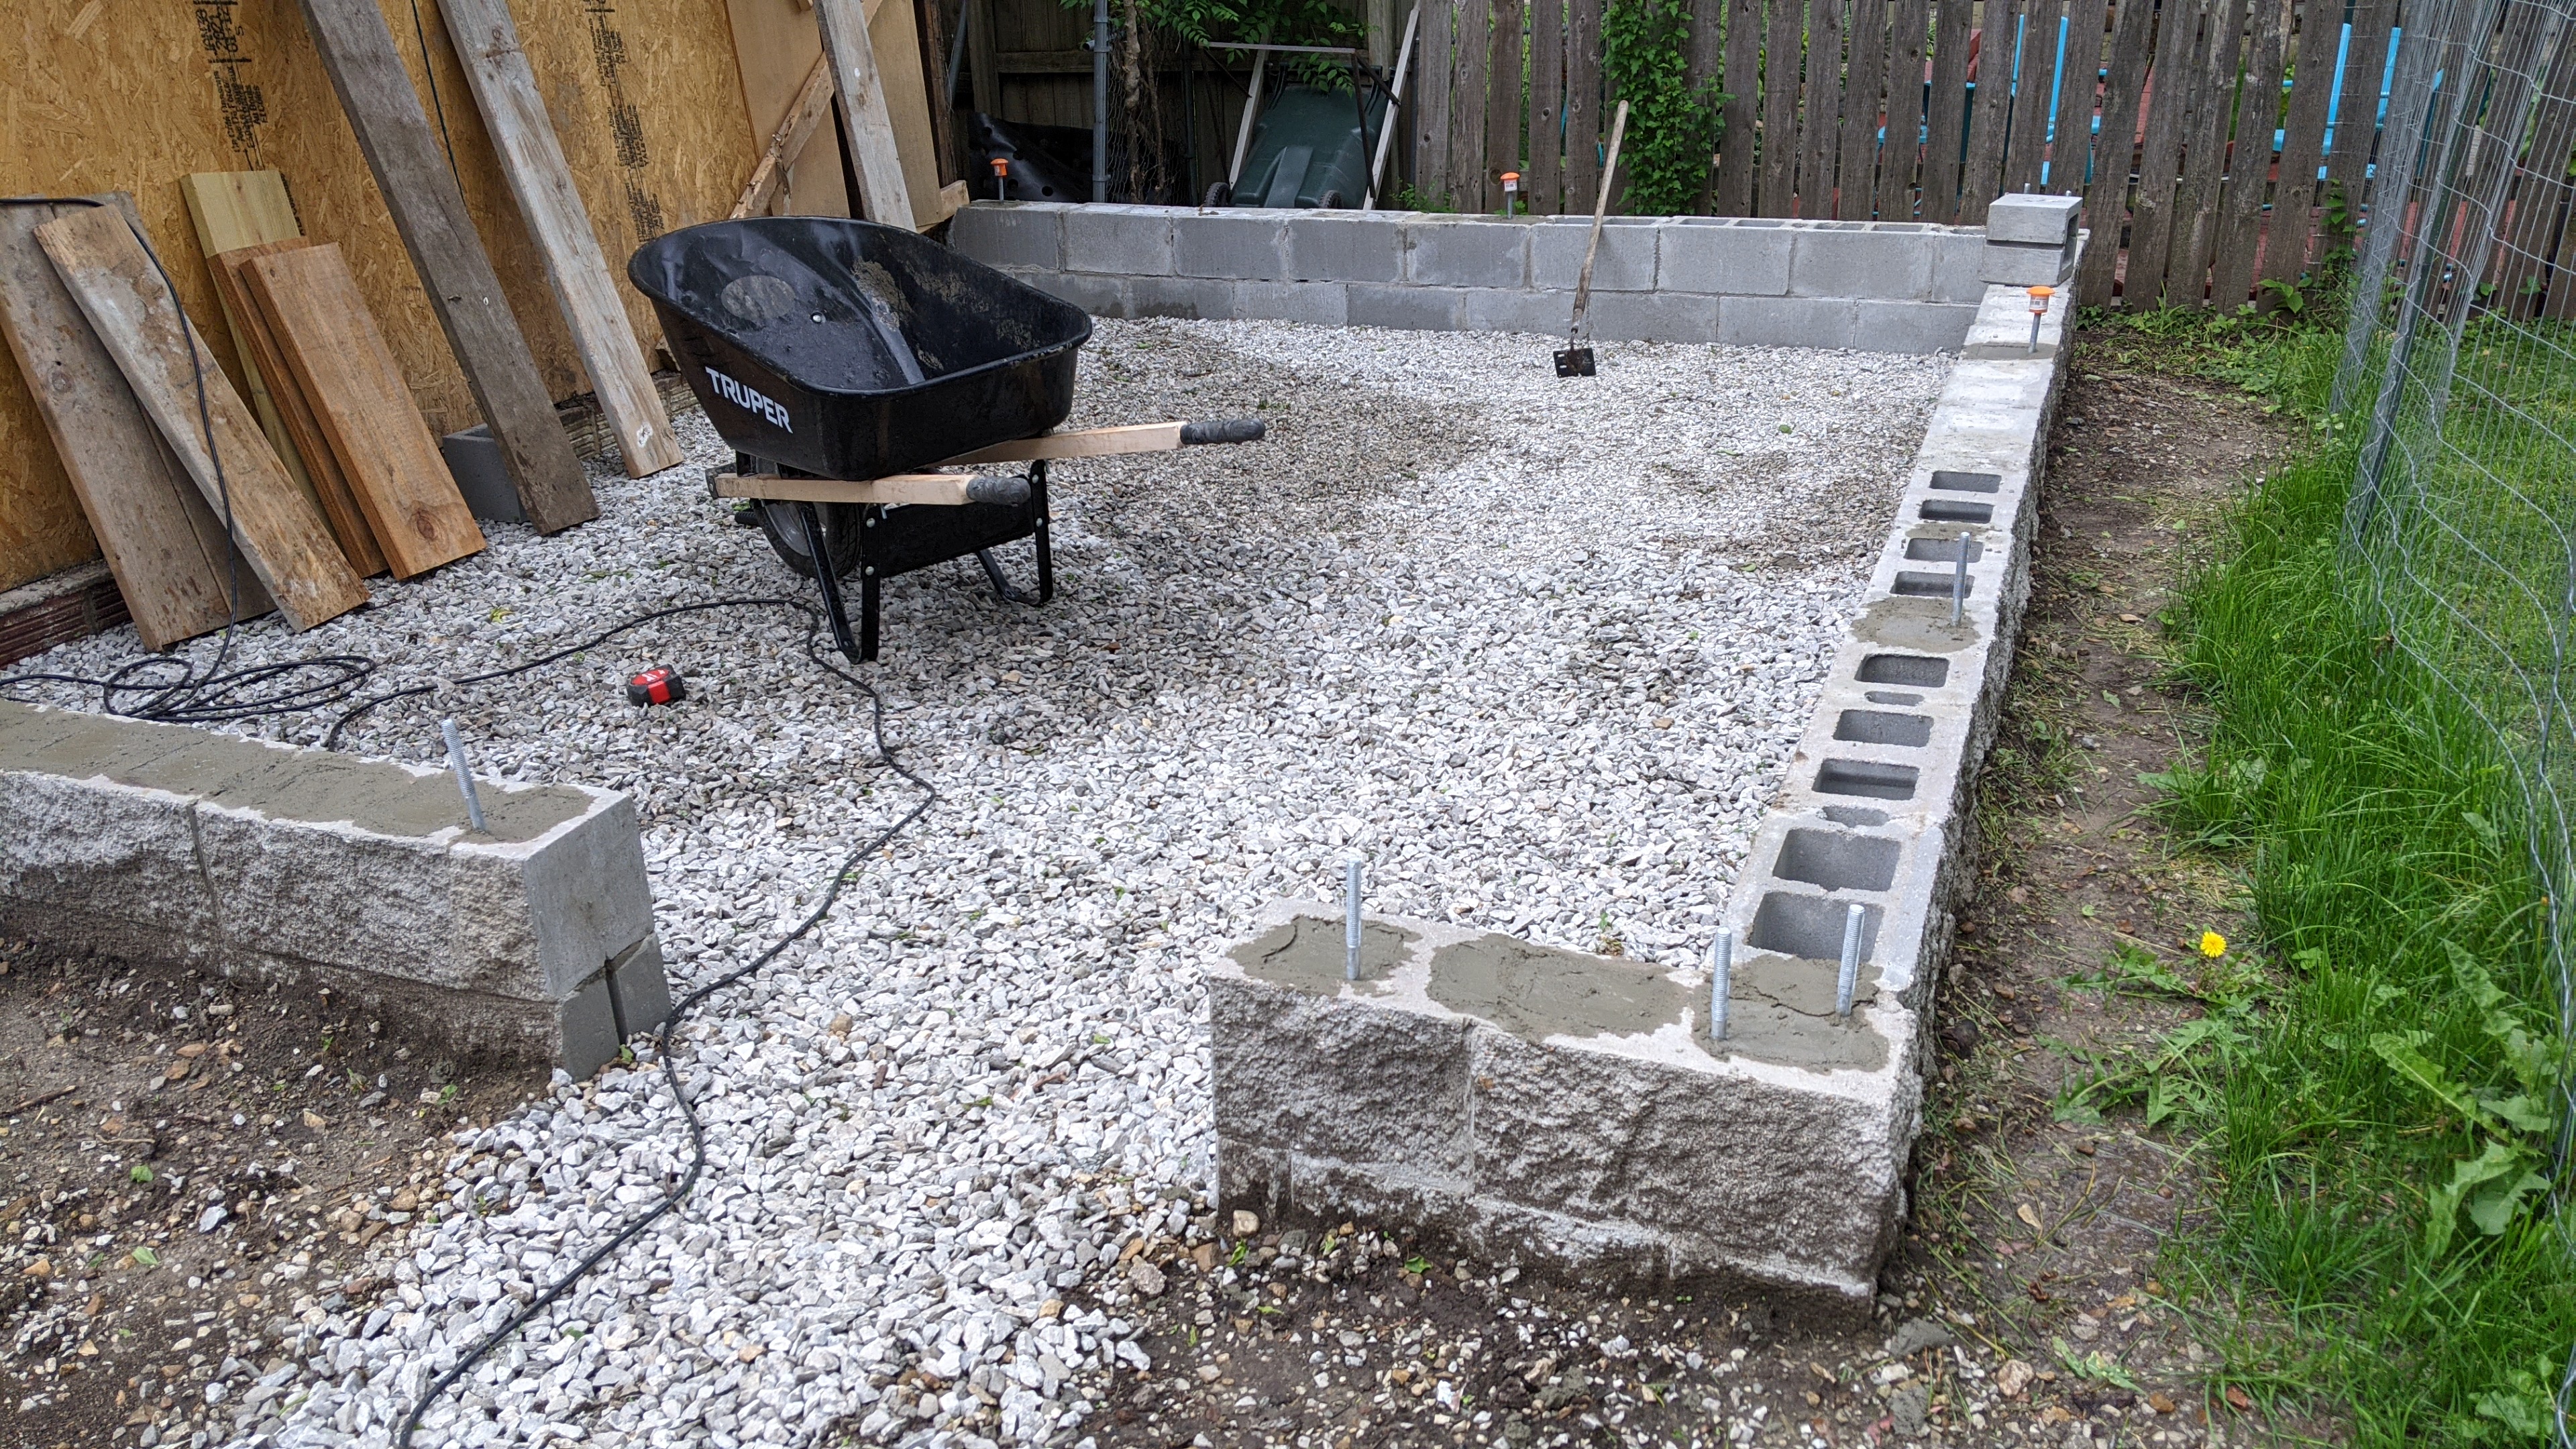
Building the CMU Block Stem Walls
The rains finally stopped and I was able to get started on the block walls.
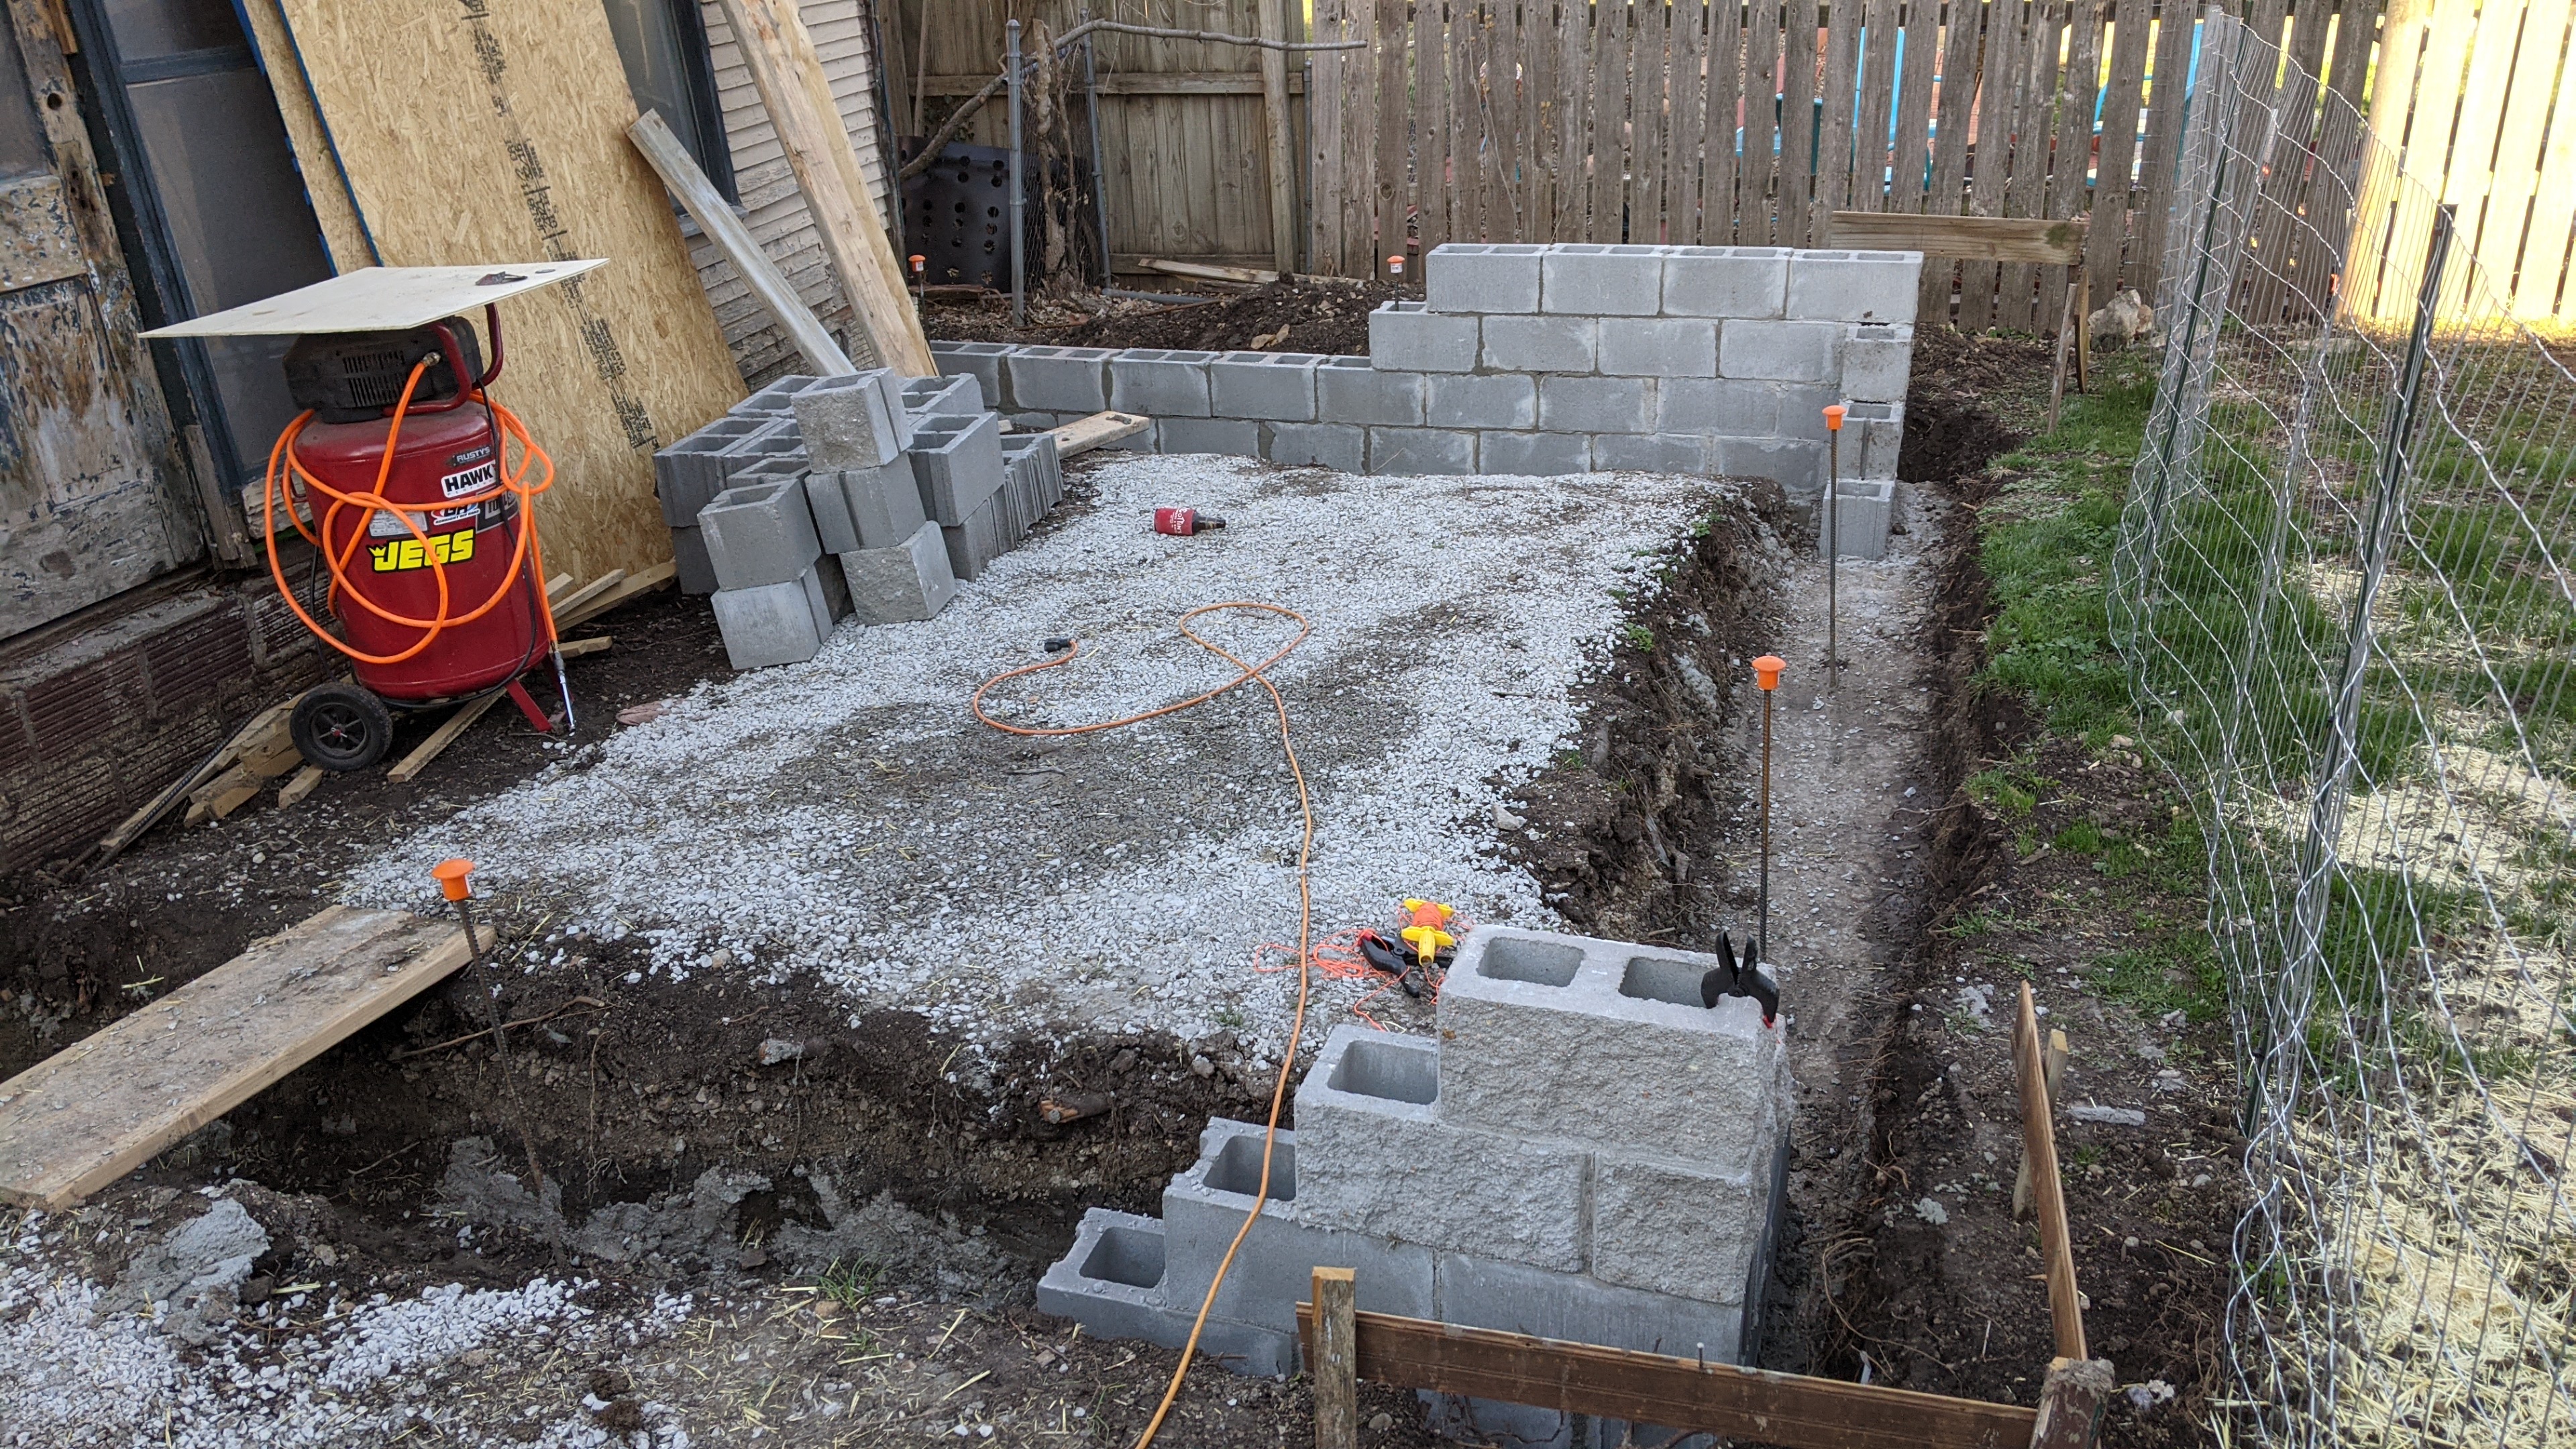
That is as far as I got before I hurt my back from lifting the blocks. It's a little worse than when I hurt my back at the start of construction,. I was almost feeling 100% before I hurt it again.
So I'm probably going to need to pay somebody to do the rest of the block walls for me. I can't risk hurting my back again. I think building and raising the walls will be a piece of cake compared to the foundation!
------------------------------
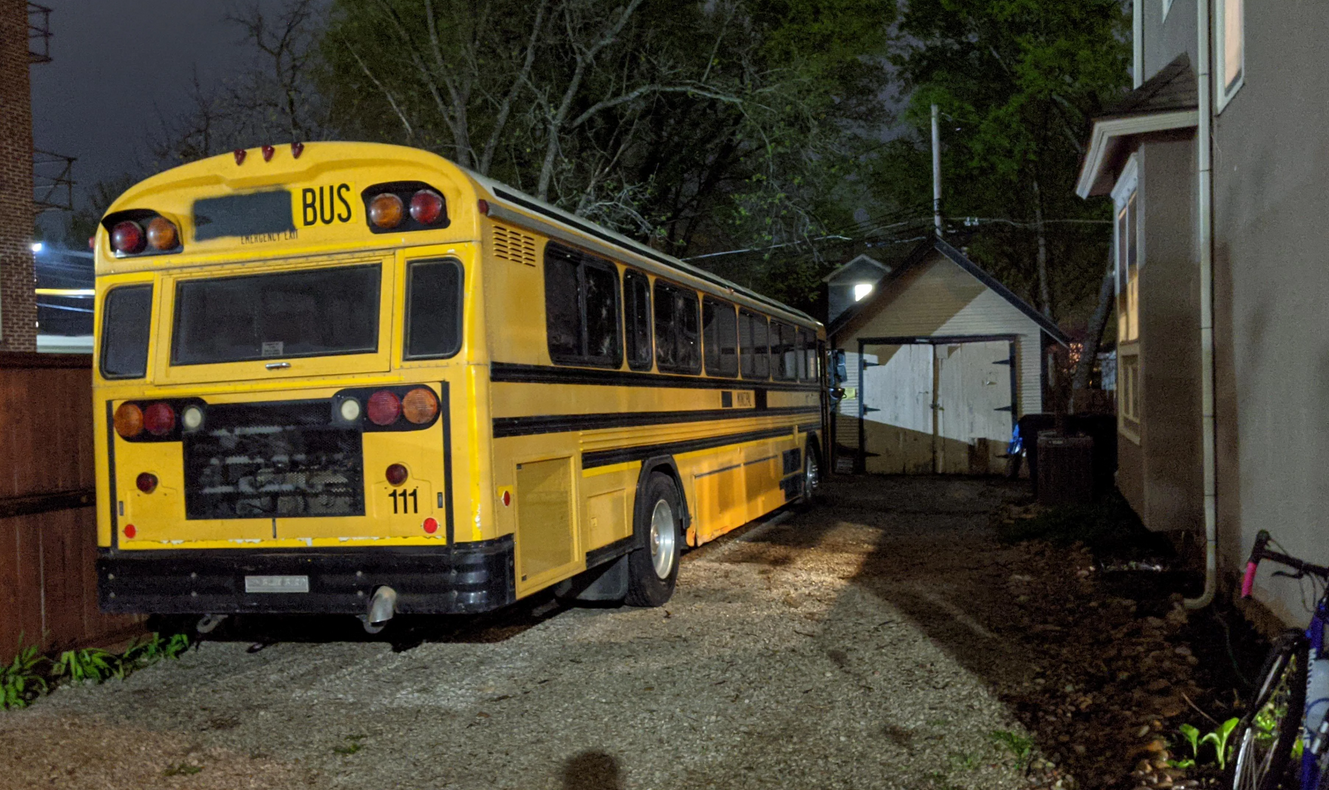
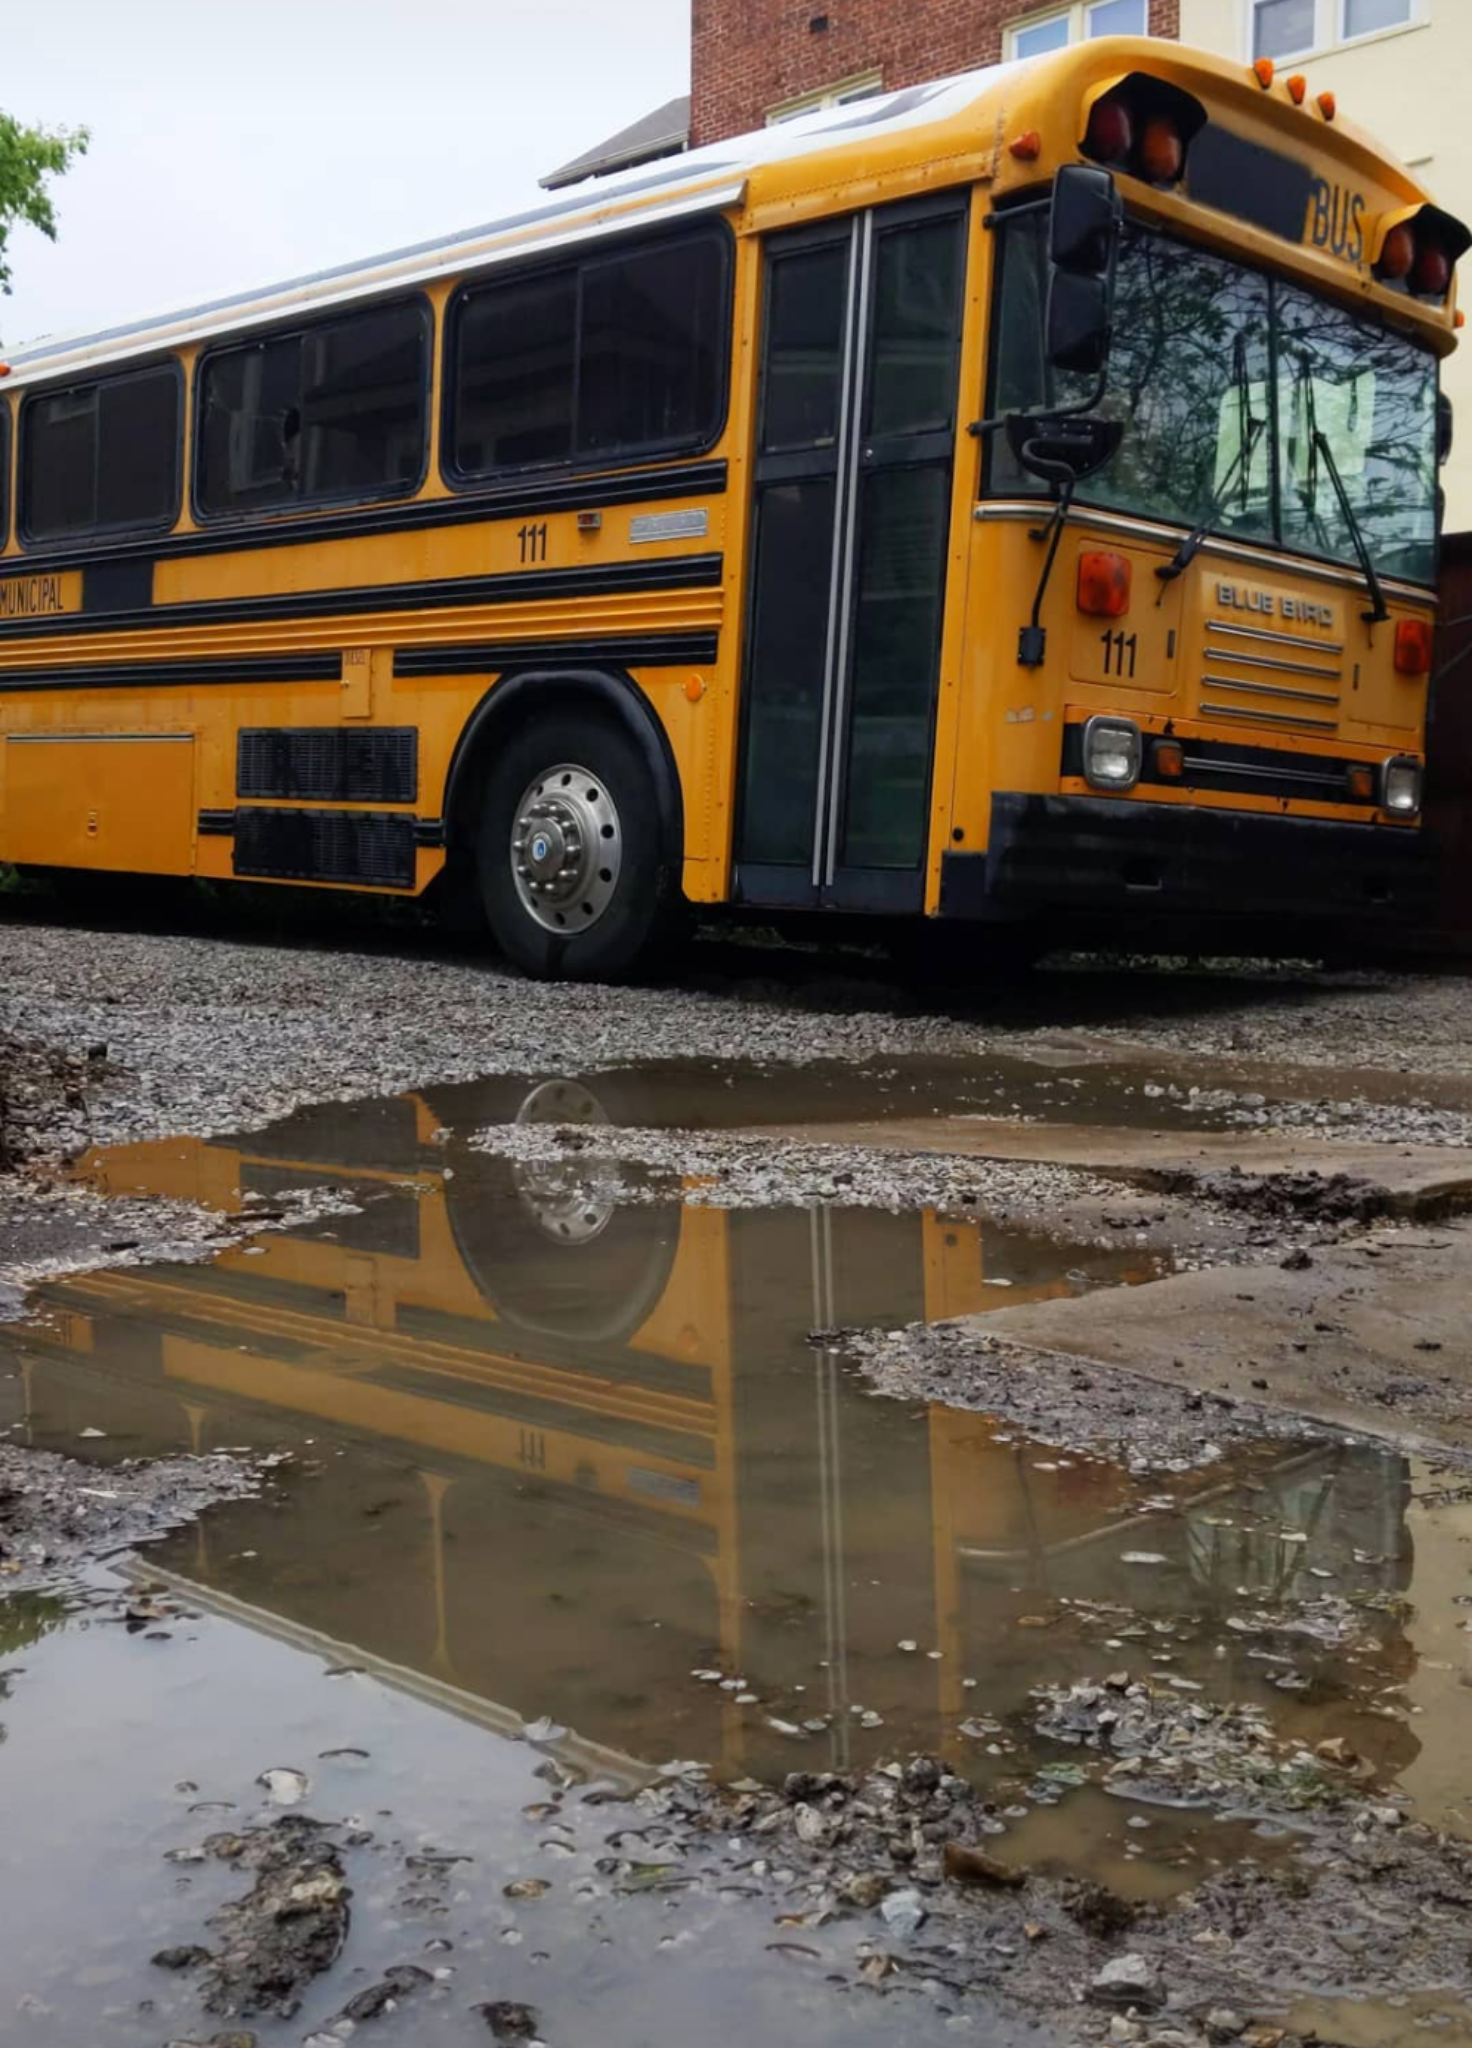
My buddy helped me finish the block wall while my back healed. In return I'm letting him park a 40ft bus in my driveway while he converts it to an RV so I'm not sure who's getting the better end of the deal here but I'm happy for the help.
While he worked on that I got started on demolishing the rotten wall and replacing it with an LVL header beam. With two king studs and two jack studs, on each side.
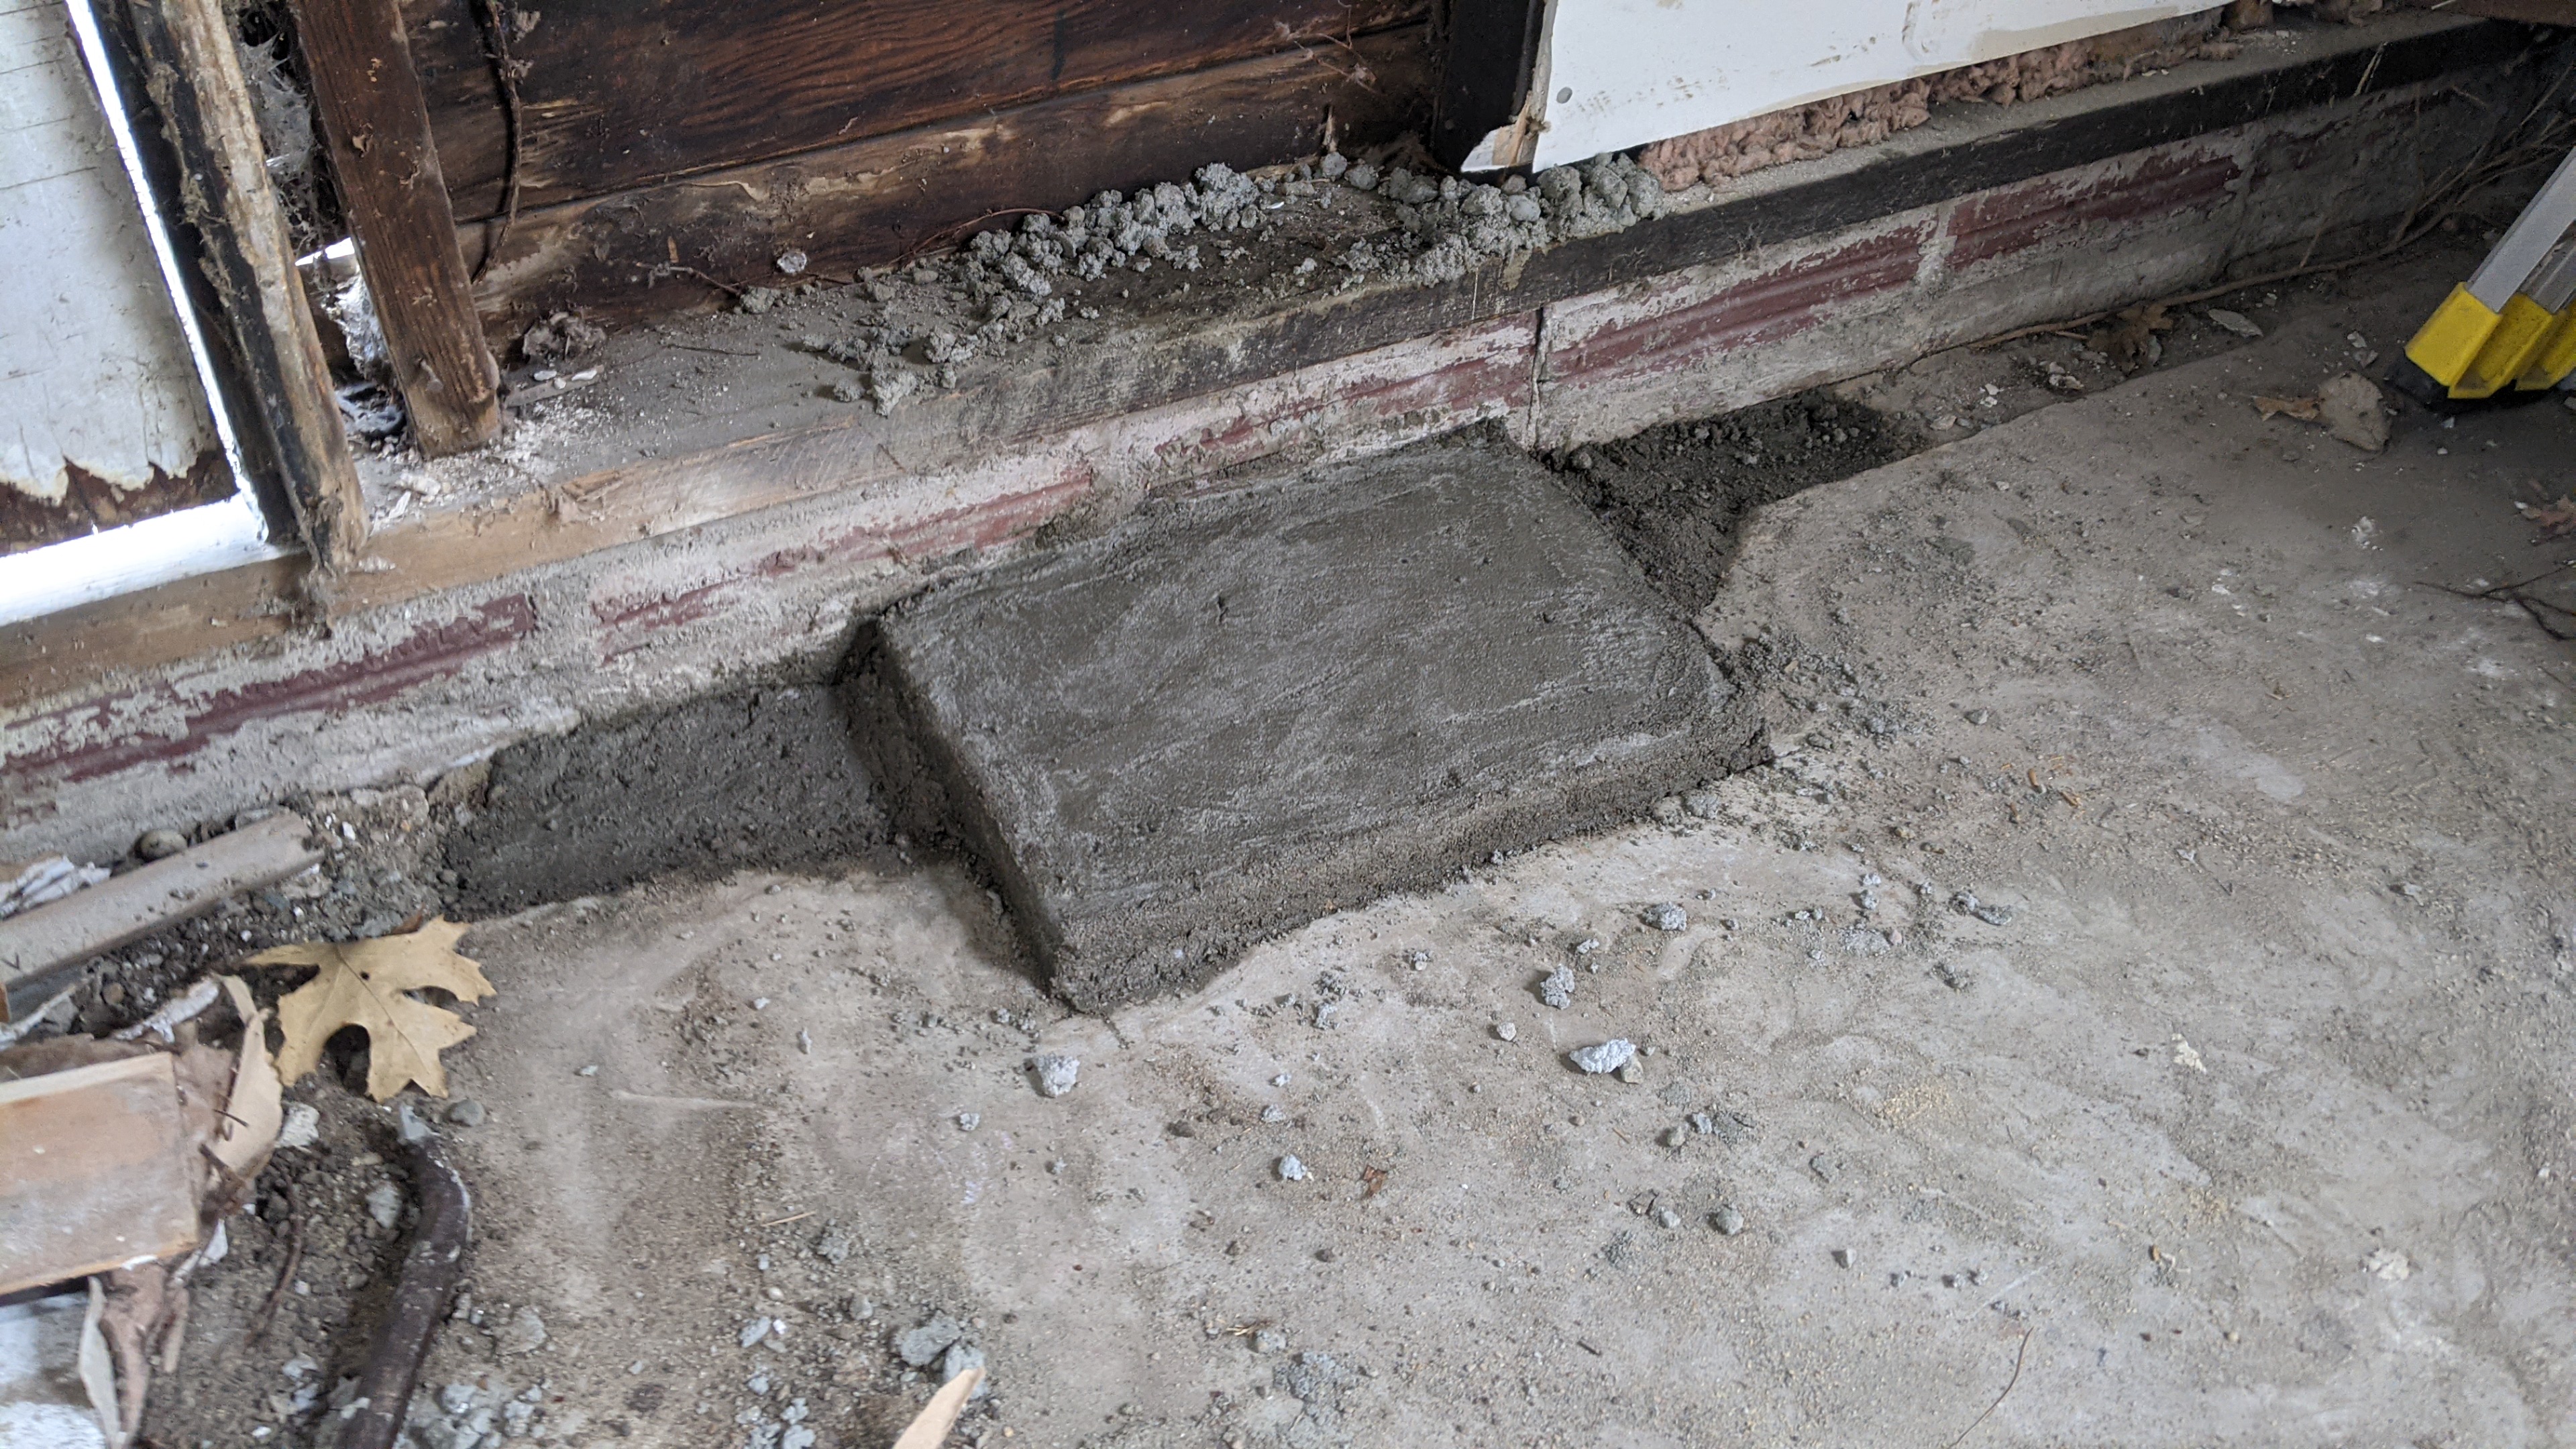
I didn't do a great job a getting a photo of it, but in the lower right corner in the picture below you can see the footer for the posts and what I had to do. Normally the king and jack studs for the header would get toe-nailed to the sill plate, but the sill plate was so far off that I could put the studs straight up and down and they would totally clear the old sill plate and not make any contact at all! What I had to do was bolt a chunk of PTW to the concrete footer that I poured a few weeks ago, using concrete anchor bolts. Then the studs could be toe nailed to it, using hot galvanized nails for nailing into the PTW.

Here's another look at the old, rotten, crooked sill plate. The stud in the picture is straight level up and down (but not yet resting on the PTW plate that I bolted down to the footer).


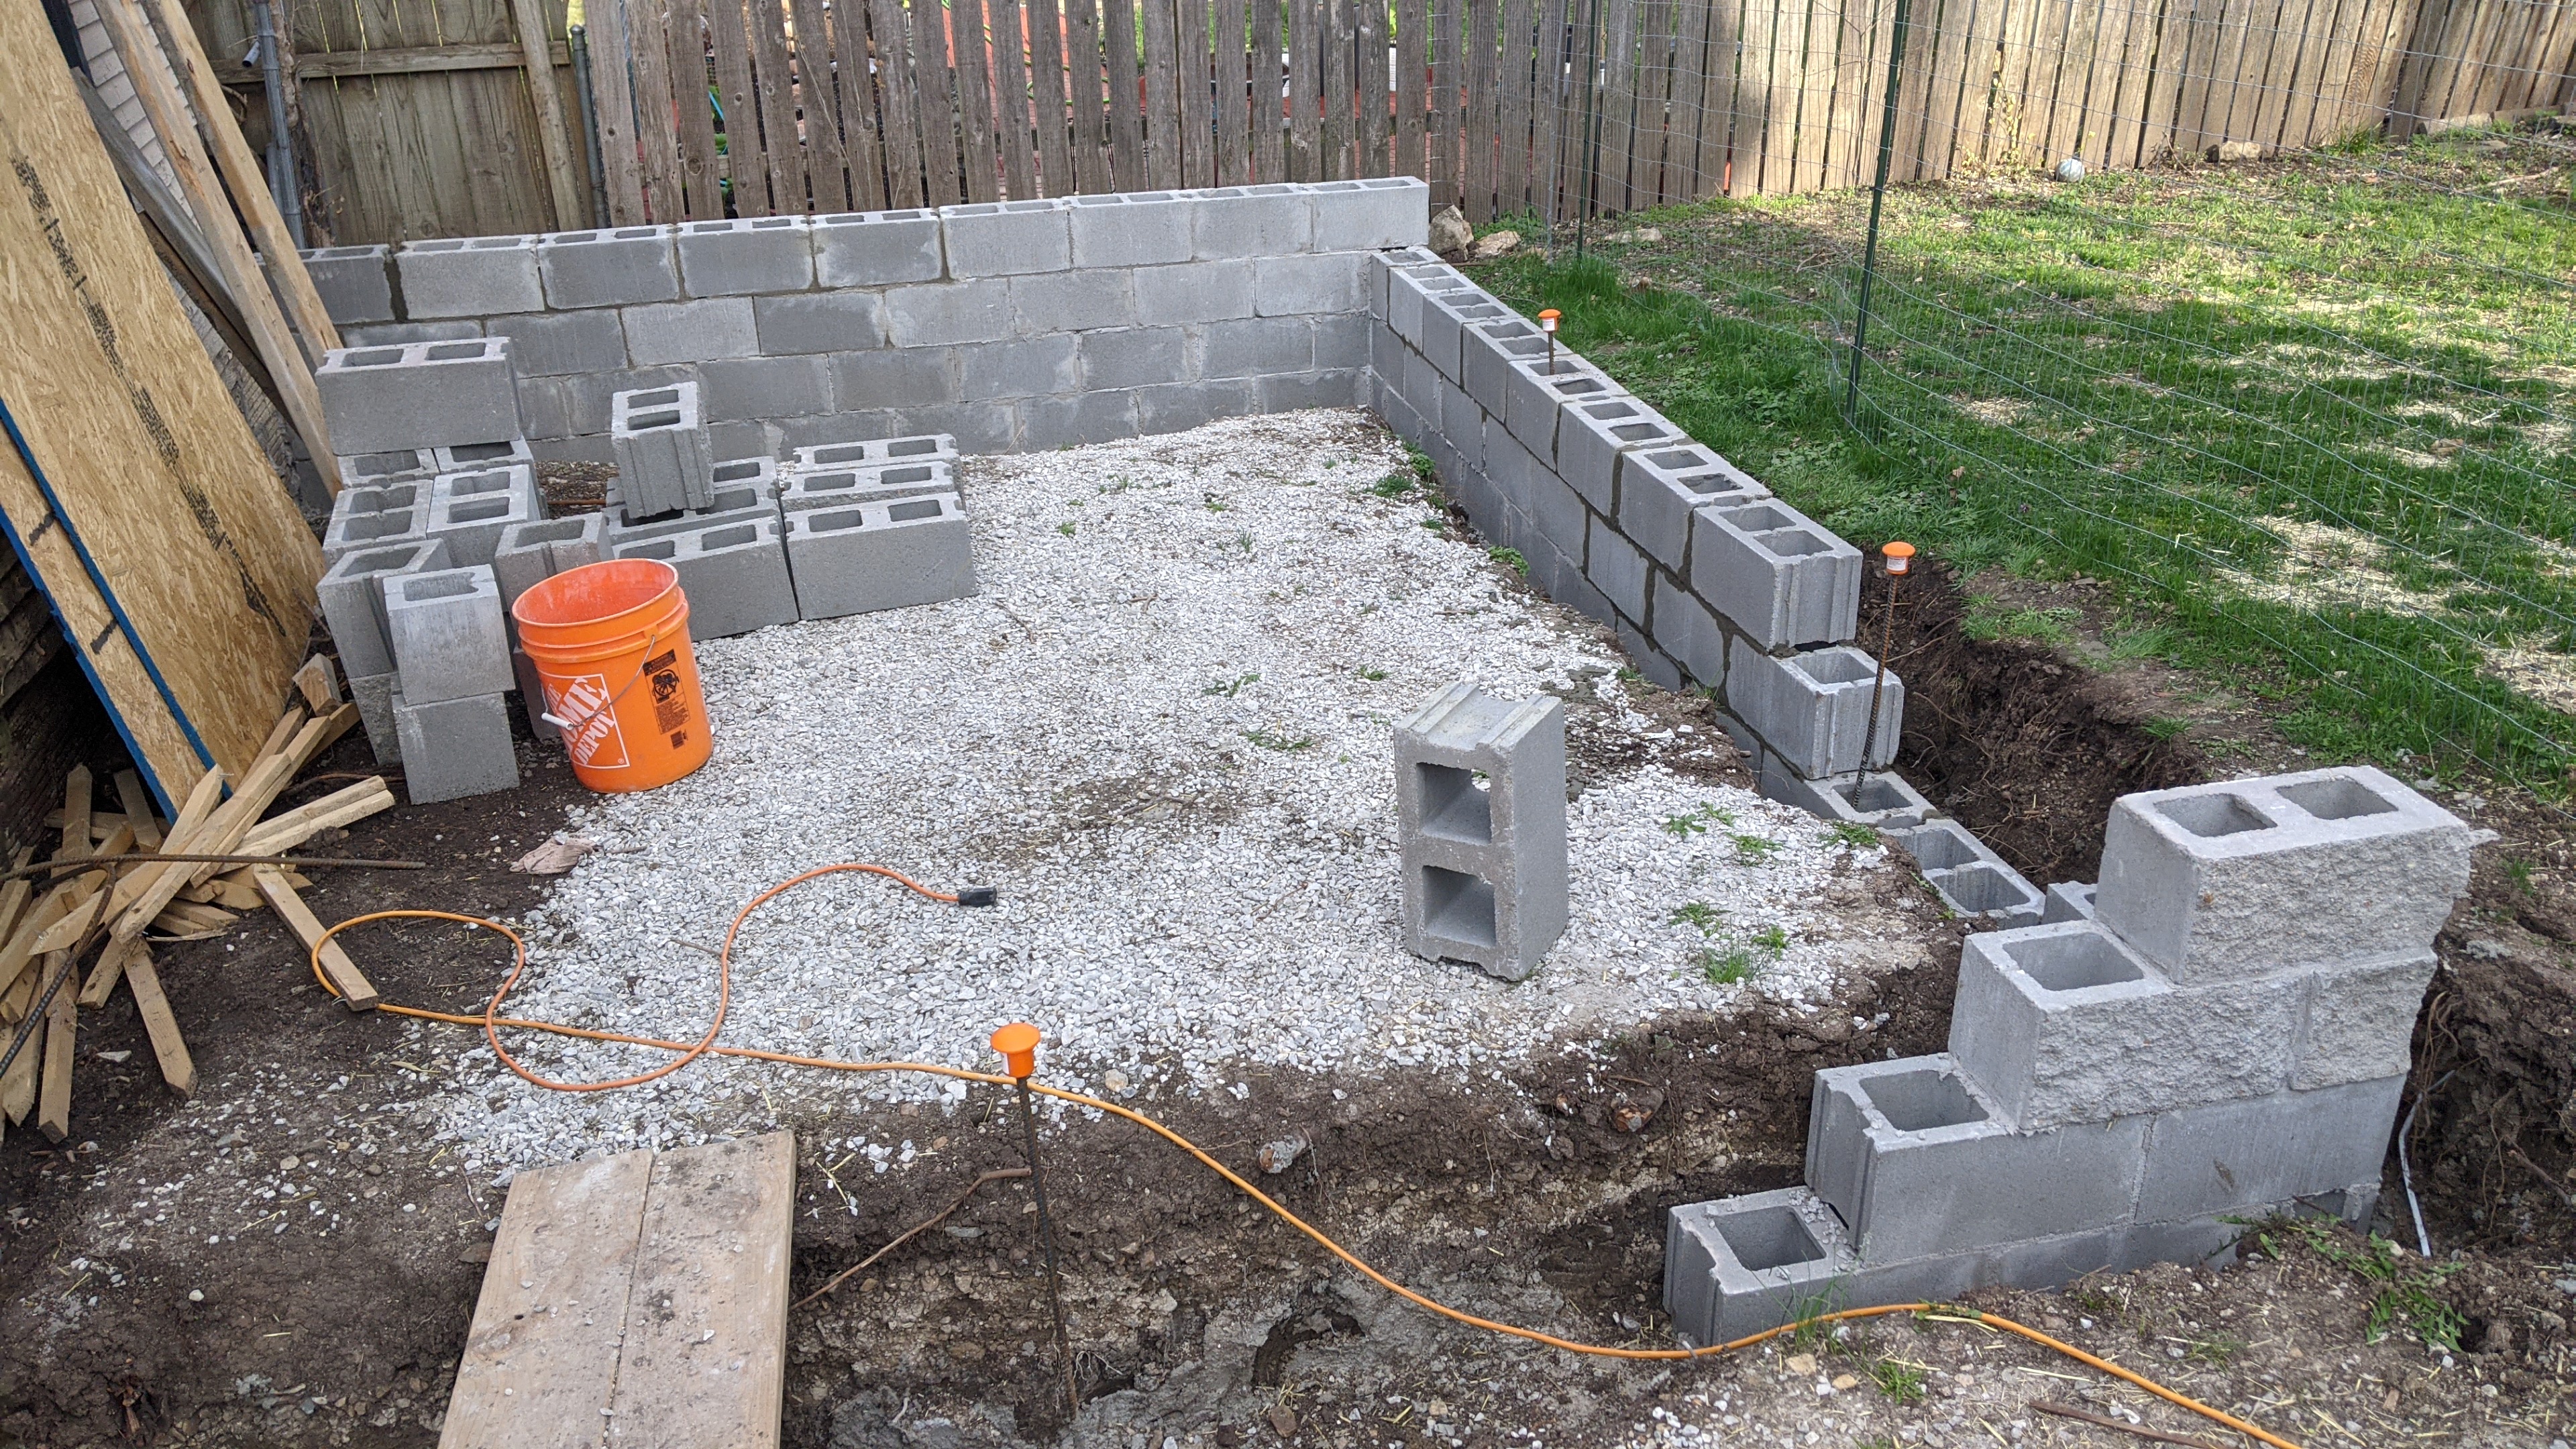
Johnny finished the CMU block walls, with an opening for the door, and I finished the header and then secured it with OSB and some scraps.
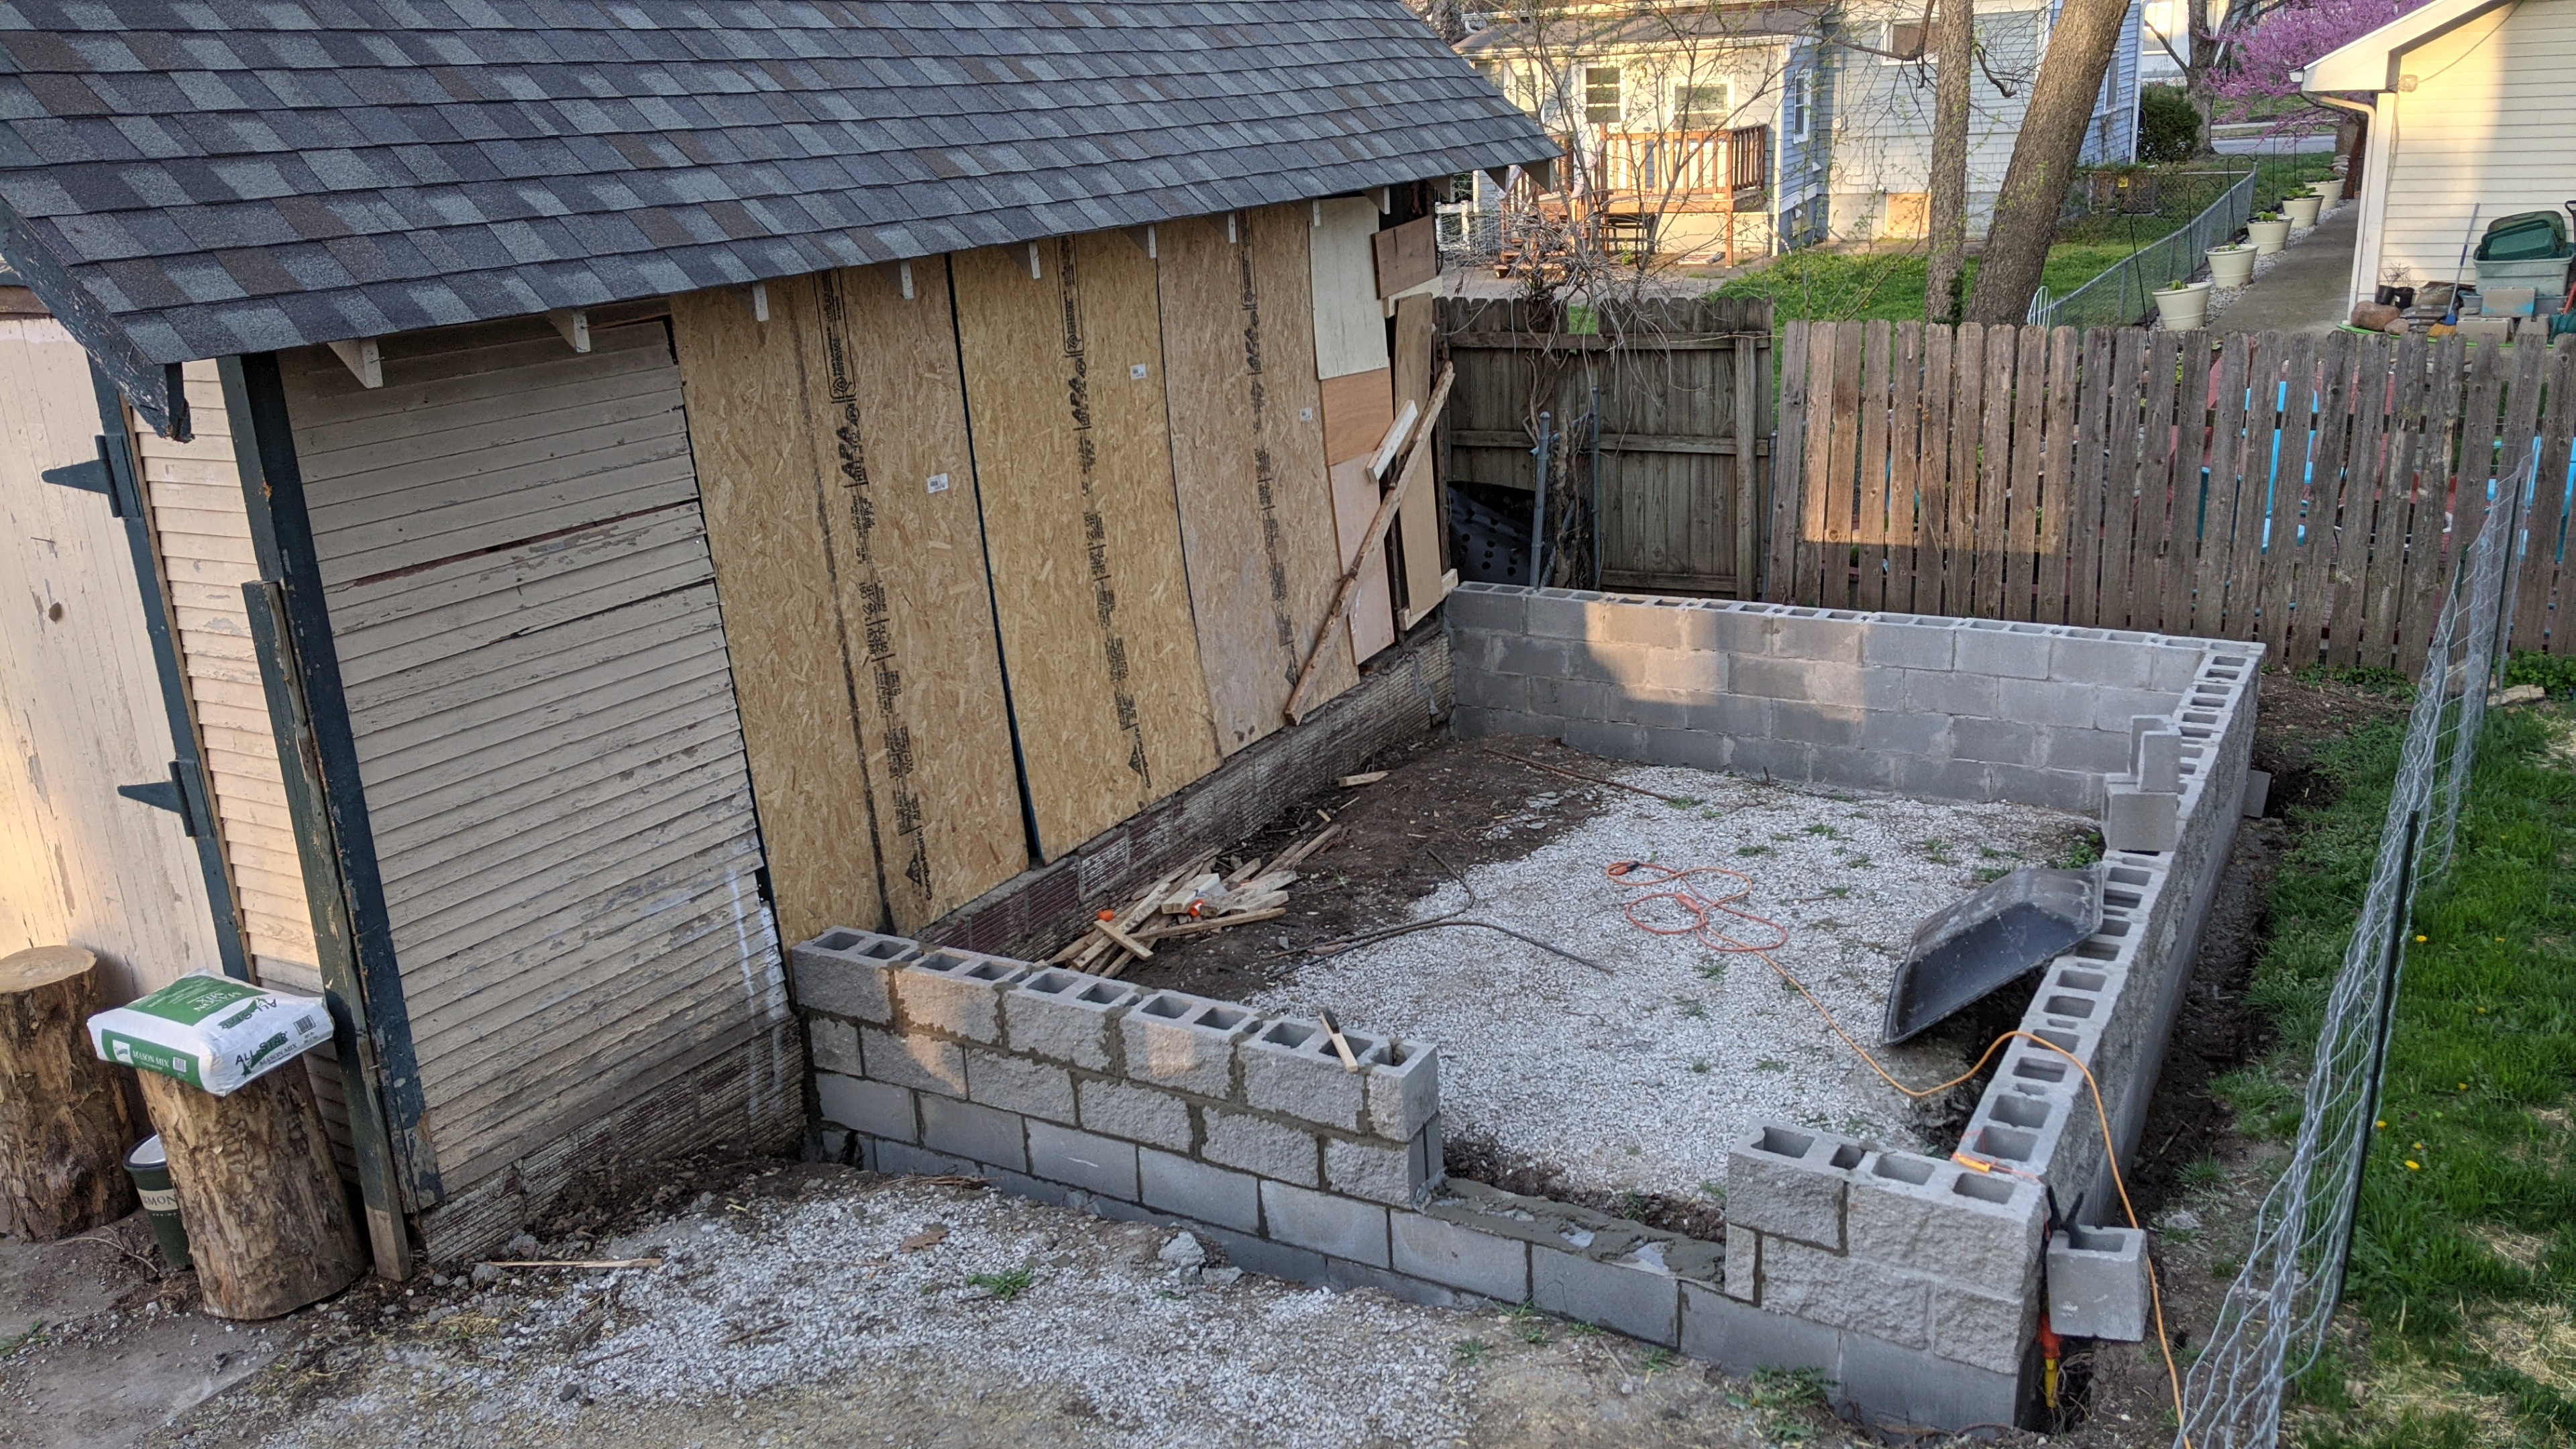
All ready now for the concrete slab! I'm paying somebody else to do it though, I hope.
Meanwhile my trusses have been ordered, here's mine (the small ones) waiting to be delivered to the location.

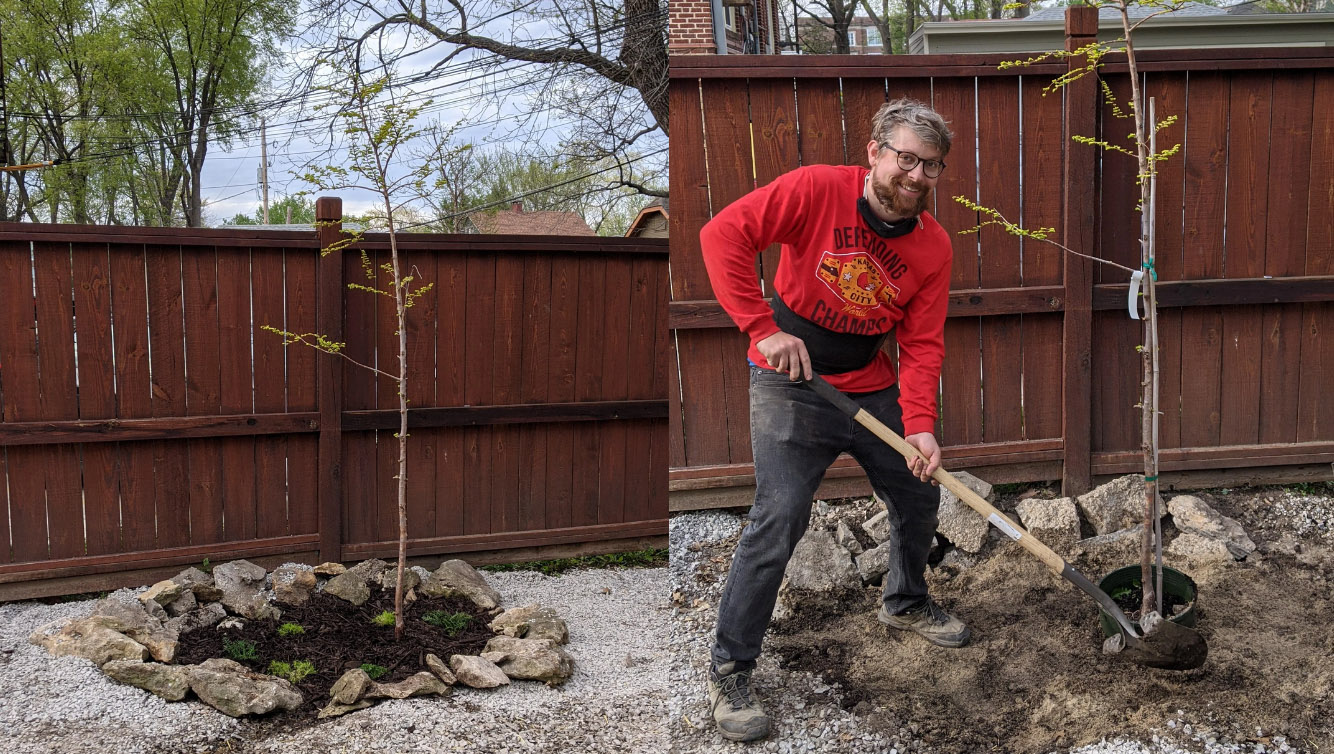
Here's my goofy ass planting a Dawn Redwood along the north fence in the rain garden:
Improving Drainage
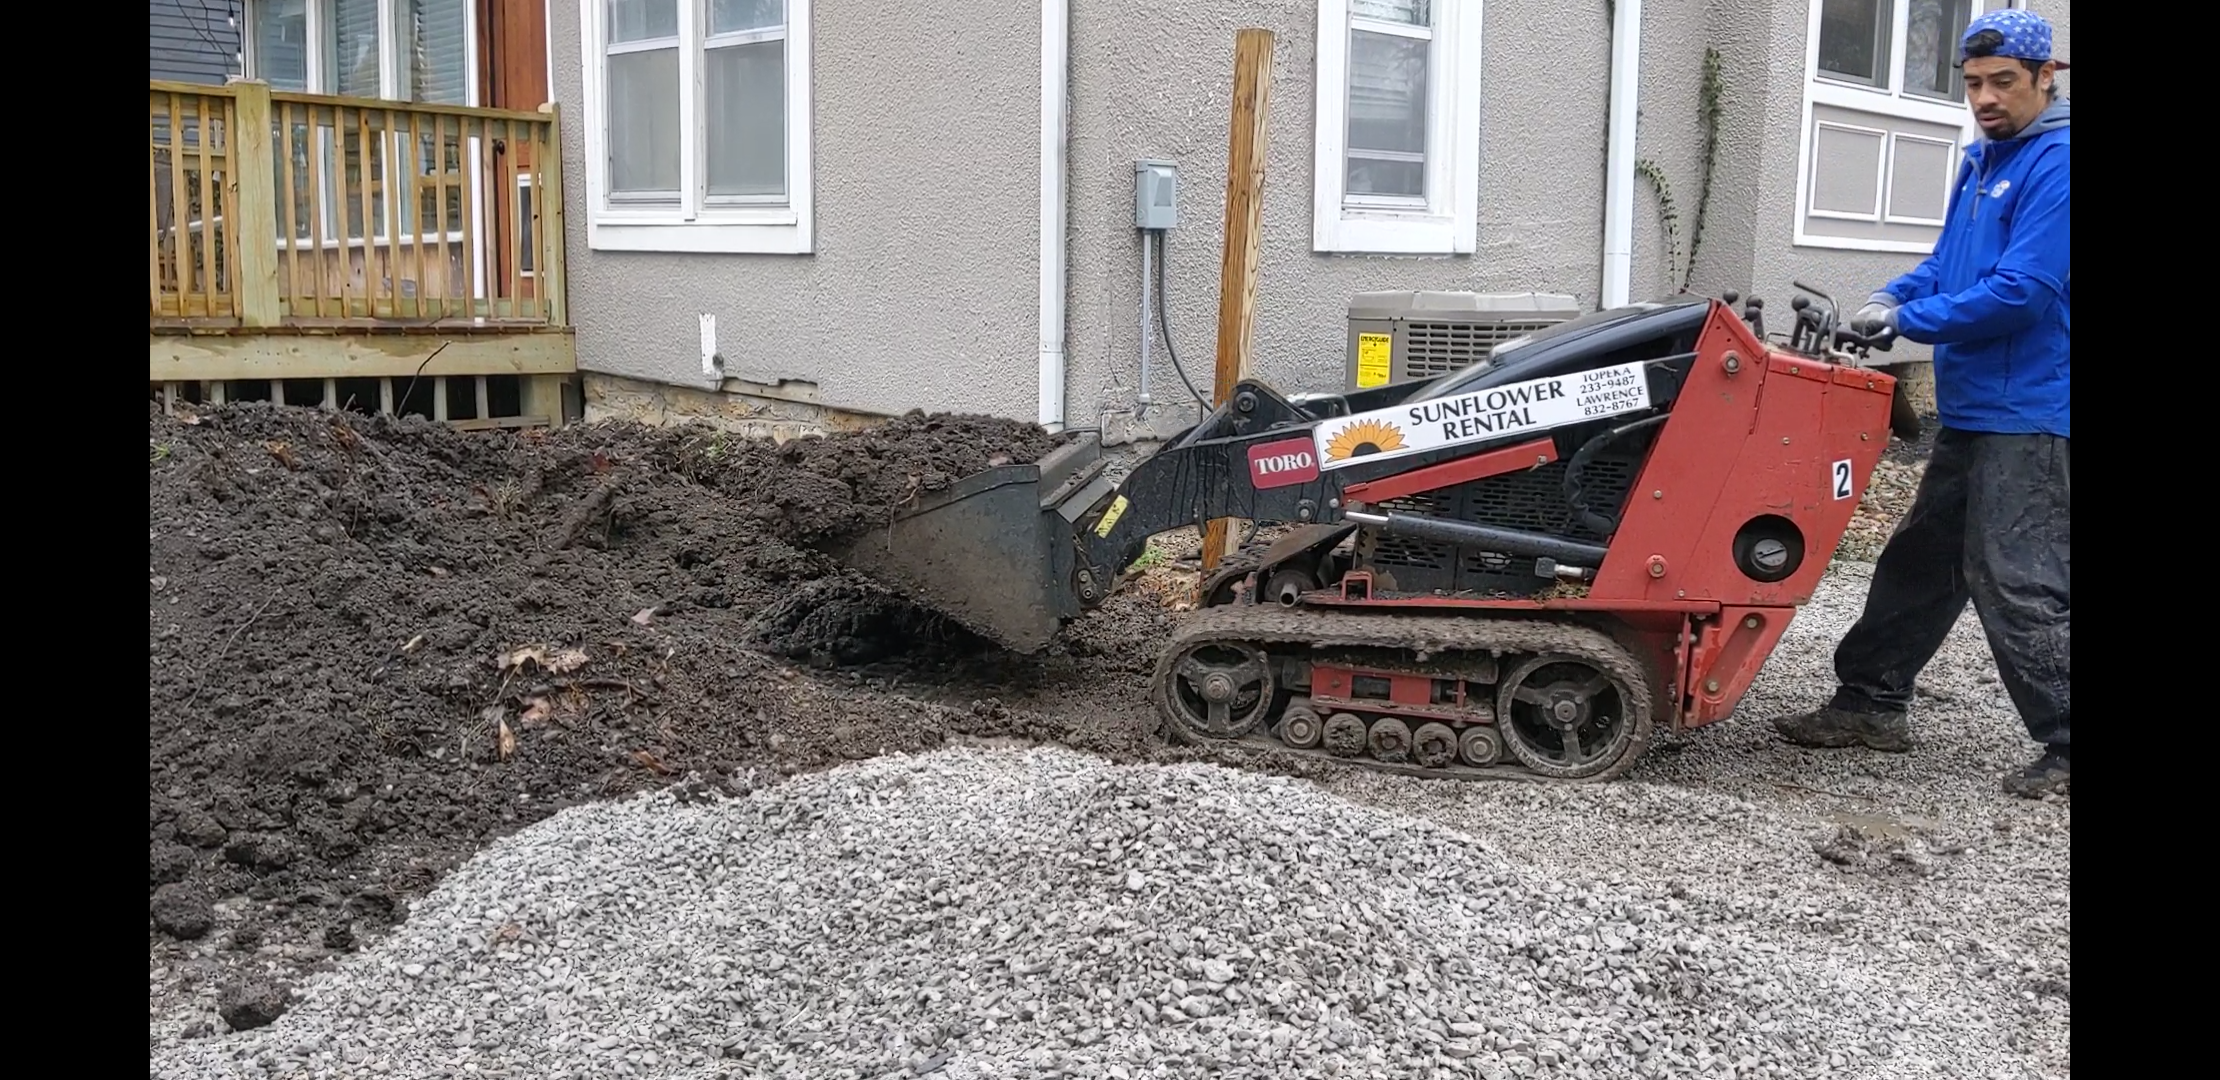
Rented a mini skid steer to help with back-filling the foundation. It just wasn't possible to do it by hand.
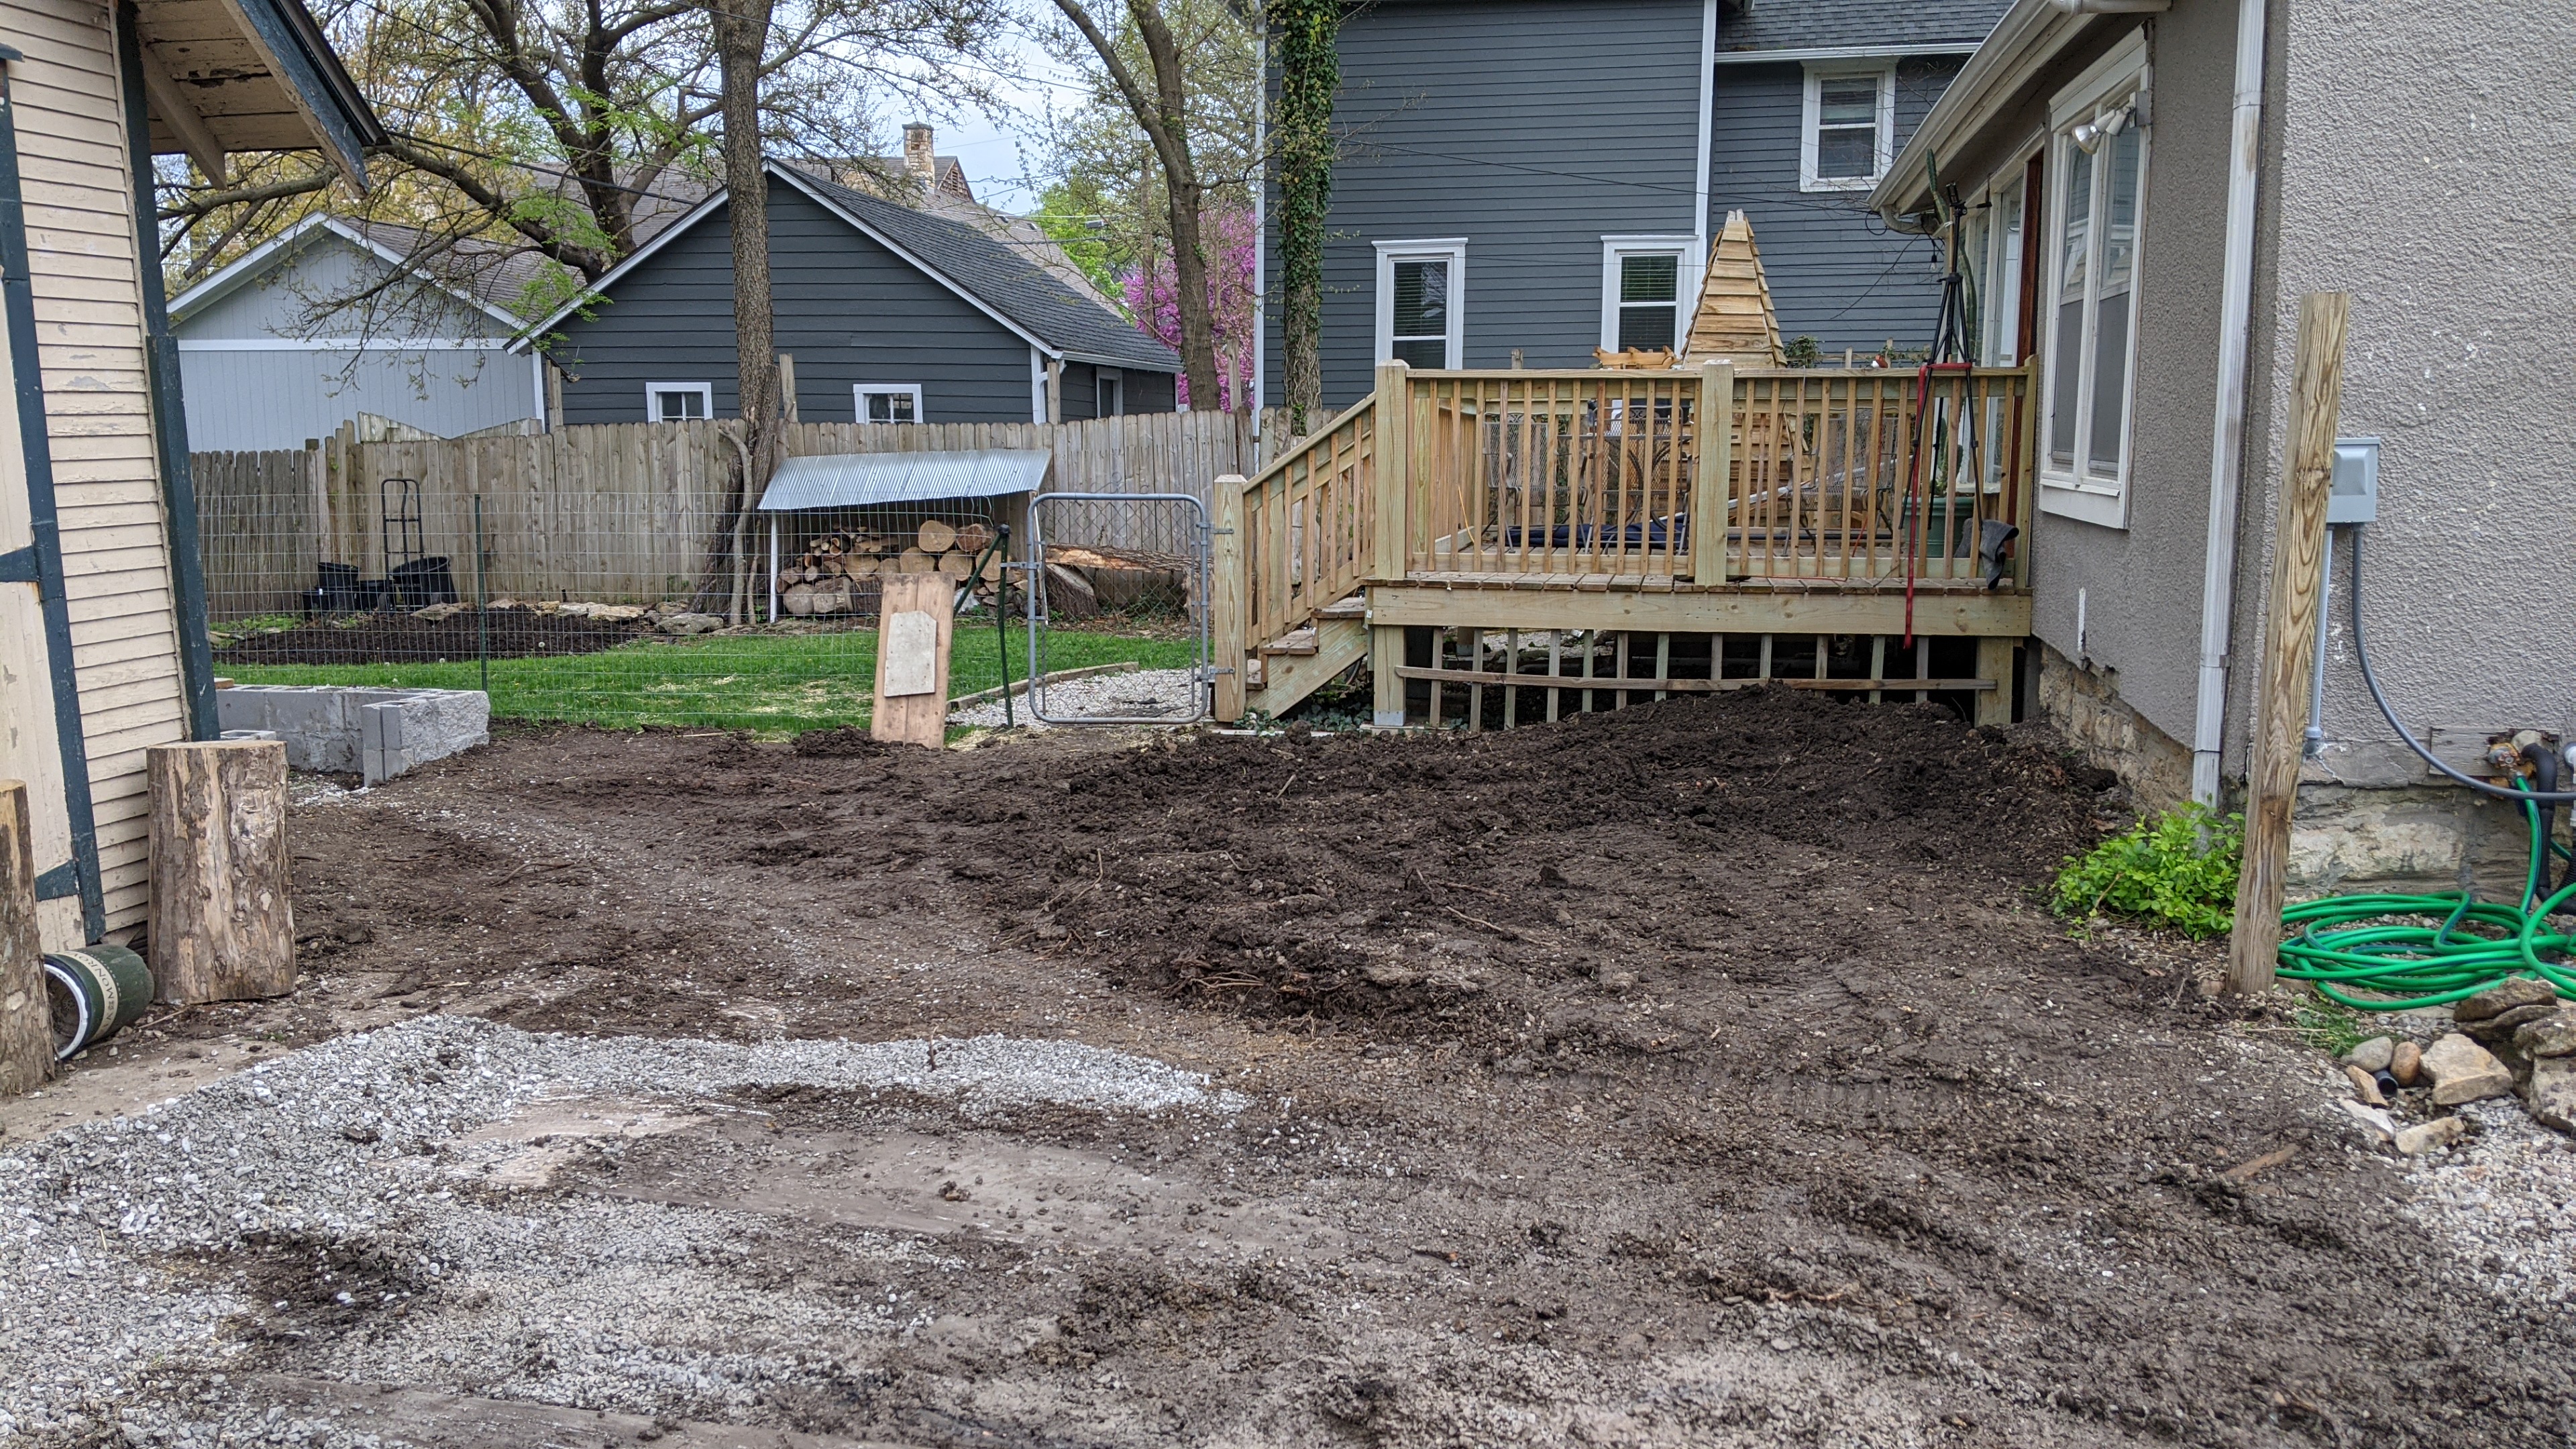
Finally got the giant pile of dirt all moved around, filled a low spot in the backyard and also made a nice flat pat for a future hot tube next to the deck.
What a mess.
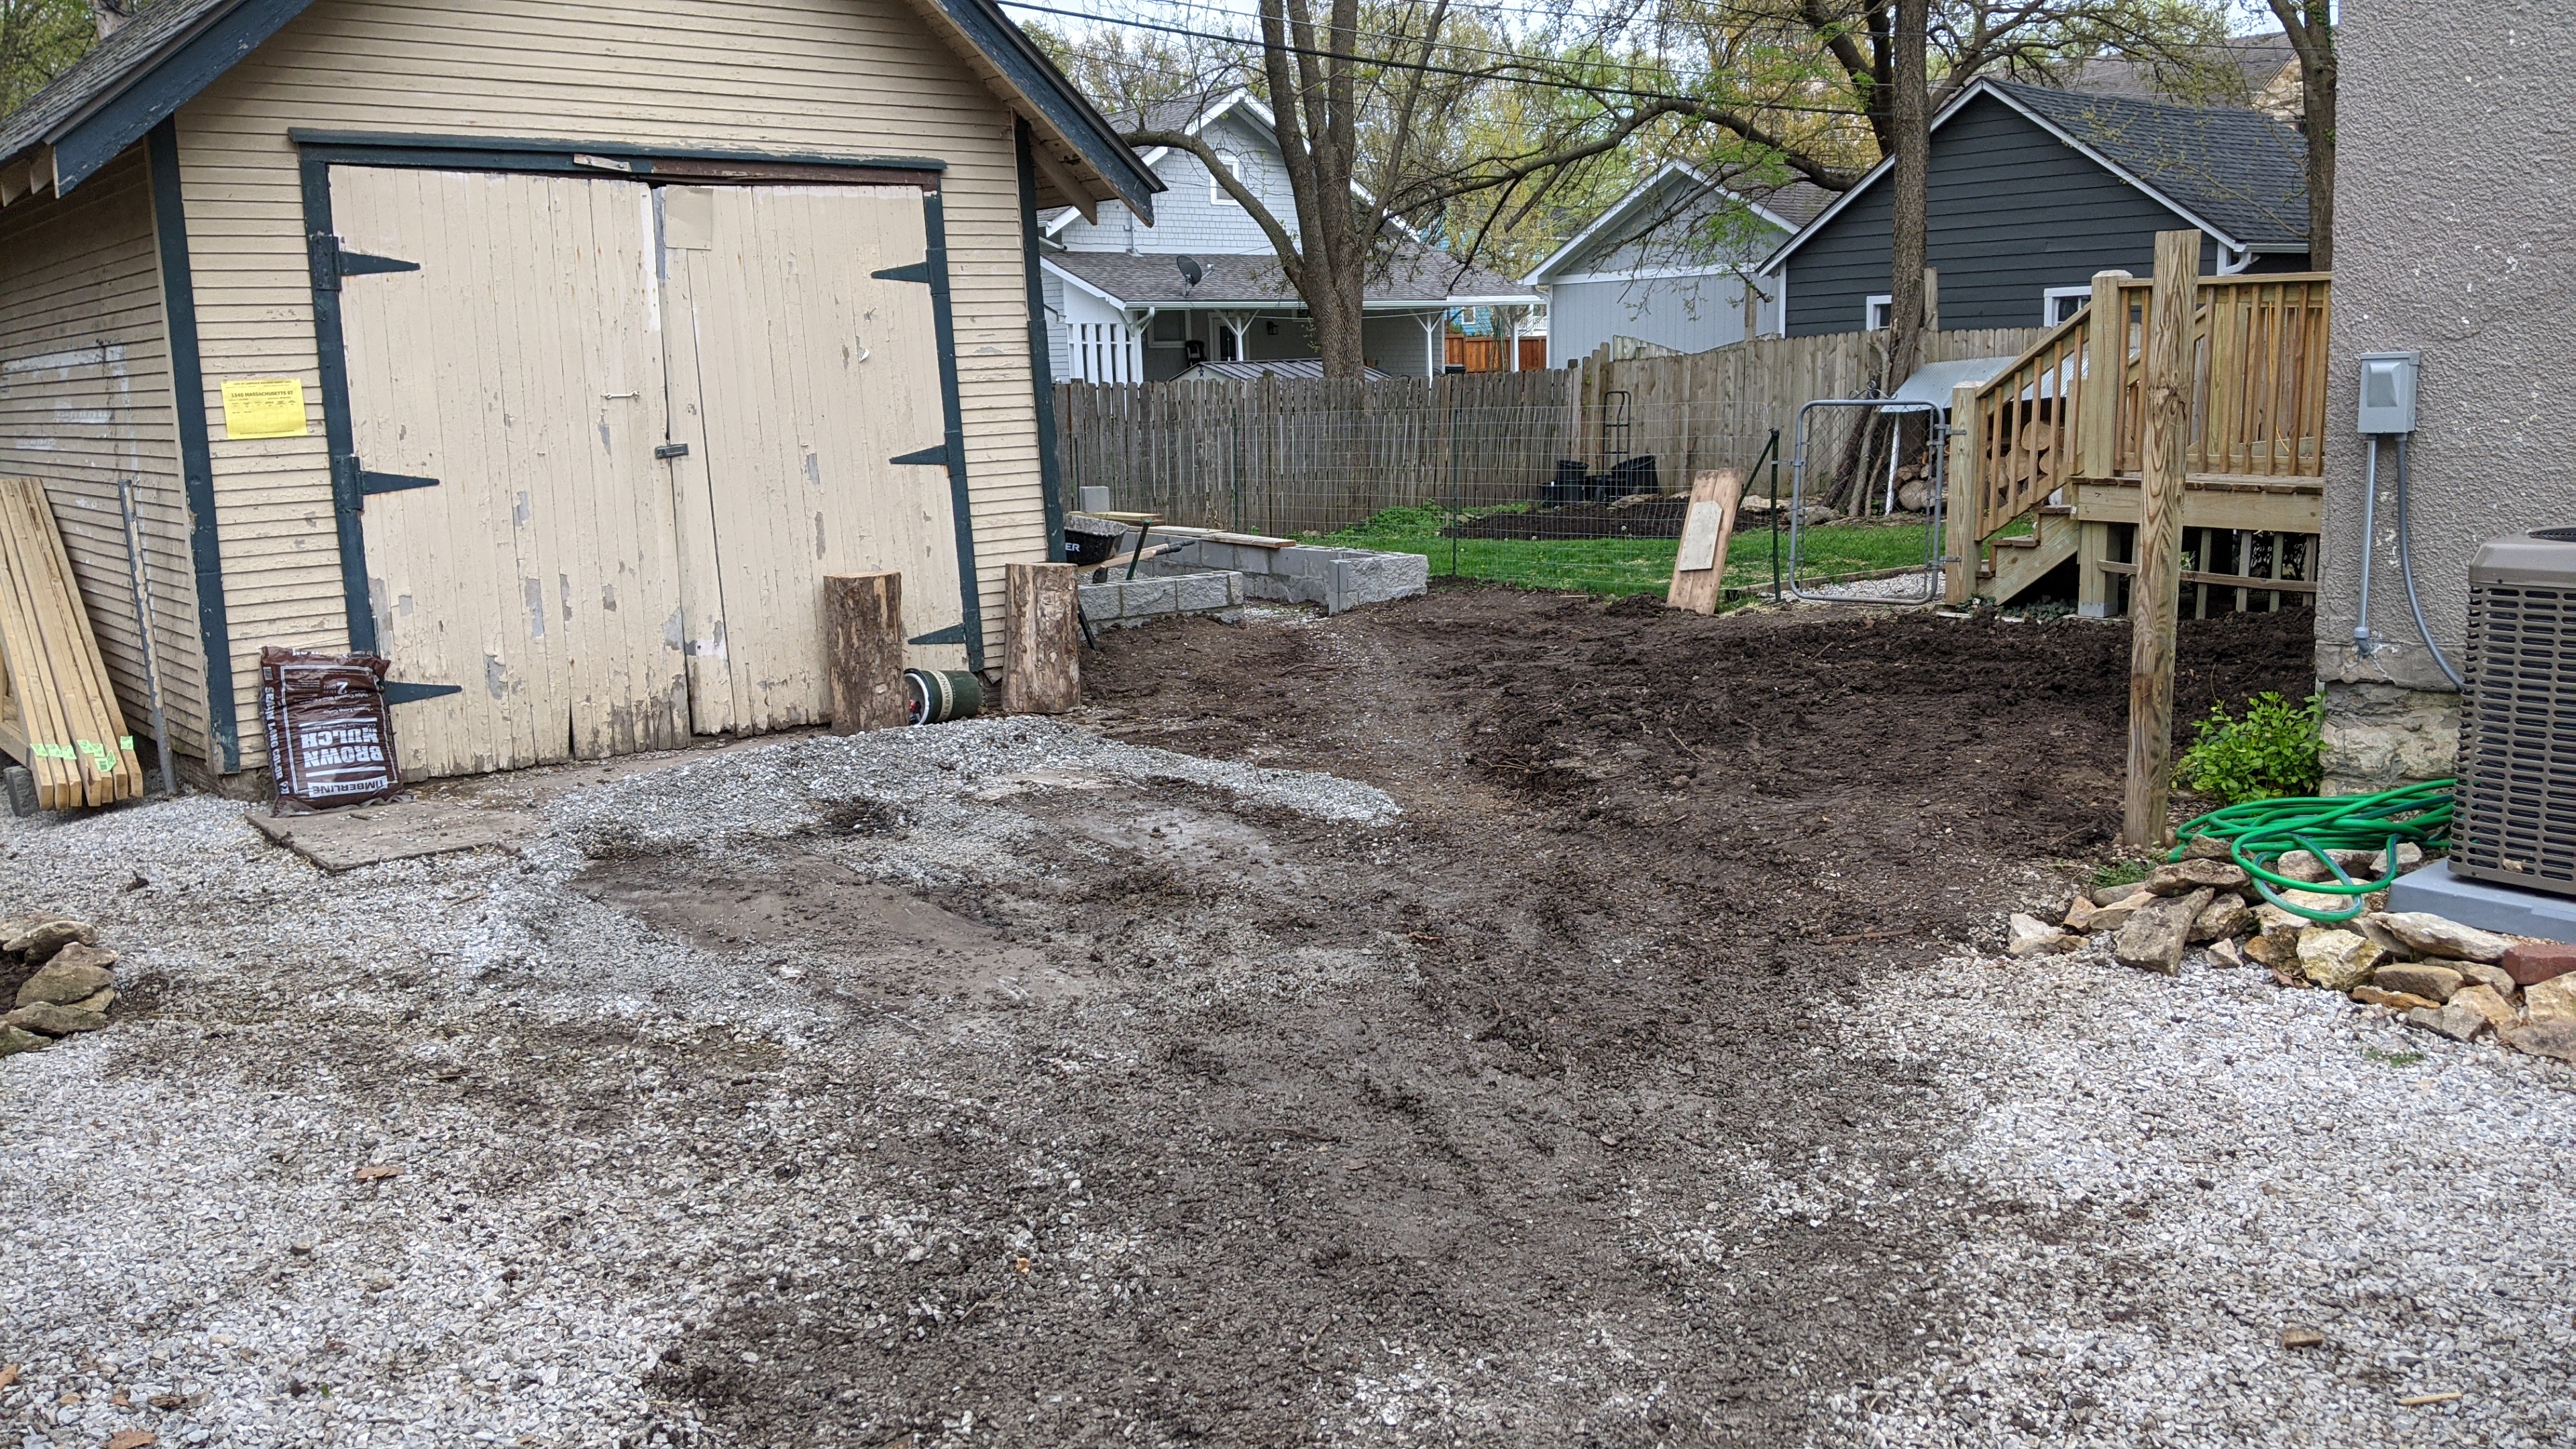
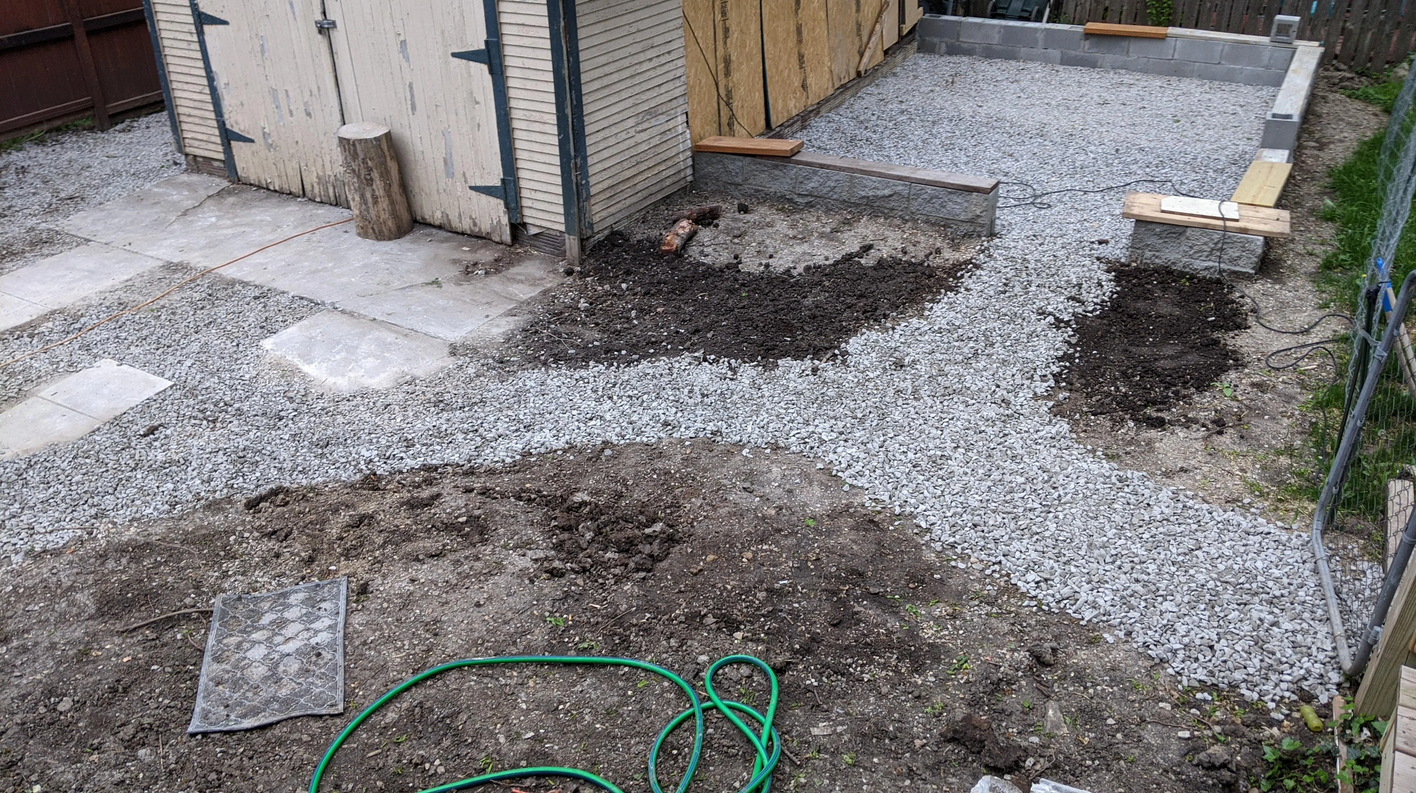
Got some more gravel and finished putting in the layer of gravel to go under the concrete pad.
As I mentioned earlier, I also had to lower the ground in front of where the door will be, so that it doesn't slope towards the structure. Well because of that, I was worried that I created a low spot...
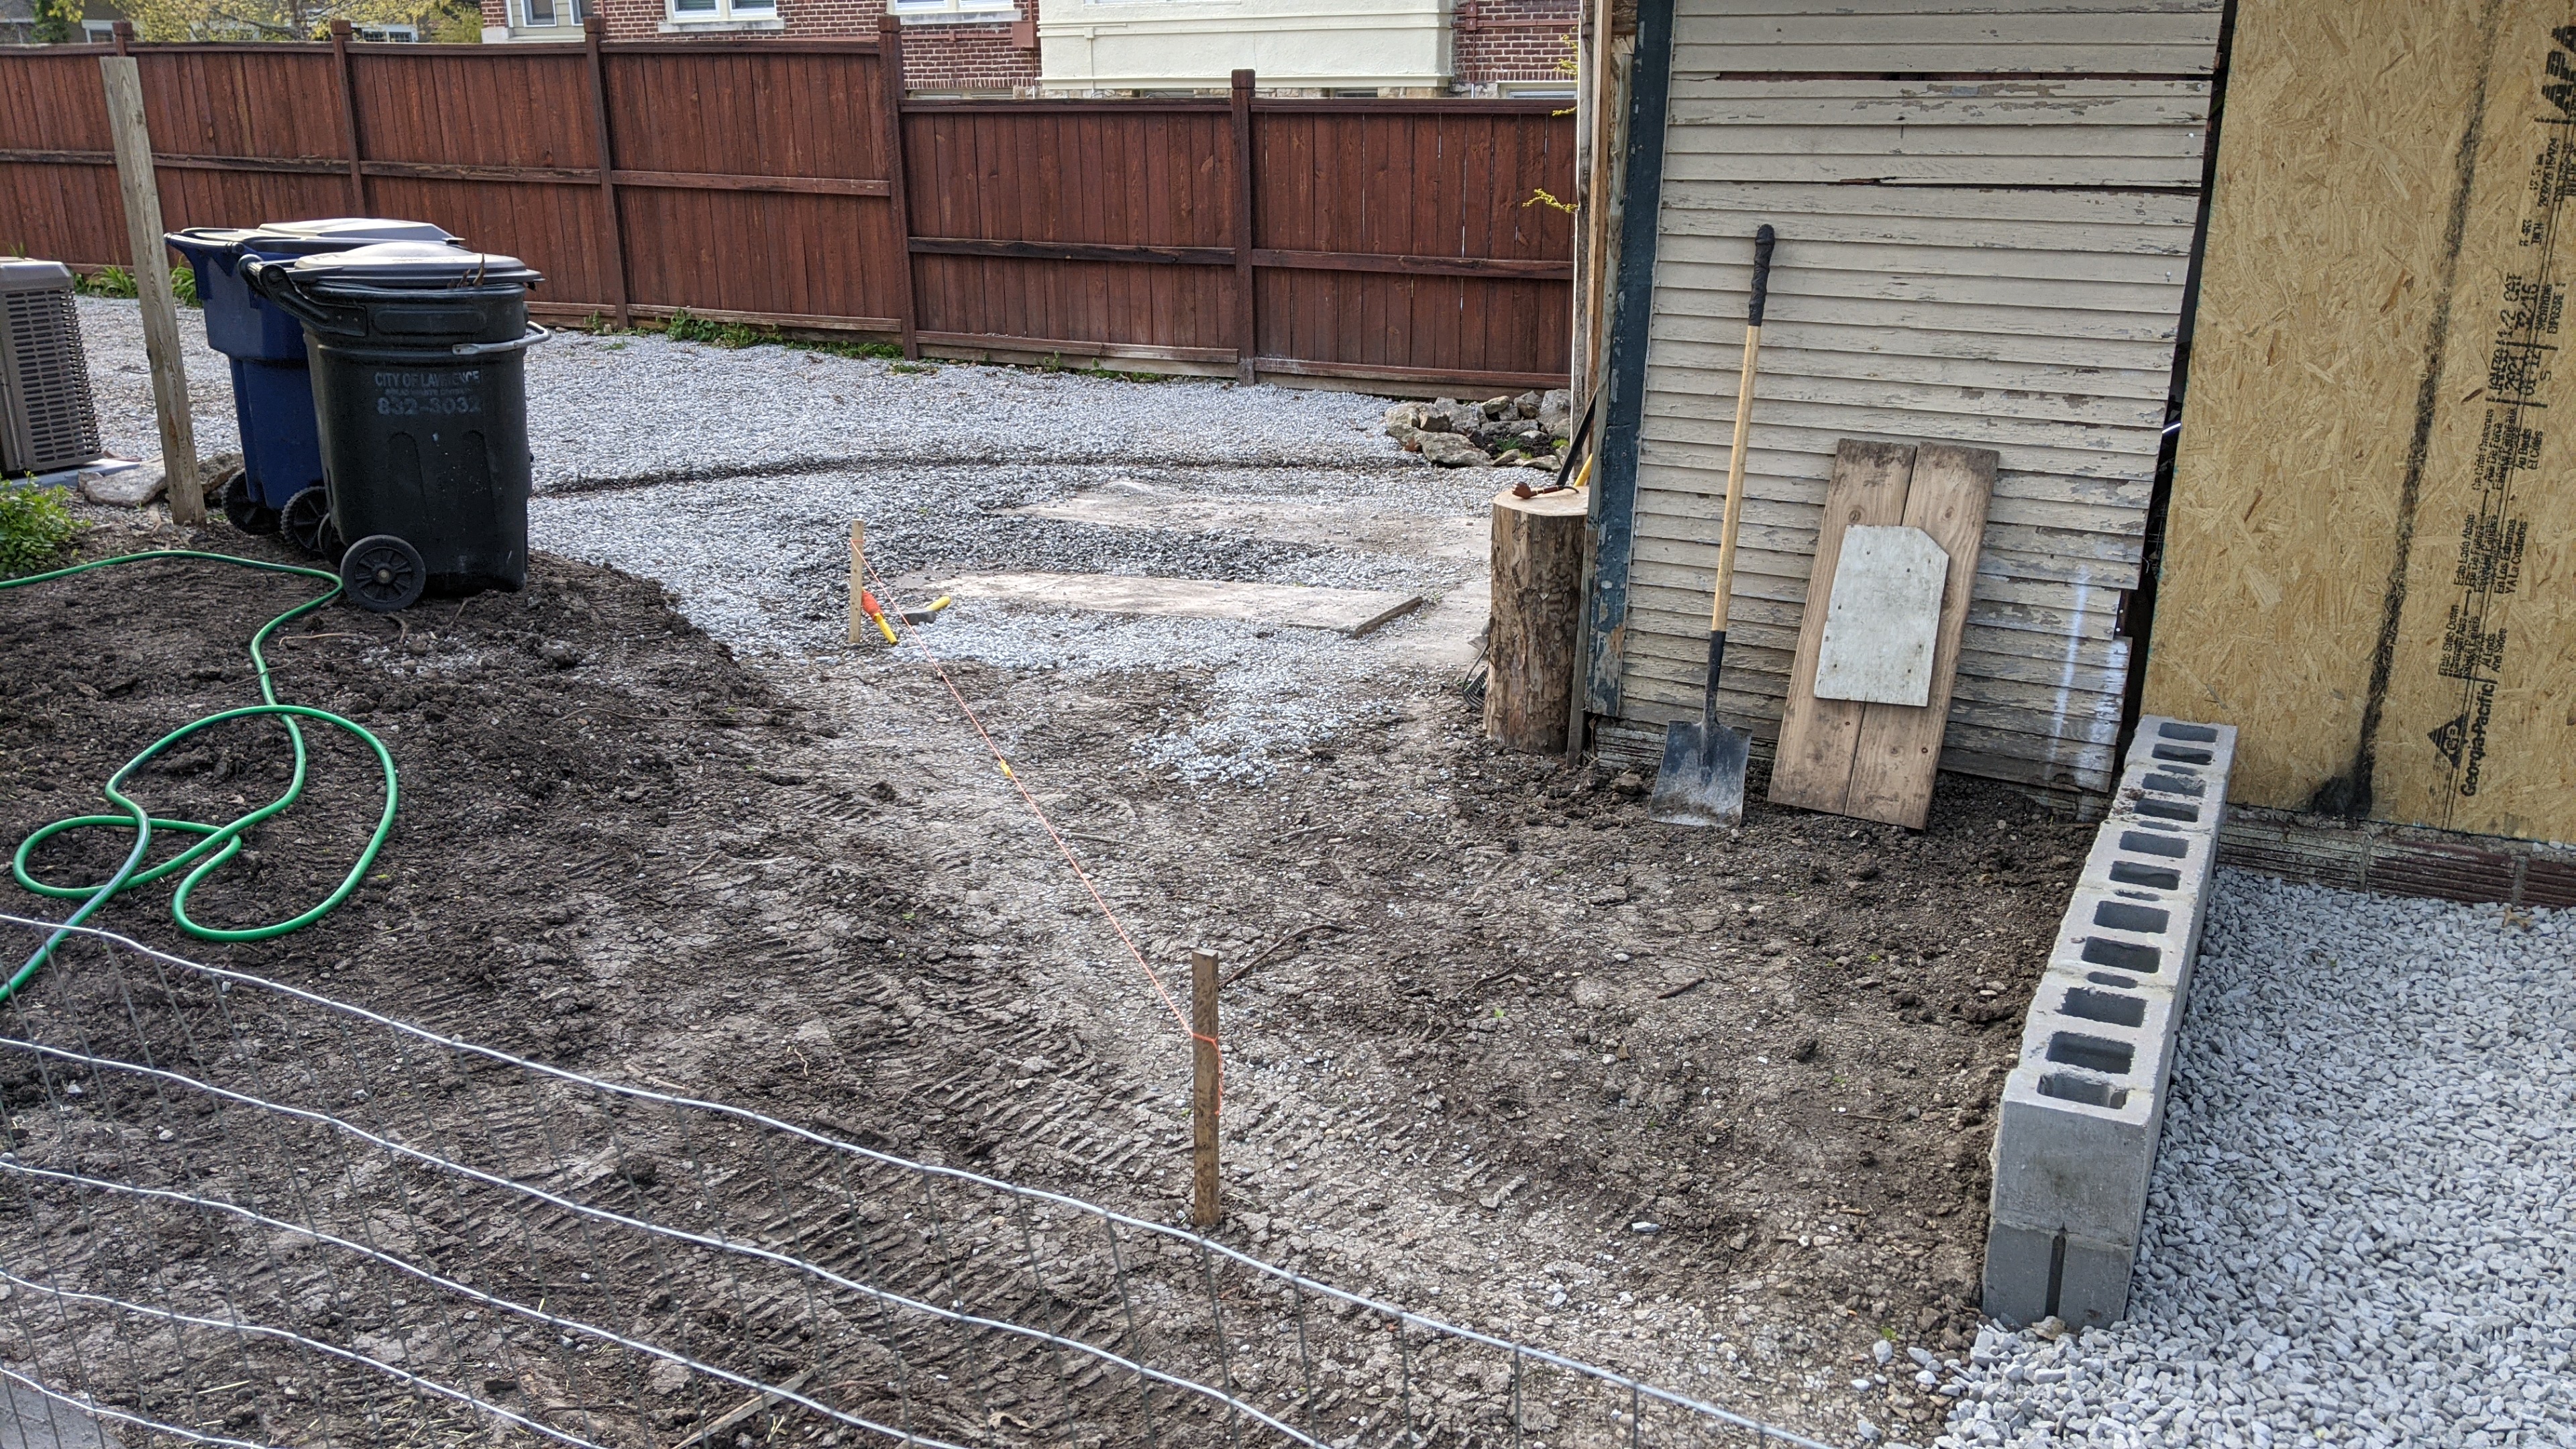
So I hammered down so stakes and took some line, a line level, and a tape measured and made sure that the ground slopped towards the grain garden with the Dawn Redwood tree I planted a week or two ago (to the left in the photo below).
Thankfully it showed that it was slopping in the correct direction, but only by 1" in 14' of run.
In the above photo, the water exits from the sump pump on the right by the trash cans, runs from right to left in a little trench that I cut through the the gravel, and into the rain garden (if it overflows that then it goes towards the back of the garage). The rain garden is a 1:1:1 mix of compost, dirt, and sand. I put in a Drawn Redwood because I couldn't find any Bald Cypresses for sale and this type of redwood is supposedly very similar and loving of water. But I'm worried that there is so much water that it is like trying to grow in a lake. There is standing water right now and it's not even raining. There's also yarrow plants and scottish moss. In a week or two we will see how they do.
The ground is also extremely packed down from the machines and I'm certain that rain water will not drain through it right there.
I think I'm going to need to do something to increase drainage in the compacted soil. Not sure what I should do about that.
-------------------------
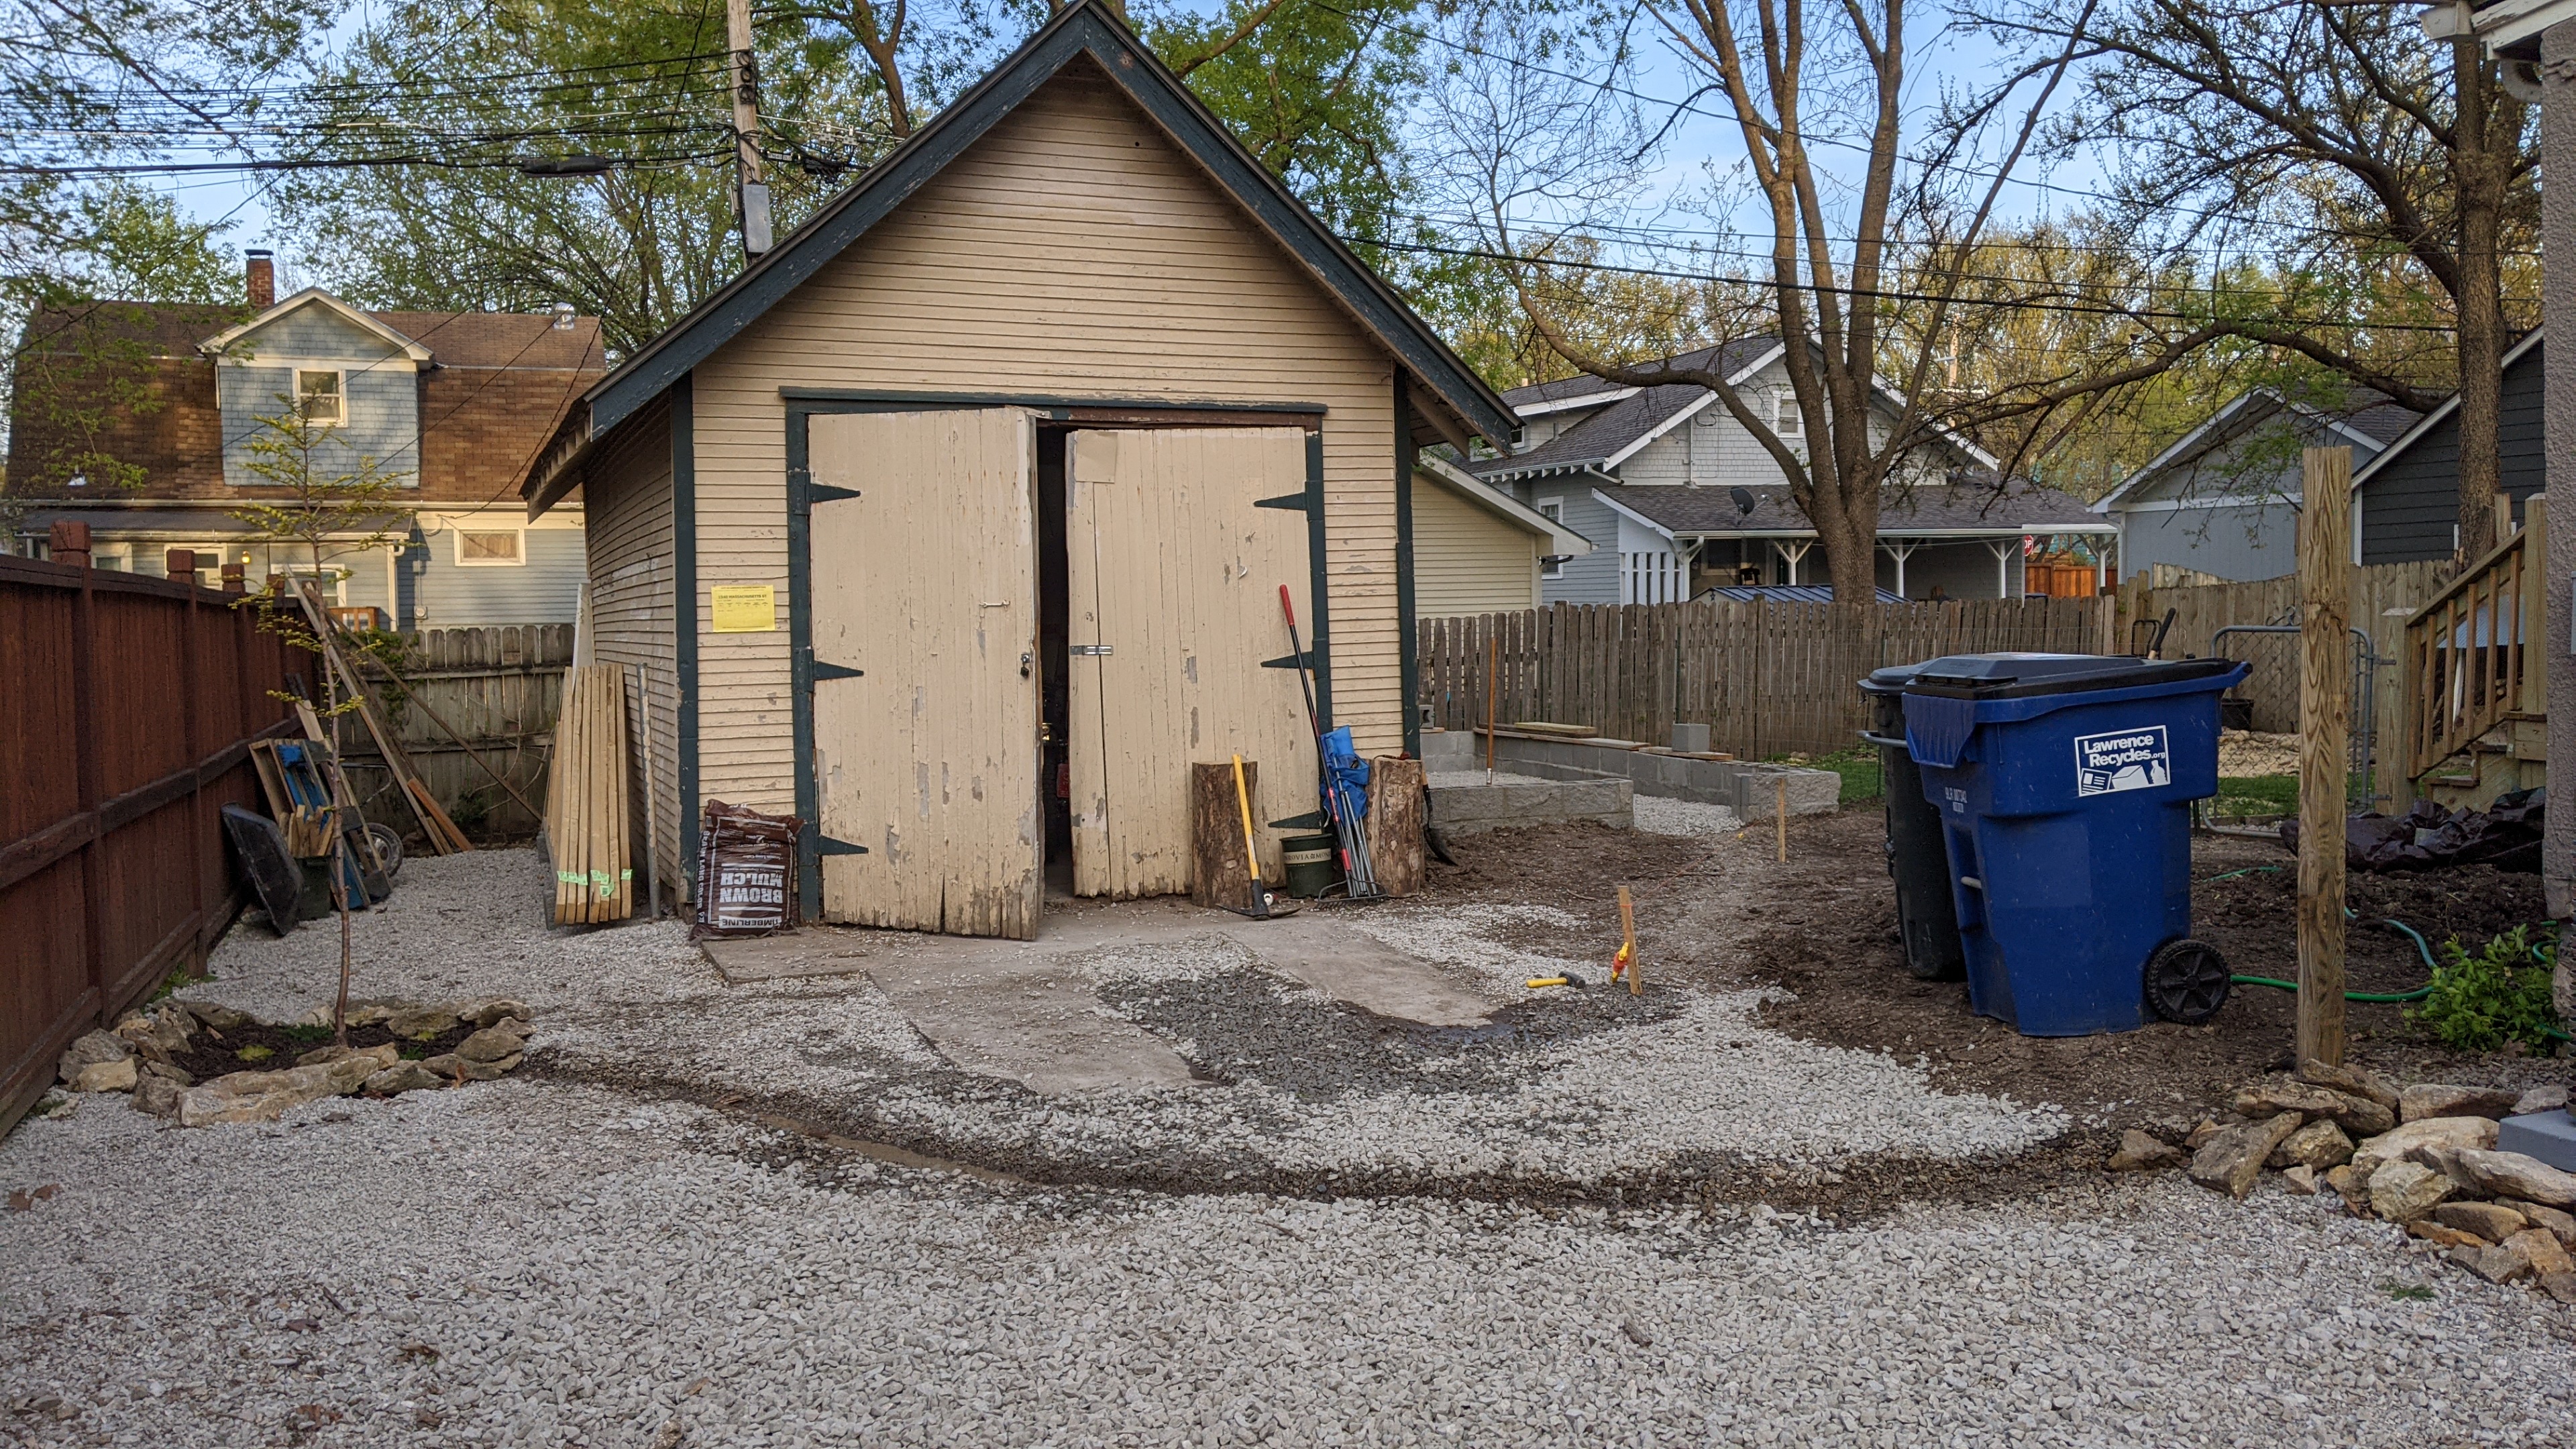
Johnny's 40-foot school bus that he's converting to an RV has arrived in my driveway.
And you can see that water (rain and also from the sump pump) is now pooling up in front of the garage door.
The problem is that the two concrete strips are blocking it from draining towards the rain garden. So I rented a large concrete saw and bought a sledge hammer.
Then I made a simple french drain to help it drain even better.
Now it is draining perfectly!
The J bolt anchors are going in. Need to be a few inches from the end of the wall, but a not too far to meet code. In the corners, I'm putting both in the same hallow core of the corner block and will see if that is cutting it to close. If it is then I can just cut them off and drill holes for the wedge-style concrete anchors.
I'm filling the cores with mortor all the way to the bottom only where there is vertical rebar and around the door opening. All the other cores will get filled only on the top layer because I won't have a fill width mud sill.
Pouring the Concrete Floor
It is FINALLY time to pour the concrete floor for the workshop! I thought I would hire this part out, but the two price quotes I received where both well over $2,500, or over $12.70 a square foot. And I felt like I didn't need to spend that much on a glorified shed. So, once again, I'm doing it myself.
It was a lot of work just to get everything ready - the inspection, the cement truck, the help from at least two friends (who could only help on weekends!), the tool rental, the weather (it has been really rainy), and a free Saturday without any obligations. Was a lot of ducks to get into a row.
But the day finally came.
I thought I had everything ready, but then the cement truck came 30 minutes early! At this point my main helper Johnny was just waking up, so I rushed over to his house to pick him up. When I got back, my second helper had erroneously removed the vapor barrier! He hadad already poured a few loads of concrete onto the gravel before I realized the mistake. And I spent $50 on it the day before. Waste of money.
The rental tools I had were a bull float and a magnesium screed board. Both were essential. Then I find two extra wheel barrow (both needed repairs) to add to mine to make three wheel barrows. I needed all three because the cement truck couldn't get far enough back into the driveway because of Johnny's enormous bus. My other friend/helper, Carl, said that it would have been better to move the bus and have the truck go all the way back so we could use the shoot, but that would have been a big job moving the bus out, finding somewhere to park it (I live in inner city), and then moving it back in place.
So we ended up using the wheelbarrows and it wasn't a problem at all. They were getting the concrete to me faster than I could screed it.
It was tricky to screed the concrete because we didn't have form boards to use as guides. Instead, there was the stem walls that were 8" taller than the height of the floor. This is a normal situation in garages and basement floors, and the process is called "wet screeding". The ideas is that the first step is to make a flat margin around the perimeter of the floor, and to use that as a guide for the screed board. Not as easy as a form but no other option.
So Johnny and I screeded while Carl delivered the last of the concrete. It took a long time for Johnny and I to find our rhythm with the screed board - he wanted to do his motion that he was used to, and I wanted to do it like how I saw them do it in the youtube videos - but about half way I gave up and just did it his way. We barely finished in time before it was set up too much to easy screed.
Then Johnny started using the bull float while I troweled around the edges.

My pregnant wife did her contribution:
That was about as much work as she was willing to do, lol.
After it set up for about two hours and I could just barely press my finger into the cement, I start finish trawling it. Unfortunitally I bought cheap wooden finish trowels instead of nice (expensive) magnesium ones. They were no good for finish troweling. So I used the large metal trowel that I had for laying the CMU blocks, and it worked a little better. But was not perfect.
Finally, I could step back and breath and little. Take another photo.
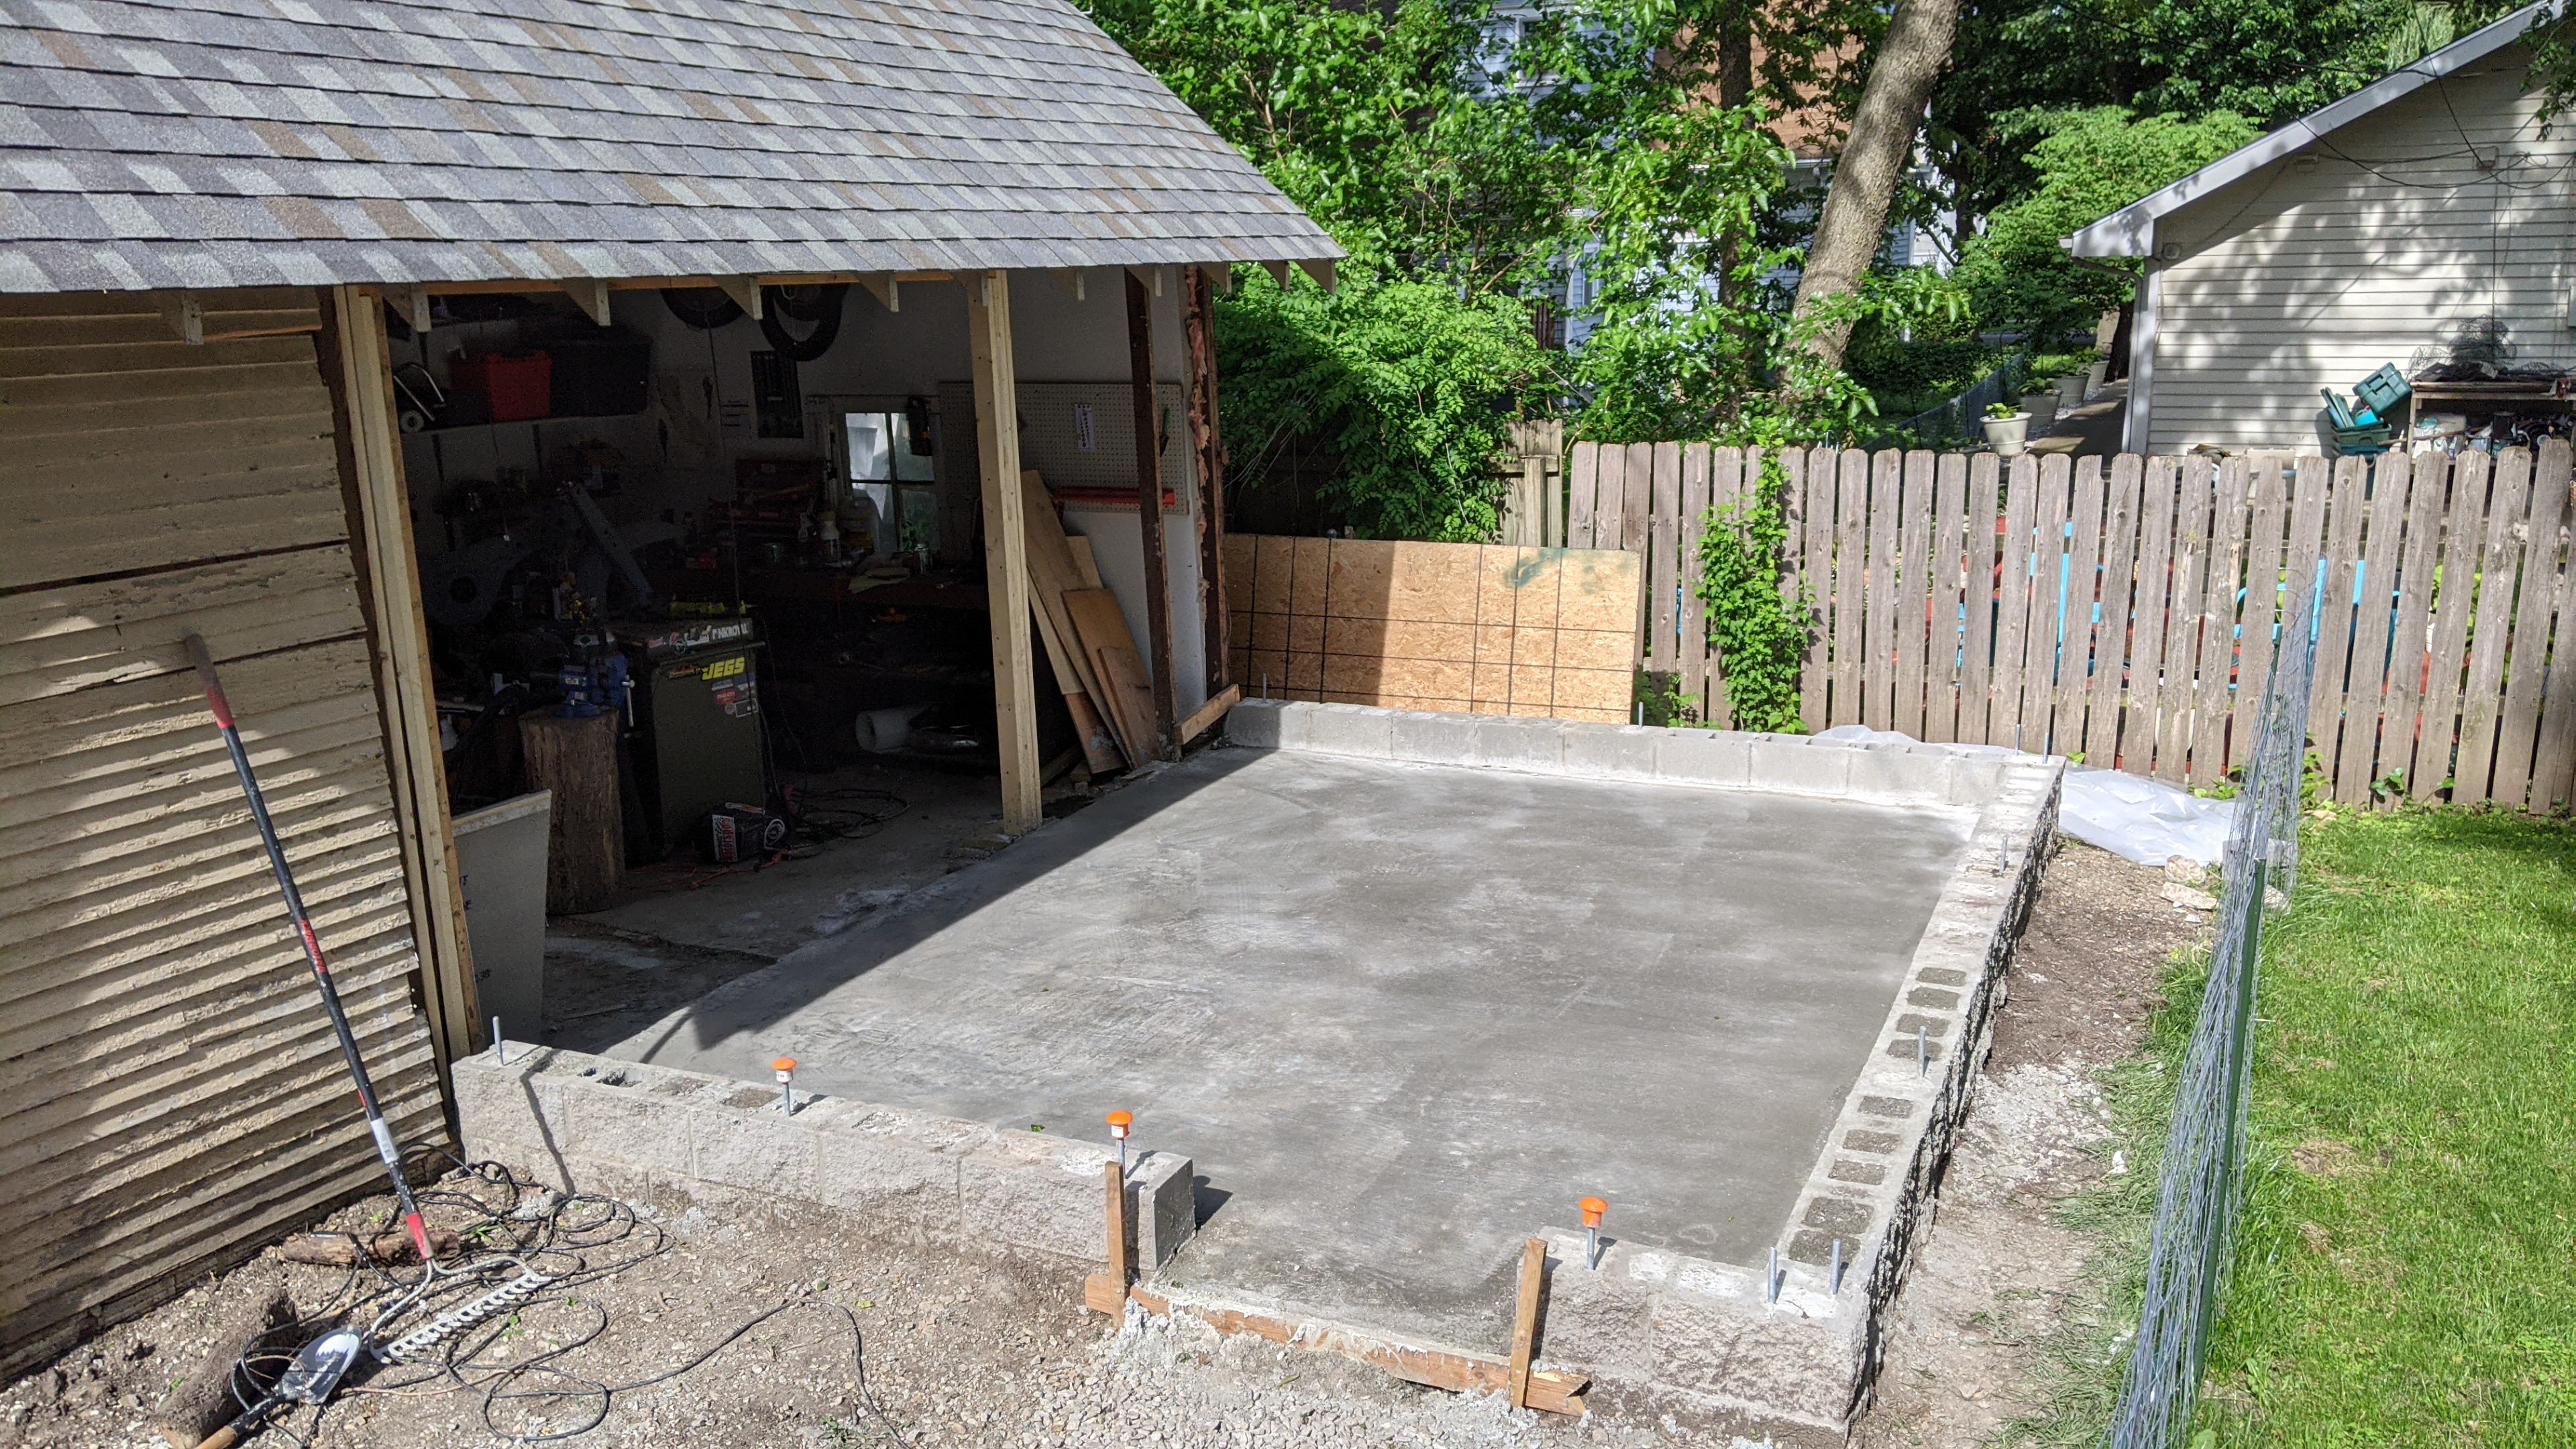
It's been a few days since the concrete was poured and today it is looking pretty good!
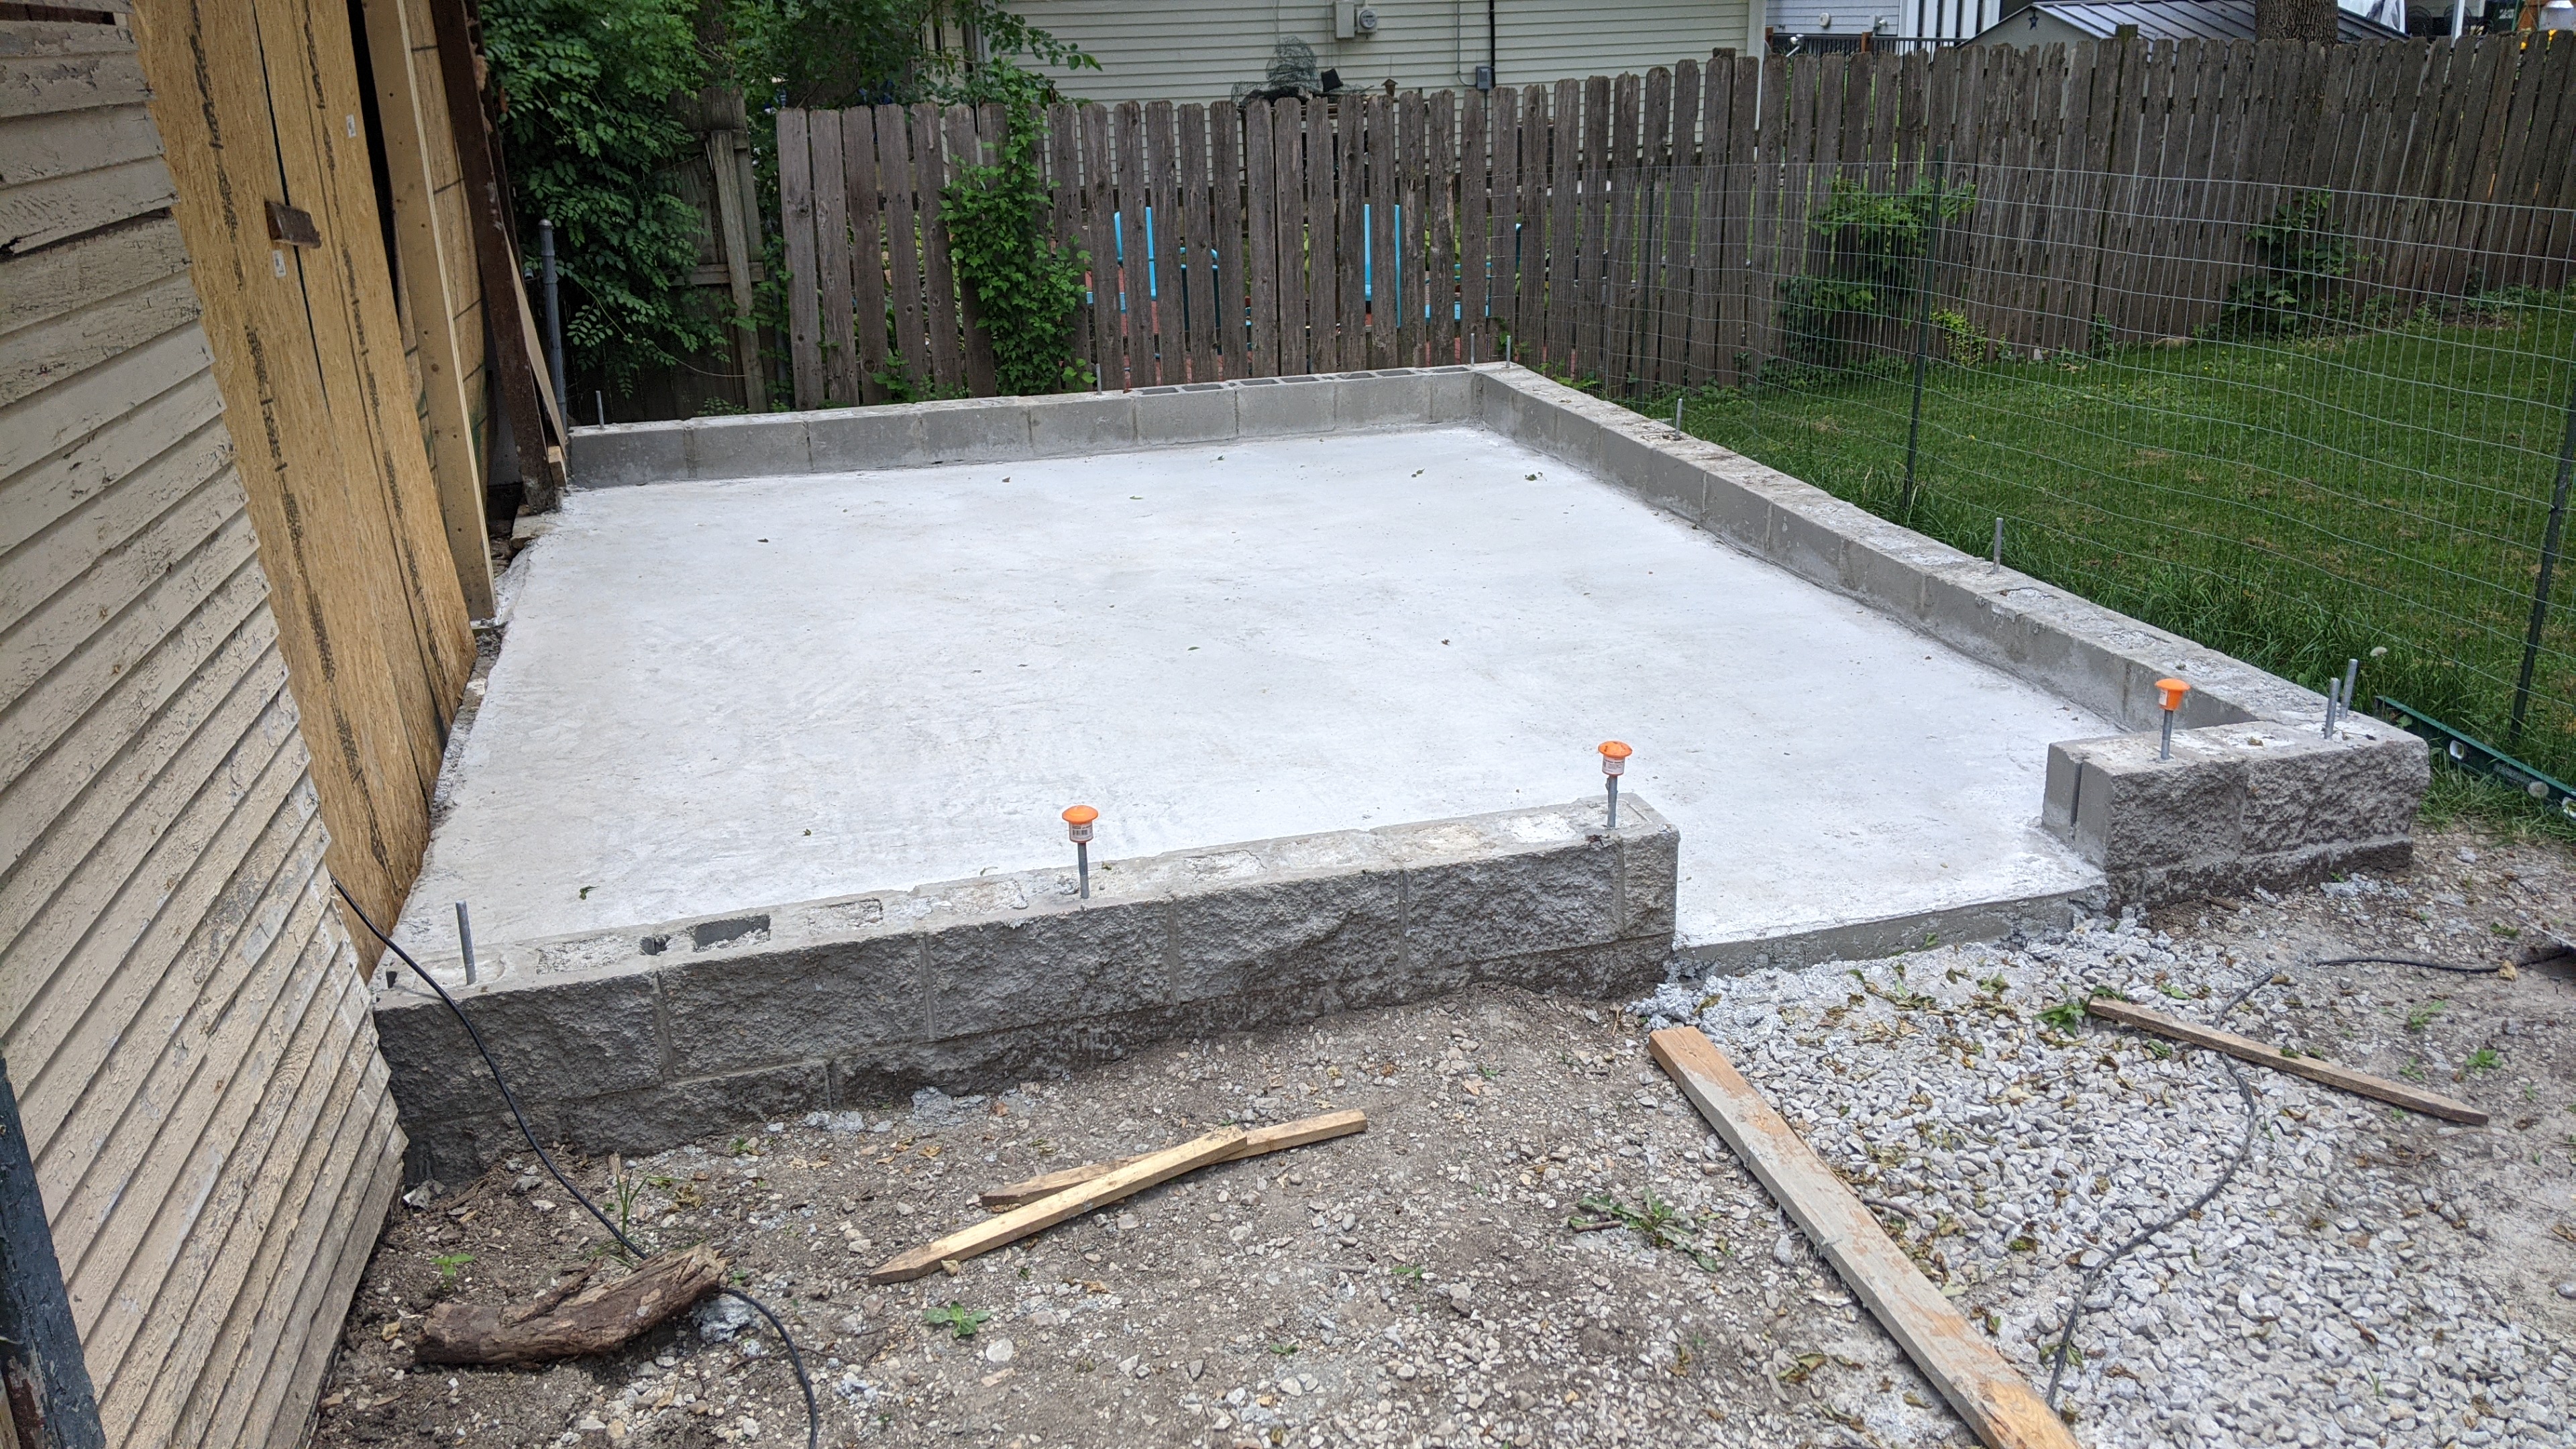
So with that, the foundation is totally done! I can't believe I did it all by myself (with help, of course). I wanted to build the workshop, but I just wanted to do the framing and pay somebody else to do the foundation. But there's a labor shortage in my town, and across most of the country I think.
It's not perfect and there's plenty of mistakes, but overall I am happy with it.
Can't wait to get started on the framing!