The stairs! What a long journey... I first started working on them in July. It's now December and they're finally, finally finished. They challenged me at every step along the way - no pun intended. I had to use every tool I had, every skill I knew, and every ounce of my patience. And I did it all by myself (well, my fiance helped! but I didn't hire anybody is what I'm saying. And I had a little help from friends of course). It was the ultimate test of my carpentry skills, and I passed.
Here's how I did it.
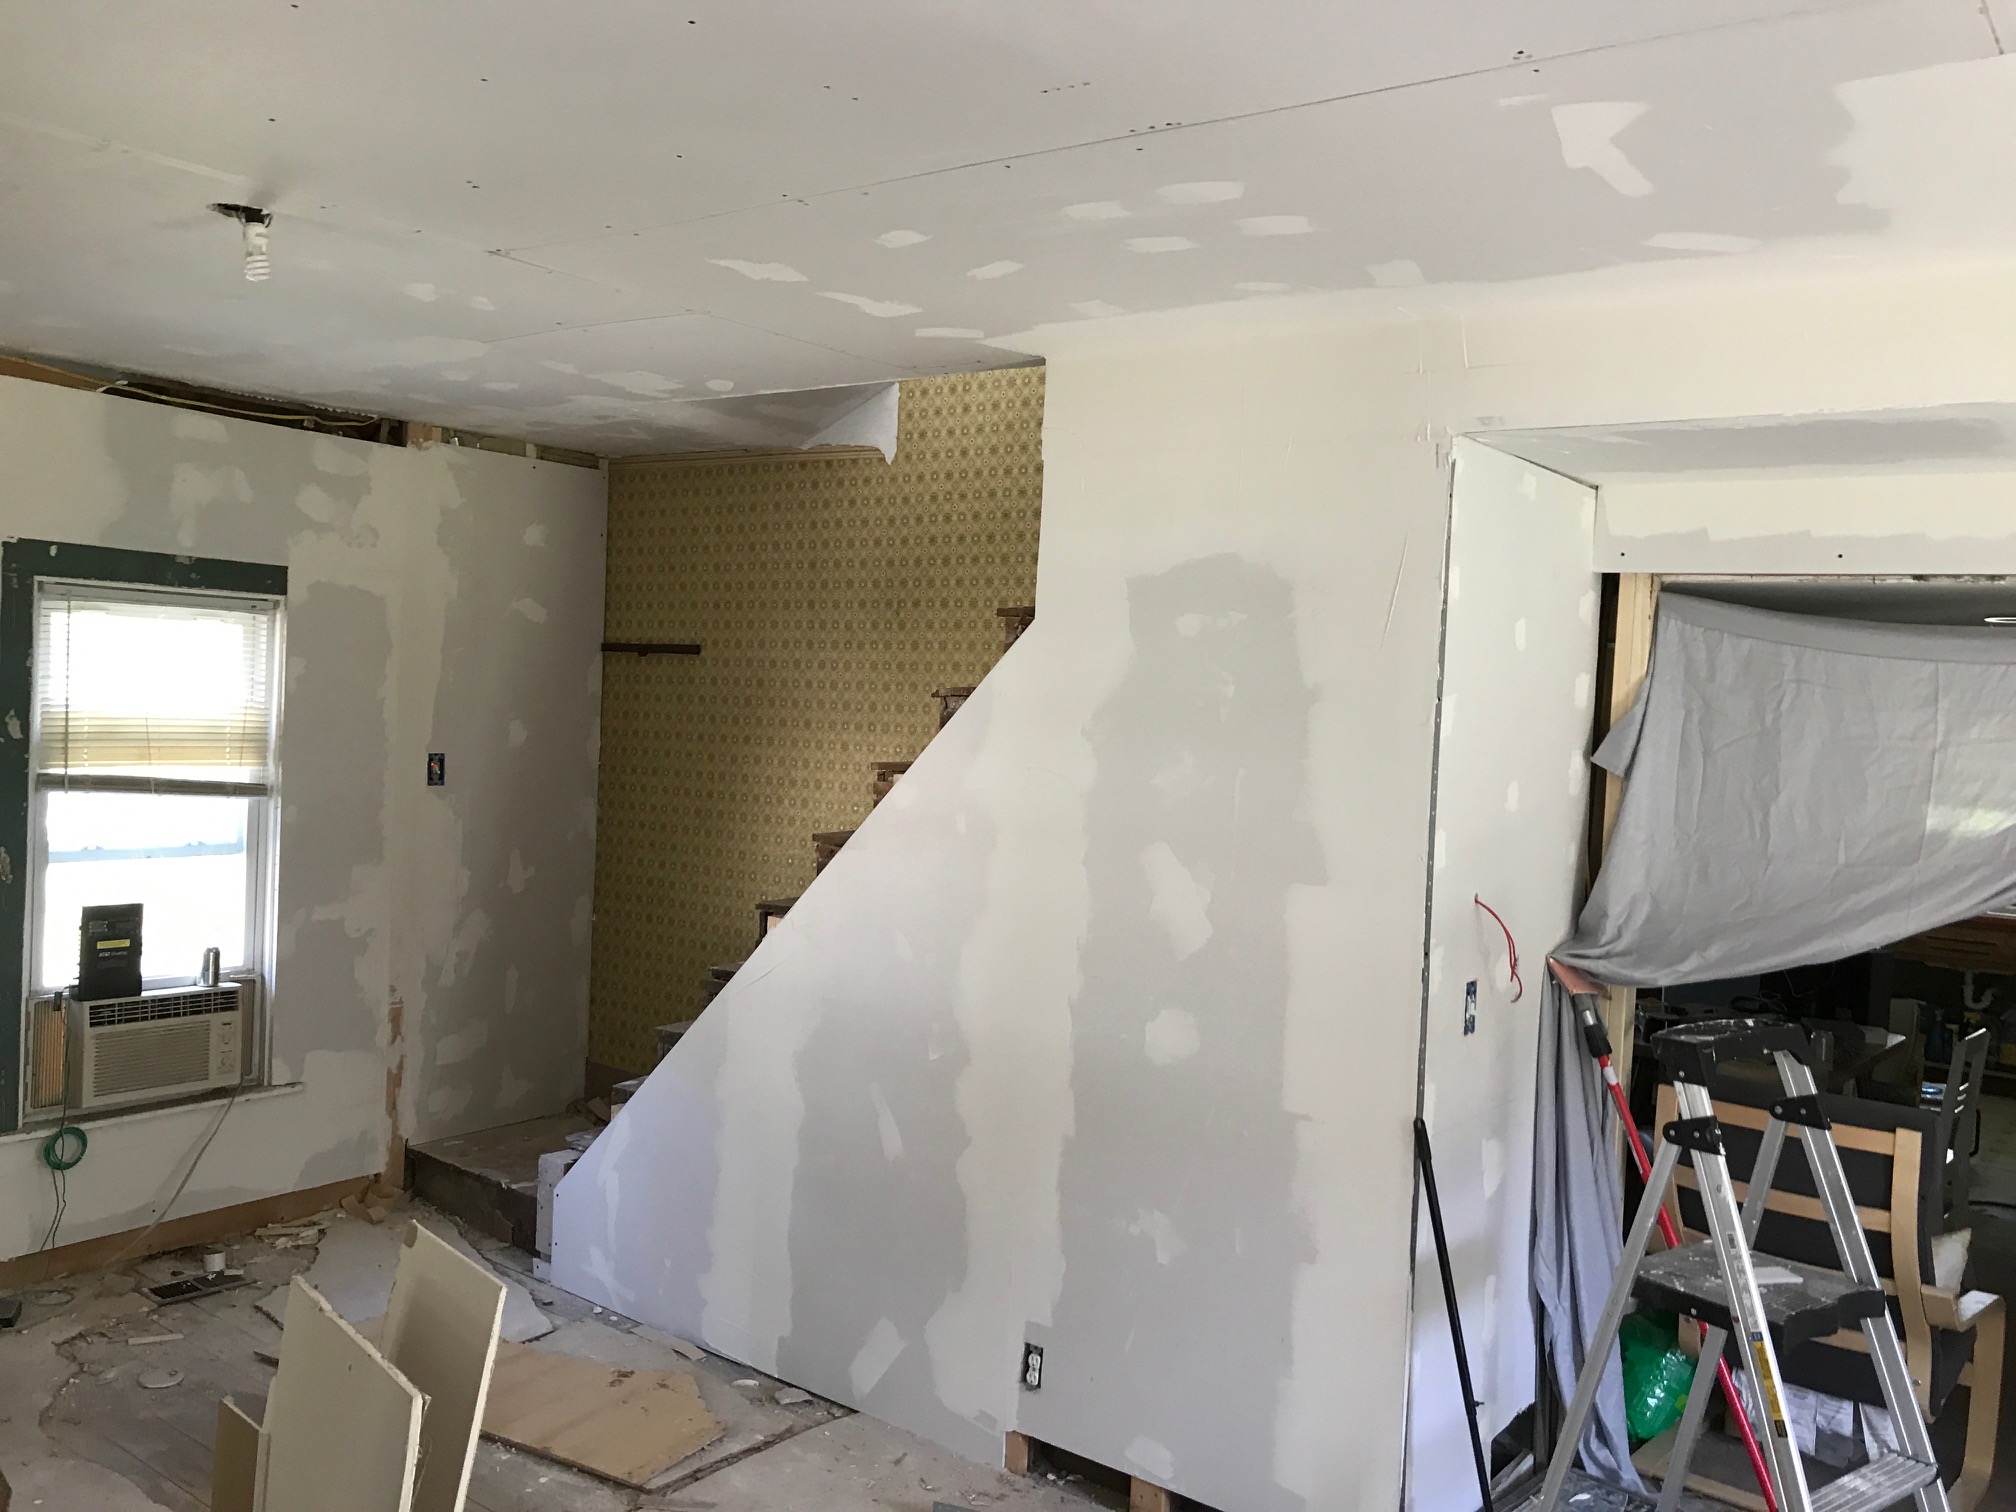
Demolition and prep work
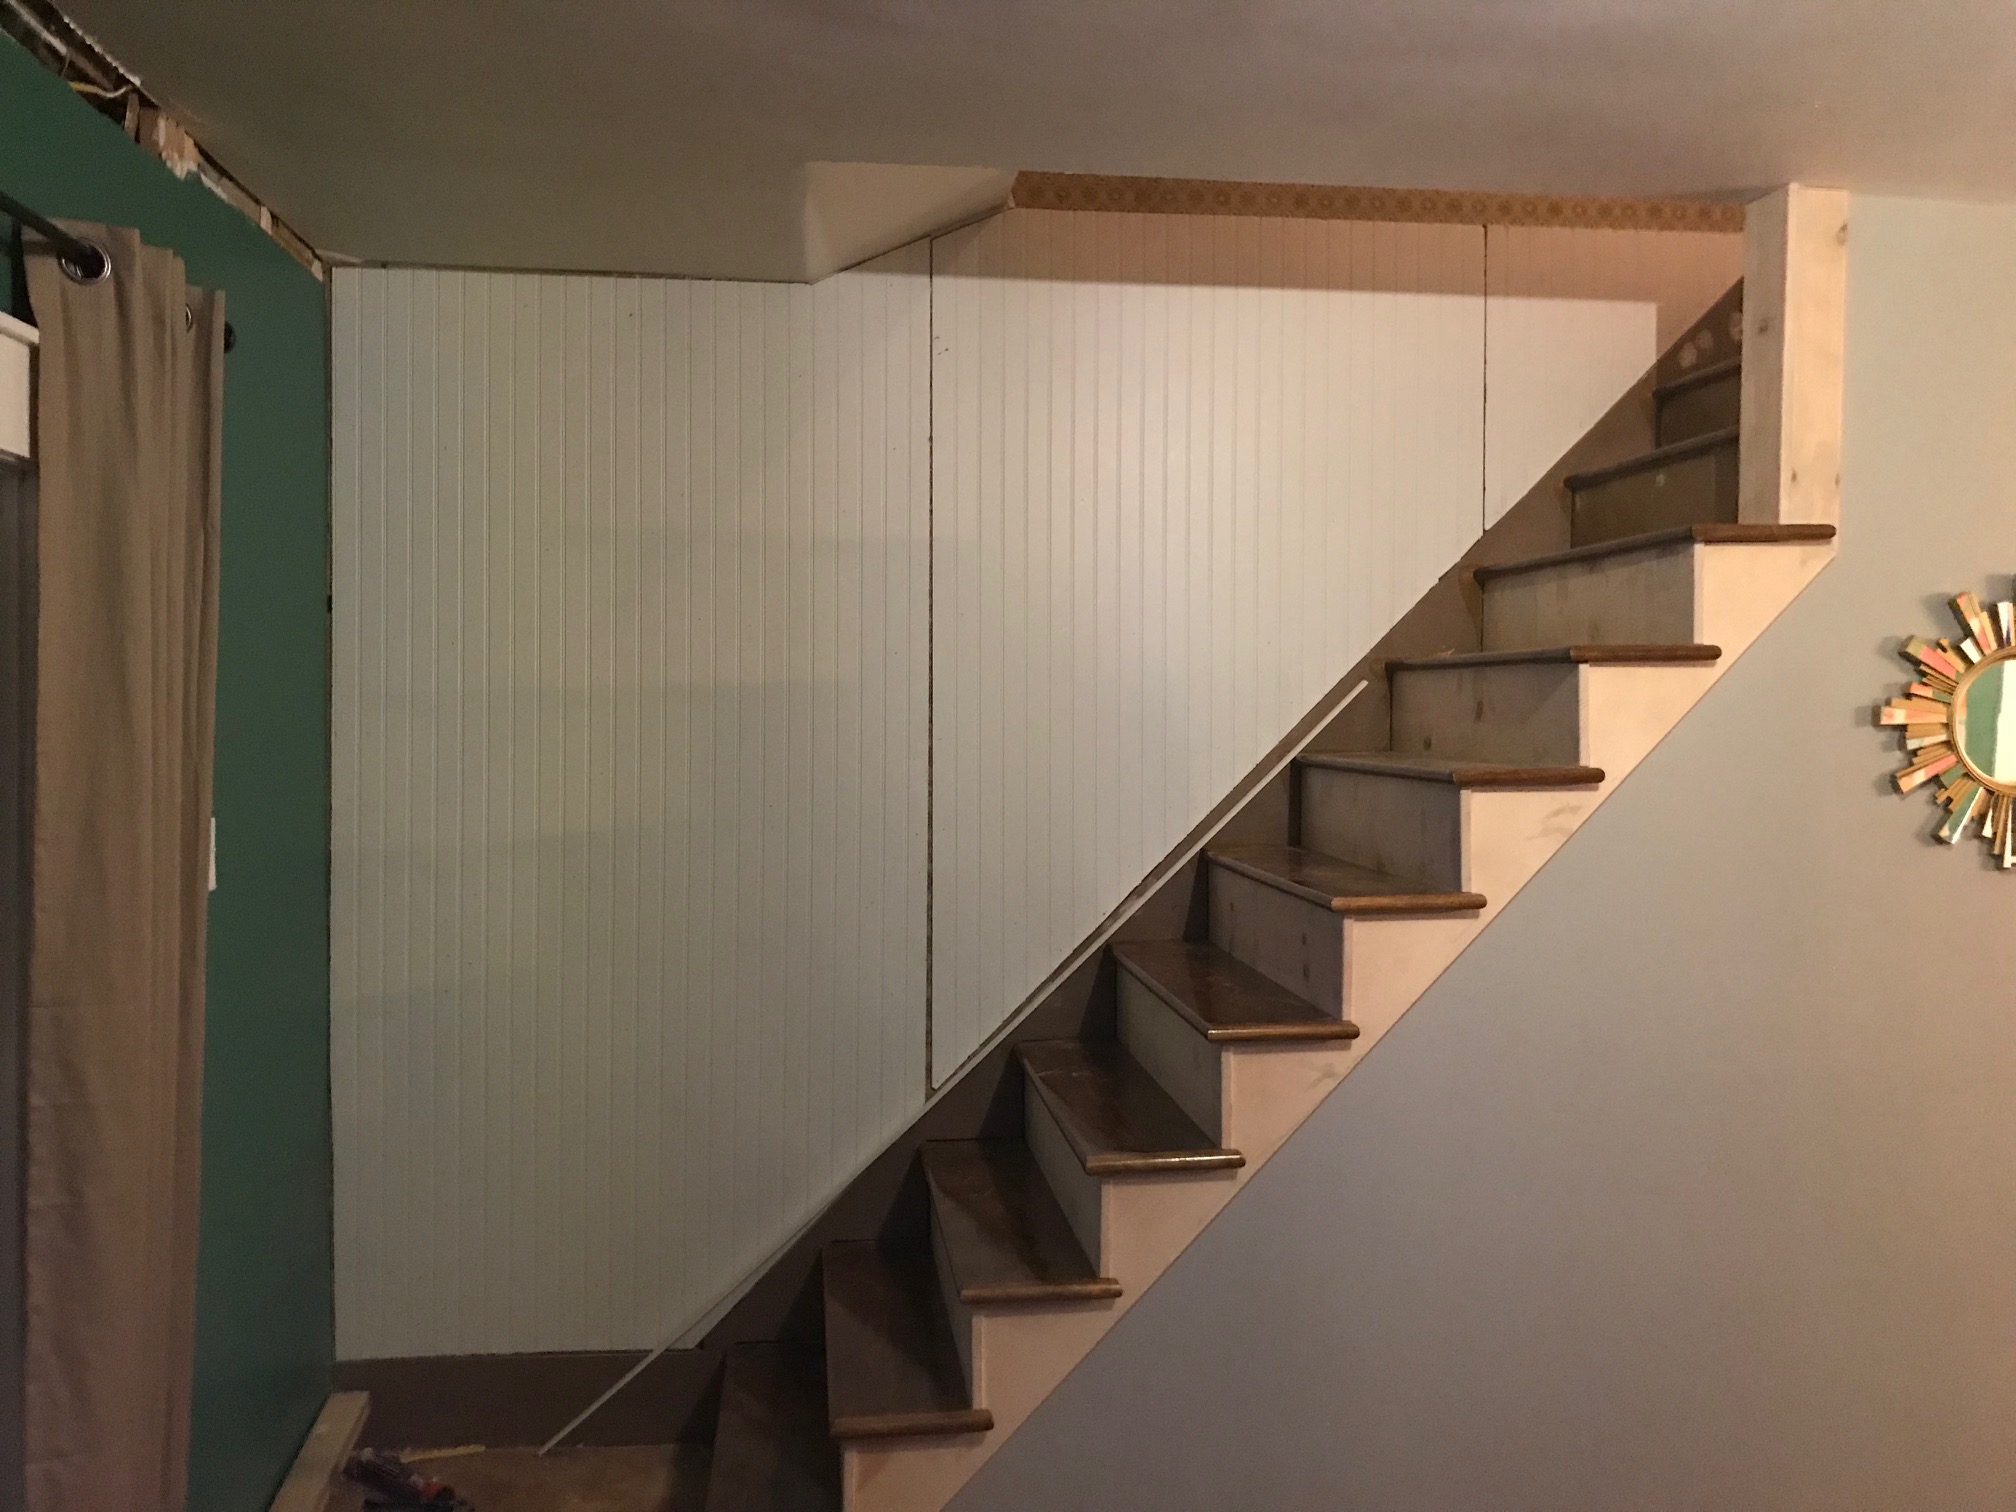
How's this for a "before" photo? This one really gets me. Really makes me shake my head and say, "Wow, look how far we've come." Behind this wall I'm knocking down is the stair case. The whole staircase was in this very narrow opening between two walls with a tiny door by the stairs landing. Very very uncomfortable. And the carpet on the stairs was the ugliest green color I've ever seen.
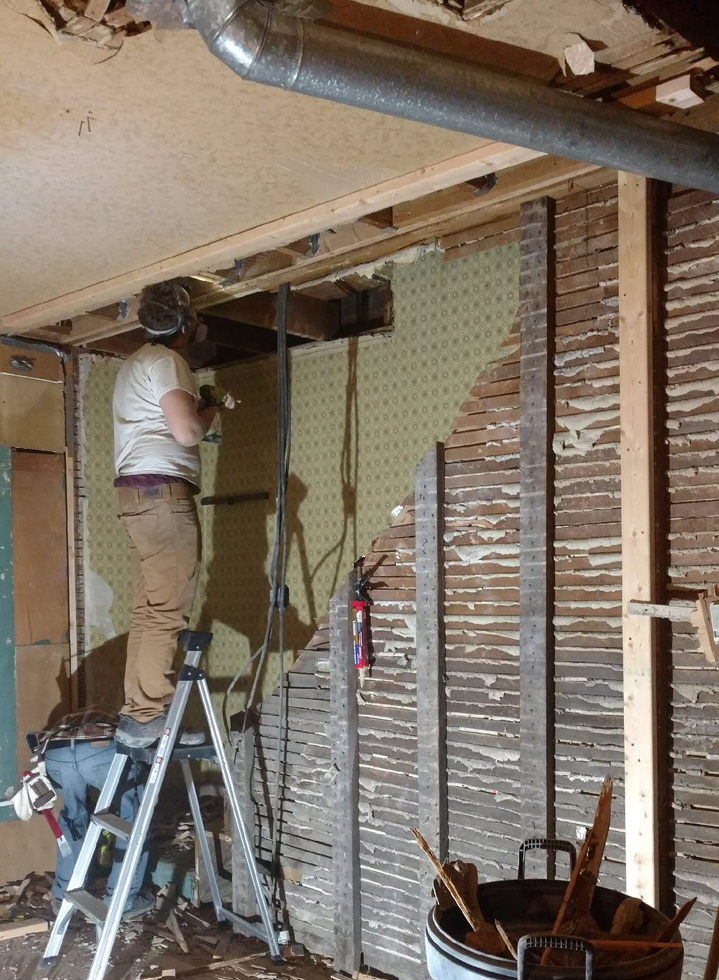
We had to install a header where the old wall was. Check out Part 1 of my This Old Fixer Upper series for more info.
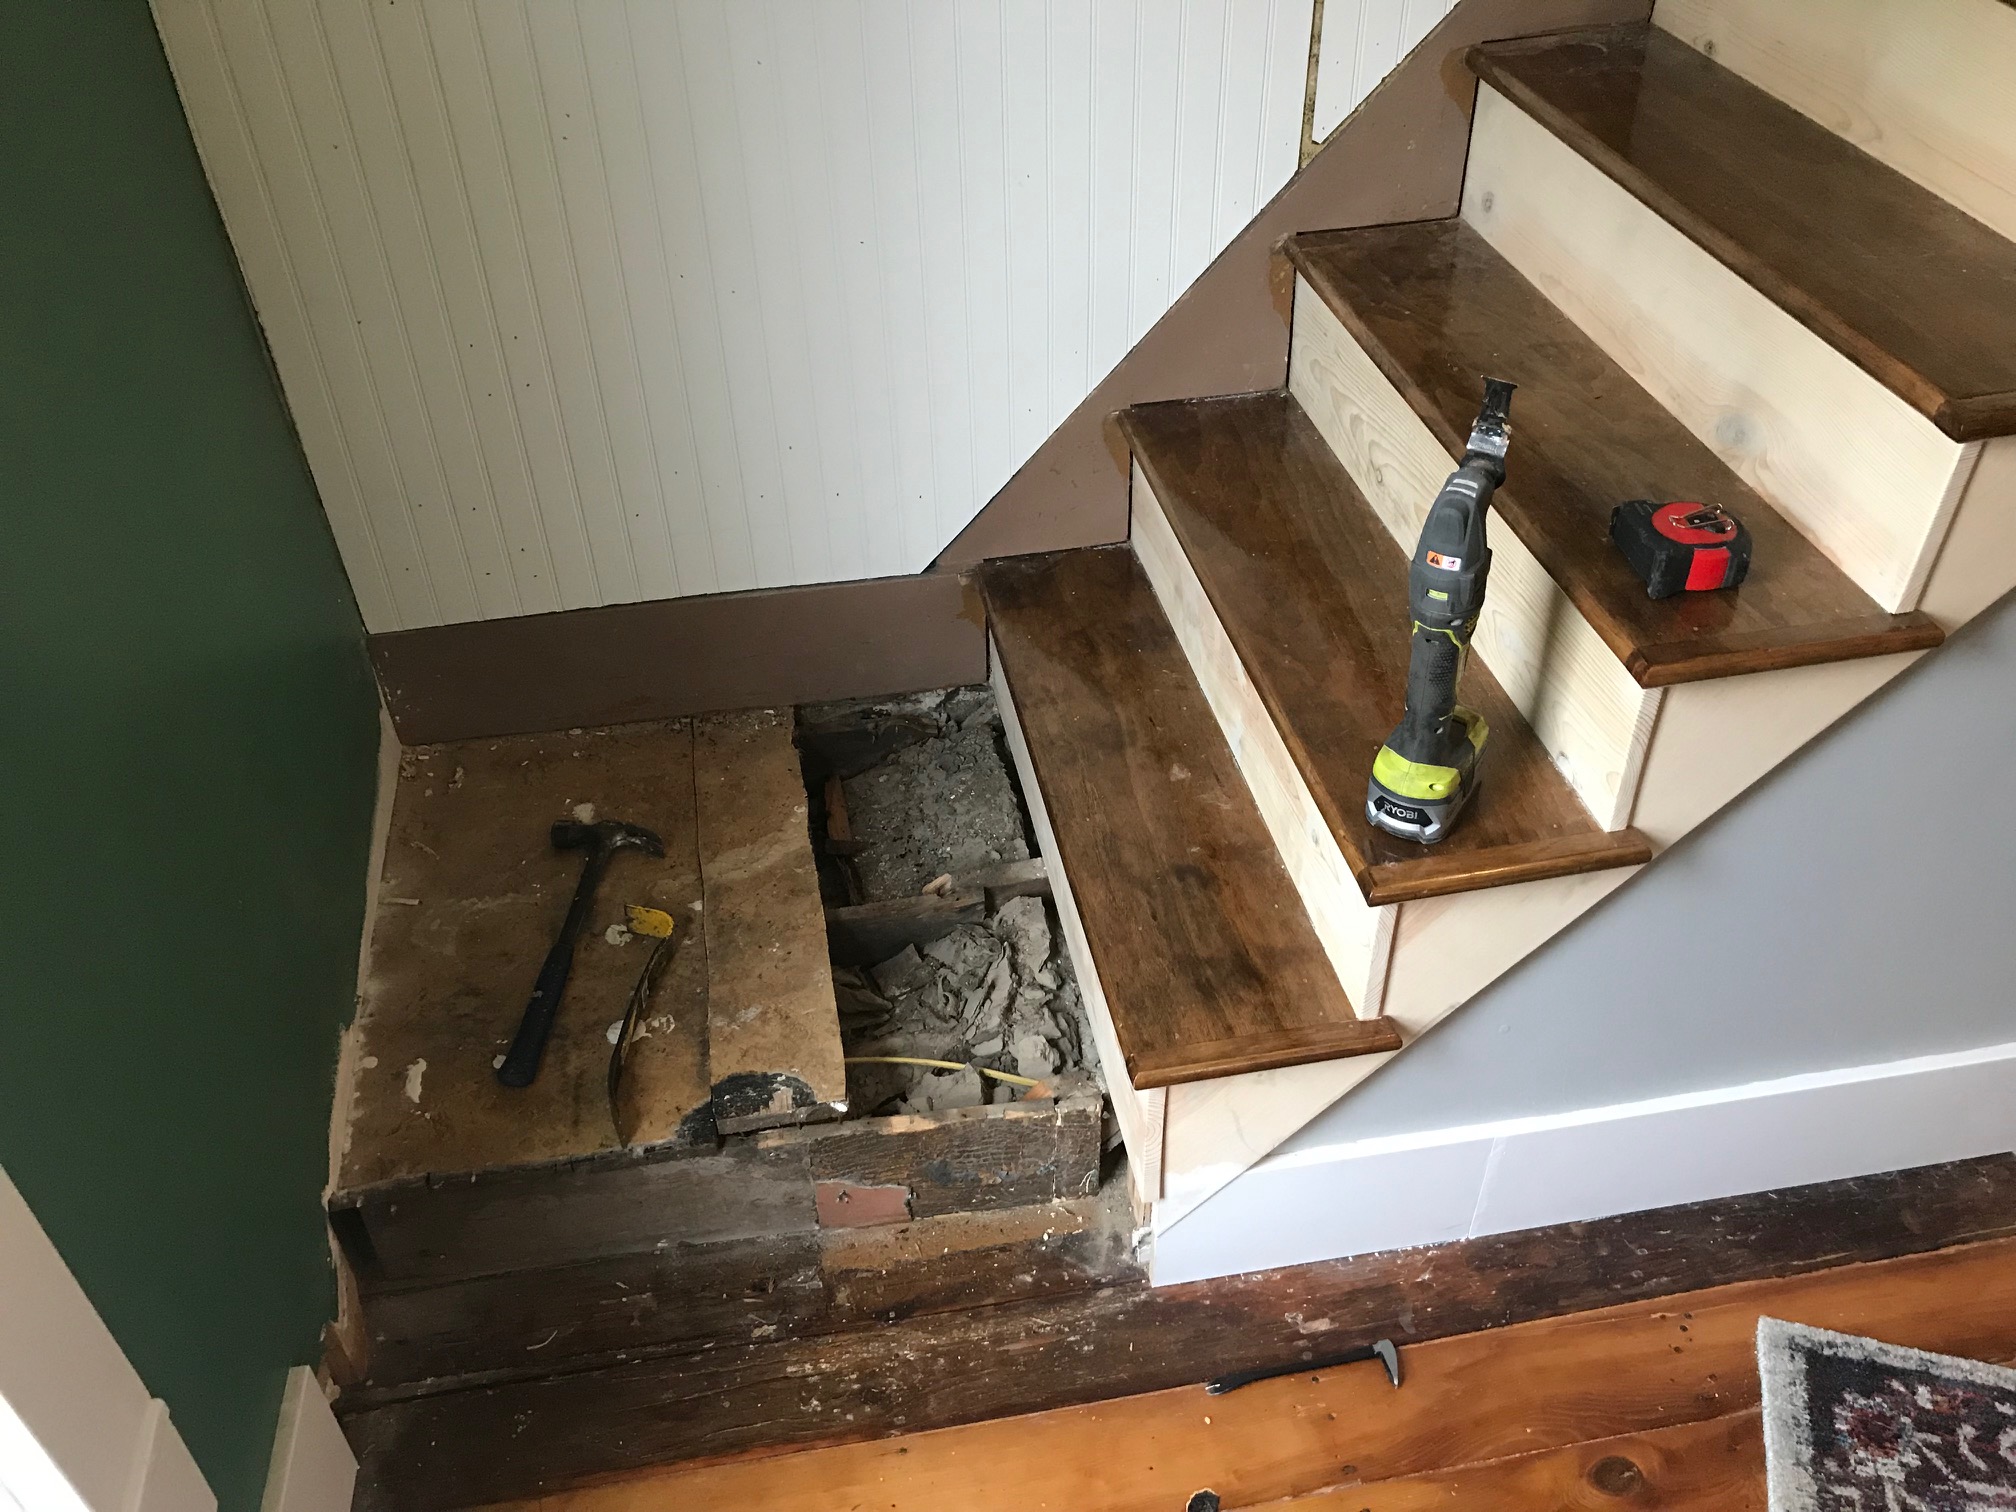
Before doing the drywall in the living room, I decided to pry up the stair treads and then screw them back down with easily removable screws. I did this because I didn't want to damage the new drywall with the pry bar, and I think I made the right choice.
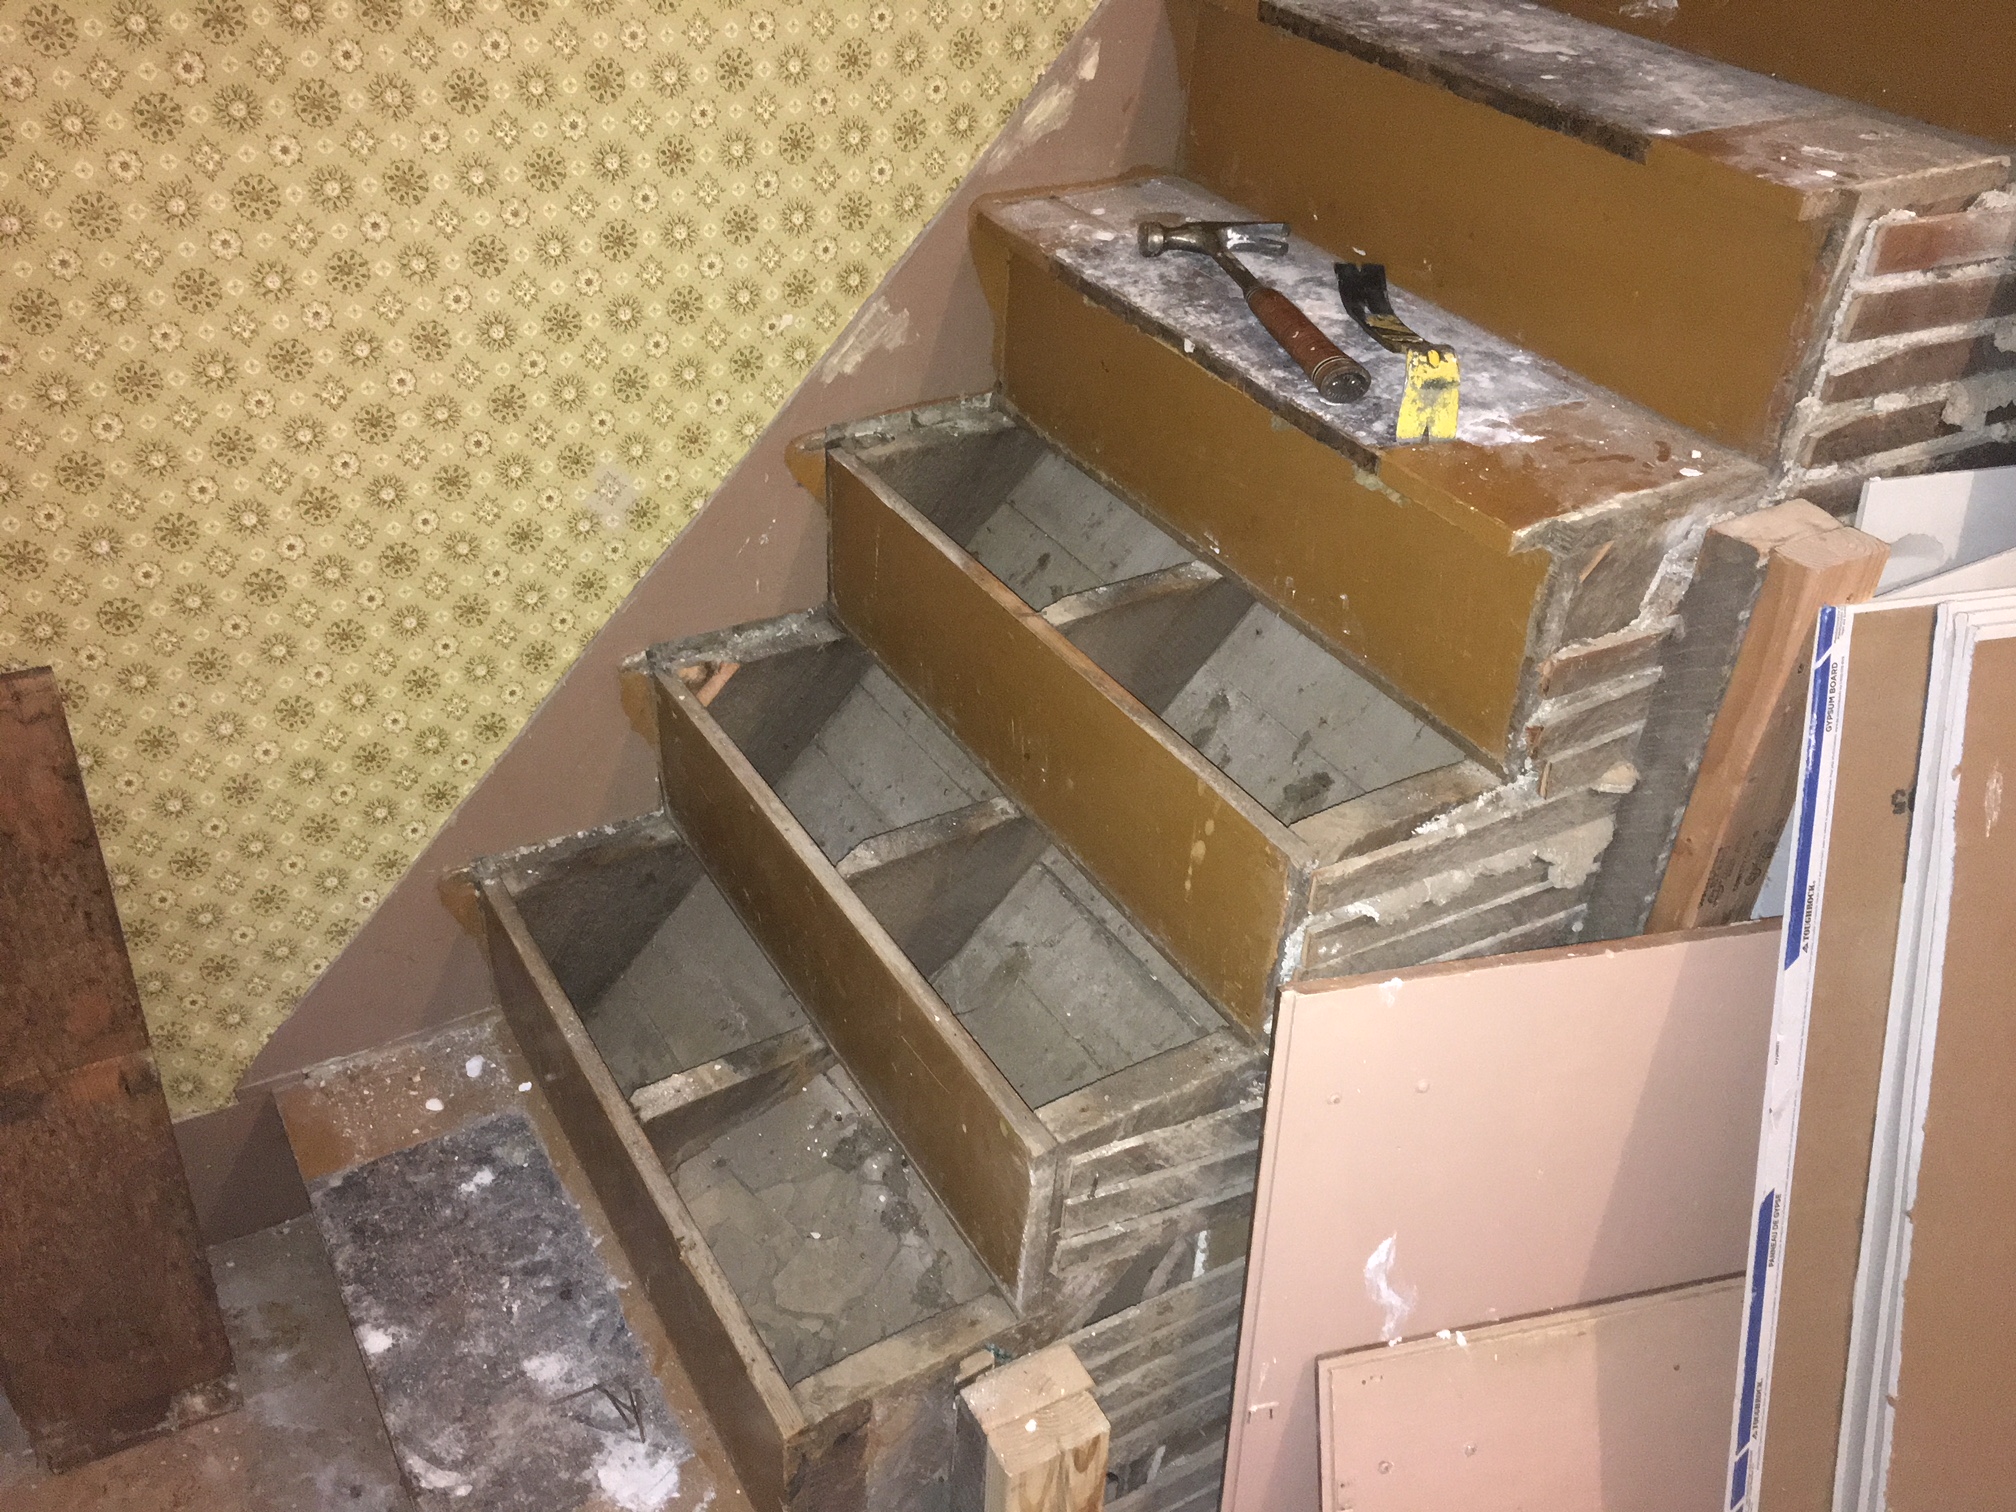
We found lots of mud under the bottom few treads! It's from the Great Flood of 1951.
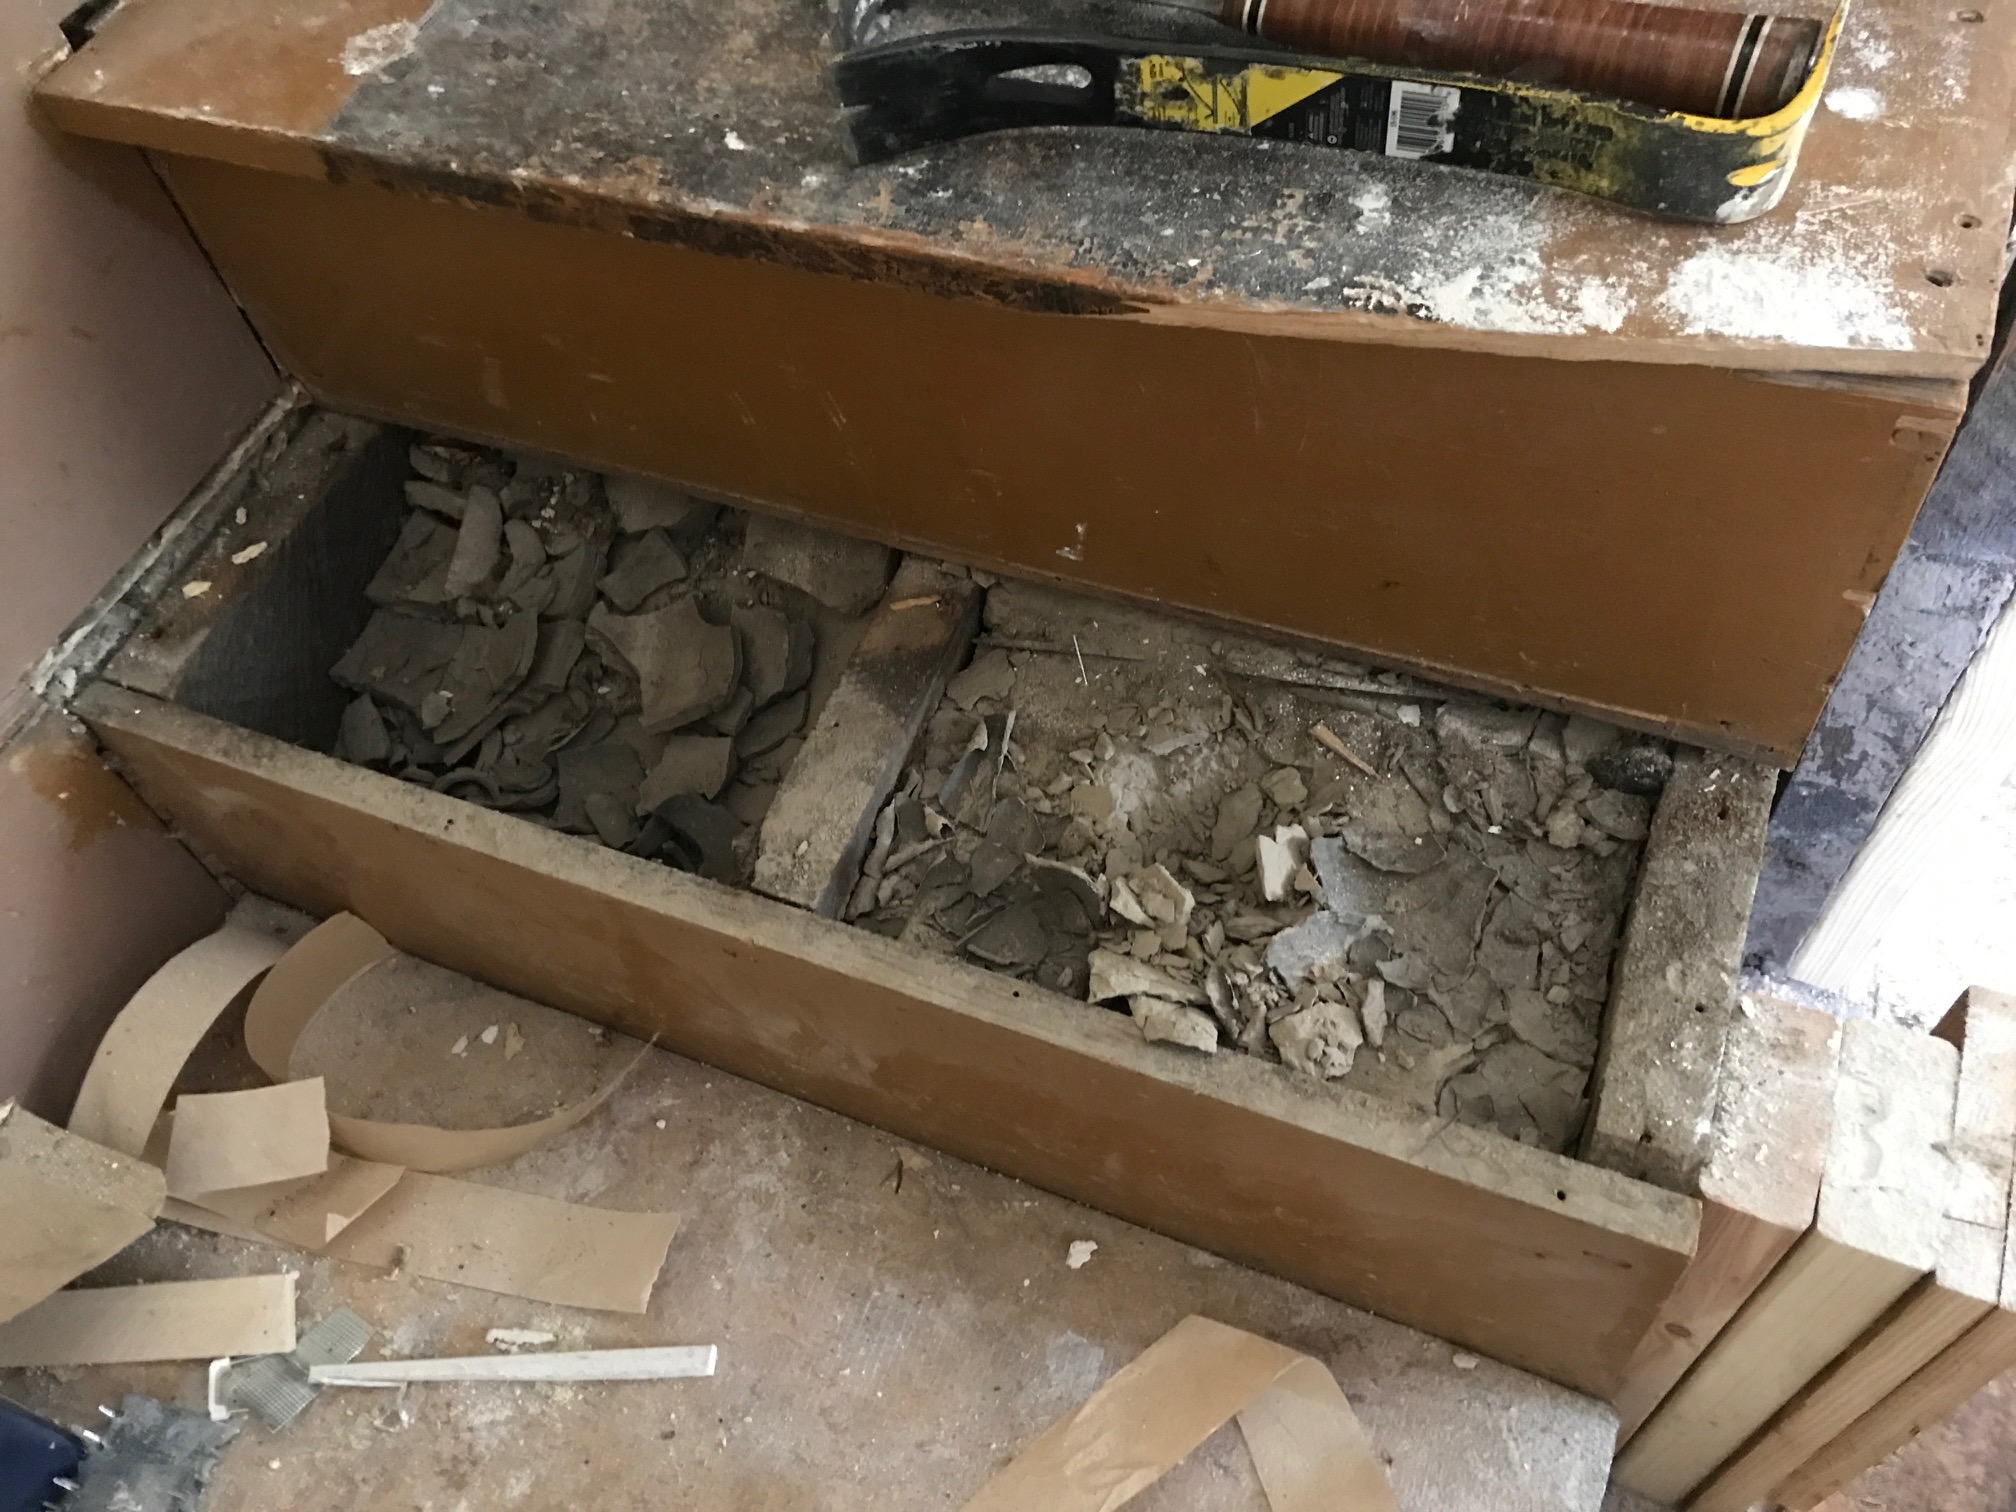
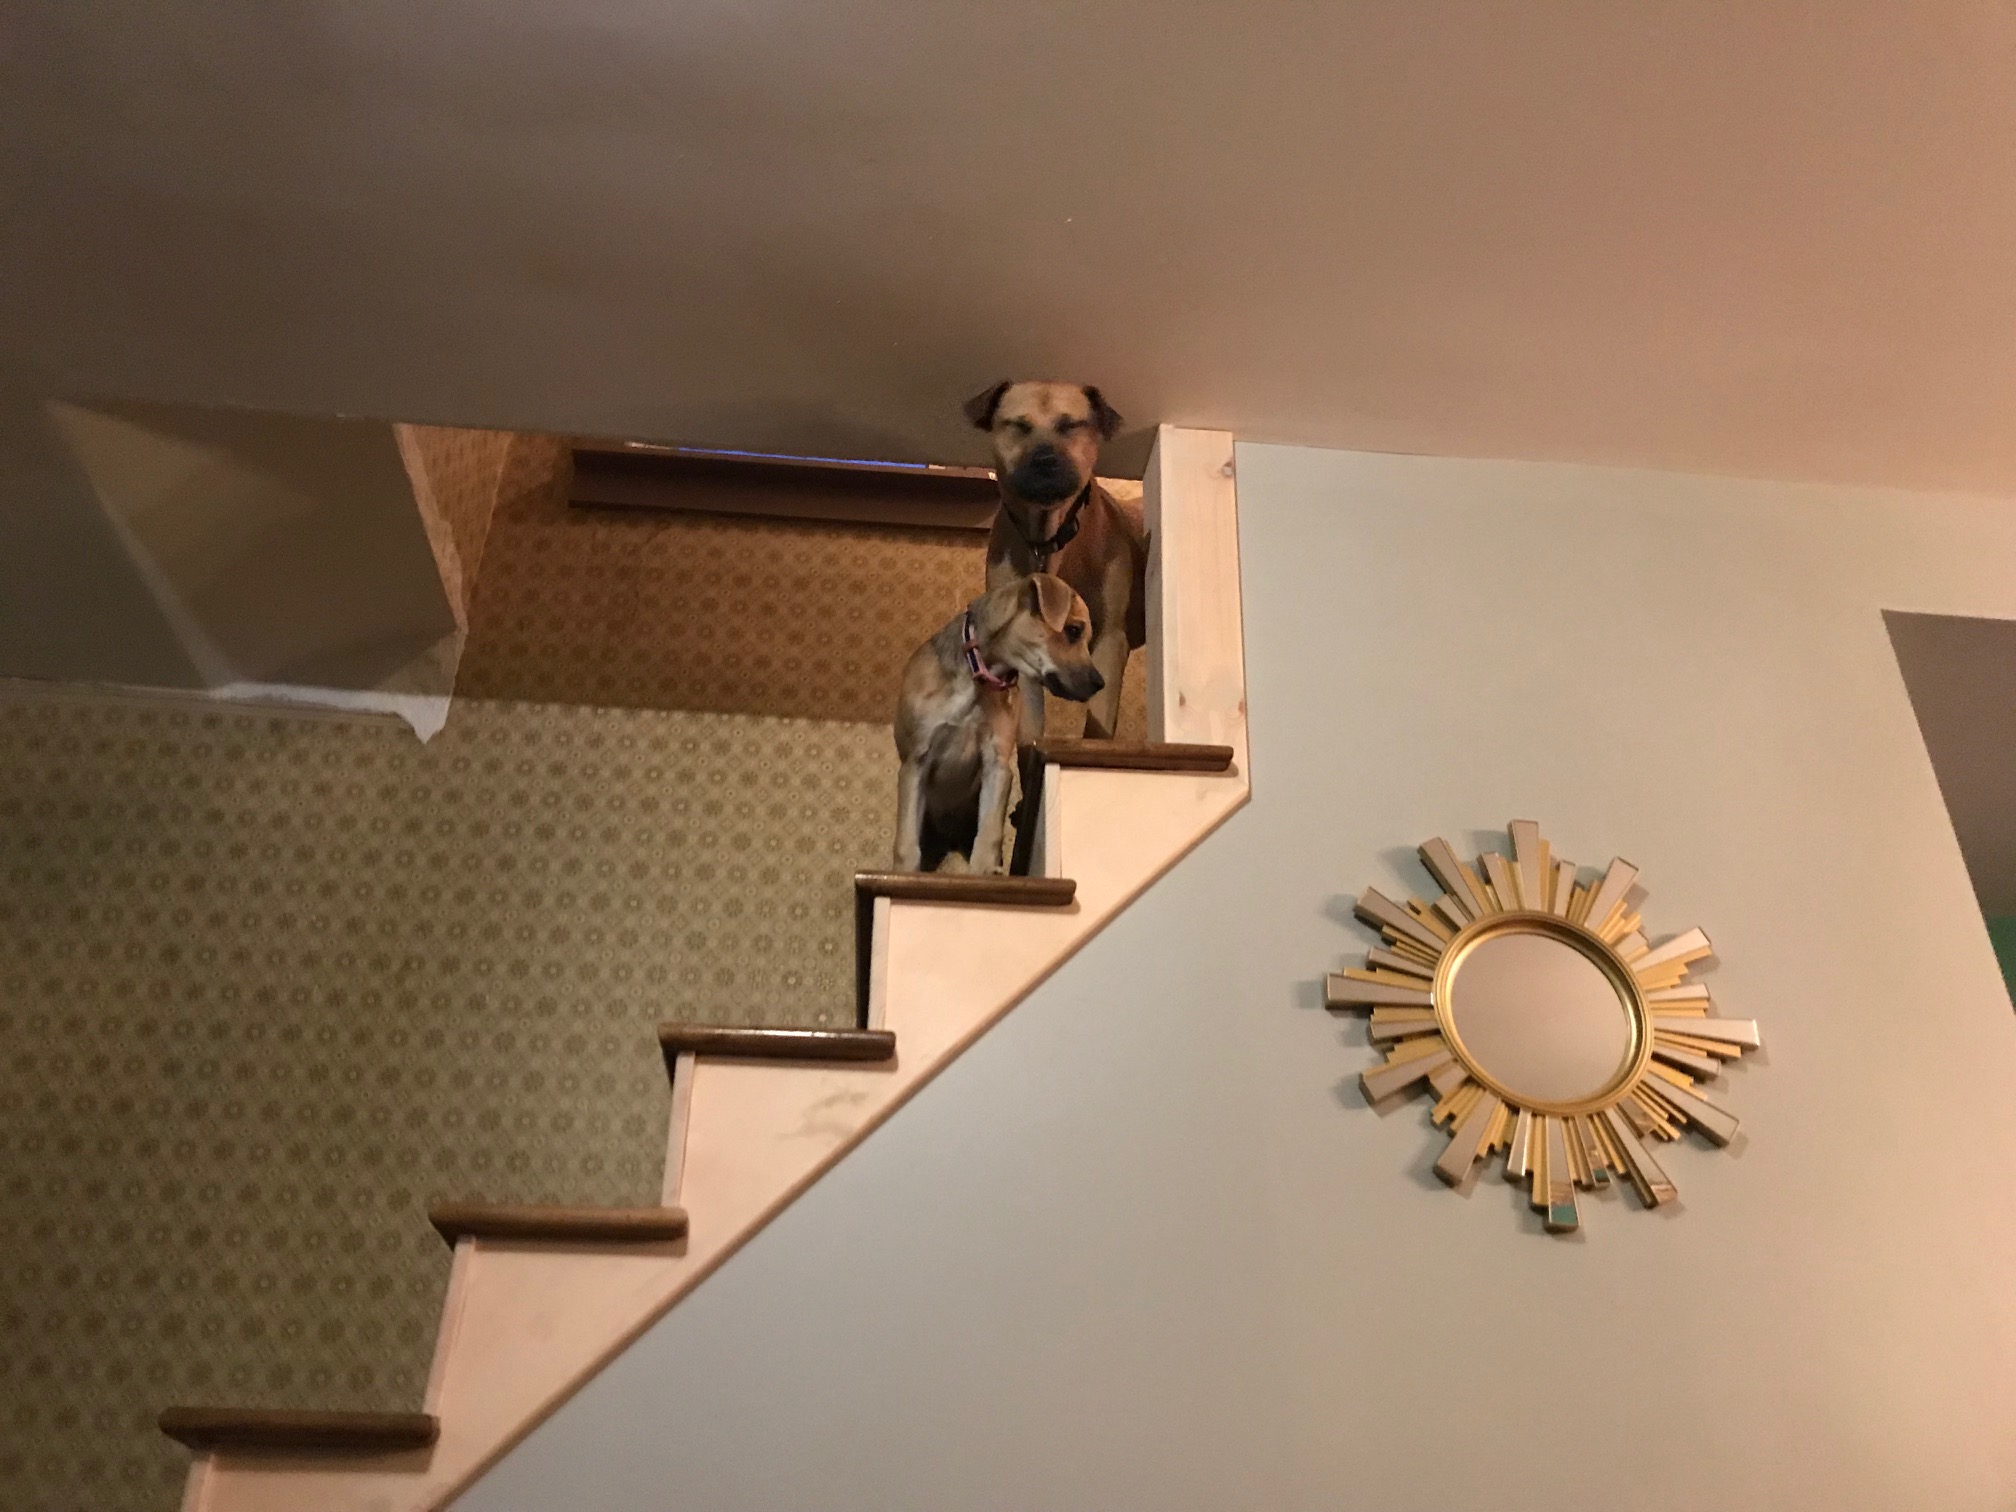
The poor animals had a hard time getting down the stairs without stair treads, haha!

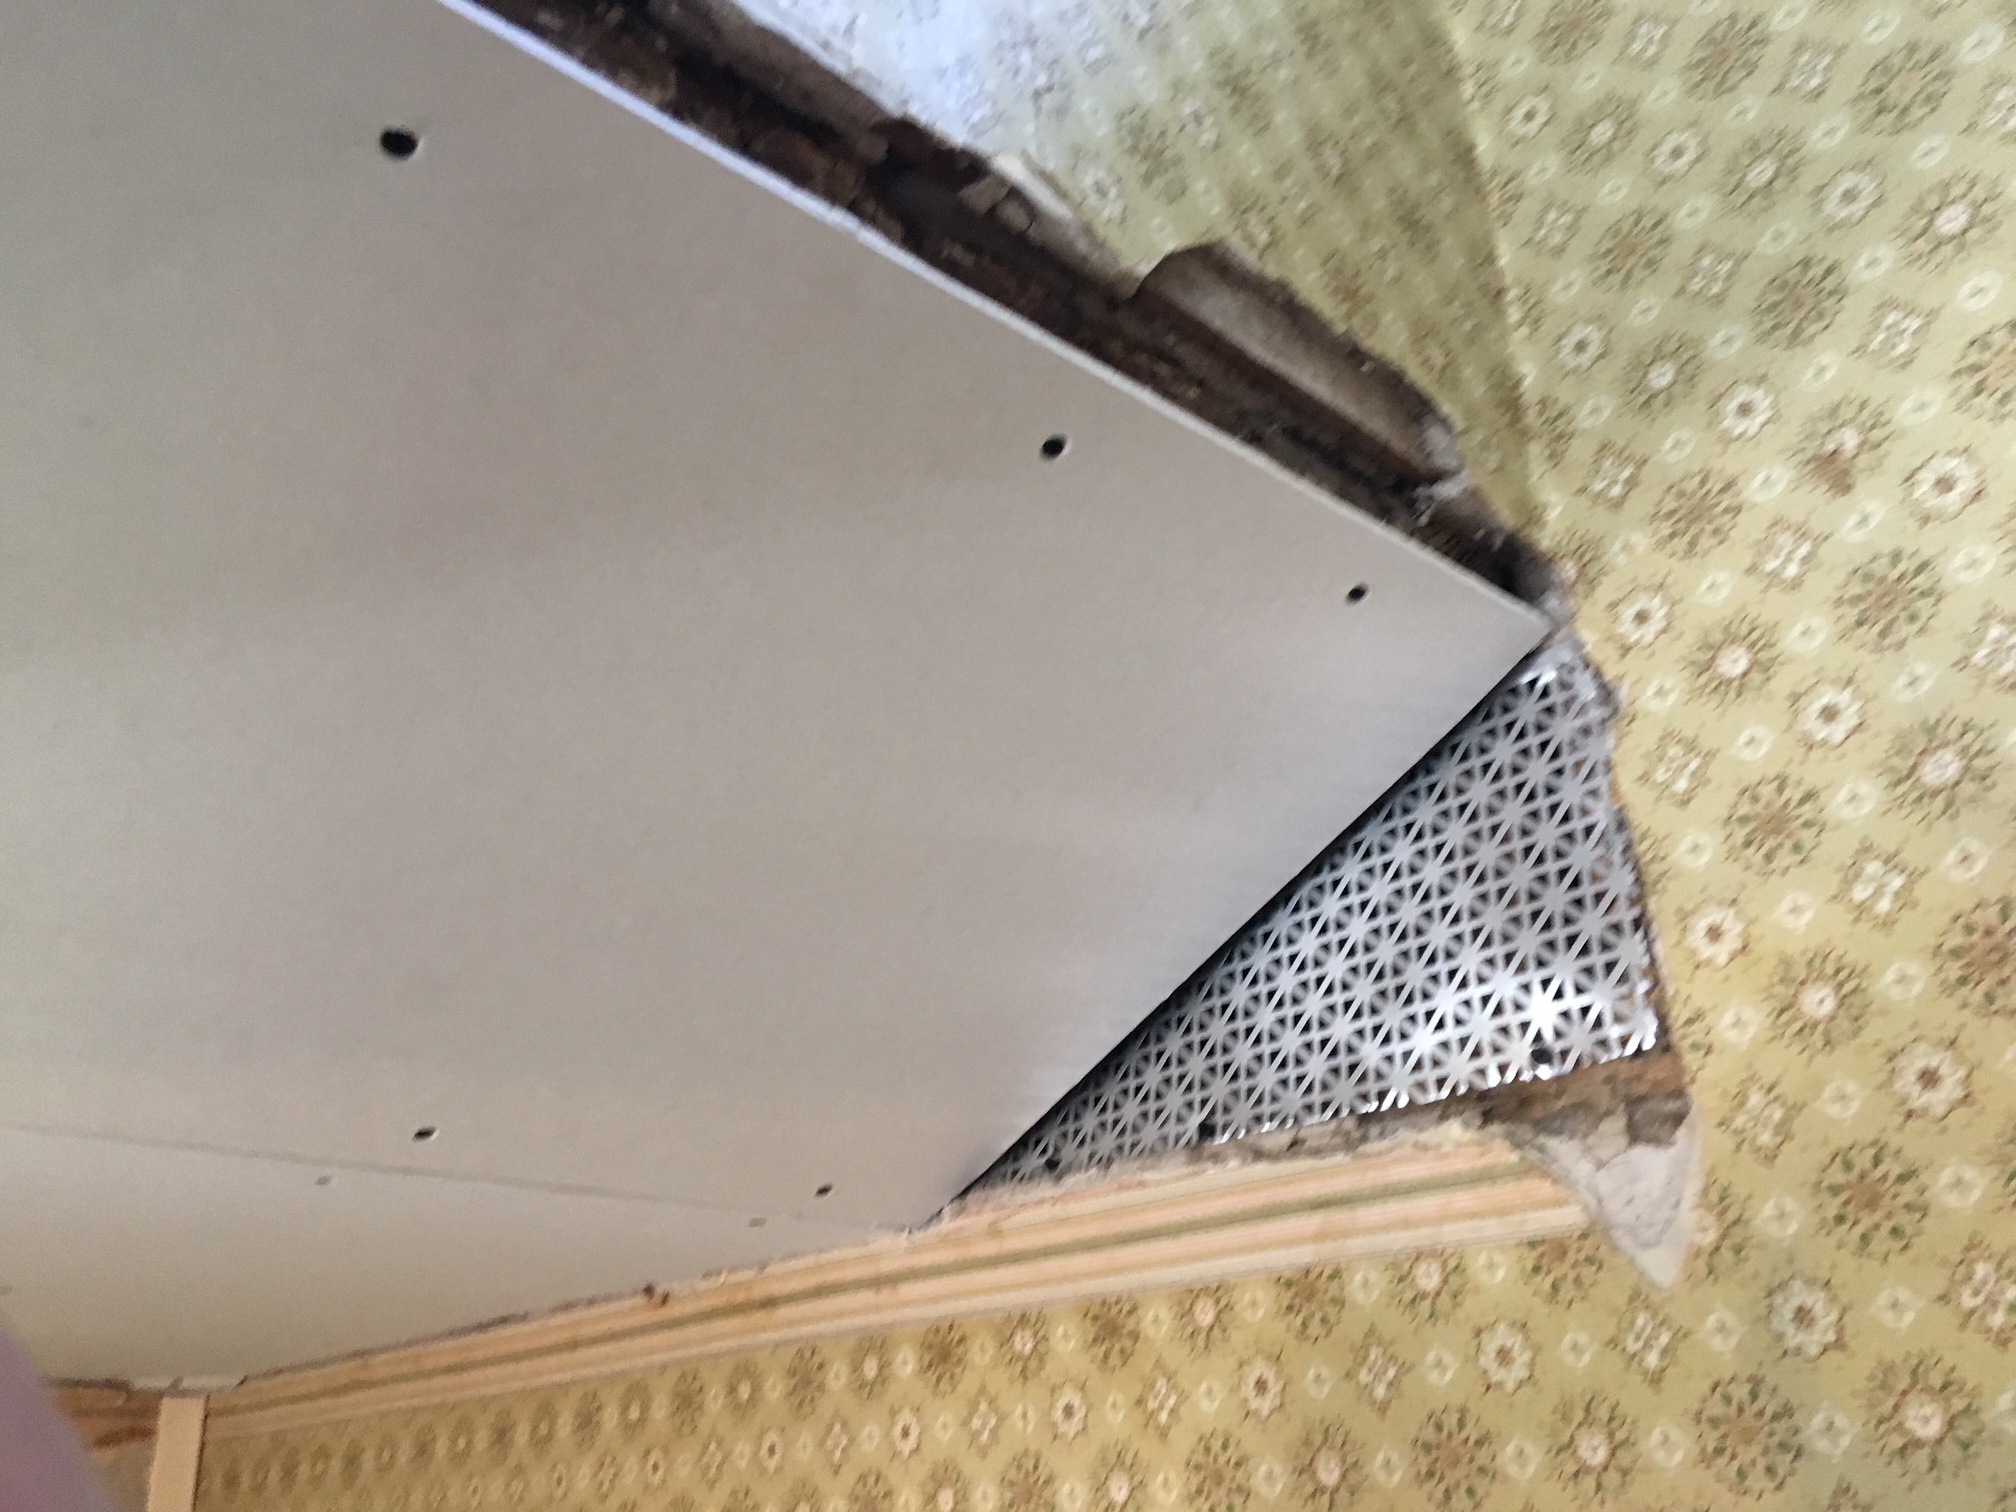
I also took out a section of the floor joist above the stairs to give some much needed headroom. Installed a piece of drywall at an angle. A tall person could still hit their head on the corner, but before this, even an average height person like myself needed to duck. That had to change! Note: you can't just take out section of a floor joist, that's structural! However there was a header just to the left of this picture, one that I had to install after knocking down the wall.
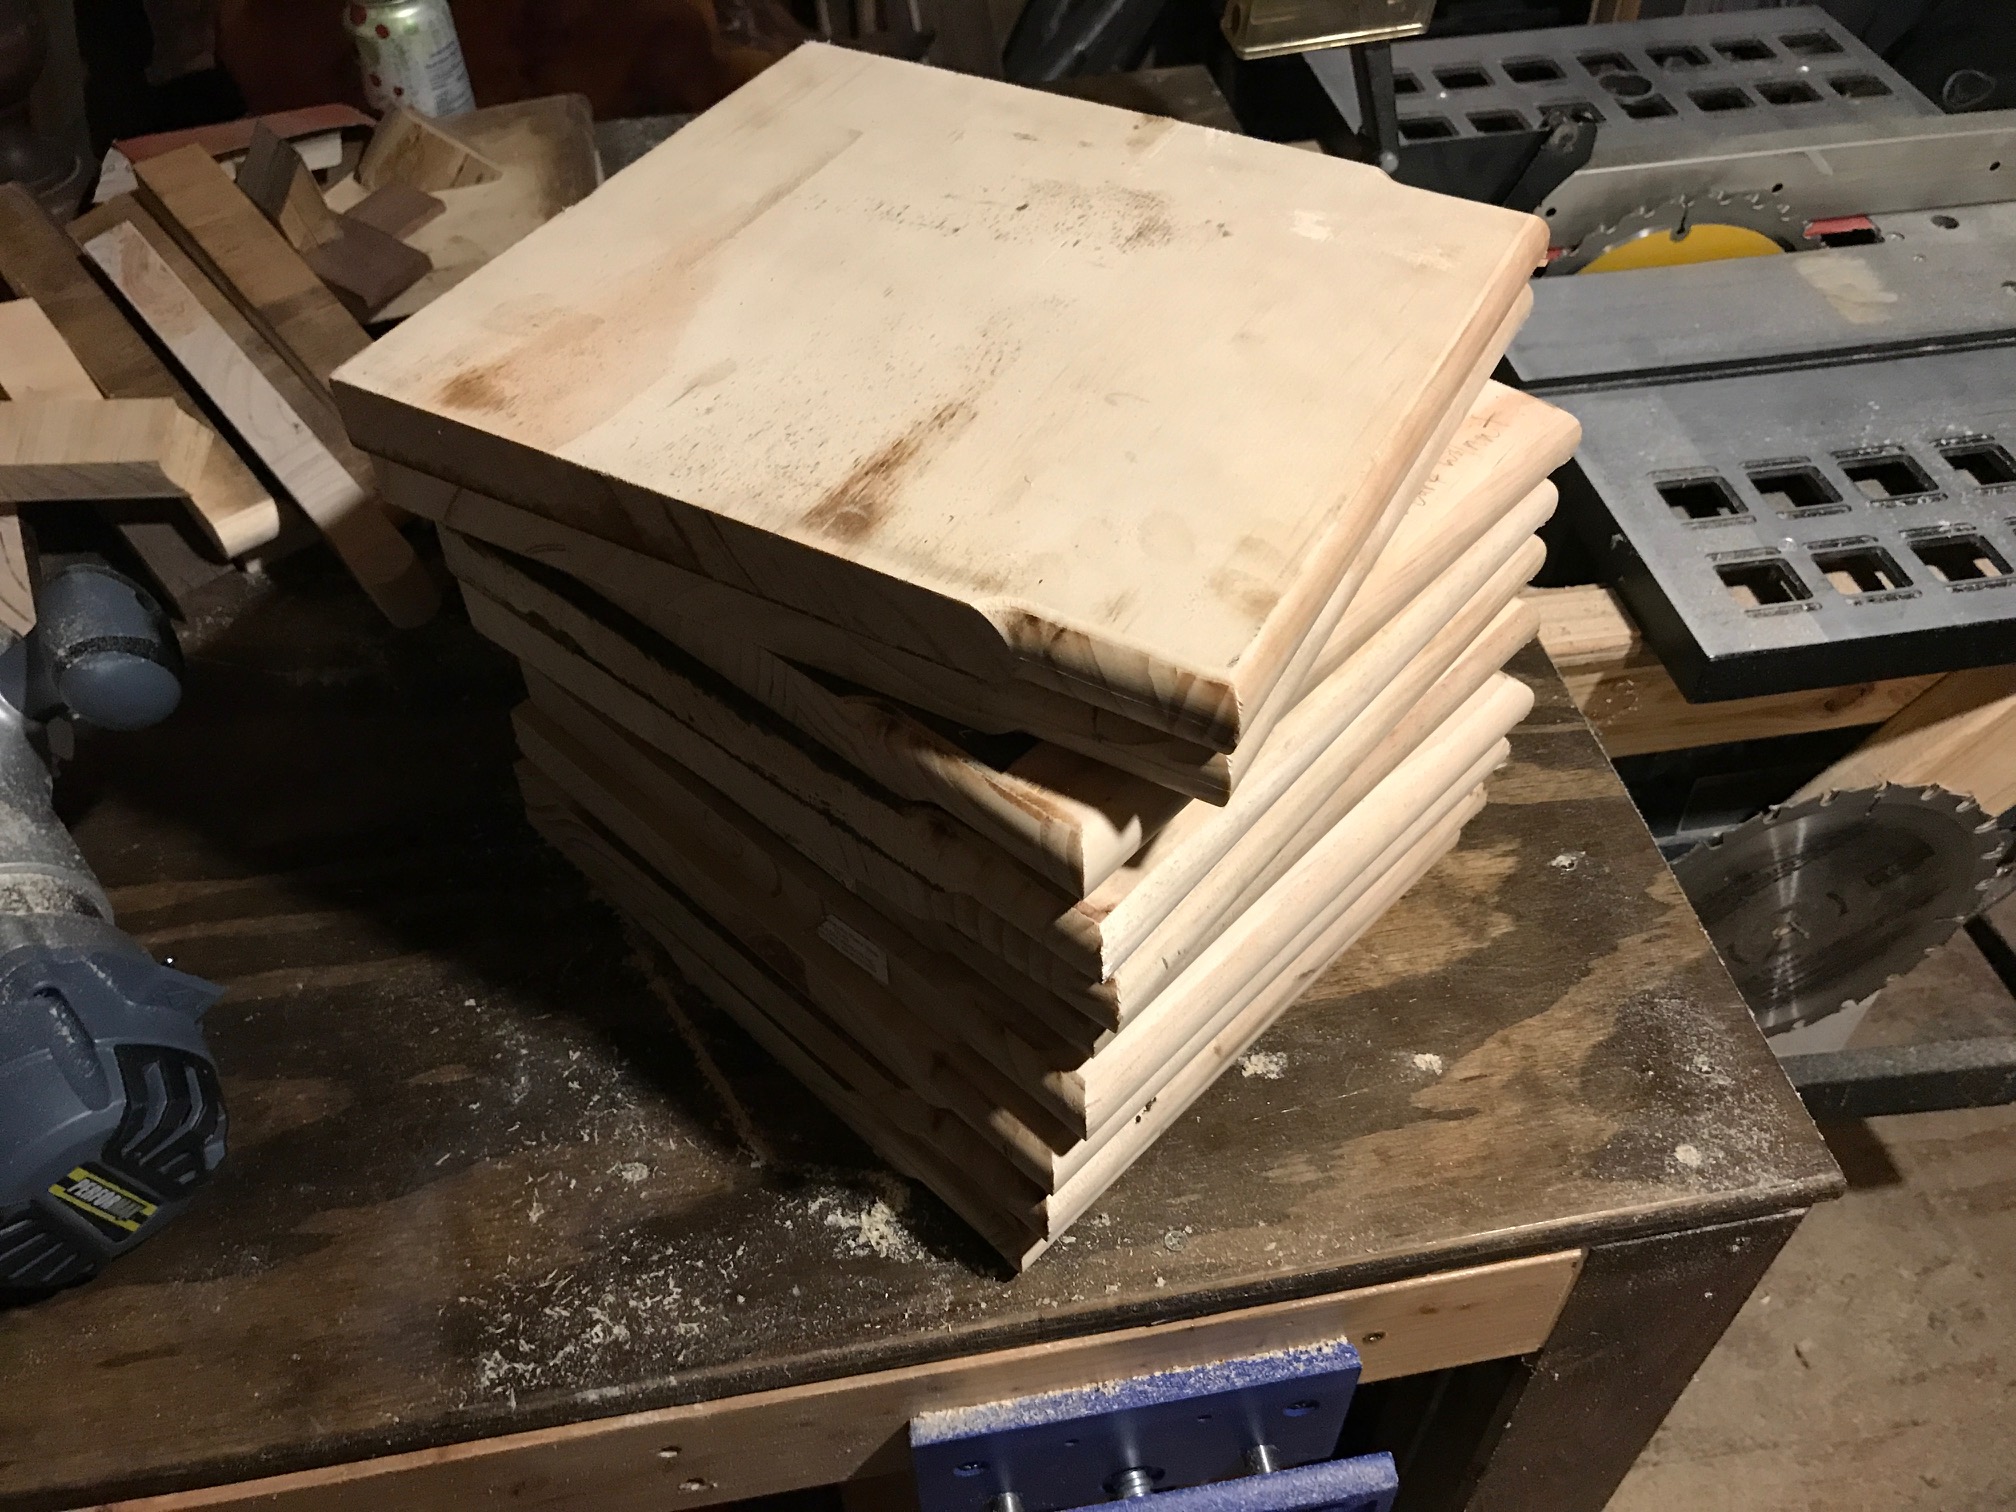
I bought some pine stair treads and a hemlock hand rail from Homeless Despot.

Did lots of testing with many different stains and finishes to see which we liked best. Tried minwax stain, gel stain, stain conditioner, etc. We went with our old favorite: Watco Danish Oil in black walnut. The can says it just needs to cure for a few days before top coating with poly. I found out that on the soft pine, I needed to be careful wiping it on so it wouldn't look blotchy - couldn't just flood it on and wipe away excess.

The treads were far longer than they needed to be but this worked to my advantage. I could use all the waste to make my own nose molding.
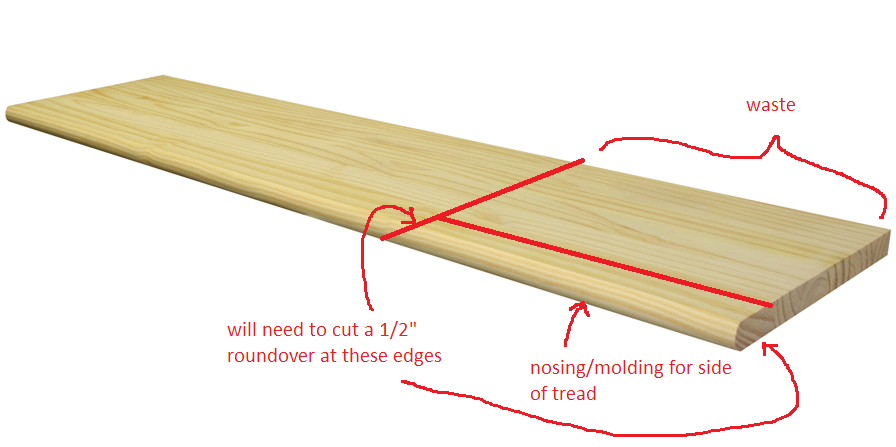
I made them 1.25 inches longer than the width of the treads. This will make a nice effect, as you'll soon see.

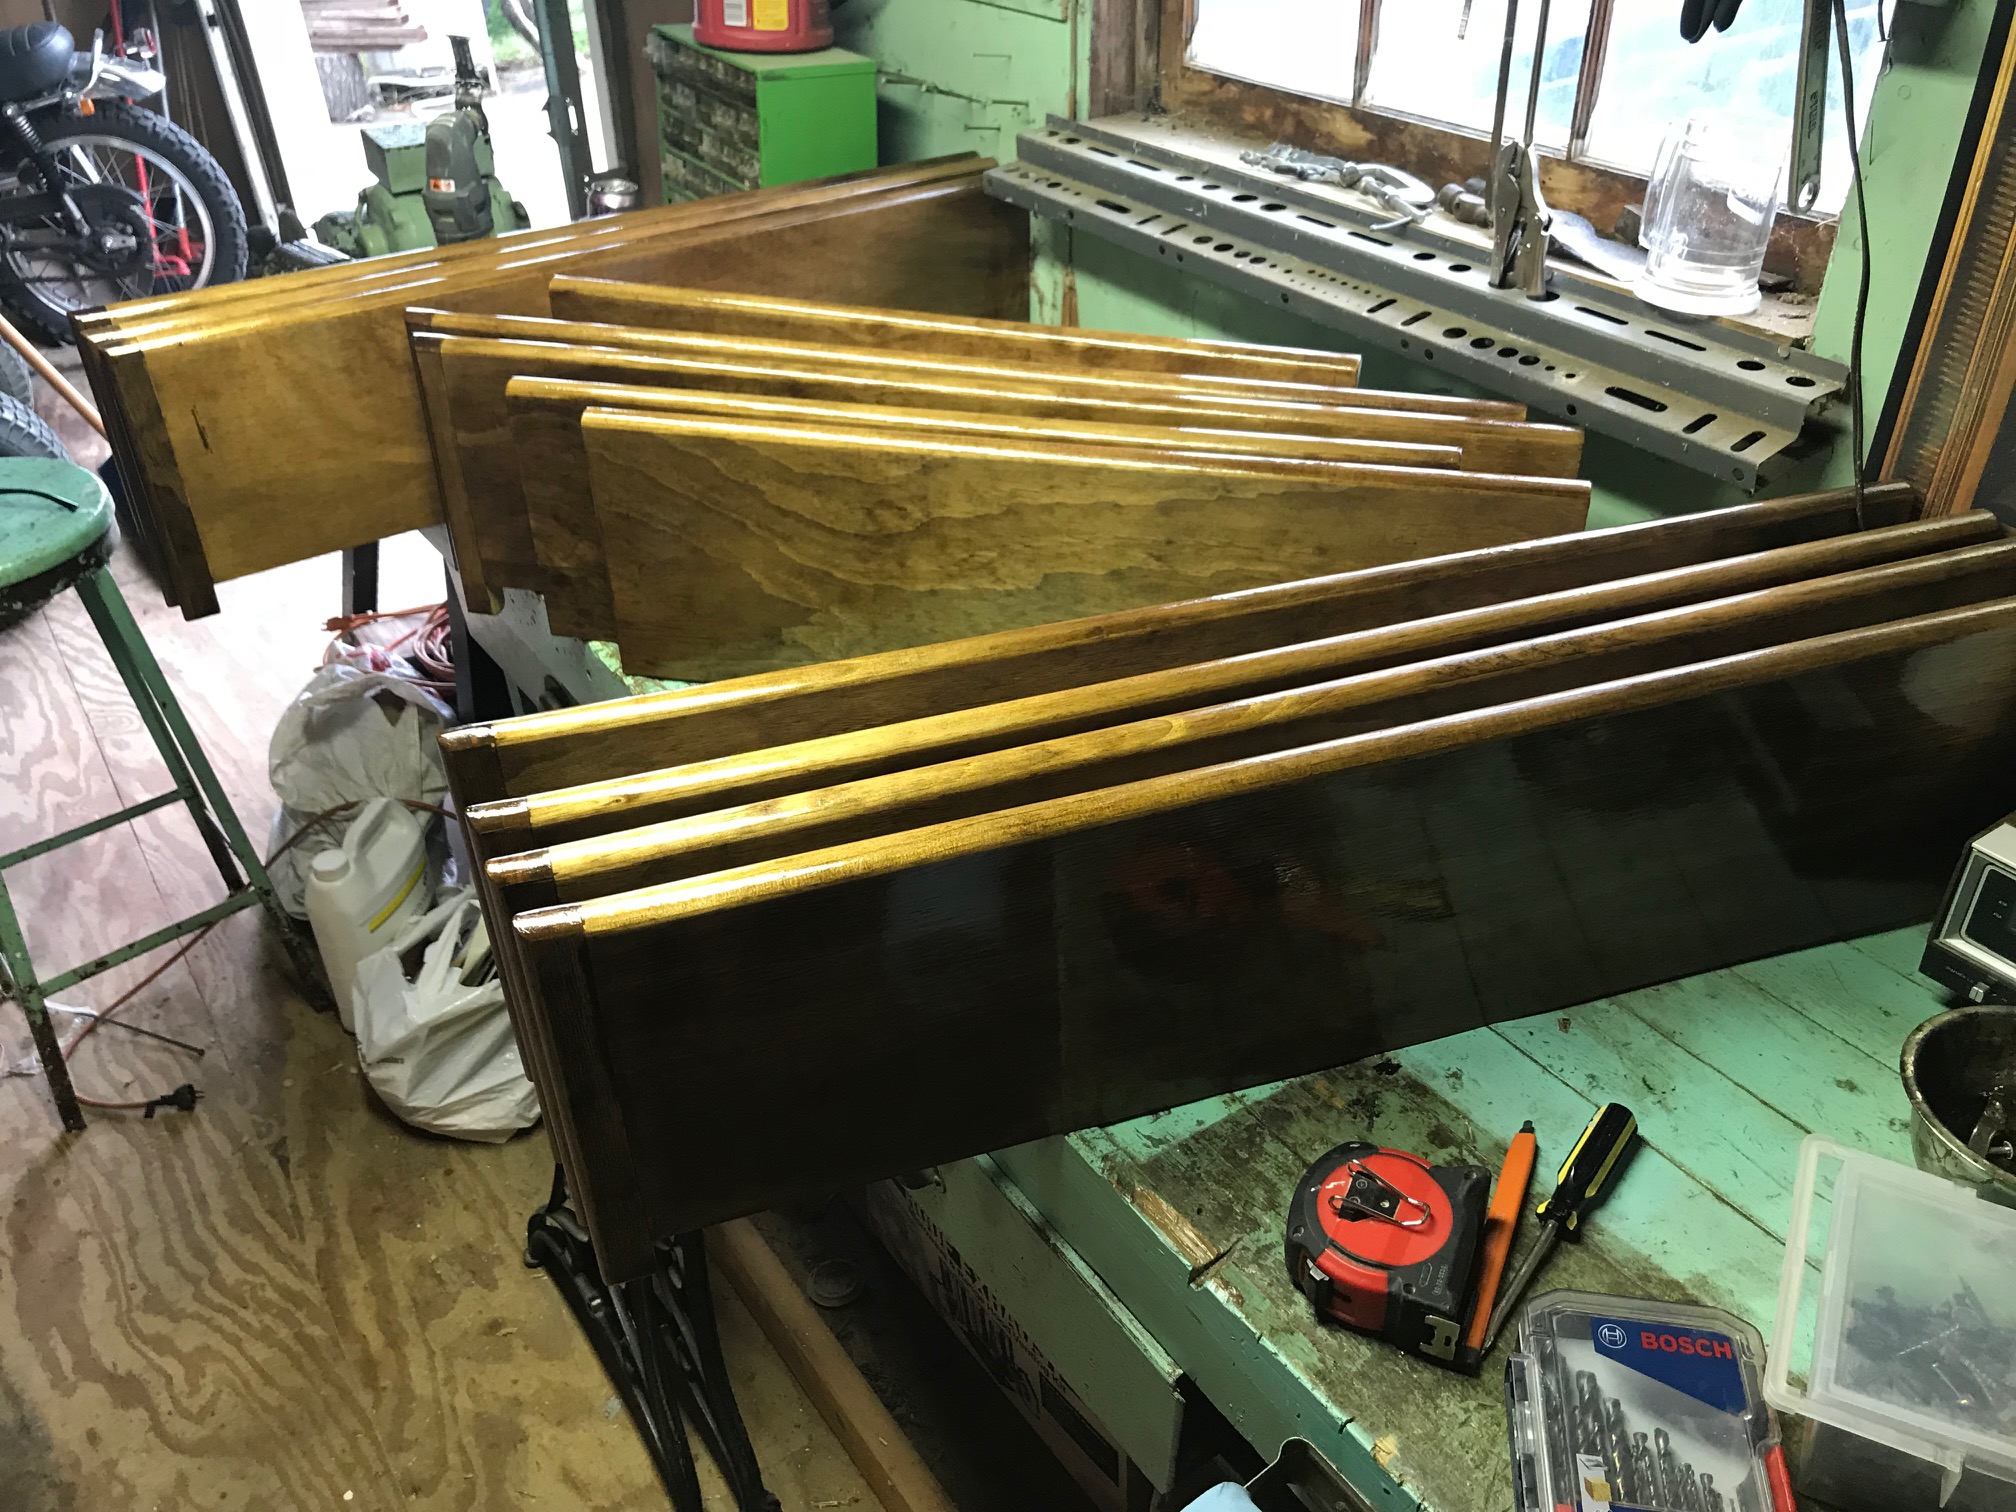
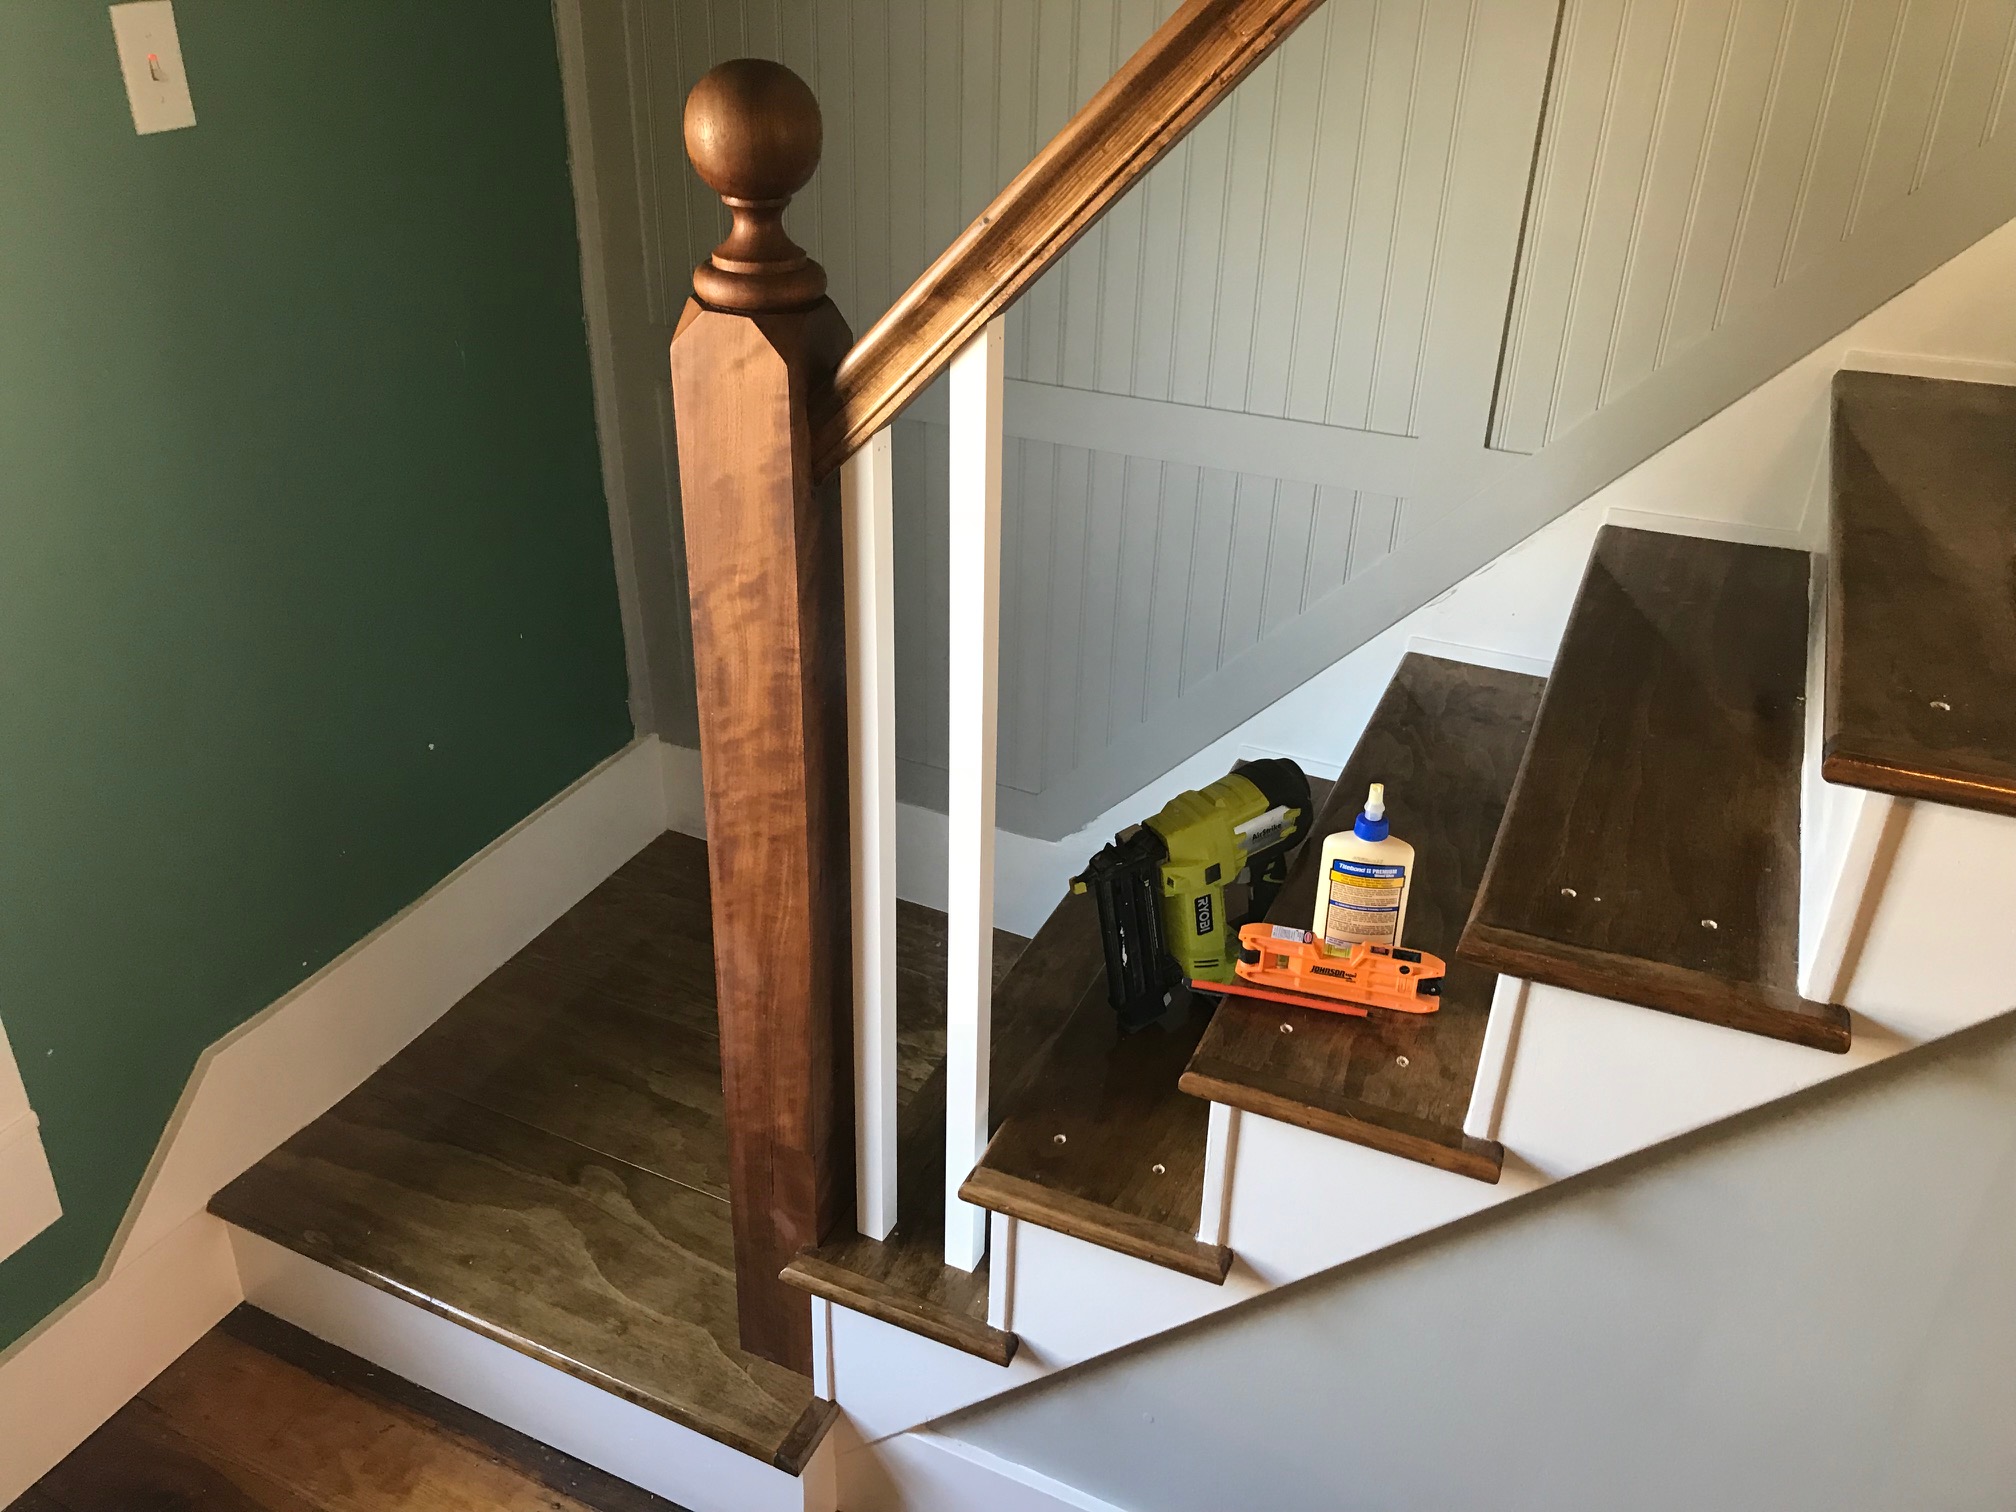
I glued them up and used my Ryobi brad nailer to quickly secure them to the sides of the stair treads. Once the glue was dried, I filled the nail holes and any gaps with wood filler and let that dry for a day. Finally, I stained with the Watco black walnut danish oil, using two applications.
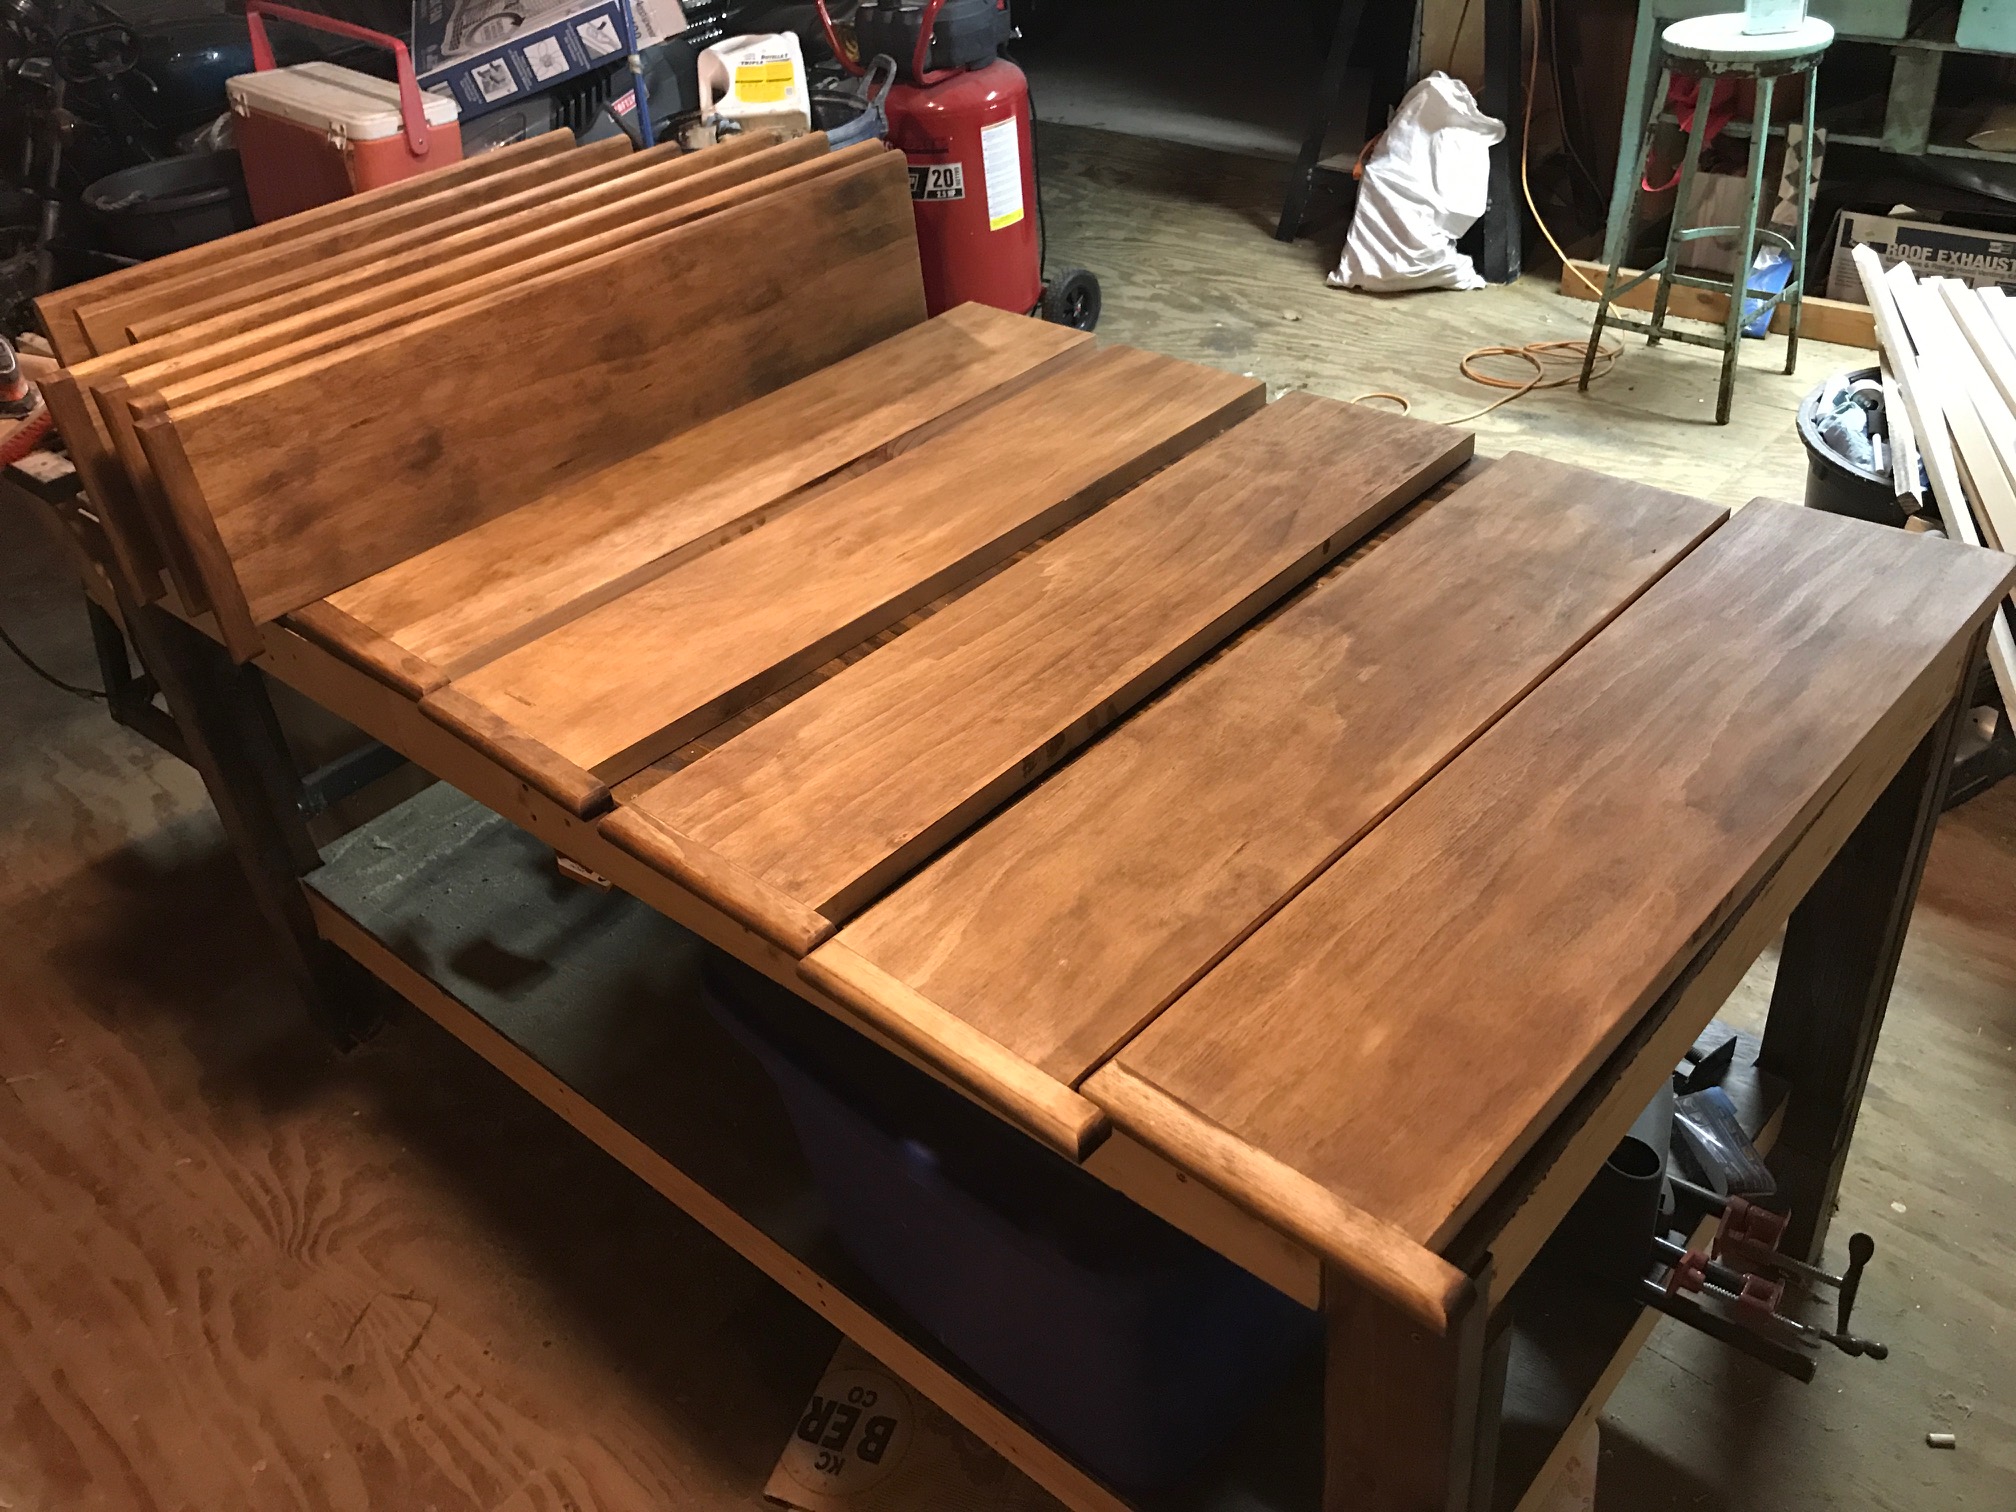
After that cured for a few days, I put on the poly. I used high gloss oil-based Varithane brand (rustoleum) polyurethane. Had to be very careful with sags!
While all that was going on, we were hard (very hard!) at work on doing the drywall in the living room.

A great deal of time passed. We did the living room drywall which took for-e-ver, then sanded and finished the old floor boards, went on a long and well deserved vacation, and even got engaged :)

Installing the stair treads, risers, and skirtboard
Back from our vacation and getting engaged (yay!!) it was time to tackle those damn stairs.
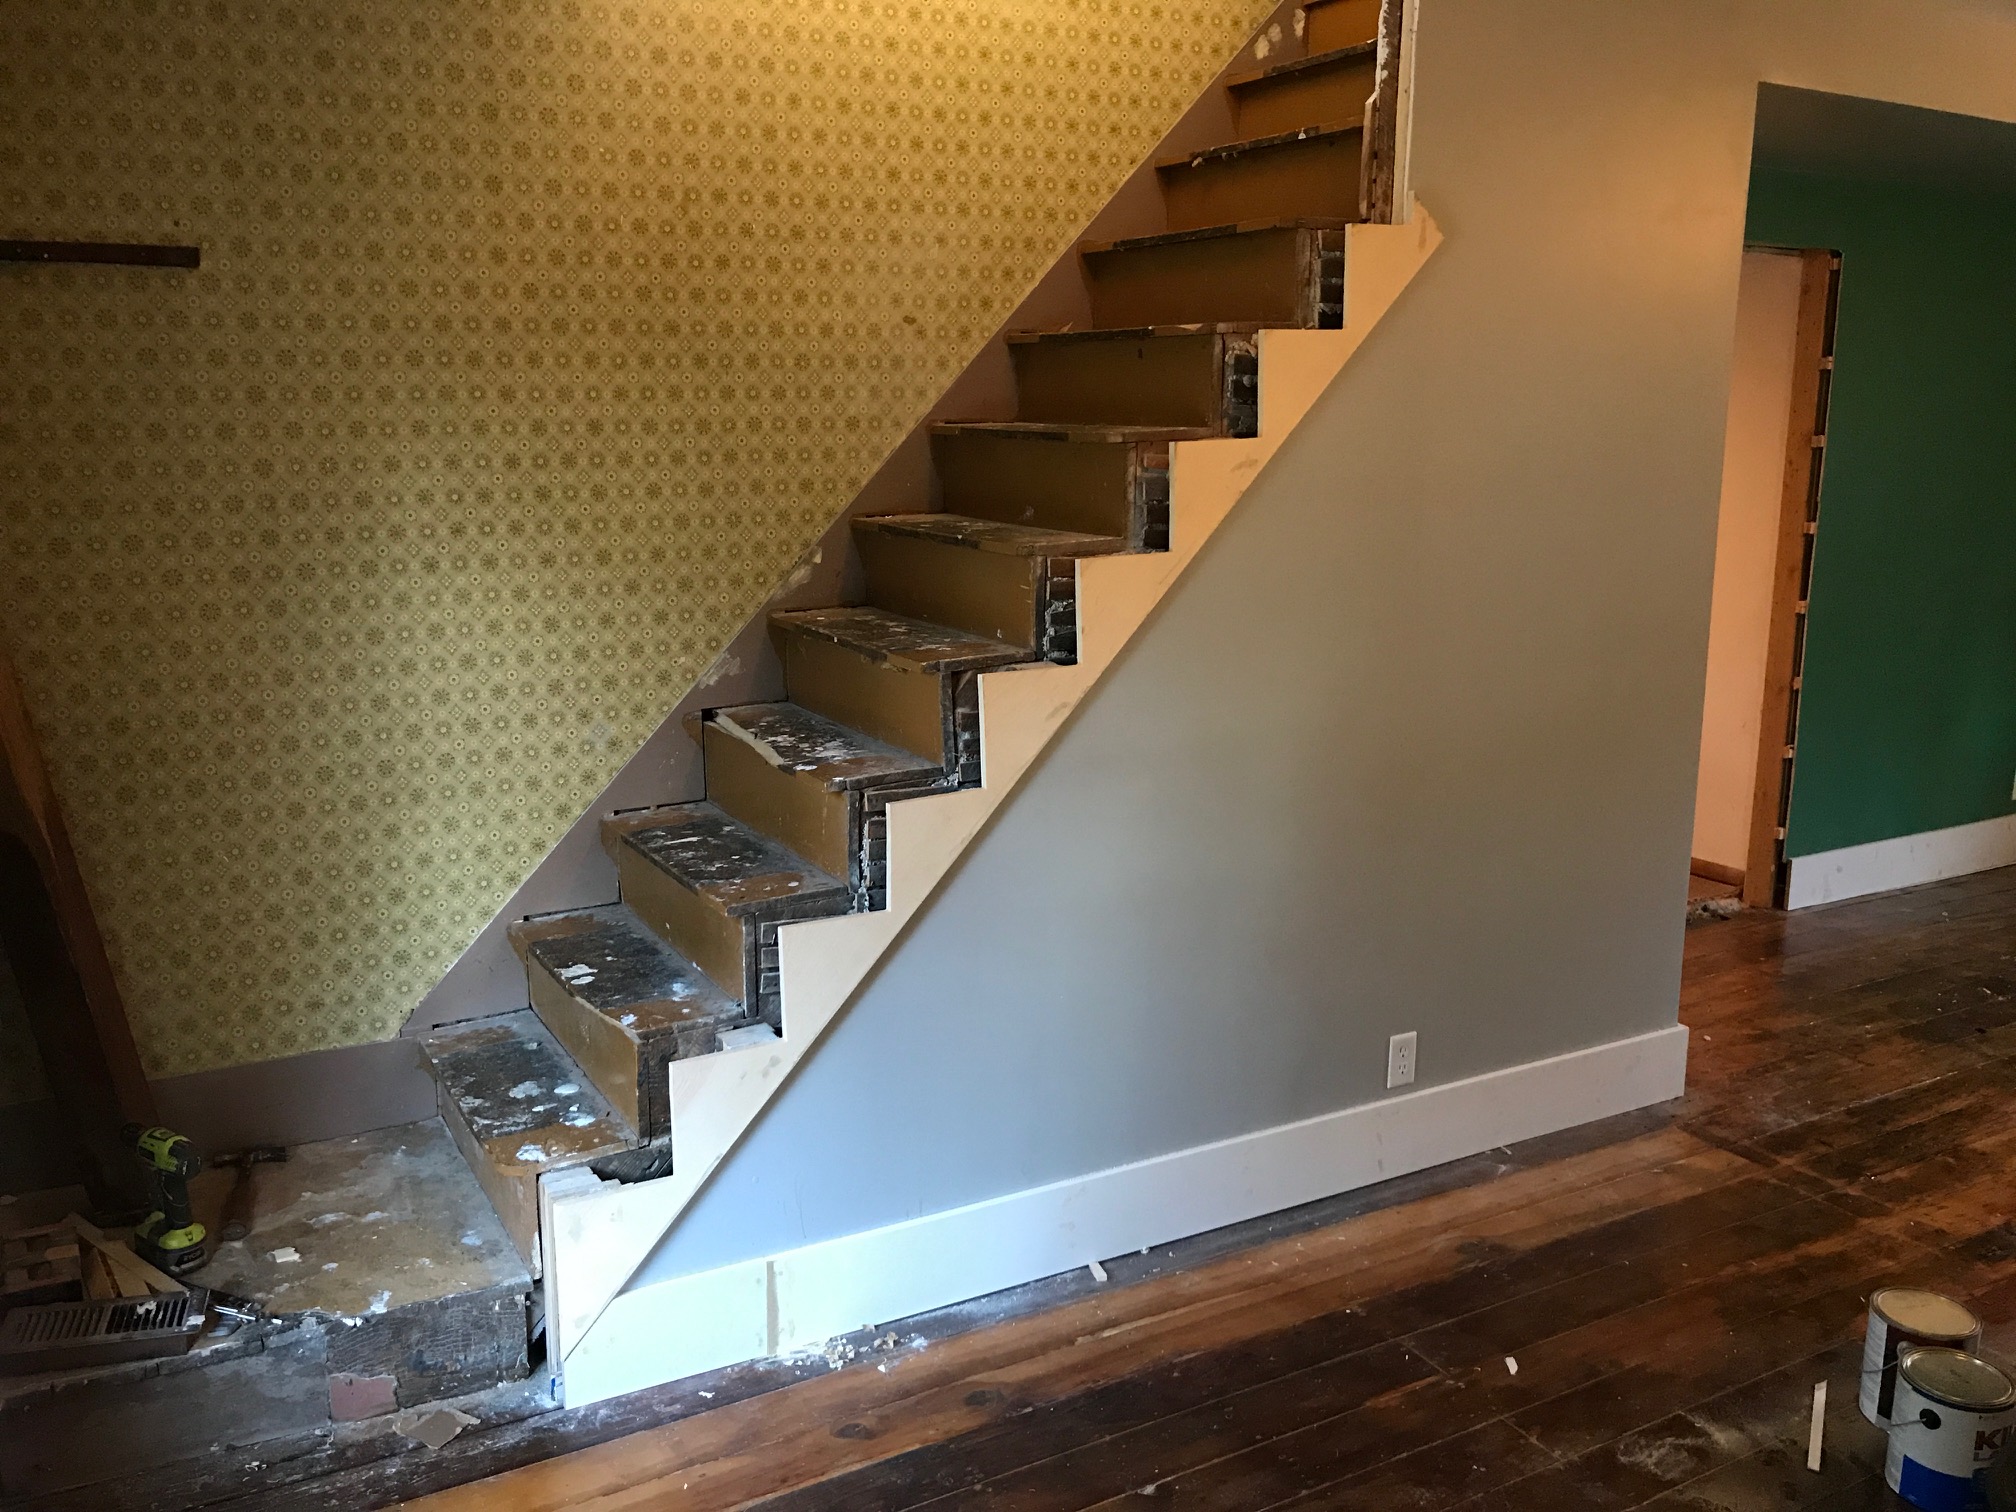
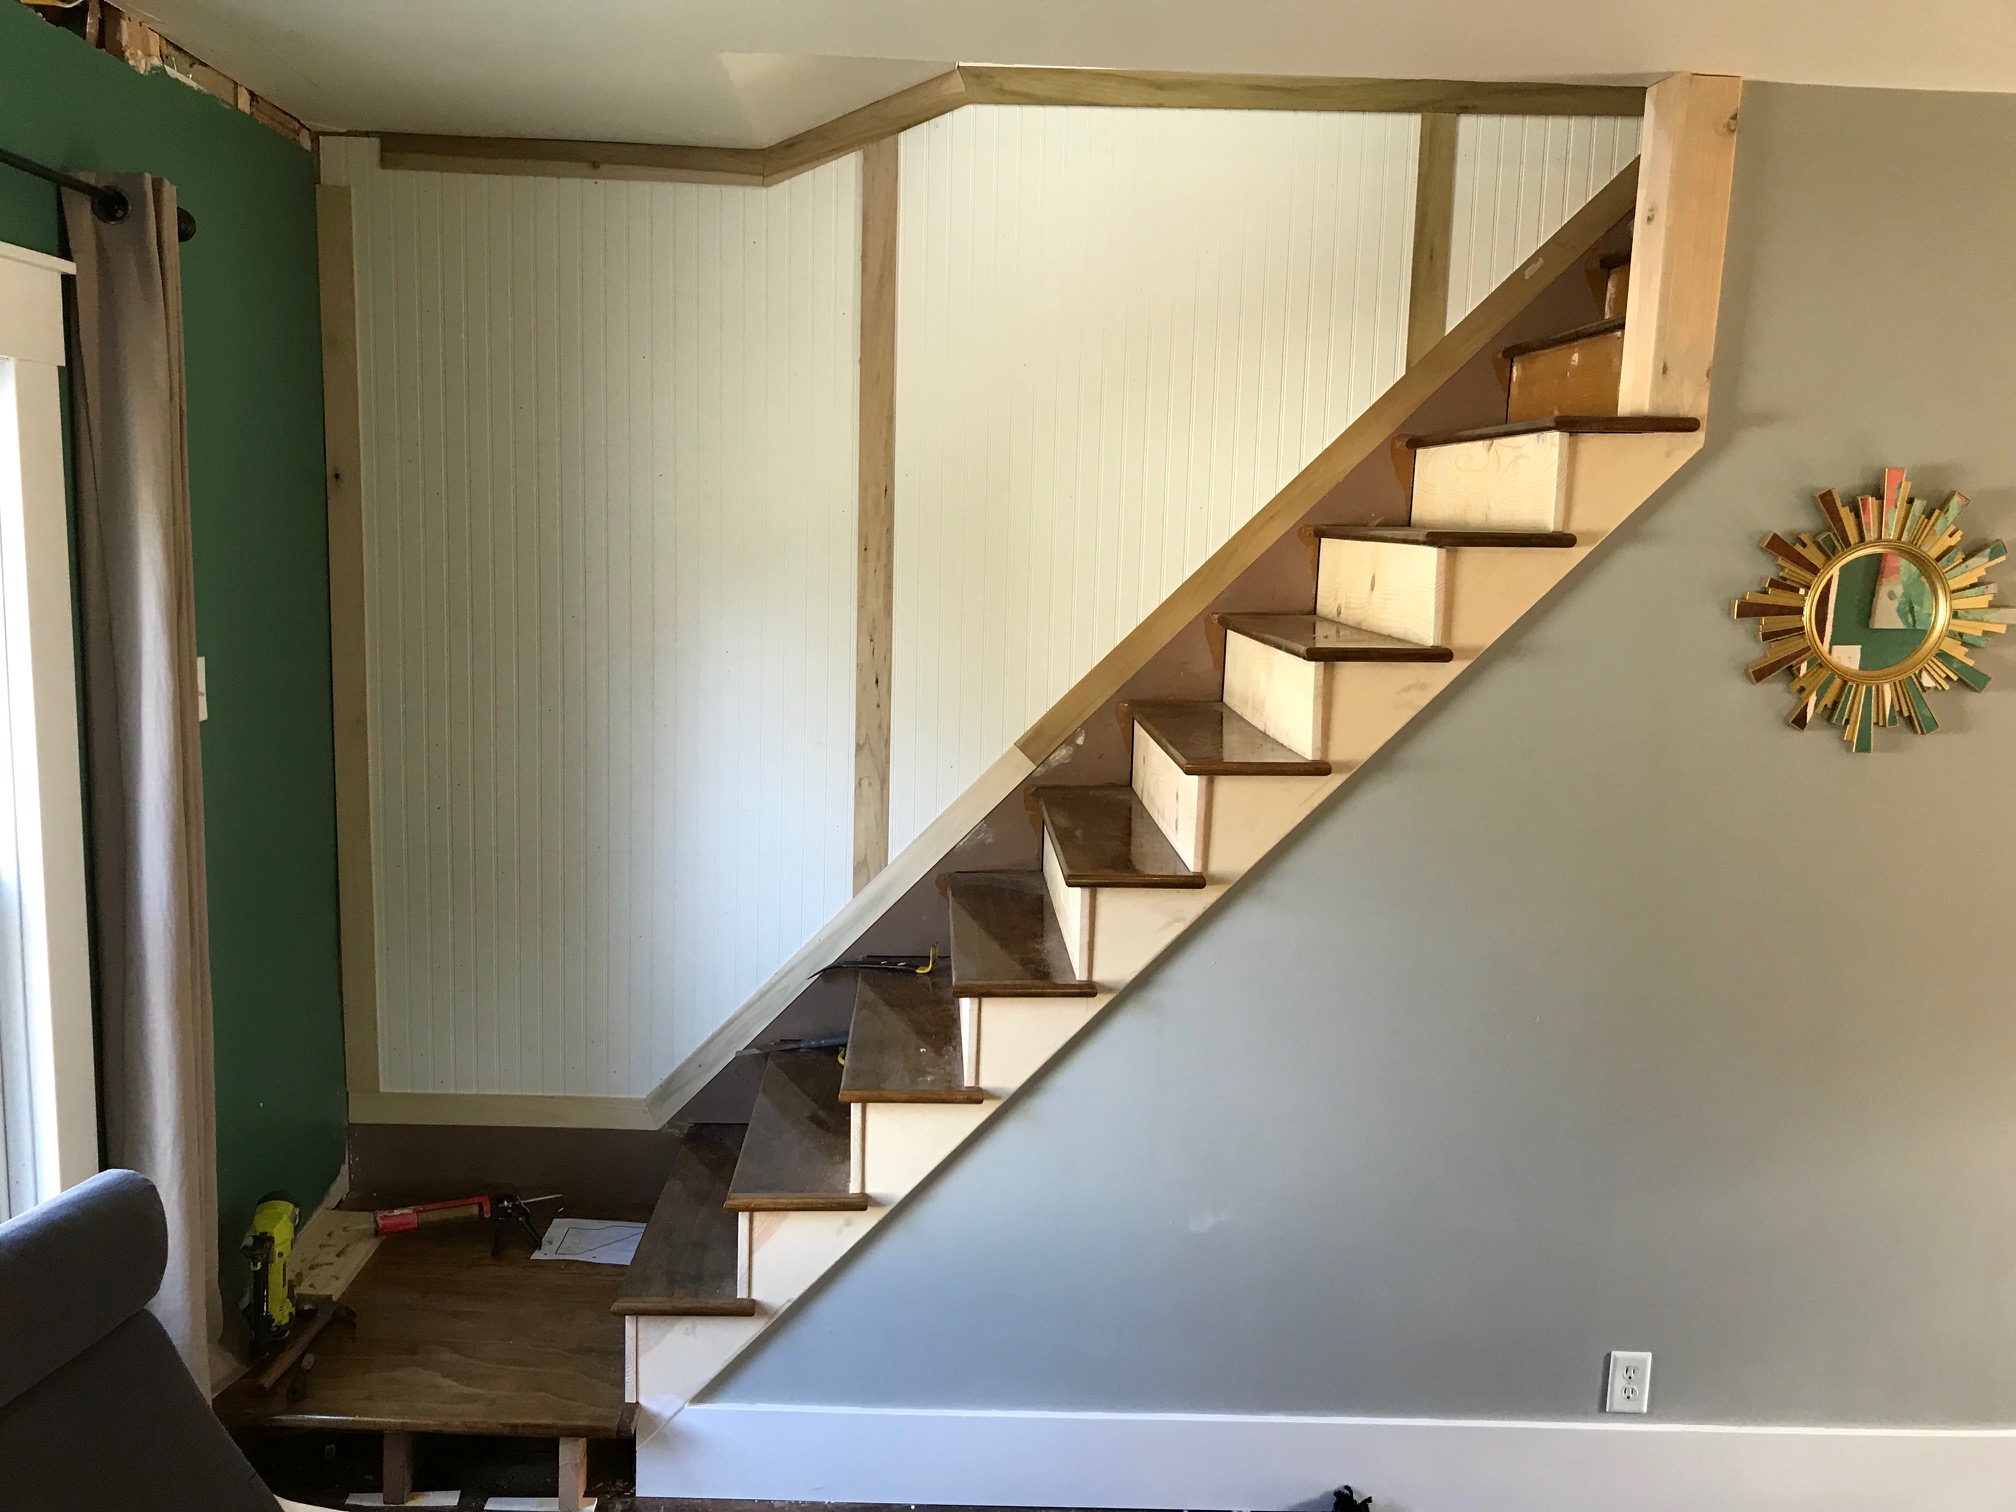
First thing to do was make the skirtboard. The skirtboard is the board that runs parallel with the stairs and is zig-zaggy on one side to match the stair treads and risers. I used a piece of 1x12 medium-grade pine. Most people use the stain-grade pine but that was $50! All that was needed was little B.I.N. primer to block the knots and wood filler to fill in the tear-out and cracks.
Marking the lines for where to cut was... difficult. I used a method that involved building a jig that could slip over the uncut skirt board.
- cut the ends of the skirtboard as needed
- tack it to the wall/side of the stairs
- slip the jig over the skirt boards and risers such that one side was flush with the risers/treads (this assumes the riser/tread boards are level/plum! Mine were no, lolfml)
- mark the lines
- you MAY need to transfer the lines for the risers only by the thickness of the new riser boards. This is if you're butting the boards up against each other (like I did) rather than joining the risers and skirt board together at a miter joint.
- pry it off the wall and make the cuts. I used a circular saw and a hand saw.

The top three steps where closed, not open, on both sides so I went ahead and installed those treads first. Those three risers, along with the upper skirt board to the left, where the only remnants of the old stairs that could be reused (and the stringers of course).
I figured out that the best way to install the treads and risers was to work from top to bottom and pull out two steps at a time. I used 2 inch long finish nails, the nail holes were later filled with wood putty of a matching color. No complaints.
The risers boards I used were 1x10 medium-grade pine, ripped to the correct height on my table saw. Just as with the skirt board, wood putty and B.I.N. primer was needed for the knots and tear-out. It beat spending double on the high-grade pine but not everyone will agree depending on how much your time is worth.
Installing the treads and risers was a lot harder than I thought it would be. Each one of them had to be scribed and trimmed, sometimes on more than one side, and massaged into place. Sometimes the skirt board needed to be trimmed a little. Almost every time, wedge-shaped shims needed to be used on the stringers. Lots and lots of wood glue and finish nails!
One more tip: for the both the risers and treads, I didn't cut them to their final length until it was ready to be installed. For each install I measured, cut, and then nailed it in. Doing this rather then cut them all at once to one measured length would have been a disaster as they actually needed to be nearly a half inch longer at the bottom of the stairs than in the middle.
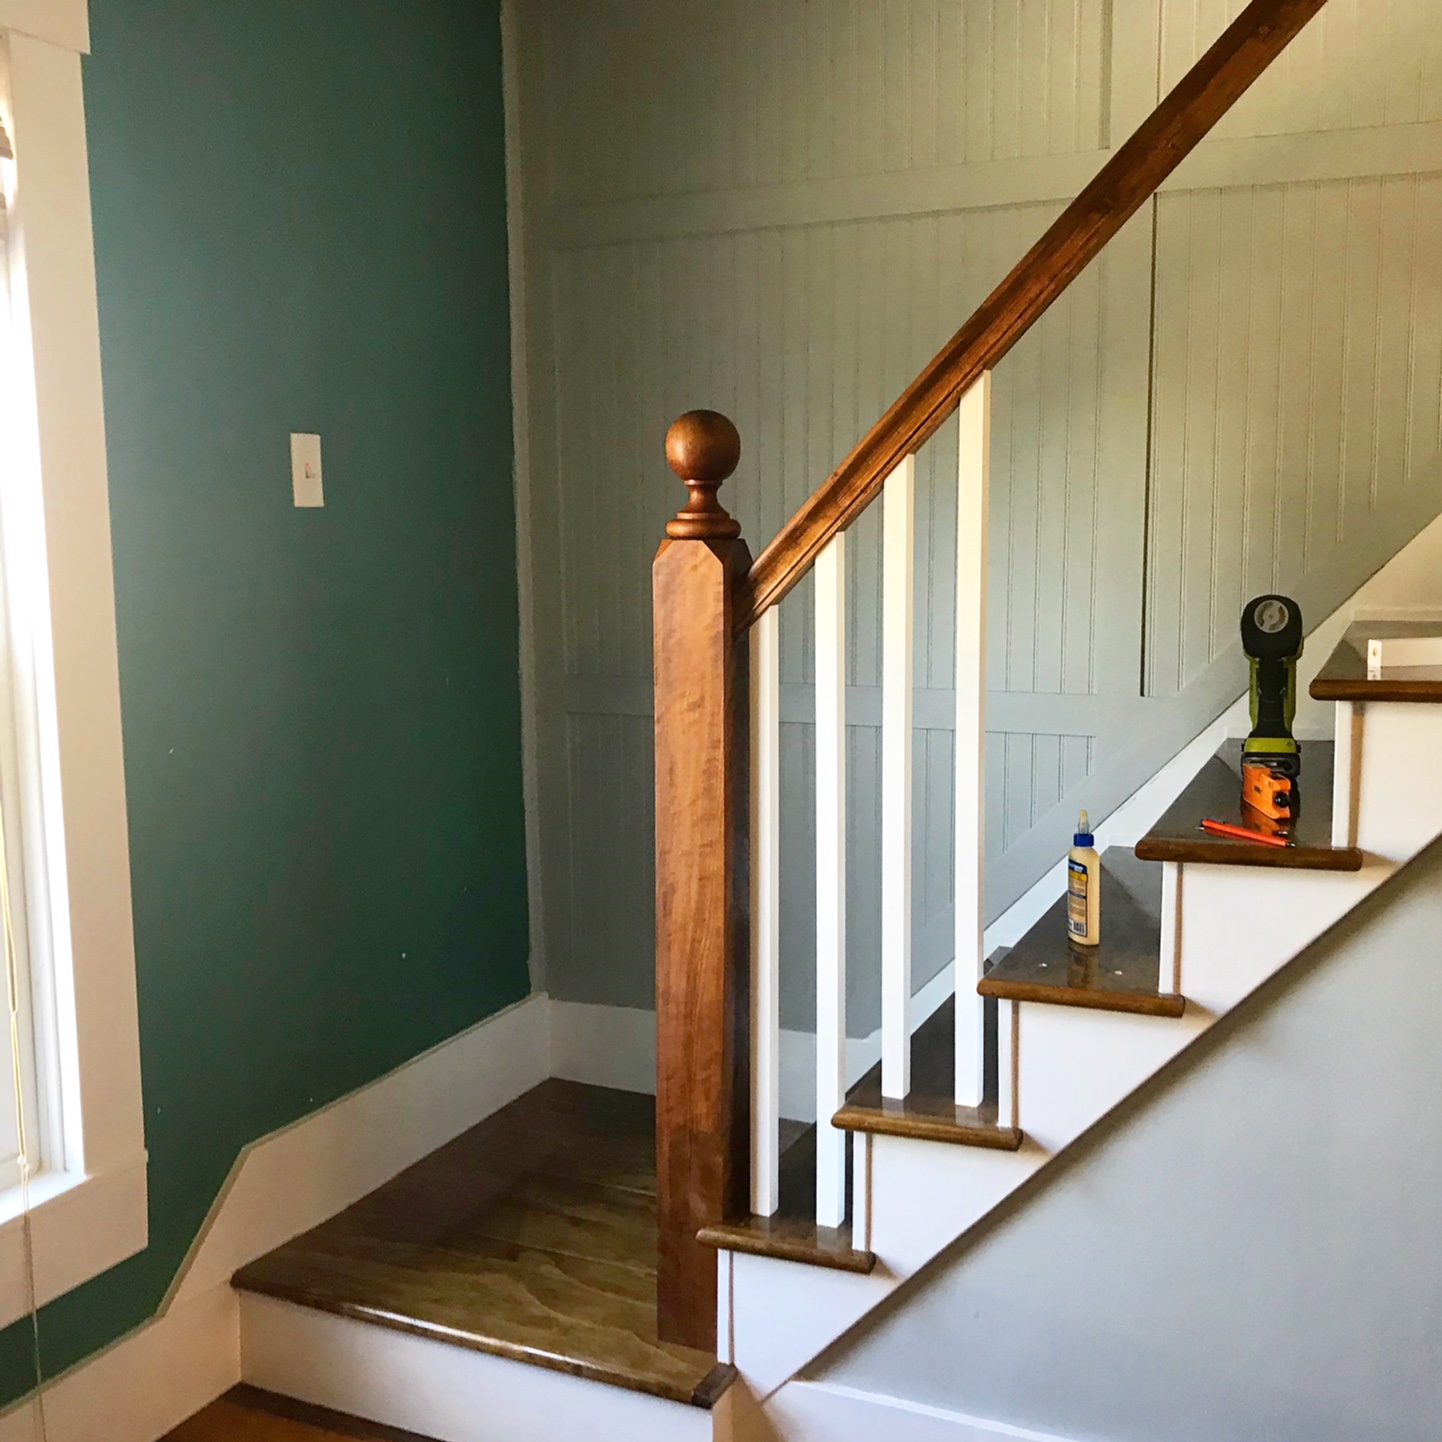
In the below pic, you can see what I decided to do with how the risers met the skirt board. The traditional way to do it is with a miter joint. However, for a few reasons including how un-level the whole house is and my own limits as a carpenter, I chose to go a different route. I went with a butt joint, but instead of it being flush I thought I would have the risers stand proud about 1/4 inch. I think it worked out great!

Do you see how the nosing/molding on the sides of the treads are extending a little over an inch past the actual depth of the treads? This makes it look a lot better.
We gotta install the handrail and balusters soon before something bad happens to these puppies!!
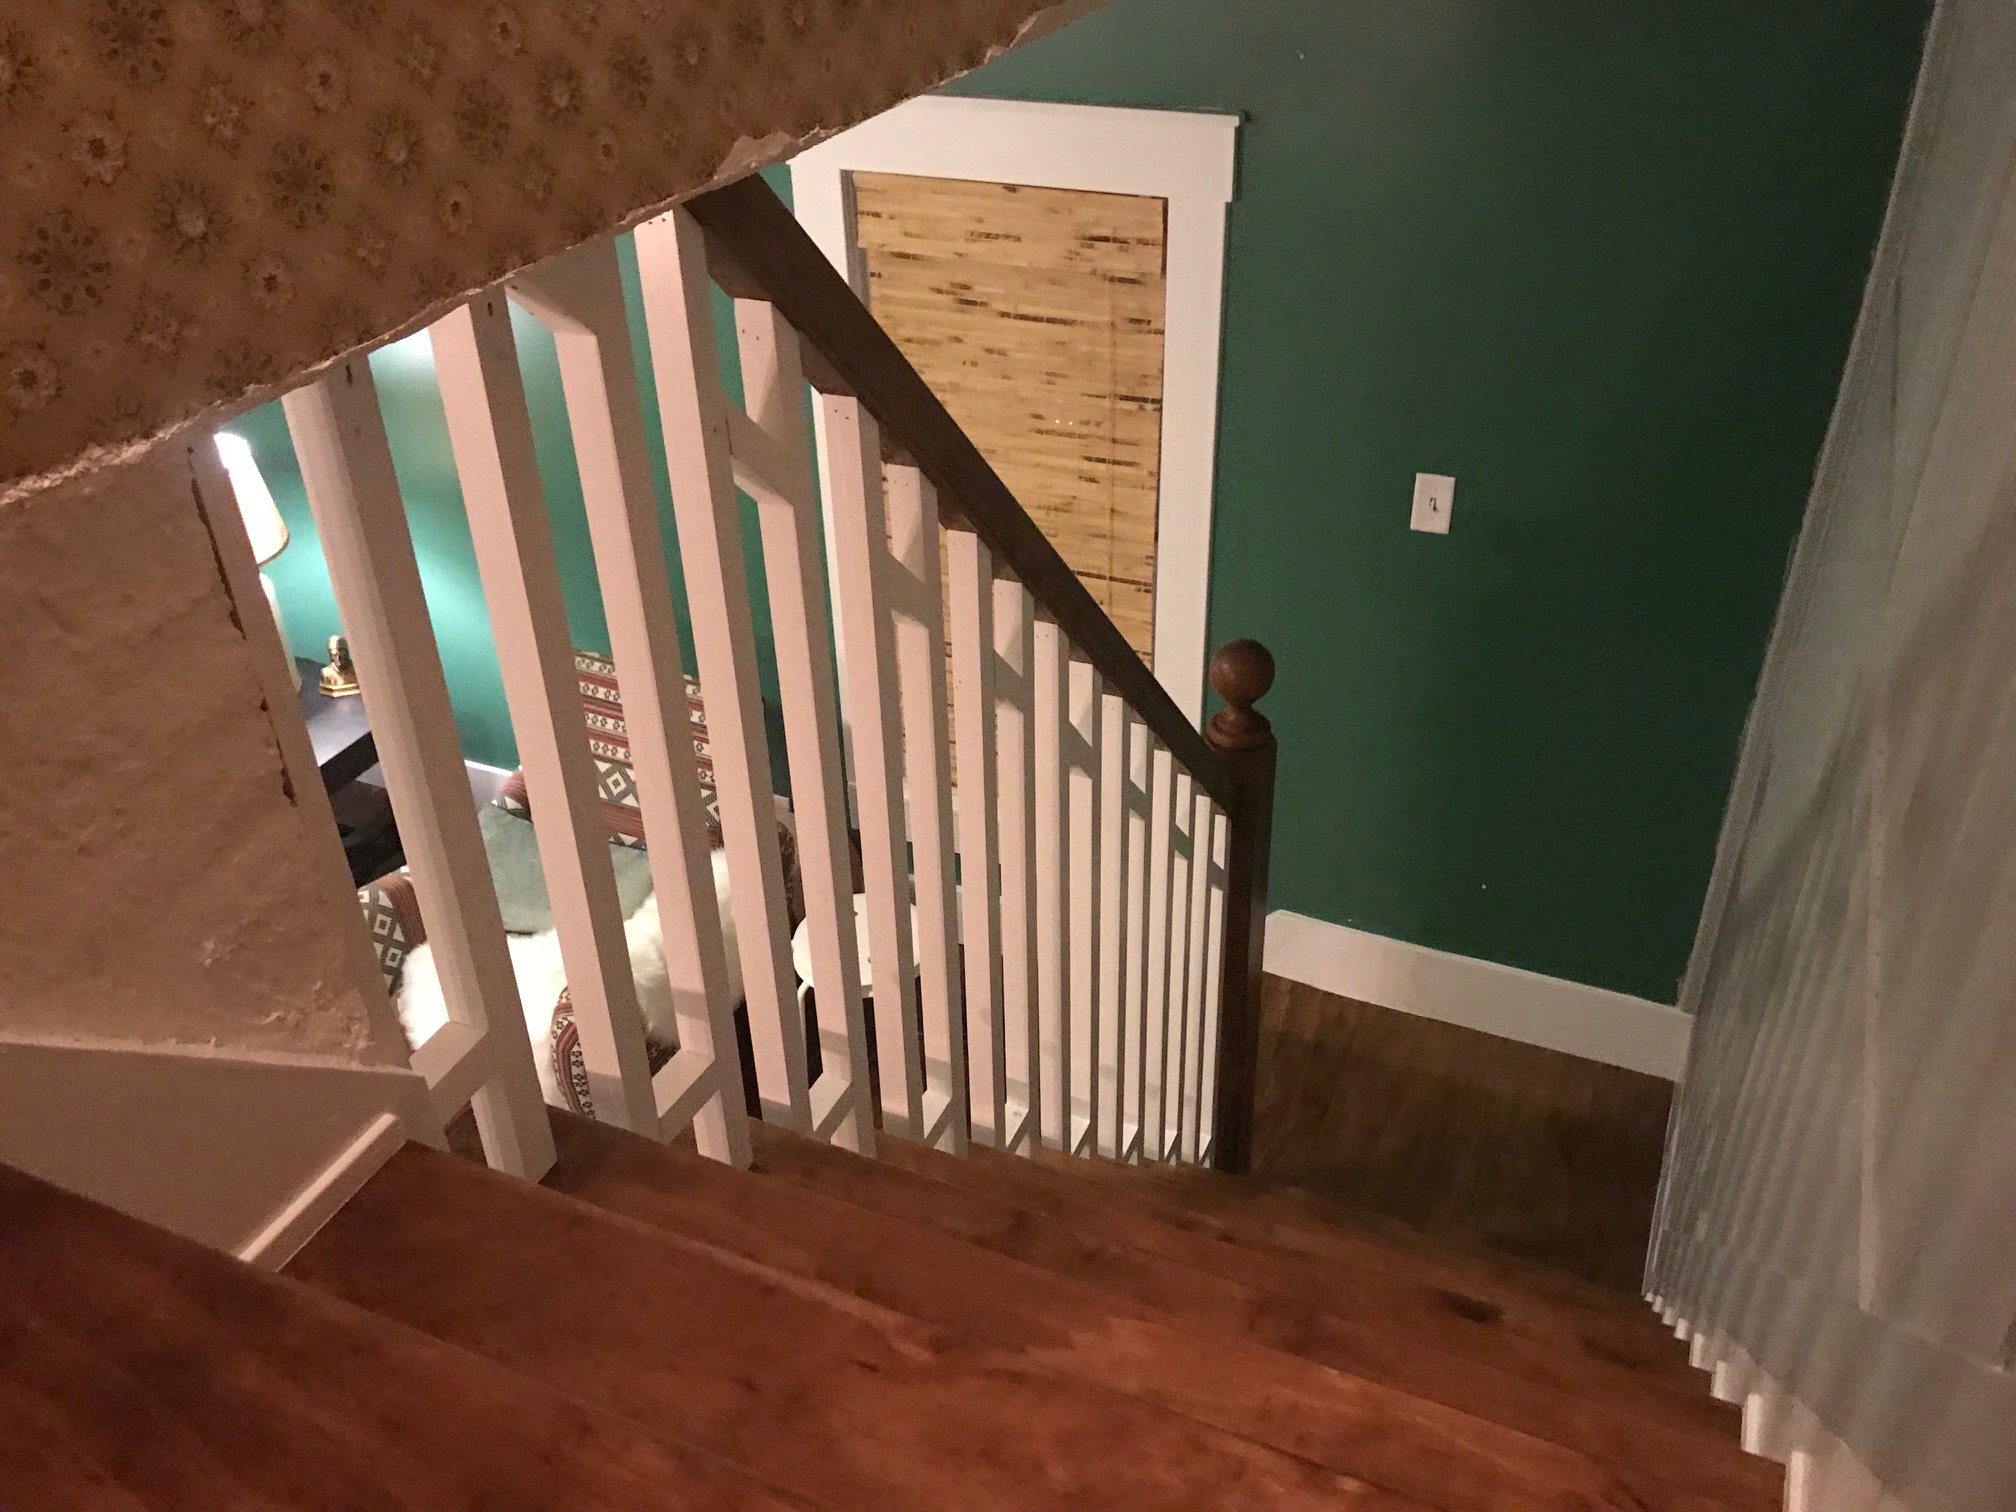
I held off as long as I could, but I just couldn't stand that wallpaper any longer. I covered it with beadboard fiber panels. They'll get a heavy dose of trim later.
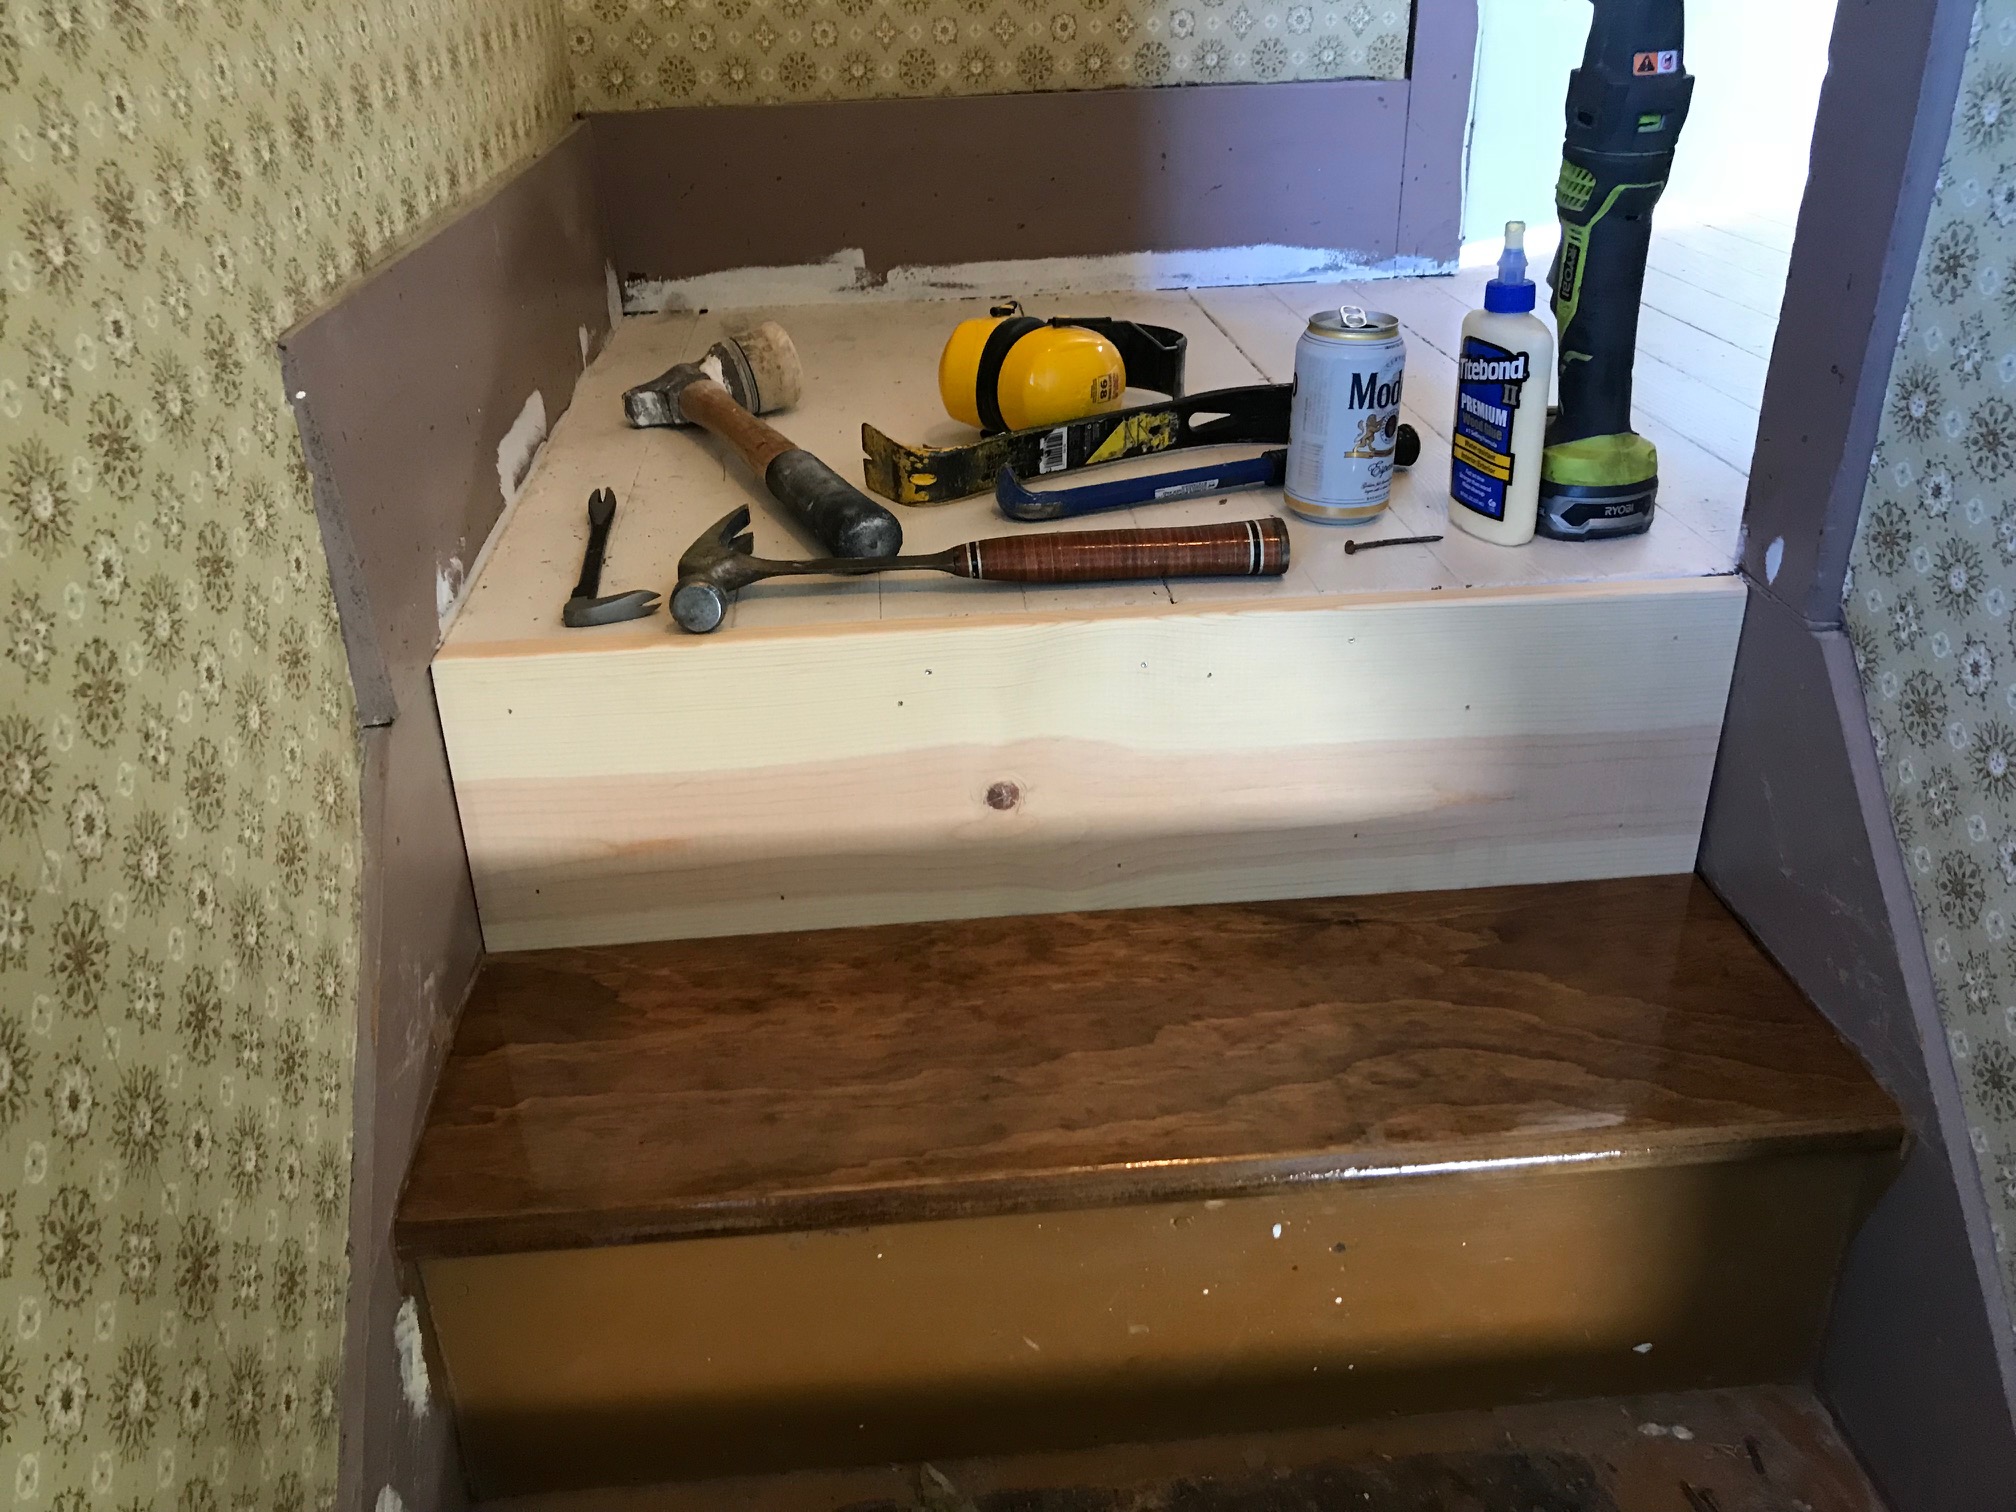
I had almost forgot about the landing, somehow. I had to go back to Homeless Despot and get more stair treads (so that the landing matched the treads) and, after cutting the front nosing off all but one, I stained and poly'ed them just as the treads were.
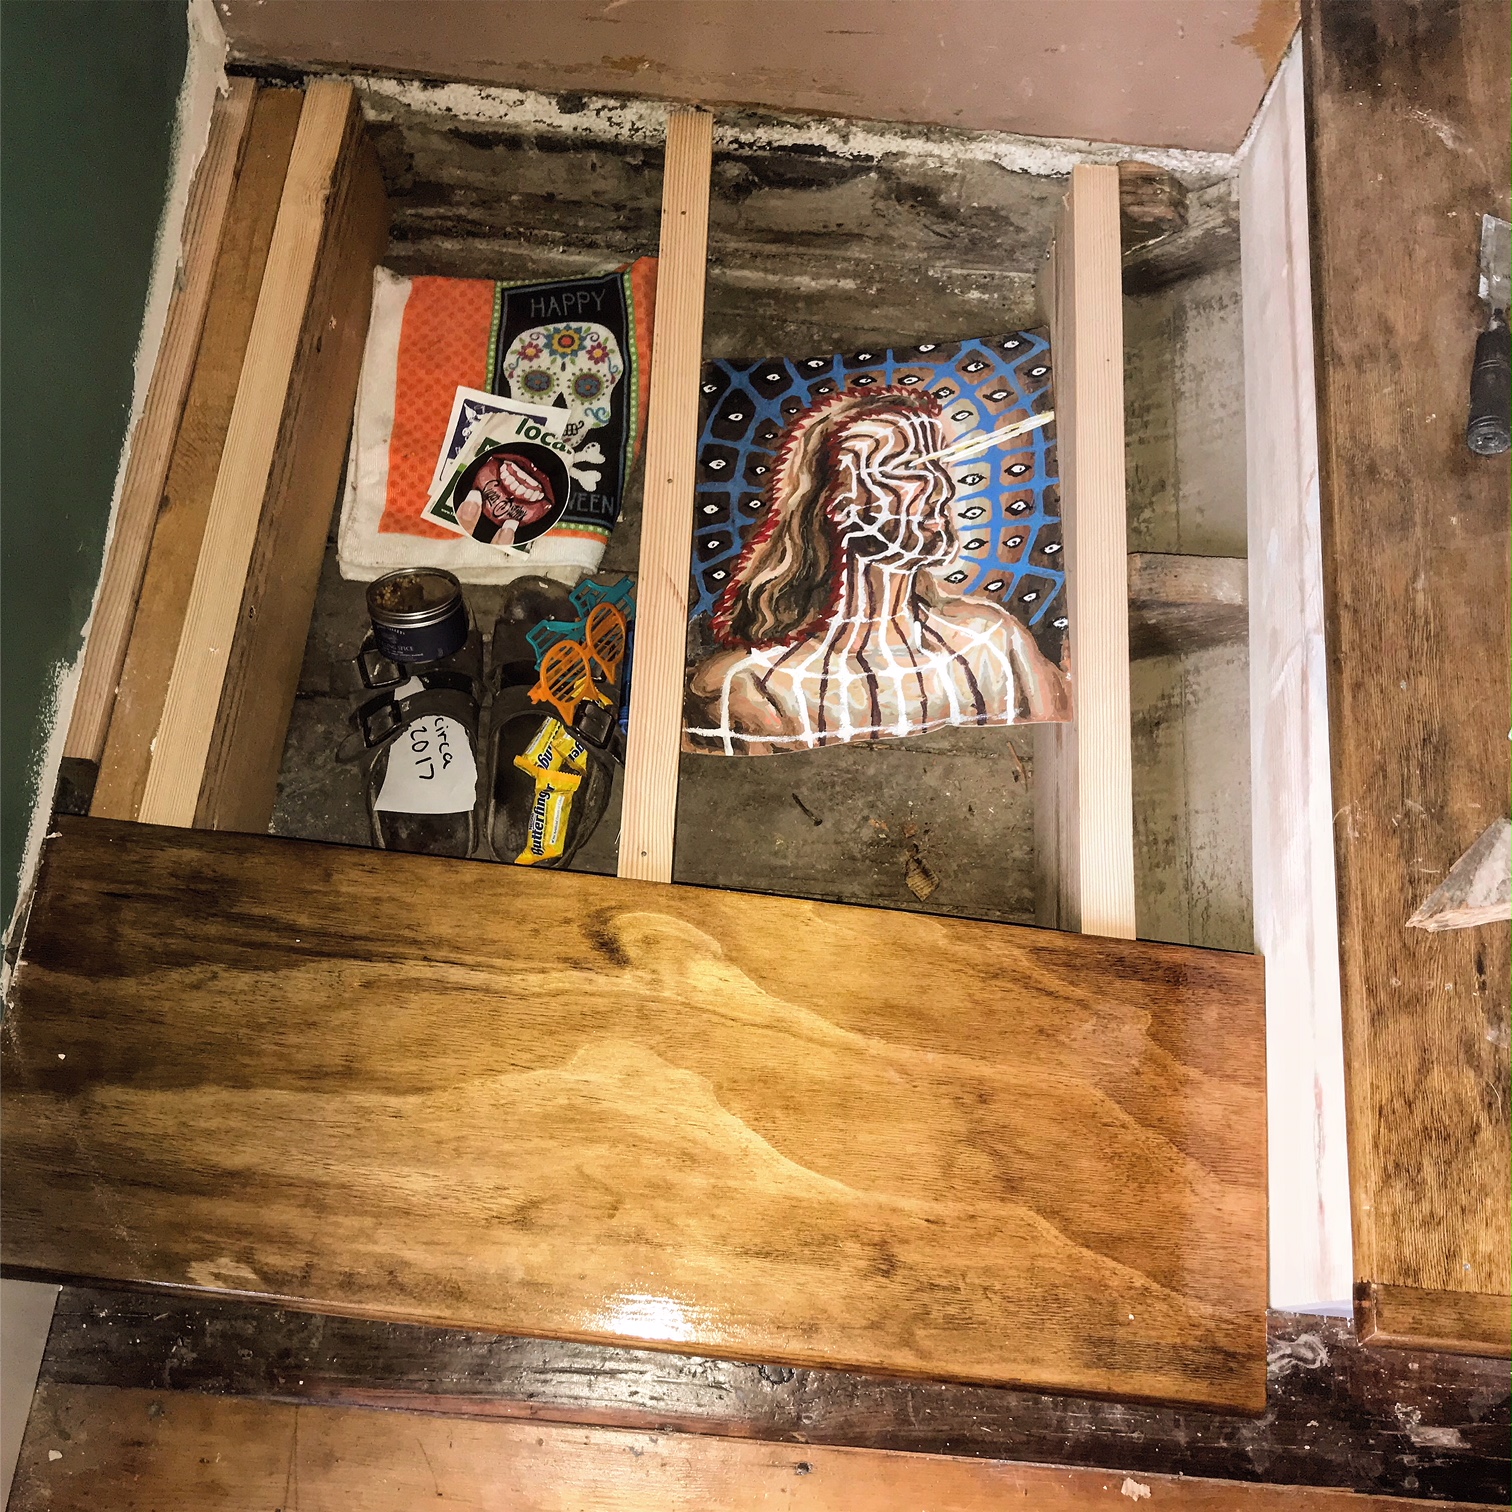
When plying up the old landing, we found more mud from the Great Flood of '51.
Maybe it was the slap-silly feeling we got after working on the damn stairs for so long, or maybe it was the alcohol.. but we through it would be fun to put in a weird time capsule under the landing boards! (The candy was later removed, just didn't seem like one of the better ideas).
Almost done..
Installing the newel post, balusters, and handrail
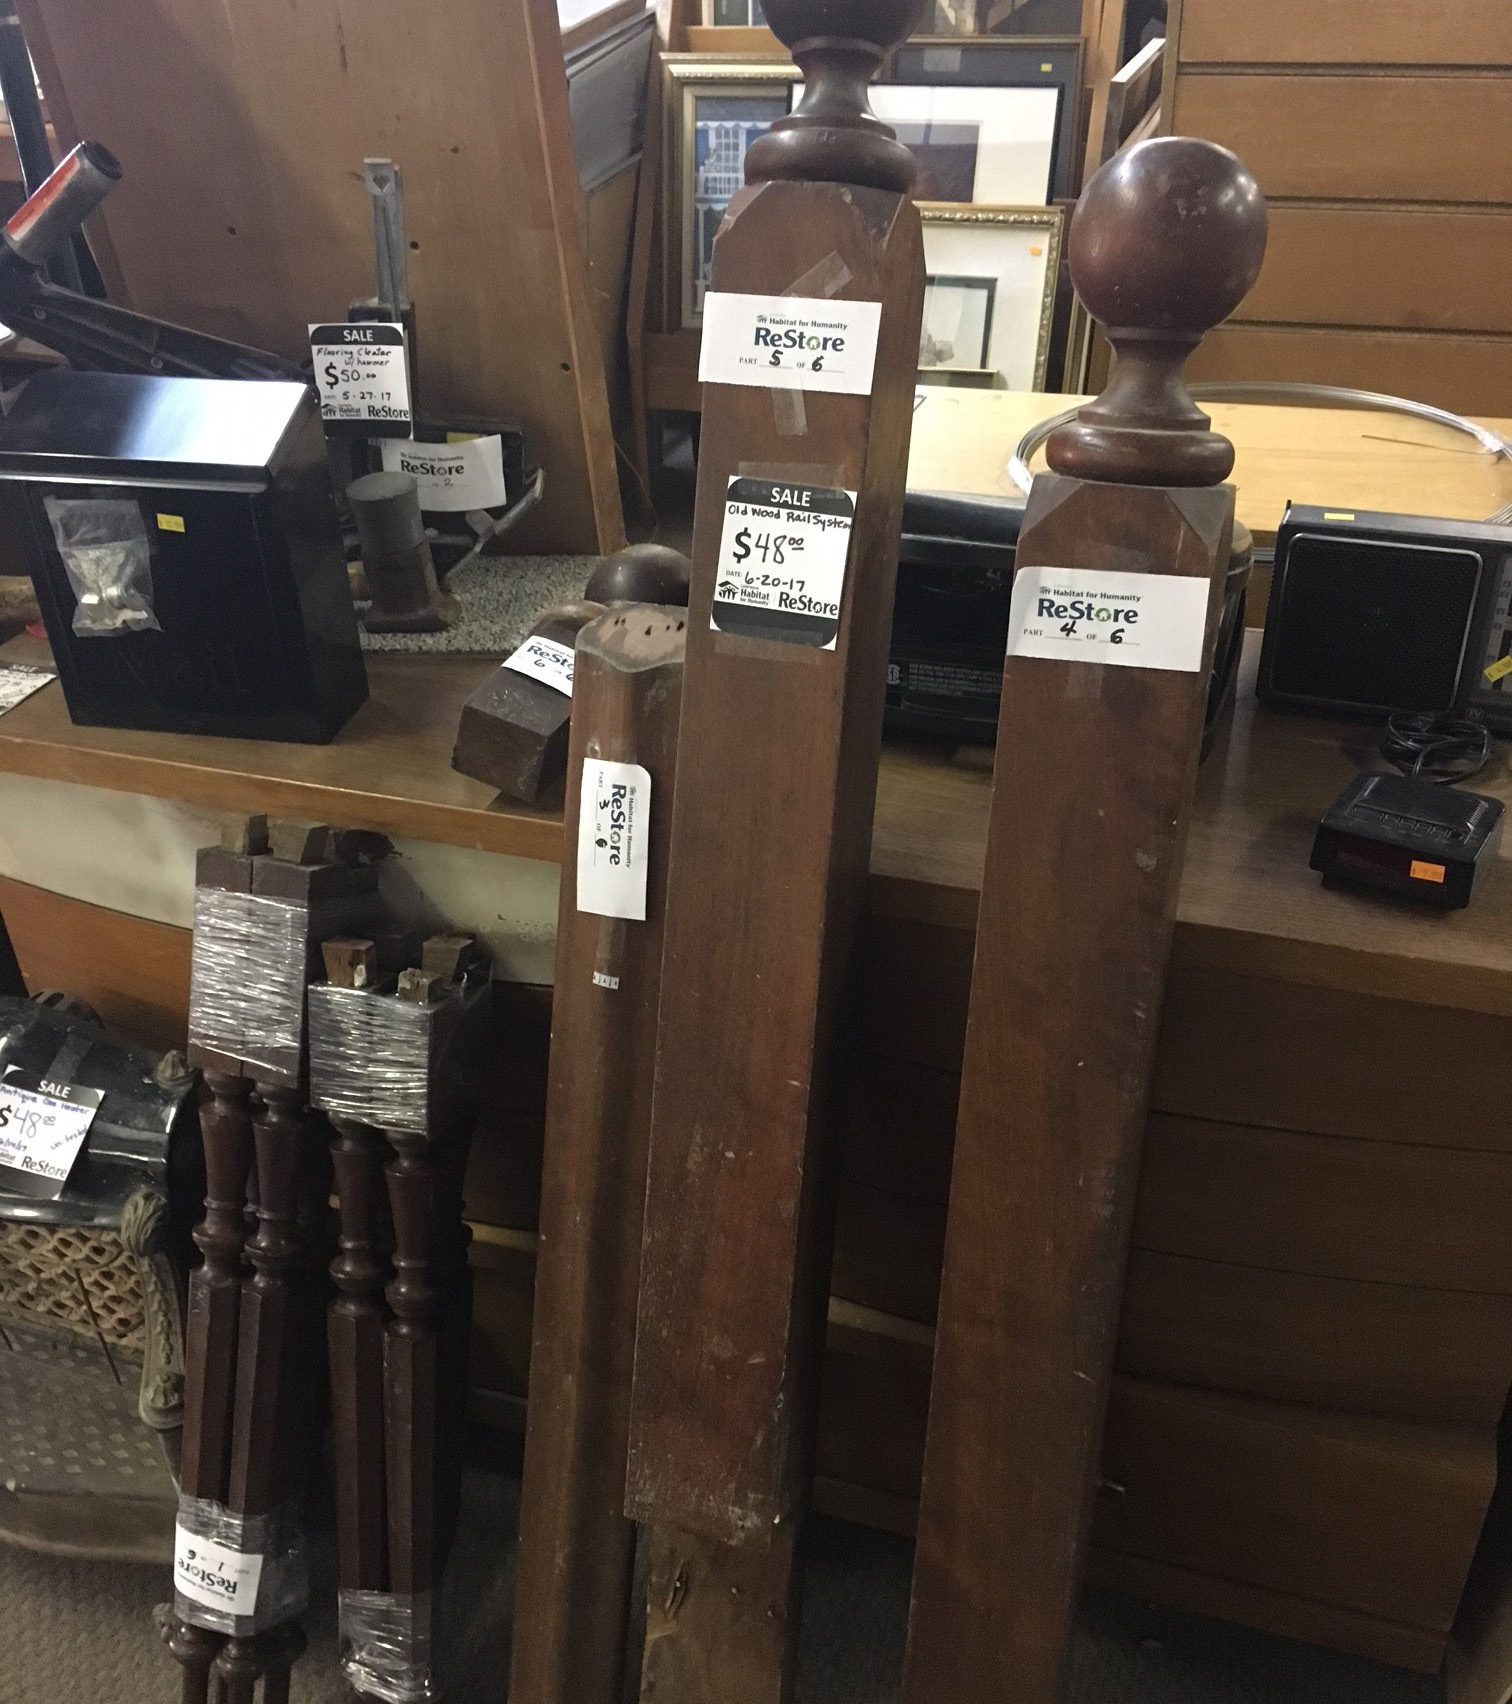
One day in late June (7 months before it was installed) I found these amazing newel posts at the Habitat for Humanity ReStore. Solid walnut. SOLID MOTHER BLEEPING WALNUT!!!! $48!
The old varnish came off fairly easily with non-toxic Citristrip.
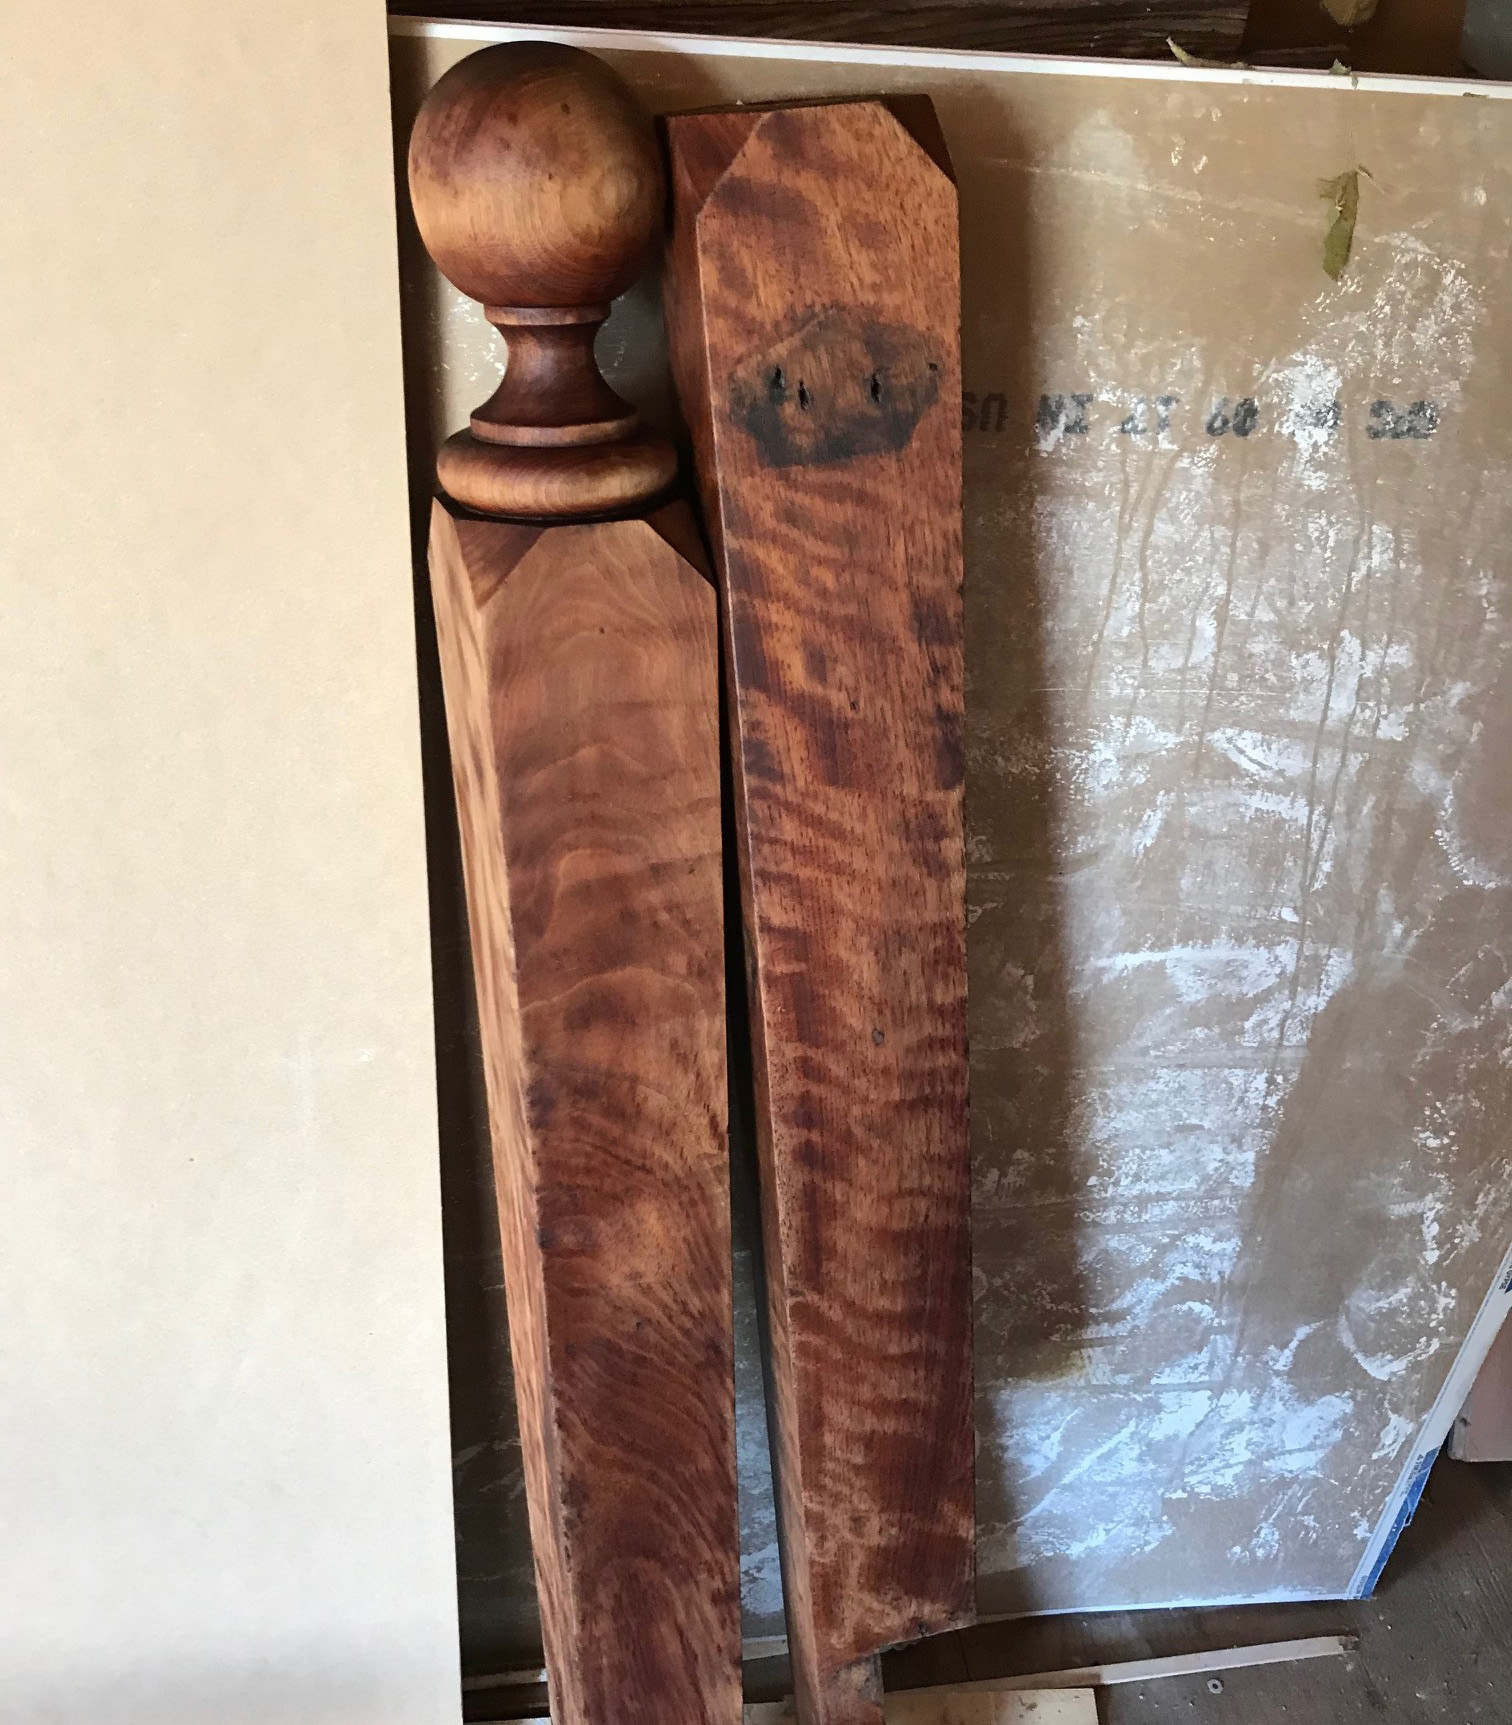
After stripping the old varnish, I chose the best of the two posts I had, yet it was still not tall enough. So I joined BOTH of them together, with a lap joint. Then some hand planning was needed as they were not exactly the same width, followed by lots of sanding. I started with 80 grit on the palm sander, then 120 grit on the belt sander, then 120 grit on the palm sander, then 120 grit by hand, then 220 grit by hand. Finally, I put on two coats of my all-time favorite finish: Tru Oil. I'm REALLY happy with the way it turned out. It's my baby.
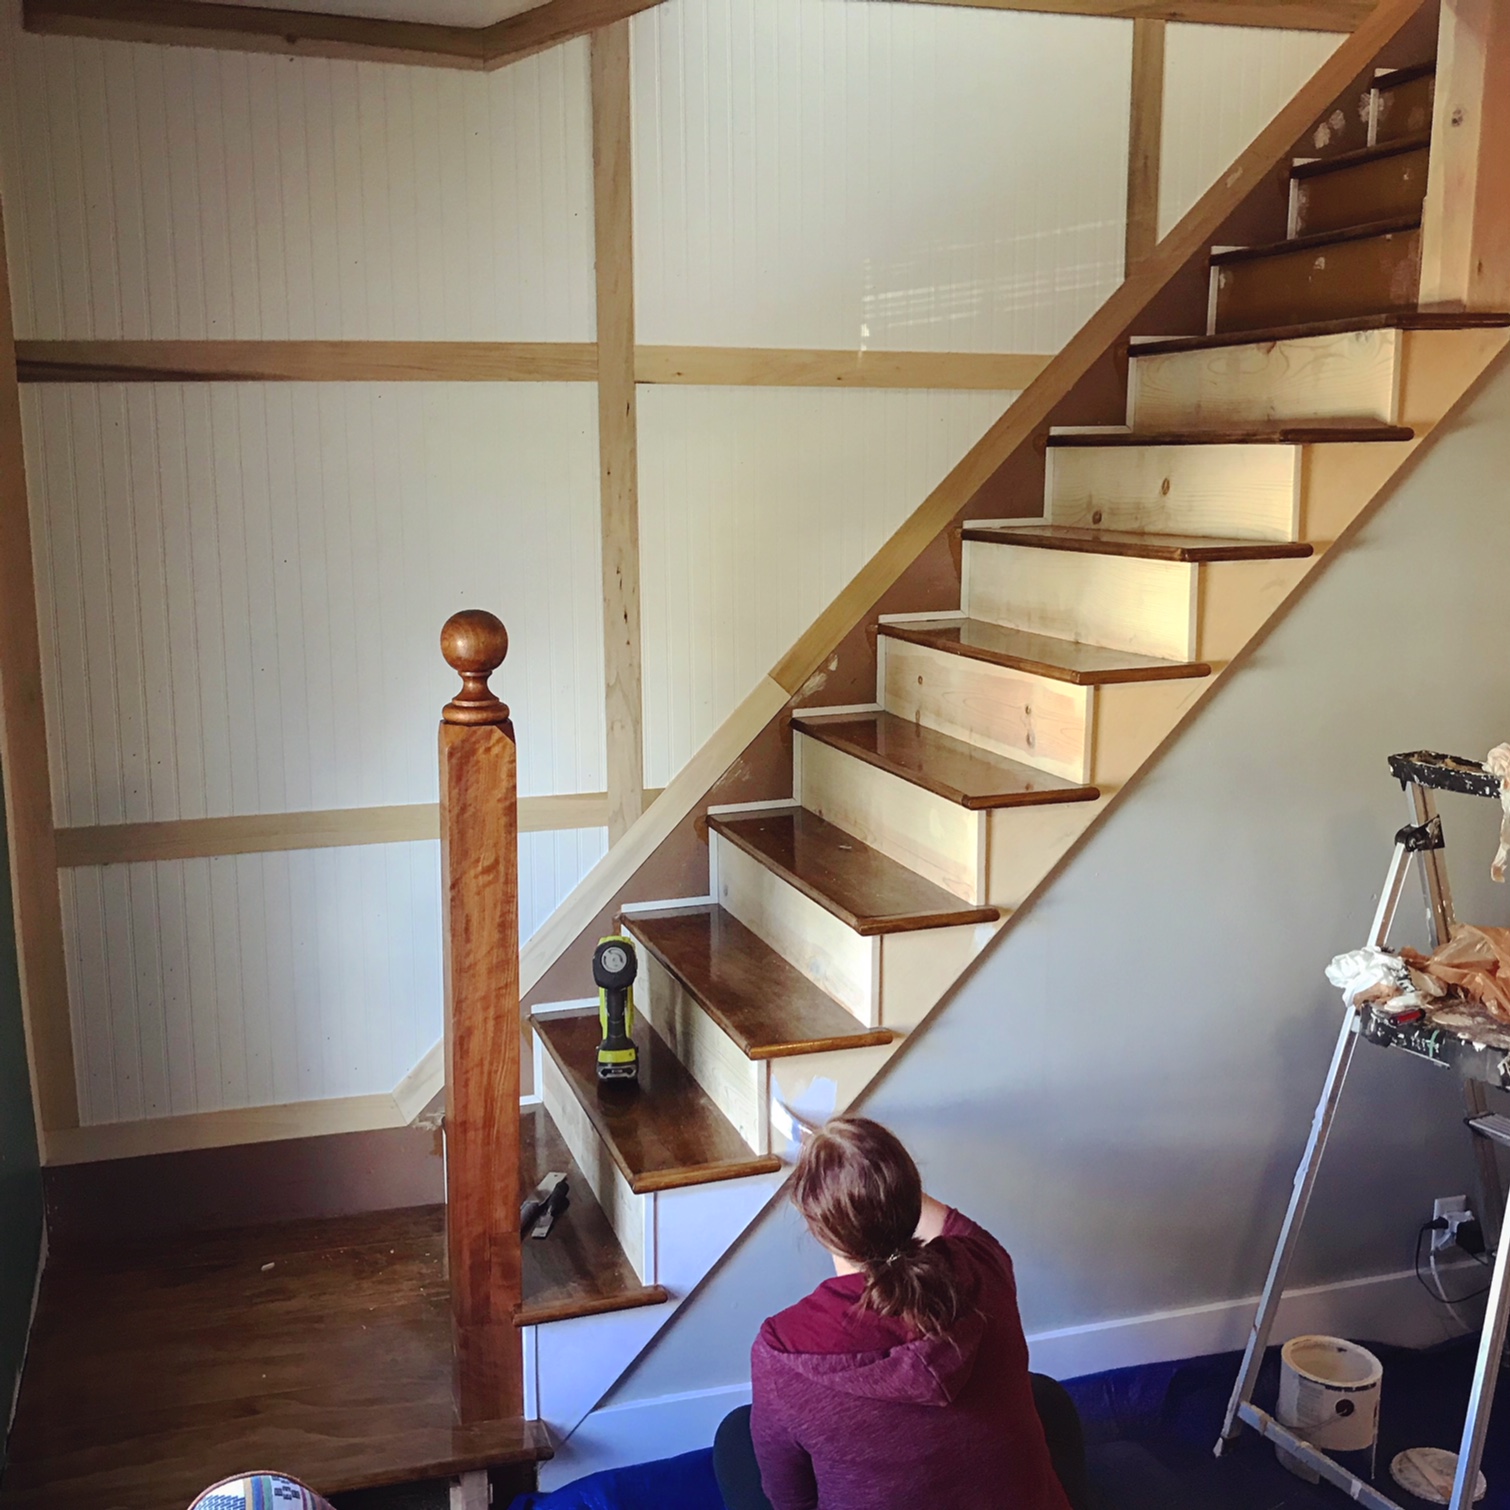
I used super long lag bolts (6 or 7 inches, iirc) to secure it to the stringer and the riser its butted up to, to the stud in between the stringer and the skirtboard, and to the joist bellow the landing. I had to cut the post just a little so that it fit perfectly snug in between the joist and the riser, and I had to hammer it in with a mallet - that's how tight it fit. Even without and screws, it felt fairly secure. Once it was in place, I could put the final riser below the landing (or is it a base board?).
Finally, the painting could begin.
For the risers, which needed an extra tough paint because the narrower-than-normal treads meant that the heels of my shoes rubbed on them a lot when going down the stairs. So I used an expensive, new paint from Sherwin Williams called All Surface Pro Enamel Acrylic Latex (water based). Why water based? We didn't have time for an oil based enamel to dry (think two dogs and two cats) and it also would have been very stinky. Well this new paint sure is tough but it does not lay flat or cover well at all when using a brush. Had to do three coats! I even used the finest Purdy brush we had.
One more thing: we needed a little trim to cover the gap in between the old upper skirt board (one of the few pieces of the old stairs to remain) and the new treads and risers. There was not a good way to get wood filler or latex caulk in there so I picked up some of the simplest trim I could find and just did the damn thing. There was no easy option or better way to cover the gaps, and be covered they must!

Everything else was painted with normal gloss latex paint. LOTS of latex caulk was used to fill all the cracks and creases, and wood filler was used on the many many nail holes. It was a lot of work! We also ended up painting the wainscoating/beadboard wall with Argon Grey from SW, left over paint from painting the living room walls. I wish it was gloss instead of satin but they can't all be winners.
Onto the balusters...
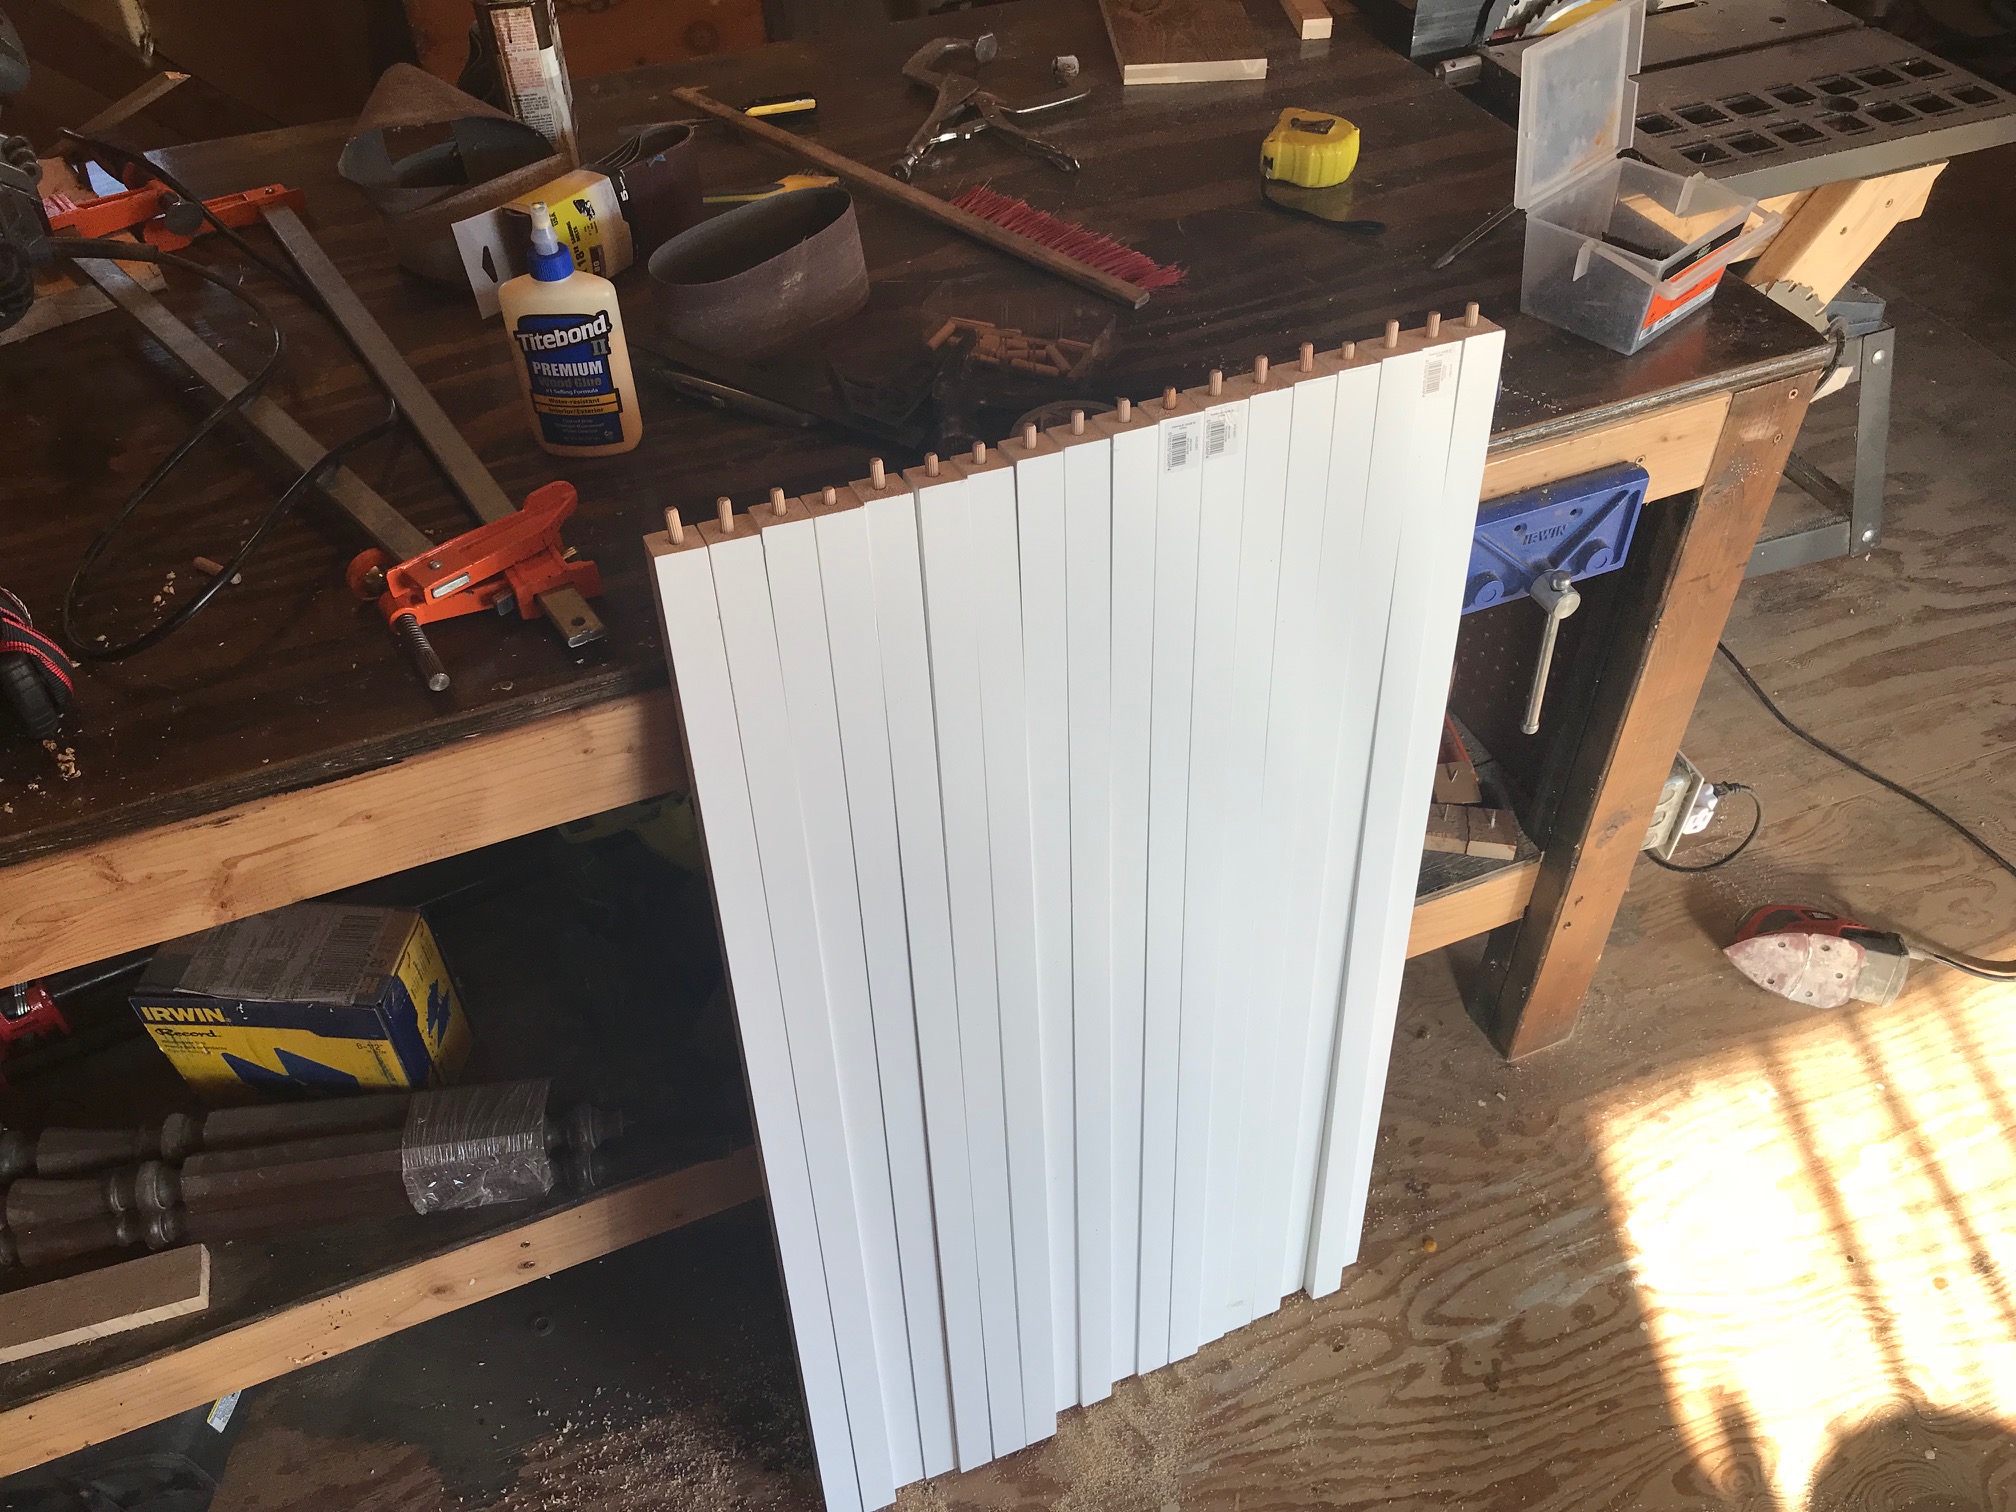
I bought a bunch of square pine balusters from Menards for about $5 each. Yes I could have milled and painted my own but at this point I was willing to pay any amount of money to save time and effort and finish this project ASAP,
To attach the balusters to the treads, I decided to use dowels and glue. To get a perfectly level dowel, I used a trick I had up my sleeve: my handy "drill block" that lets you drill perfectly flush holes without a drill press.

To drill the hole for the dowels on the treads, I first made a template to easily mark where the holes in the treads needed to be. And again the drill block was used to get a perfectly level hole. Then I held the baluster up, with the dowel end in the hole that was just drilled, against the handrail and I marked were it needed to be cut with a pencil. I think that this was a much better way than using a tape measure. Once it was the perfect length, I filled the whole with glue, inserted the end of the baluster with the dowel into the hole and used the brad nailer and glue to nail it to the hand rail.
Oh yeah, the hand rail.
It's a solid hemlock handrail. I used one coat (not two like the treads, because the hemlock is darker than pine) of Watco black walnut danish oil, followed by at least 5 coats of Tru-Oil. It needed many more coats of Tru-Oil than the walnut did because its a softer wood and couldn't be sanded as smooth, to achieve the same luster. Once it was cured, I cut the ends to the needed angles and length, and then used two 5" screws on either side to screw it to the newel post and to the ceiling. Fortunately for me, right above the drywall on the ceiling was the large header I installed after knocking down the wall.
Finally, finally, finally! the detail pieces in-between the balusters could be installed. I don't know what the fancy word (newel post, baluster, skirtboard, etc) for these pieces are, just deal with it. As before, I physically held the piece up where I wanted it and marked it with a pencil rather than use a tape measure. Worked pretty well. Used the brad nailer to install them, but there's probably a better way like nailing them to the two balusters first before attaching them together to the stairs. Maybe. The sides of the rectangle/trapezoid shapes that are created (with the stair tread being the bottom edge of the rectangle and the hand rail the top edge of the trapezoid) are at the golden ratio. That's how I decided how high up and down to put the pieces.

BOOM! DONE! (Ok, just need a little wood filler, caulk and paint for the tiny brad nail holes and gaps, THEN it will be done).
Before:

« Part 4: The Bedrooms | Part 6: Restoring the Hardwood Floor »