First I want to say that I know very little about trucks and engines, and everything I do in this article should not be used as instruction for how to fix your truck as well. I'm just sharing my experience so others can learn from it.
After completing my book, I needed some mental rehabilitation. Something therapeutic and relaxing. I also had a (small) wad of cash from the deal so I decided to buy an old truck!
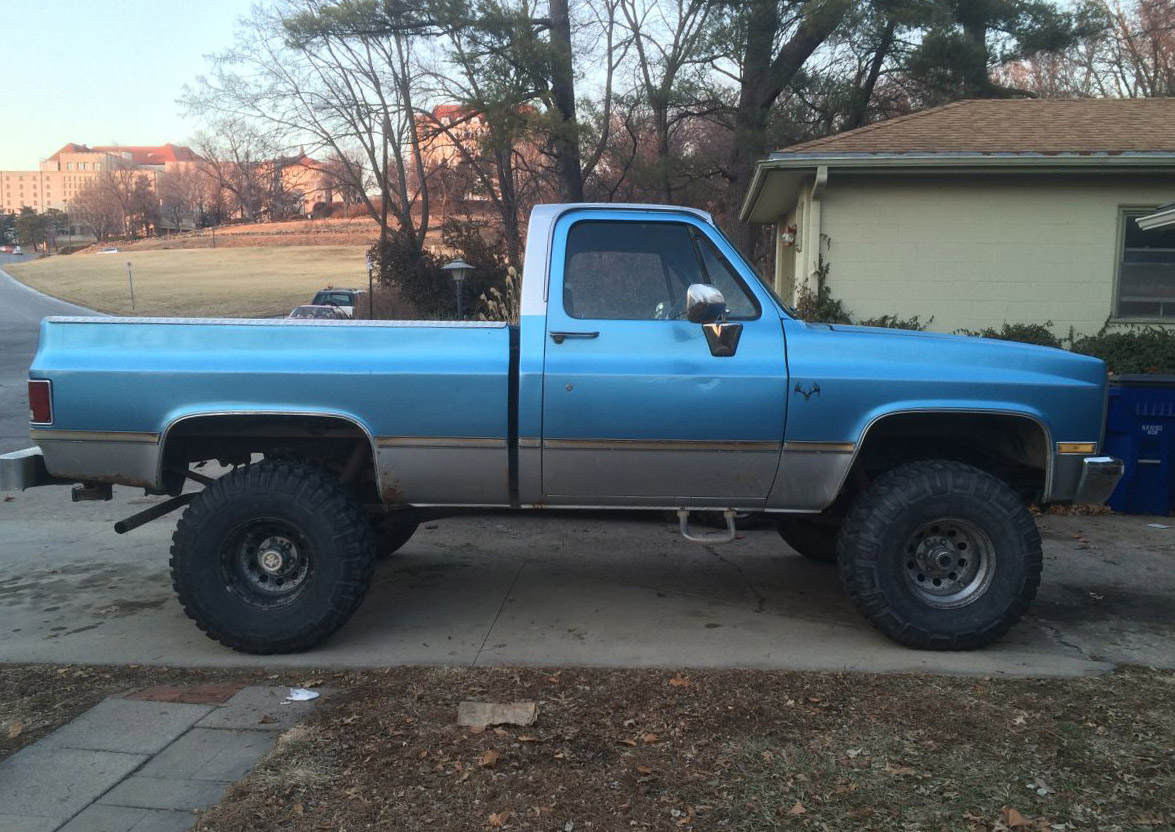
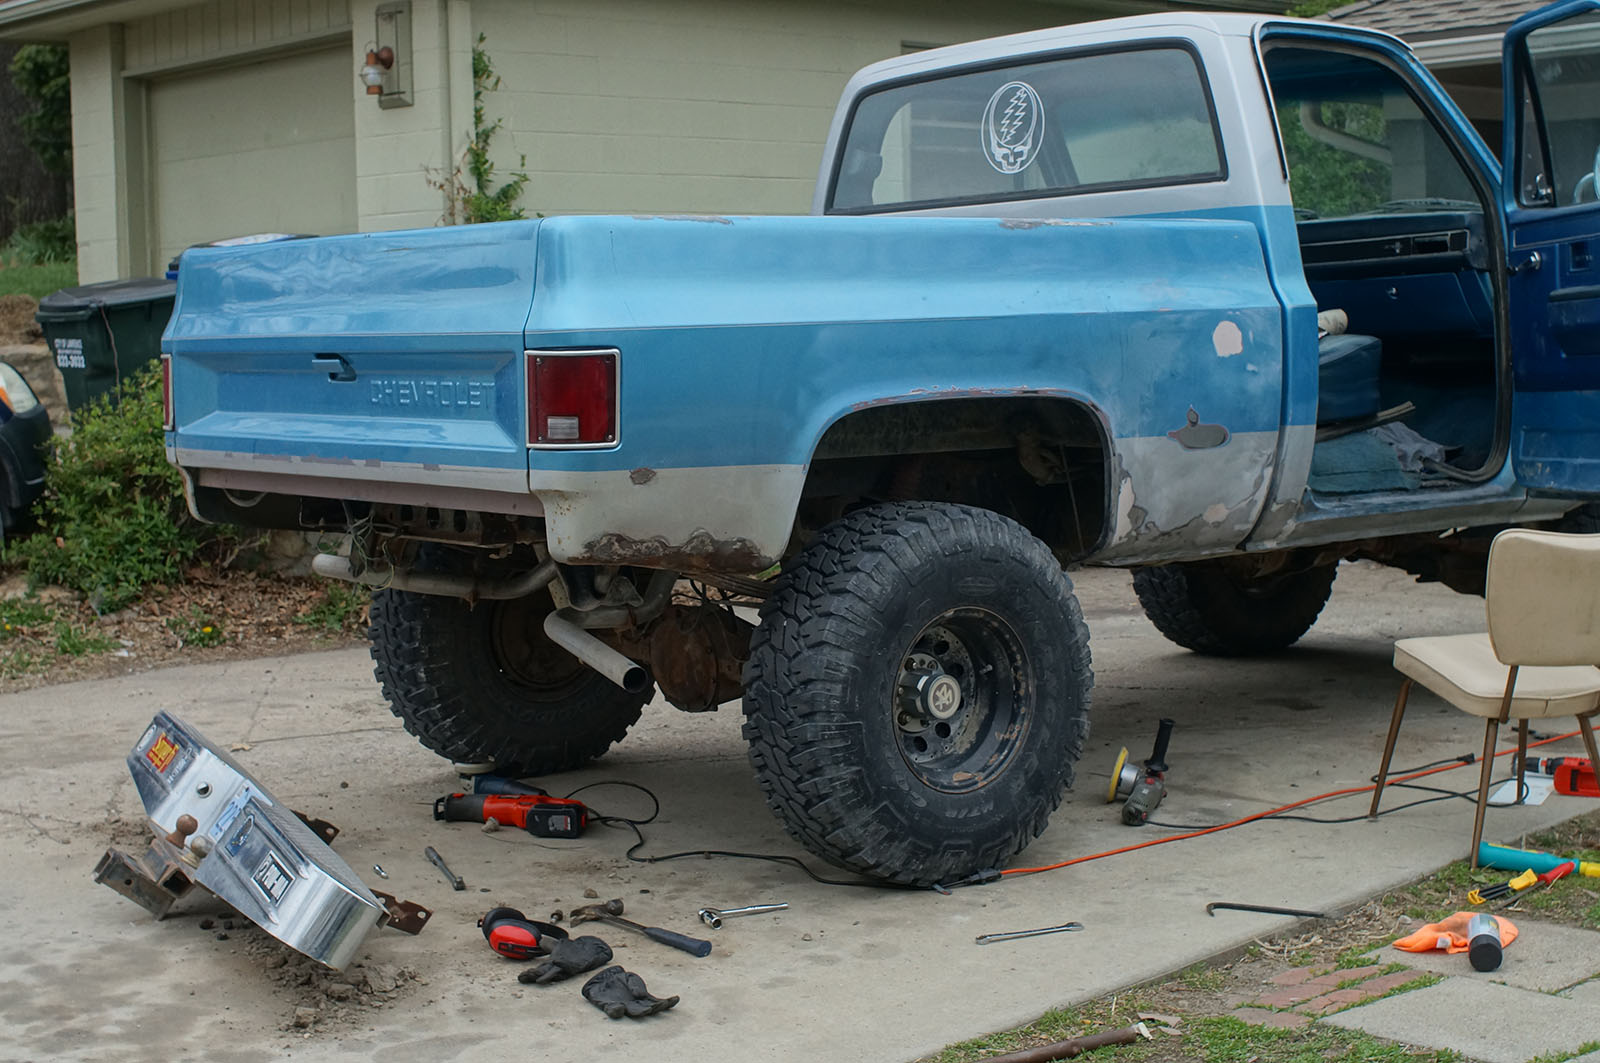
I found this old guy, I've named him Hank, someone's old hunting truck. It belonged to an older gentleman in Wyoming and he gave it to his grandson who was entering the marines. The grandson drove it to Missouri and sold it to the guy I bought it from. I have no idea at what point in the truck's life that the engine was swapped out for a 350 and it was converted from 2wd to 4wd! The VIN shows it's a 2wd truck but it is most definitely a 4wd. So it was either converted to 4wd, or a cab with the exact same color scheme was swapped (unlikely). Someone put a lot of money into this truck, and it's kept it's value pretty well. Only a loose bolt and little bit of rust here and there (I'll soon learn just how "little").
The pros:
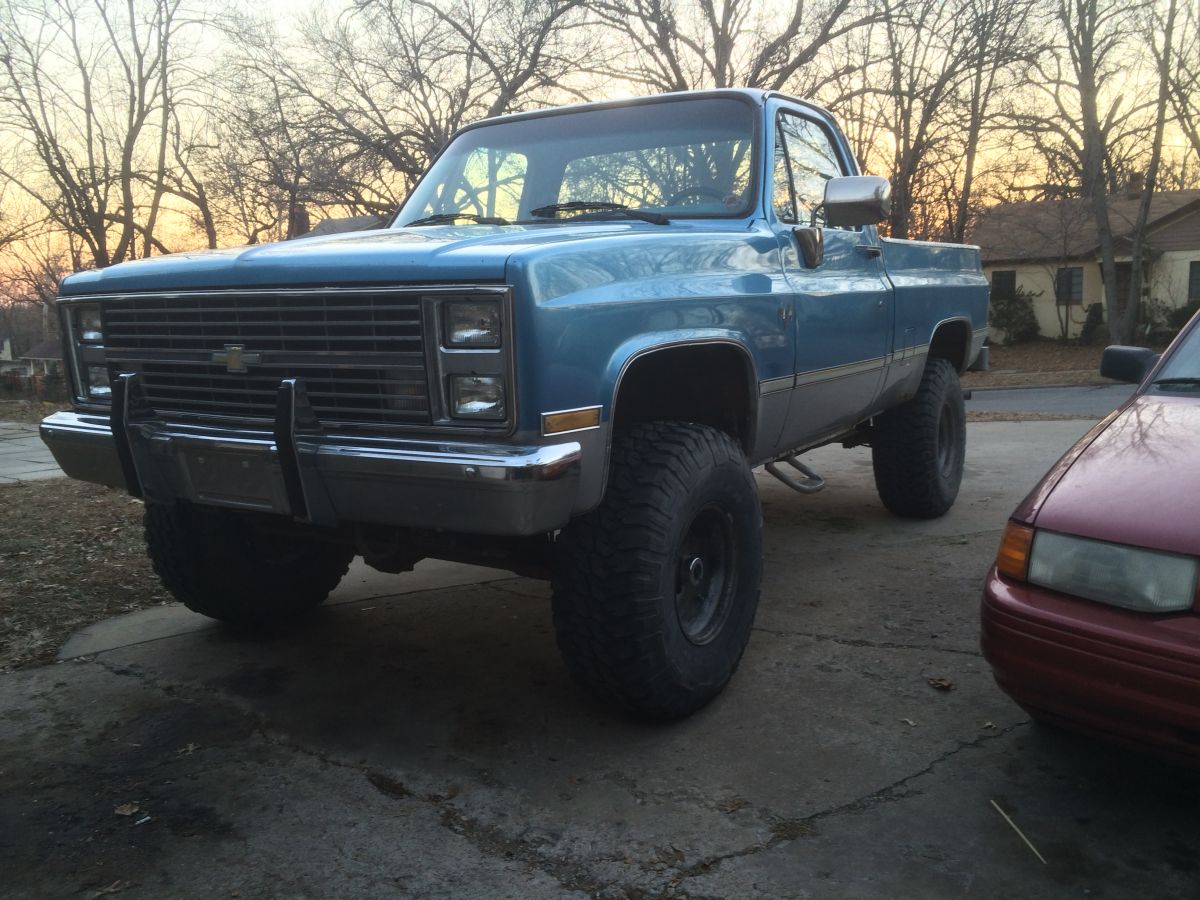
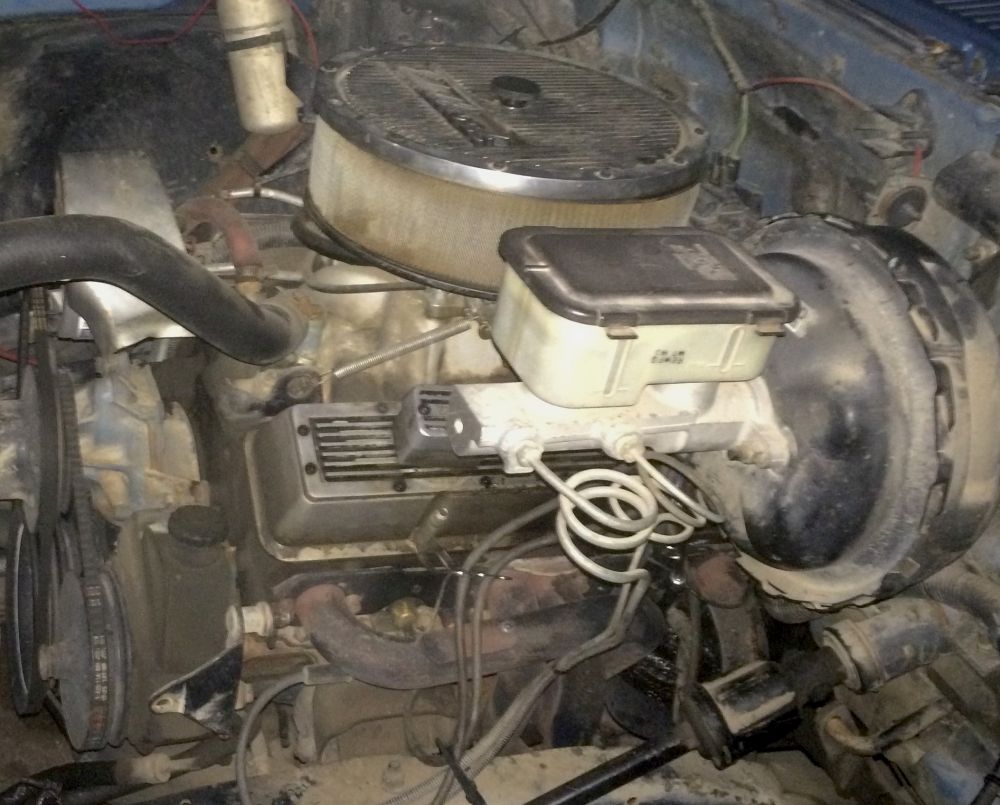
- Chevy 350 small block (SBC) with loads of edelbrock air/fuel parts, headerman headers, etc.
- Muscie SM465 four-on-the-floor manual tranny.
- NP205 transfer case (this is the cast iron, gear driven one that every off-roader wants).
- big ass expensive tires.
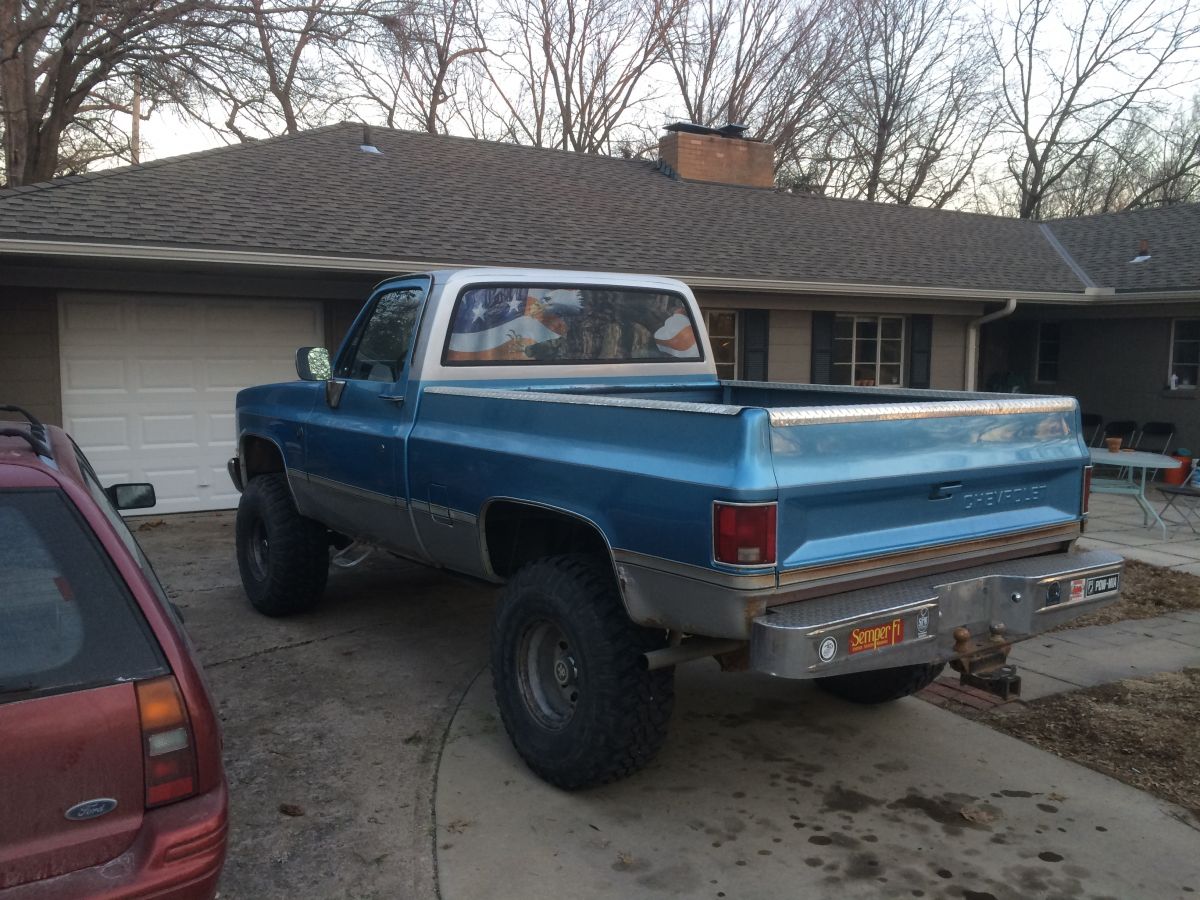
- Short bed. I wouldn't even bother with a long bed.
- Very little rust. Most trucks this age and in this part of the country, you can see through them there's so much rust! Not Hank, he's all there.
The cons:
- Muscie SM465, yes I said this is a pro, but it's also incredibly difficult to drive! These are not like the smooth Japanese sporty manuals. The first gear is basically unusable because it so low, it doesn't even have synchros (sp?) and you're supposed to start in 2nd gear. So it's really a 3 speed tranny.
- Wimpy axles. Both front and rear are GM 10 bolts with 3.42 gears, much too small for the 35" tires that are on the truck now.
- Lots of questionable bits, namely the Mackey rear lift blocks made out of a section of C-channel steel, cut wires all over the place, etc.
- Redneck bling all over the damn thing...
Time to begin checking everything over...
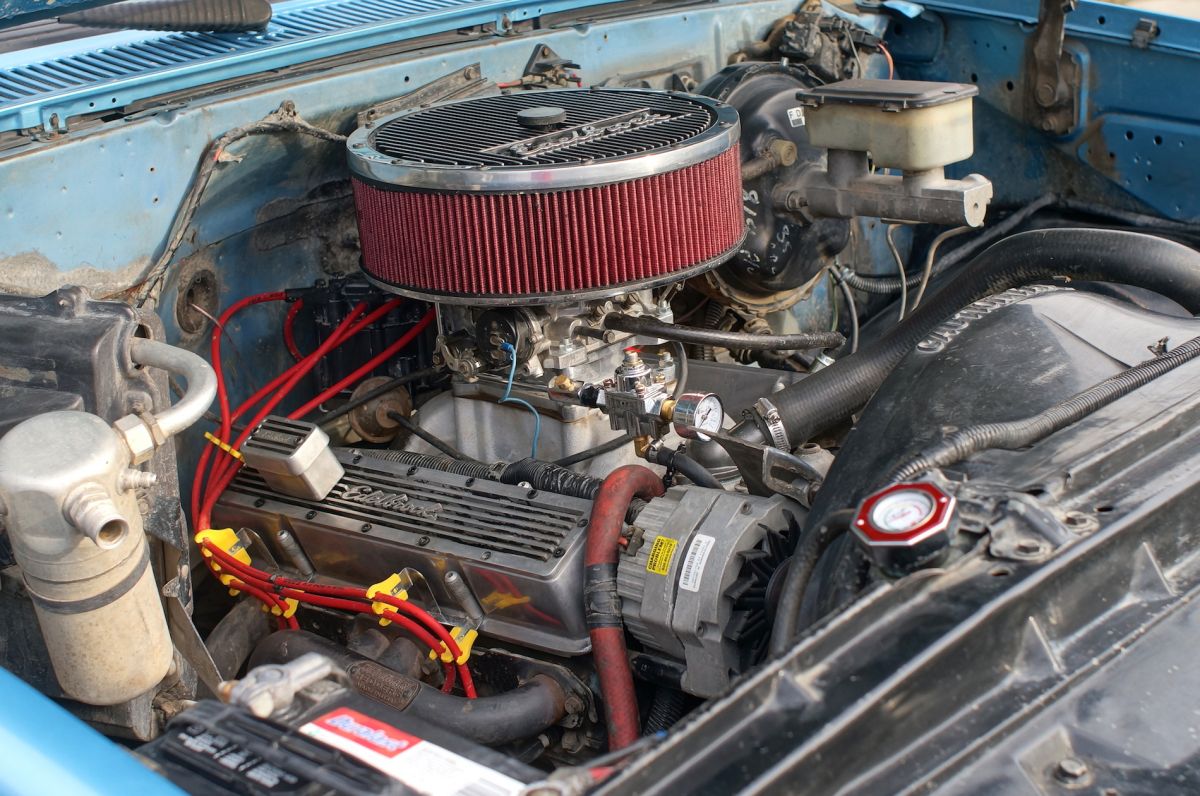
Here's the sad, depressing looking engine as I bought it:
And a looksie down below and.. OH GAWD THE FLYWHEEL COVER IS MISSING!!

At least I could inspect the clutch easily. It looks like one of the newer ones with all those little fingers (don't know if that's the technical term or not), I think the older ones had 3 or 4 big ones.
I searched high and low for a flywheel cover. Hard to find! LMC truck did not have one. I saw one that looked like it may fit on ebay, so I bought it and crossed my fingers. Not only did it arrive earlier than expected, but it fit! Believe it or not, it was called a "1955-1962 Corvette Bell Housing Underpan". So for anyone looking for a flywheel cover / clutch cover for a Chevy 350 mated to a Muncie SM465 manual tranny... search for a "bell housing underpan", that's what GM calls them. Oh, and I needed 4 x 3/16" bolts, 1/2" long, course thread.

Yes, there's a lot of oil down there. I bet the main seal needs to be replaced, and that's a major job...
 In fact, I need to clean the whole engine. A clean engine is a clean mechanic (yeah, right). That's when I noticed that the #8 cylinder's header pipe still had it's black paint on it while all the others had the typical heat rust. That can only mean one thing: the cylinder is not firing. My first assumption is that the spark plug wire is jumping to ground. Just look at those ugly wires! Half of them are melted from the exhaust.
But first, gotta clean the engine. I park the truck in the yard where the garden hose can reach and begin scrubbing and hosing it down. Once finished, I started it up to drive it back to the driveway. That's when a hit a major gumption block. I turned the truck engine on, it starts up just fine, then the RPMs slowly began to drop and the engine stalled. I could not get it to start after that. I switched to the other tank which had even more gas (this truck has two gas tanks), but it was not starting either. I took the distributor cap off and there was a little fluid in it (later I learned this was just wd40 not water), so I took it off and gave it a little (more) WD40. I checked spark on several wires and they where all good.
Next I grabbed a can of starter fluid and, while I cranked the engine, my roommate sprayed it into the carb. The engine backfired back up the carb and it caught on fire. I may have overreacted when I grabbed the fire extinguisher and gave it a quick blast into the carb. So now I have an even bigger problem: extinguisher powder down the carb.
Here's a shot of the carb, now with exhaust dust all up in it:

At this point it started raining, so, with the truck still in the front yard, I put one of those easy-up canopy tent things over it.

I took the carb off, was pretty easy to do. In this pic, you can see my attempt to clean the intake manifold, the front of it at least. It's an Edelbrock performer series dual plane intake.

The carb is an Edelbrock performer 1400, I'm told it's really reliable and maintenance free and a great street carb. I drenched it inside and out with two cans of carb cleaner and all the powder is gone now. I could have took it apart to adjust the floats, but it was running perfectly before so I think I won't mess with it.

But before I put it on I wanted to test the fuel pump, so I had someone crank the engine for 10 seconds while I watched the fuel line that goes into the carb. No fuel came out. We switched to the other tank (both have plenty of gas) and it was the same story. So I pulled the old fuel pump off and it literally fell apart as I took it off the engine. Luckily no little bits fell into the block.
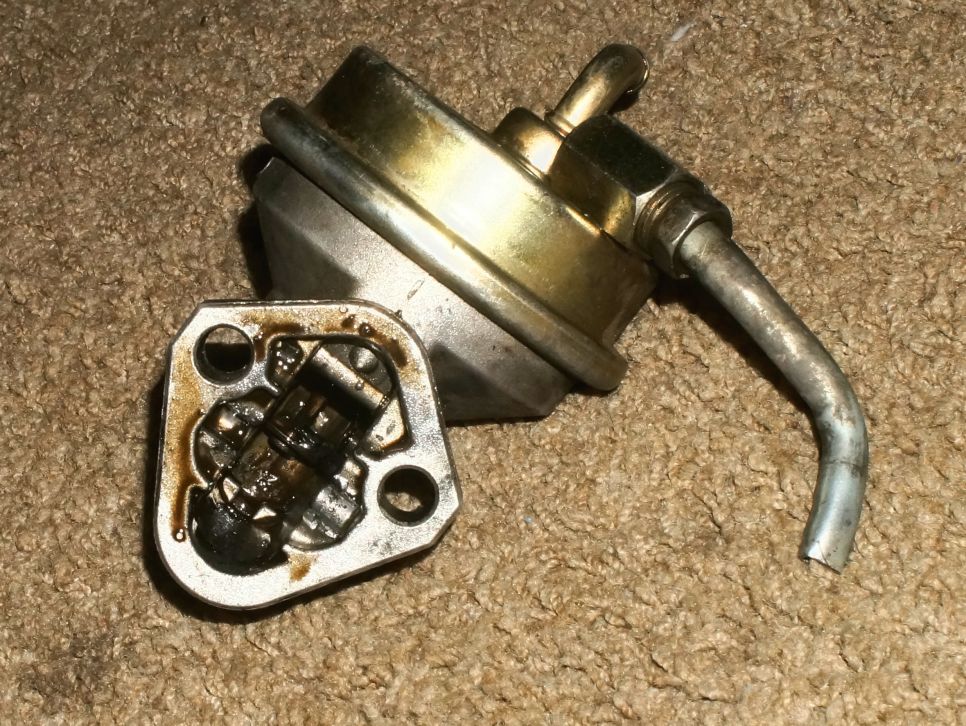
Bought a new one from Oreilly's for $20, along with a new fuel filter and pvc valve (why not?), installed it (yes I made sure to lift the pushrod thingy), and did the same test as before. Nothing. No gas came out Dammit!
My next step was to hook a little bottle of fuel to the new fuel pump and see if it can pump that. Or maybe 10 seconds or cranking just isn't enough to get fuel from the tank to the end of the empty fuel line. Will have to prime the carb. But the battery was now drained. I don't have a true battery charger but I do have a motorcycle battery tender, much too small for these batteries but if I let it go overnight it helped by a few volts. At this point in the weekend it was now snowing and 10 degrees out side and I had to take down the ghetto garage because it was so windy it was going to knock it down. Plus I was hung over and wanted to watch the super bowl.... 2 1/2 days of work and truck is still not running. That Sunday a cop showed up because a neighbor called complaining that the truck was parked in the yard, he gave me a warning for "parking on an unimproved surface". I had to get some friends help me push the truck into the street and then back into the driveway. Was not a good day....
Once the weather and my head cleared up, here's what I did to get it FINALLY running:
- Installed a CLEAR fuel filter BEFORE the pump so I could see if fuel was getting to the pump
- Hooked a long fuel hose to the IN side of the fuel filter, and put the other end of the hose into a bottle of gasoline. When I cranked it, gas came out the other end of the fuel pump, so I knew that the pump is working good
- Hooked everything back up, put the carb on, and cranked the engine for 10 seconds. Looked at the clear fuel filter, no more gas in it now
- Found the fuel tank selector solenoid and started looking around. Found some really cracked rubber hoses and replaced them.
- Cranked for 10 or 15 seconds. Didn't start but this time I could see gas in the fuel filter
- Sprayed a little starter fluid onto the carb and cranked for another 15 seconds. Voila! It runs!!
Replaced two cracked rubber hoses. Here's the worst offender:

Finally, I could now replace the spark plugs and wires! After all, that's what I set out to do in the first place...
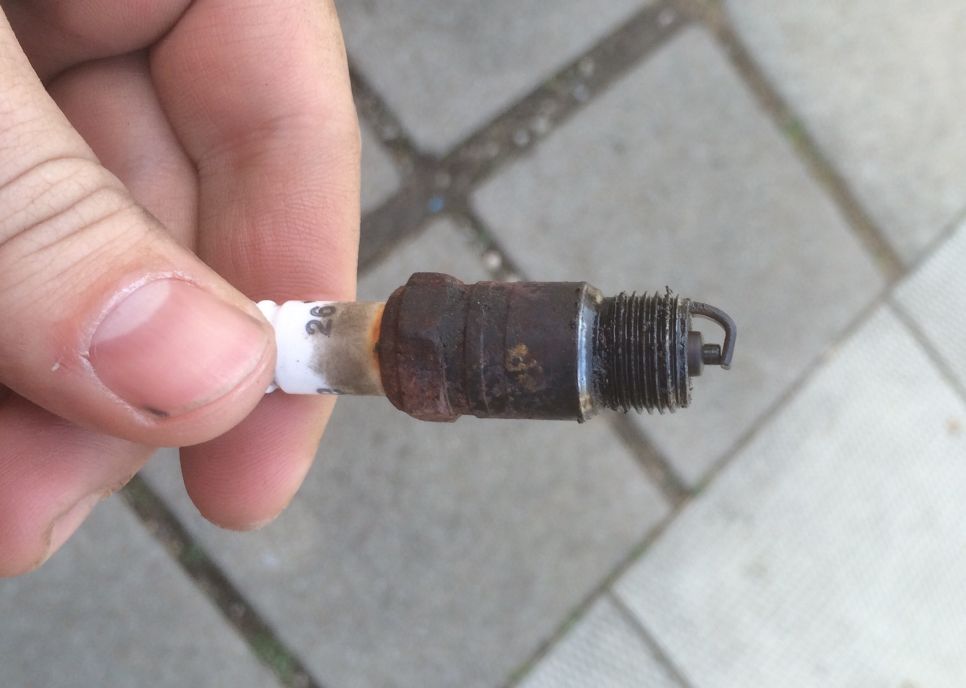
That was the #8 spark plug. Yeah, I don't think that's enough resistance to create a spark!!
With the new fuel pump, I was worried that fuel was blowing past the Edelbrock carburetors' float needle and causing a rich condition (MPG was not too inspiring after all, I clocked it at 8mpg when driving to KC). So I bought and installed a Holley fuel regulator. Not all that pricey either, from Amazon. Fitted the second fuel output with a Mr. Gasket fuel pressure gauge.
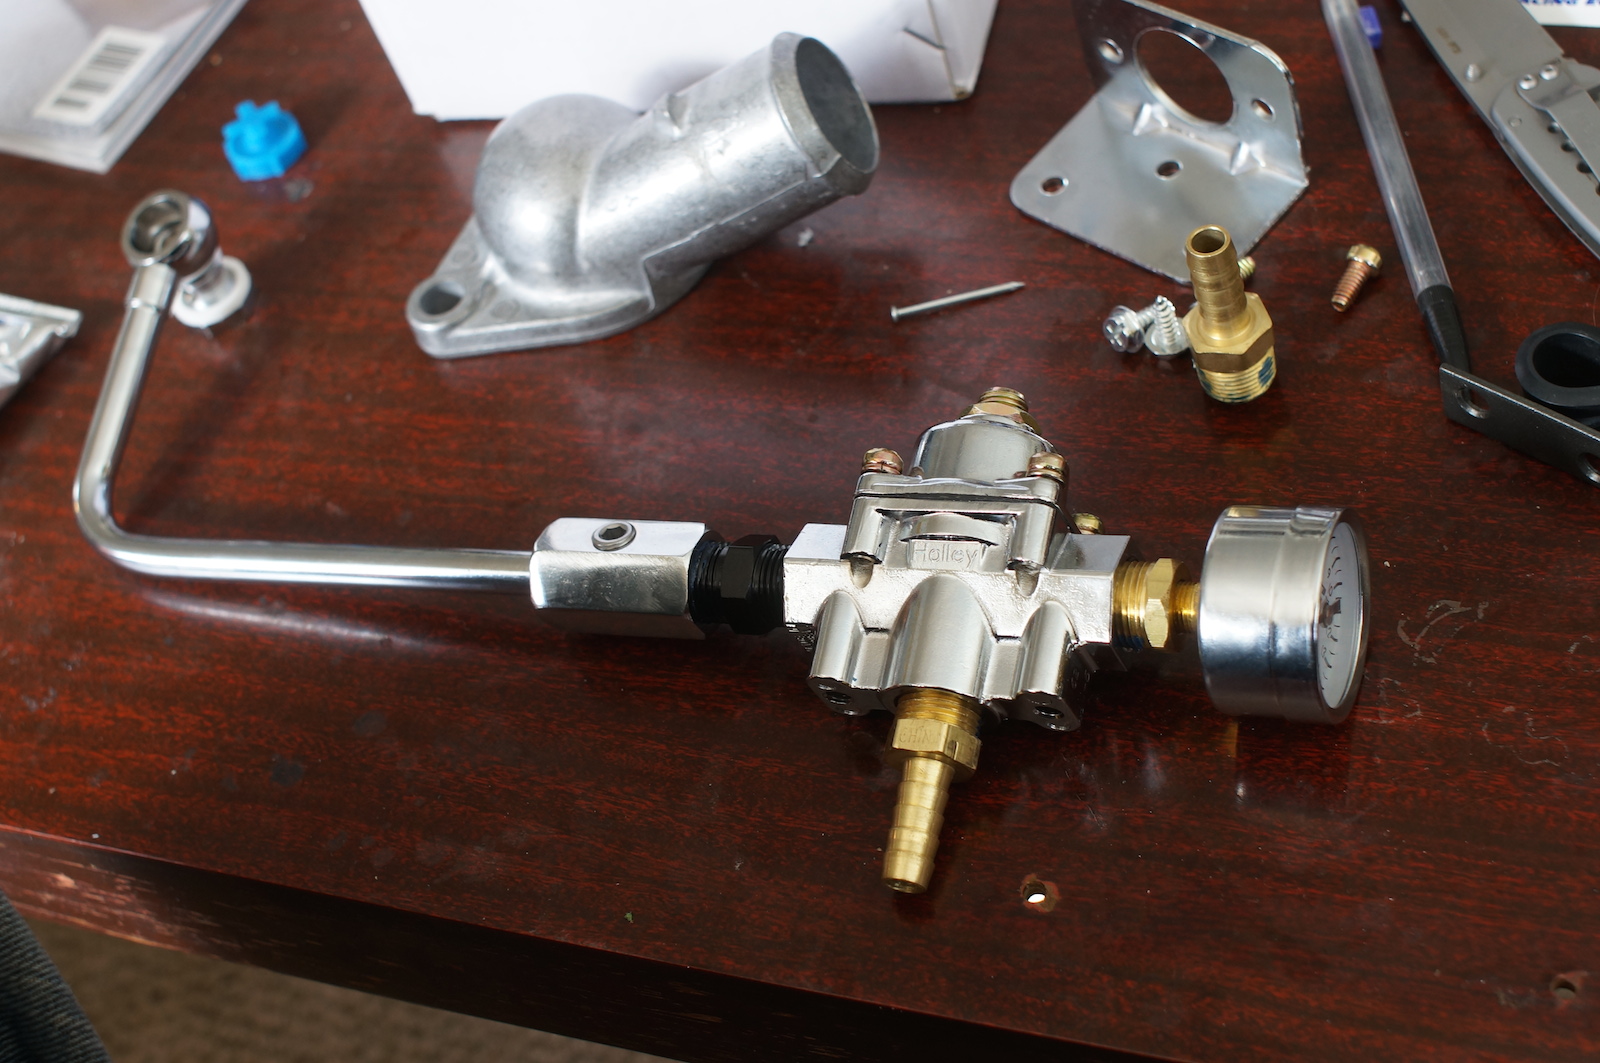
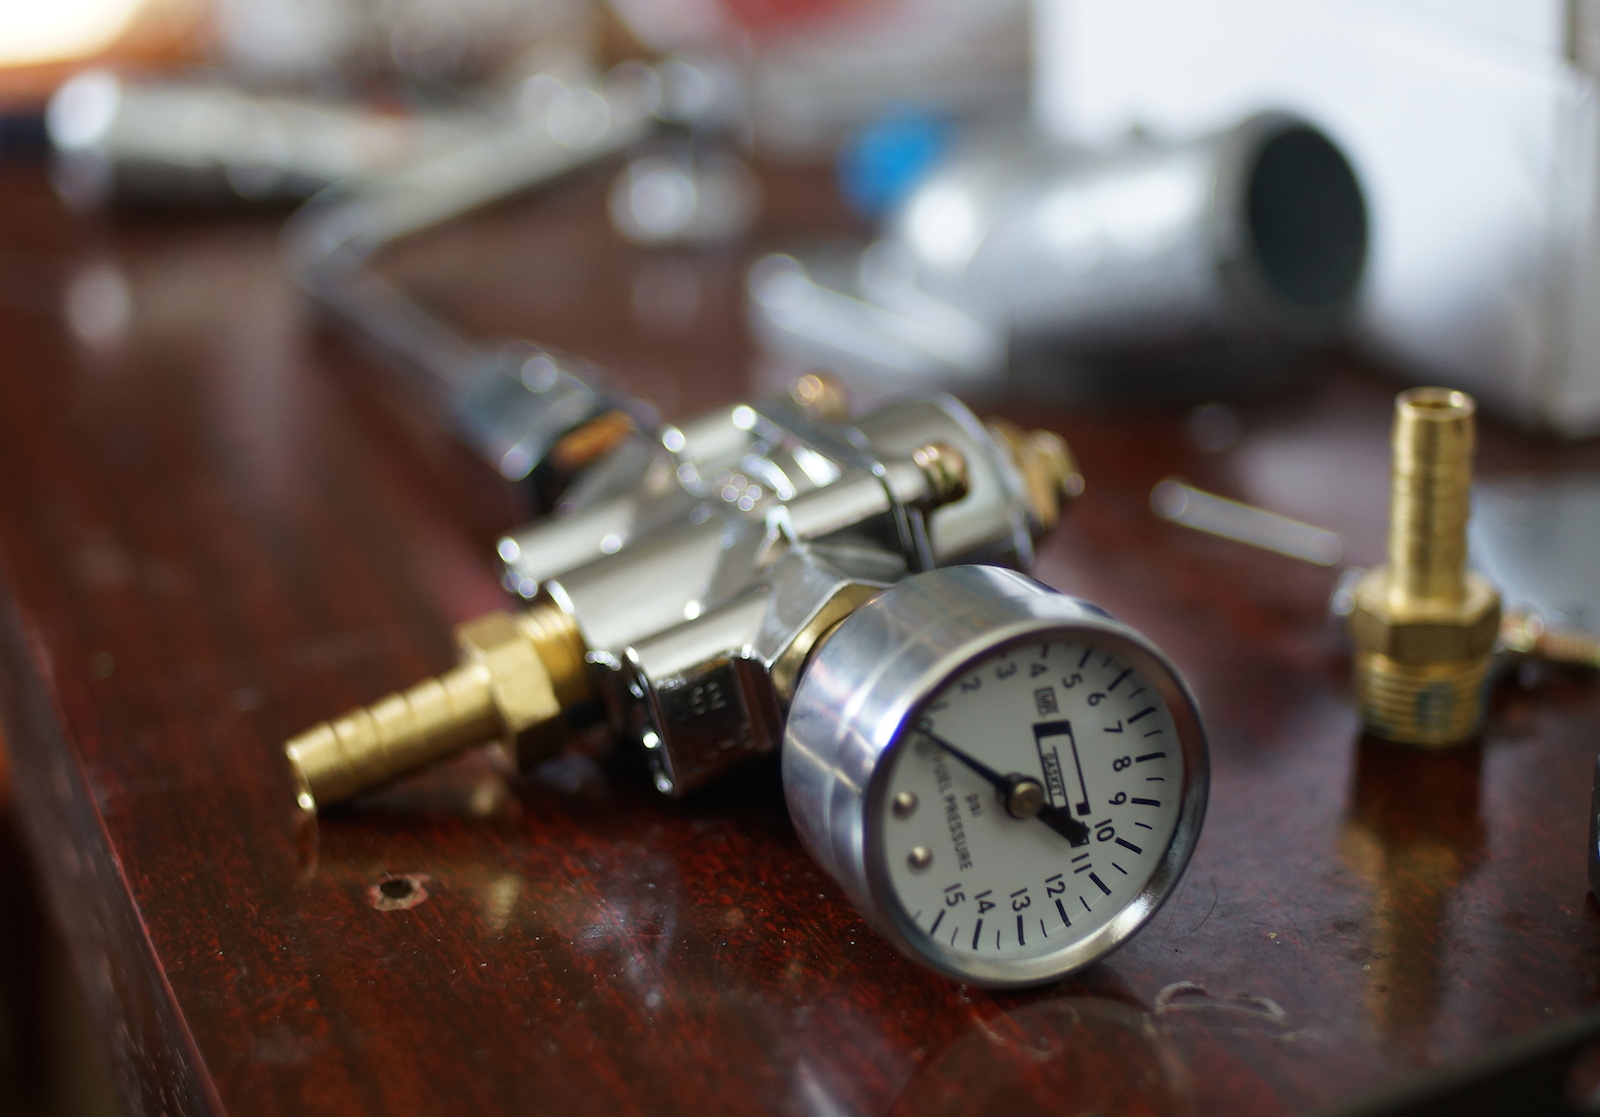
The new fuel line also included a steel fuel line with a banjo fitting which will give the air cleaner a little more room, it was hitting it before. But in order for it to fit all with the big fuel regulator and it's fuel line input coming from underneath, I needed a little more vertical space below the carb, so I added a 2" carb spacer. It worked perfectly! 1" wouldn't have been enough. I don't know if horsepower or torque increased or decreased, but it's runny perfectly fine after the mod so... maybe one day I'll pick up the 4-barrel design and compare it to the open design on a dyno.


And now, the engine rehab was complete. All clean, new spark plugs and wires, air filter, timed and tuned, and completely overhauled fuel system.
I did all this with the engine half way in the garage cause it was raining/snowing outside but the truck would not fit all the way into the garage! lol

Last but not least, I just HAD to get rid of the got awful redneck bling....
...and replace it with something a little more my style. It's a dead giveaway!
Stay tuned for the next chapter in this series: body work and rust removal.