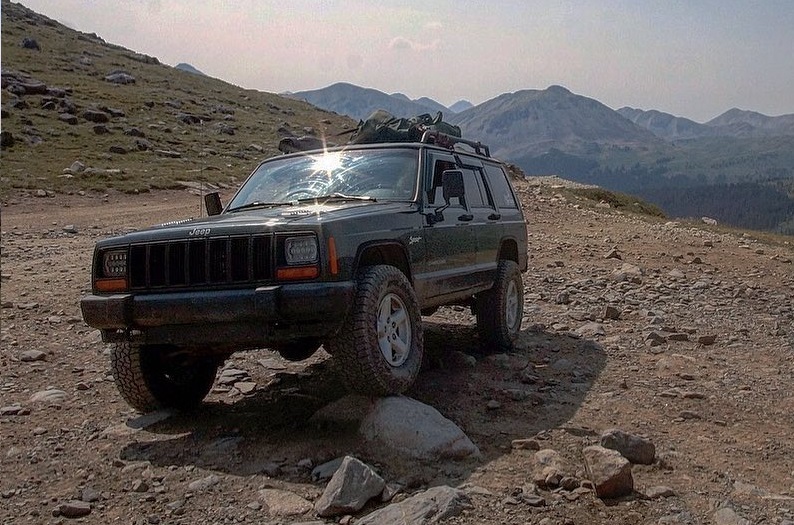
It all started last summer (first summer after buying it, so I don't know if there was a problem before or not) when the radiator exploded when I pulled off the highway to get gas. I did notice the needle was getting a little above normal before the rad burst open. I was towed home and I put in a new radiator, but I found that it was now overheating on the highway after 20 minutes or so.
I replaced the rest of the cooling system and started aggressively flushing the rust buildup out of the coolant passages and it got better, now it only overheated after several hours of highway use. I figured the new radiator was clogged with rust scale and stuff, so last week I swapped it out. I cut open the old one a yeah there was some black crud in it. But a few days ago I went on a 30 minute highway drive and it started getting warm again, like 230*F. I used the heater core to lower it back down to normal temps and drove slow on the way back home.
It had the characteristic of a mild blown head gasket (it would only run hot on the highway, no other problems), but non of the physical symptoms - no coolant visible in the oil, no oil in the coolant, no smoke in the exhaust, compression was great on all cylinders (cold engine), it passed the combustion "block test" both with the rental kit from a parts store and when I took it to a local garage with an emissions test machine, and it passed the cooling system pressure test. I was stumped.
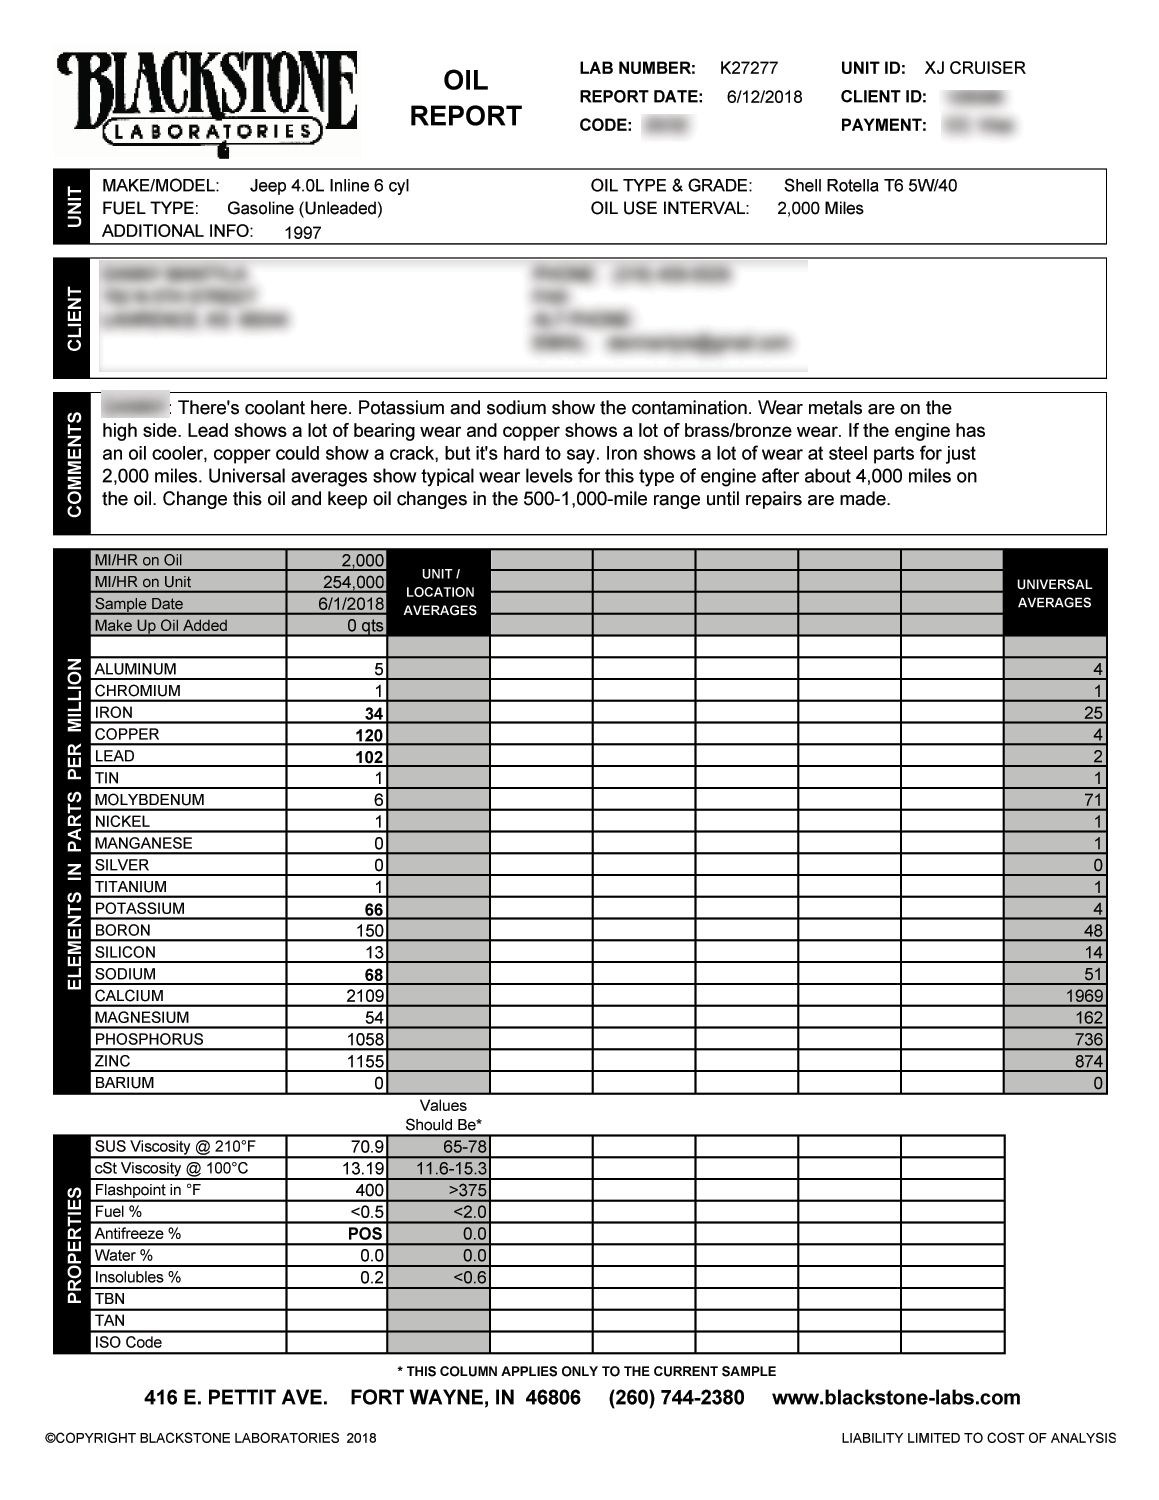
After reading this article, I decided to do the same thing so I sent in my oil sample to Blackstone lab. Here it is:
I was in BHGD (blown head gasket denial) for a few days, even thought about putting Bars StopsLeak in the radiator, but eventually I came to my senses and started removing the head.
There are a lot of good write-ups on how to remove the engine head already on the internet, and in Hayens Manuals and stuff, so I will not go through step-by-step how to do that. But I'll say a few things:
- I found it faster/easier to disconnect the fuel line from the fuel rail, rather than take the whole fuel rail off the intake like some instructions tell you to do. I needed a special tool for this but it was cheap.
- I didn't find it all that hard to get to the exhaust header bolts. Just a 3/8" ratchet and extender was all that was needed, and a flashlight to see, although a few times all I could do was feel with my finders to find the bolt head. A wrench worked for the intake bolts.
- When it came time to physically lift the head out of the engine, it is very long and very heavy so I climbed under the hood and put one foot on the firewall and one foot on the radiator core support and used my body as a crain. Lift with your legs!
- Instead of removing the power steering pump completely, I only pulled the two (or three?) bolts securing it to the intake manifold
- For the head bolts, I needed a 1/2-inch 12-pint deep sock. Oreilly's and AutoZone both did not have it, had to go to Homeless Despot.
While it's not supper obvious, there's signs that the combustion was leaking past the HG and probably getting into other cylinders and into the coolant. Right now it's just a theory, but my theory is that these engines are so badass they run great even with a warped head or blown head gasket. You'd never know until it starts to run a little too hot. And when it does, you can, or at least I could, keep the temps under control by slowing down and turning on the heater. I did that well over a year, including a long trip to Colorado about a year ago. It did boil over a few times but it didn't seem to damage the engine at all. So most people might not ever detect it. There's many folks out there, myself included for a while, who say that these engines just like to run hot and the cooling system just isn't good enough. But maybe they have a tiny head gasket leak just like I did, and they'll never know it!
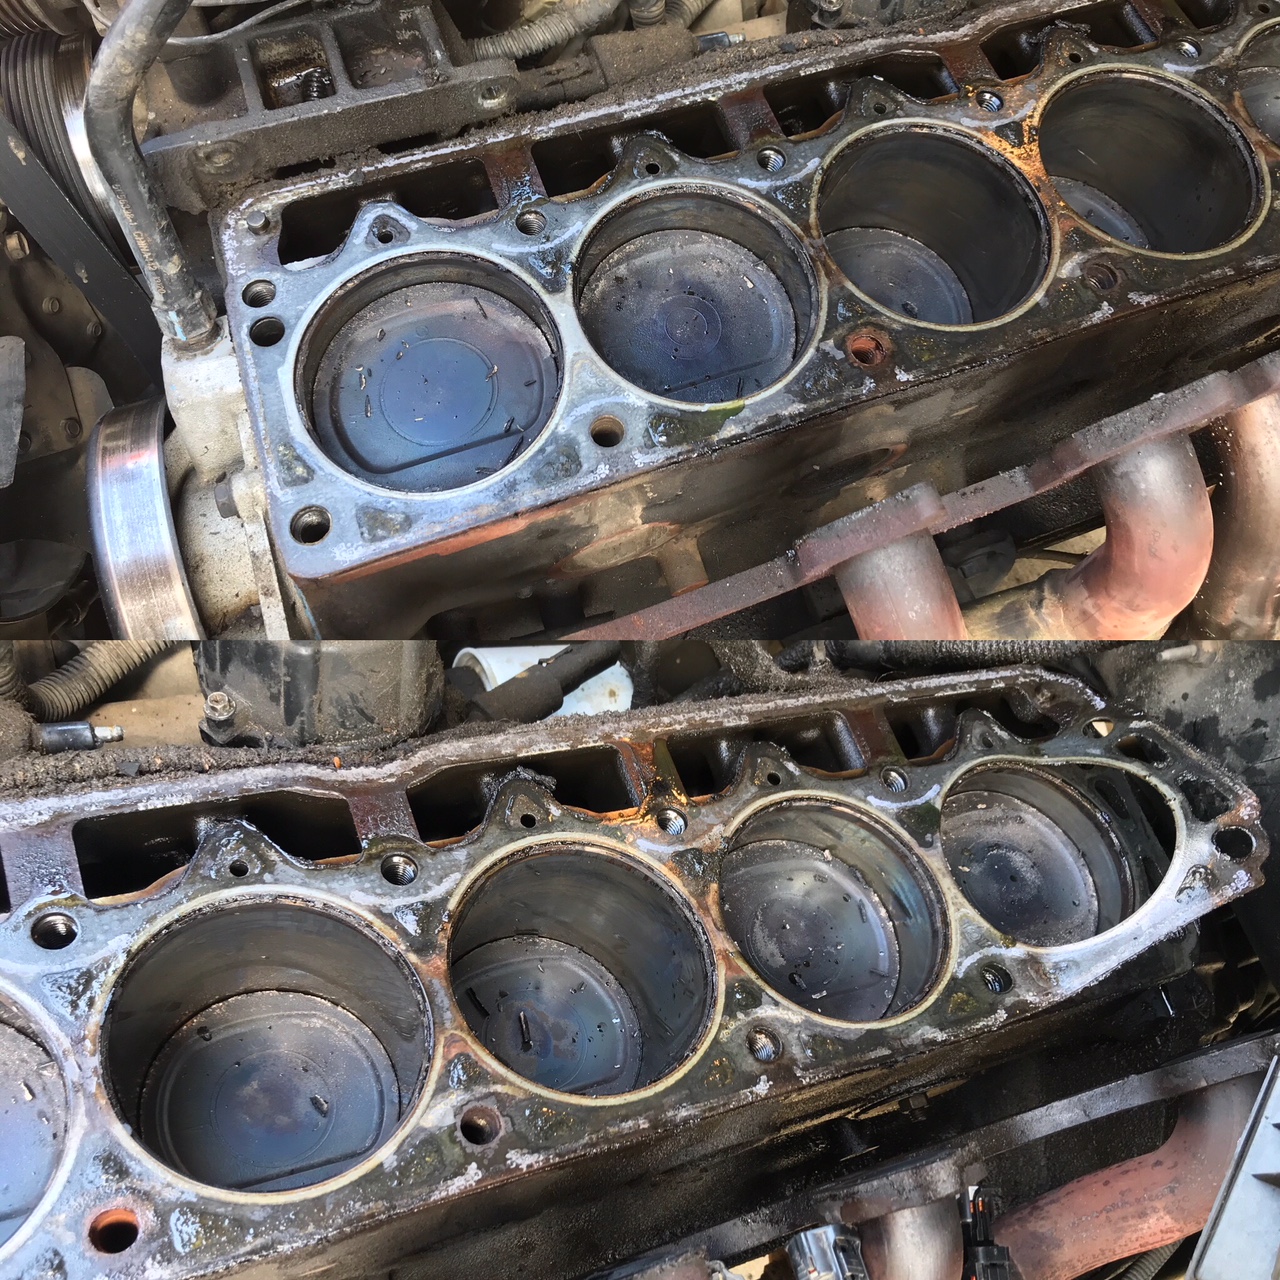
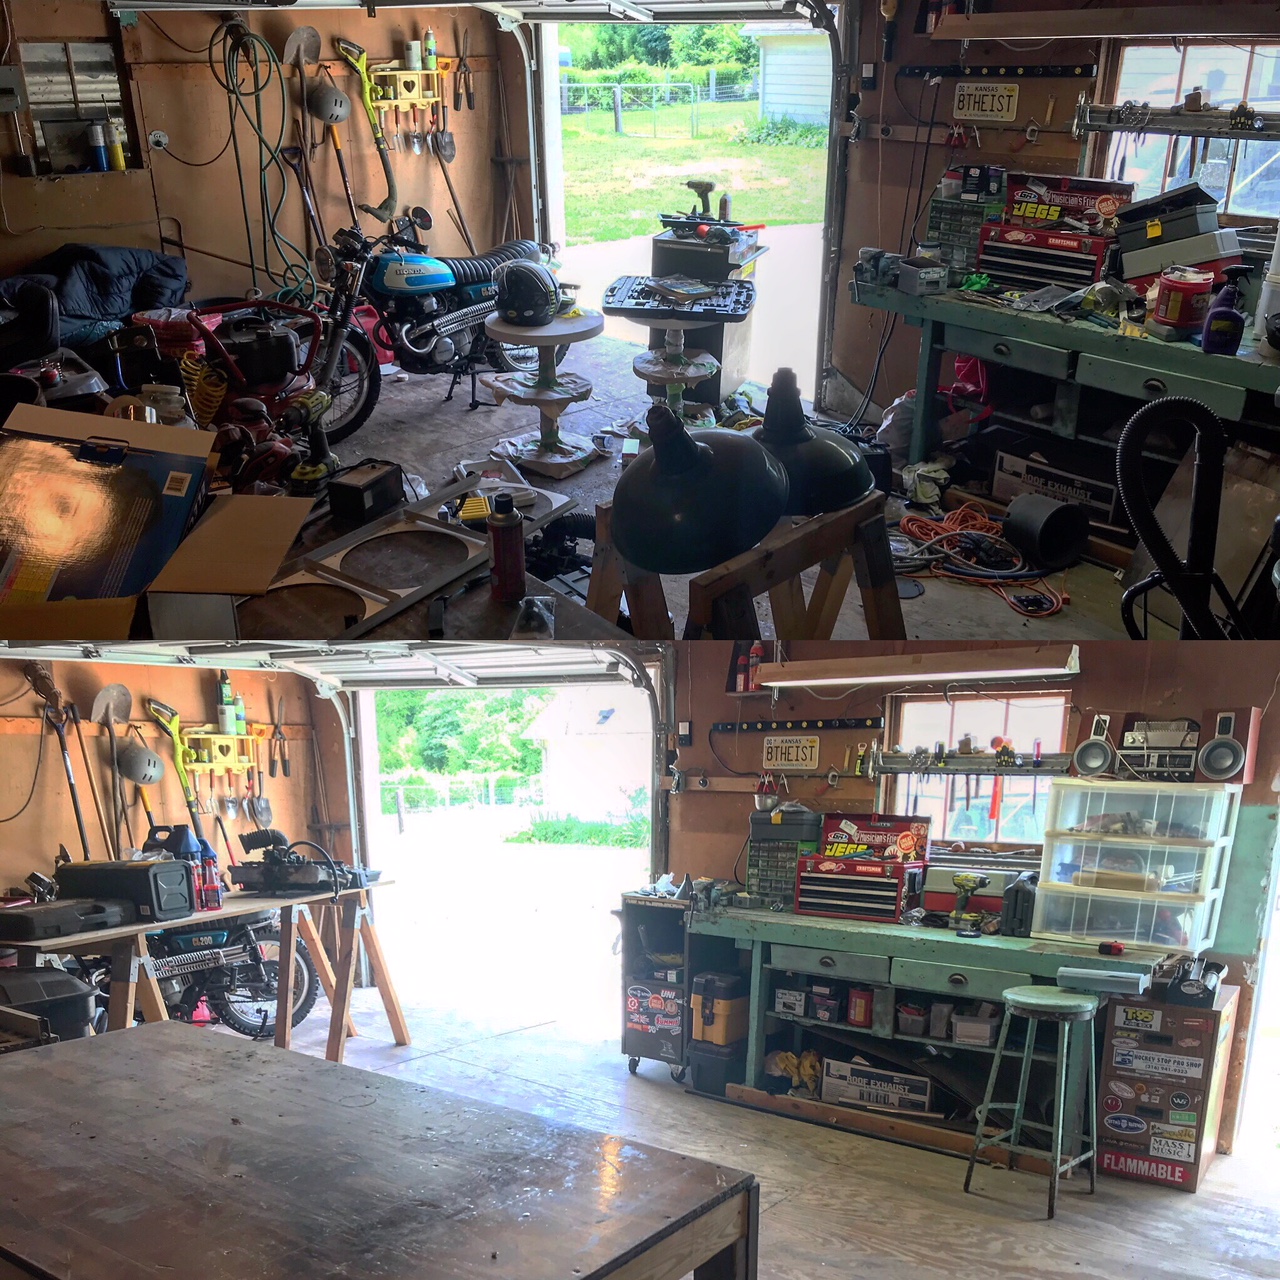
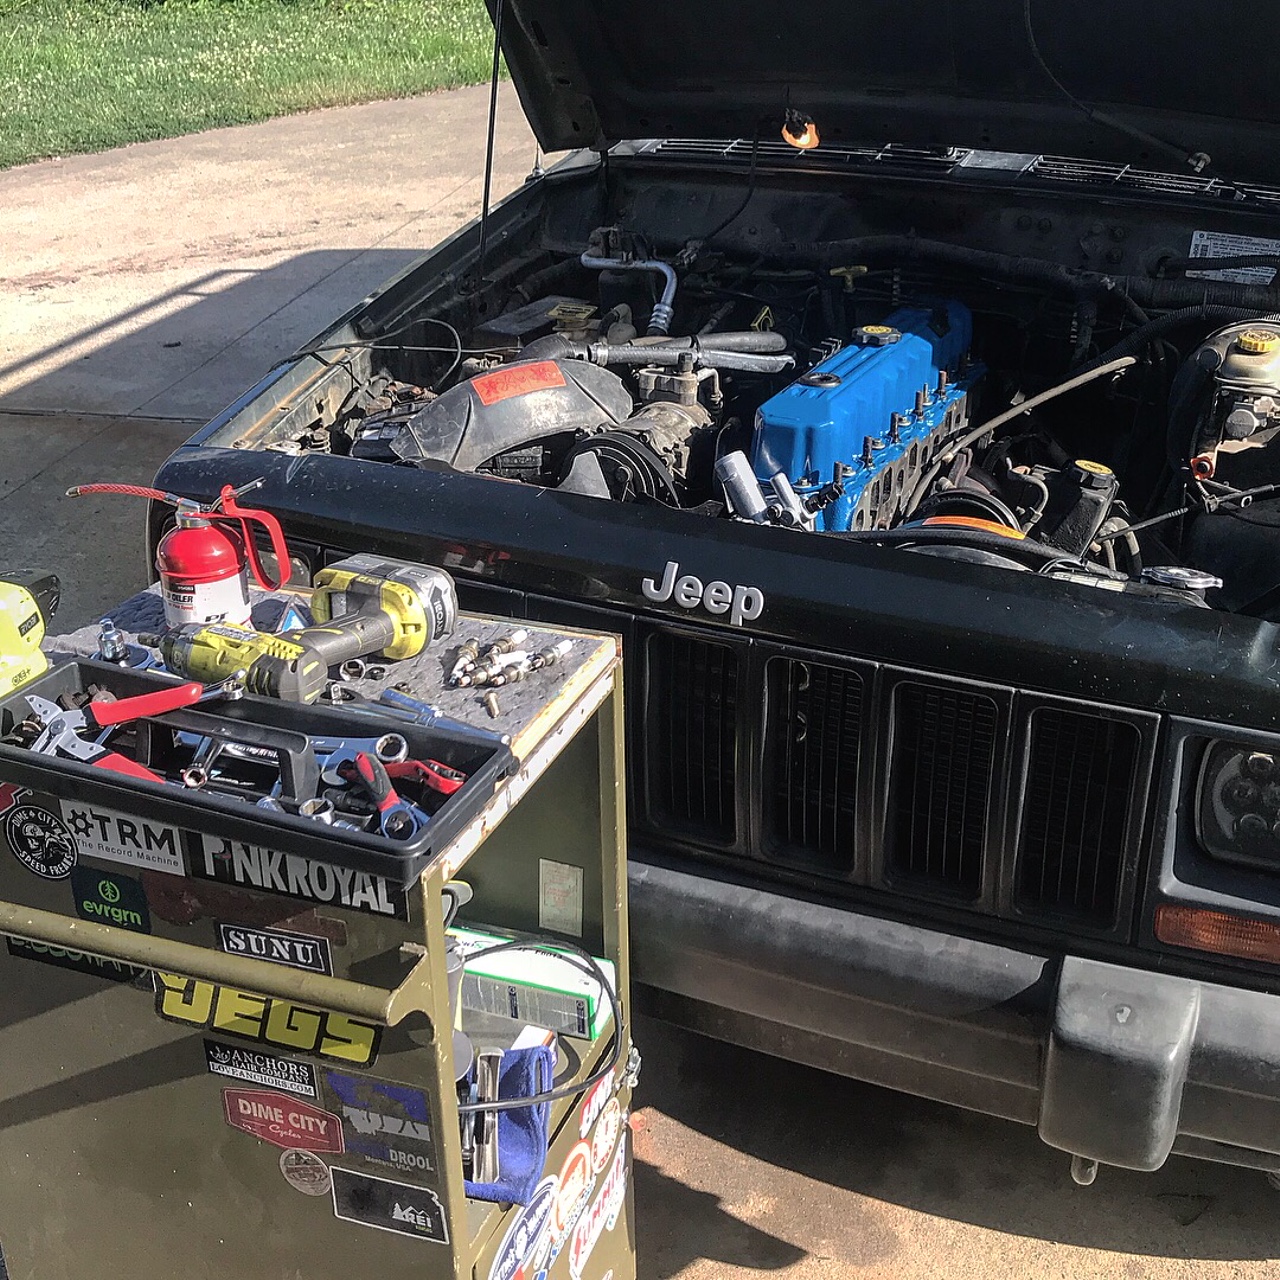
A quick word on the workspace required to do this job: it will help if your shop looks like the one on the bottom and not the top!
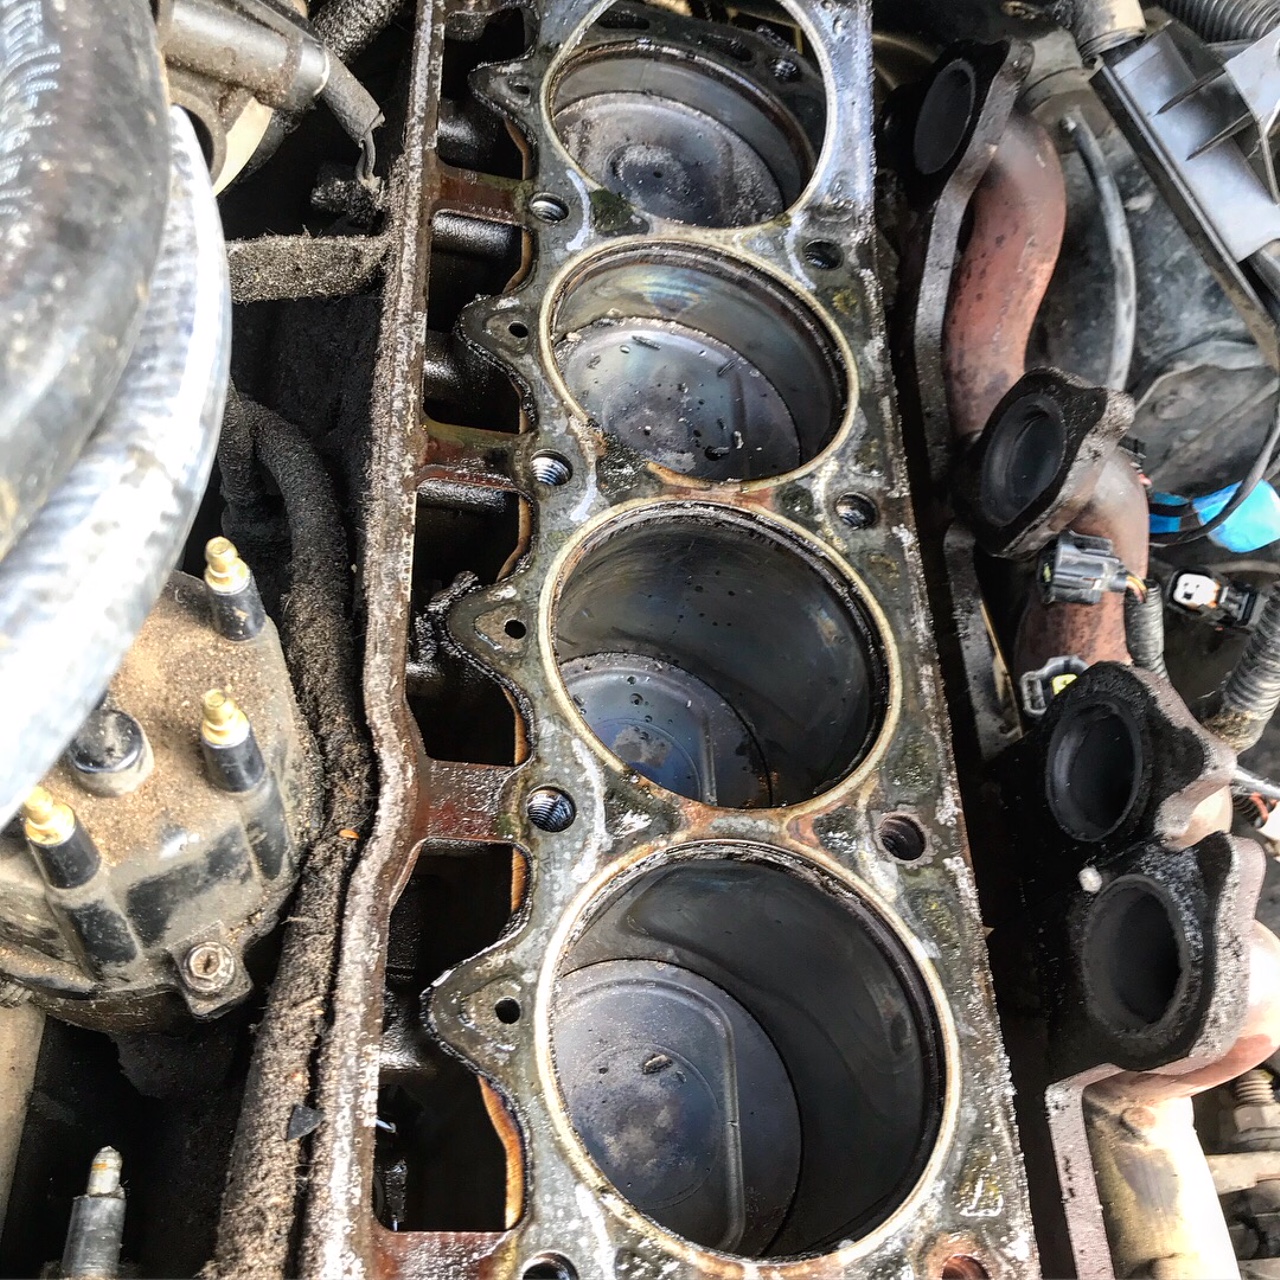
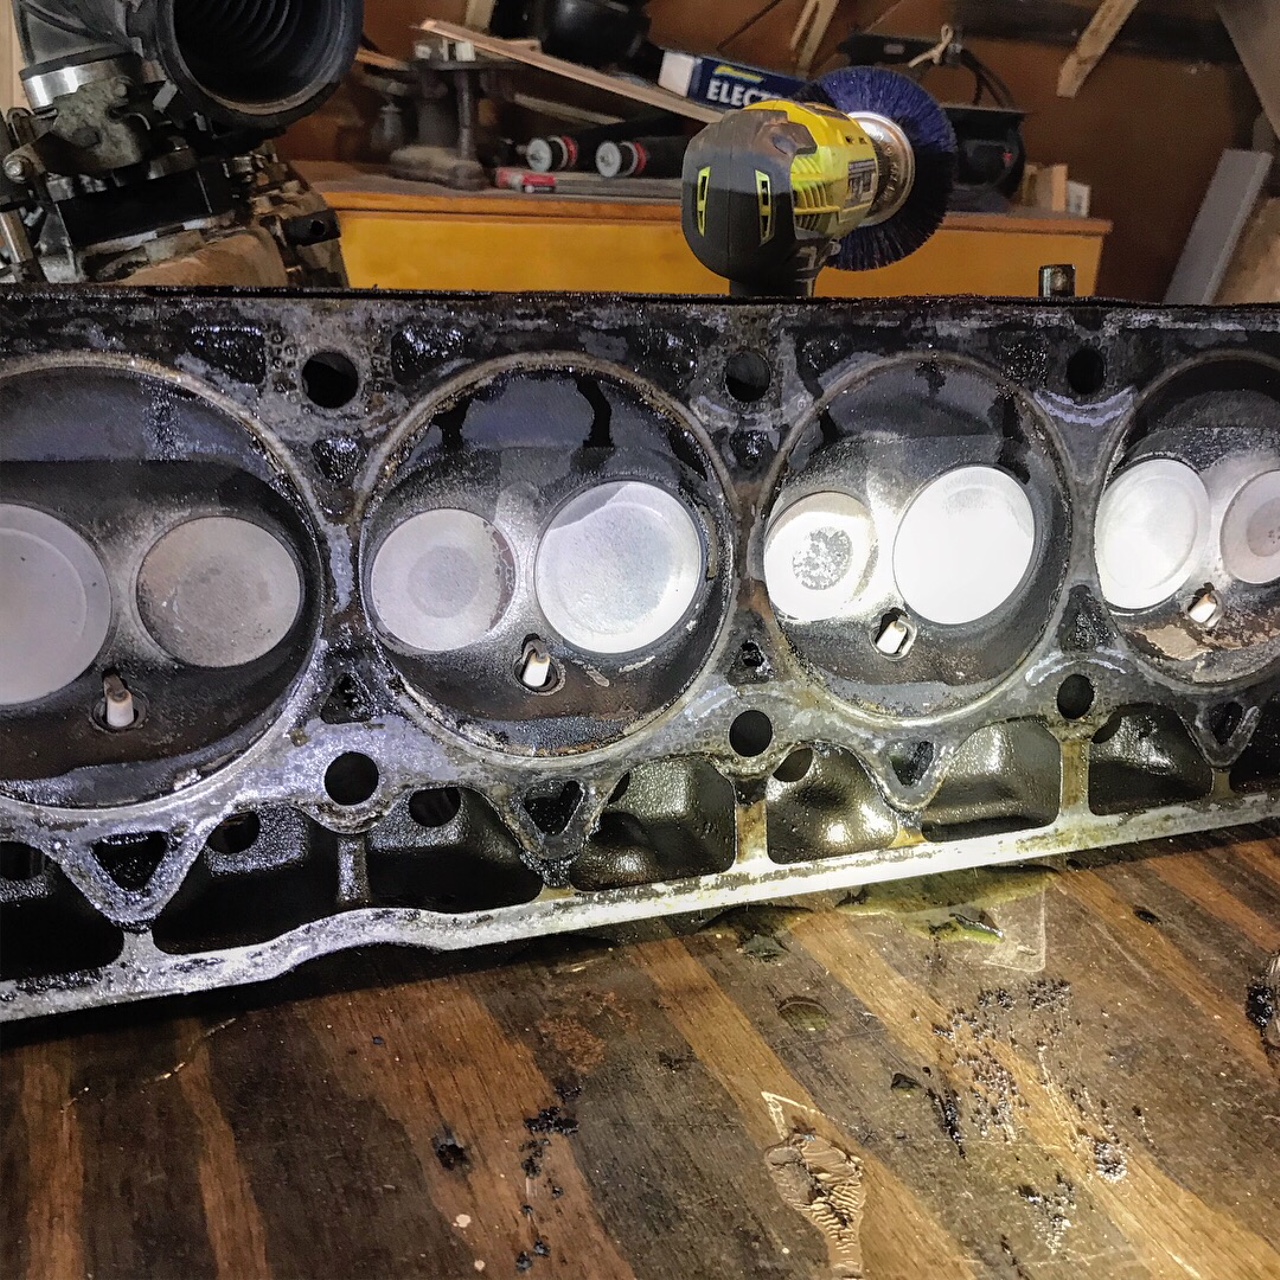
Now with a clean work shop I could inspect the head.
At first I was bewildered because I thought the coolant passages were blocked! Only the ones in the rear and a few on the passenger side were not clogged. But the gasket itself blocks those passages by design.
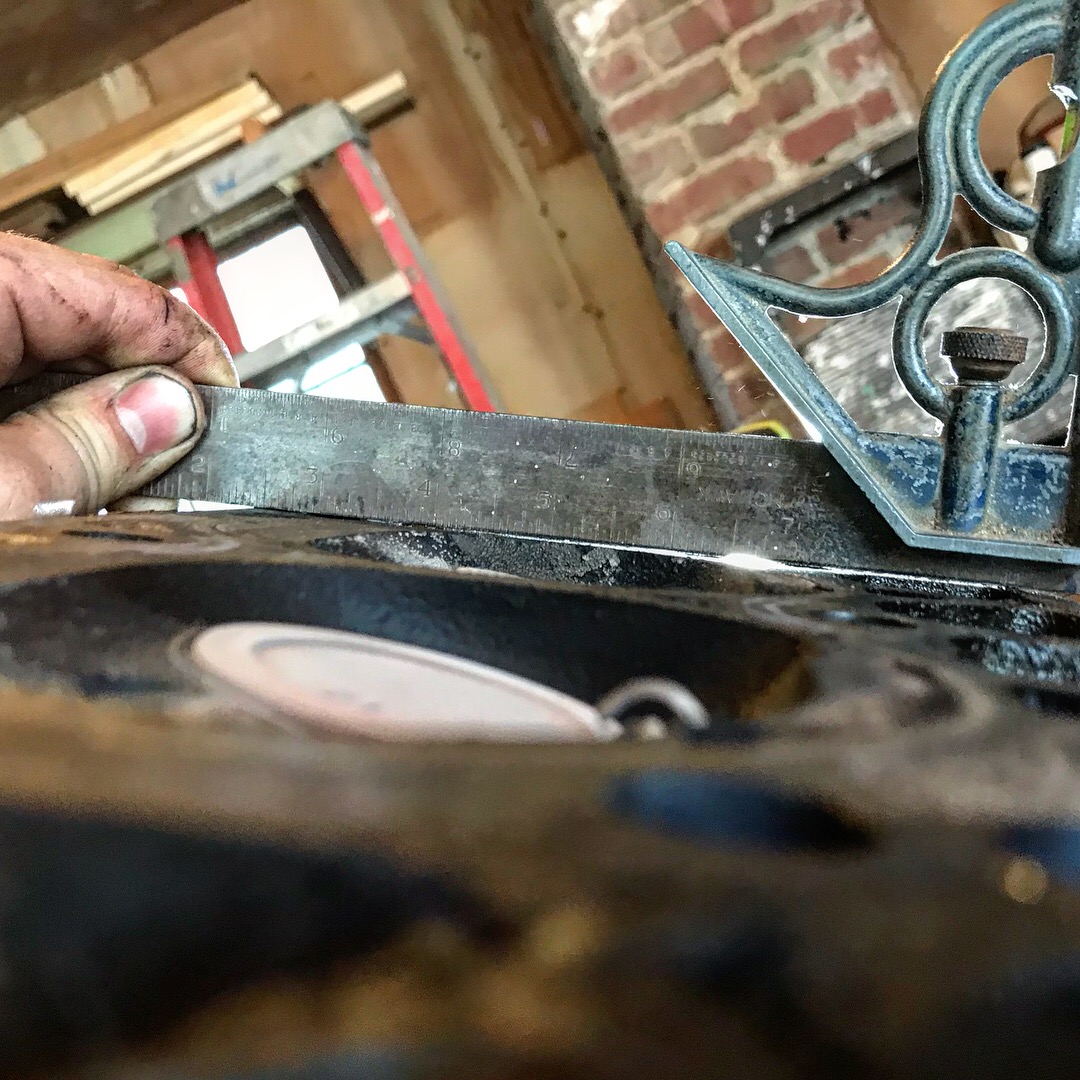
Time to get out the straight edge and some feeler gauges. It was pretty evident that the head was warped when I could easily pass 0.004" under the straight edge.
The next day I took the head to a machine shop. Not only was it warped, but he also needed to look for cracks. At first I wanted just those two things, but in order to look for cracks he had to take it all apart and clean it in the hot tank. So it was all or nothing. He resurfaced the deck (took 0.006" off), magnafluxed it for cracks (found none), and did a valve job. All the exhaust valves were pitted and the ones on the ends were cupped. $300 for these services.
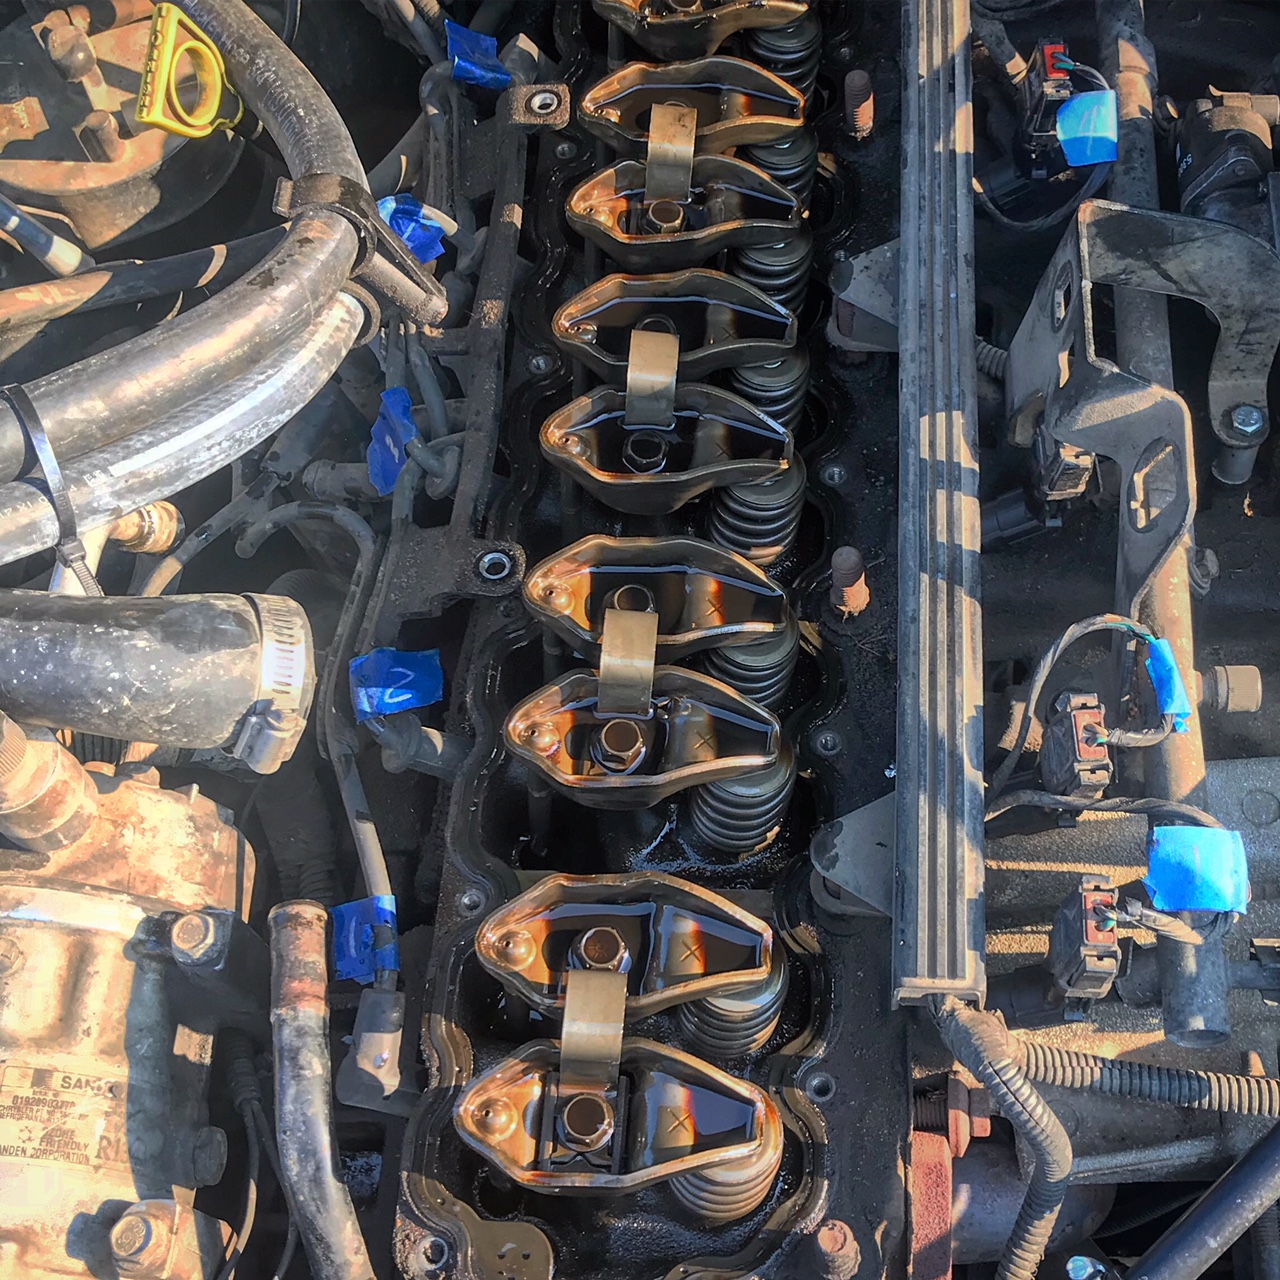
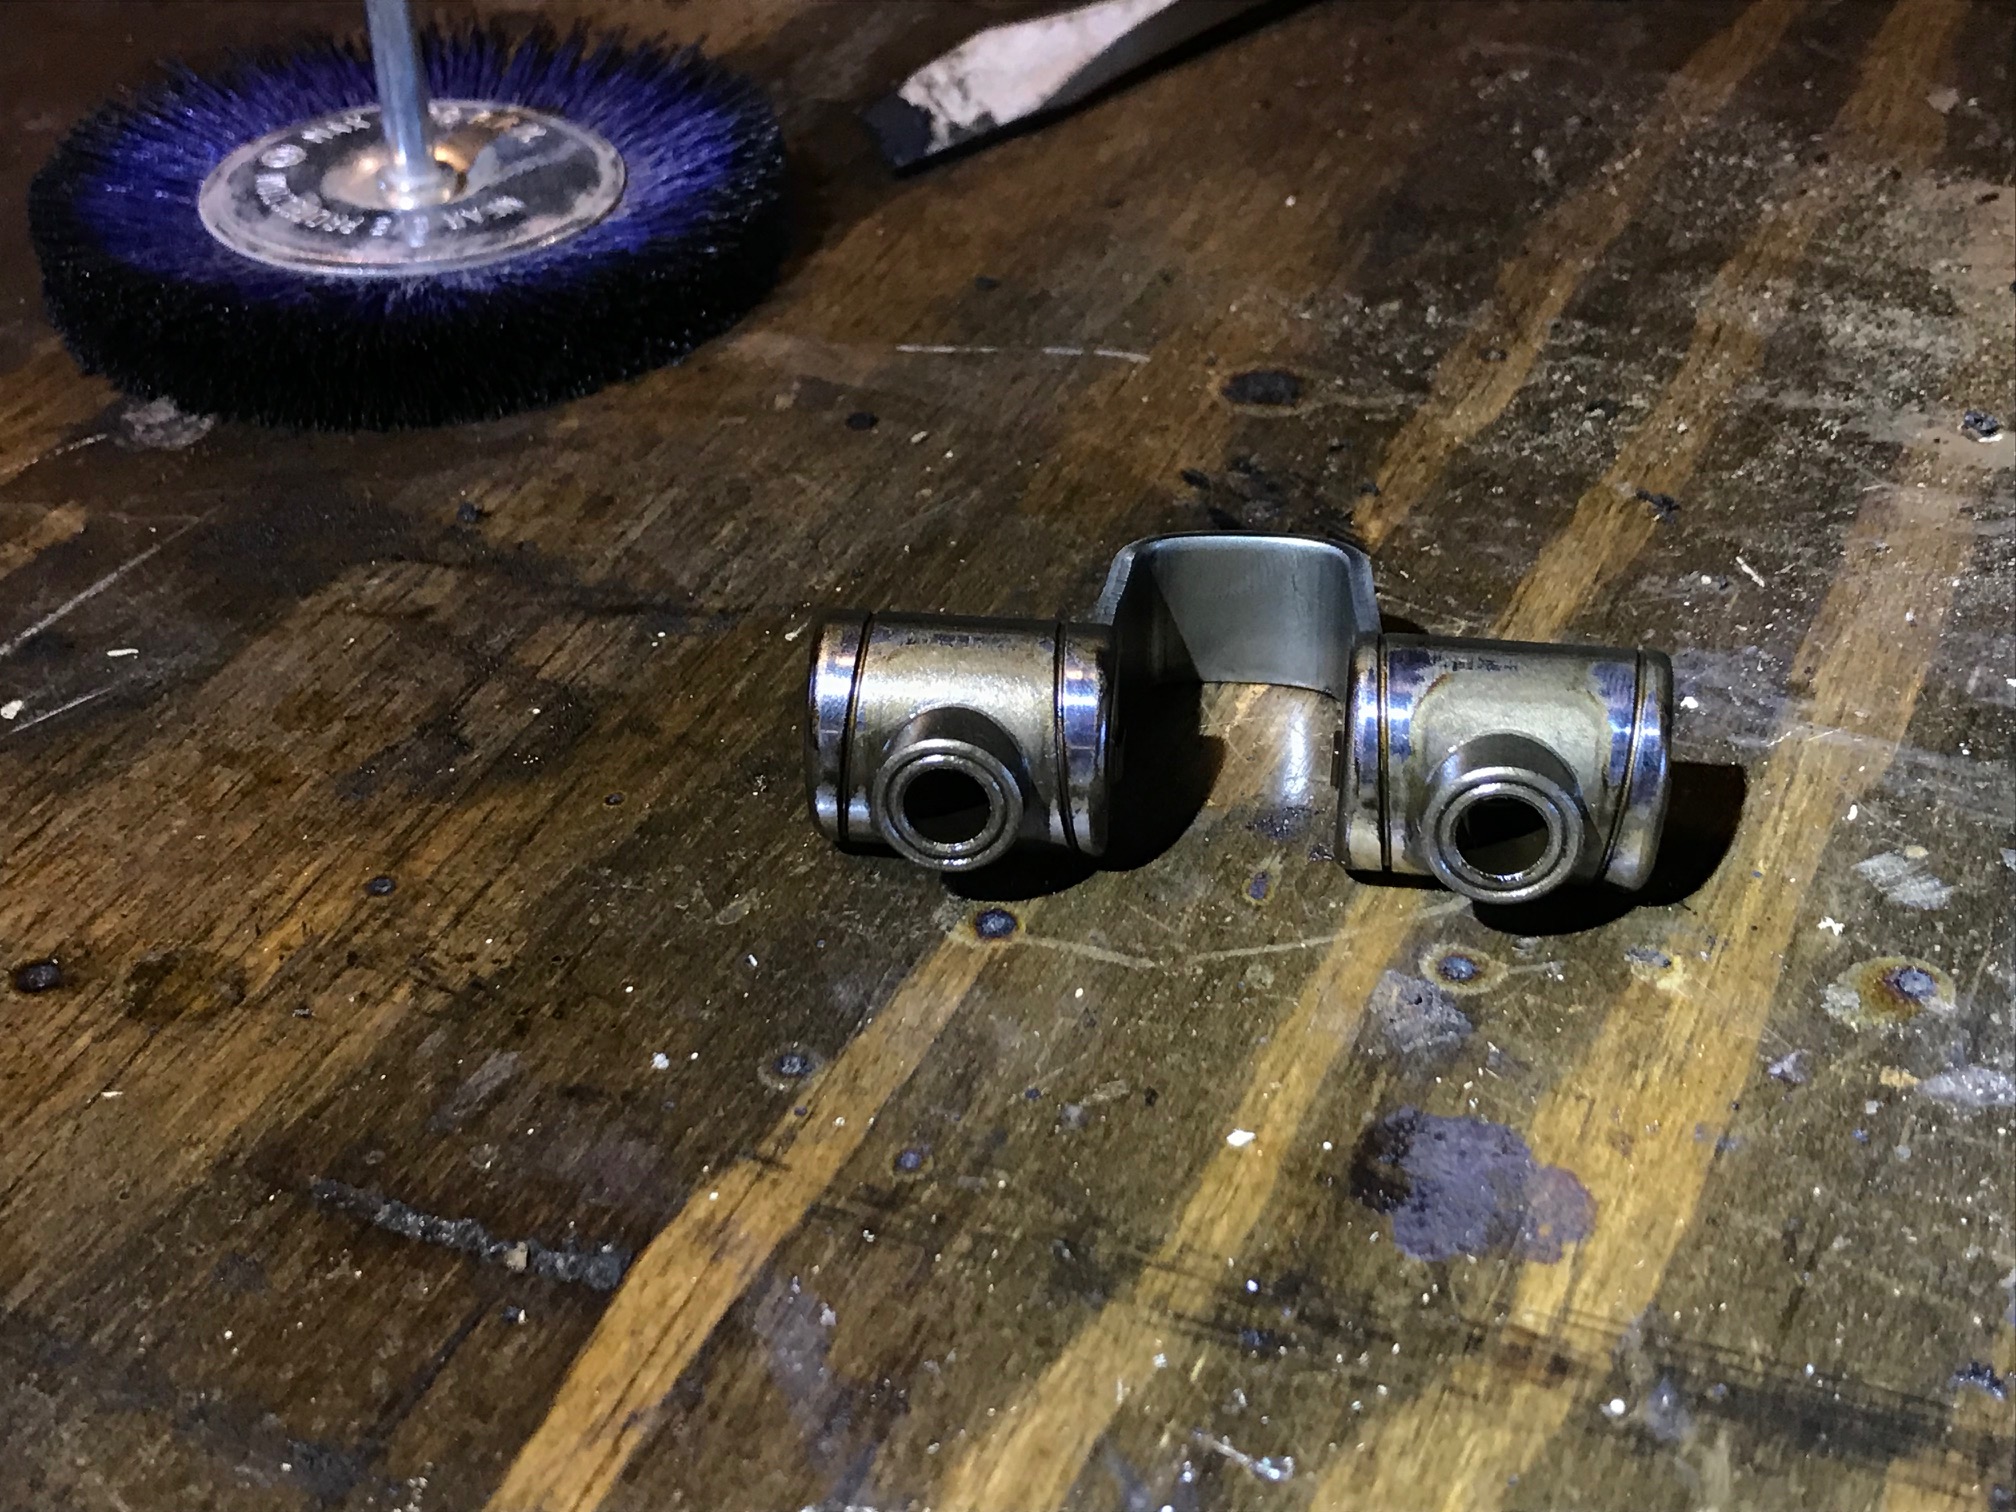
While it was at the machine shop, I took a closer look at the valve train.
The rockers and fulcrums were a little worn but not excessively, so I decided to leave them alone.
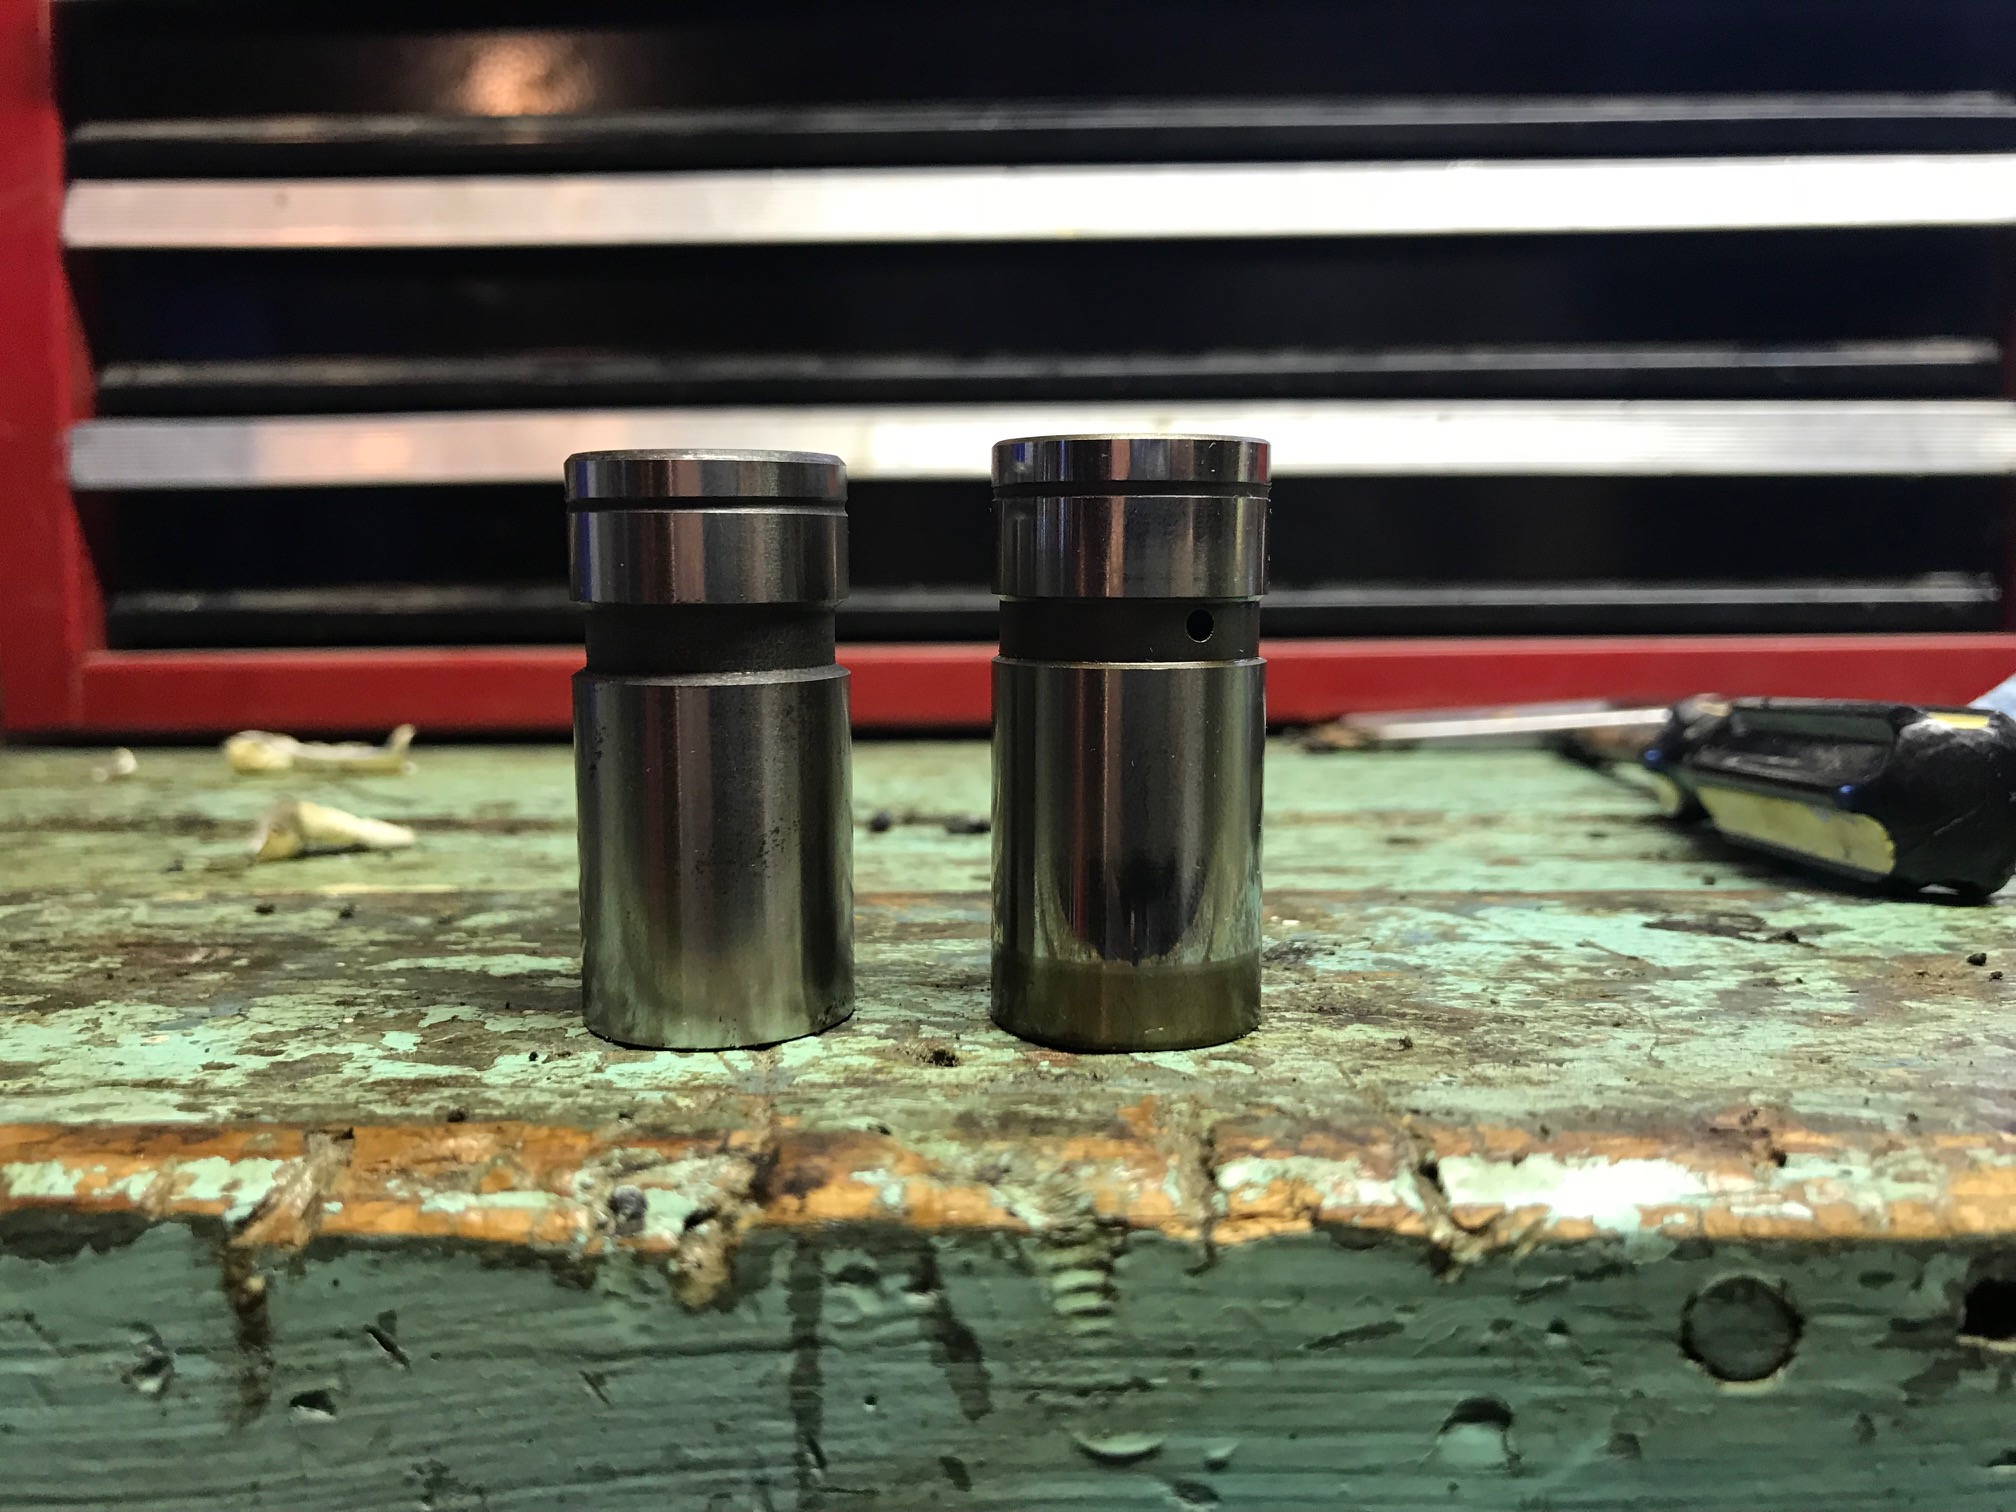
For the hydraulic lifters, I was really torn between the risk of replacing them, which could potentially cause problems with the cam, vs. the risk of not replacing them, which could be a lost opportunity to easily swap them out for new ones to quiet down the engine or if one collapses in a few years from now or something. Because a set of 12 was only $100 and NAPA had them in stock, I bought them. But after doing some research, I realize now that it was a roll of the dice. The could have ruined my old cam shaft. More on that towards the end of this article...
They look a little shorter than the old ones (on the right) but when I put the push rods in them and measured from the bottom of the lifters to the top of the push rods, they were equal.
While waiting for the head to com back from the machine shop, I dropped the new lifters into their cylinders. But before doing that, I put some assembly lube - the gray gritty kind with moly in it - on the bottom of the lifters. This is very important! More on this and why in a moment...
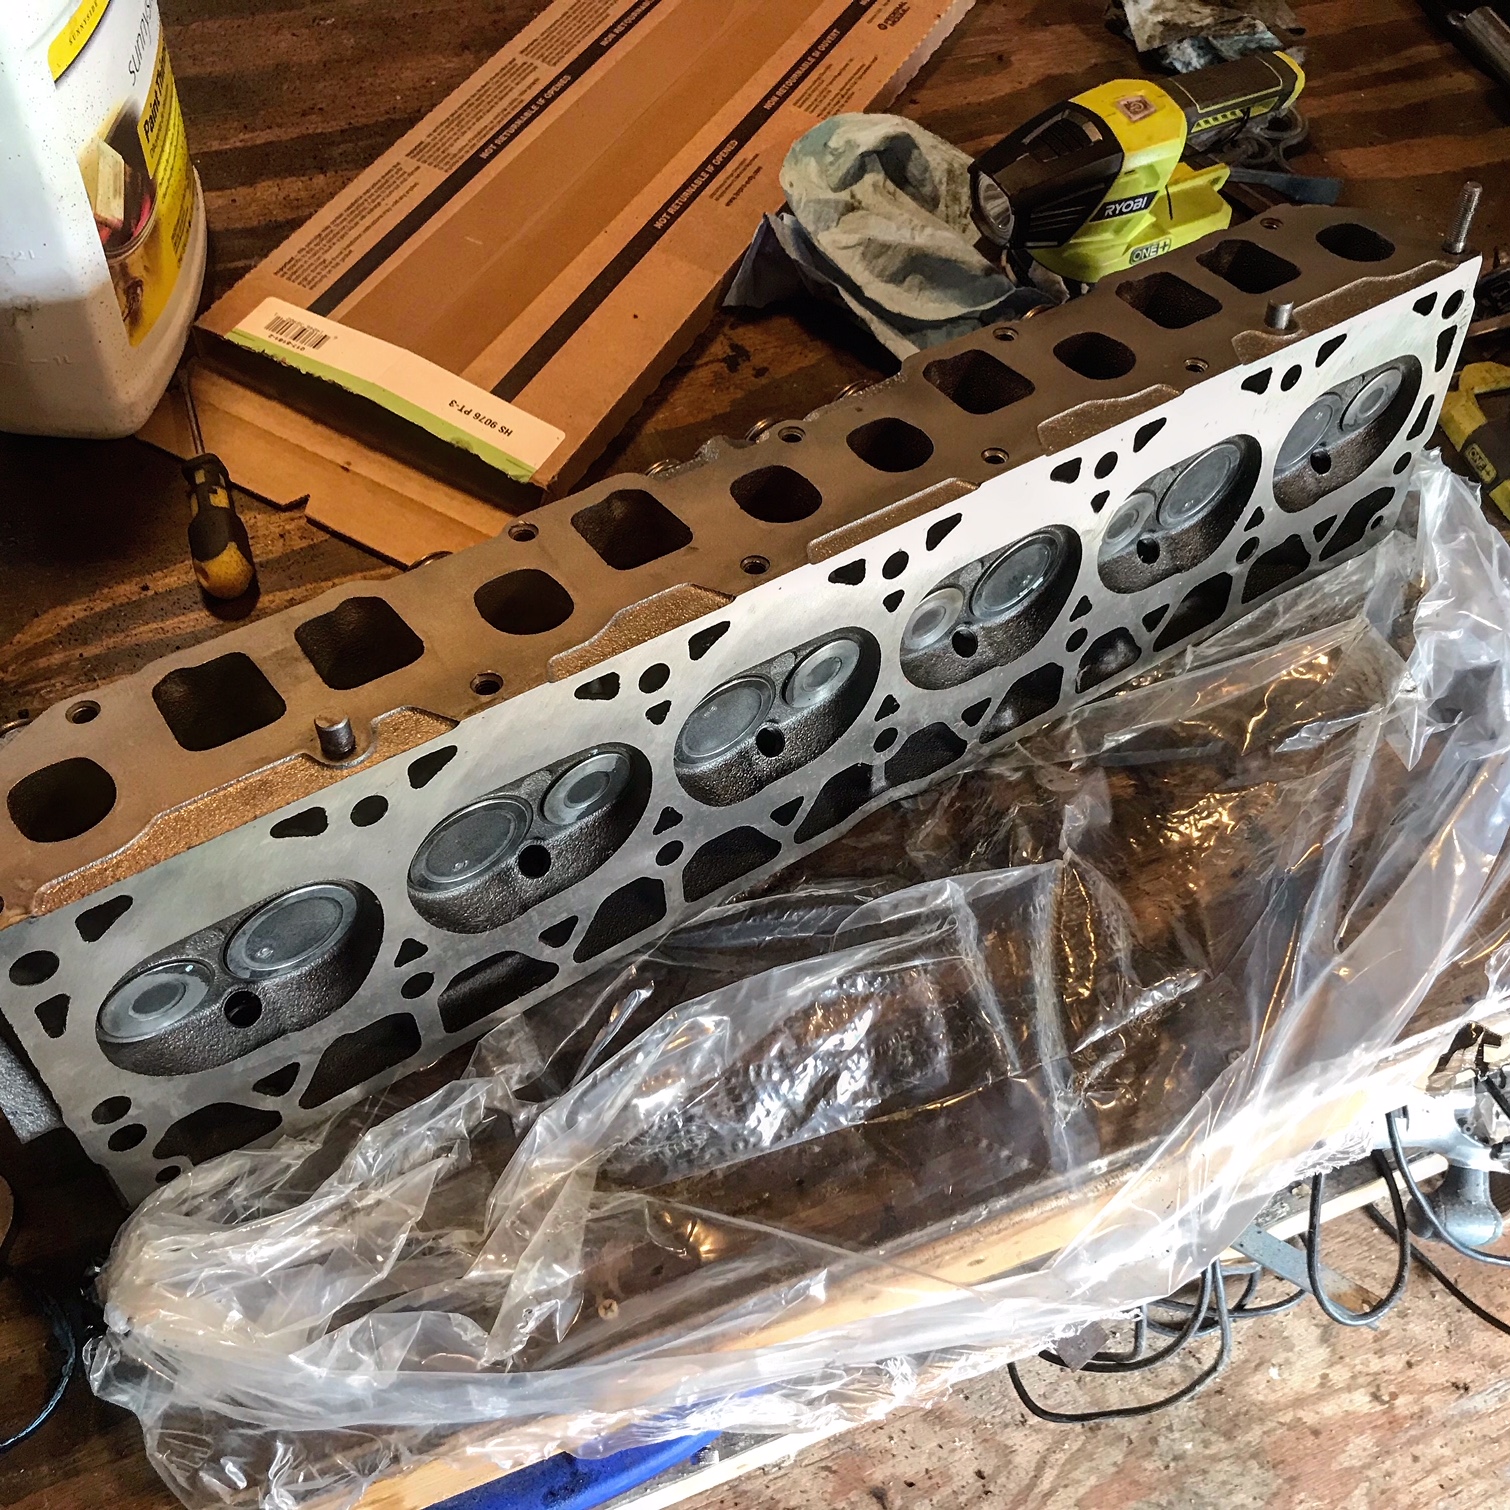
Here's the head back from the machine shop after the cleaned it, checked for cracks, resurfaced the deck and removed 0.006" and did a full valve job:
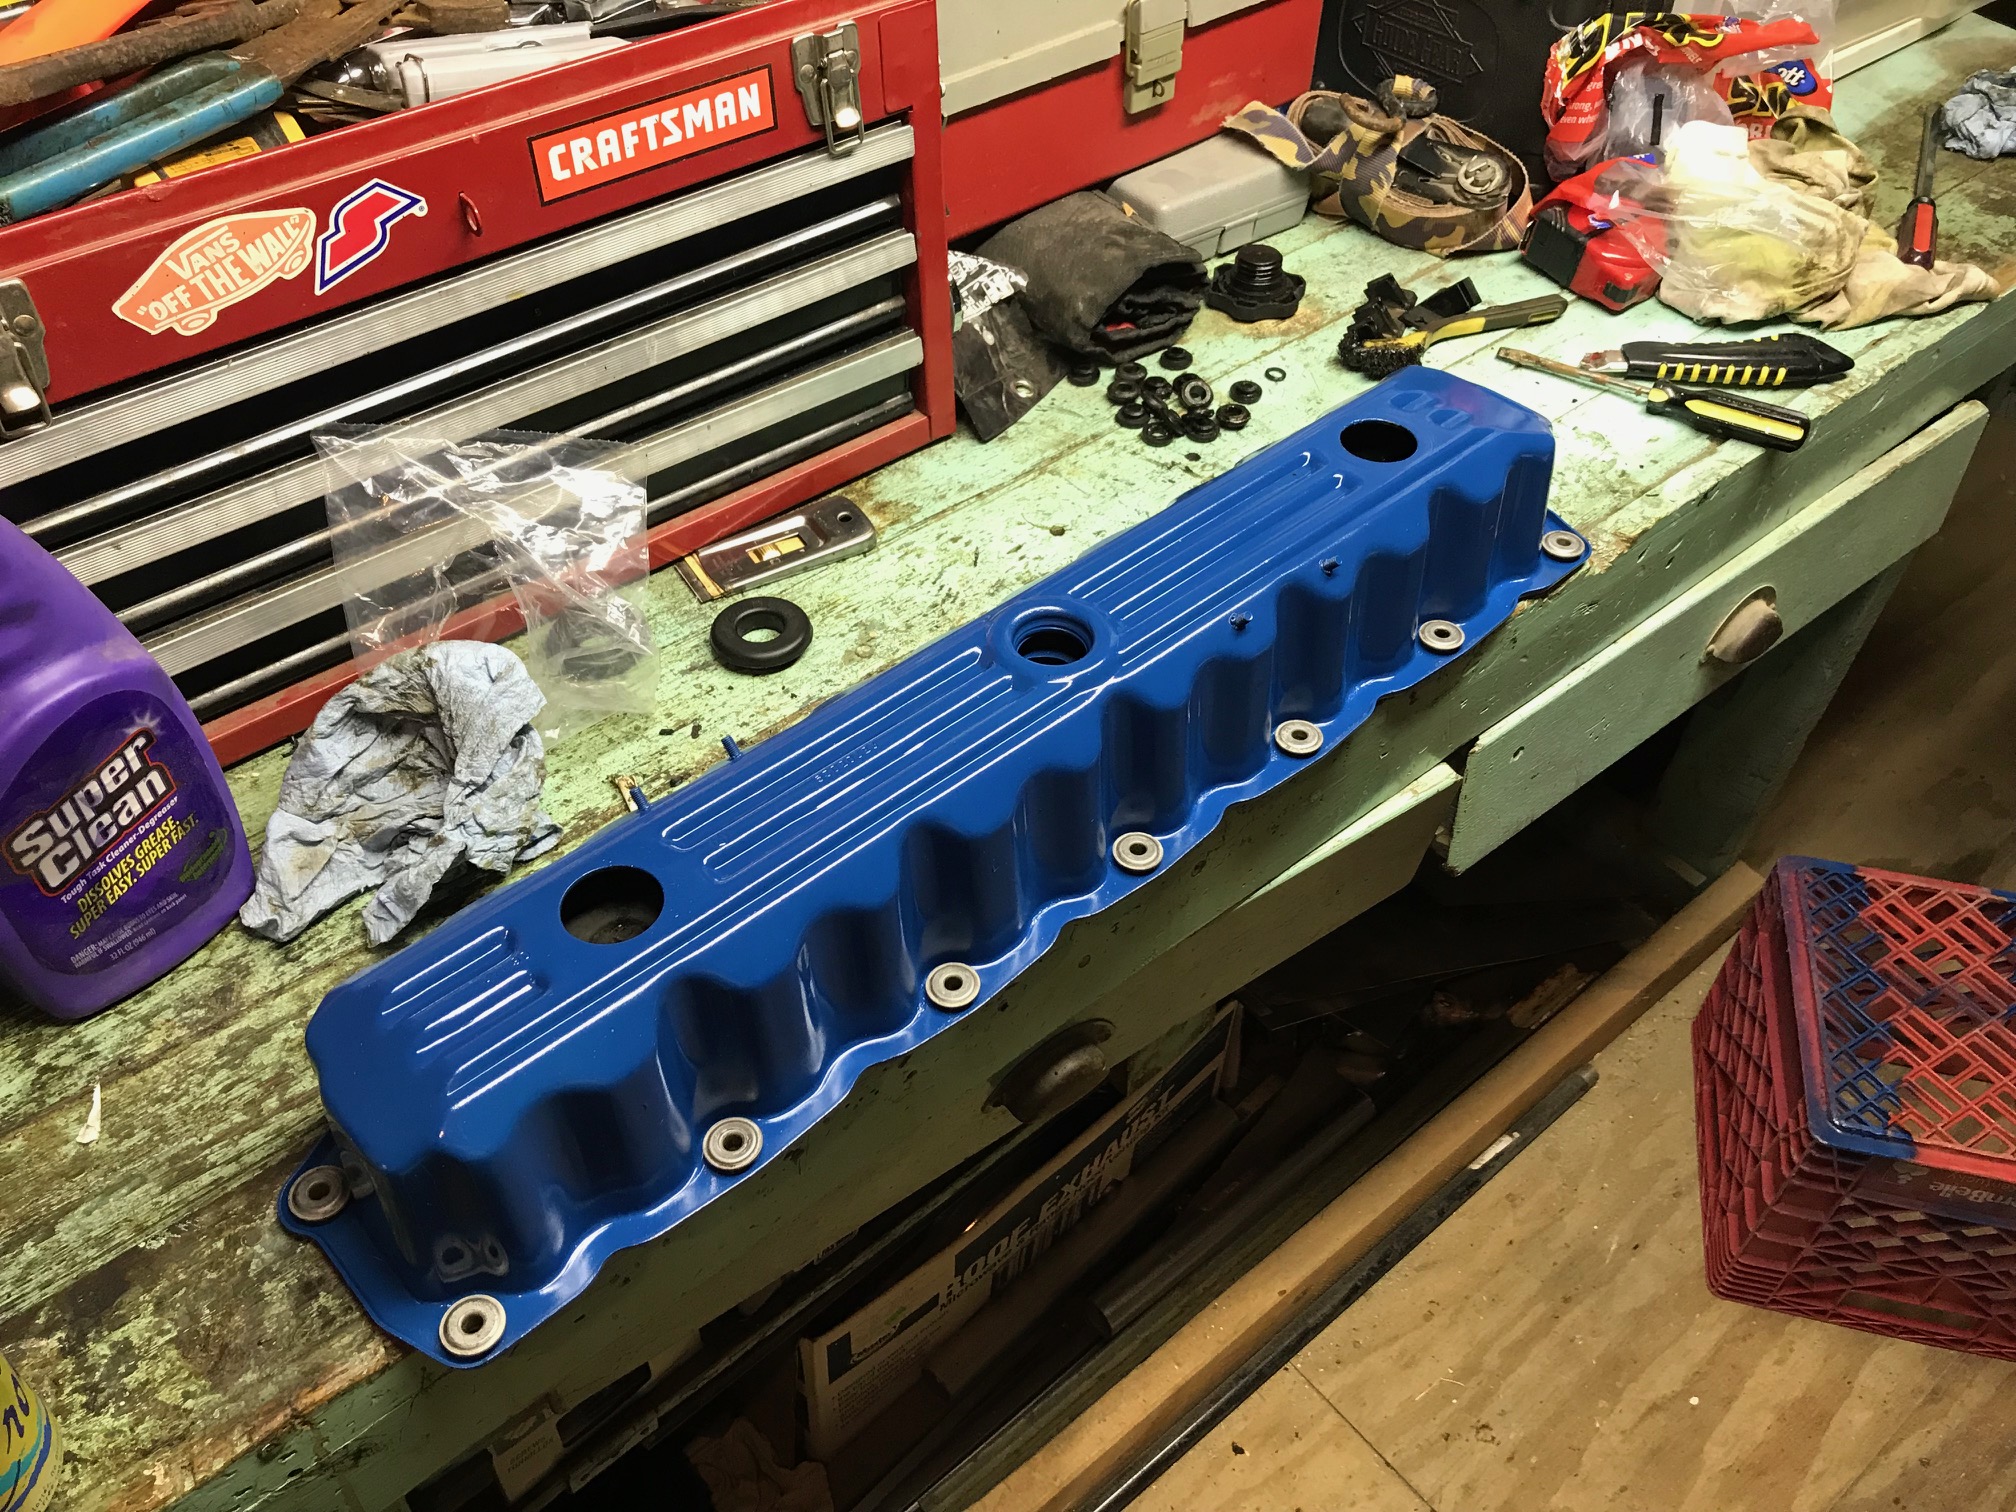
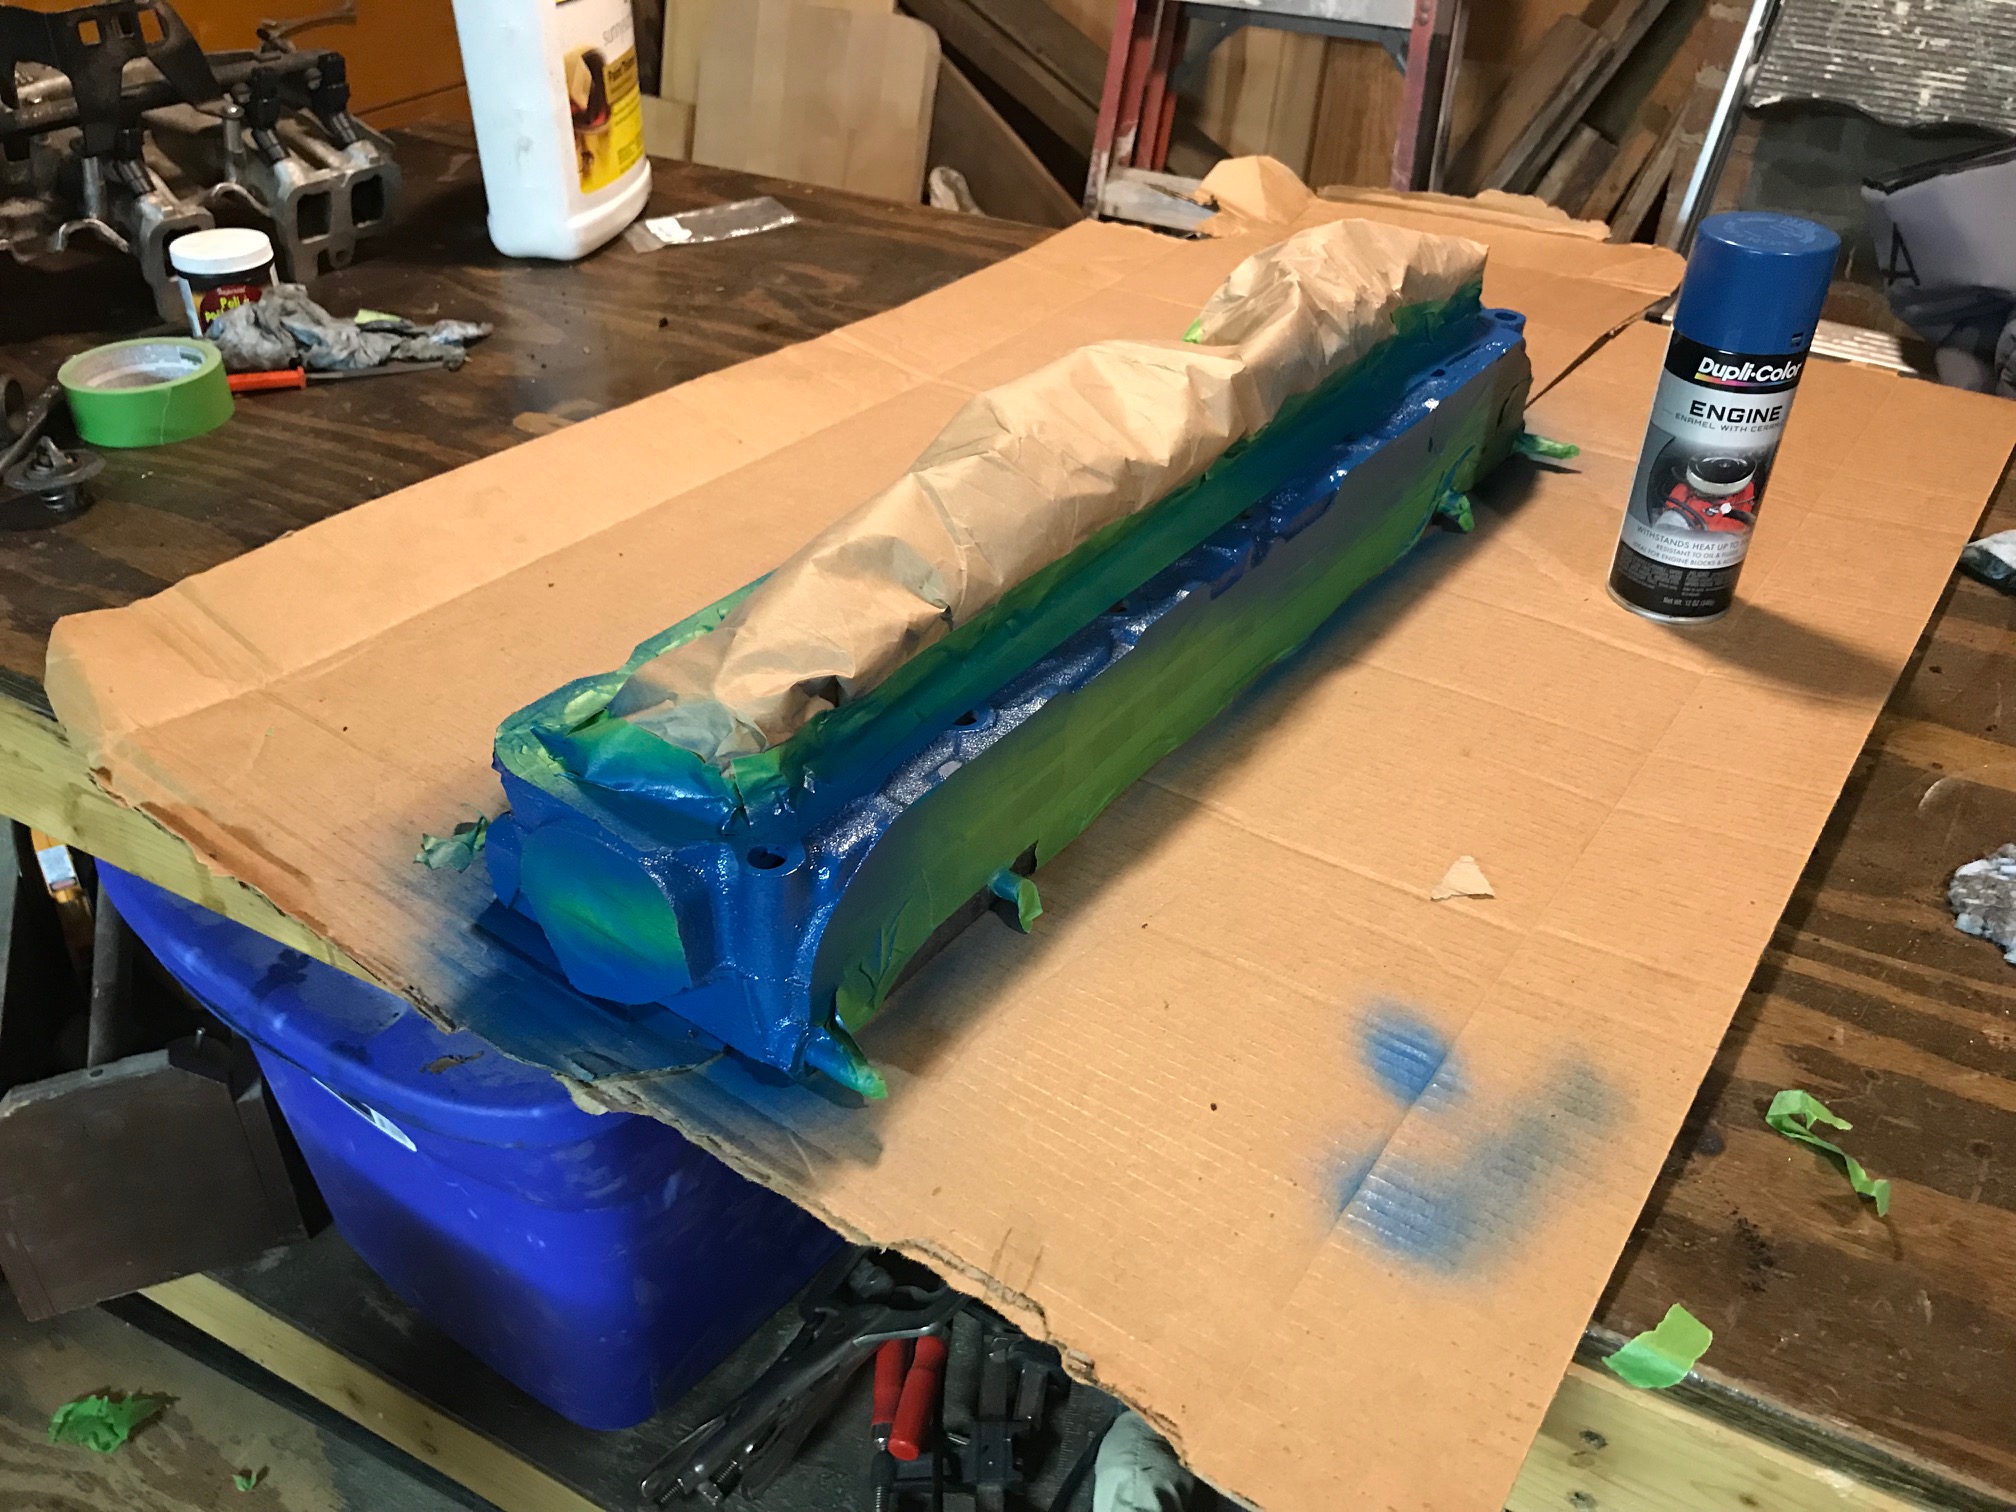
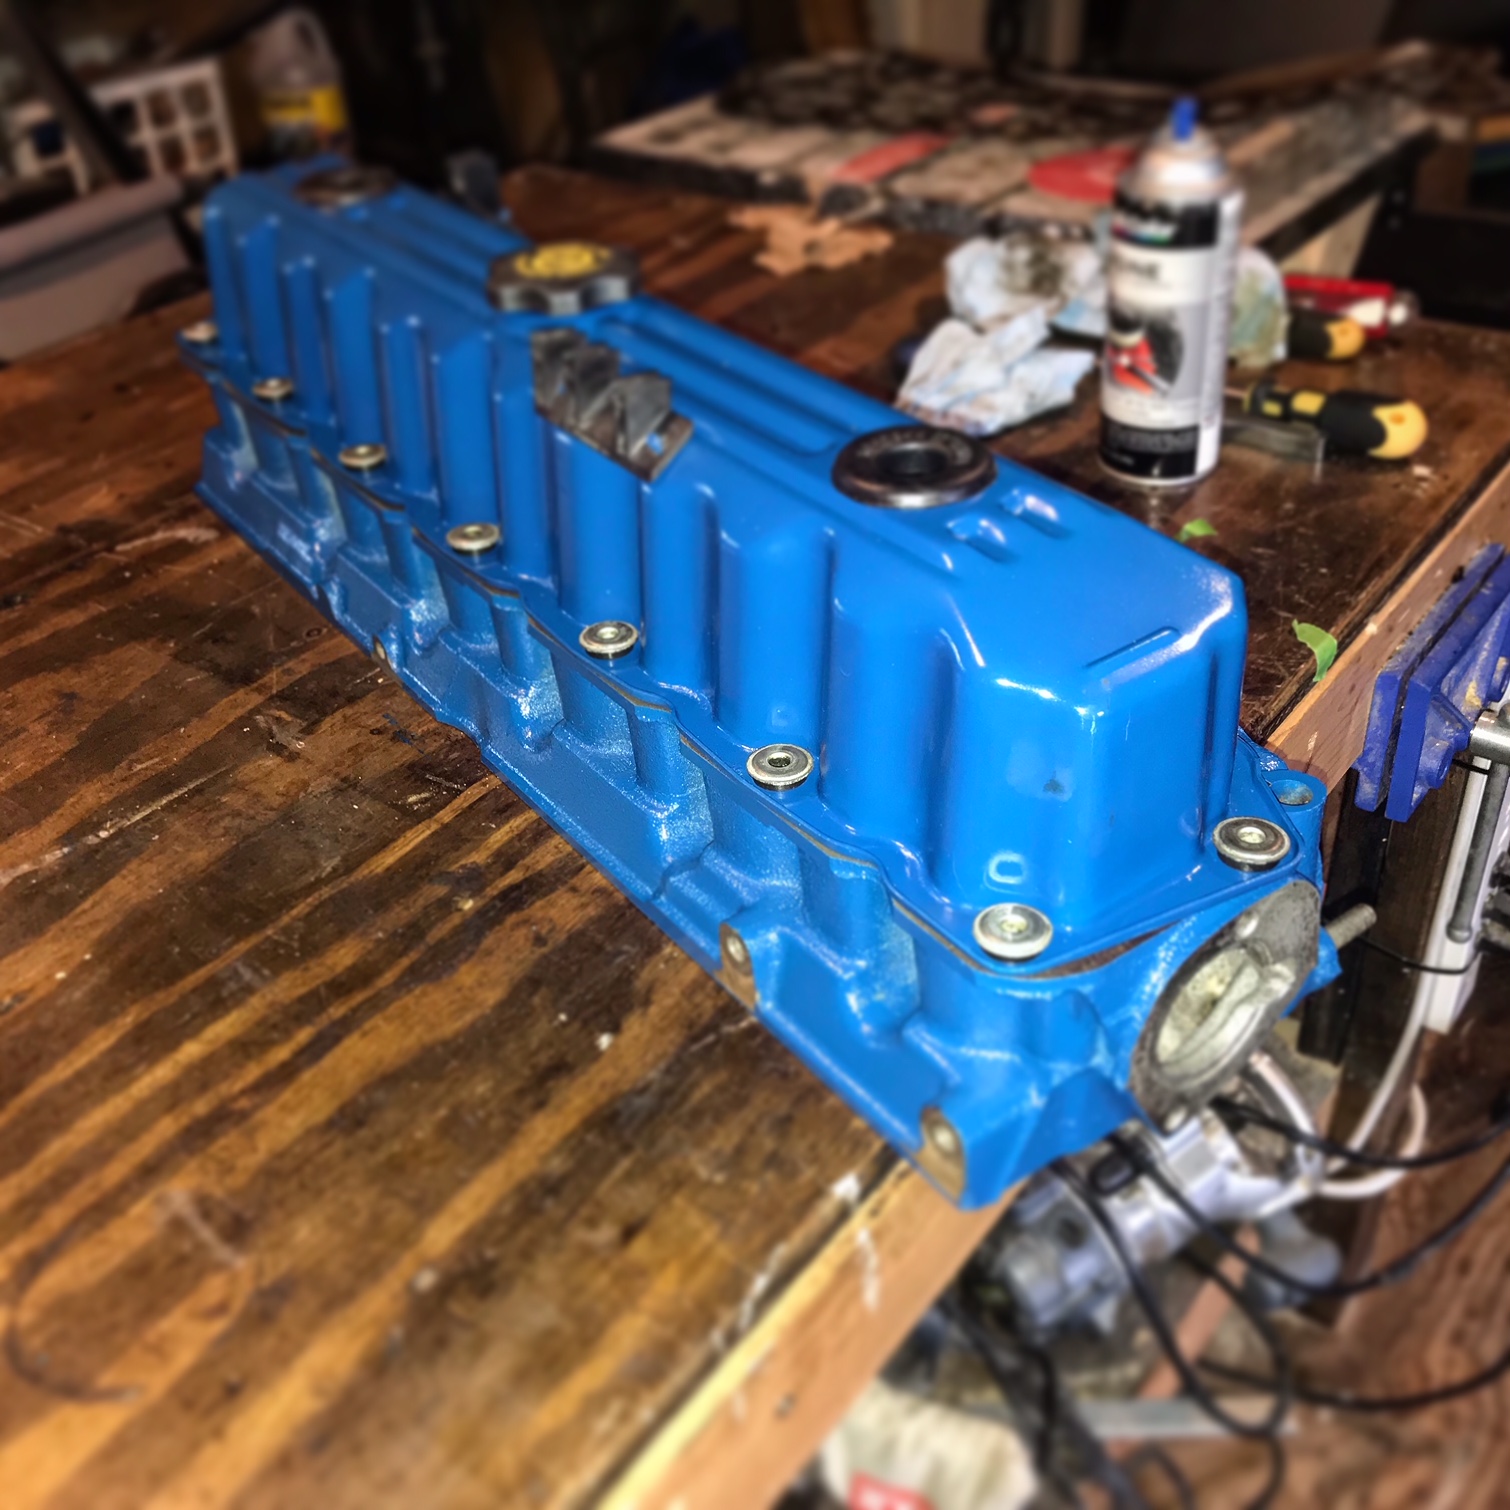
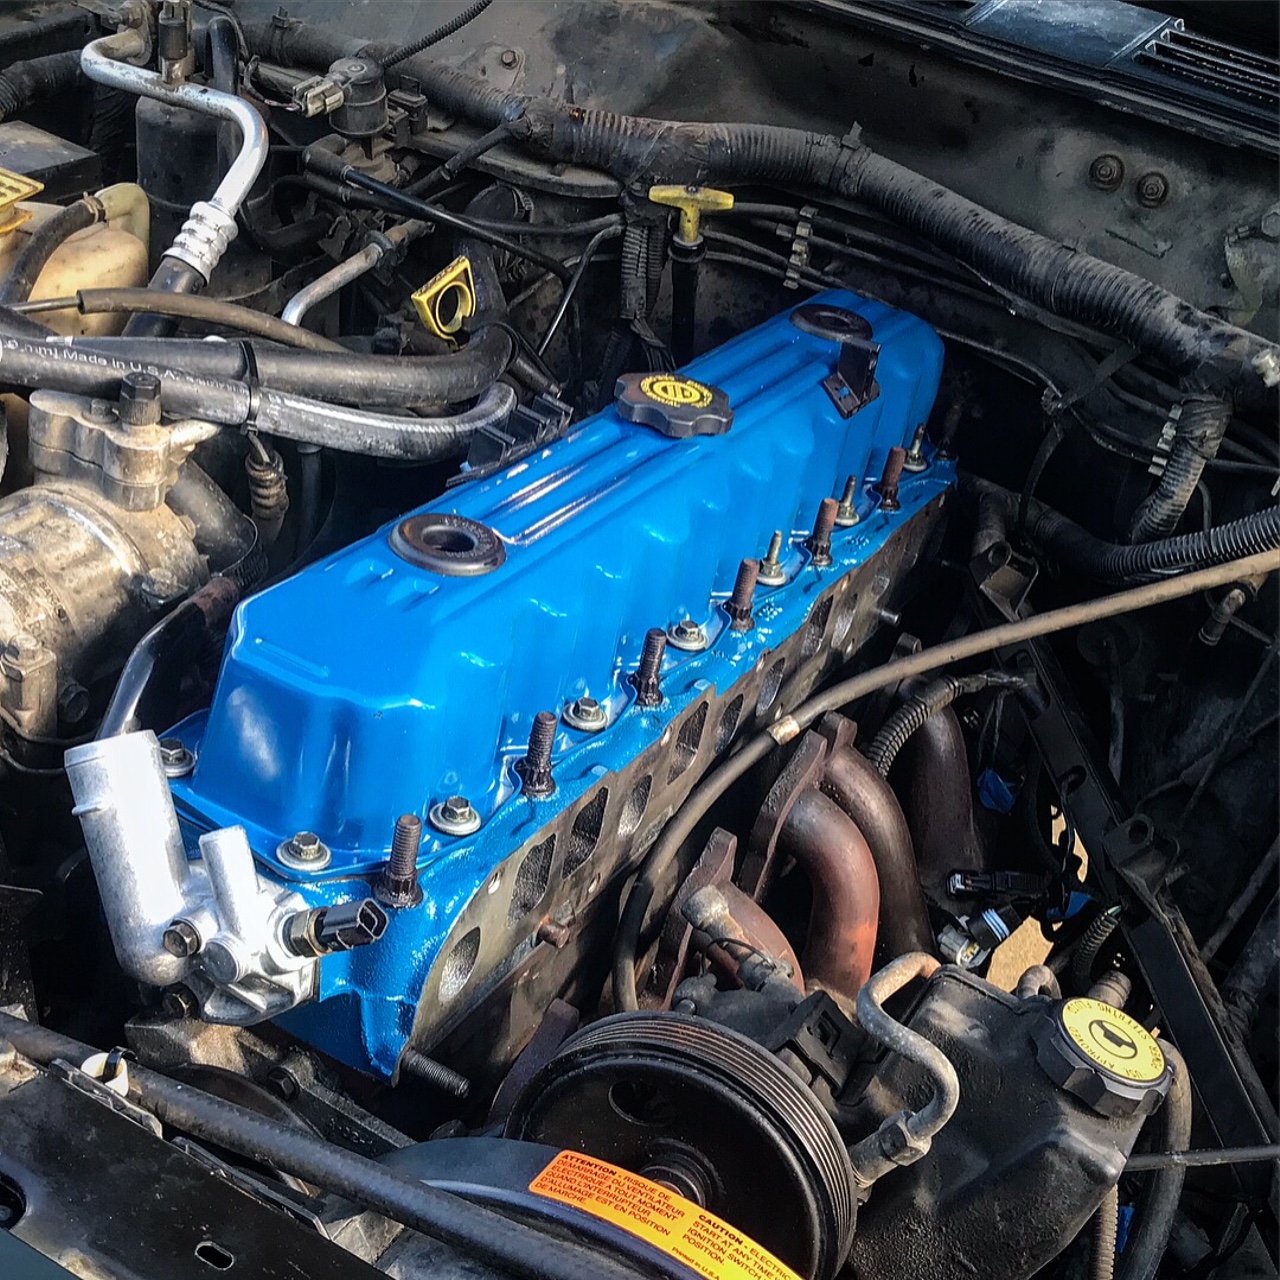
Of course, I just had to paint the head and valve cover.
Would it really be an engine rebuild if you don't paint it?
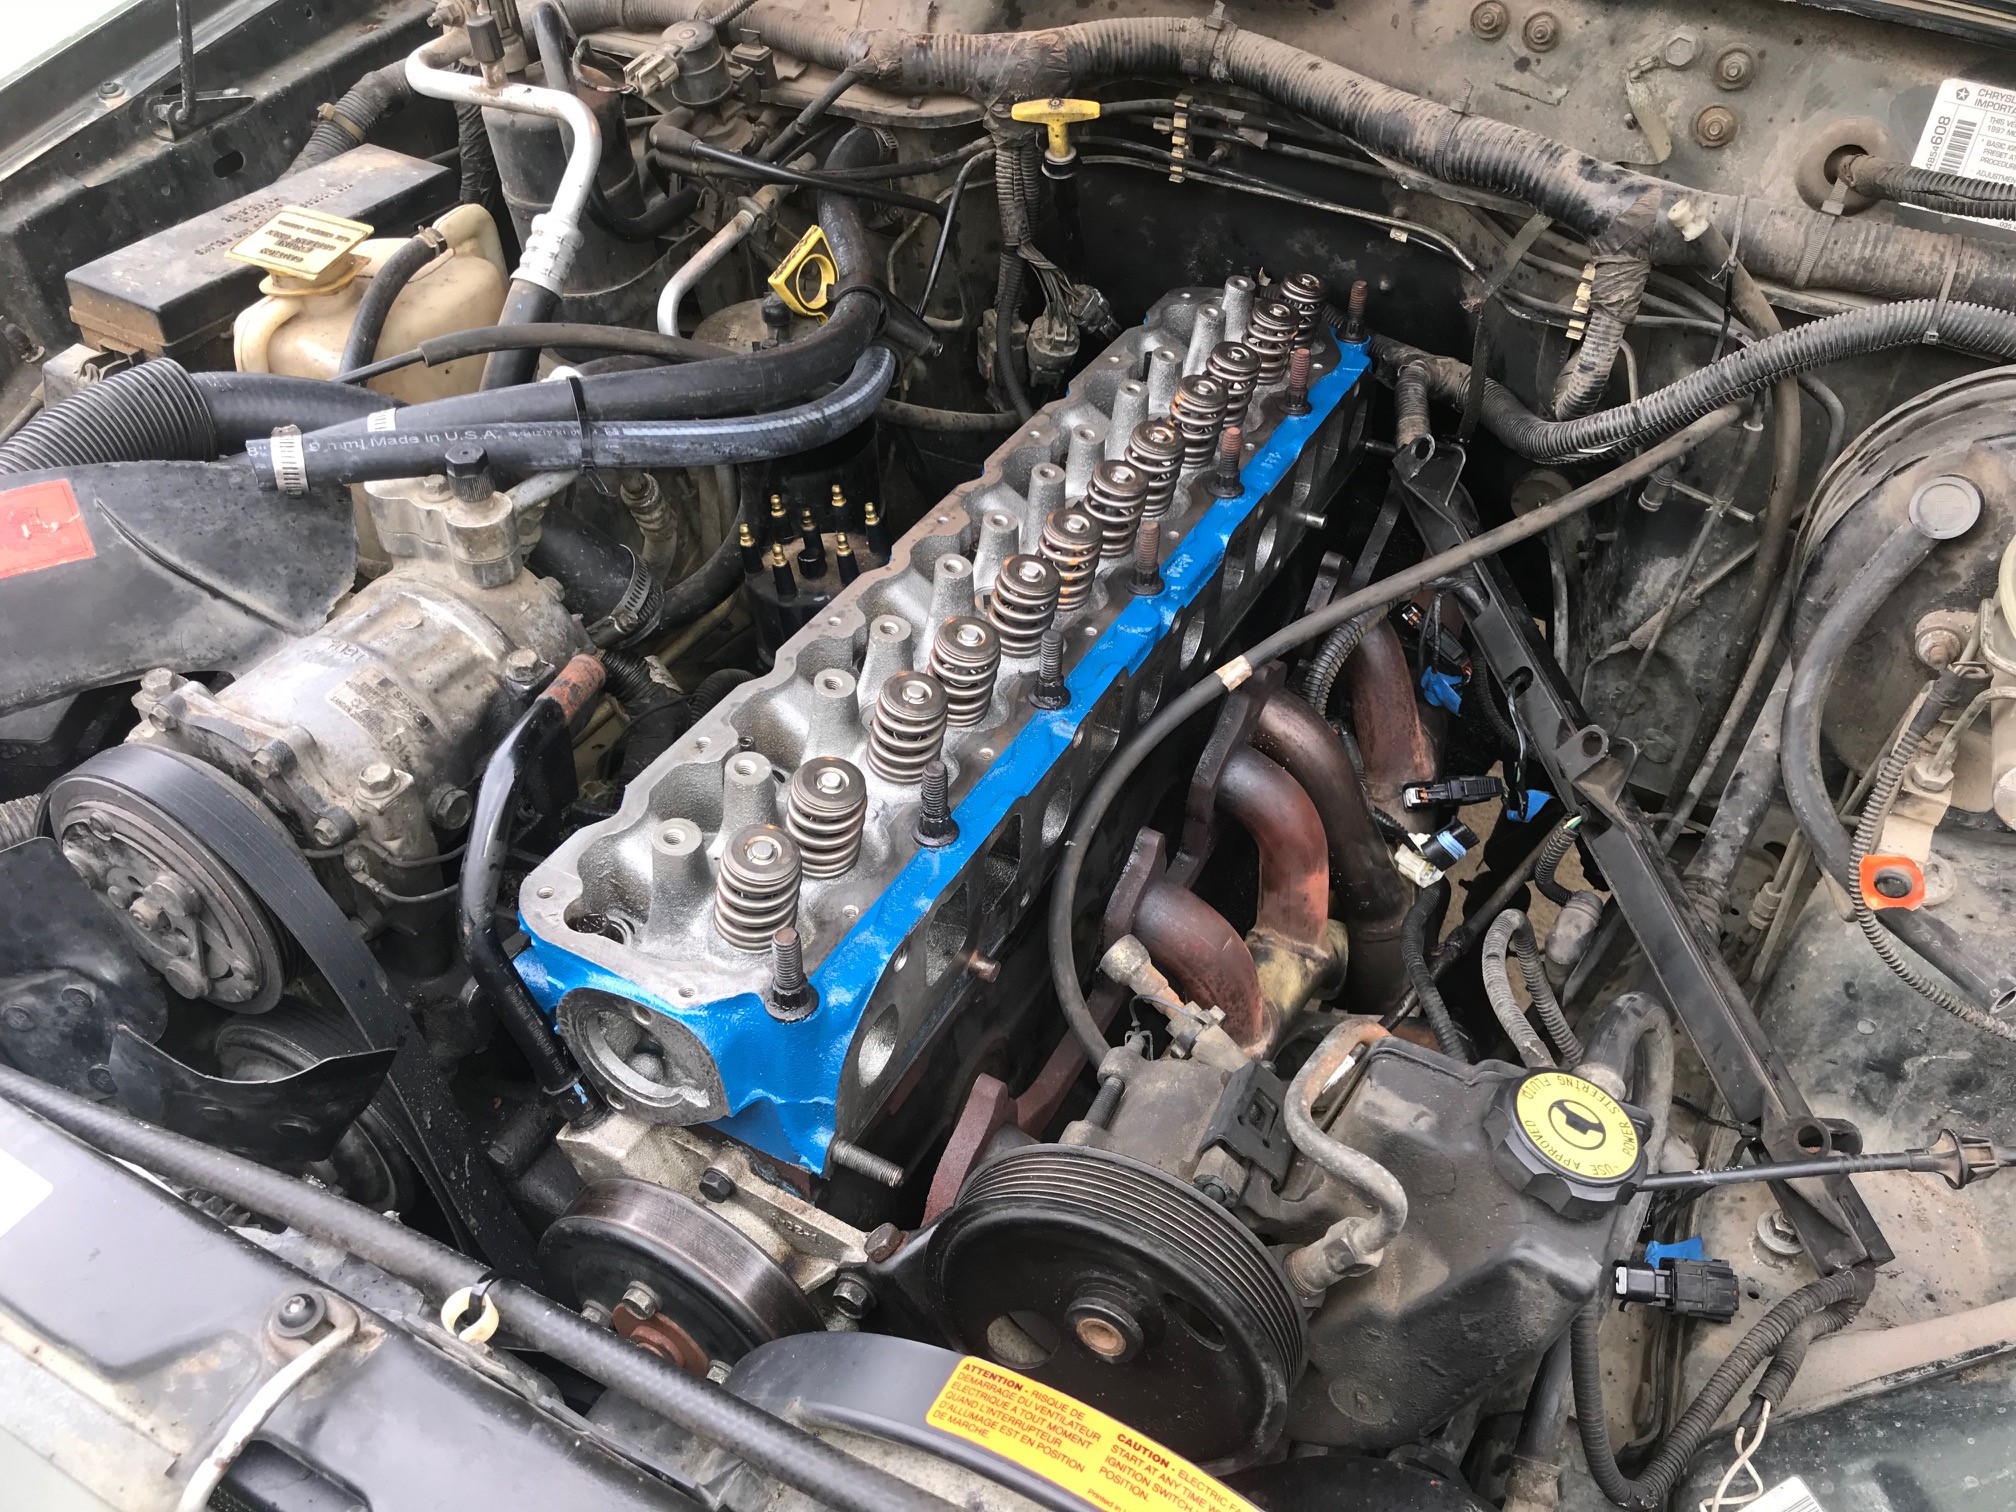
Time to start putting things back together.
The new head gasket was a Felpro "severe duty" which is normal fiber material and not MLS. They say you must not use any gasket dressing or sealant, so I did not. And before putting it on, I cleaned the engine block surface really well. After scrapping the old gasket off, I sanded it with 120 grit sand paper on a flat sanding block. You can get real technical and look at the recommened "roughness average" for your gasket material and engine material, which for steel and this Felpro gasket was 60 to 100 micro-inches RA, which translates to about 80 grit sand paper, but I felt that was too rough so I went with 120 grit). Next, I cleaned out the head bolt thread holes really well with a wire brush on a drill, then blasted out any built up liquids with shop air. Finally, I cleaned it really really well with acetone, and from this point on I had rubber gloves on to not get any oils on the surface or on the gasket.
To drop the head onto the engine, I used the same trick I used to lift it out. One foot on the firewall, another on the radiator support. Bend with your legs, not your back!
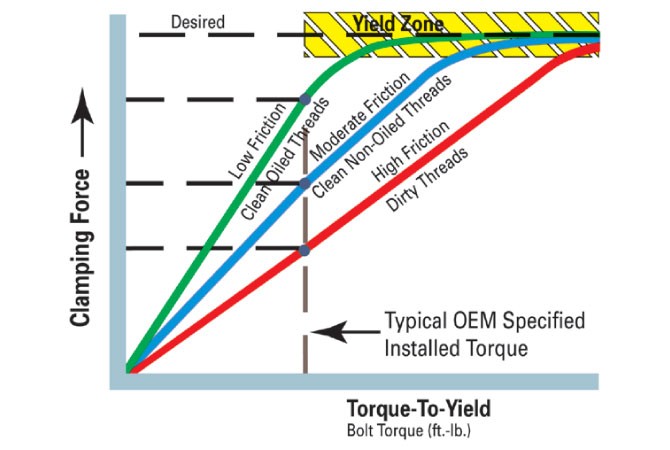
For bolting down the head, I reused the old head bolts but if I do this job again I'll have to get new ones because they can only be ru-used once.
It's really important that the head bolts get torqued down with as little friction resistance as possible so as to provide as much clamping power as possible. The threads of each head bolt got a little oil, as well as the surface where the clamp down on the head. Except for head bolt #11, that one goes through a coolant passage so it needs some special treatment. I've read a dazzling array of options to seal the threads, including teflon tape, commercial-grade Teflon sealant, non-teflon sealant, permatex "right stuff", loctite thread lock, Loctite 592 sealant, any "flexible sealer", any "PTFE pipe dope", etc. I used teflon tape on the #11 bolt as that's what I had laying around and I didn't want to wait 72 hours for a sealant to cure.
Then went in the push rods in the same order they came out (cleaned up and with assembly lube on the tips) and the rockers and rocker fulcrums which both had assembly lube put on them. Then I dowsed the valve stems and springs with engine oil just because why not.
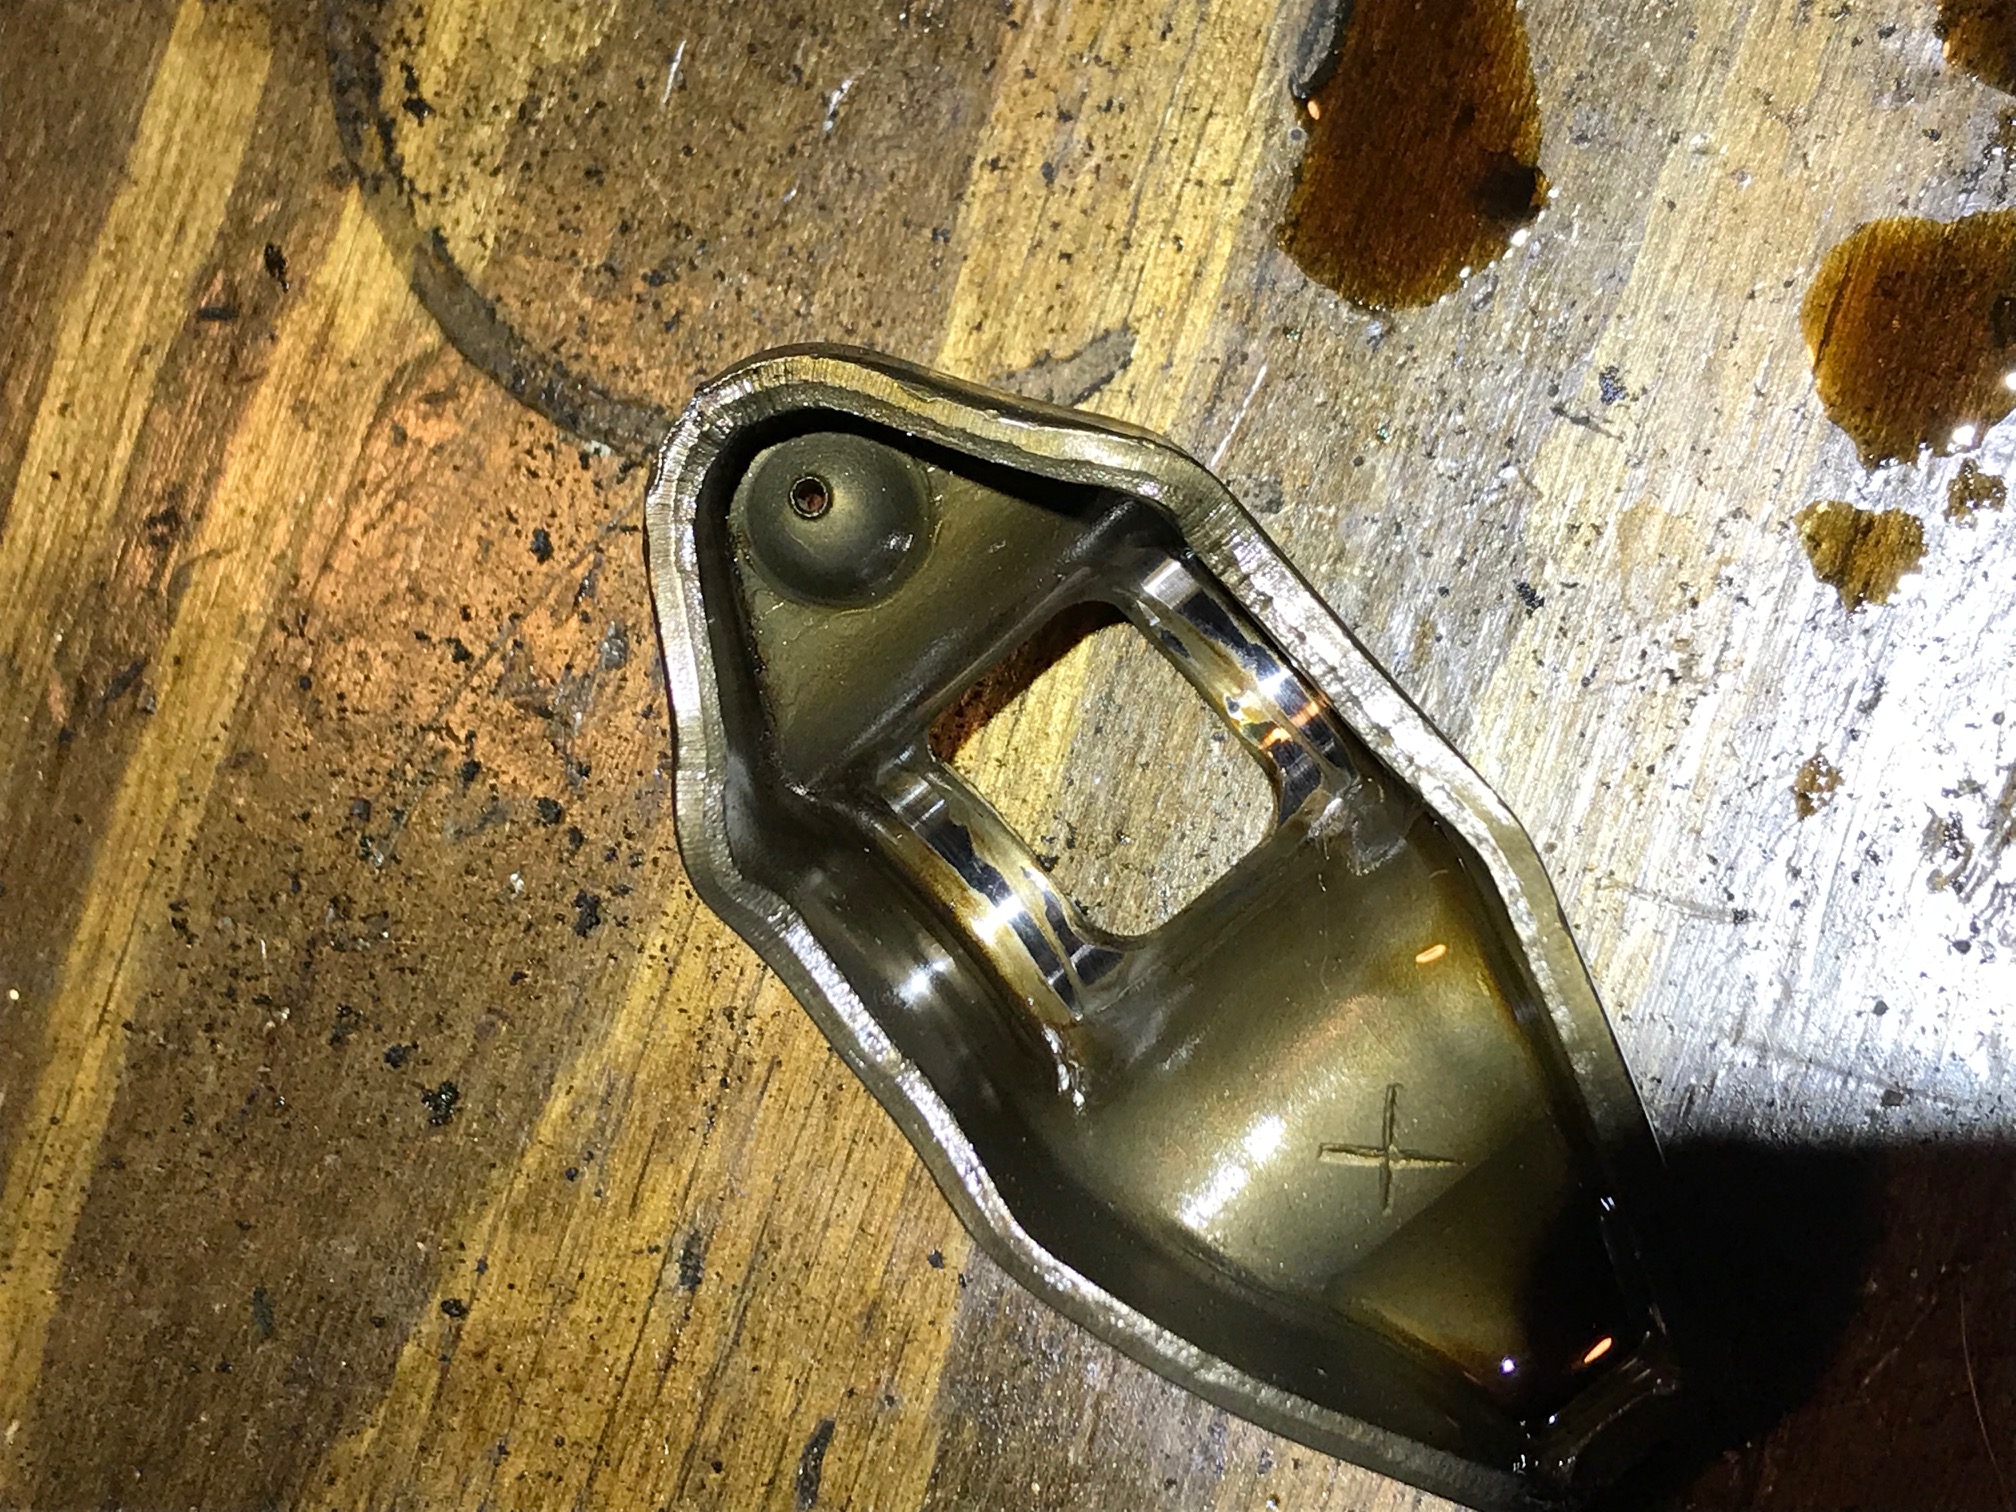
I'm not sure what went wrong here but I broke the aluminum thermostat housing using too much torque.
...and I broke a valve cover bolt because Haynes manual said to torque them to 45 inch pounds and I accidentally torqued it to 45 foot pounds (!). D'oh! Thankfully it was super easy to get out, just used some pliers.
Almost done. I broke the stupid fan shroud. Ordered a new one...
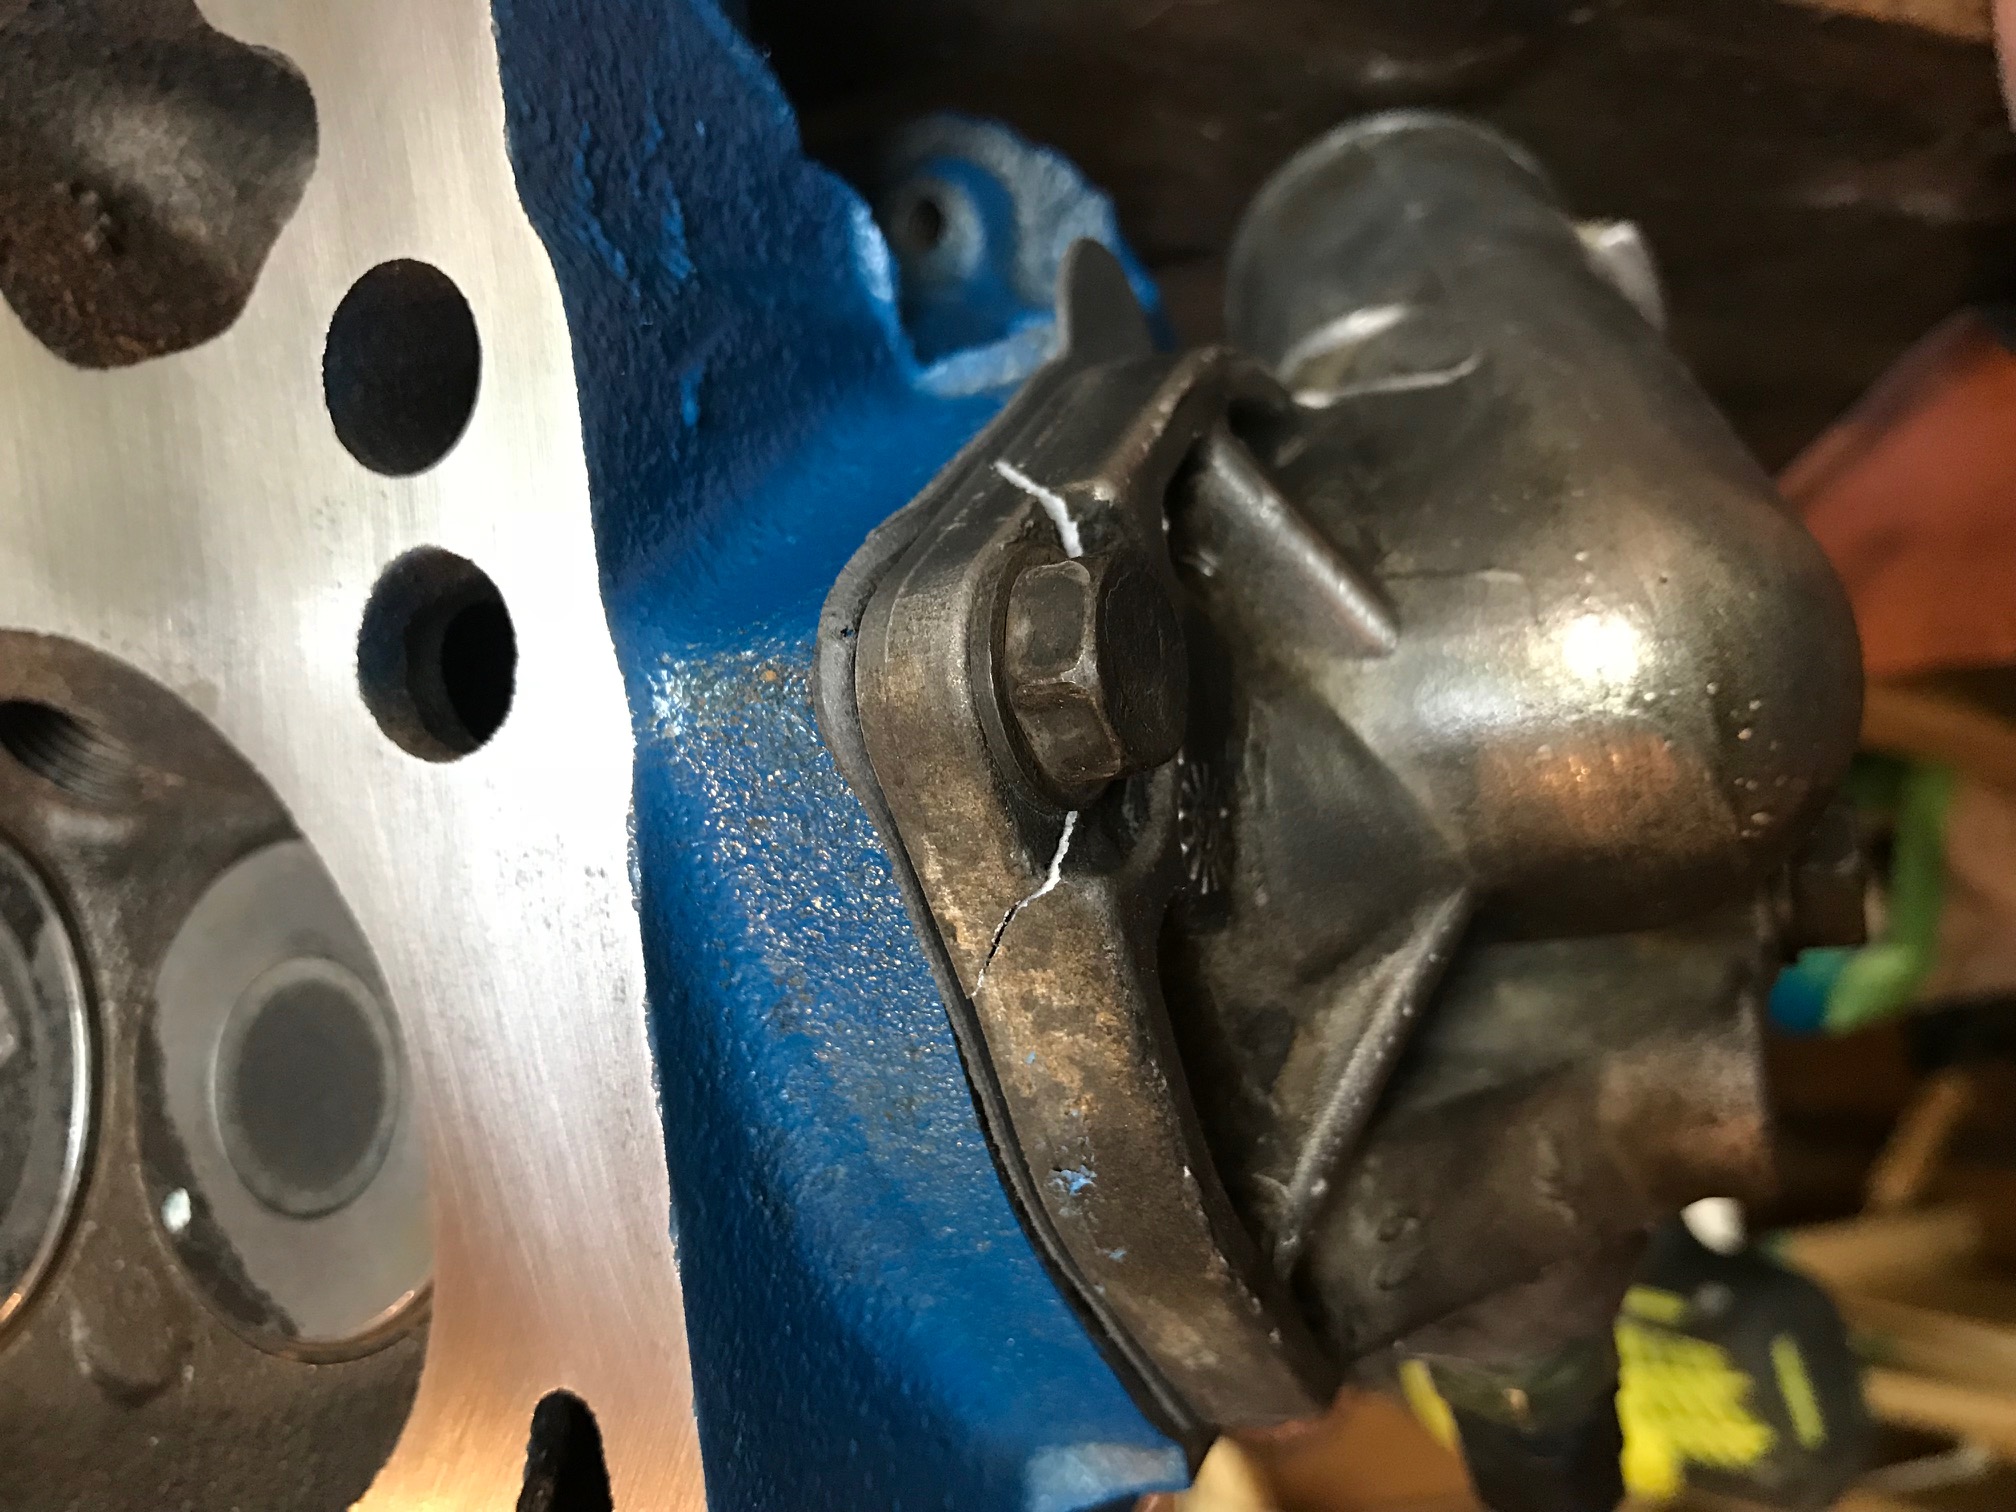
With the head and valve train all put back together, I could begin bolting everything back to it. But before I did that, I wanted to check for cracks in the exhaust header. They're known to crack pretty easily, especially at the collector.
Sure enough, the header was cracked right where everybody said it would be:
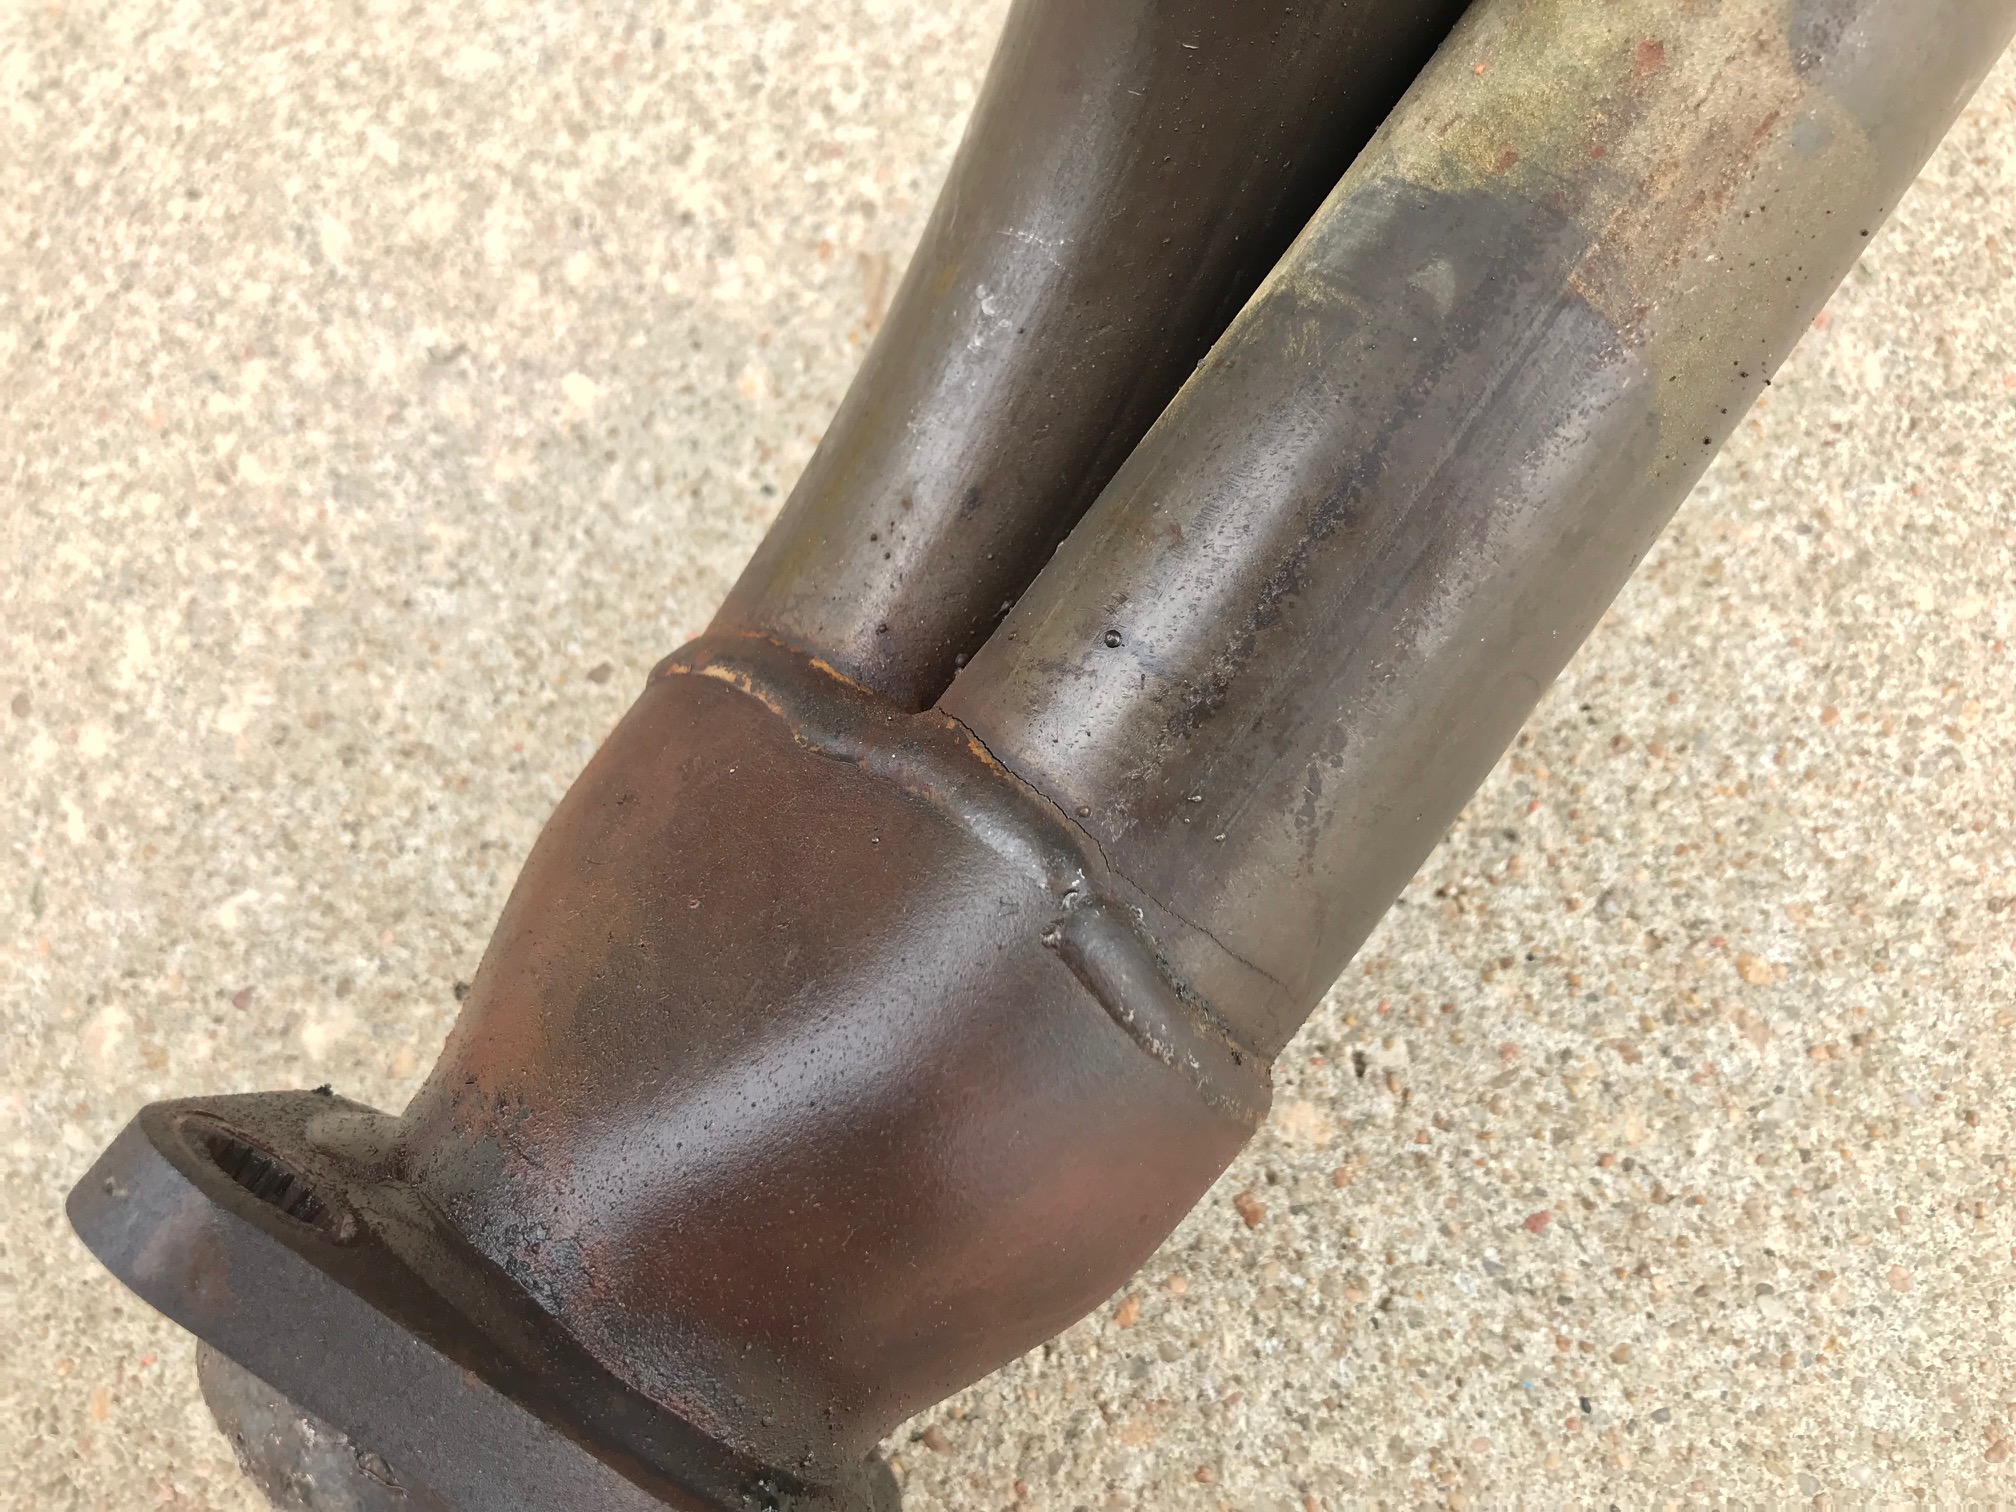
I used my new DC stick welder machine to fix it. IIRC I used 7013 rod around 120 amps. Not very pretty but best I could do with a cheap stick welder.

Then it was just a matter of putting everything back together! I made sure to reconnect all the wiring connectors including the o2 sensor, the fuel line and support bracket, all the vacuum lines, and grounding strap. Actually I replaced the grounding strap with a new one because old one was barely hanging on by a thread.
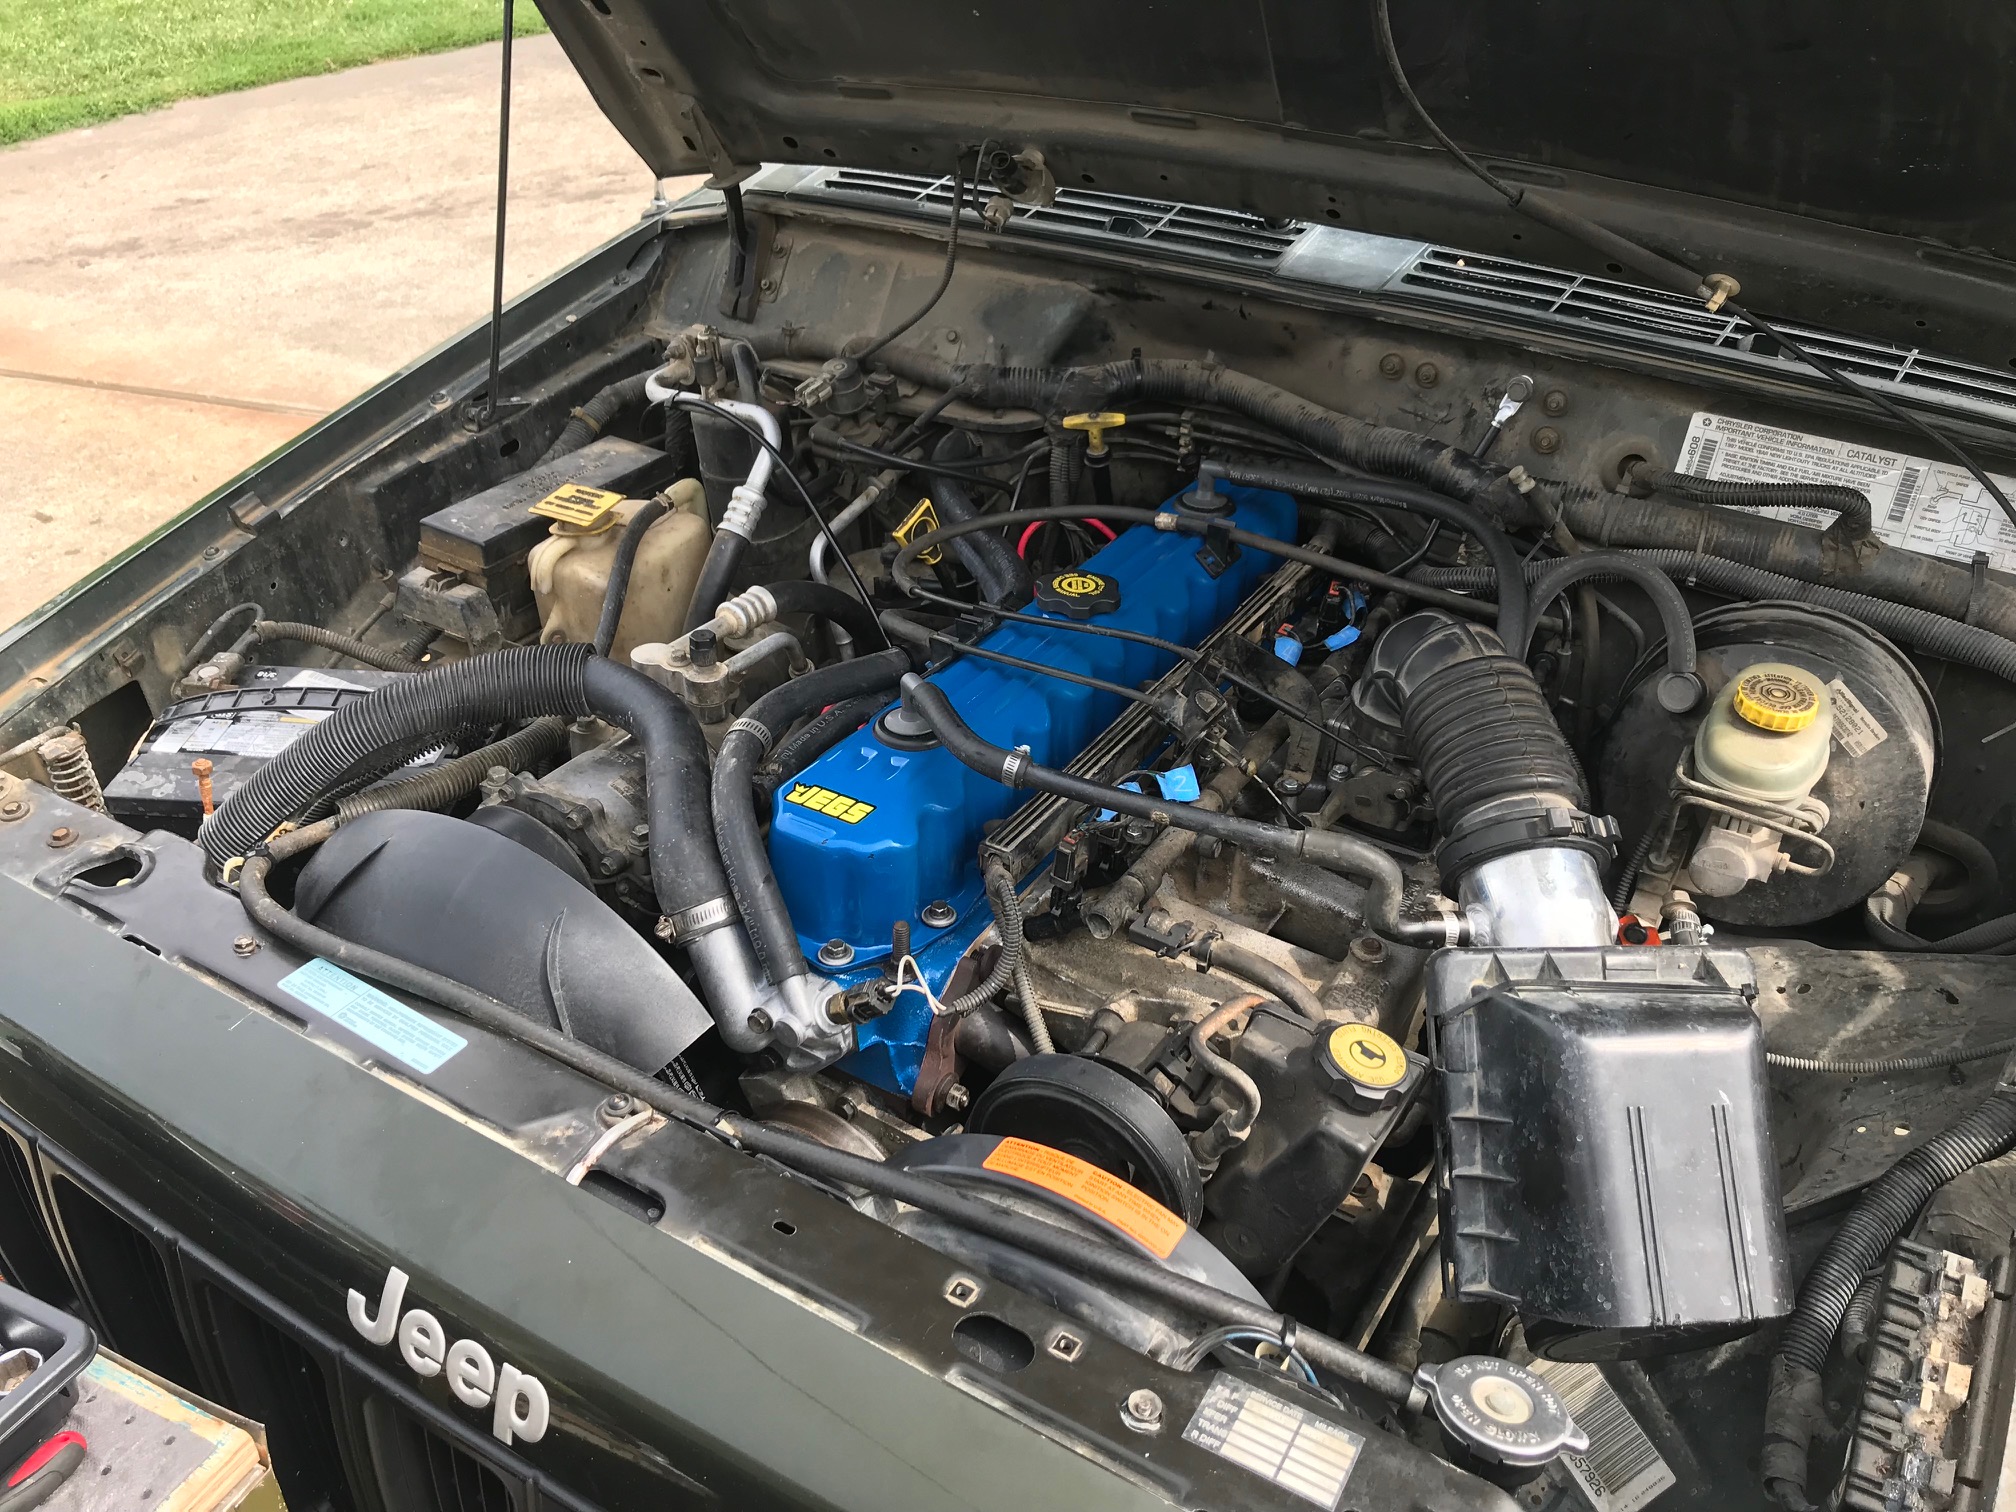
When it was all said and done, I had a new head gasket, new lifters, fresh valve seats, new distributor cap, rotor and spark plug wires, new spark plugs, and new thermostat housing and fan shroud. And only a few weeks prior I had replaced the serpentine belt, water pump, alternator, and radiator.
Time for the scary part. Or the fun part, depending on how much of a glutton you are for torture.
- double check the spark plug wires, vacuum lines, electrical connectors, fuel rail, etc.
- fill up the radiator with coolant and check for leaks
- put in fresh oil, use conventional oil with high levels of moly. I used Shell T4 15w40. Its only needed for the first 100 miles or so, then I'll put my synthetic T6 back in.
- disconnect the ignition coil from the distro and the wires from the fuel injectors (or maybe you could just disconnect the CPS)
- crank the engine for several seconds to get oil to the new lifters (the oil pressure gauge didn't move during this so idk)
- reconnect the ignition coil and fuel injectors (or CPS)
- turn on the engine
- look for fluid leaks, vacuum leaks, smoke, pinging, etc.
- burp the cooling system
- now start the cam break-in procedure (old cam, but new lifters!) by idling it for 20 or 30 minutes but revving it around 2k-3k rpms, never keeping the RPM the same for too long. The higher RPMs helps sling the oil onto the cam, and the 4.0 engine uses "squirters" on the piston connecting rods to squirt oil onto the cam.
Well, I forgot to do #10, one of the more important steps. That is because right when I turned on the engine, at least two of my fuel injectors were having connectivity problems (probably from getting grease on them when cleaning the intake manifold) and the engine was running extremely poor. I didn't know it was the fuel injectors at the time so I was scrambling around trying to find out what was wrong. It was idling so rough that the exhaust was banging against my home-made skid plate, probably because when I unbolted the manifold and put it back on the exhaust pipe shifted a little. So I thought this was either severe pinging/detonation or a stuck lifter or something. The connectivity on the fuel injectors must have started to fix itself and it slowly started running better. After about 10 minutes of idling (700 rpm) I was confident enough to slowly drive it to the liquor store and buy myself a nice bottle of scotch. I figured I deserved it. But in reality I was celebrating a little too early.
Thankfully I must have got lucky because I have not had any problem with the new lifters and the old cam. From what I've read online, if they don't break in properly I'll know within the first 100 miles as the lifters get so much metal warn off the bottom that they can't pump oil up to the head through the rods and then you'll know real quick. I also didn't find any metal flakes in the oil when draining it after 100 miles.
I also figured out that the fuel injector connectors where not behaving correctly because when I started the vehicle the next day, it was running even worse. When I disconnected and reconnected the fuel injectors - bingo! Running fine. To make sure I never had that problem again, I got a can of DioxIT to clean the connectors. No more problems! This was after I reset the ECU, triple checked the spark plug wiring, looked for vacuum leaks with propane, checked the engine vacuum (about 17 pounds), cylinder compression (was over 155psi!), oxygen sensor voltages, fuel trim levels, etc. By the time I was done I had this thing dialed down.
So with that all figured out, it was time for a long test drive at 75mph to see if it would overheat like it used to. It was hot but not too hot that day, maybe 90*F. From the start, the temp seemed a little on the high side -- just to the right of the 210 mark. After 30 minutes, the temp was at about 220*F and I had a sinking feeling in my stomach. I slowed down and got back home. It never creeped up past 220 or 225 but I thought something had to be wrong. Maybe it wasn't a bad head gasket after all. So I decided to throw everything I had at it: I got a high flow water pump, a bottle of Redline WaterWetter, a heavy duty fan clutch (never did put it in though), and I drilled two holes in the thermostat to make sure air would bleed out of the system.
A few days later and it was time for another test drive. Even hotter this day, over 103*F. But this time, the engine temp never rose above 200! I drove for much longer (1 hour) and at a faster speed too. Woohoo!!!
So at this points I'm pretty sure that the head gasket fix really did solve my overheating issue, but I didn't properly bleed the cooling system (and I had way too much antifreeze to water because I didn't measure it right) and that's why it was running just a little hot on the first test drive. And I just remembered this sound that the engine used to make, before the head rebuild, when going too fast up a highway hill or with a heavy load - it sounded like a gurgling, whooshing sound. At the time I thought it was intake noise, but now I think it was air getting pumped into the cooling system and you could hear it coming from the heater core. Whatever it was, you can no longer hear it!
Feels good to have it finally all figured out.
Update: In the middle of July, my brother and I drove the Jeep across several state lines to New Mexico and Colorado without any issues. It did great! There's no way in hell it could have done that before the engine rebuild. However, while in Colorado I was driving up Monarch Pass - a steep and long mountain pass in Colorado - and foolishly trying to keep pace with the 3rd-gen Toyota 4Runner in front of us going 65mph. That's when it overheated real quickly and real badly. Coolant burst out of the radiator cap and the heater core cracked, leaking coolant into the cabin.
We let it cool down, filled it up with water, turned around and drove downhill to the nearest auto parts store where I could buy a hose to bypass the heater core. We changed plans and decided to do some 4x4 trails on the East side of the range - we did Tincup Pass and holy hell was it a wild ride. In 4Low and climbing slowly and up hill, the engine was running a little hot but never overheated. I had planned on doing Hancock Pass and Cumberland Pass to go East and back to Salida, CO, and avoid Monarch Pass again, but my brother was not in the mood for another bumpy 4x4 road so we drove West to Gunnison, CO. Which meant we had to cross Monarch Pass from West to East, and there was no other possible route. Keeping it in third gear and going 40mph or less, we still had to pull over to the shoulder twice to let it cool down. Getting to the top of the pass was a good feeling! We kept on driving and decided to drive home all throughout the night when the ambient temps were lower. And it's a good thing we did because the next day I went for a test drive at 3pm and it only got a few miles before the engine temp started climbing into the red.
I bought an '08 4Runner to replace the Jeep, and, in comparison, it is a very impressive vehicle. Much nicer, but much less character. I'll miss my old Jeep.