It's been almost an entire year since I last worked on this project.
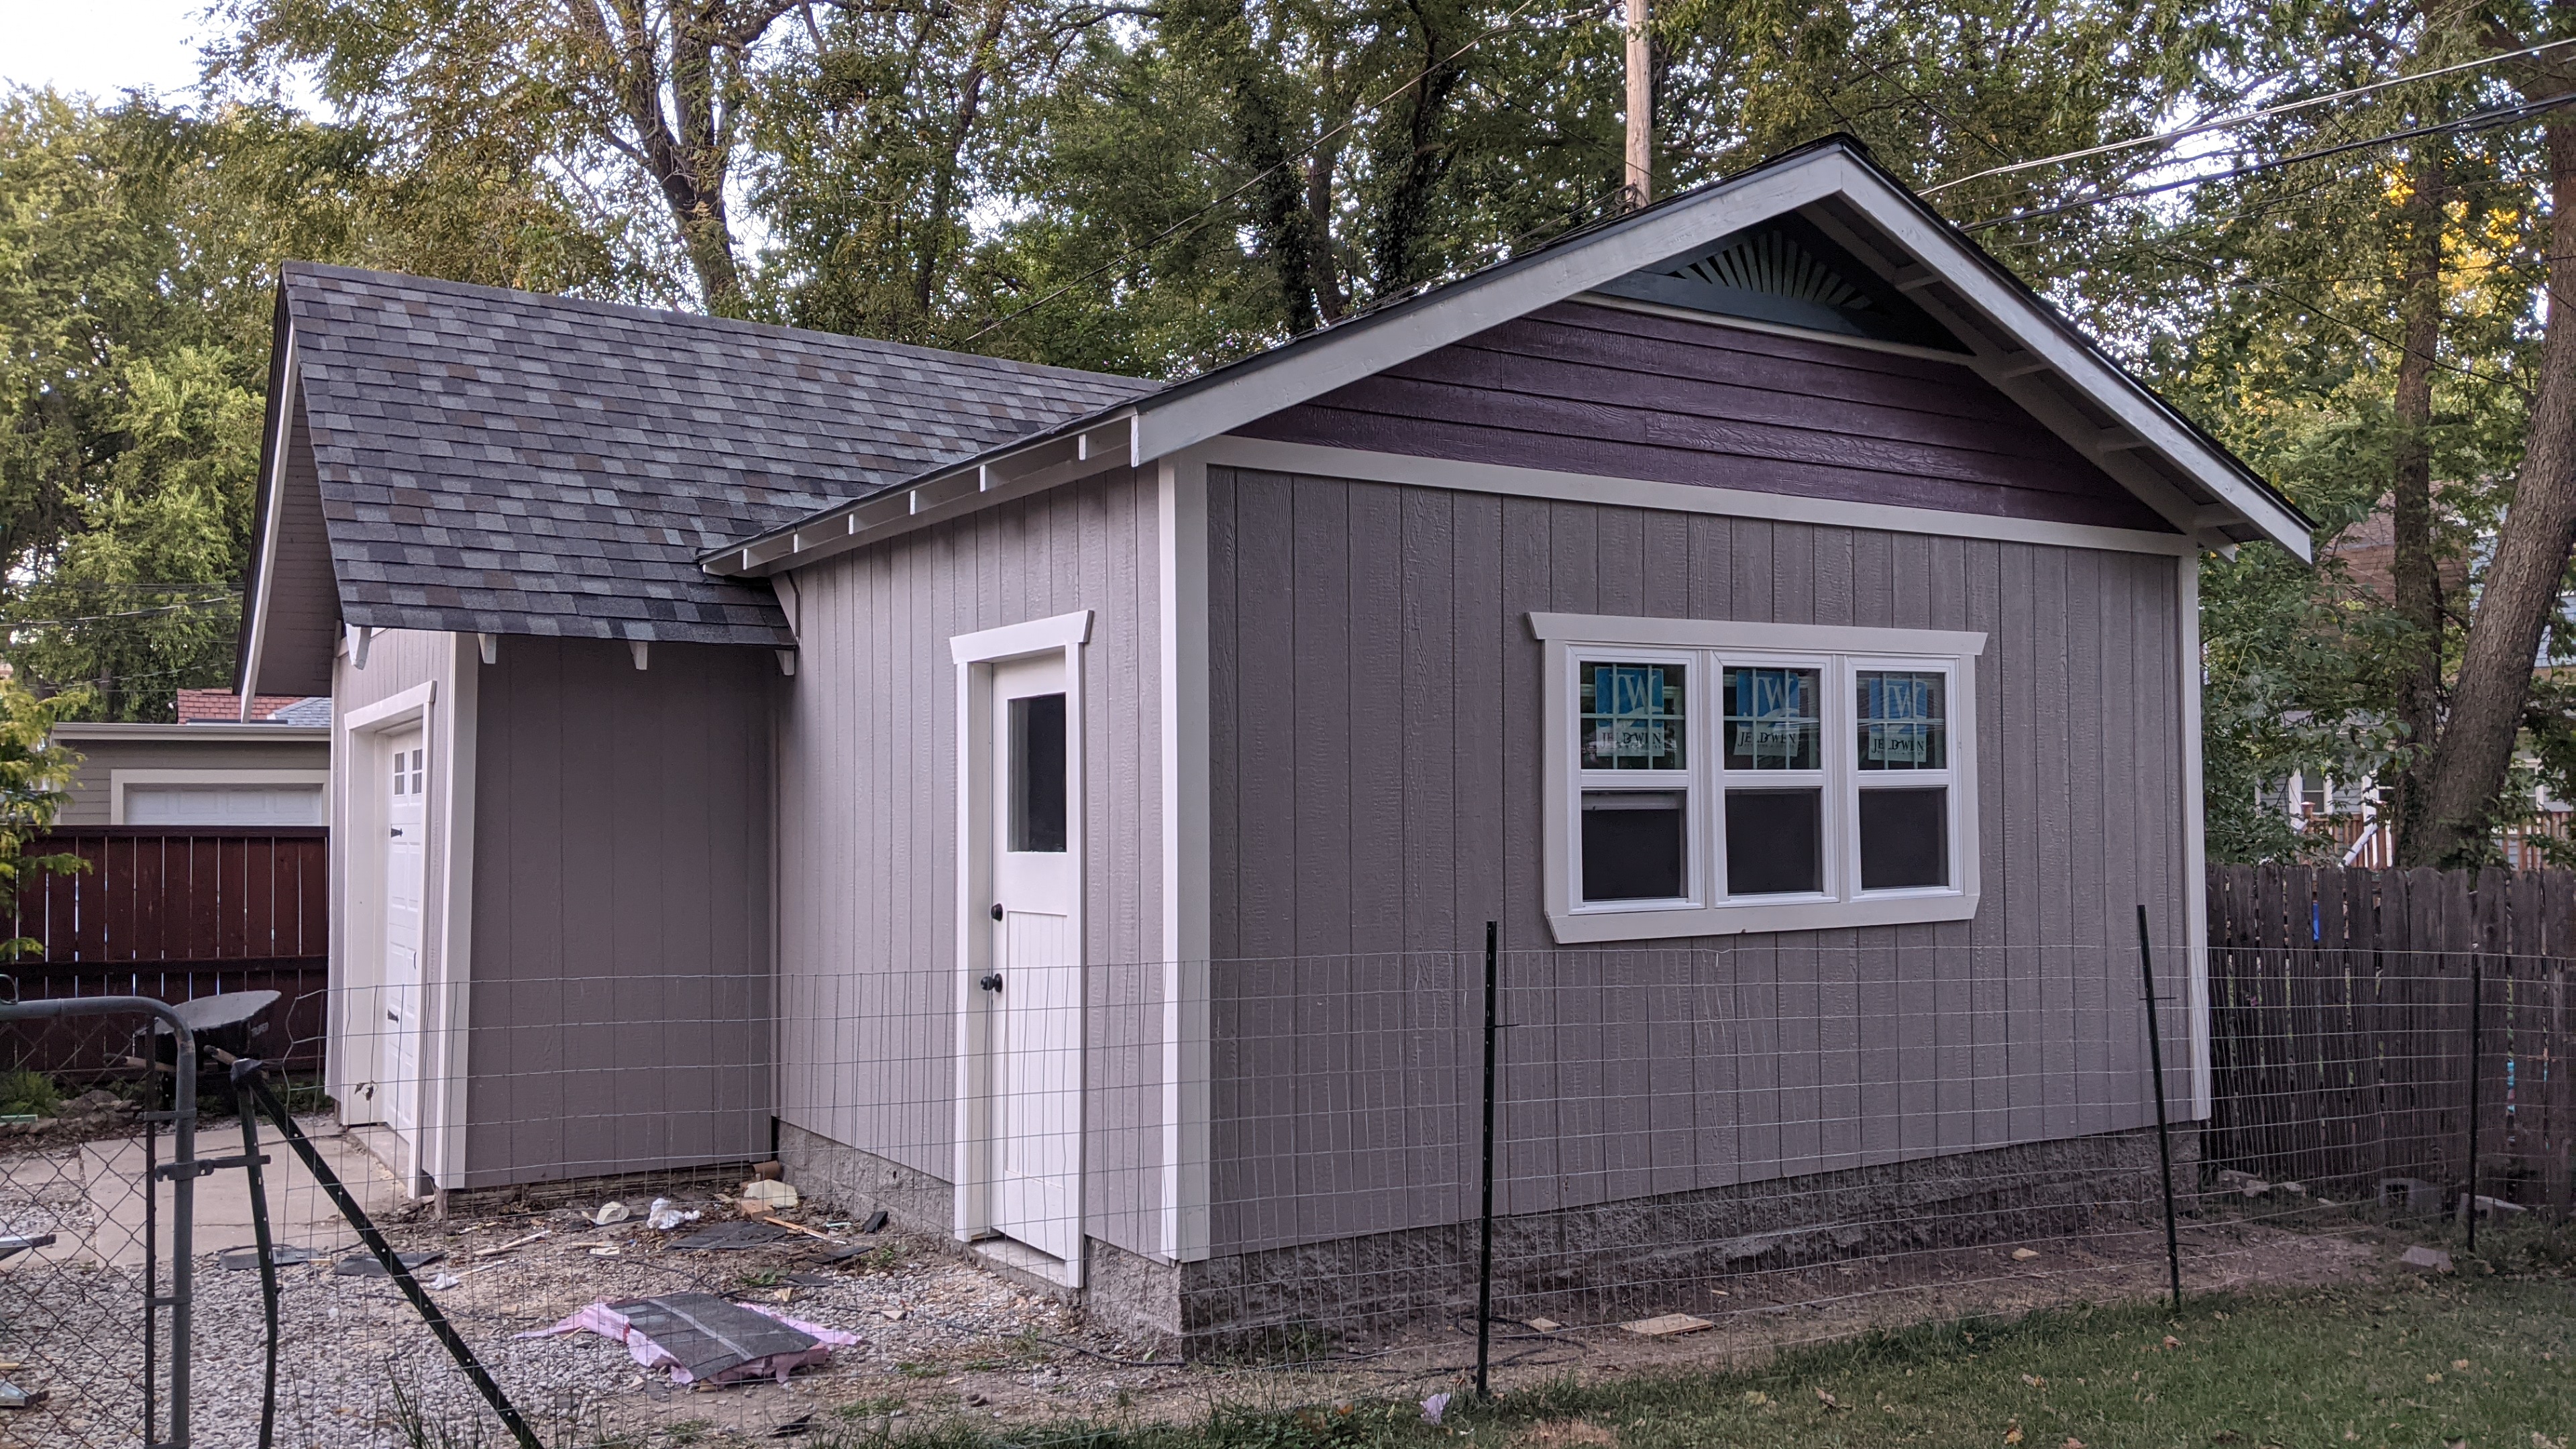
I've been just a little busy building two things: a baby and a new workshop. Well, my wife did most of the baby making work, but the workshop build easily took up all of my time. But now the time has come to get back to work on converting my 1969(?) Honda CA-160 "Baby Dream" to electric, a.k.a. Project Dream-E.
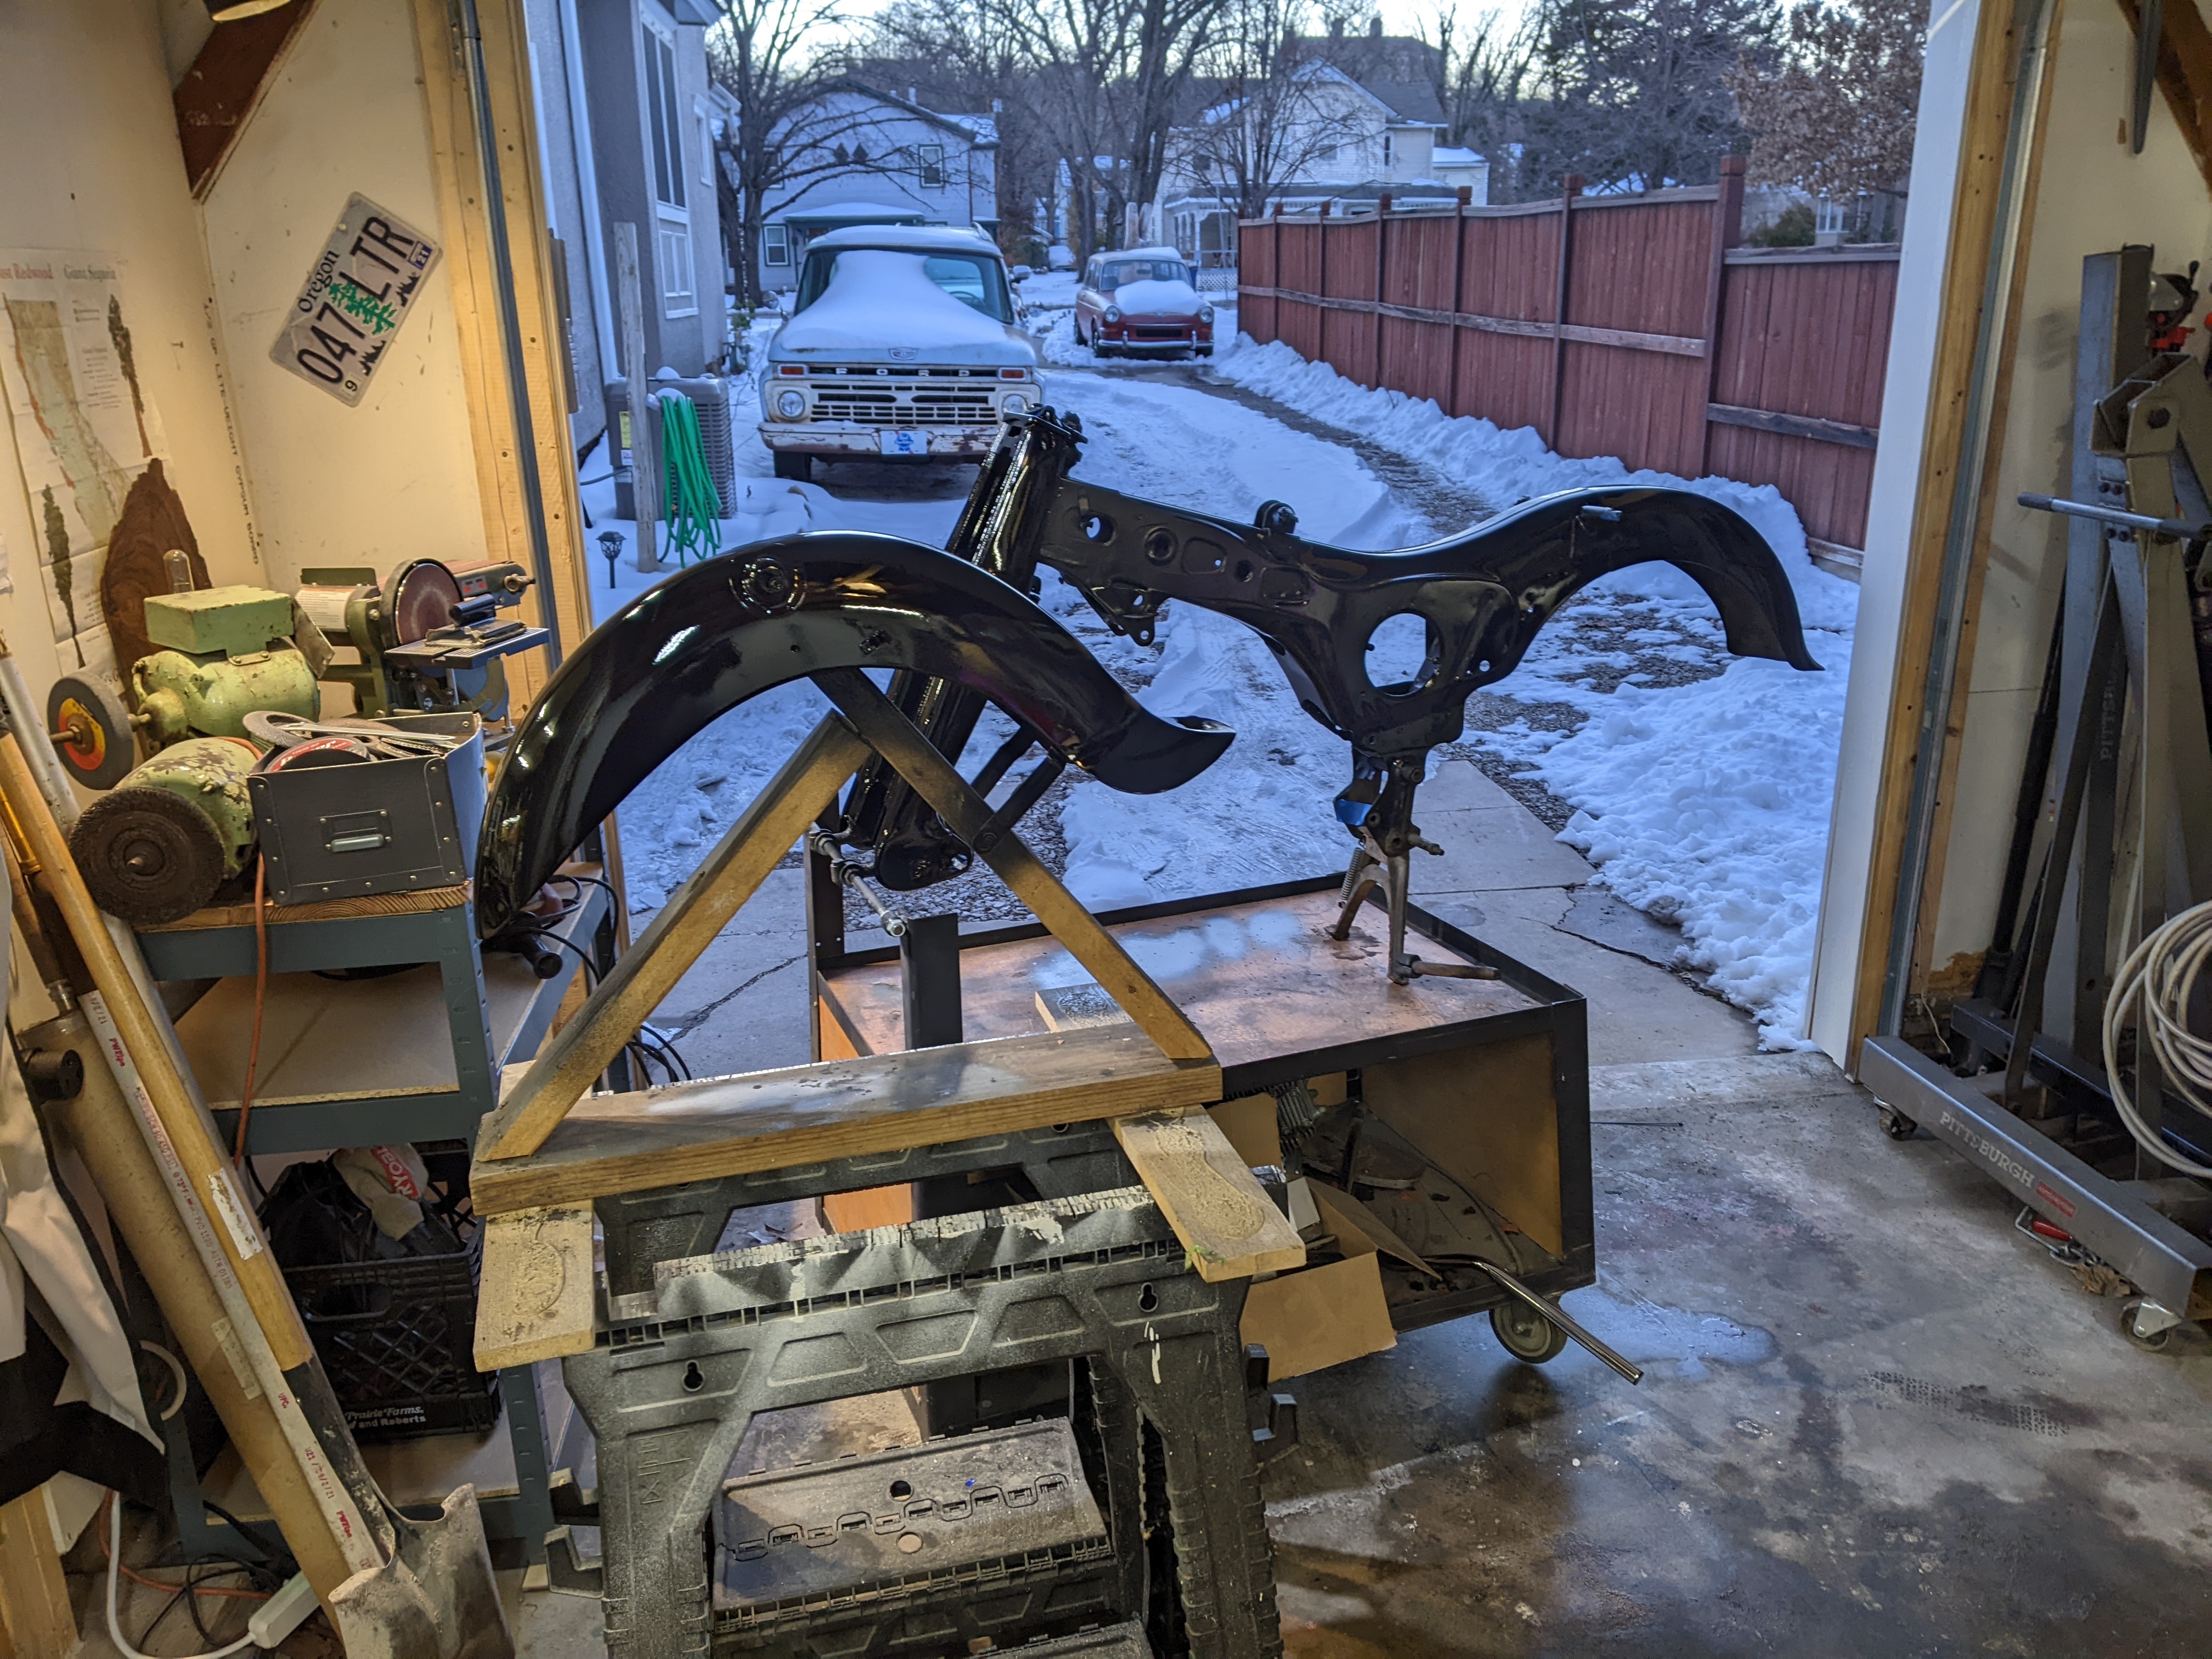
Her she is in her new home:
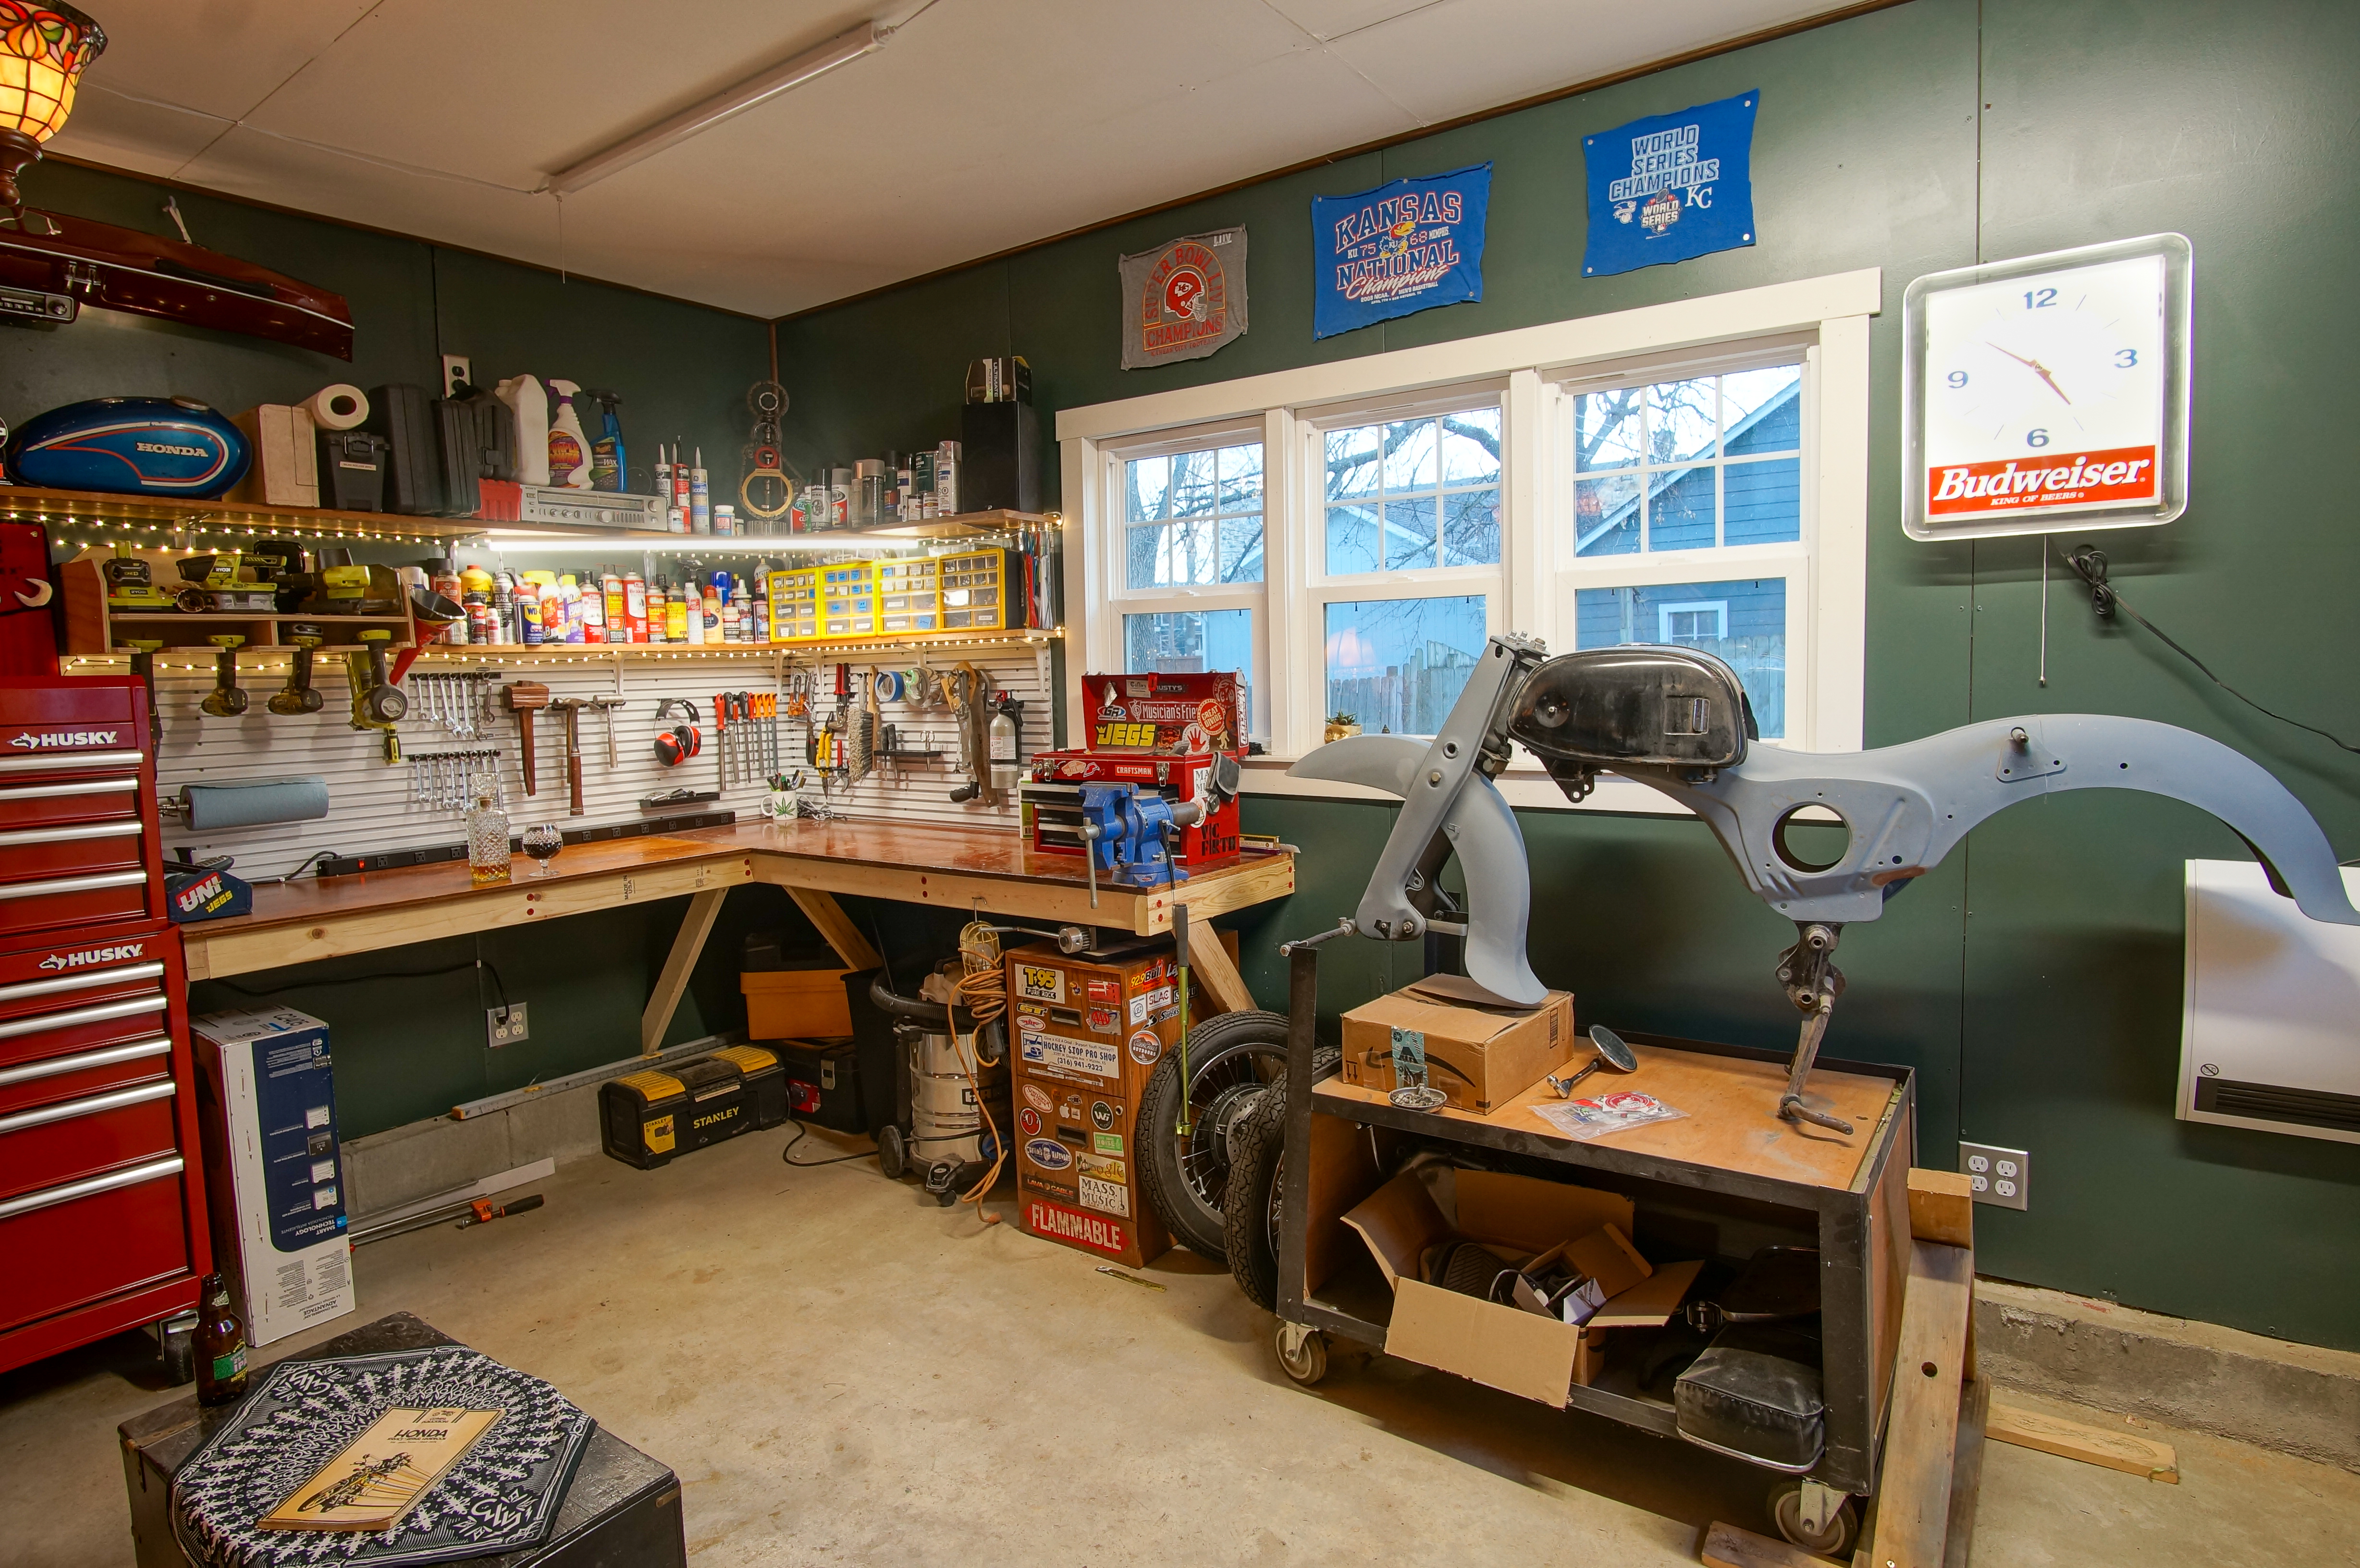
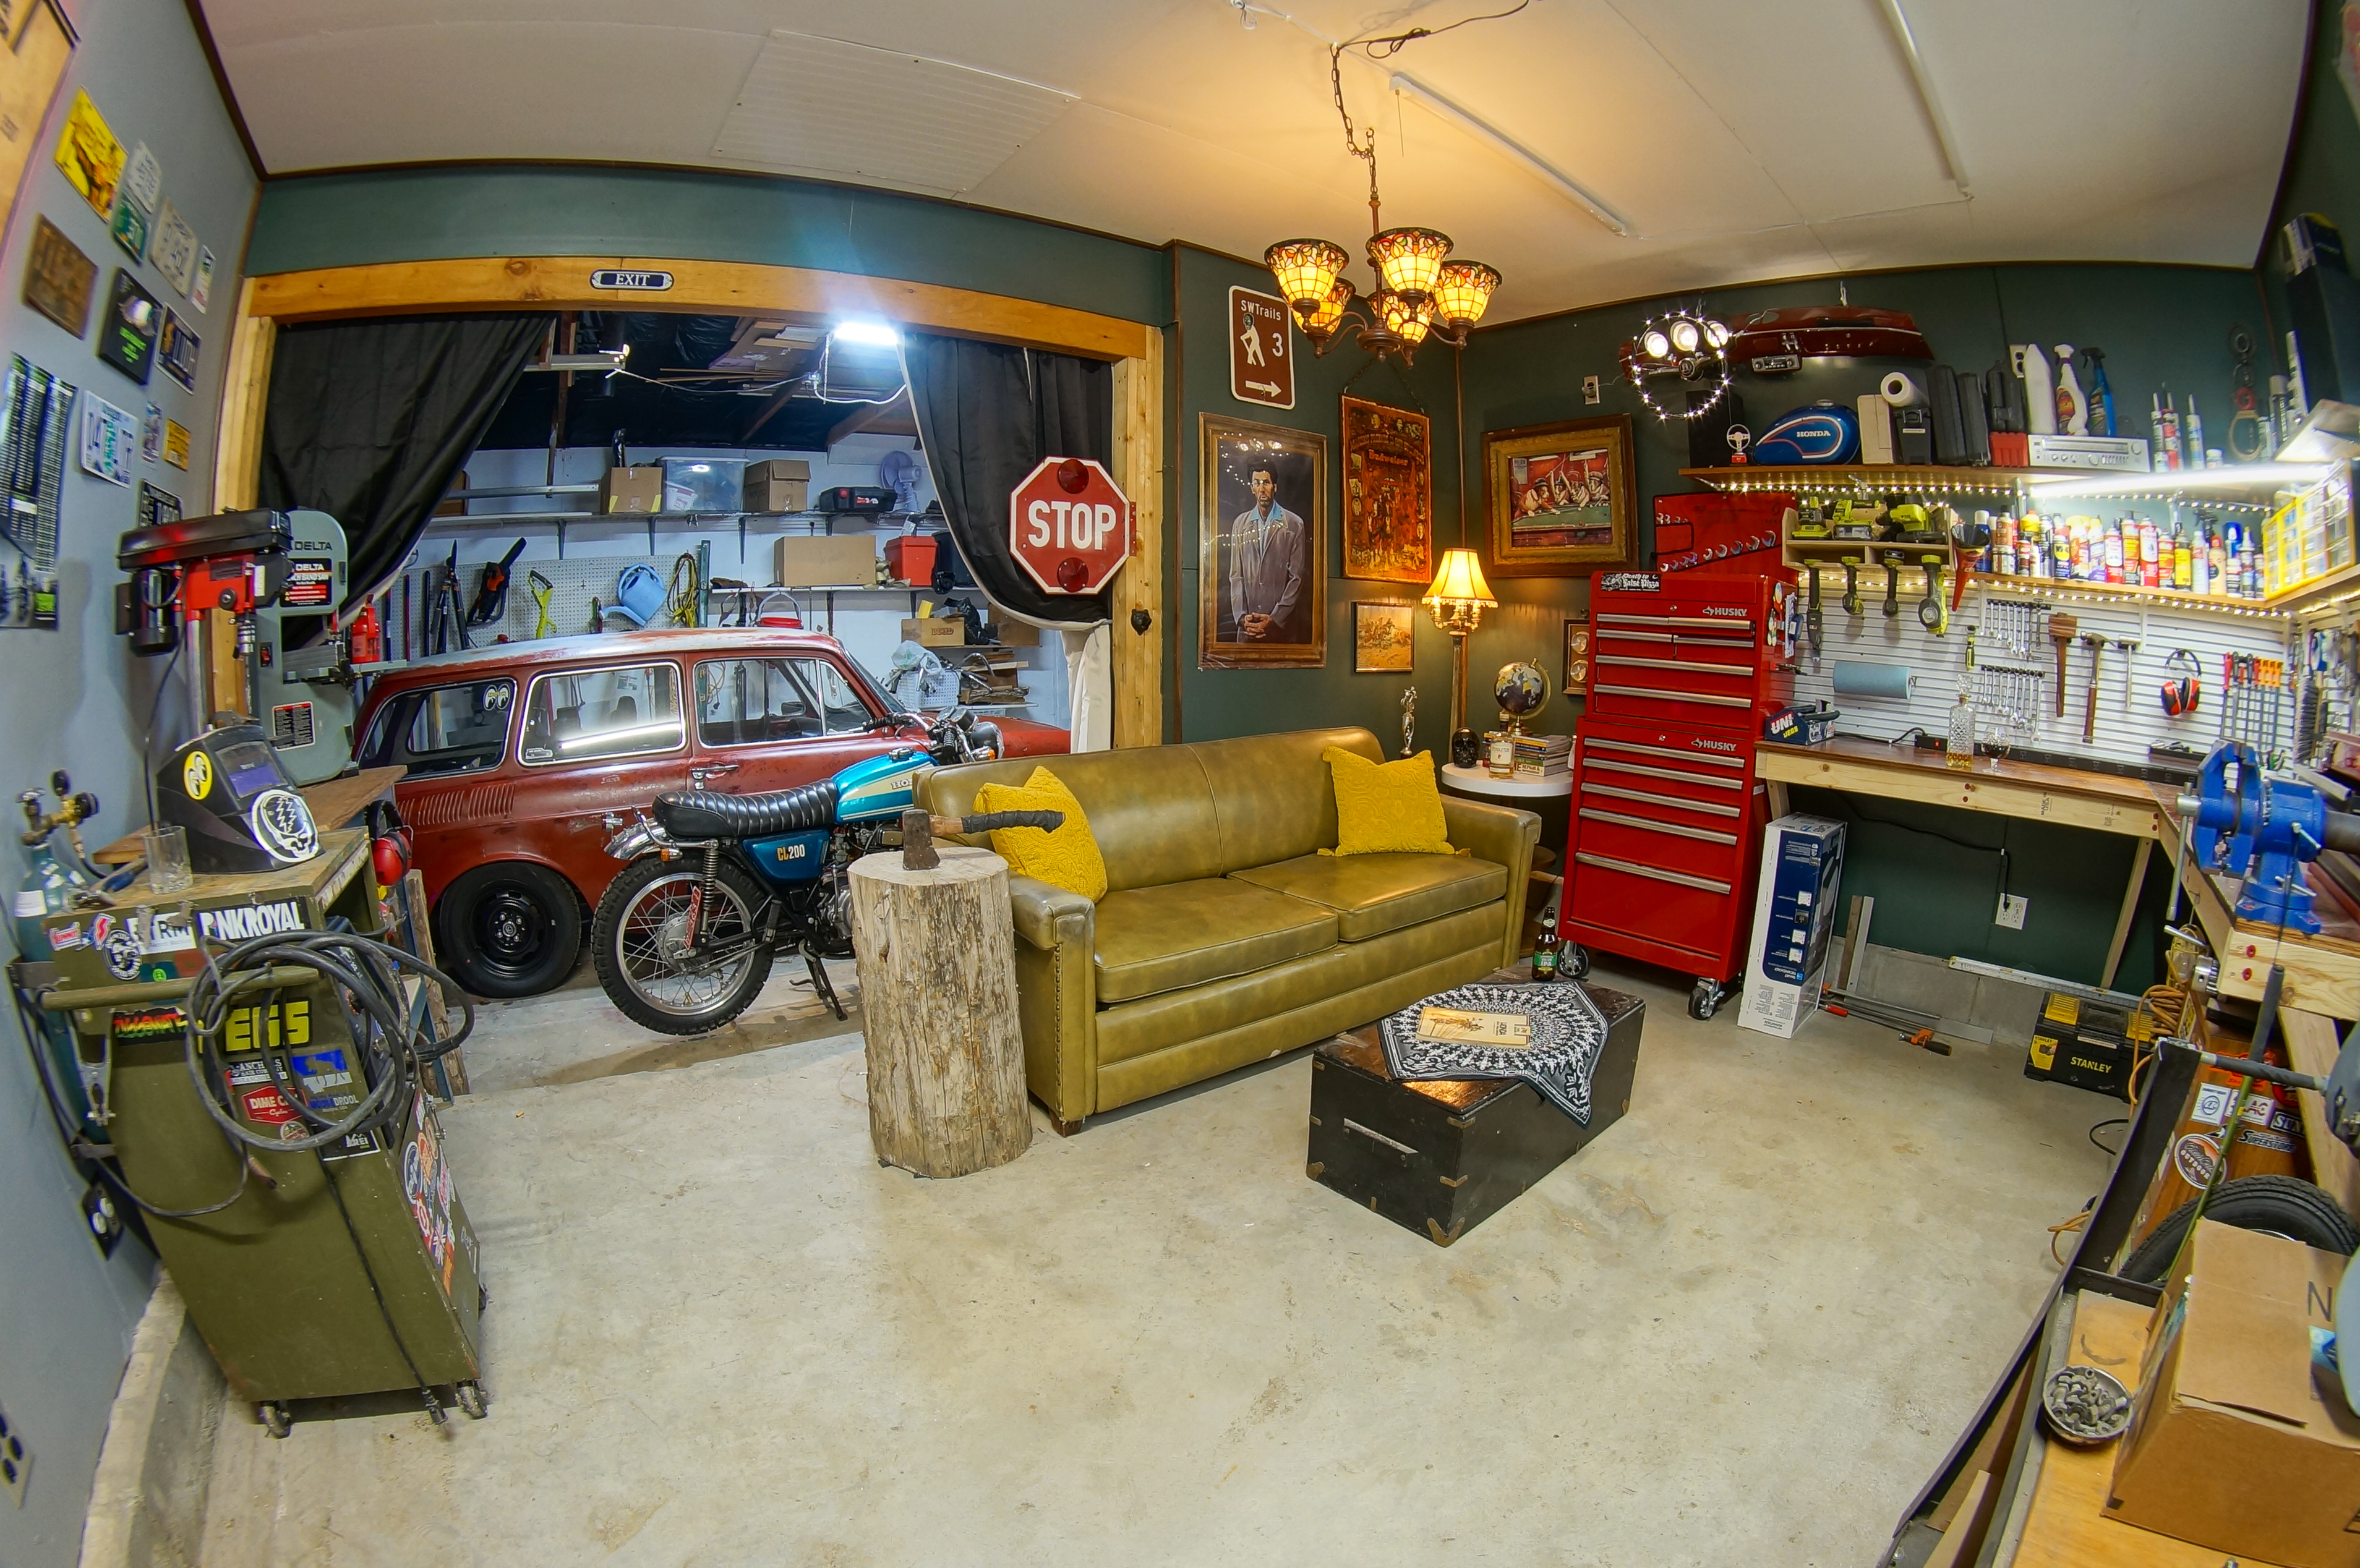
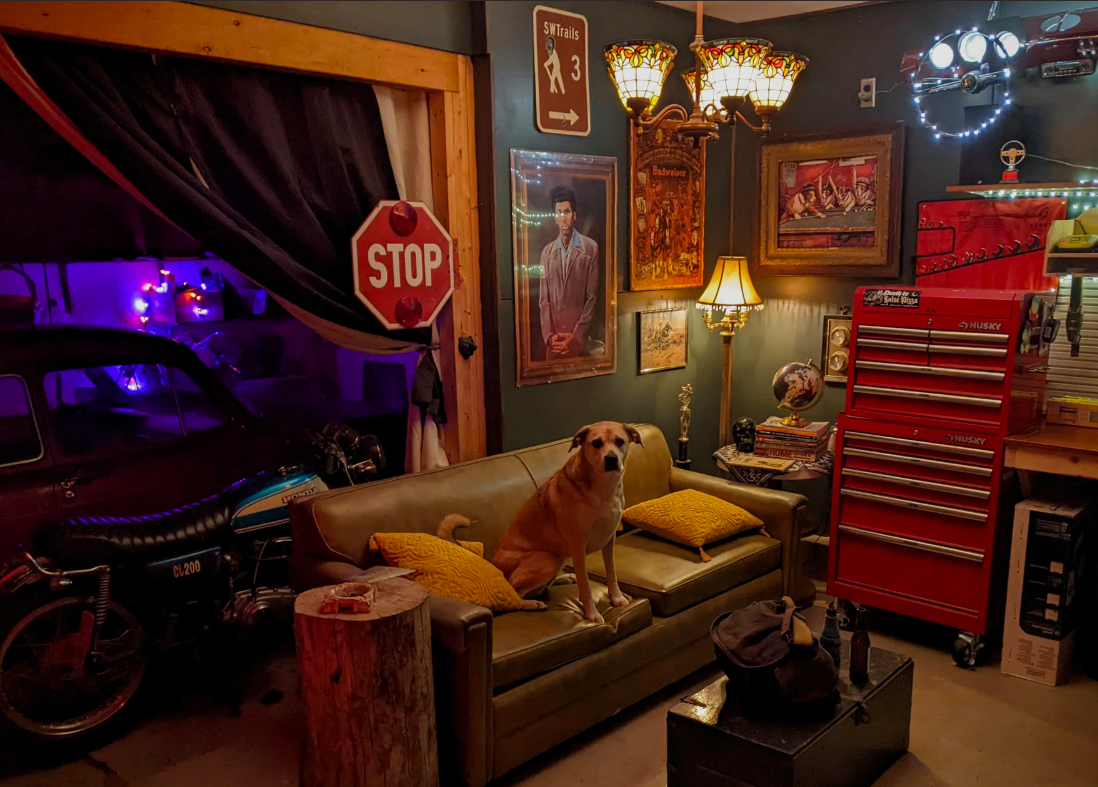
It's a motorcycle-building paradise. Yesterday I found myself sitting on the couch to work on the swingarm. Go figure lol.
Exterior:
Before and After:
...
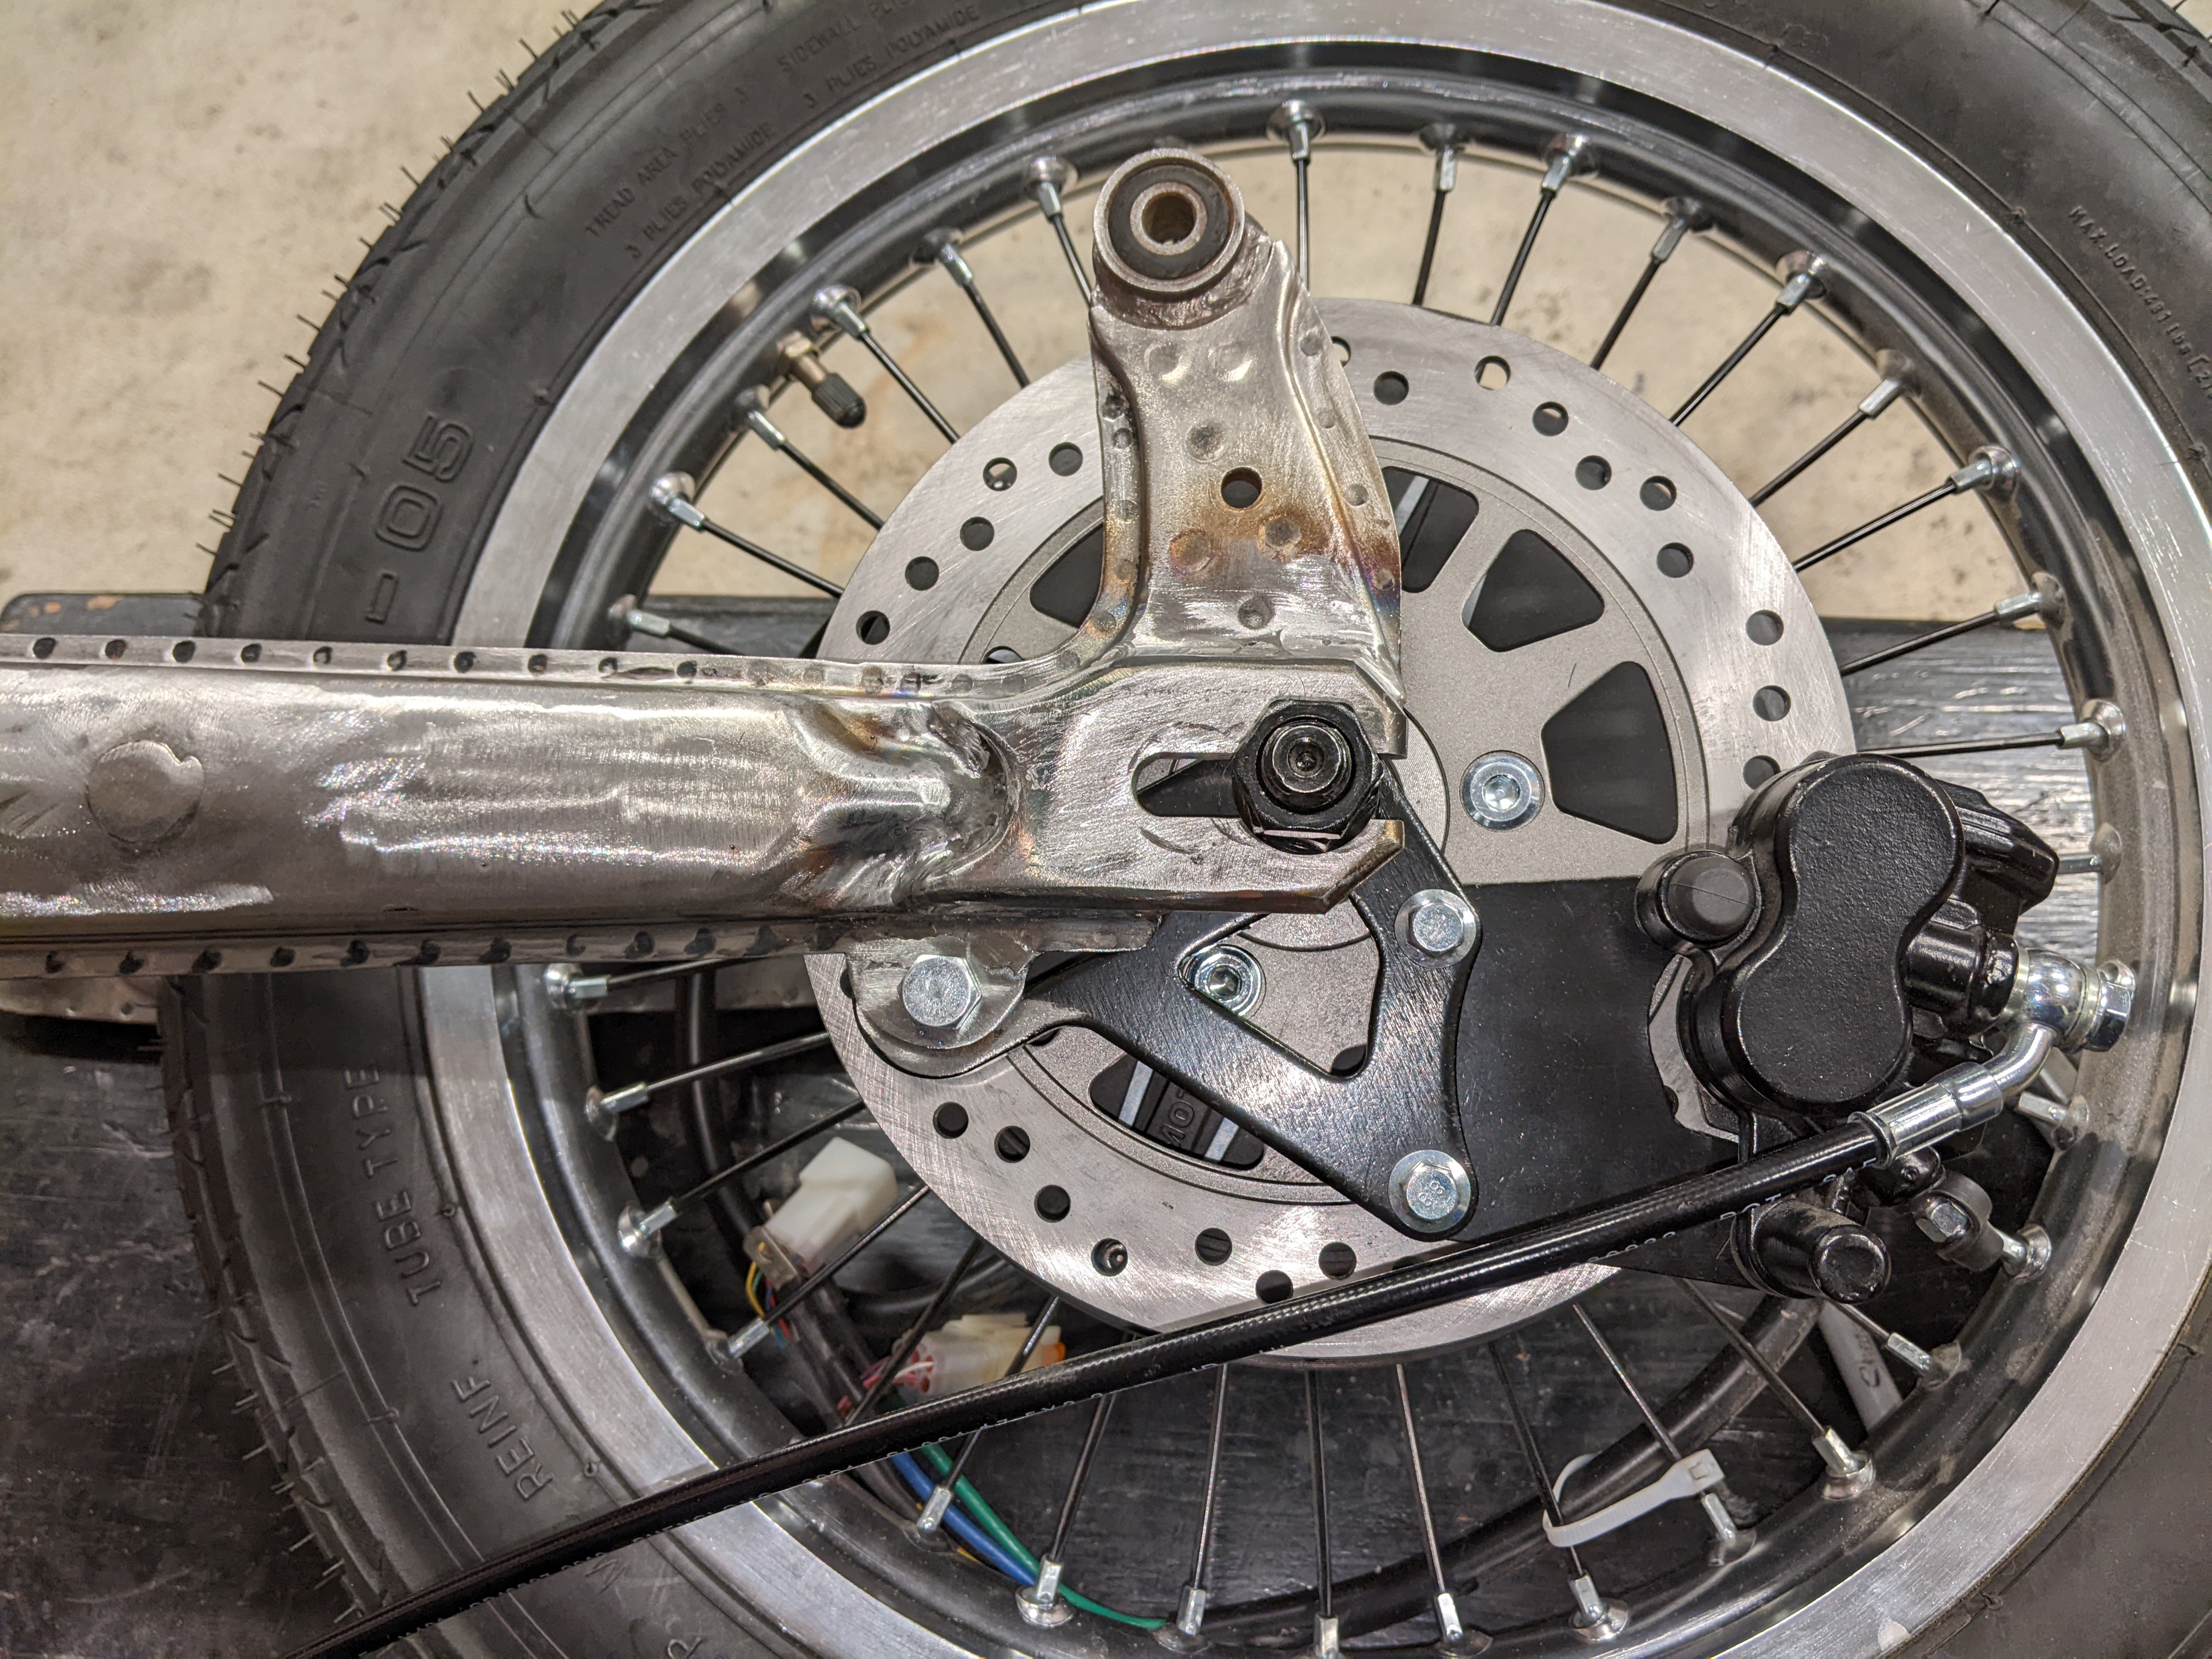
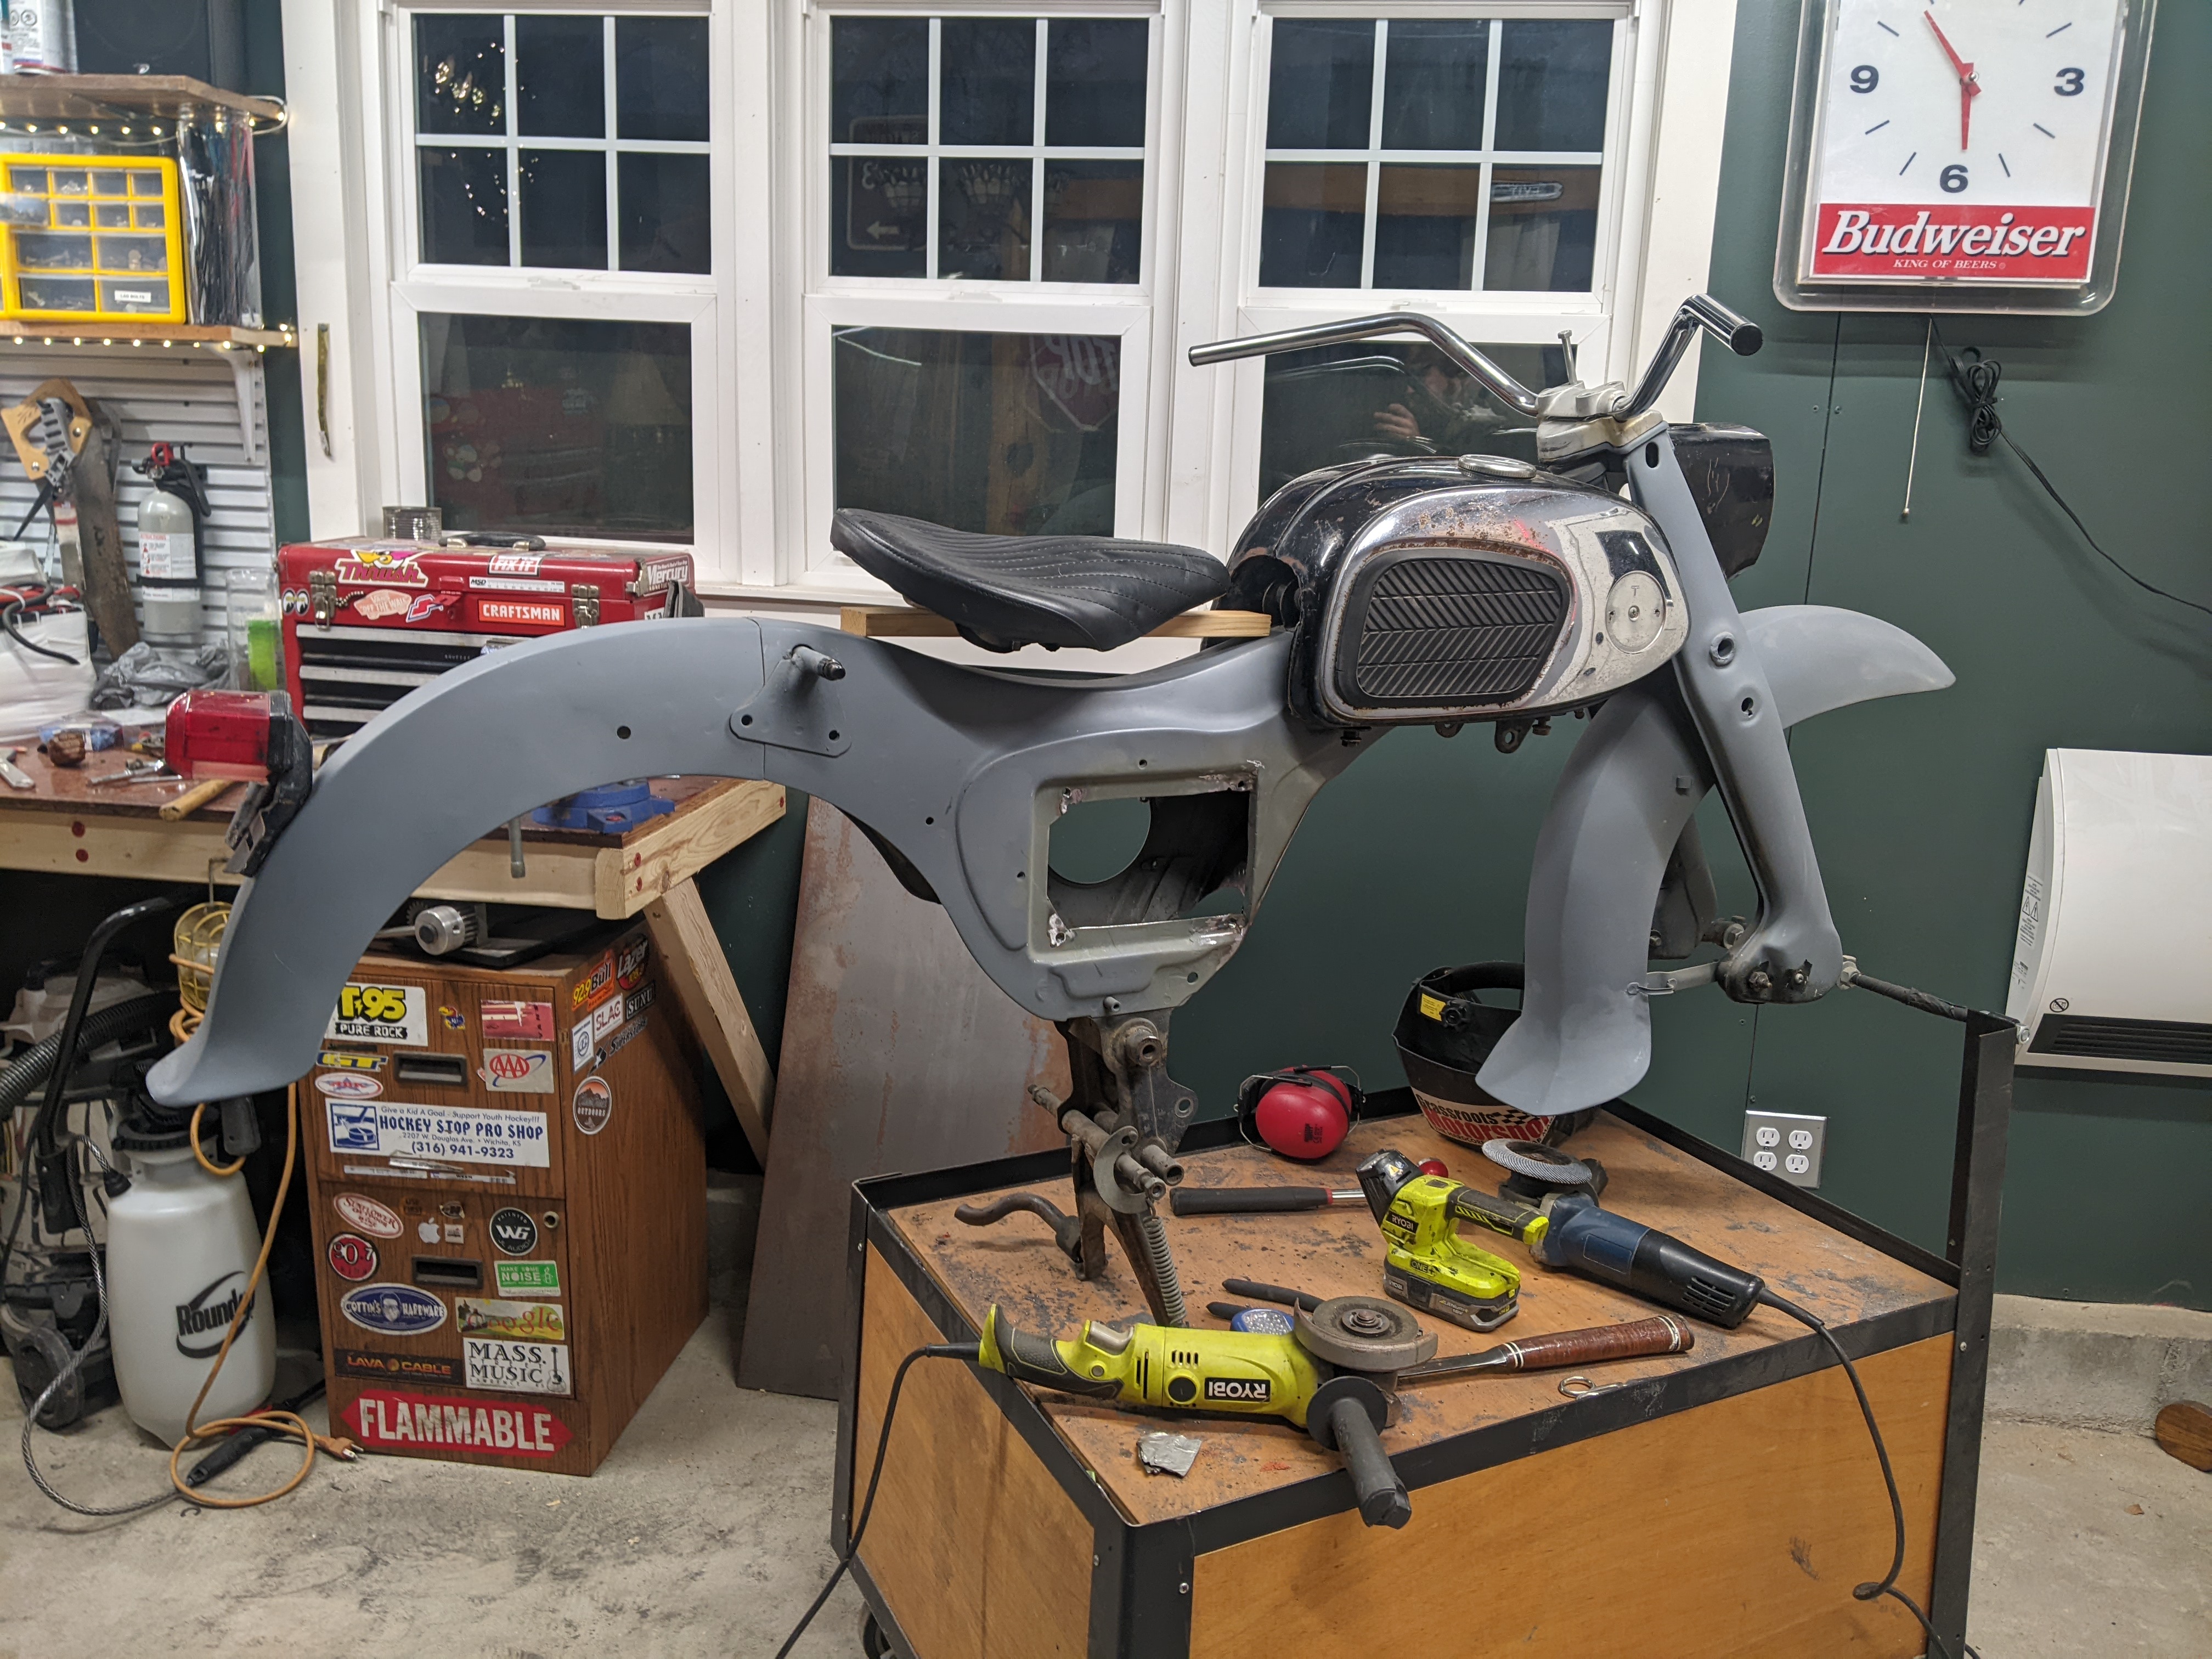
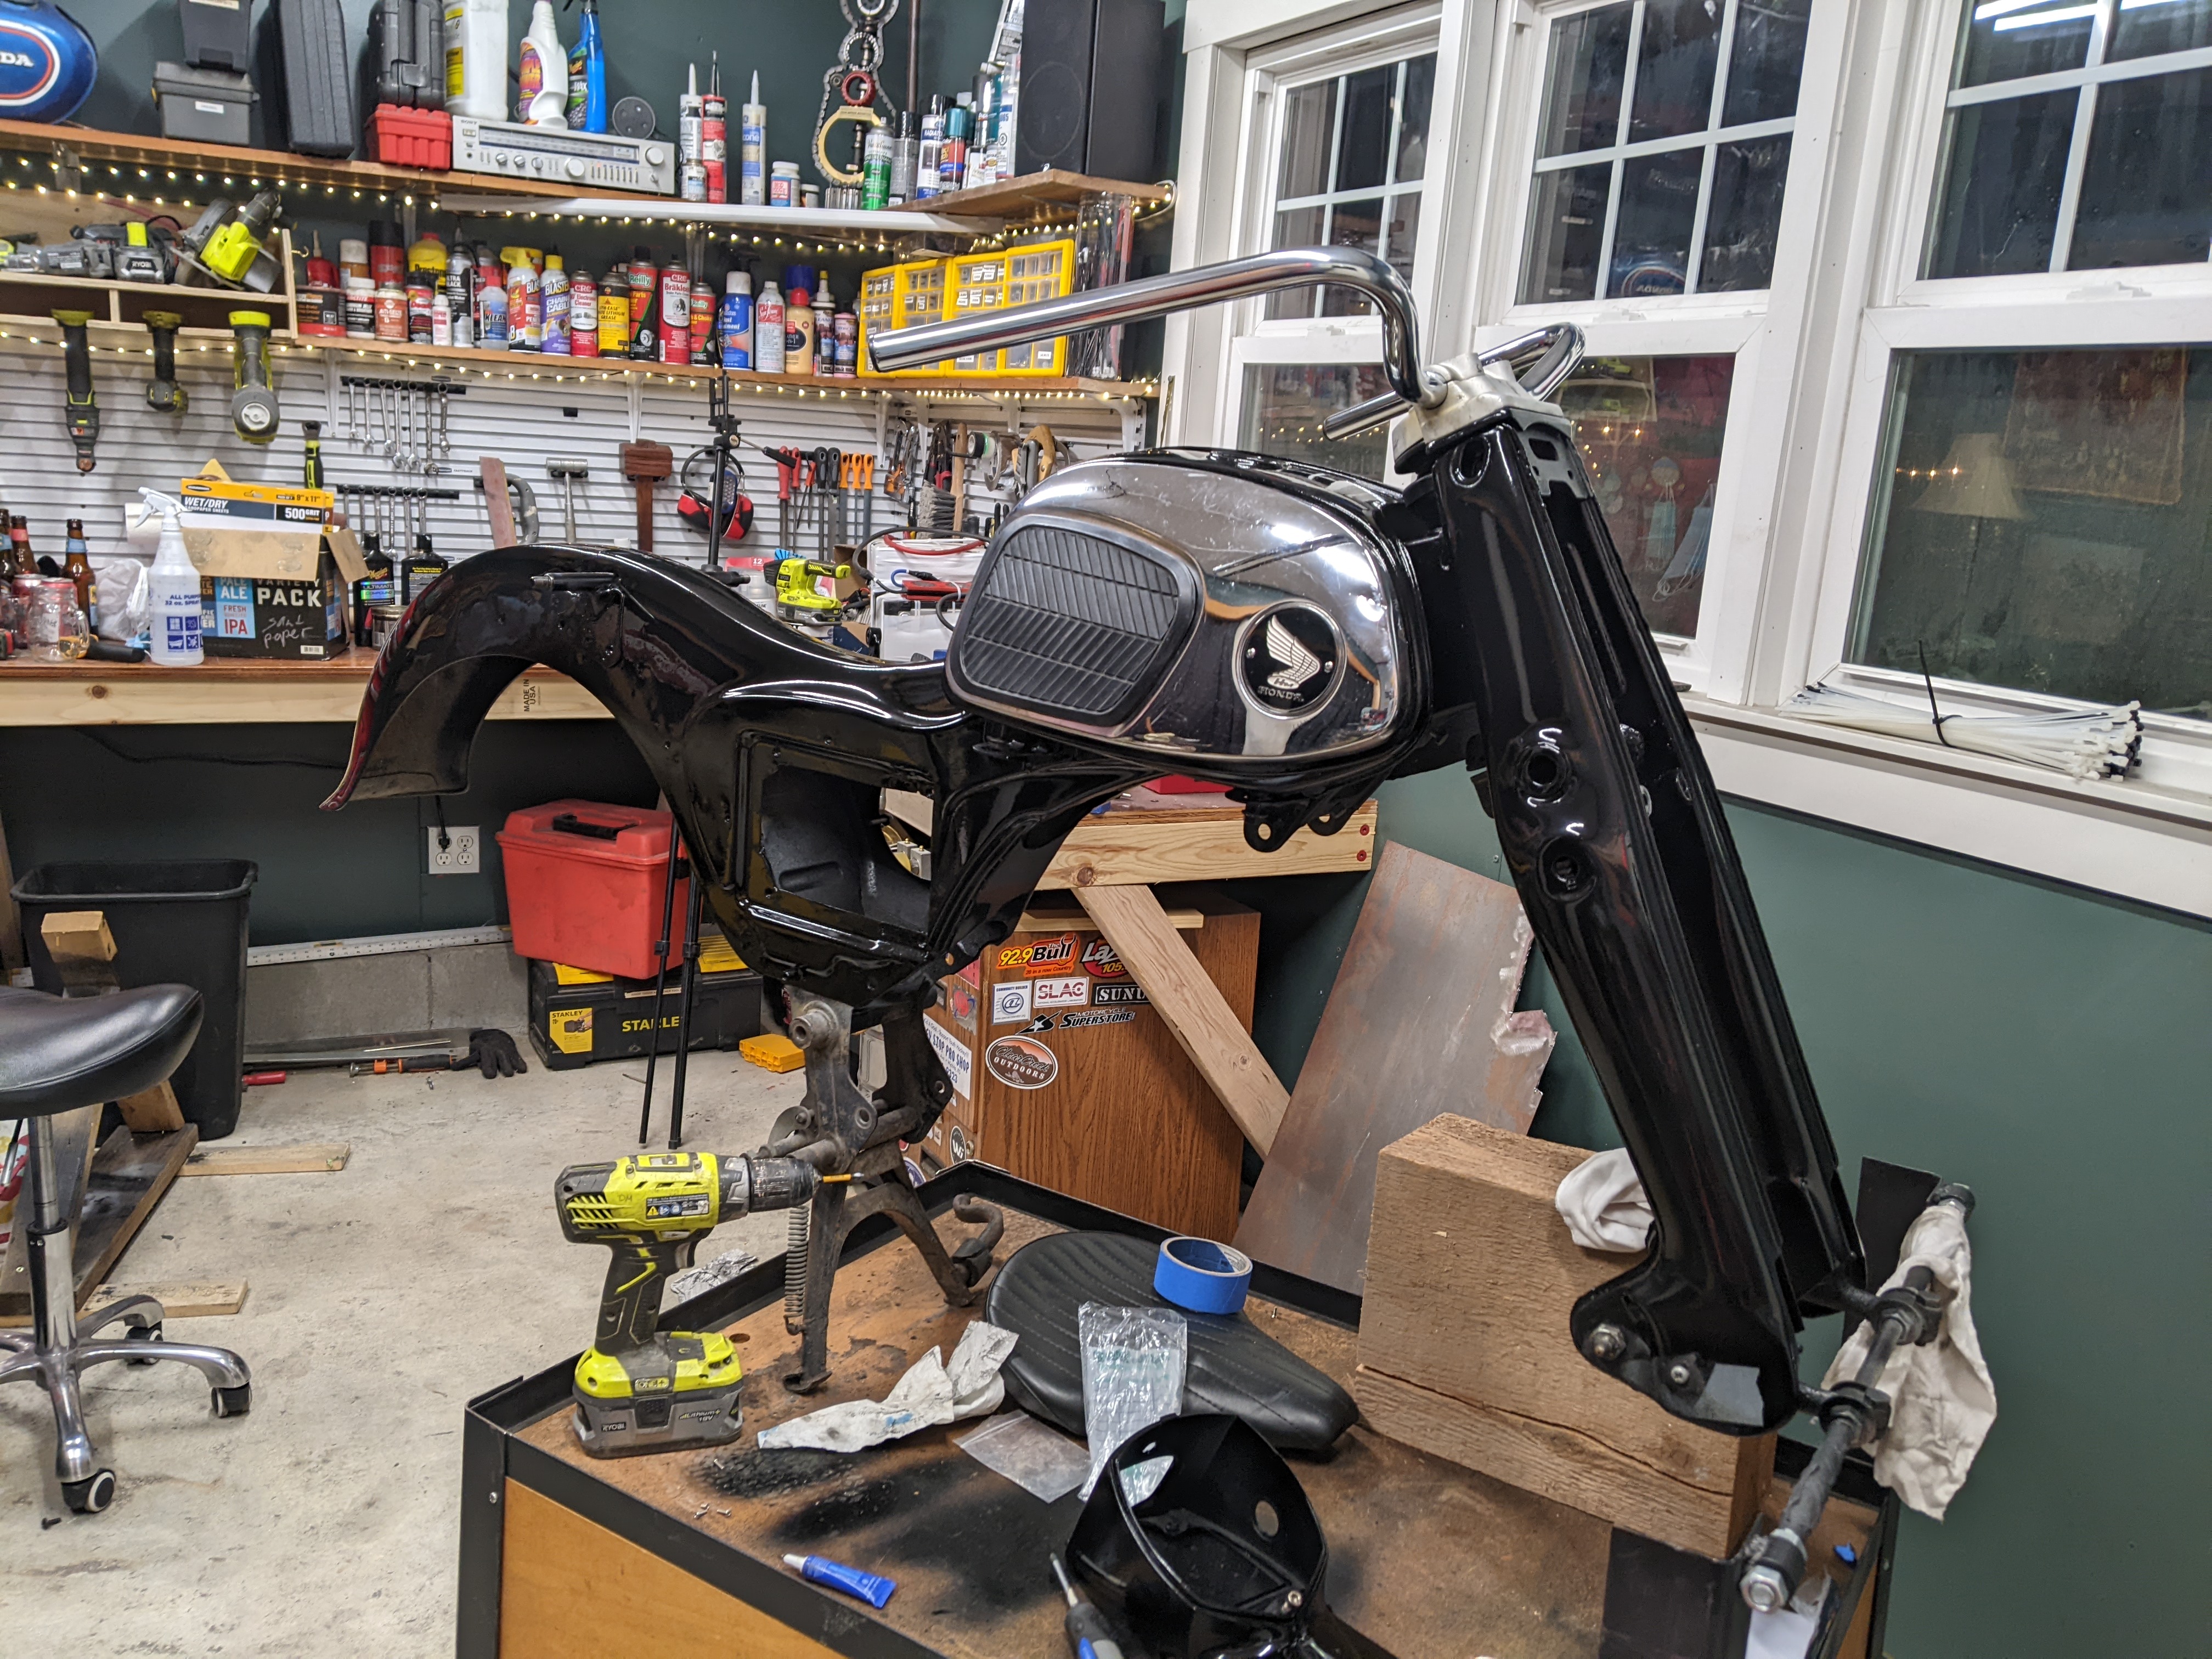
The last thing I did on the CA160 EV was fabricate new dropouts for the swingarm, but there was one last thing to do: weld on a tab for the disc brake mount. I also welded on a few washers that will be nice attachment points for some zip-ties.
Mounting the EV Components
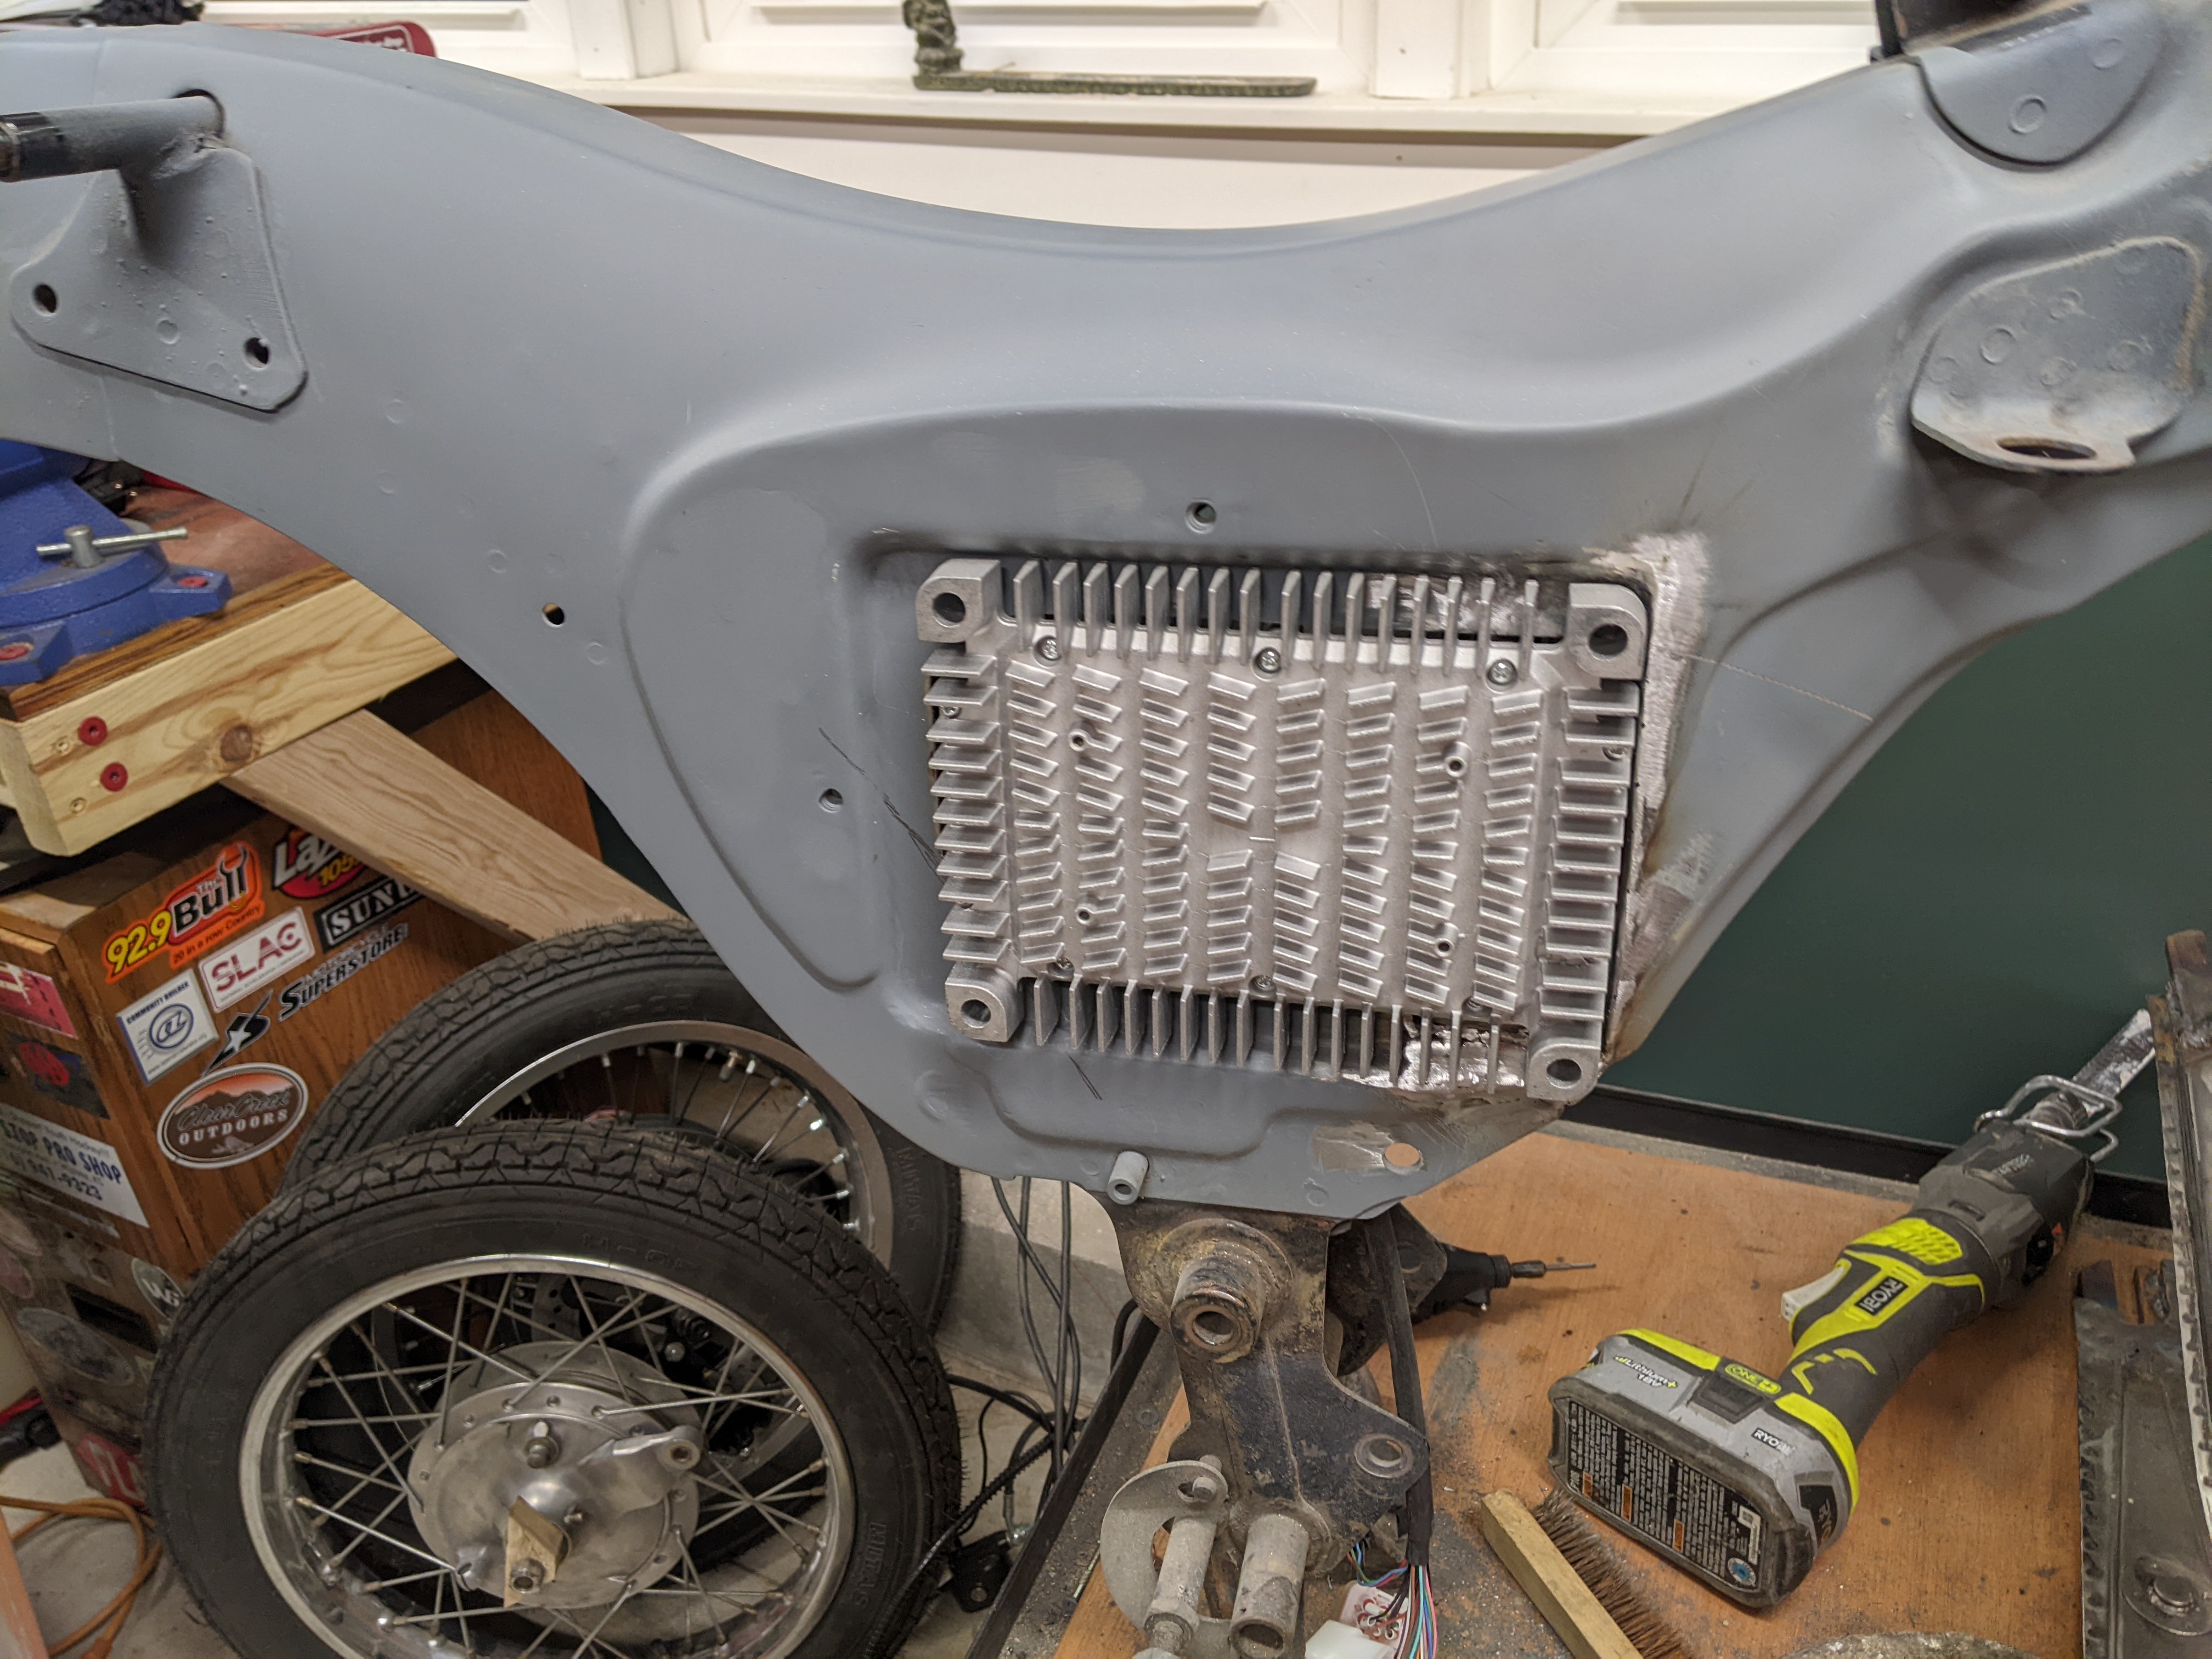
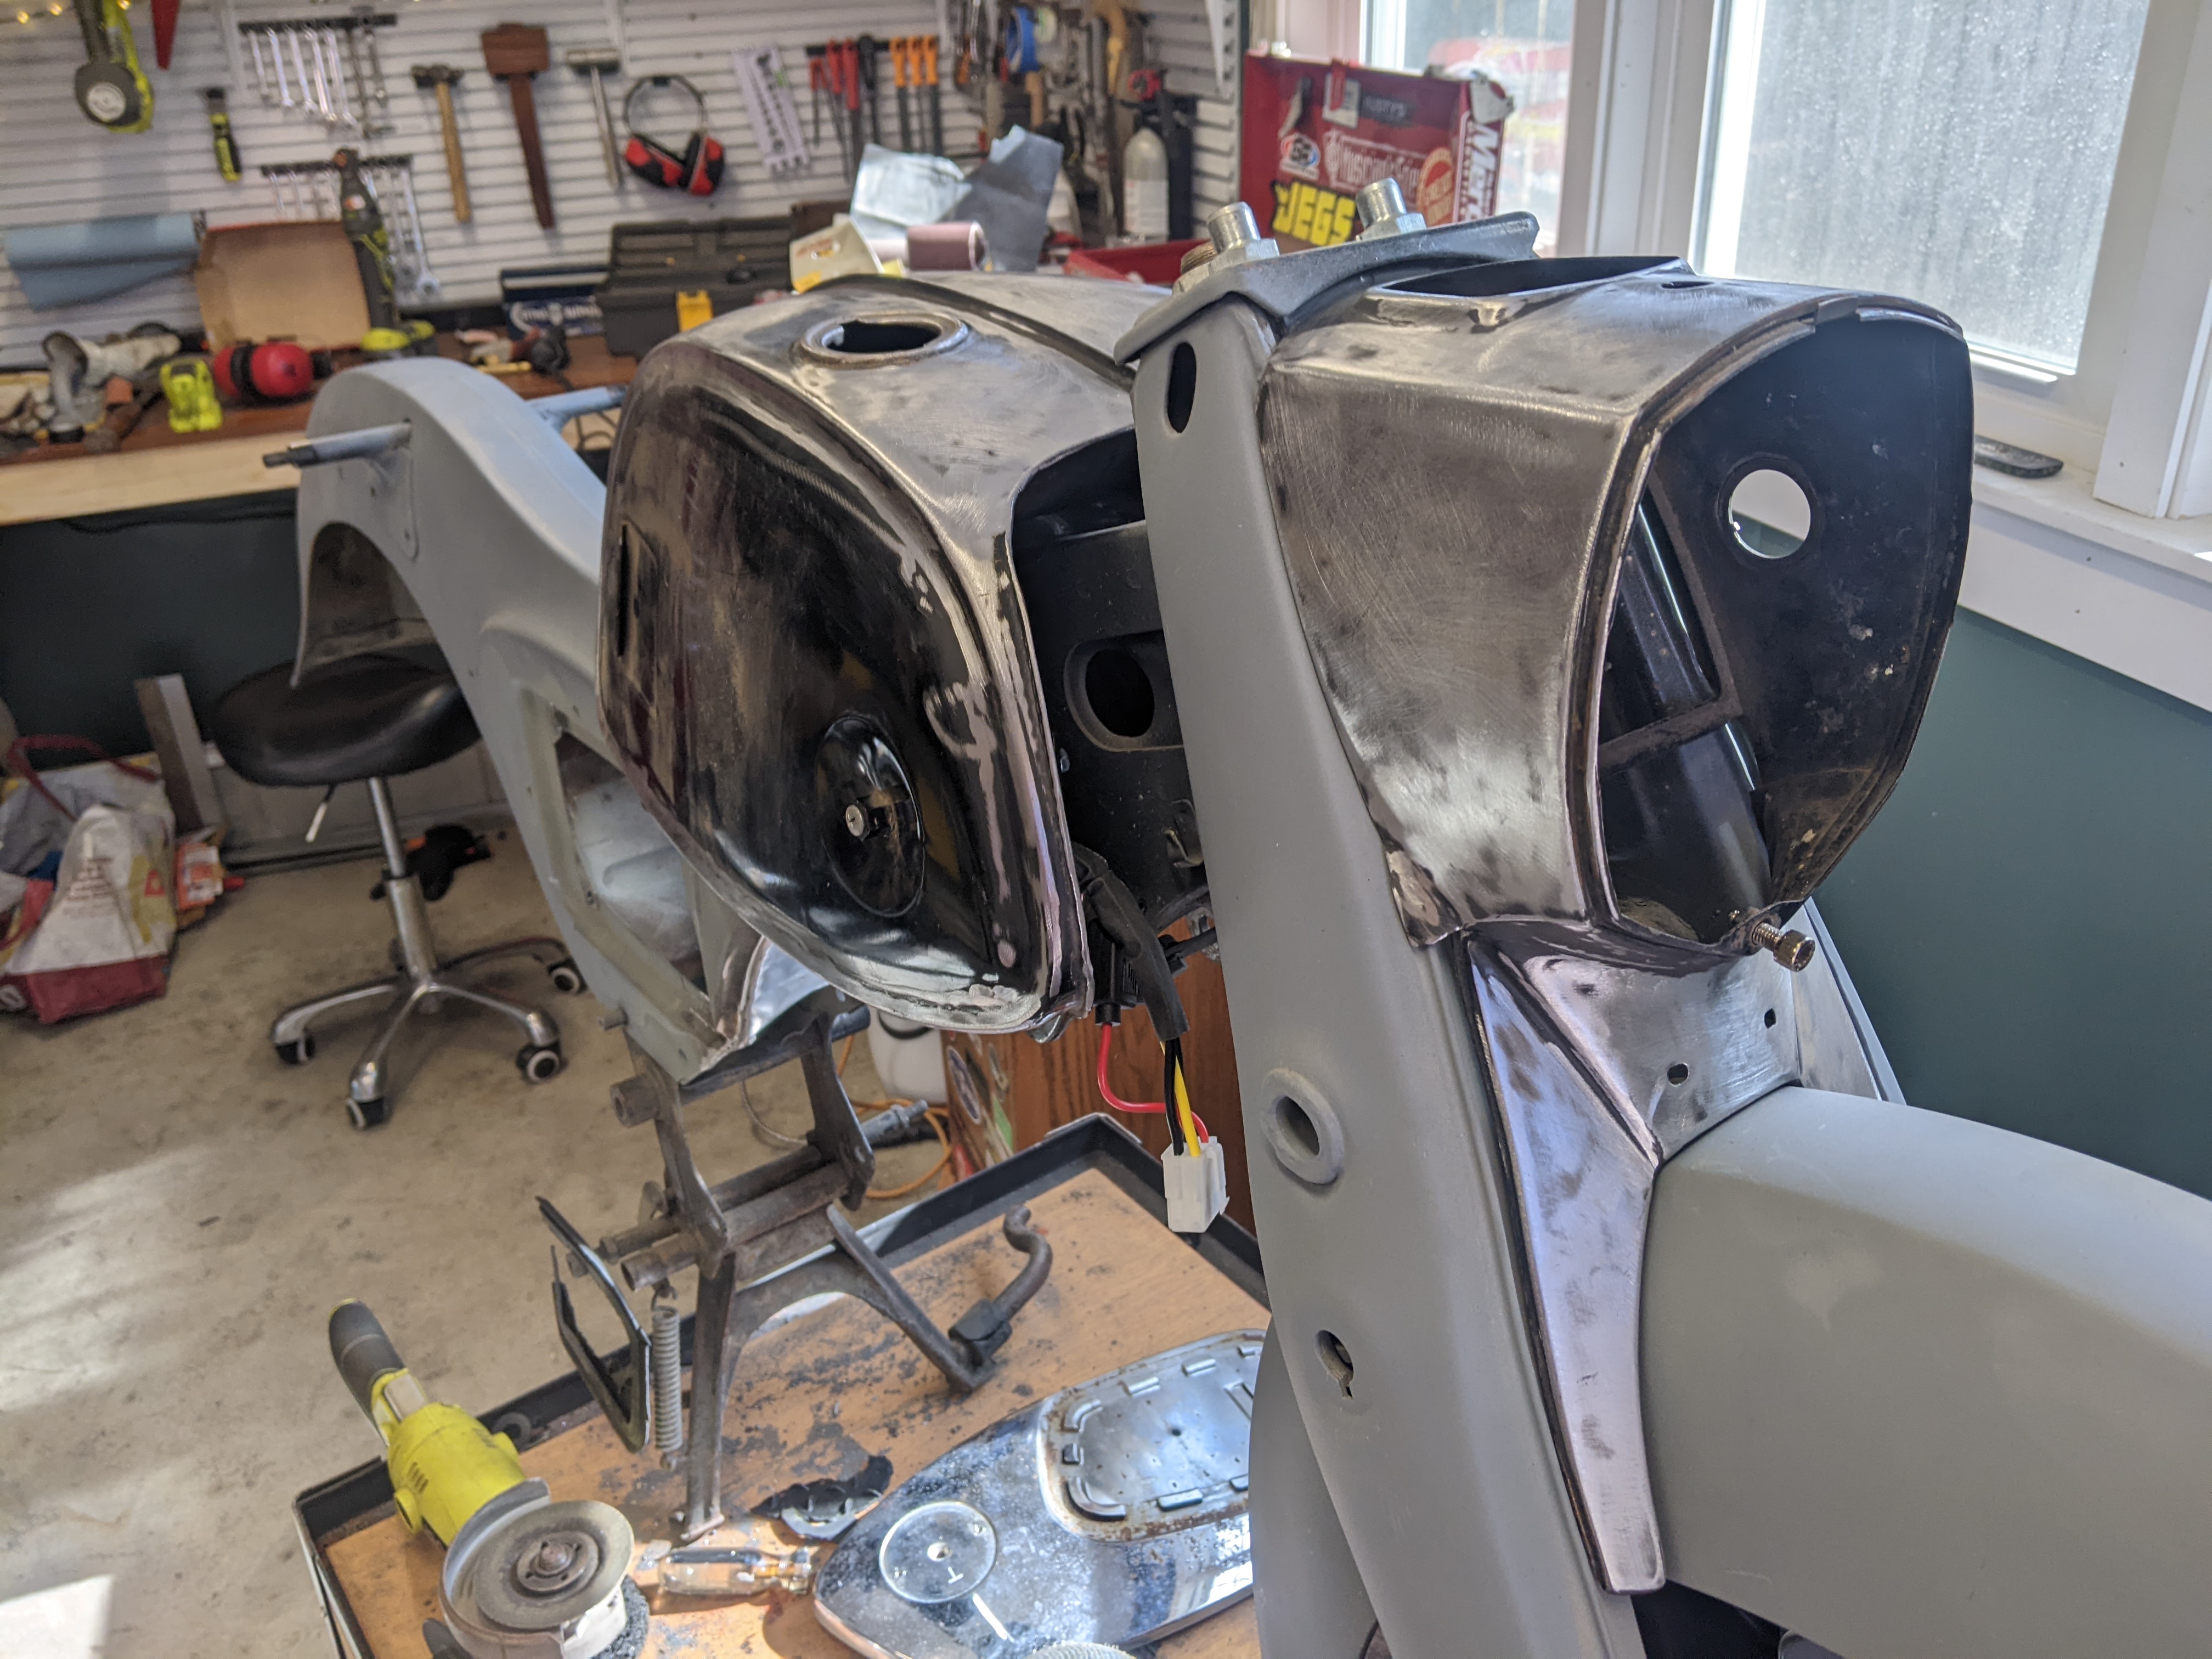
Next, I wanted to get the motor controller mounted to the motorcycle's frame/body (it's one stamped piece of stamped 16-ga steel), and get that sorted out before paint.
I knew I wanted it in this location, but it just wasn't going to fit perfectly, and I needed to reshape the body a little.
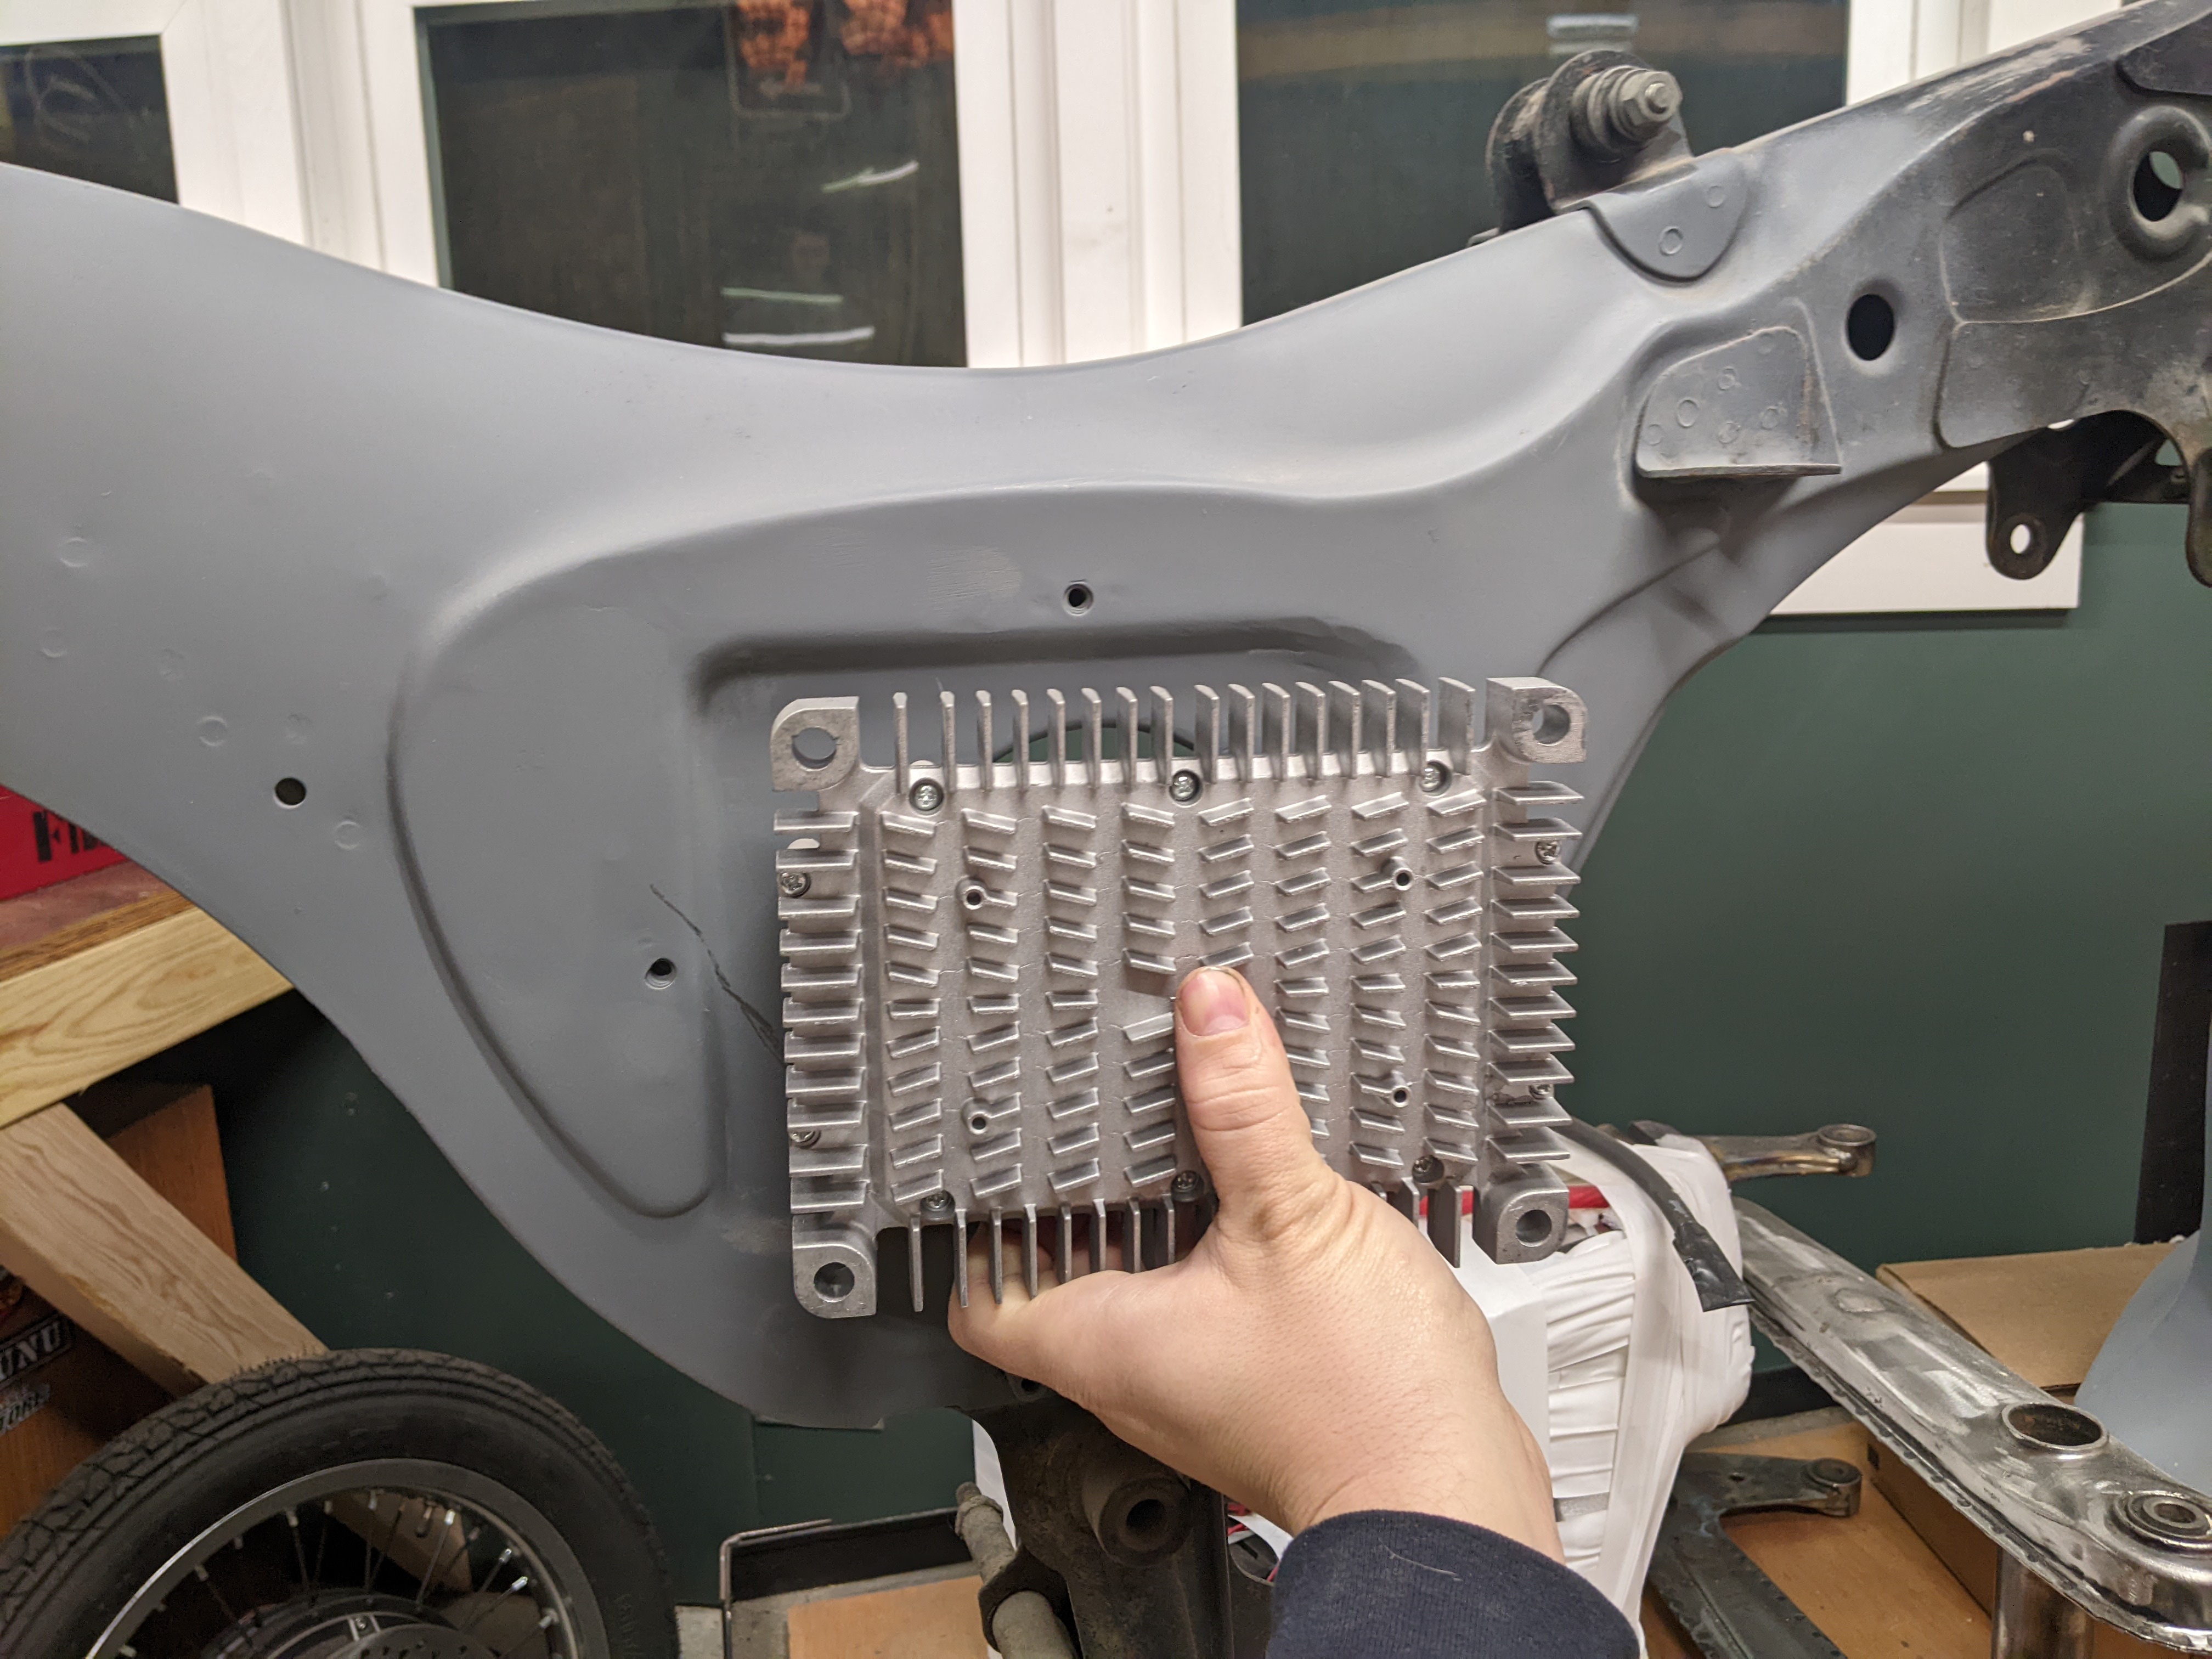
The above image shows the cooling fins on the backside of the controller, but on the other side is the controller itself.

The photo below shows the line that represents what I will have to cut:
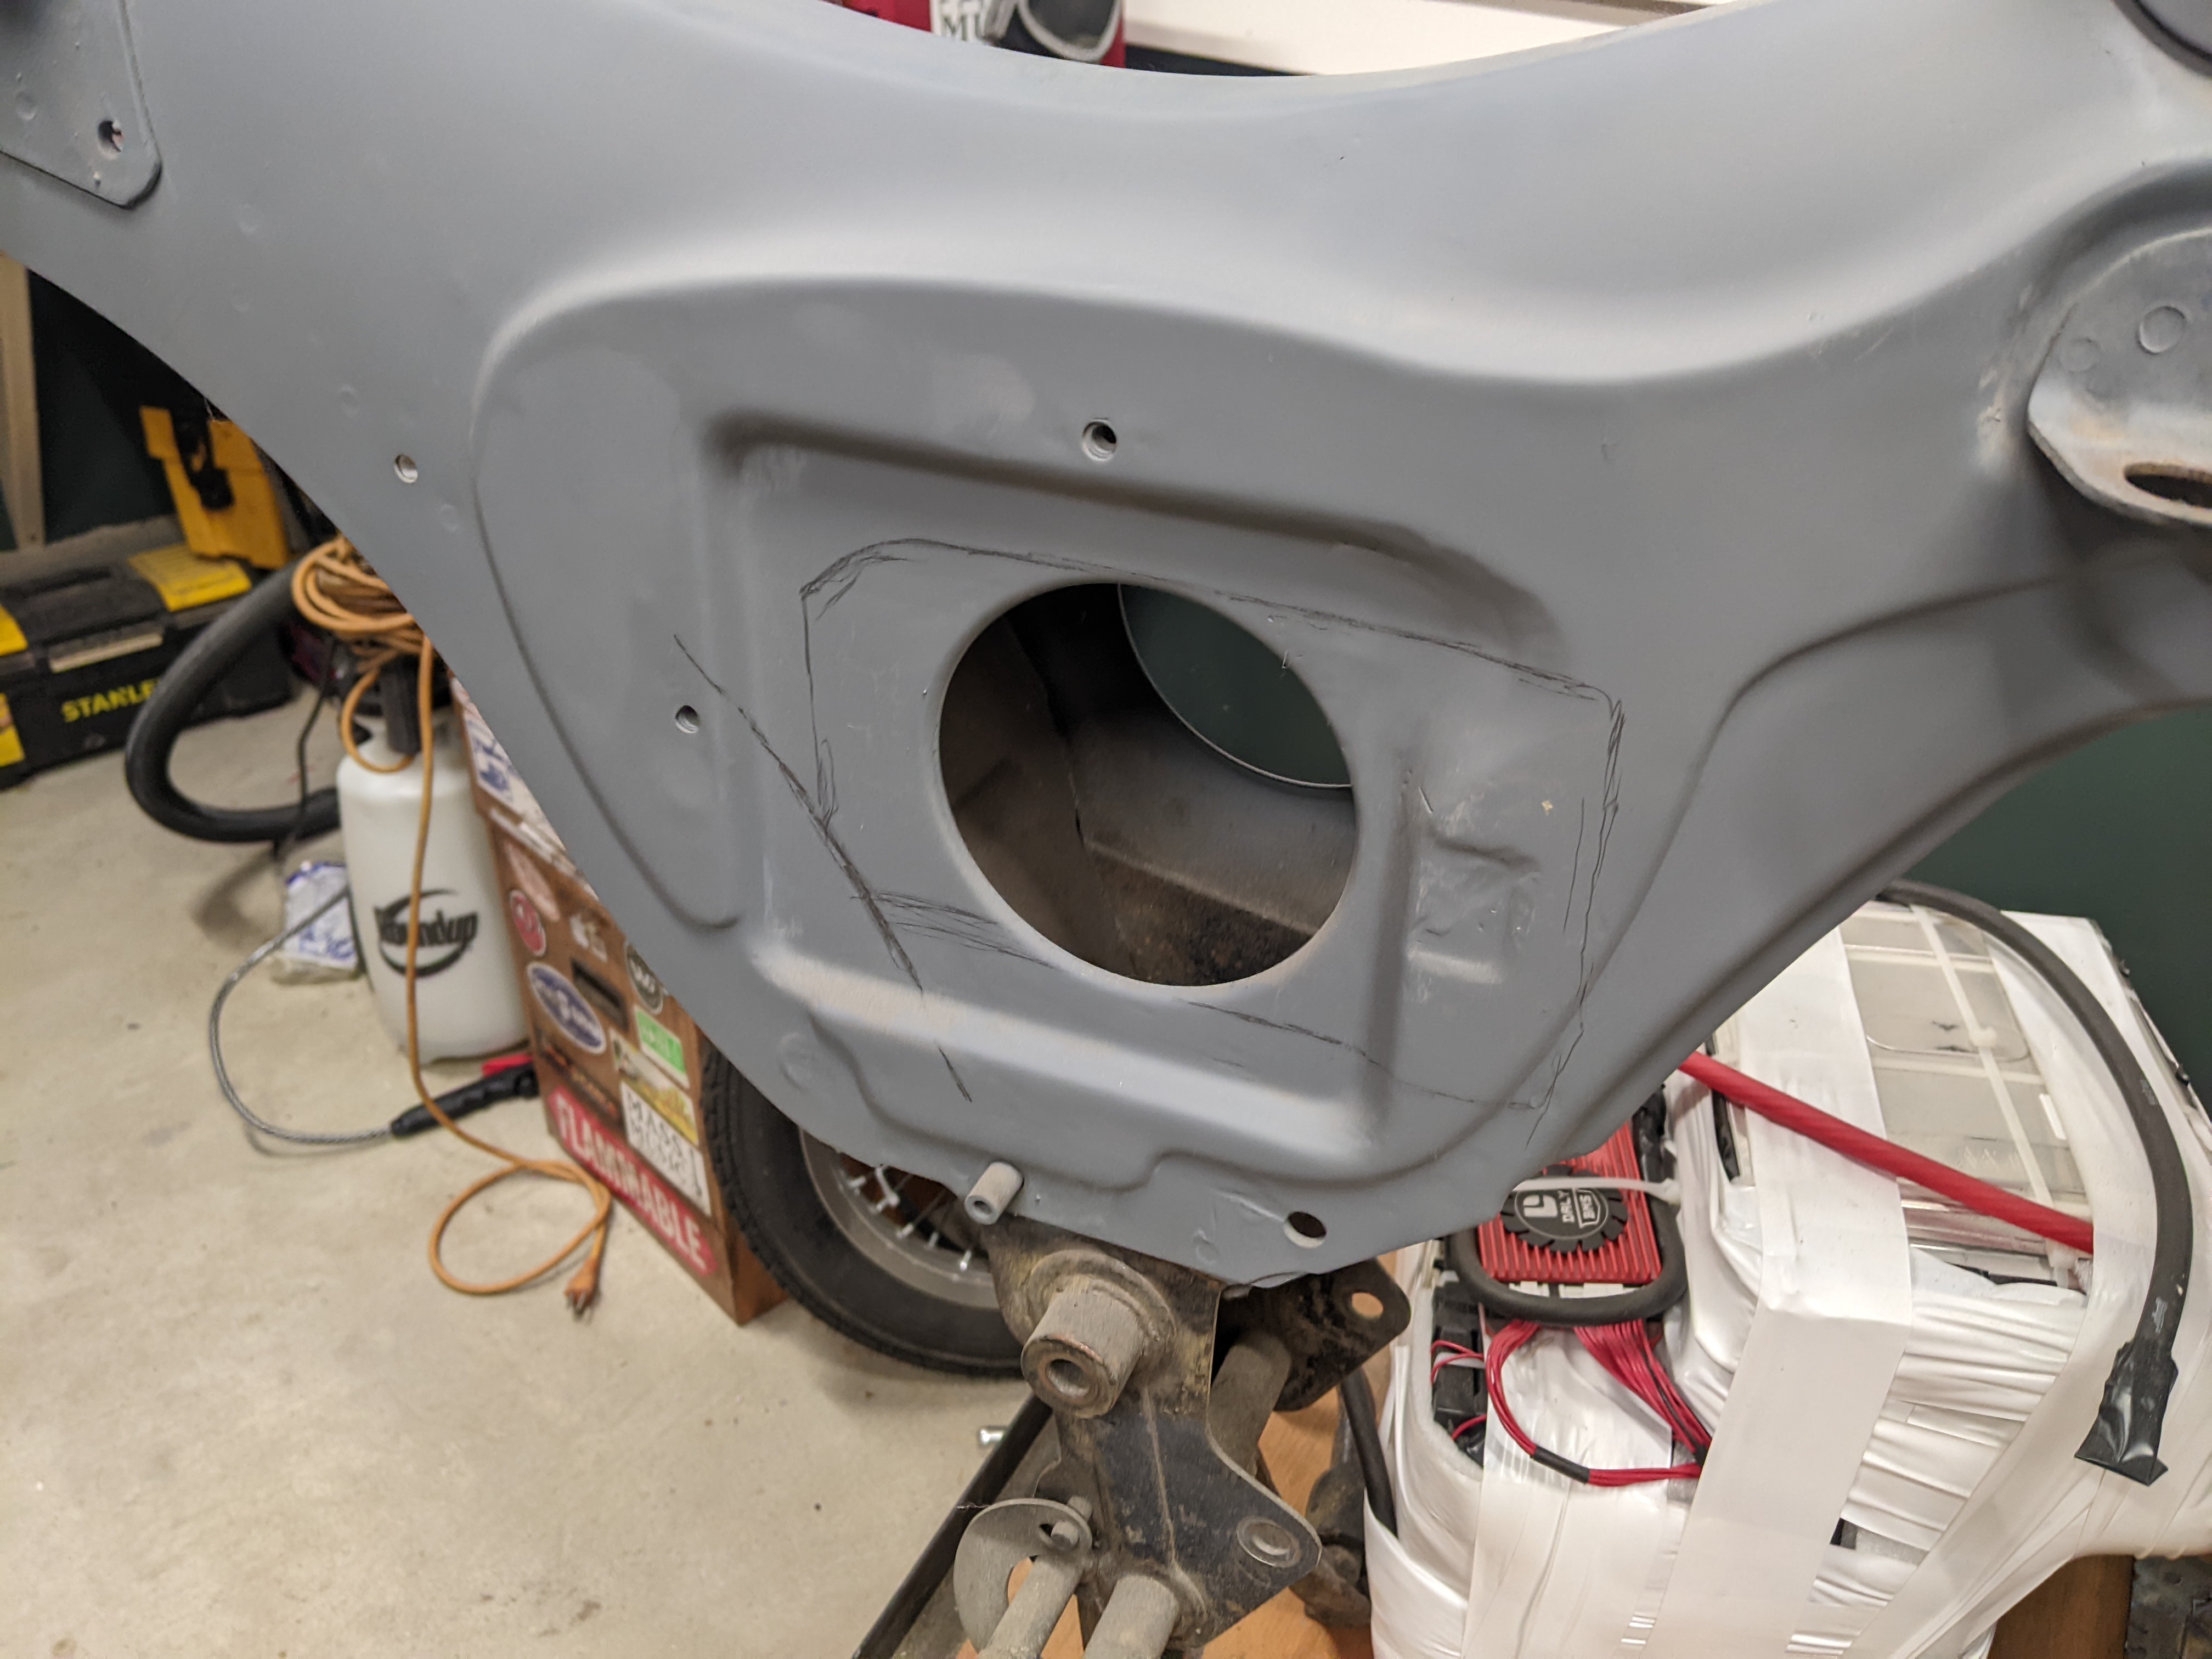
As you can see, it doesn't perfectly fit in this indention in the frame where the old lead-acid battery was. I'll have to correct that.

Several hours later I had this:
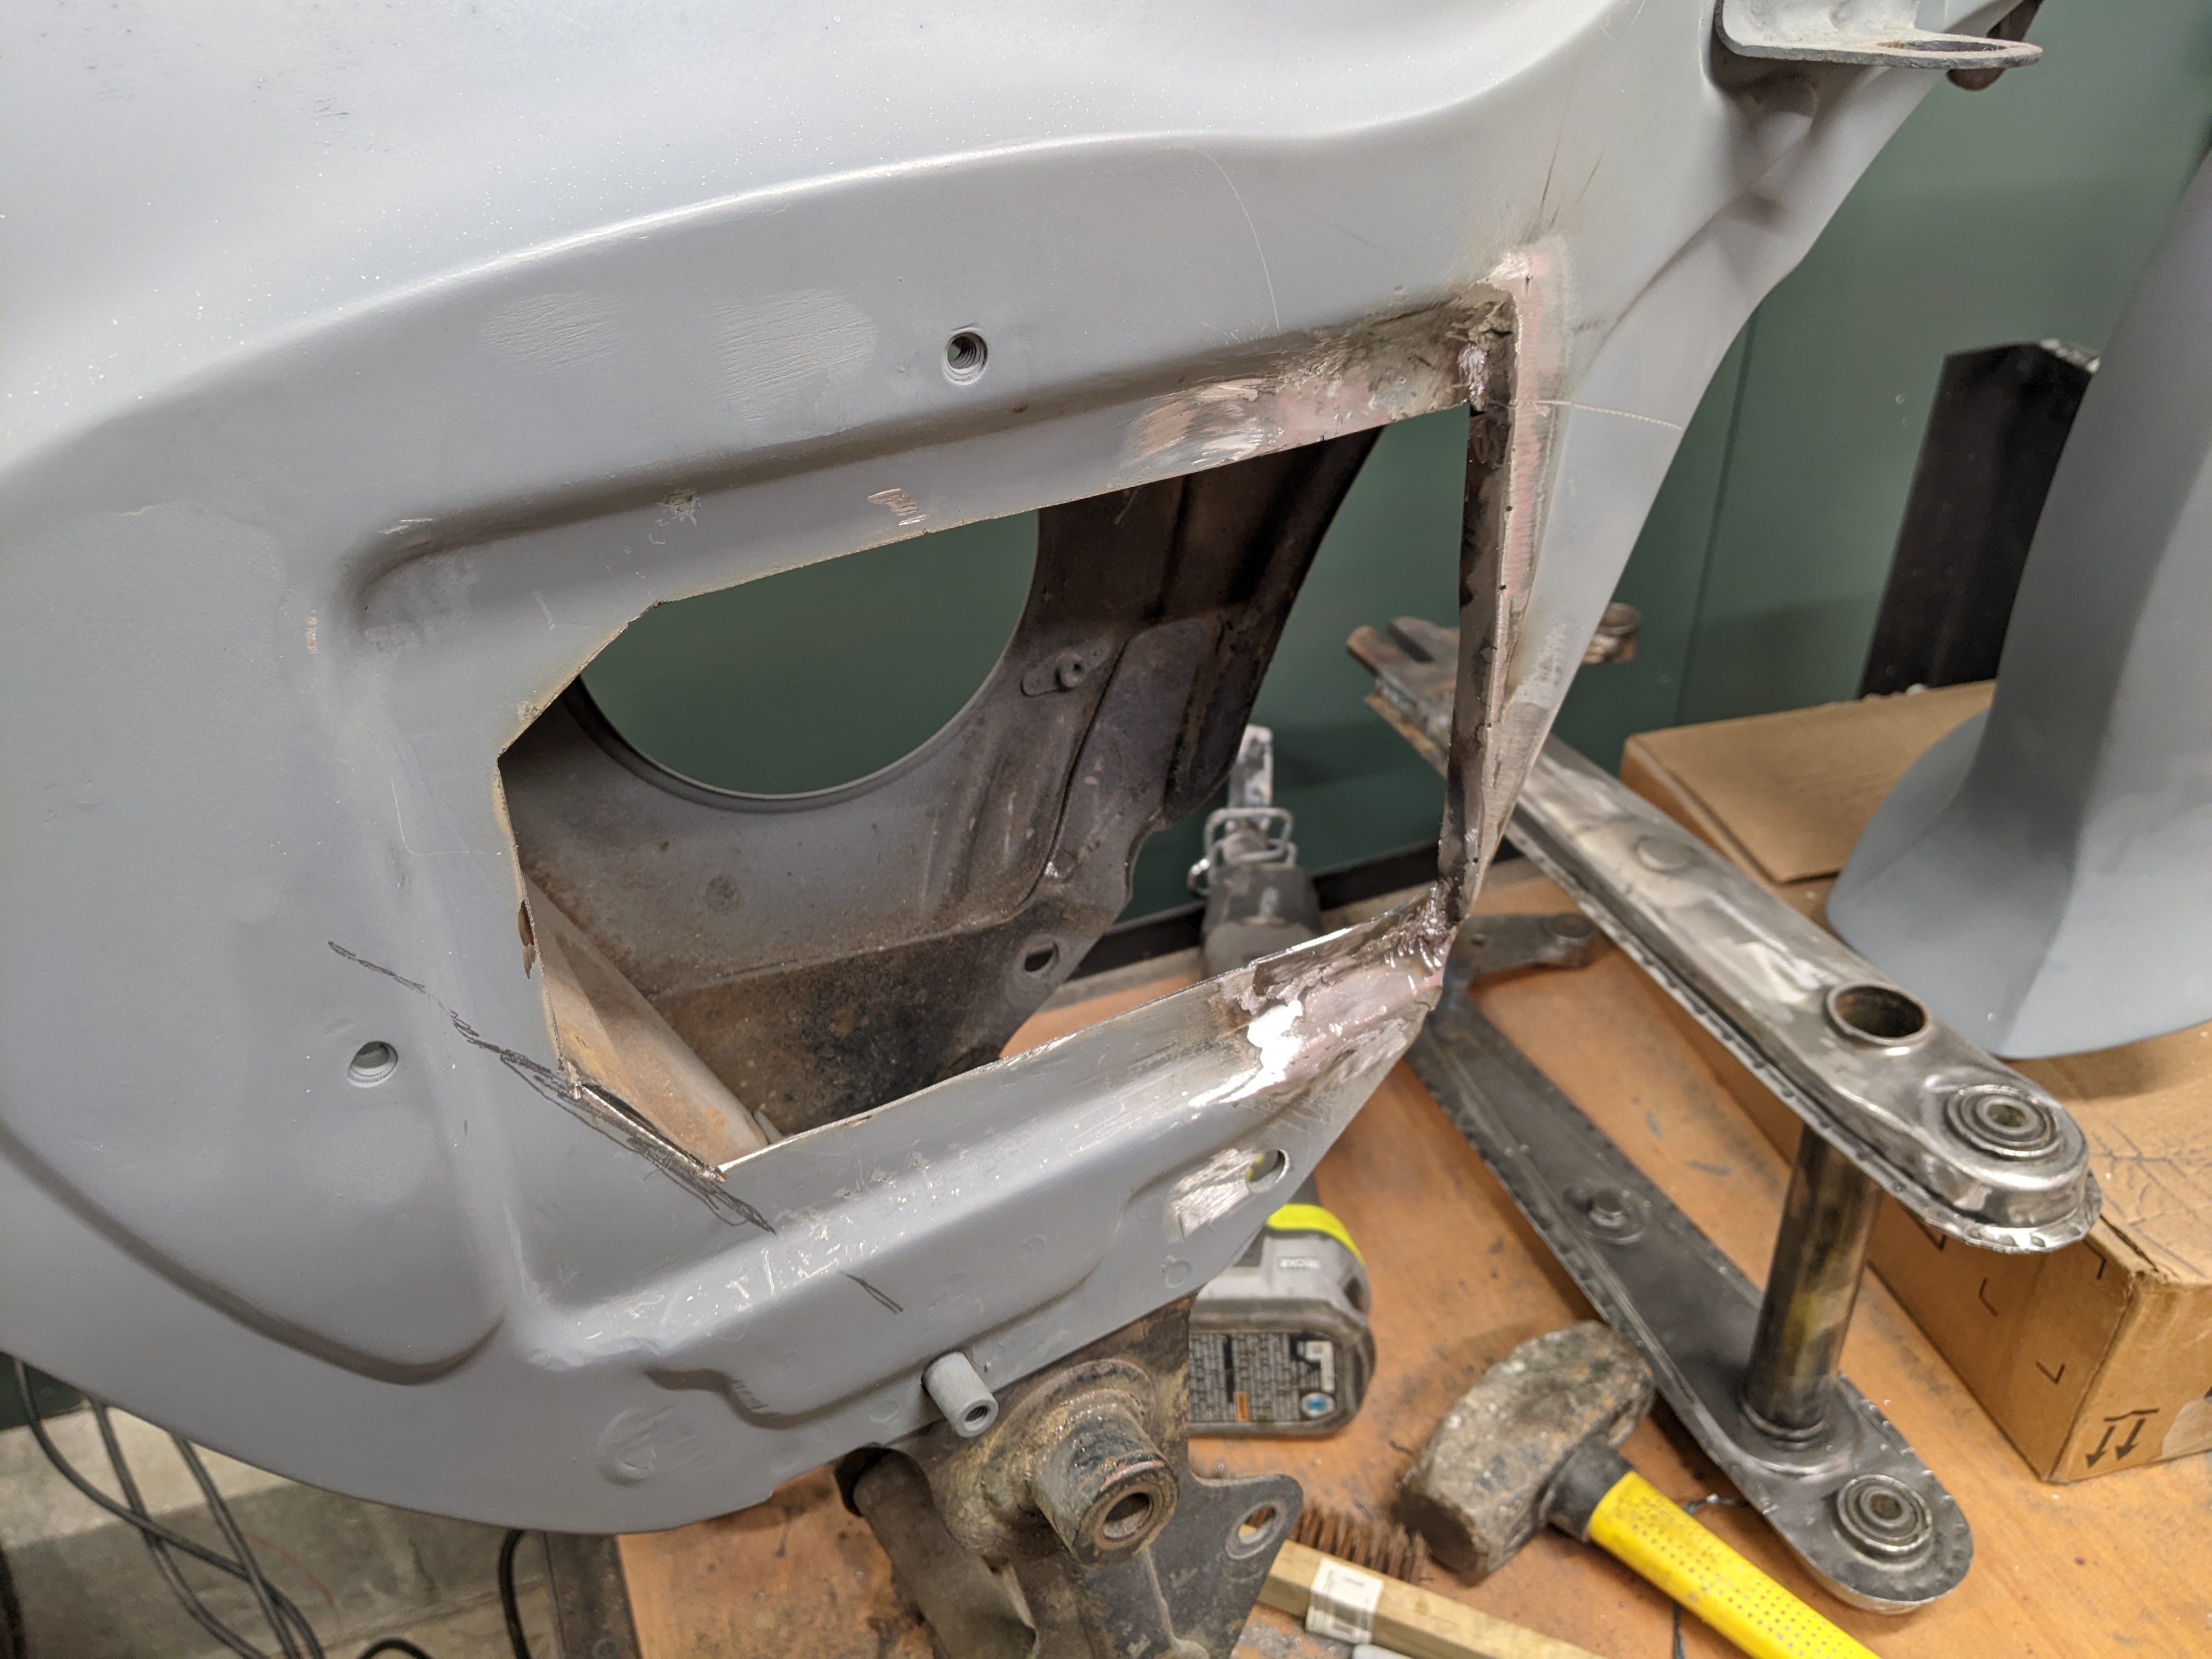
I needed to reinforce that lower-right corner of the frame. so i boxed it in with the other side. Originally there was a carb and air-box in that space, but that is no longer needed.

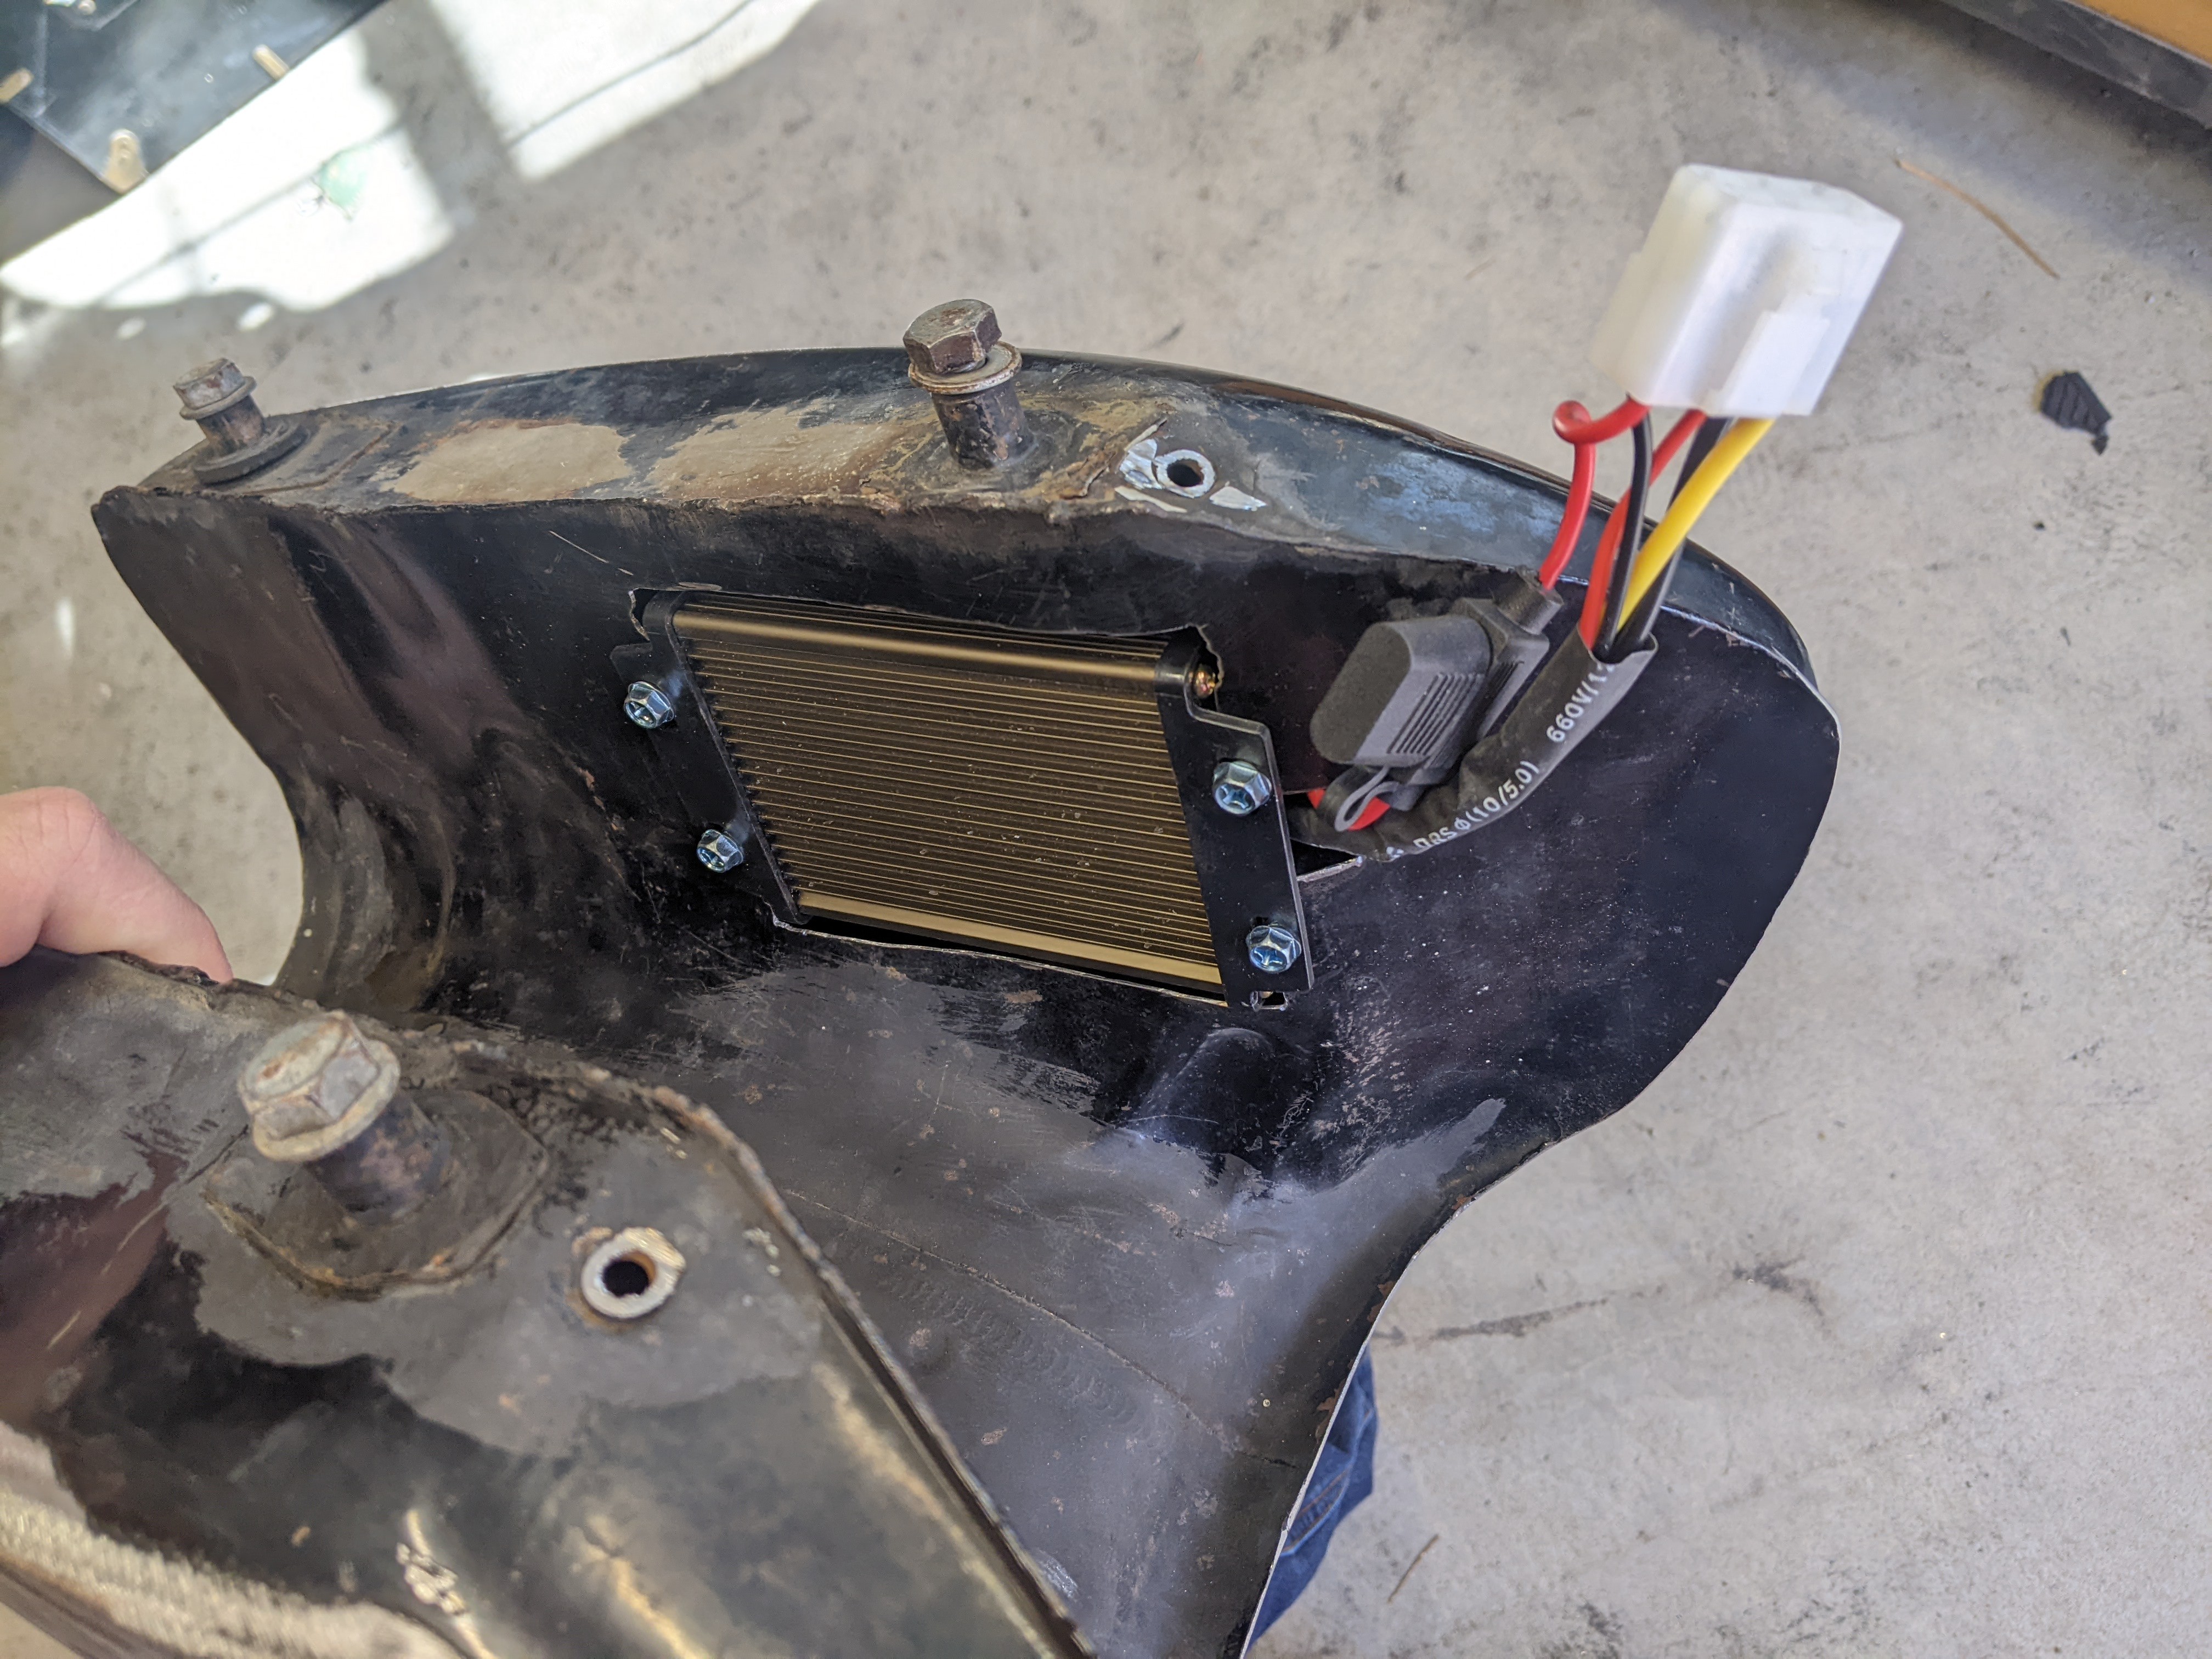
Now that i had the motor controller mounted, I moved on to mounting the dc-to-dc converter. I cut a hole on the inside section of the gas tank, and it fits inside the tank now. Perfect.
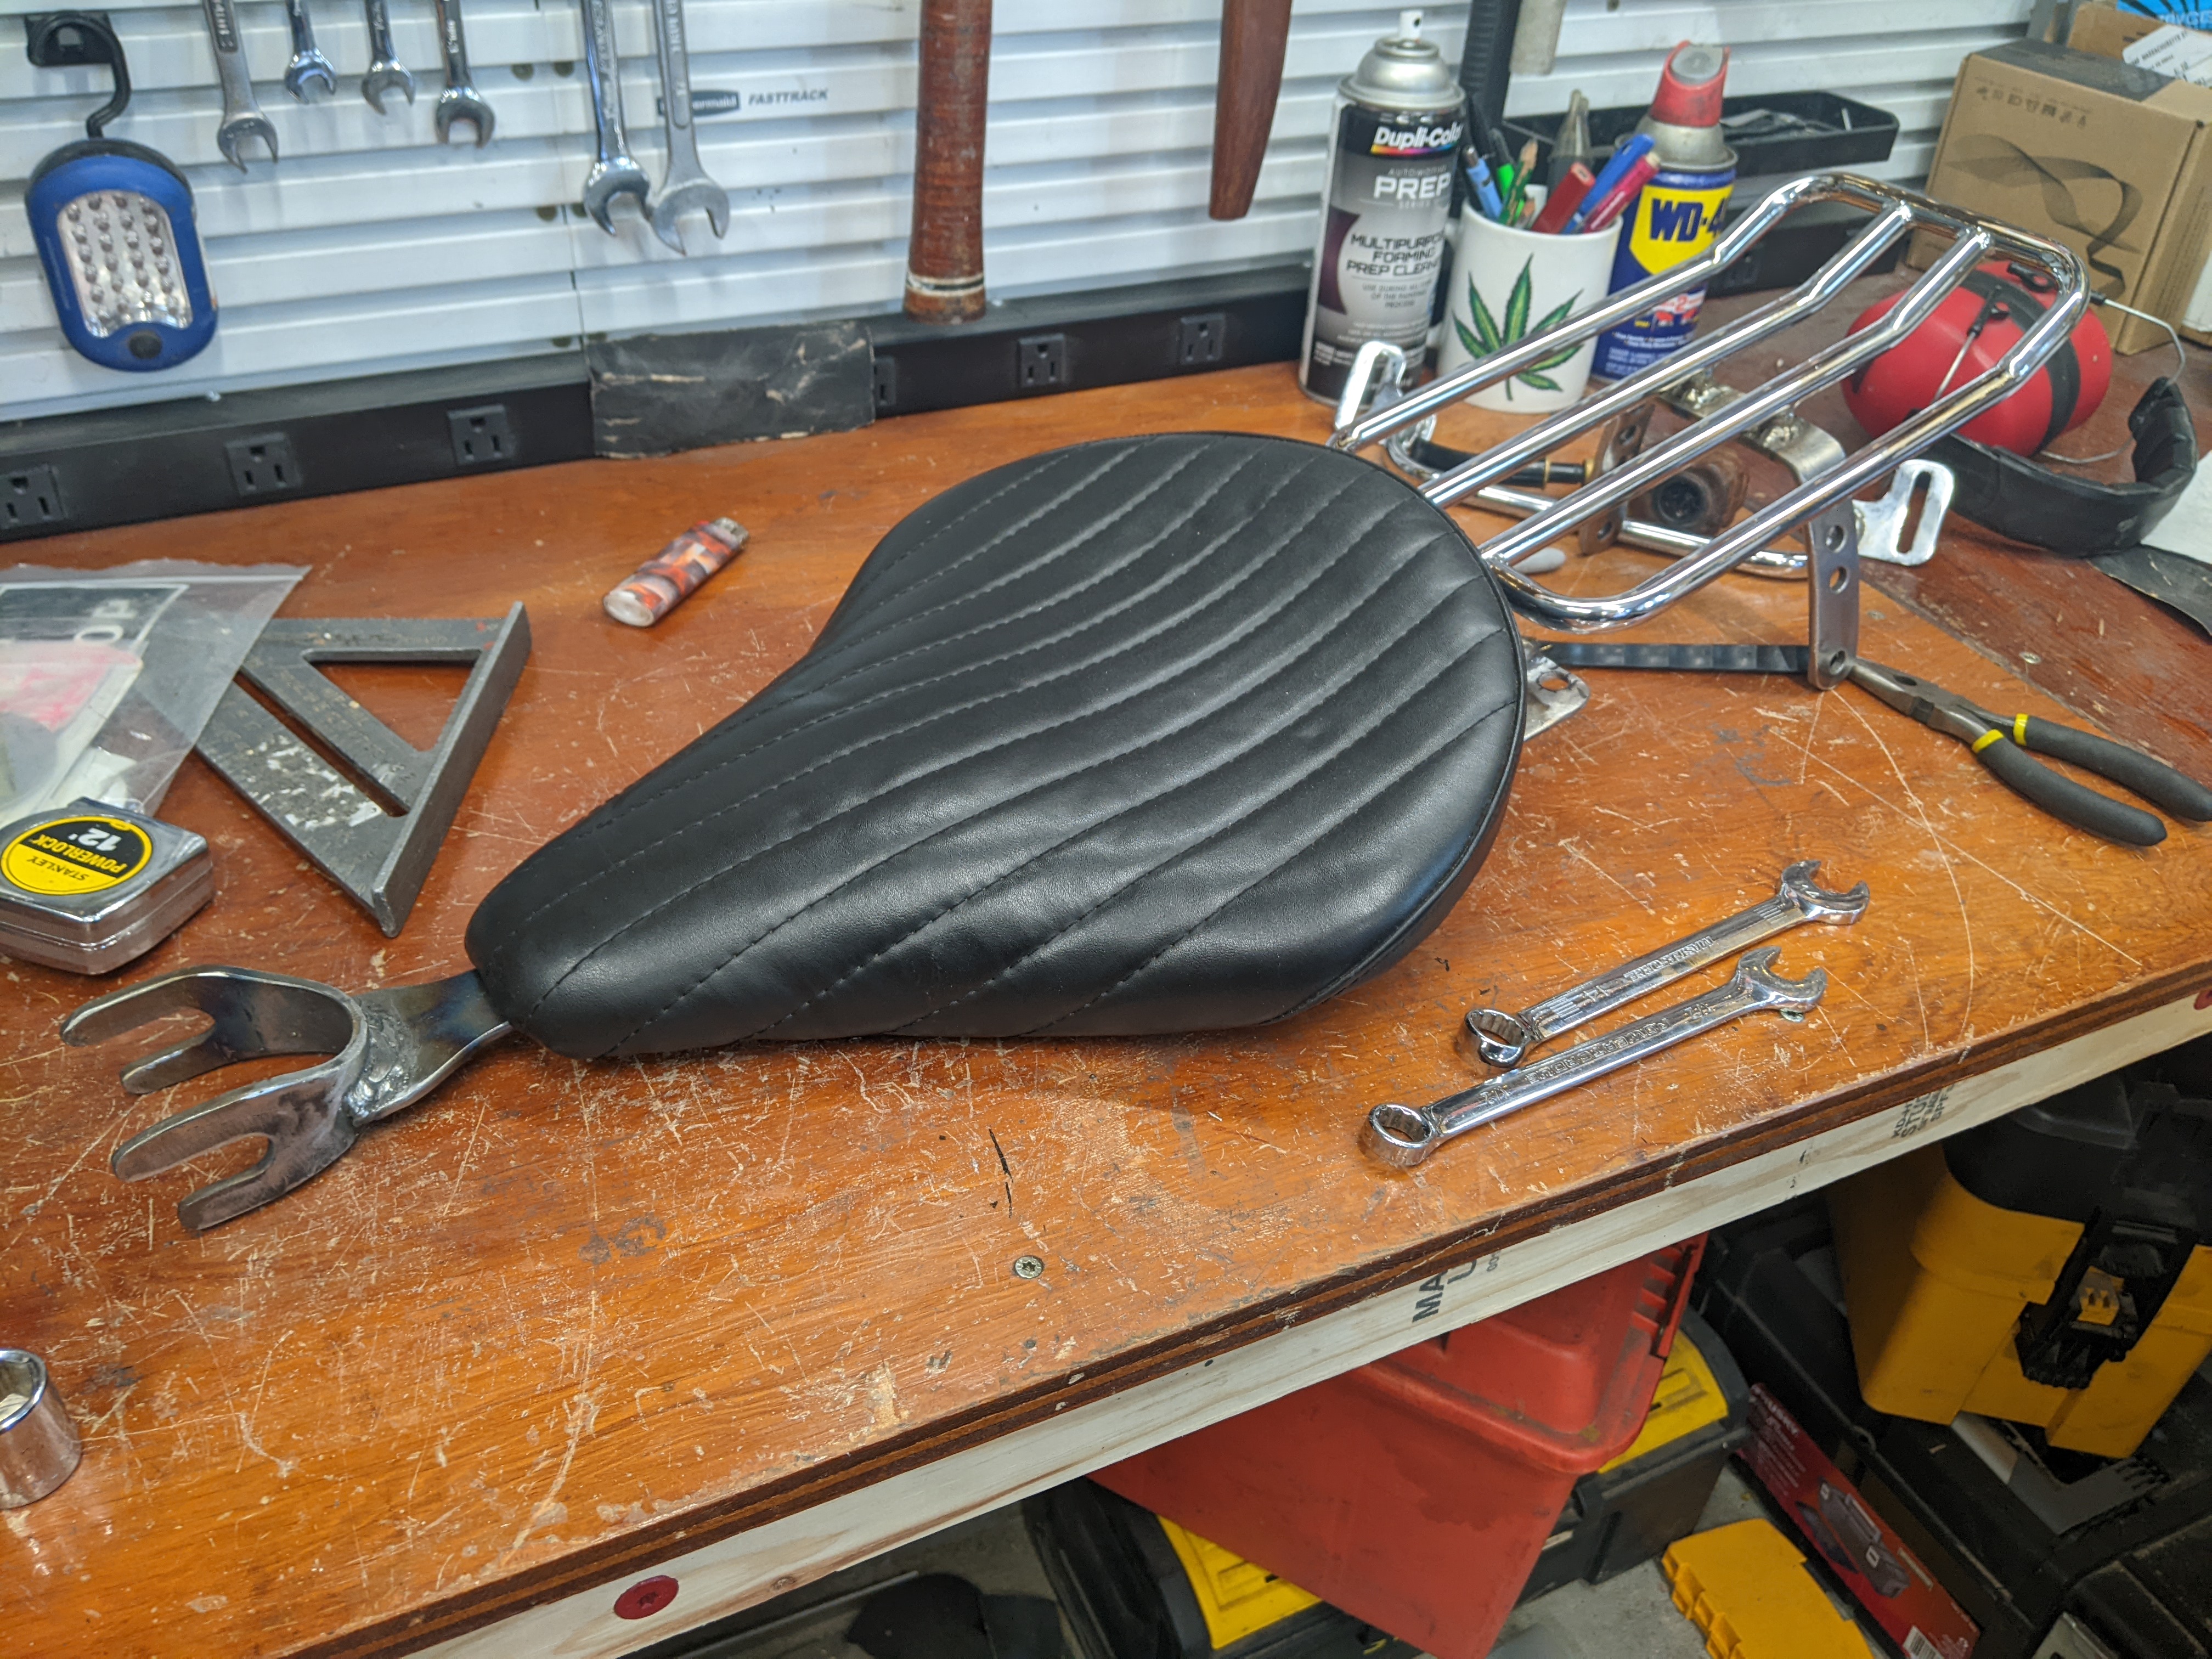
I also picked up this solo seat at a swap meet last weekend. Im not 100% sure i will use it but i will keep it for this project for now.
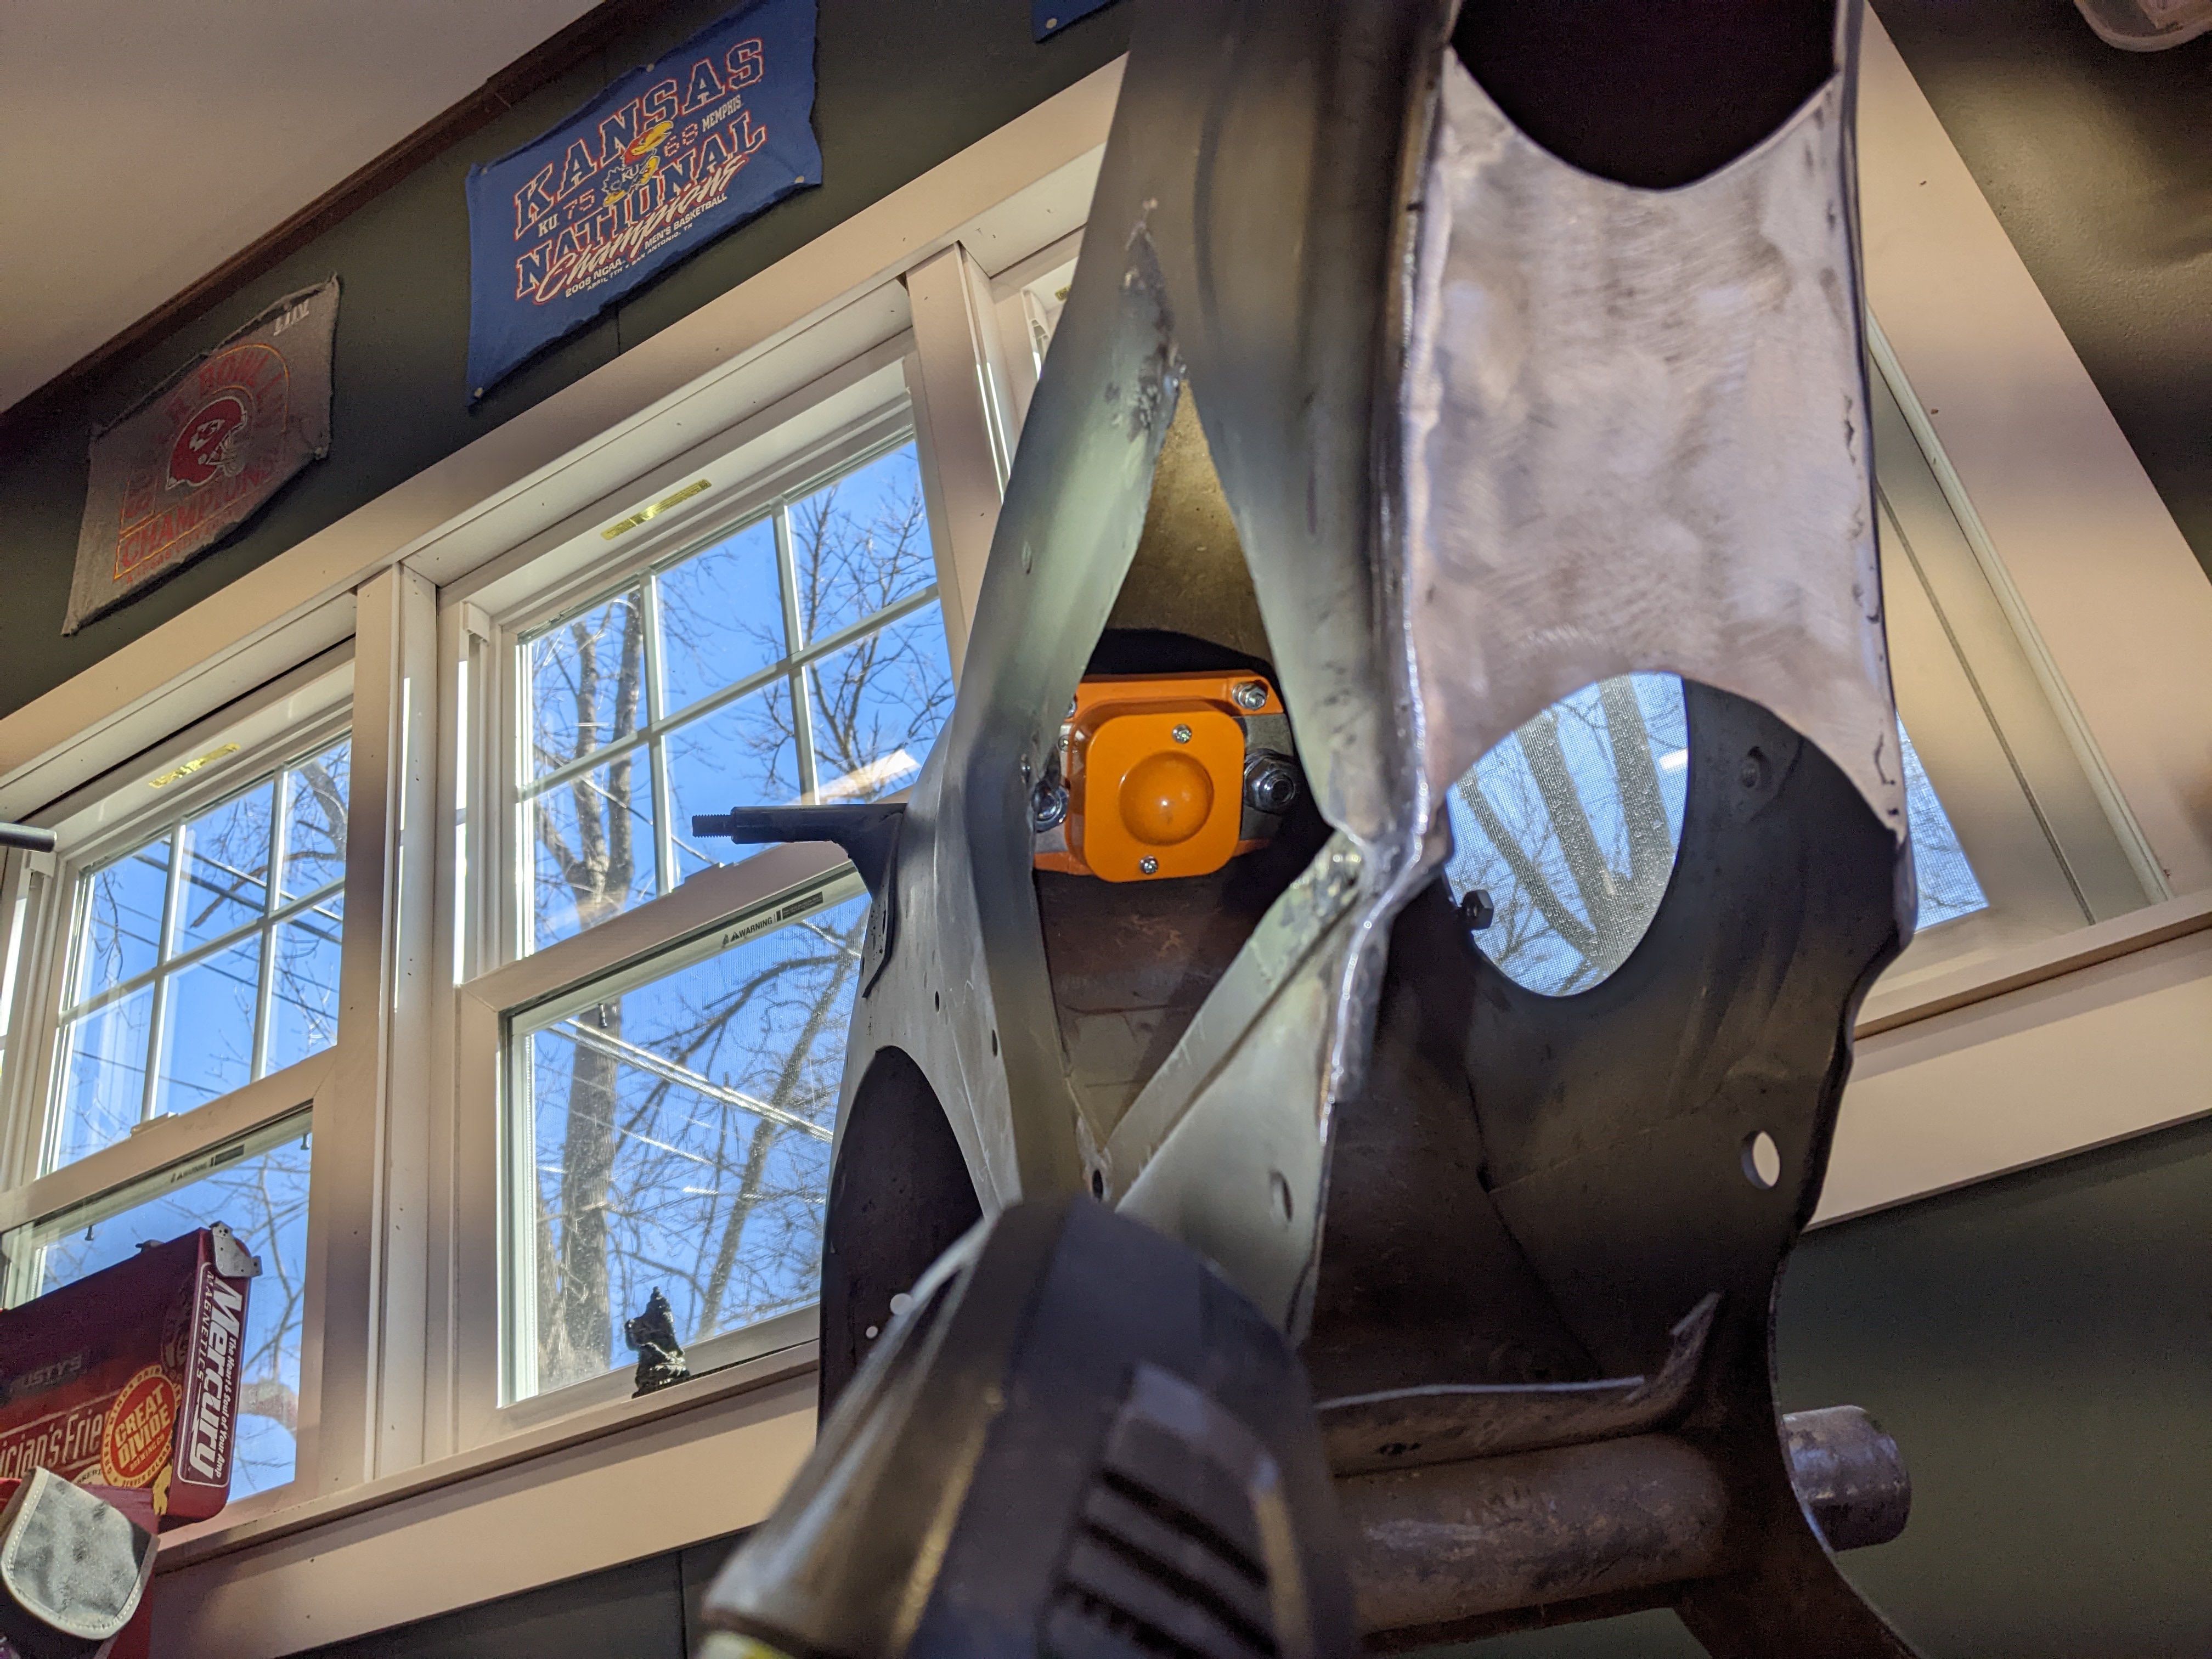
The next component to mount was the main contactor, located deep inside the frame.
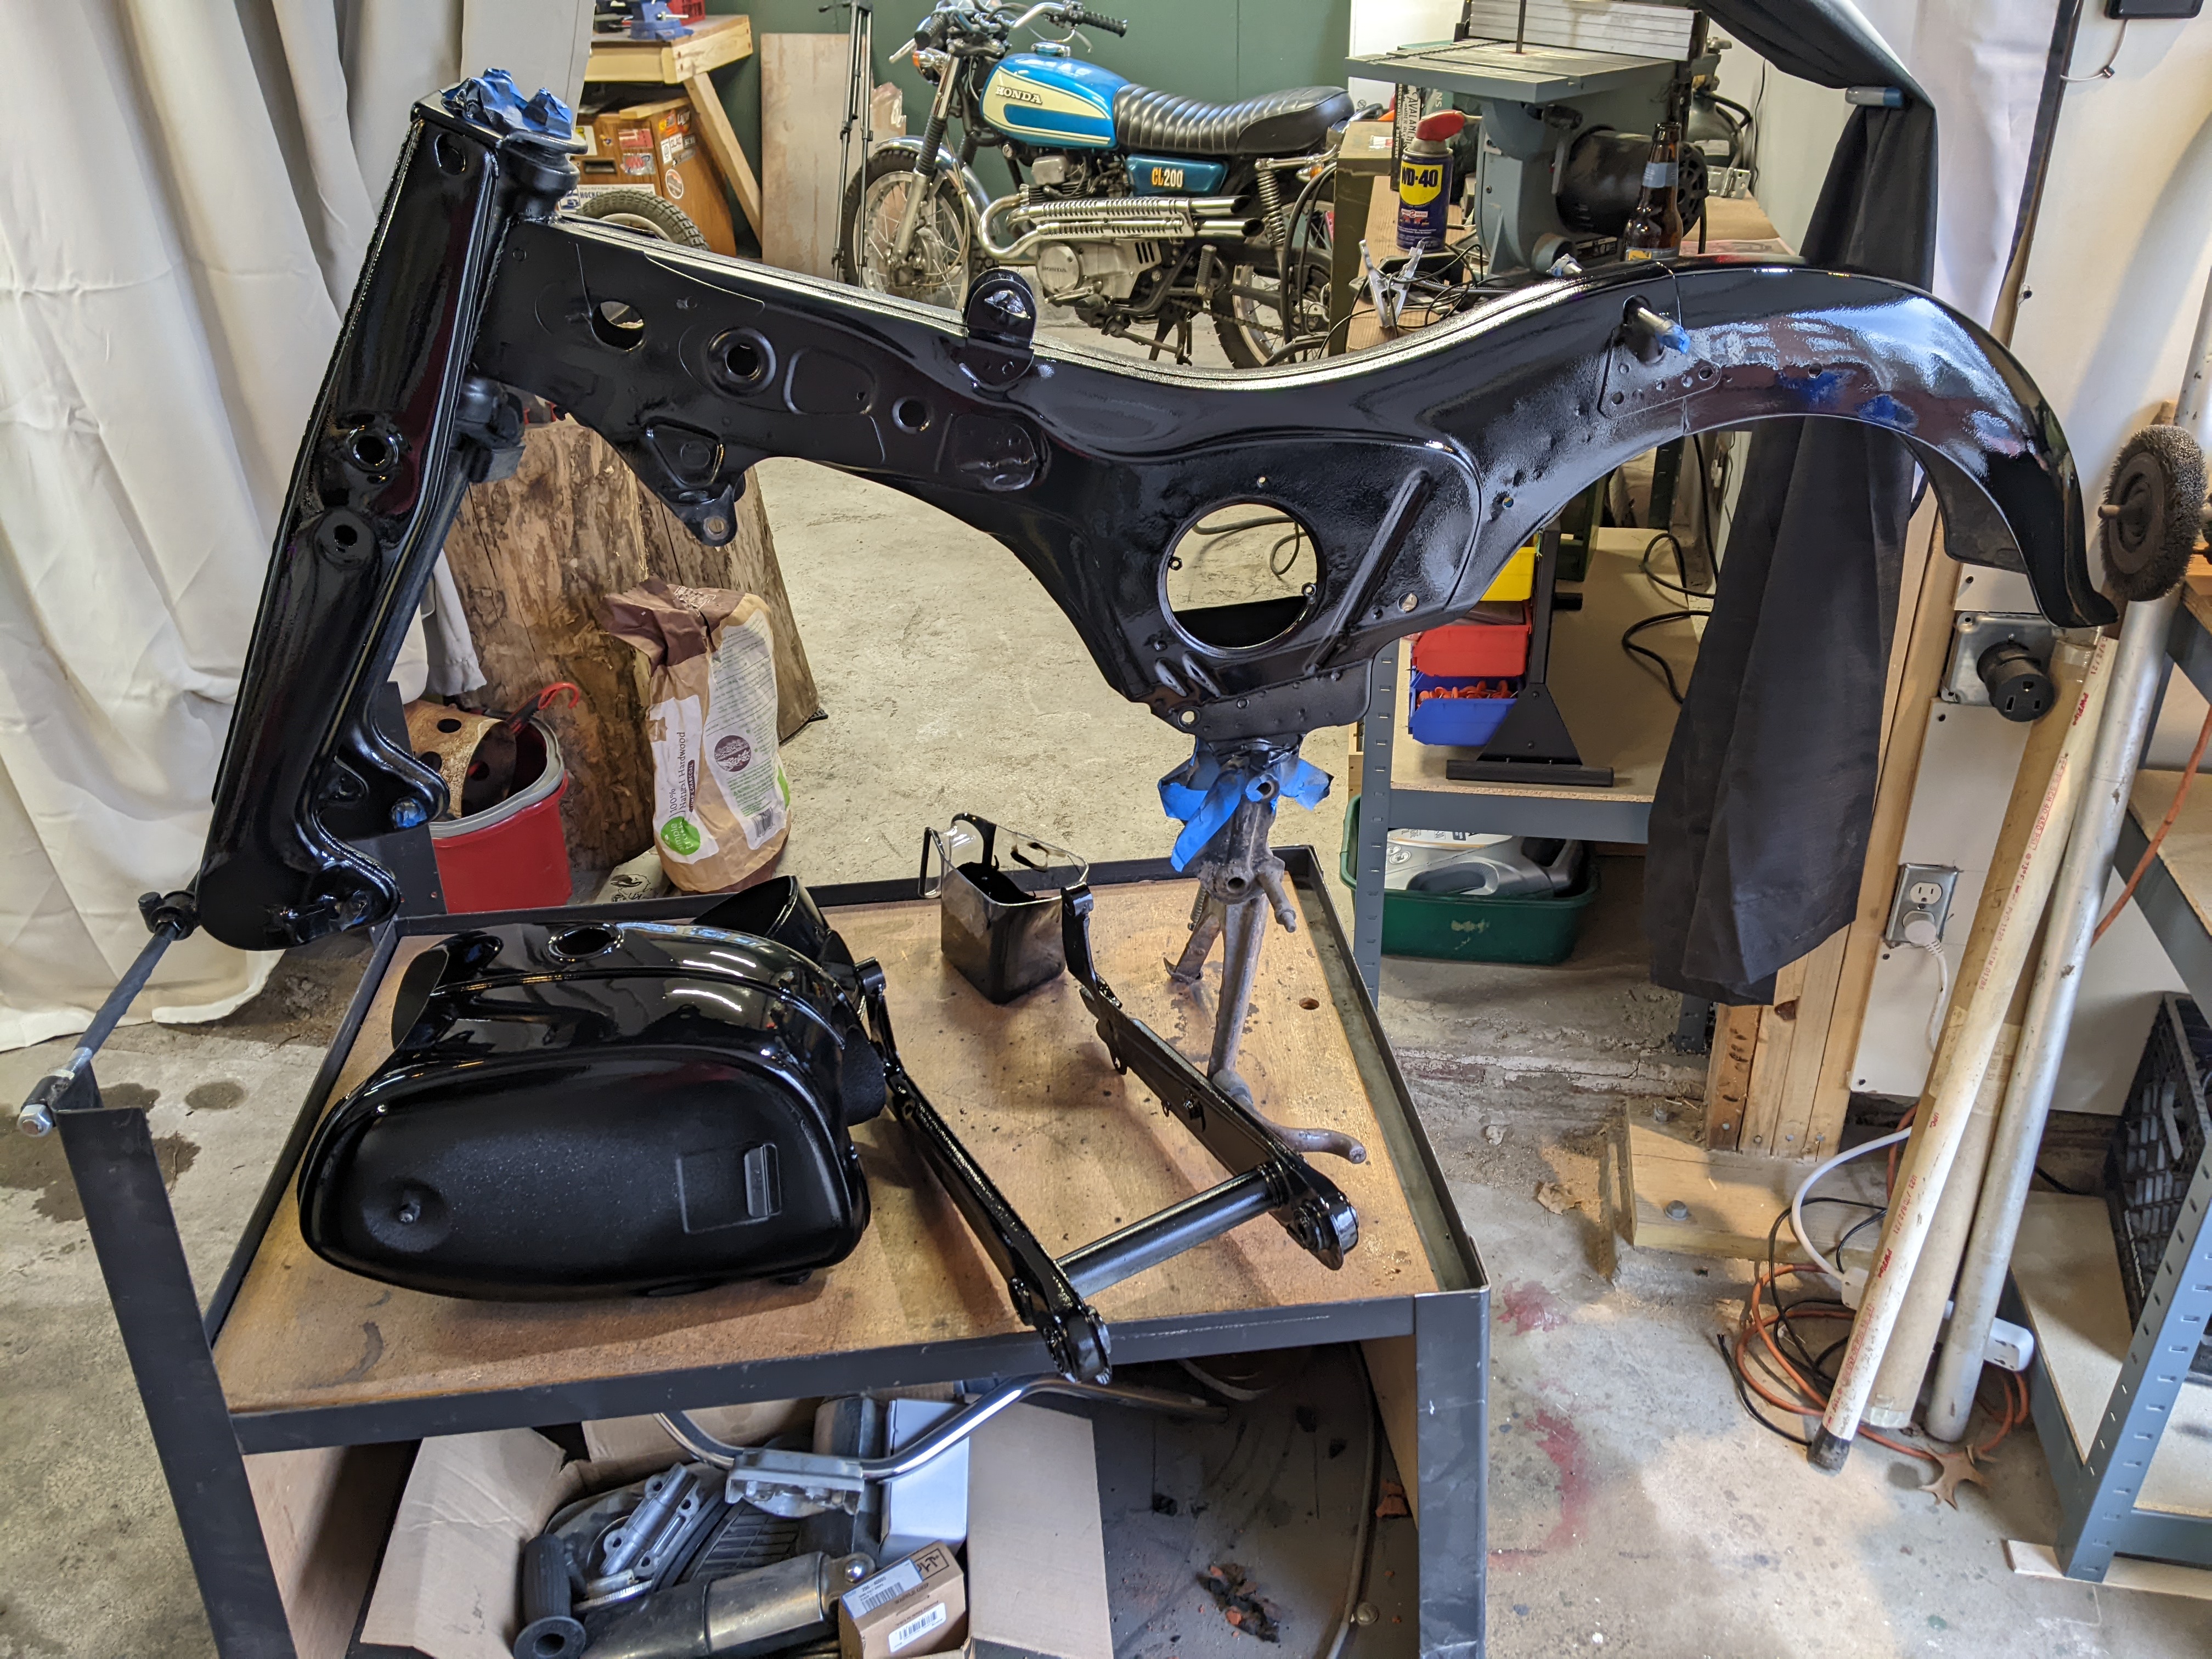
Paint
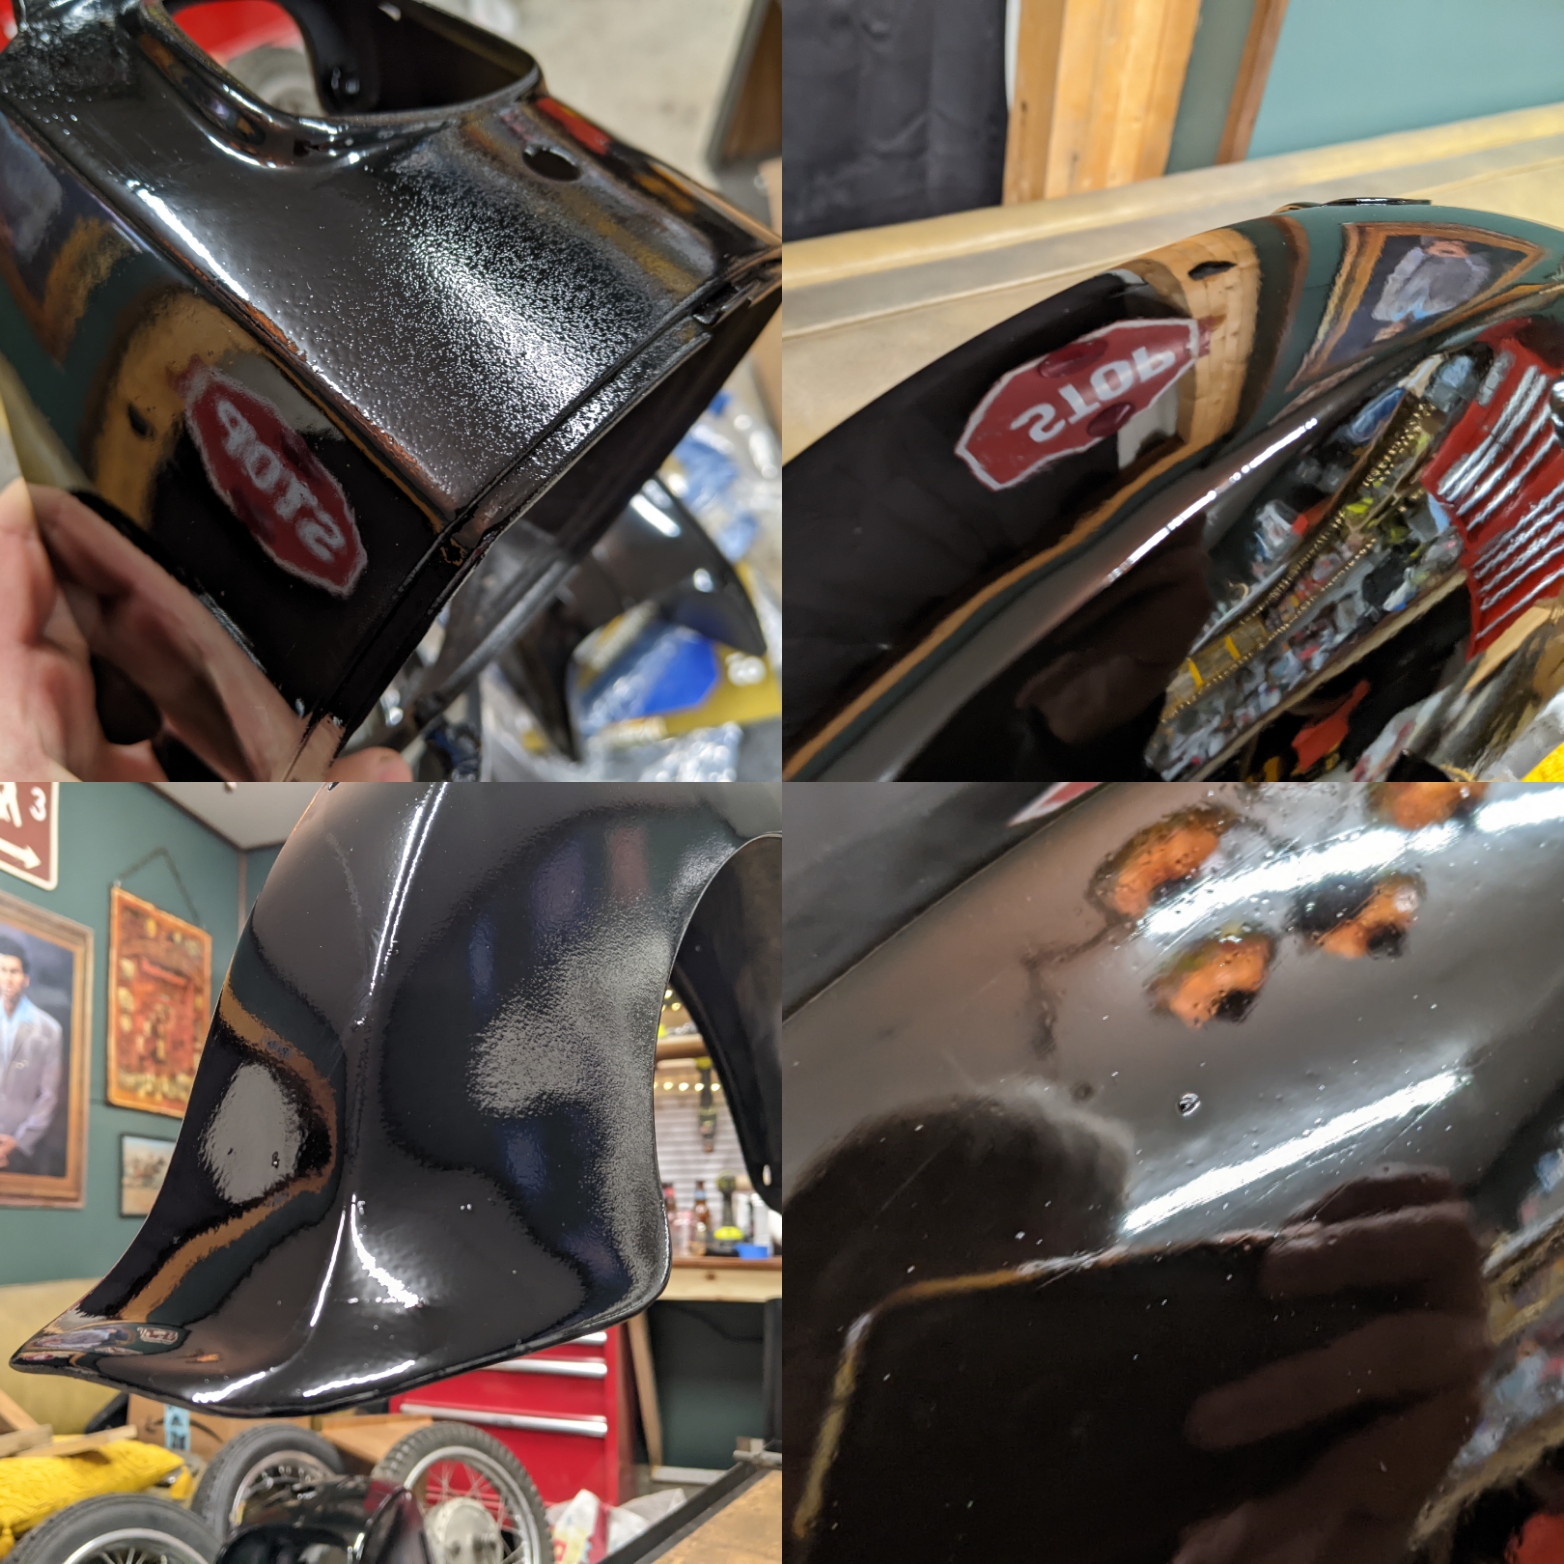
Using single-stage 2k urethane paint from Eastwood. The color is "interstate black".
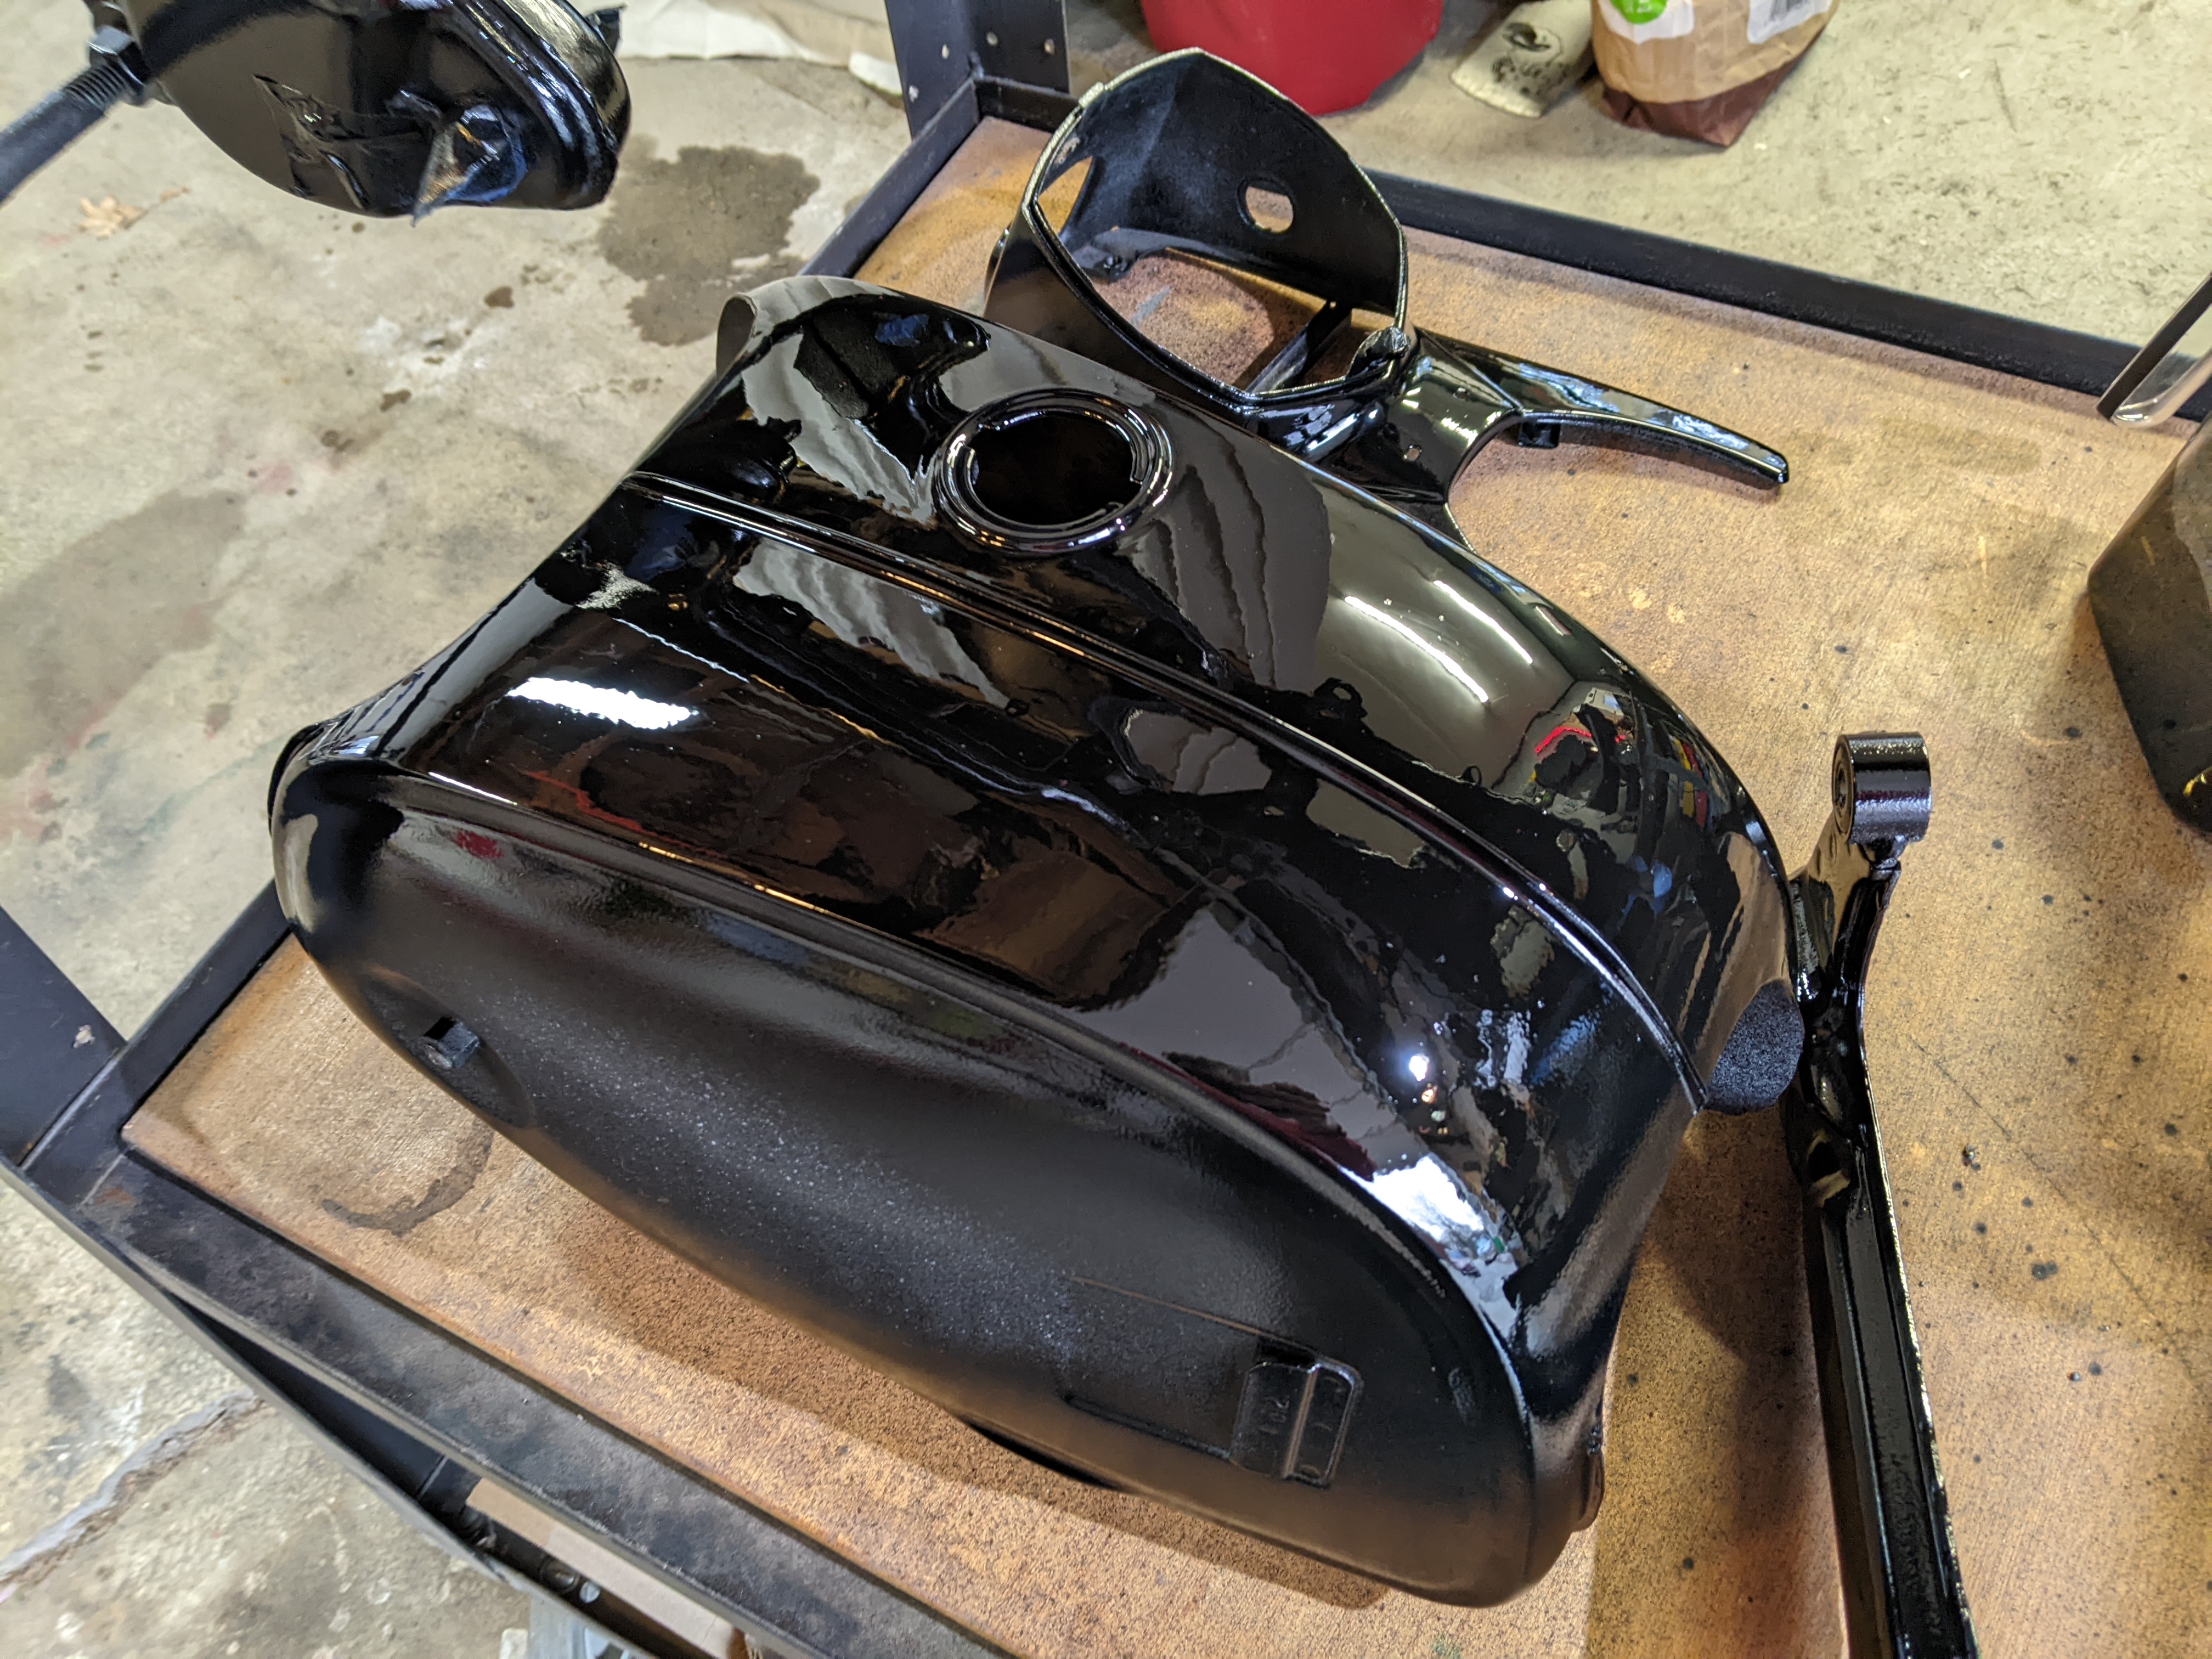
The first coat of paint went on like glass, but the 2nd coat left a ton of texture. I think I didn't lay it on heavy enough.
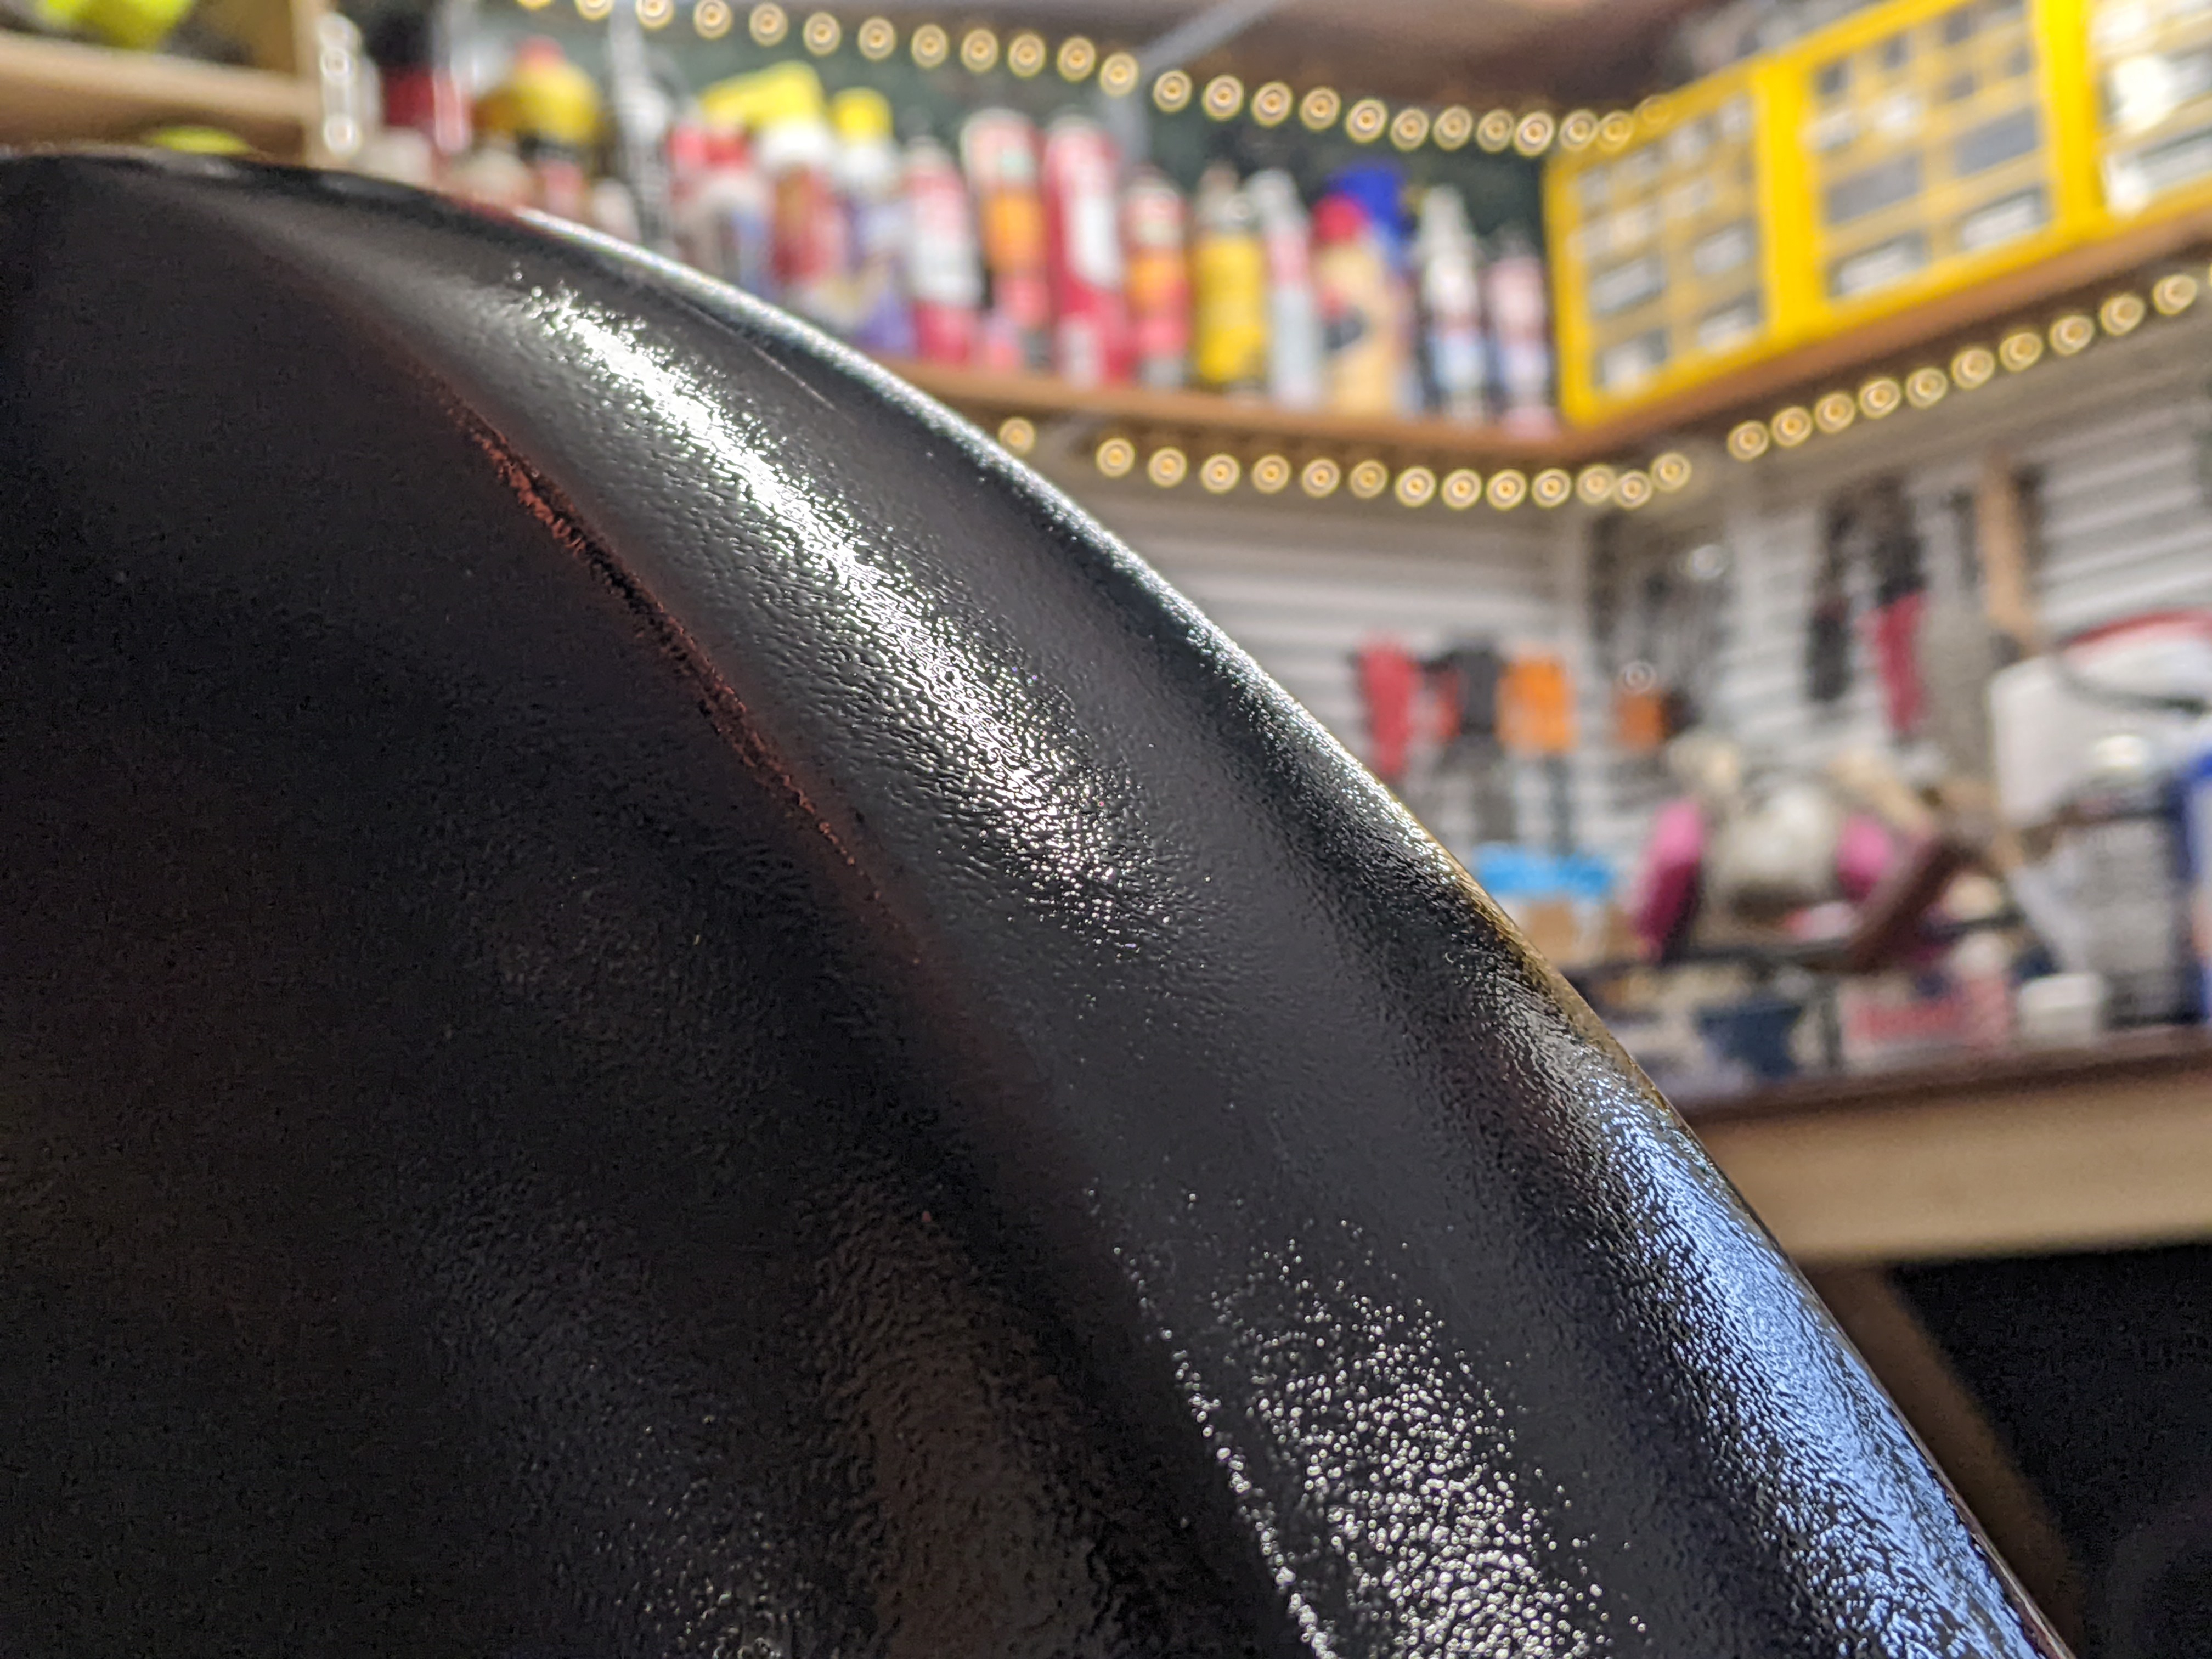
I went sanded everything with 600 grit and then put on a third coat.
However the problem with the third coat was that the gun wasn't clean enough and the gunk was sprayed out of it and into the finish. Also, there was again a few spots that were too light, and a few spots that were too heavy. I wet sanded the trouble spots with 1500 and 2000 grit and then buffed and polished.
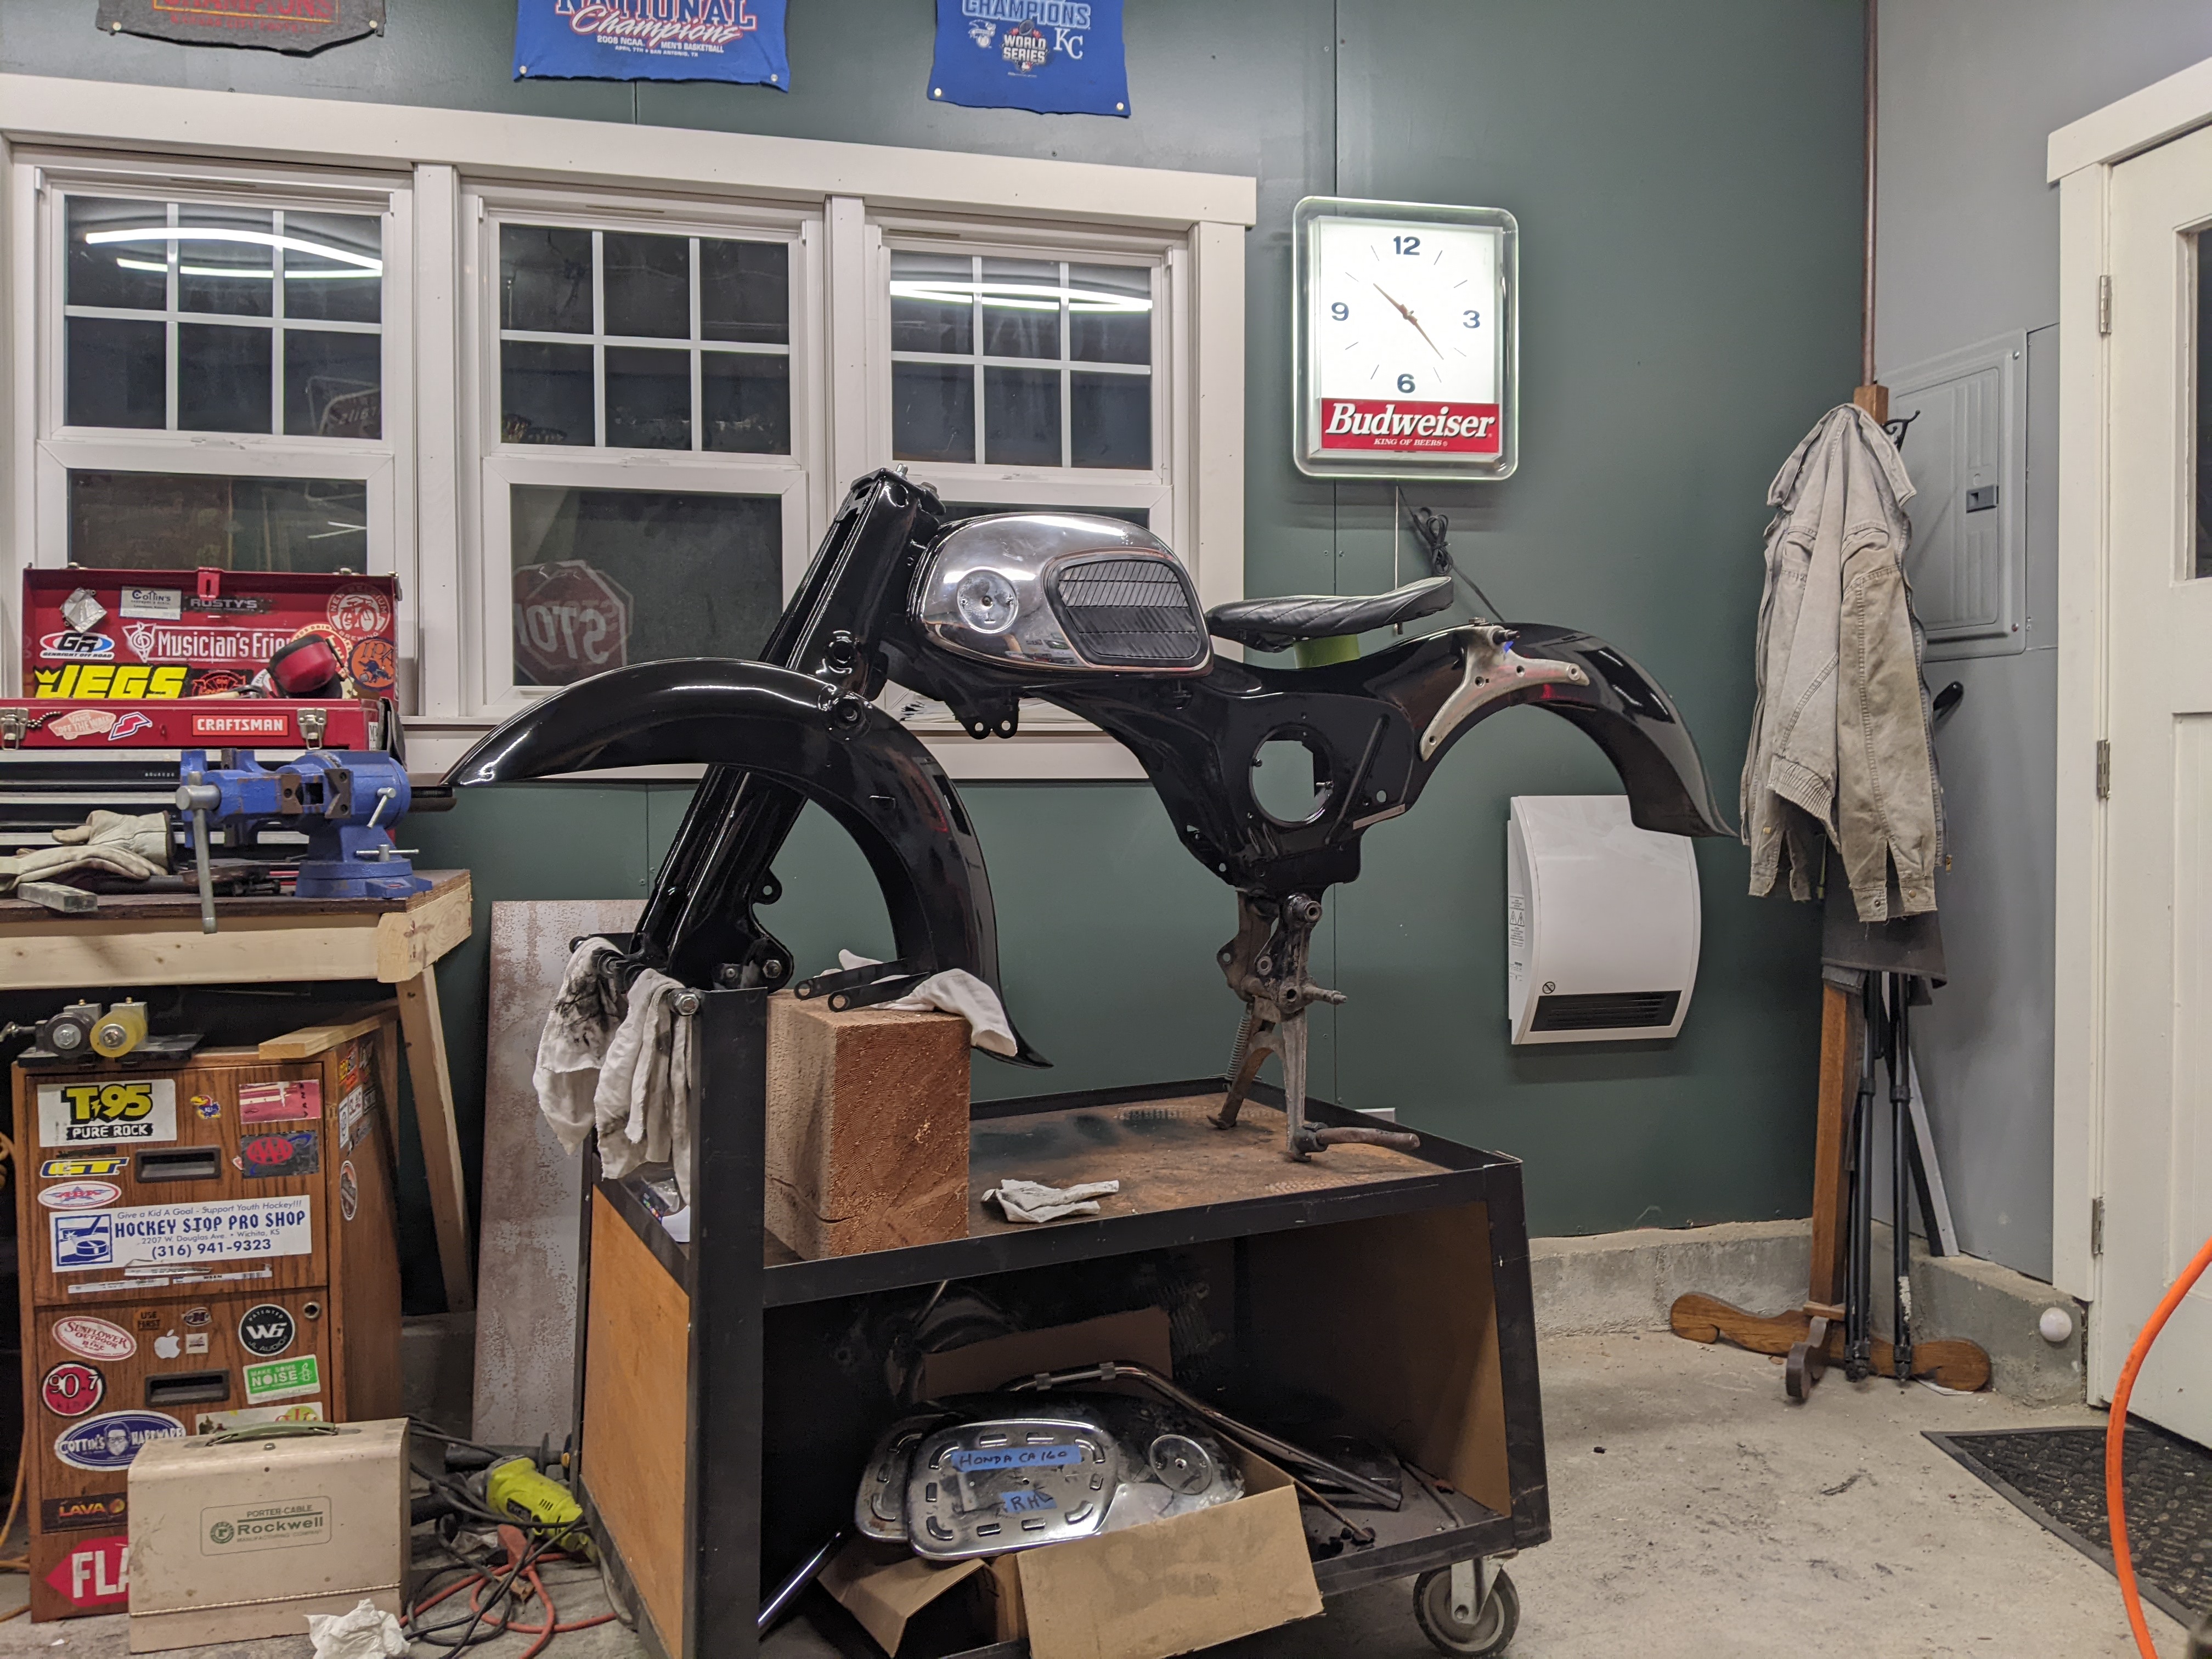
Assembly
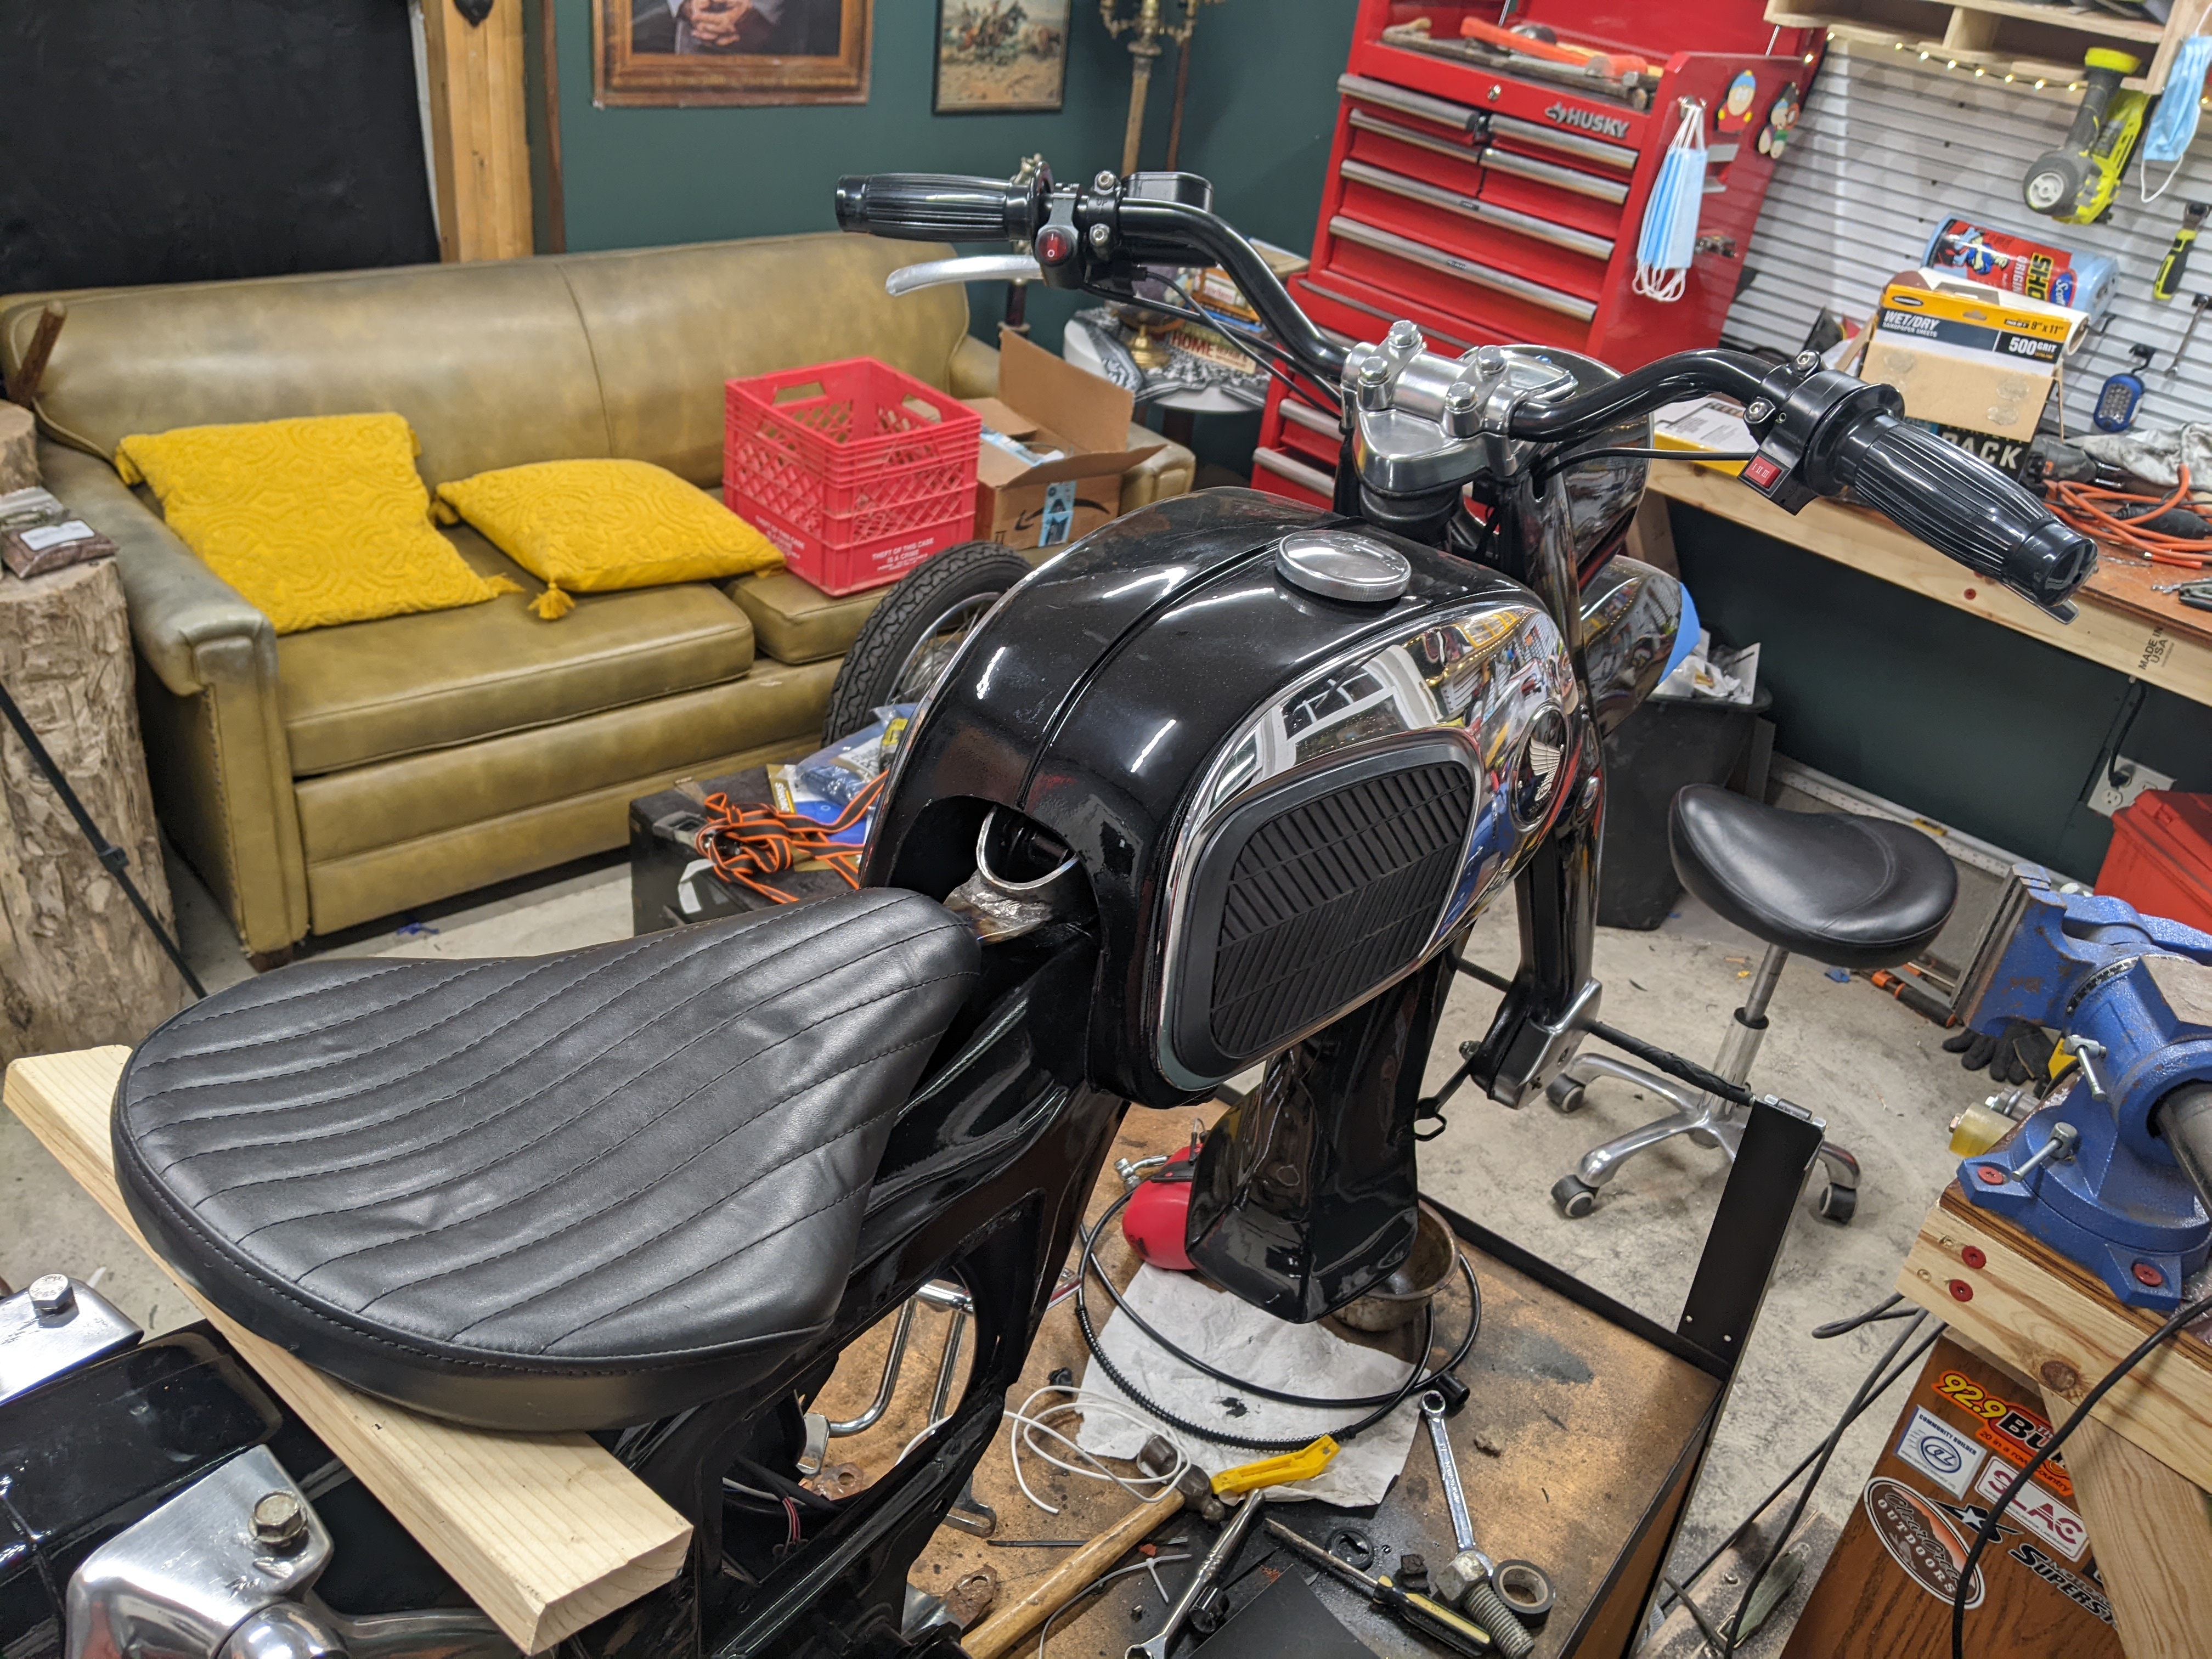
Assembly time! Experimenting with different handlebars.
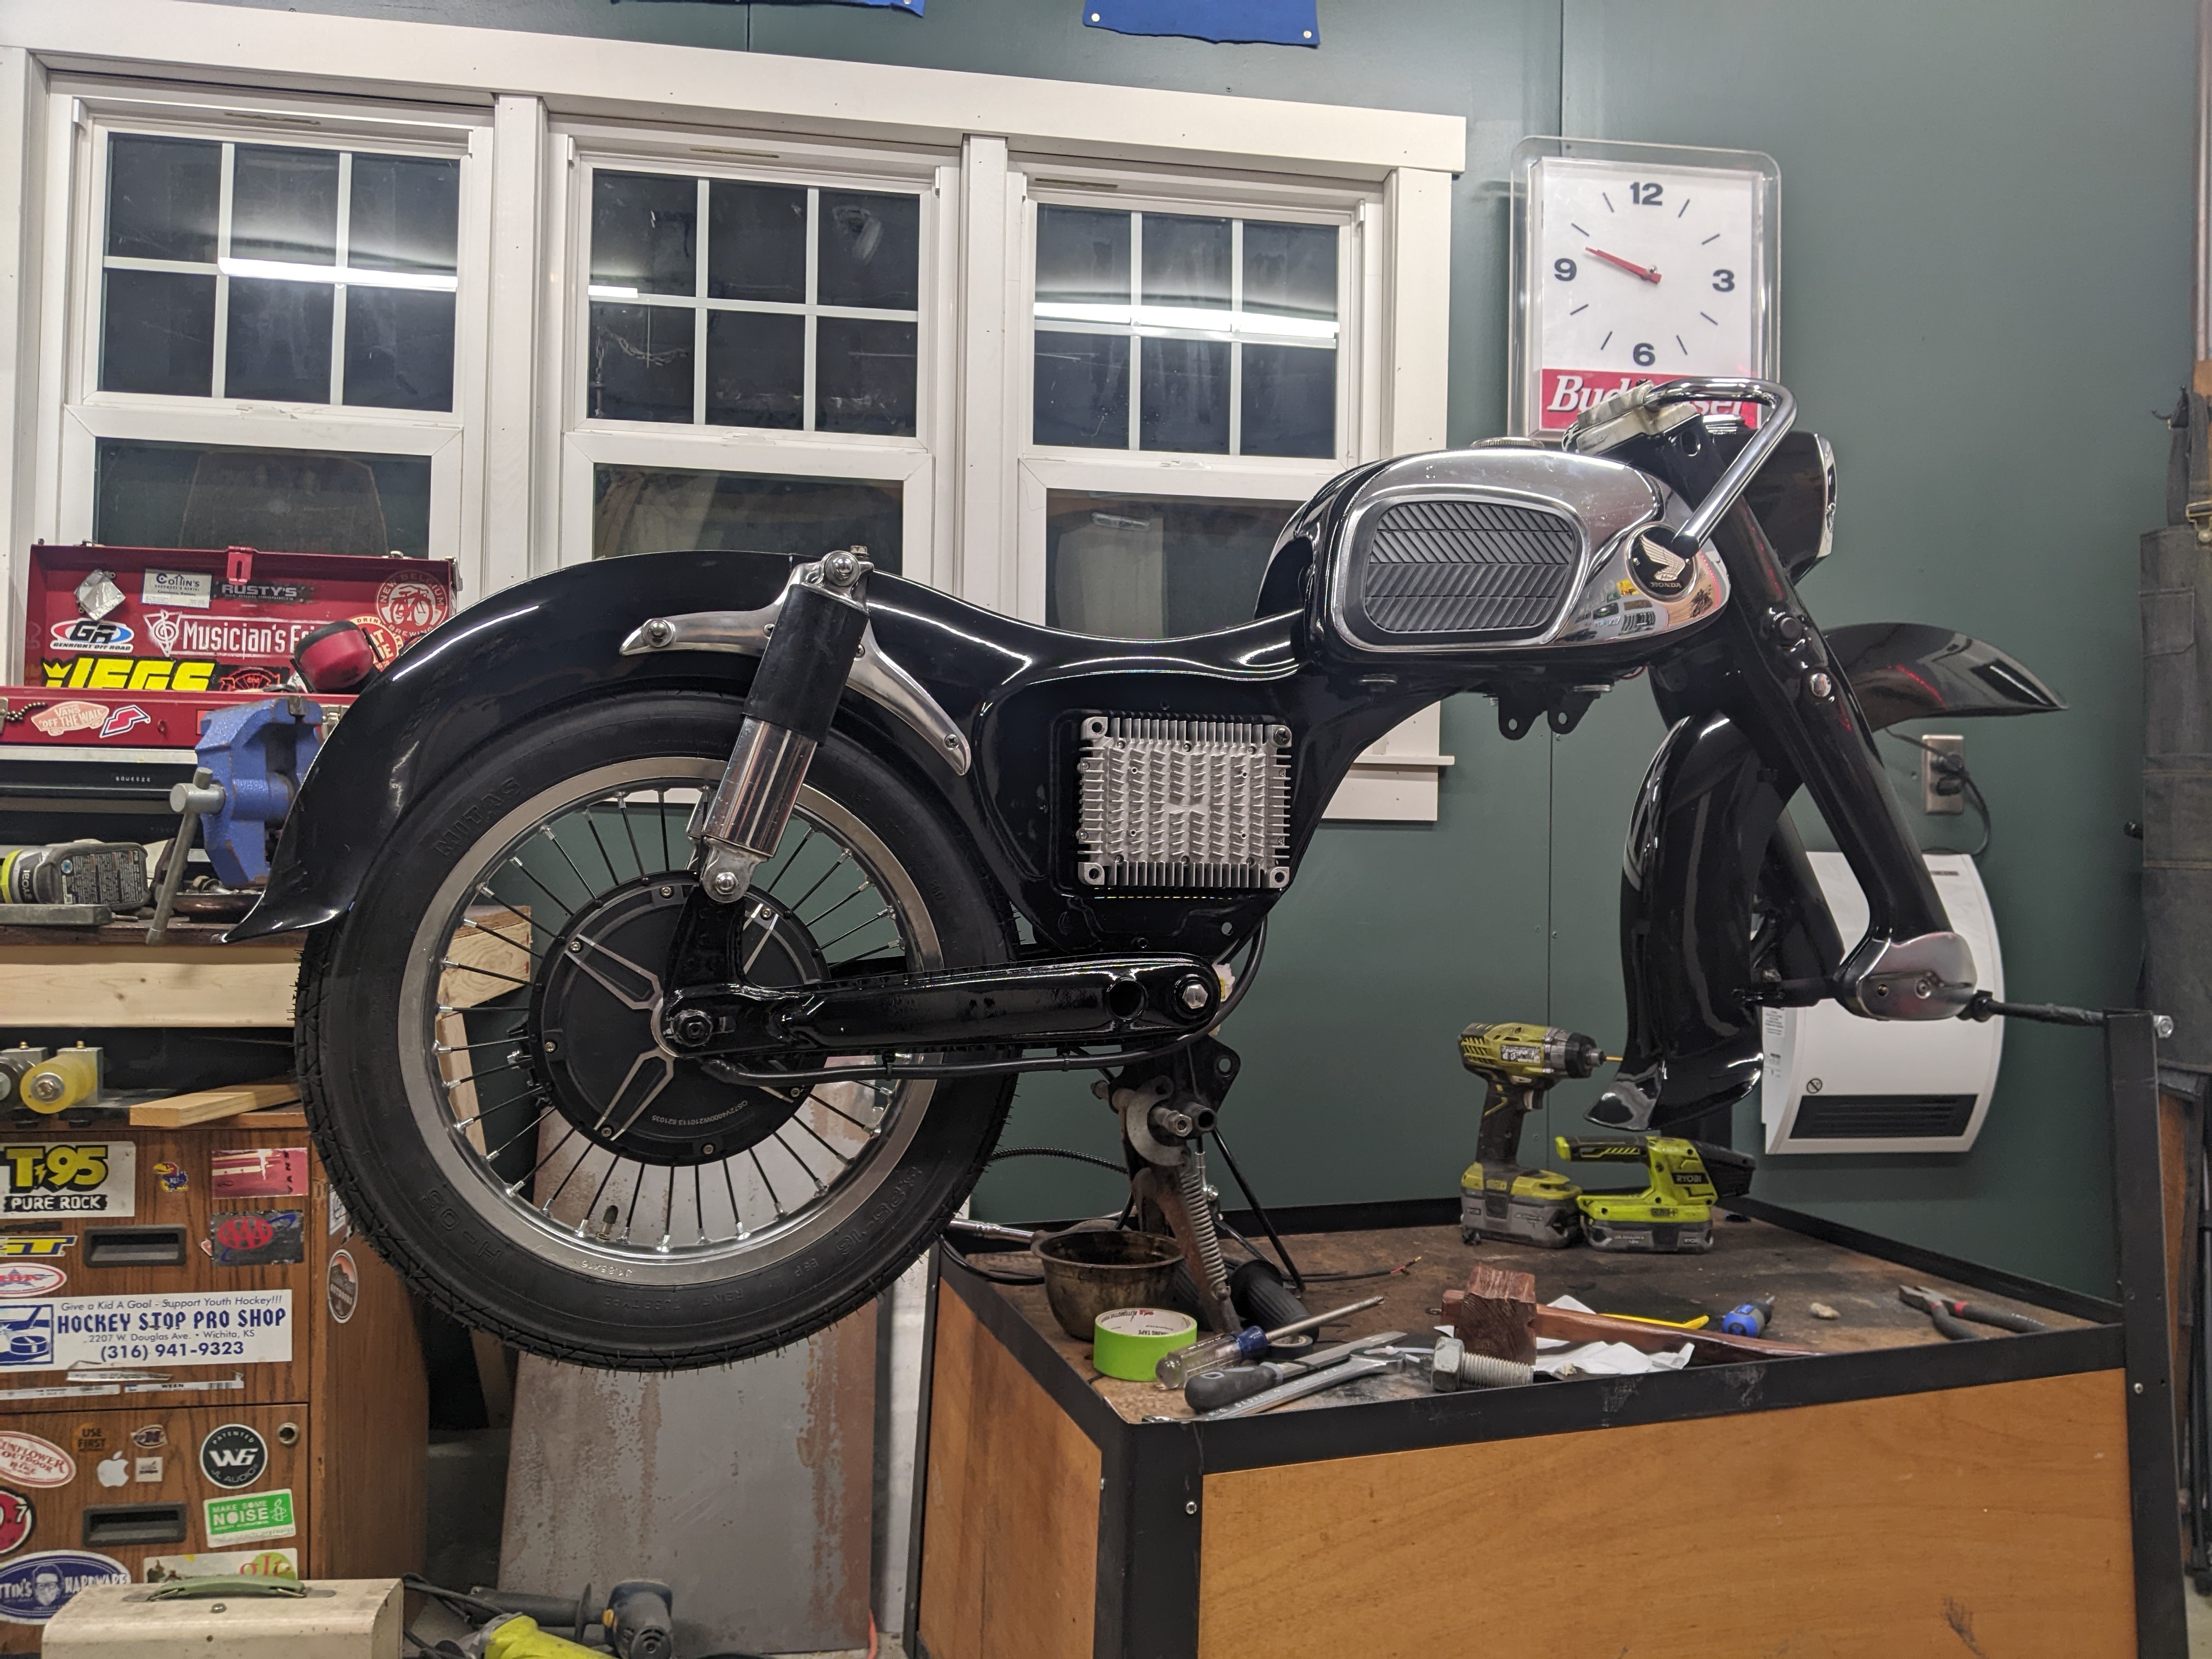
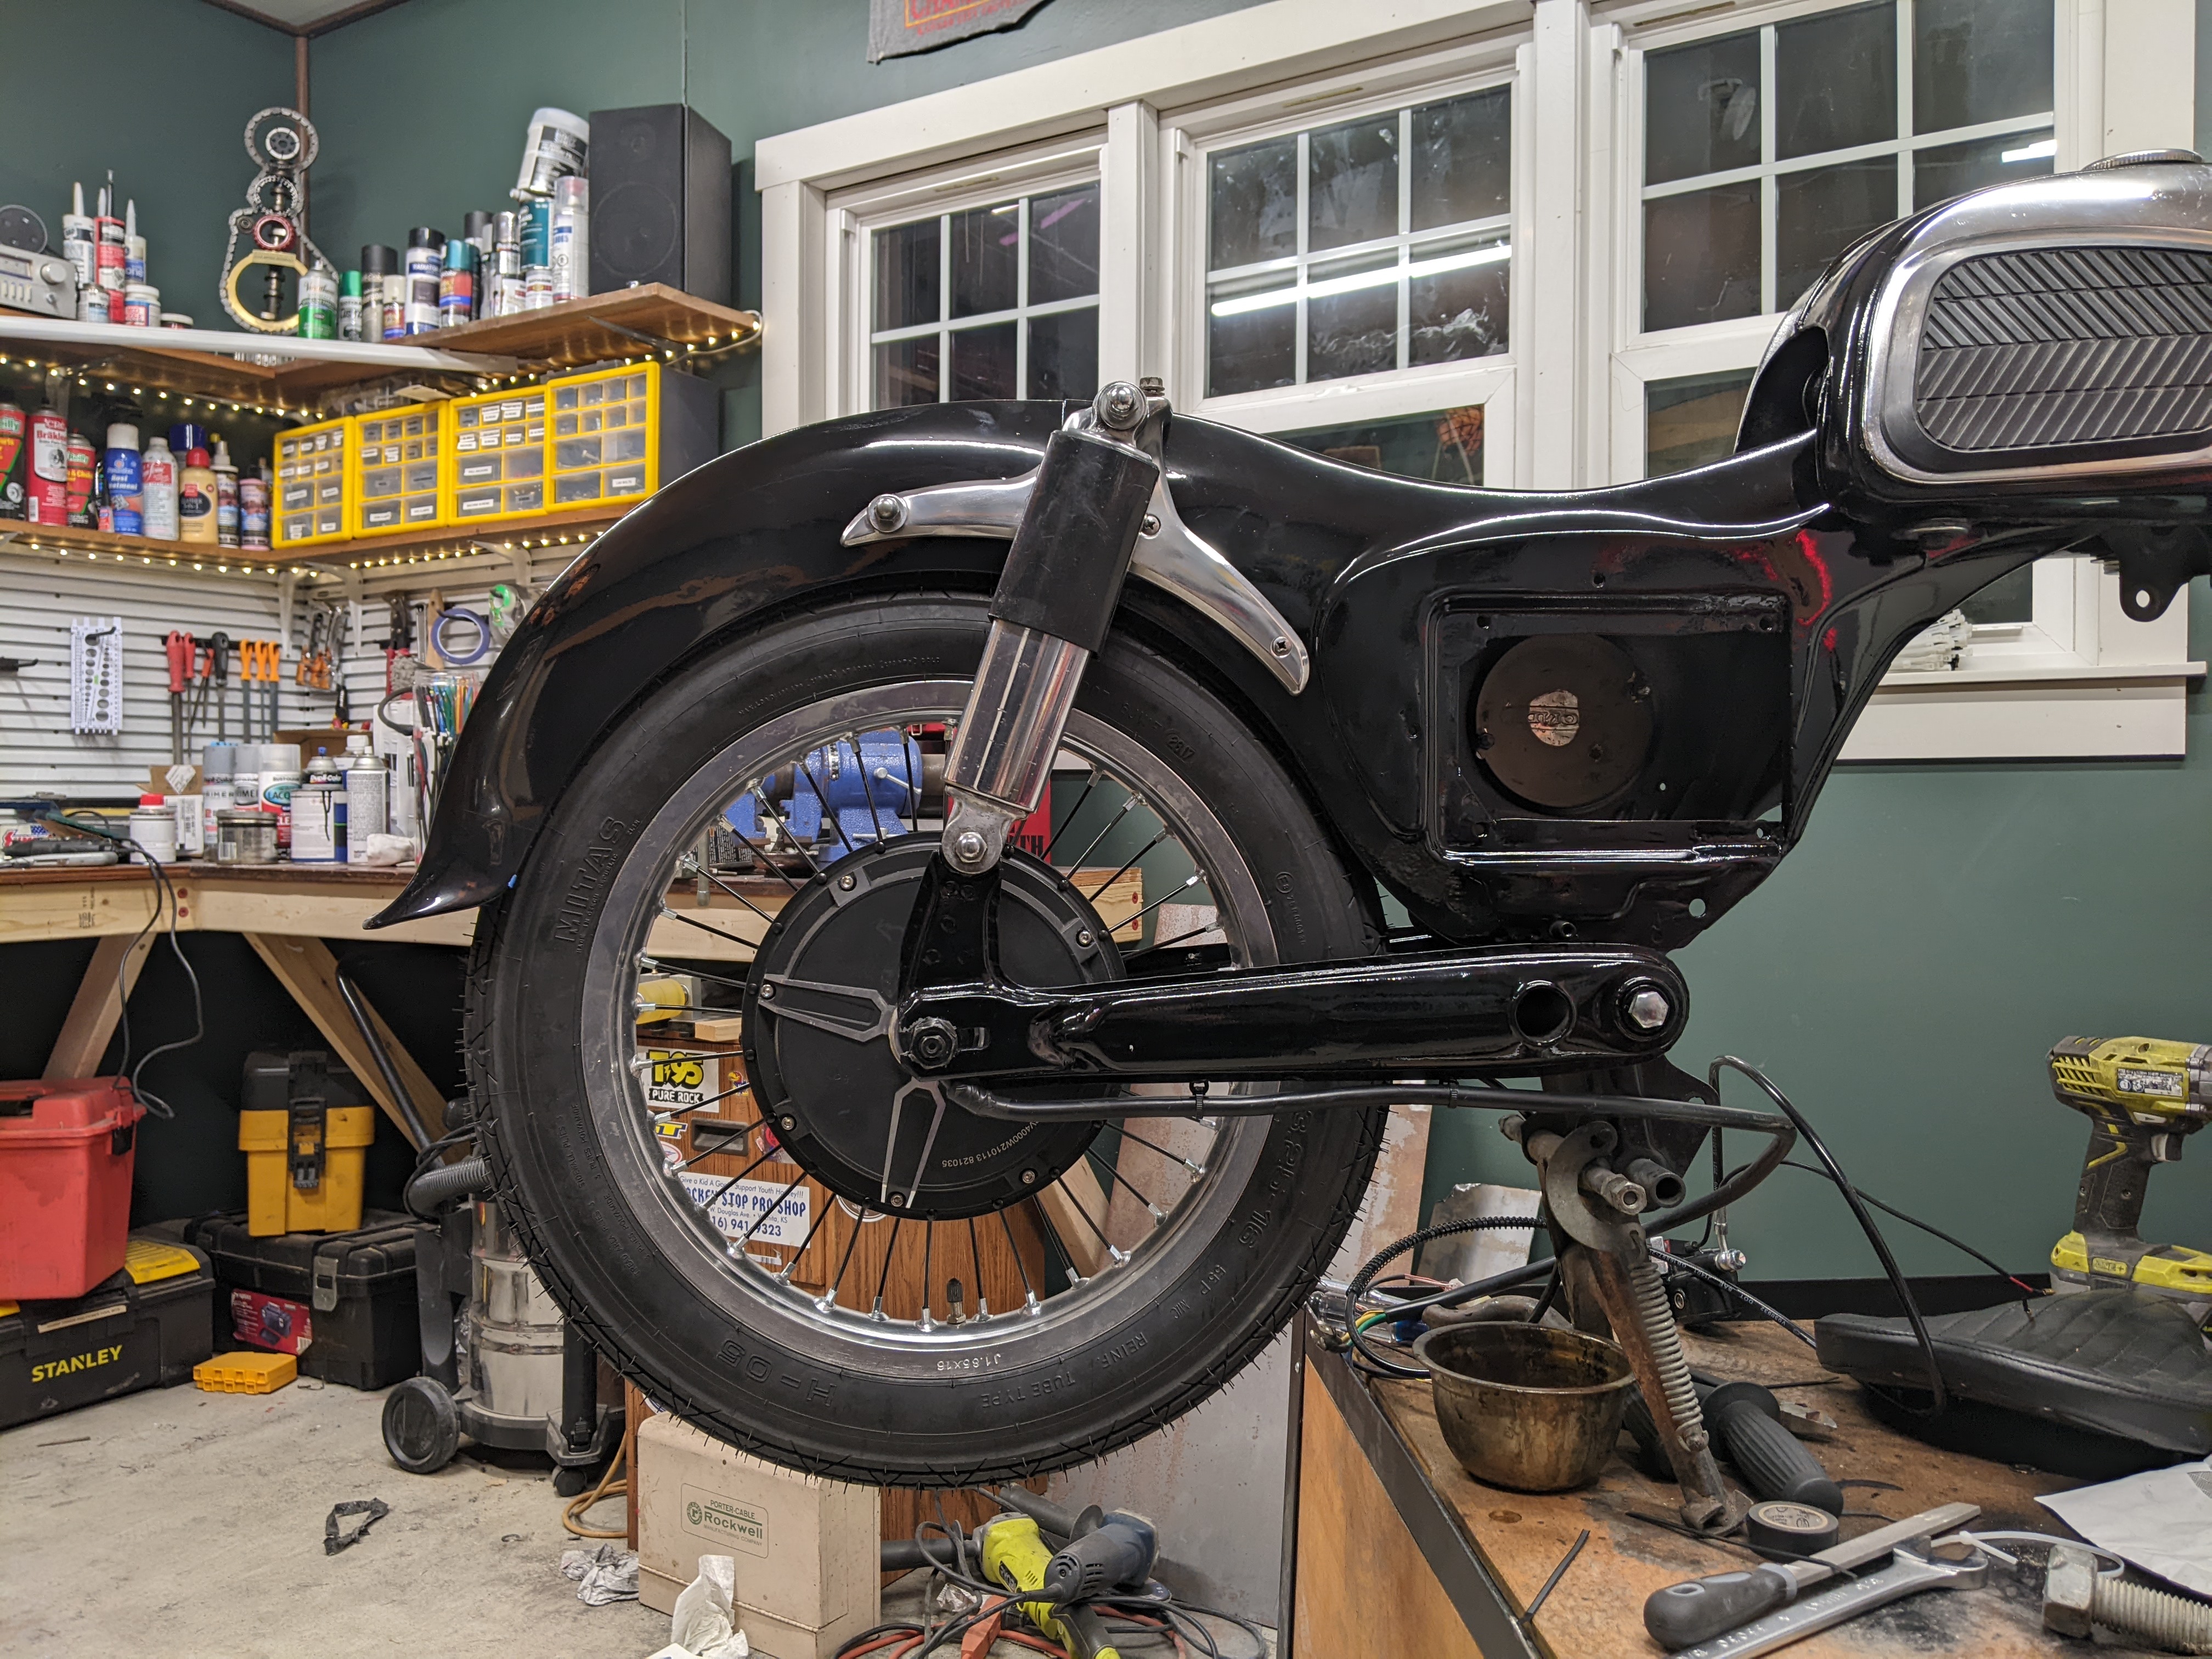
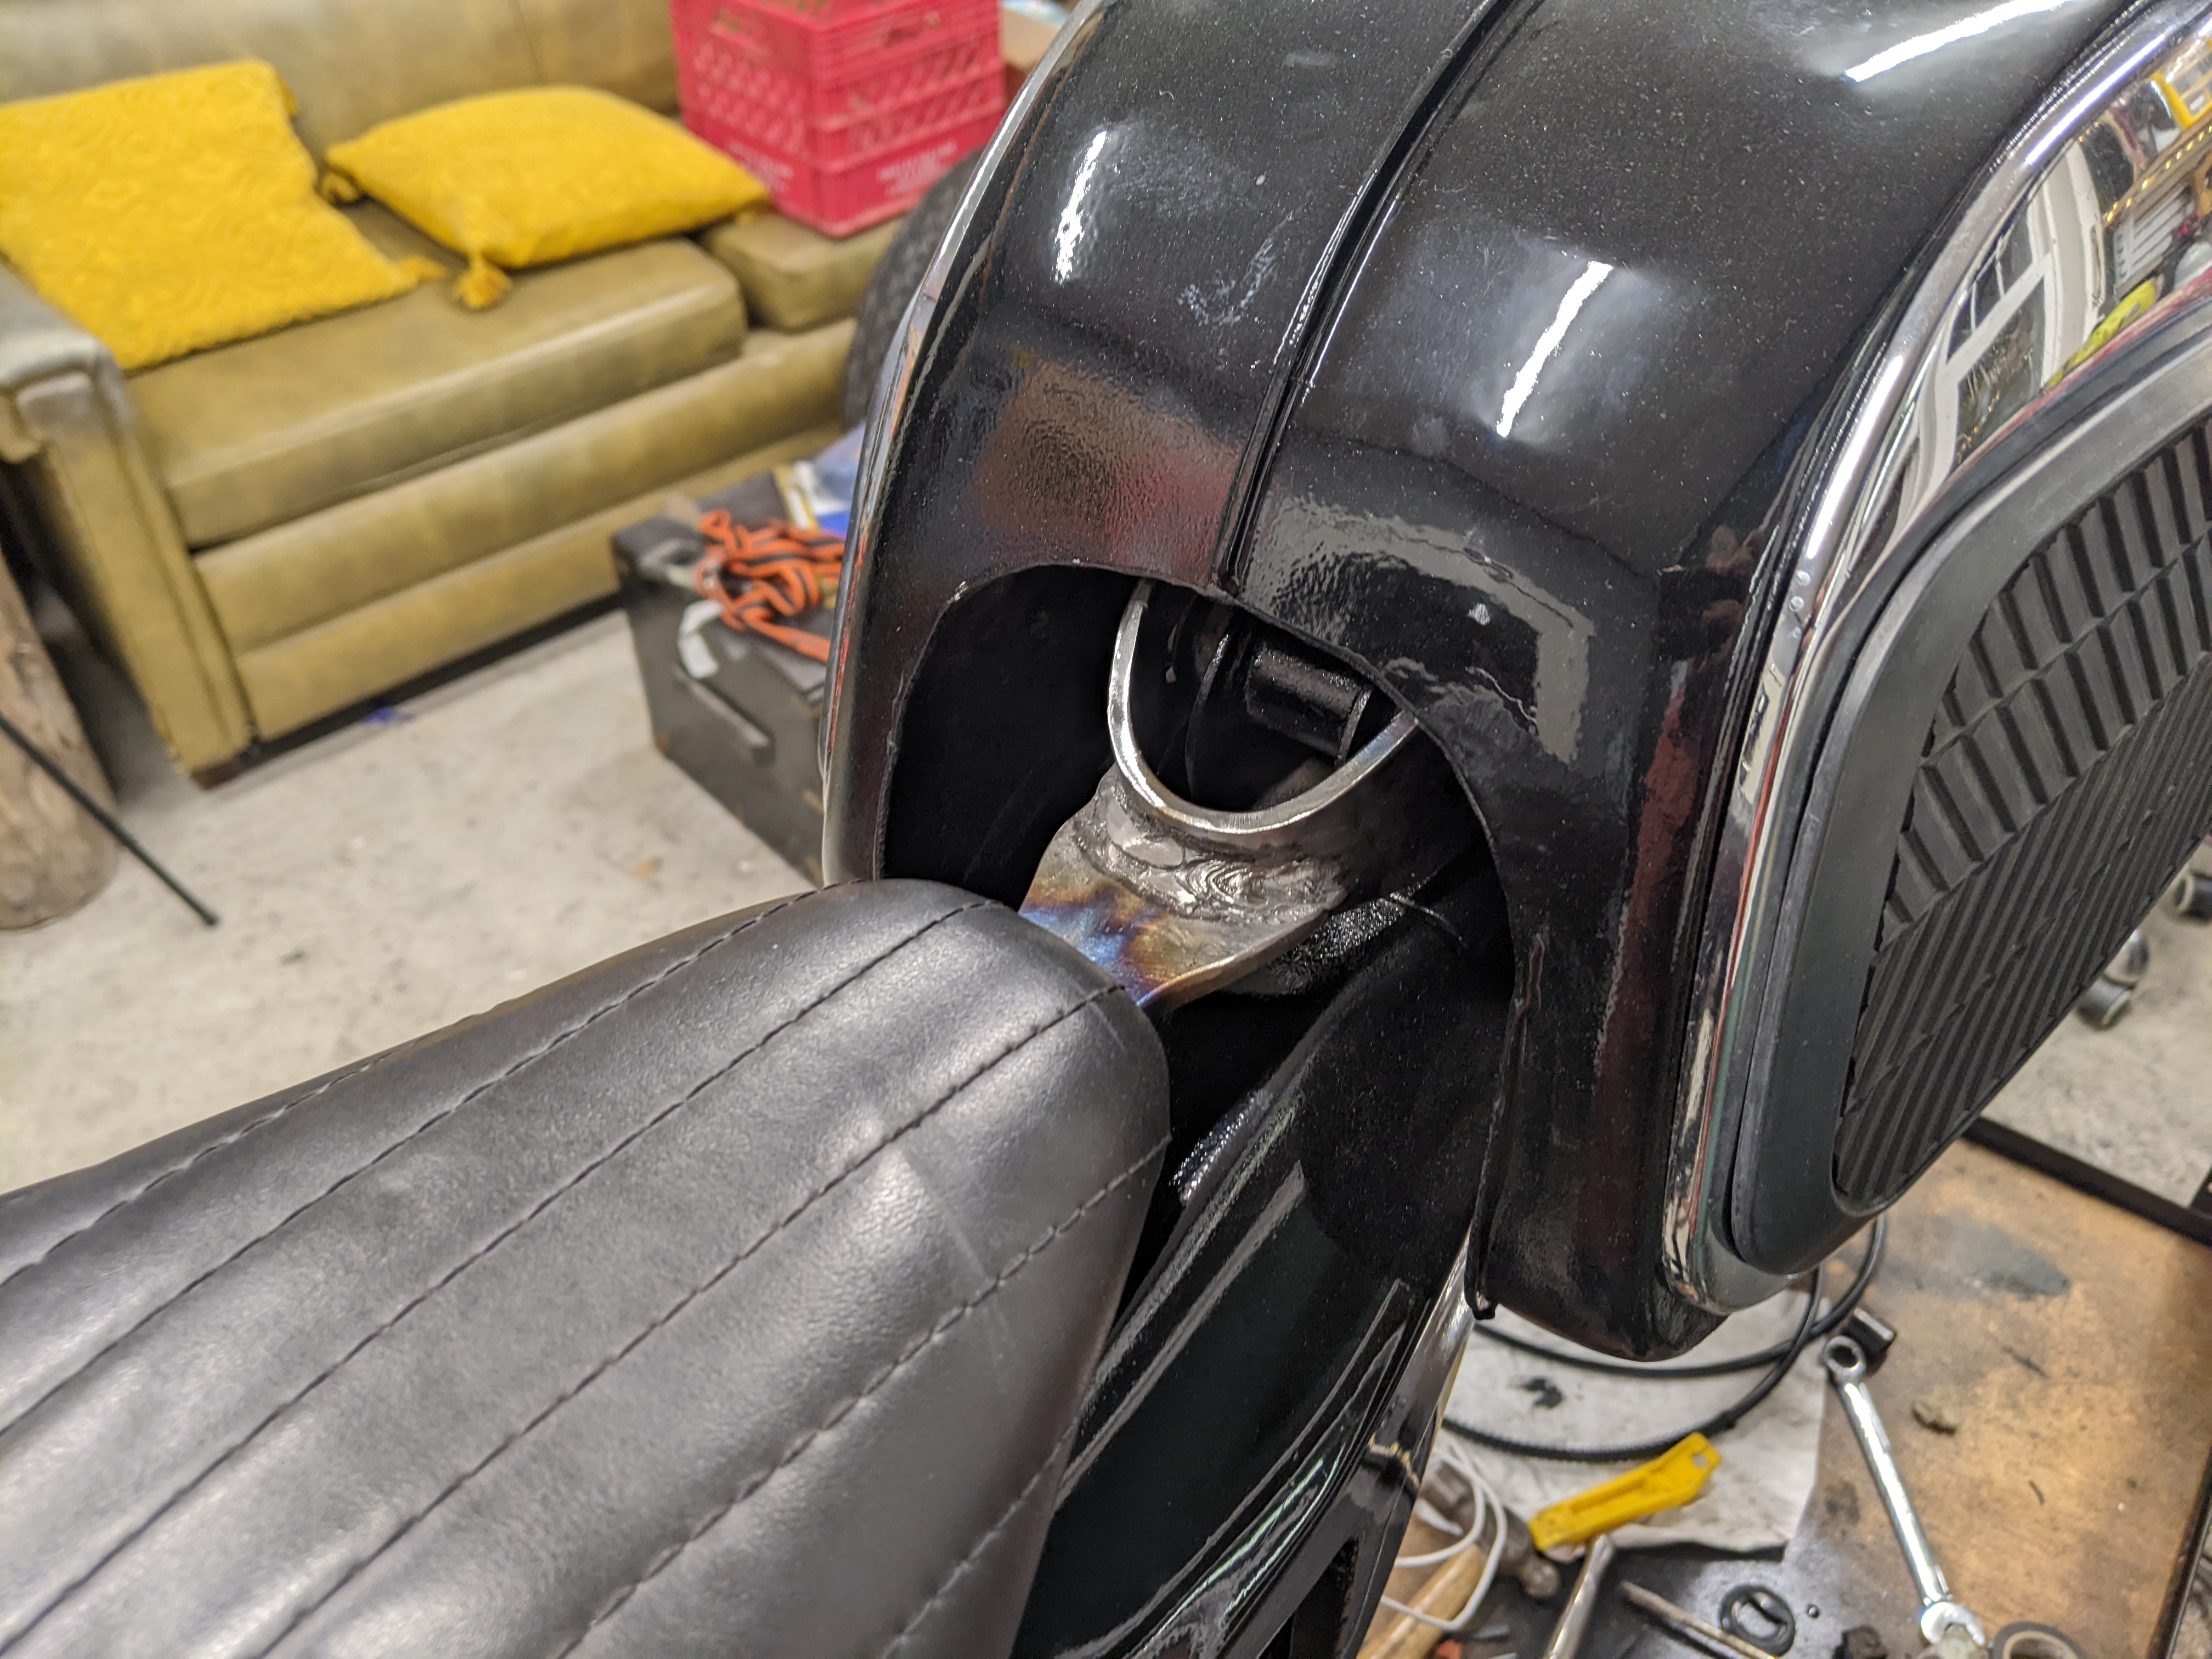
The disc brake bracket is perfectly secured to the tab I welded to the swingarm. This also would keep the wheel from sliding off of the swingarm if the nuts ever become loose.
Houston we have a problem!
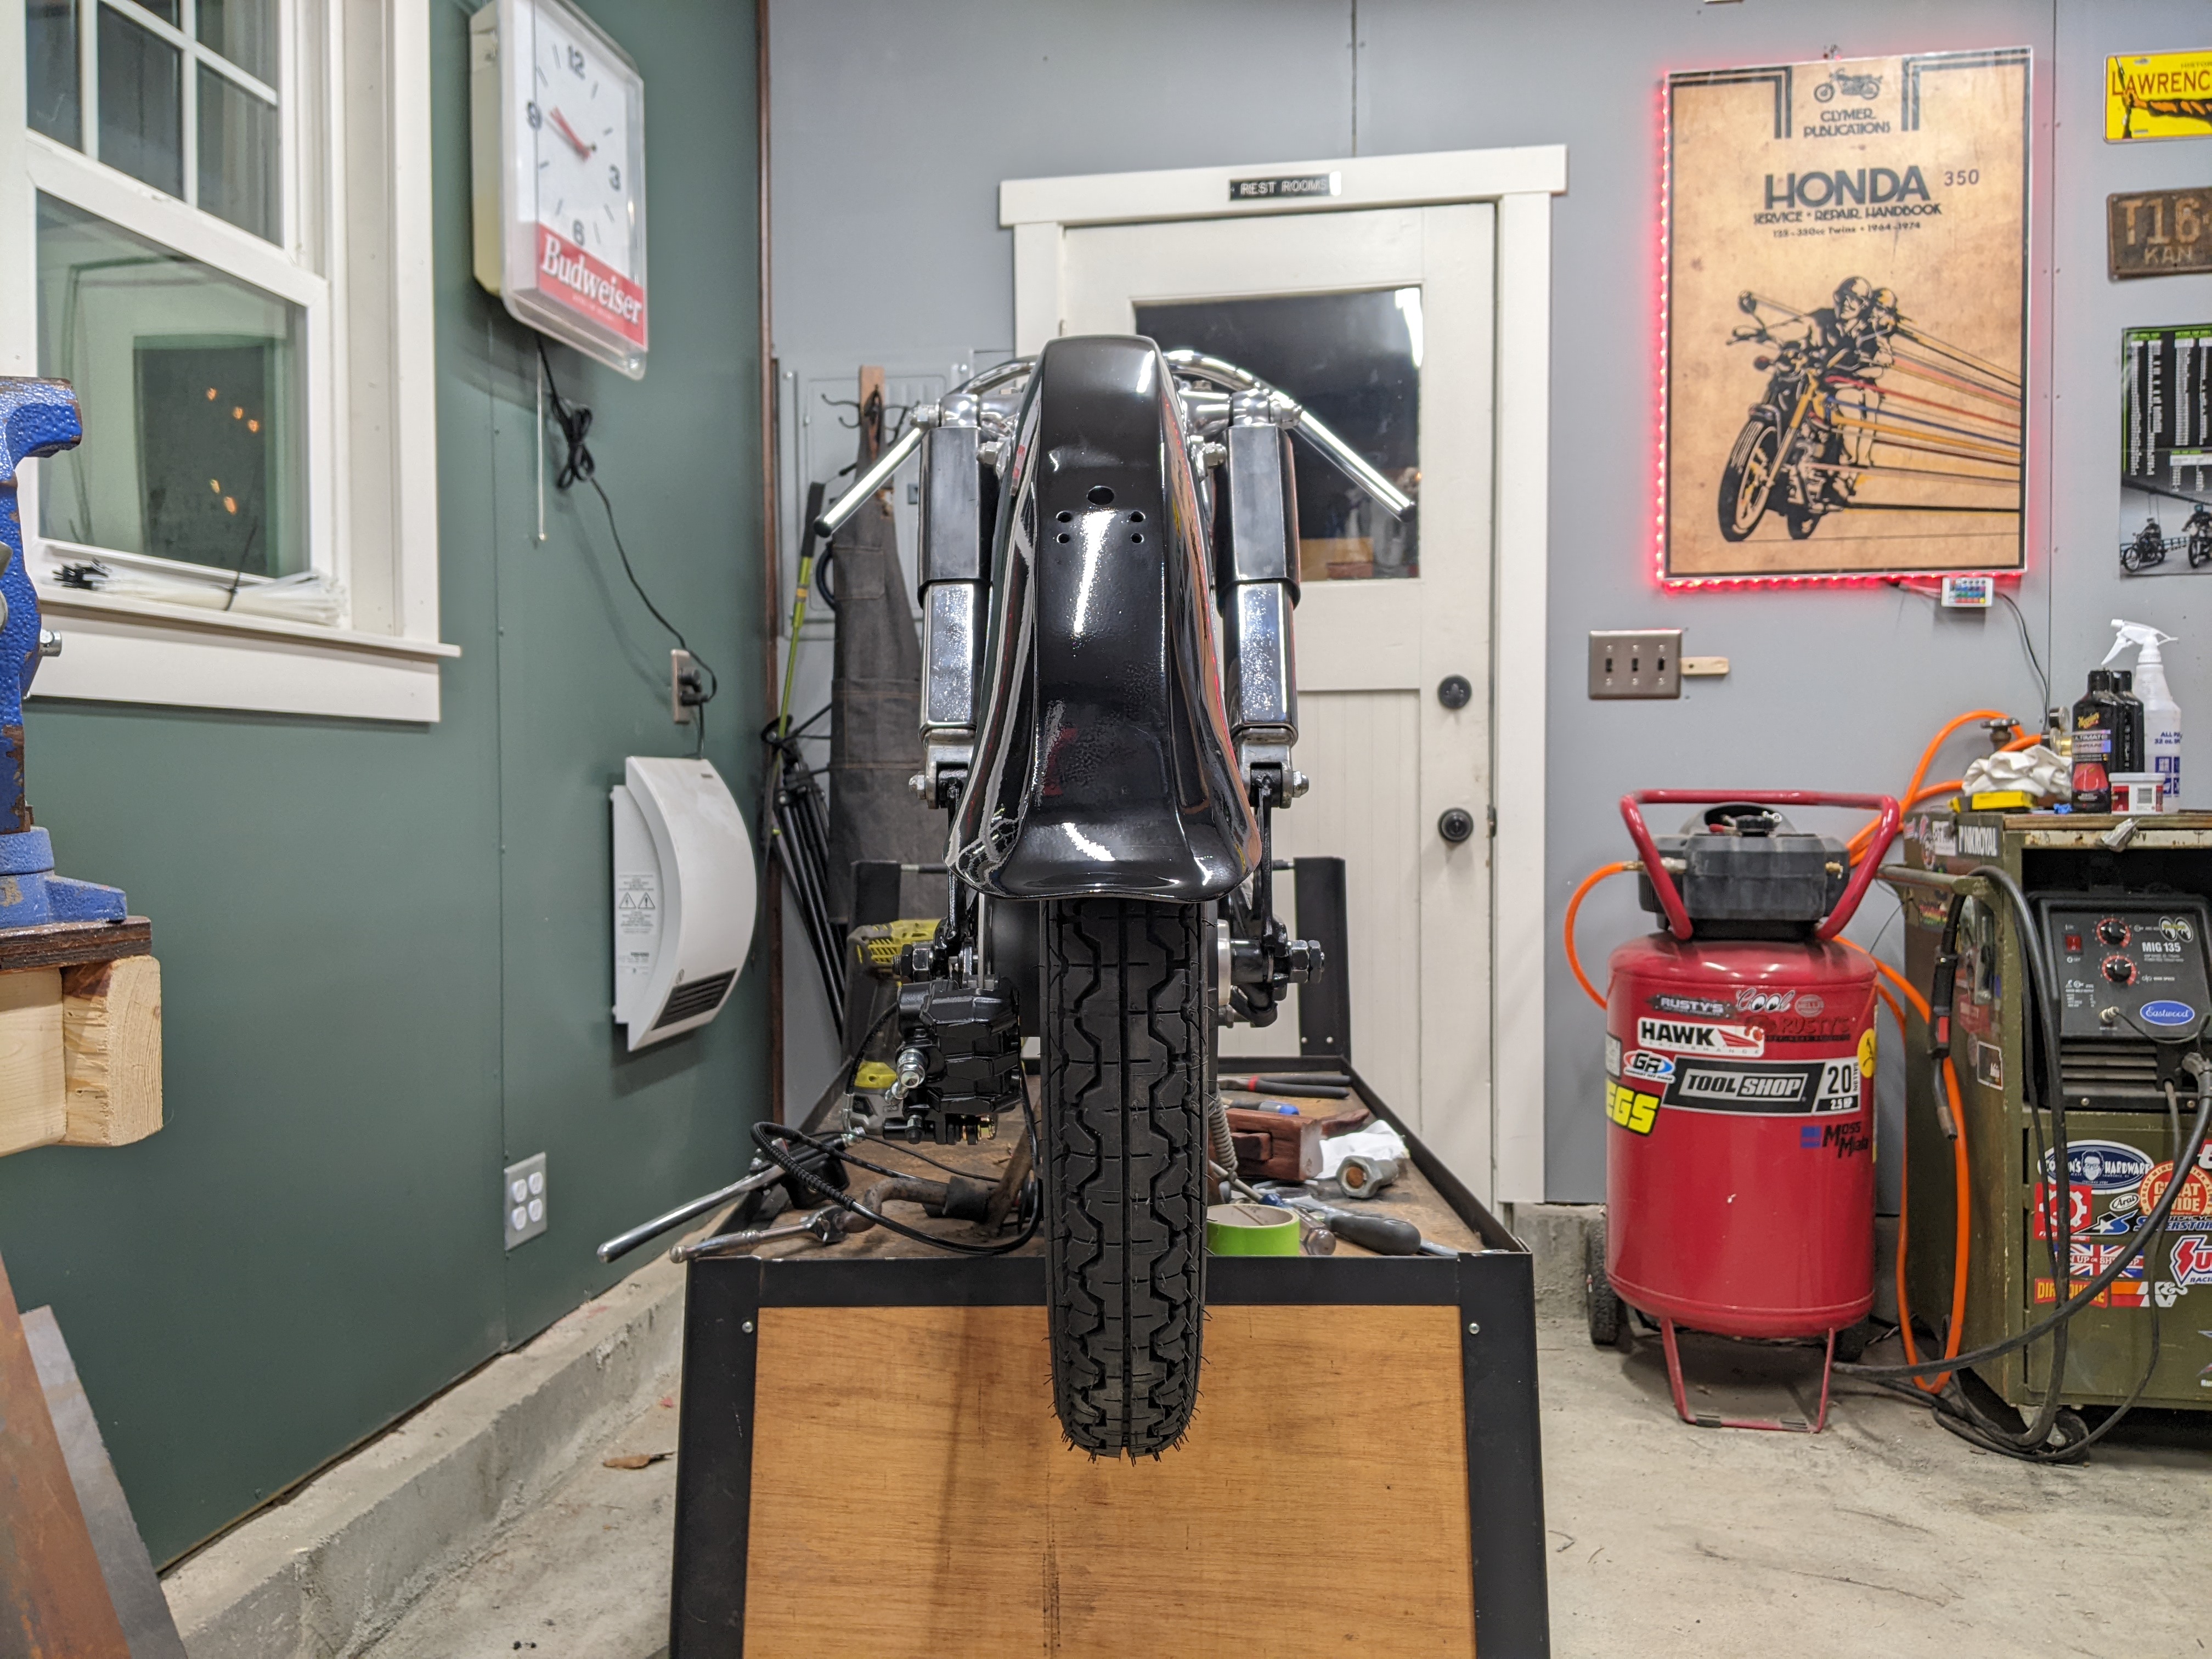
The rear wheel is offset way to far to the right. I know that the rim offset and be adjusted by tightening one side of the spokes and loosening the other side, but this is so much offset that I don't think any amount of spoke adjusting can correct it.
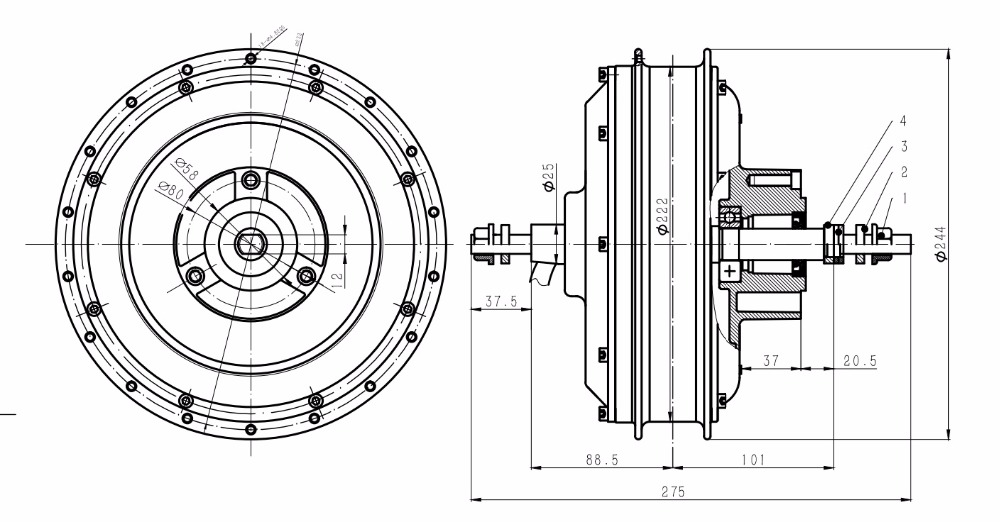
Maybe I should have payed more attention to the hub dimensions.
However that is not the only problem.
The brake disc is rubbing against the shock hardware. Maybe I could
So I'm pretty sure I'm going to remove the disc brakes completely, allowing me to move the whole wheel to the left and put a spacer on the right, that would correct the offset problem.
And instead of having rear disc brakes, I will use variable regen braking. The motor controller I'm using allows for a throttle-style input to control the amount of regen braking, and a few people have even recommended I use this instead of mechanical brakes.
It would also eliminate the strange concept of having drum brakes in the front and disc brakes in the rear.
------
After thinging about it overnight and consulting the internet, I've decided not to rely on regen braking for the rear brakes. Terrible idea. What if it cuts out unexpectedly? Or is just not powerful enough in an emergency.
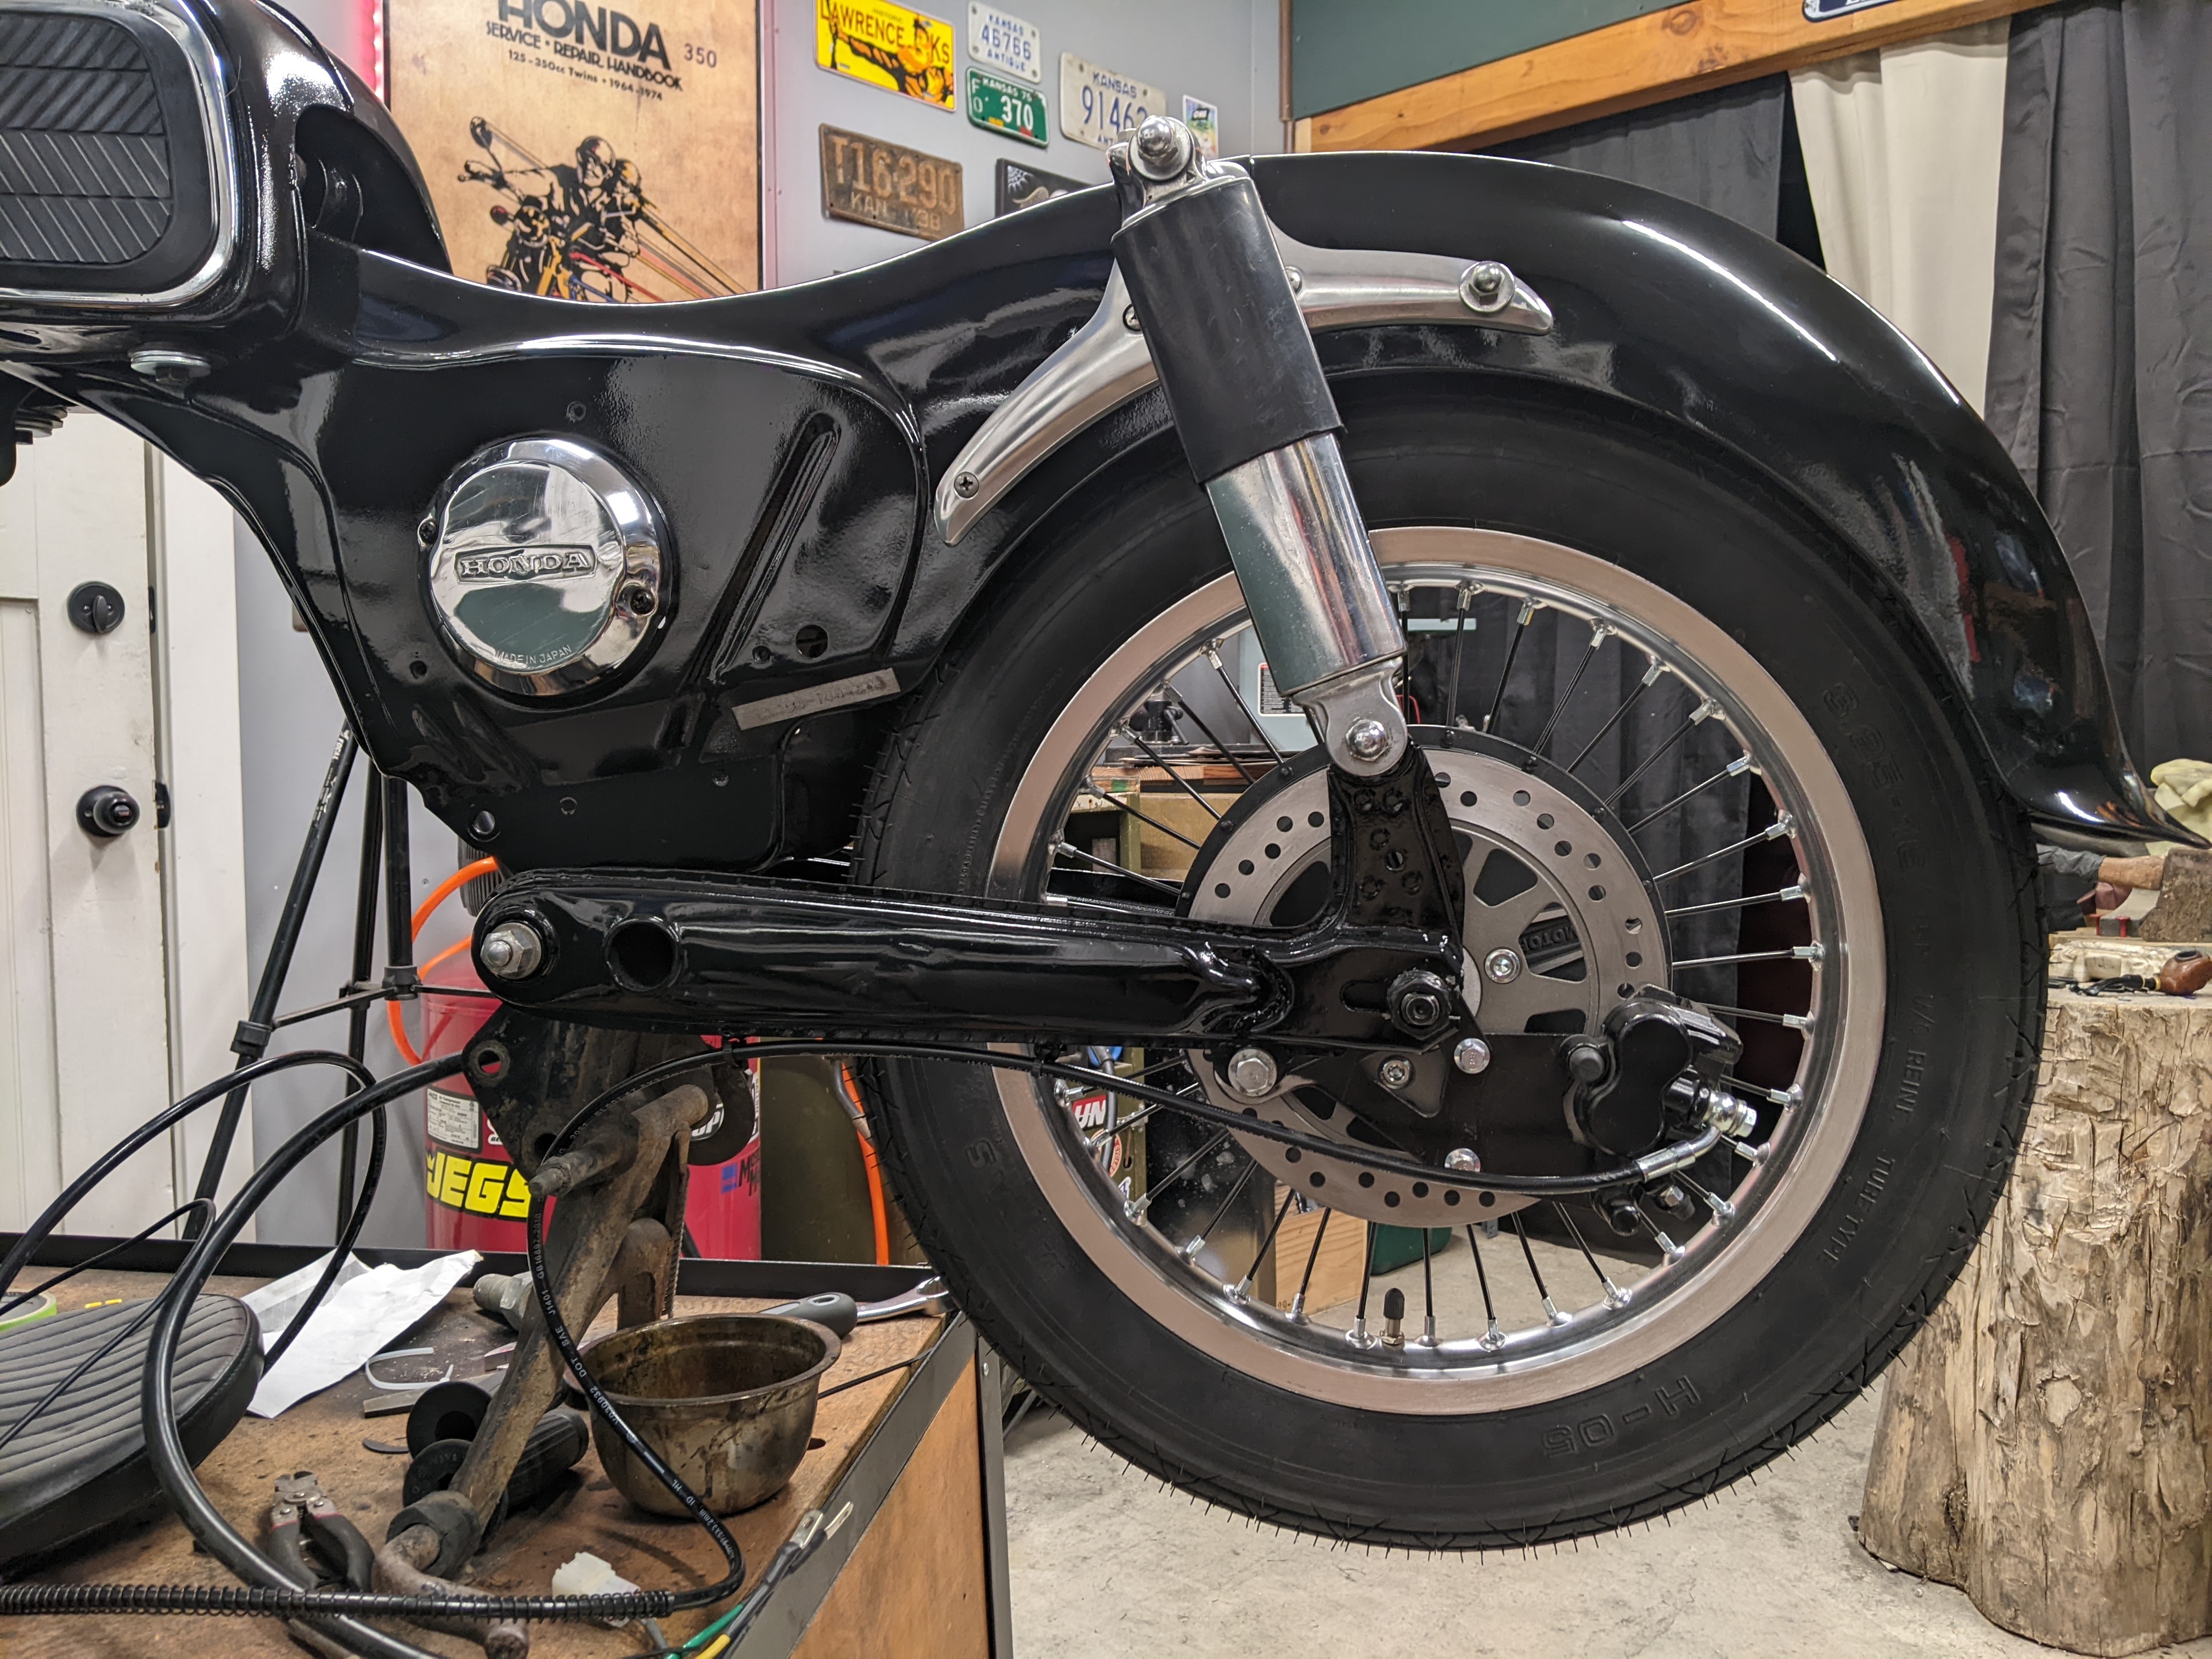
Gotta stick with the disc brakes. This means either modifying the frame and shocks to shift the swingarm to the left (and off axis, what would that mean for handling?) or put the wheel on a milling machine to remove some material and allow the disc to mount further inboard, and fabricate a new brake caliper bracket. Sounds like a lot of work.
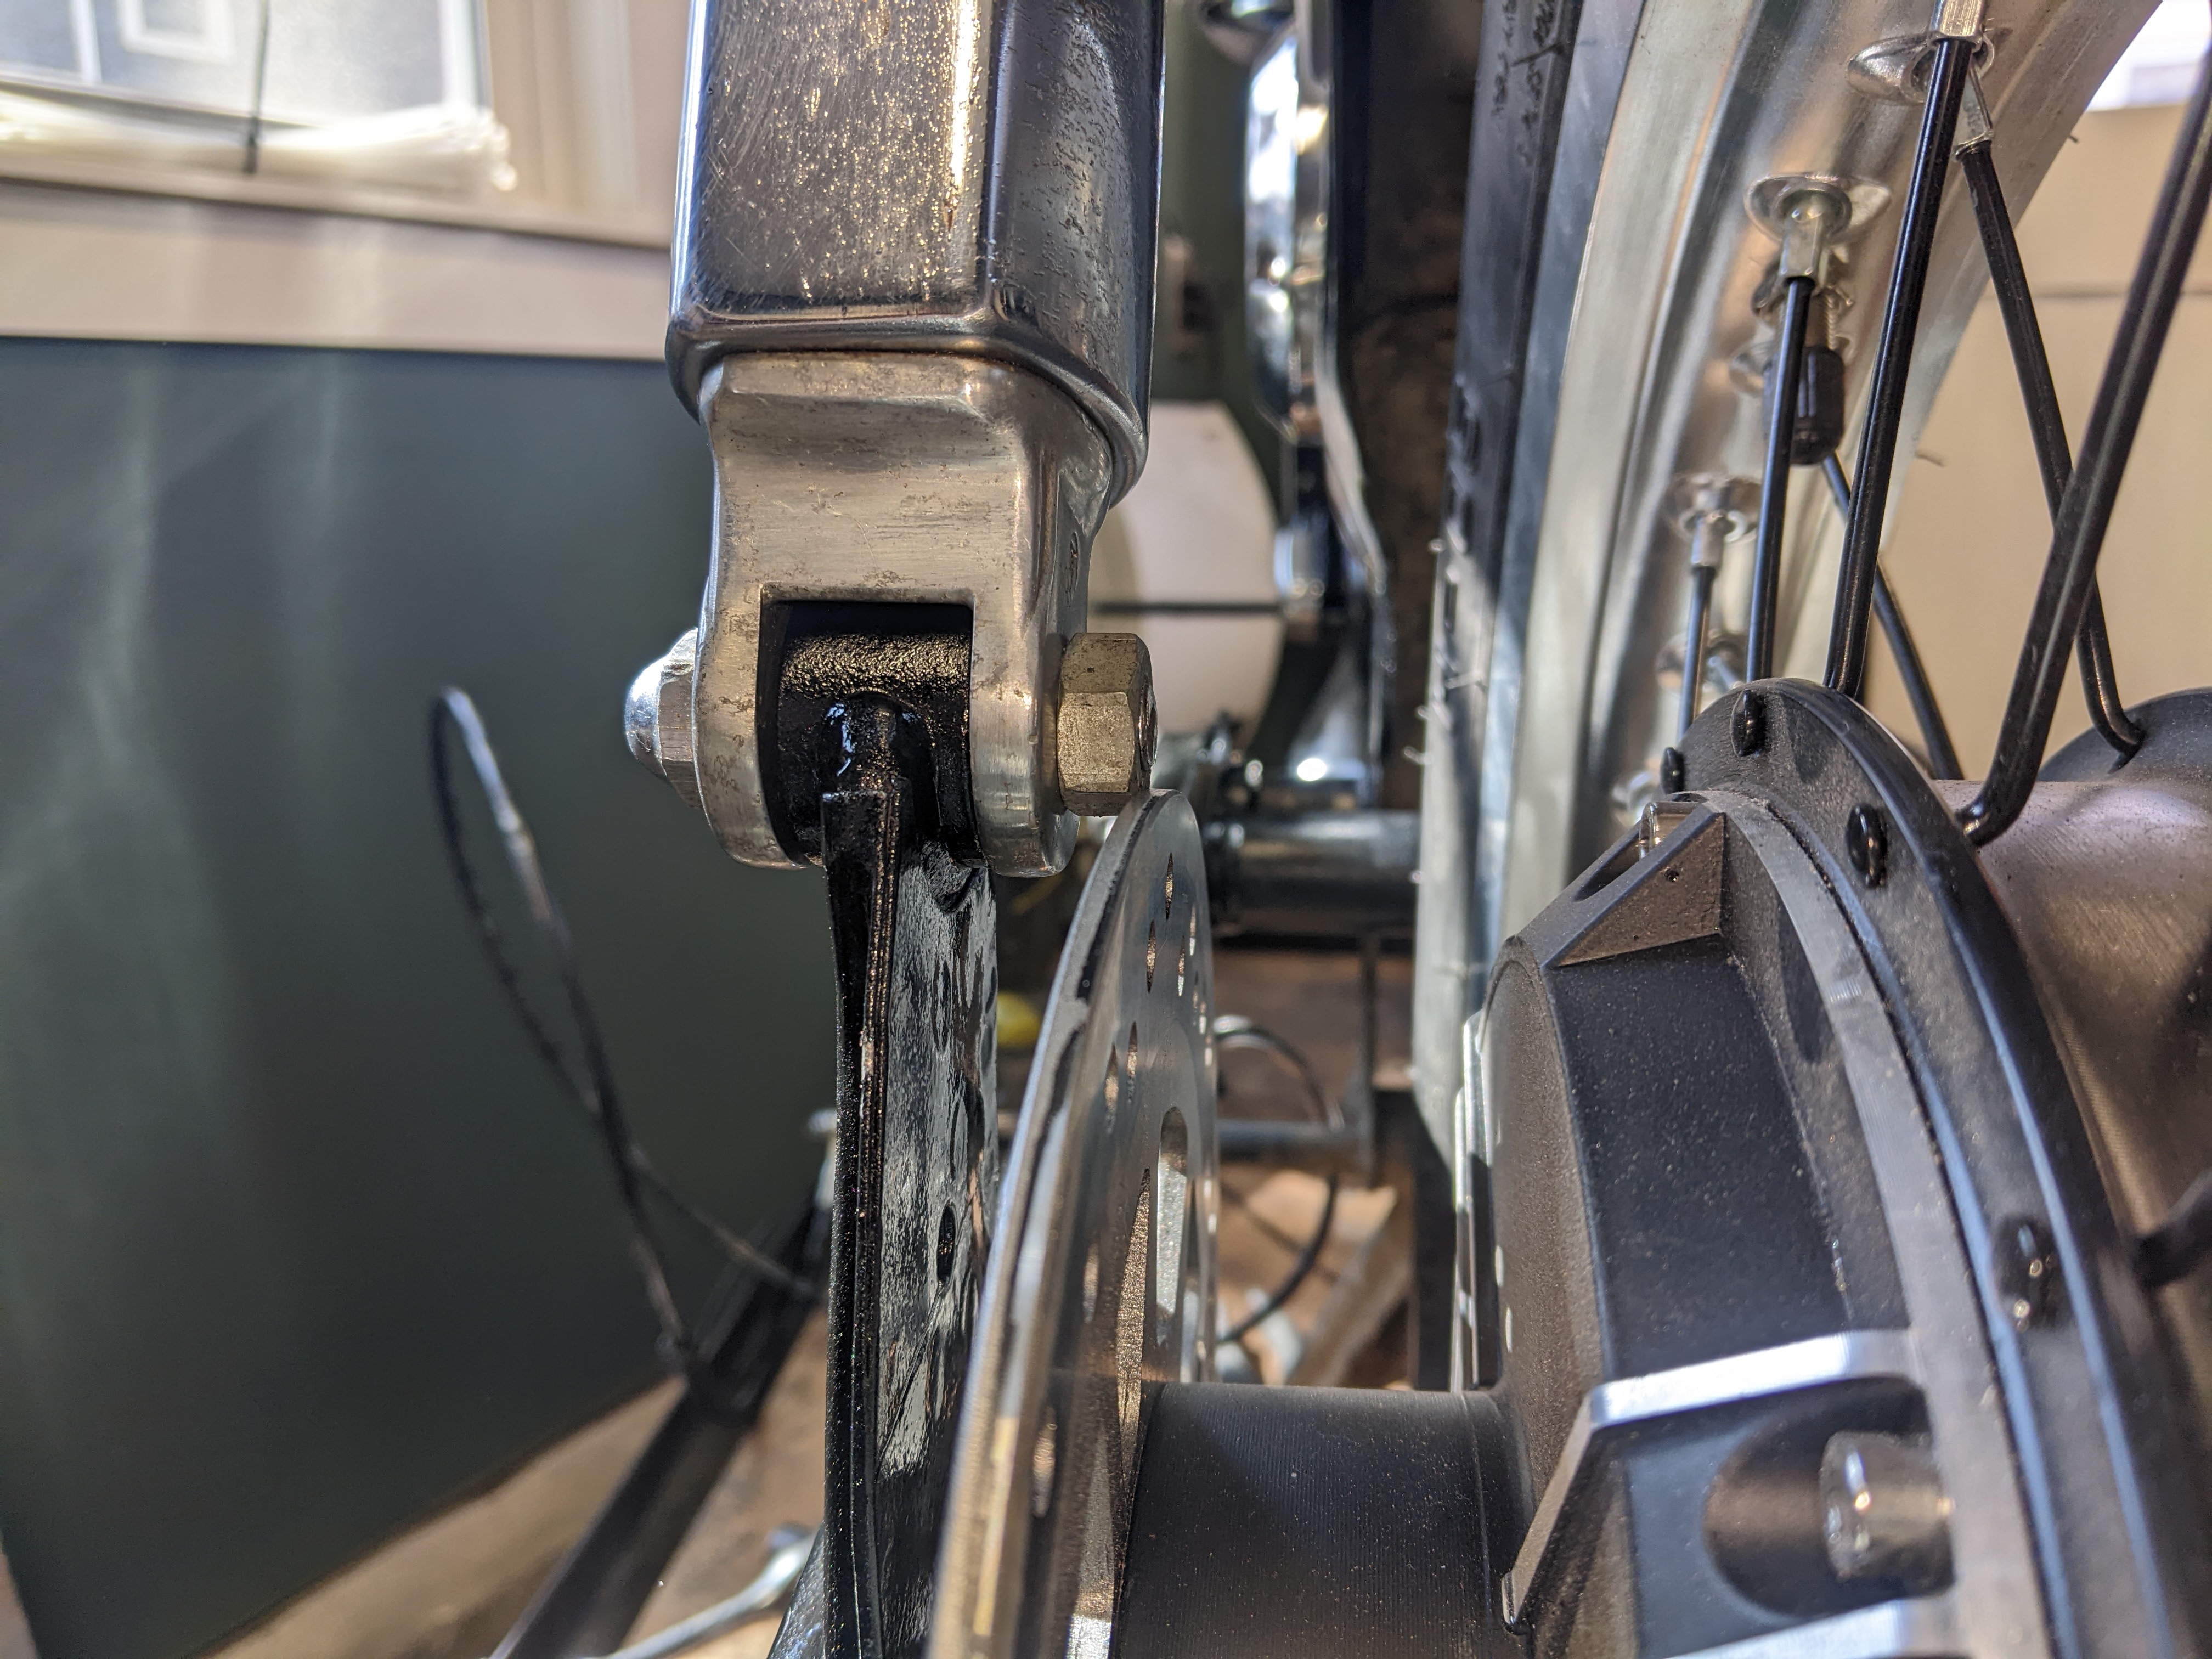
But someone suggested that I flip the wheel over. But wouldn't that cause the wheel to accelerate in reverse? Yes but I can control which direction it spins via the programmable motor controller!
So I flipped the wheel over, with the brake now on the right side, and LO AND BEHOLD! IT FITS!

Now I just need to rejigger the spacers on the axle, and weld a tab to the right side of the swingarm for the brake caliper mounting bracket.
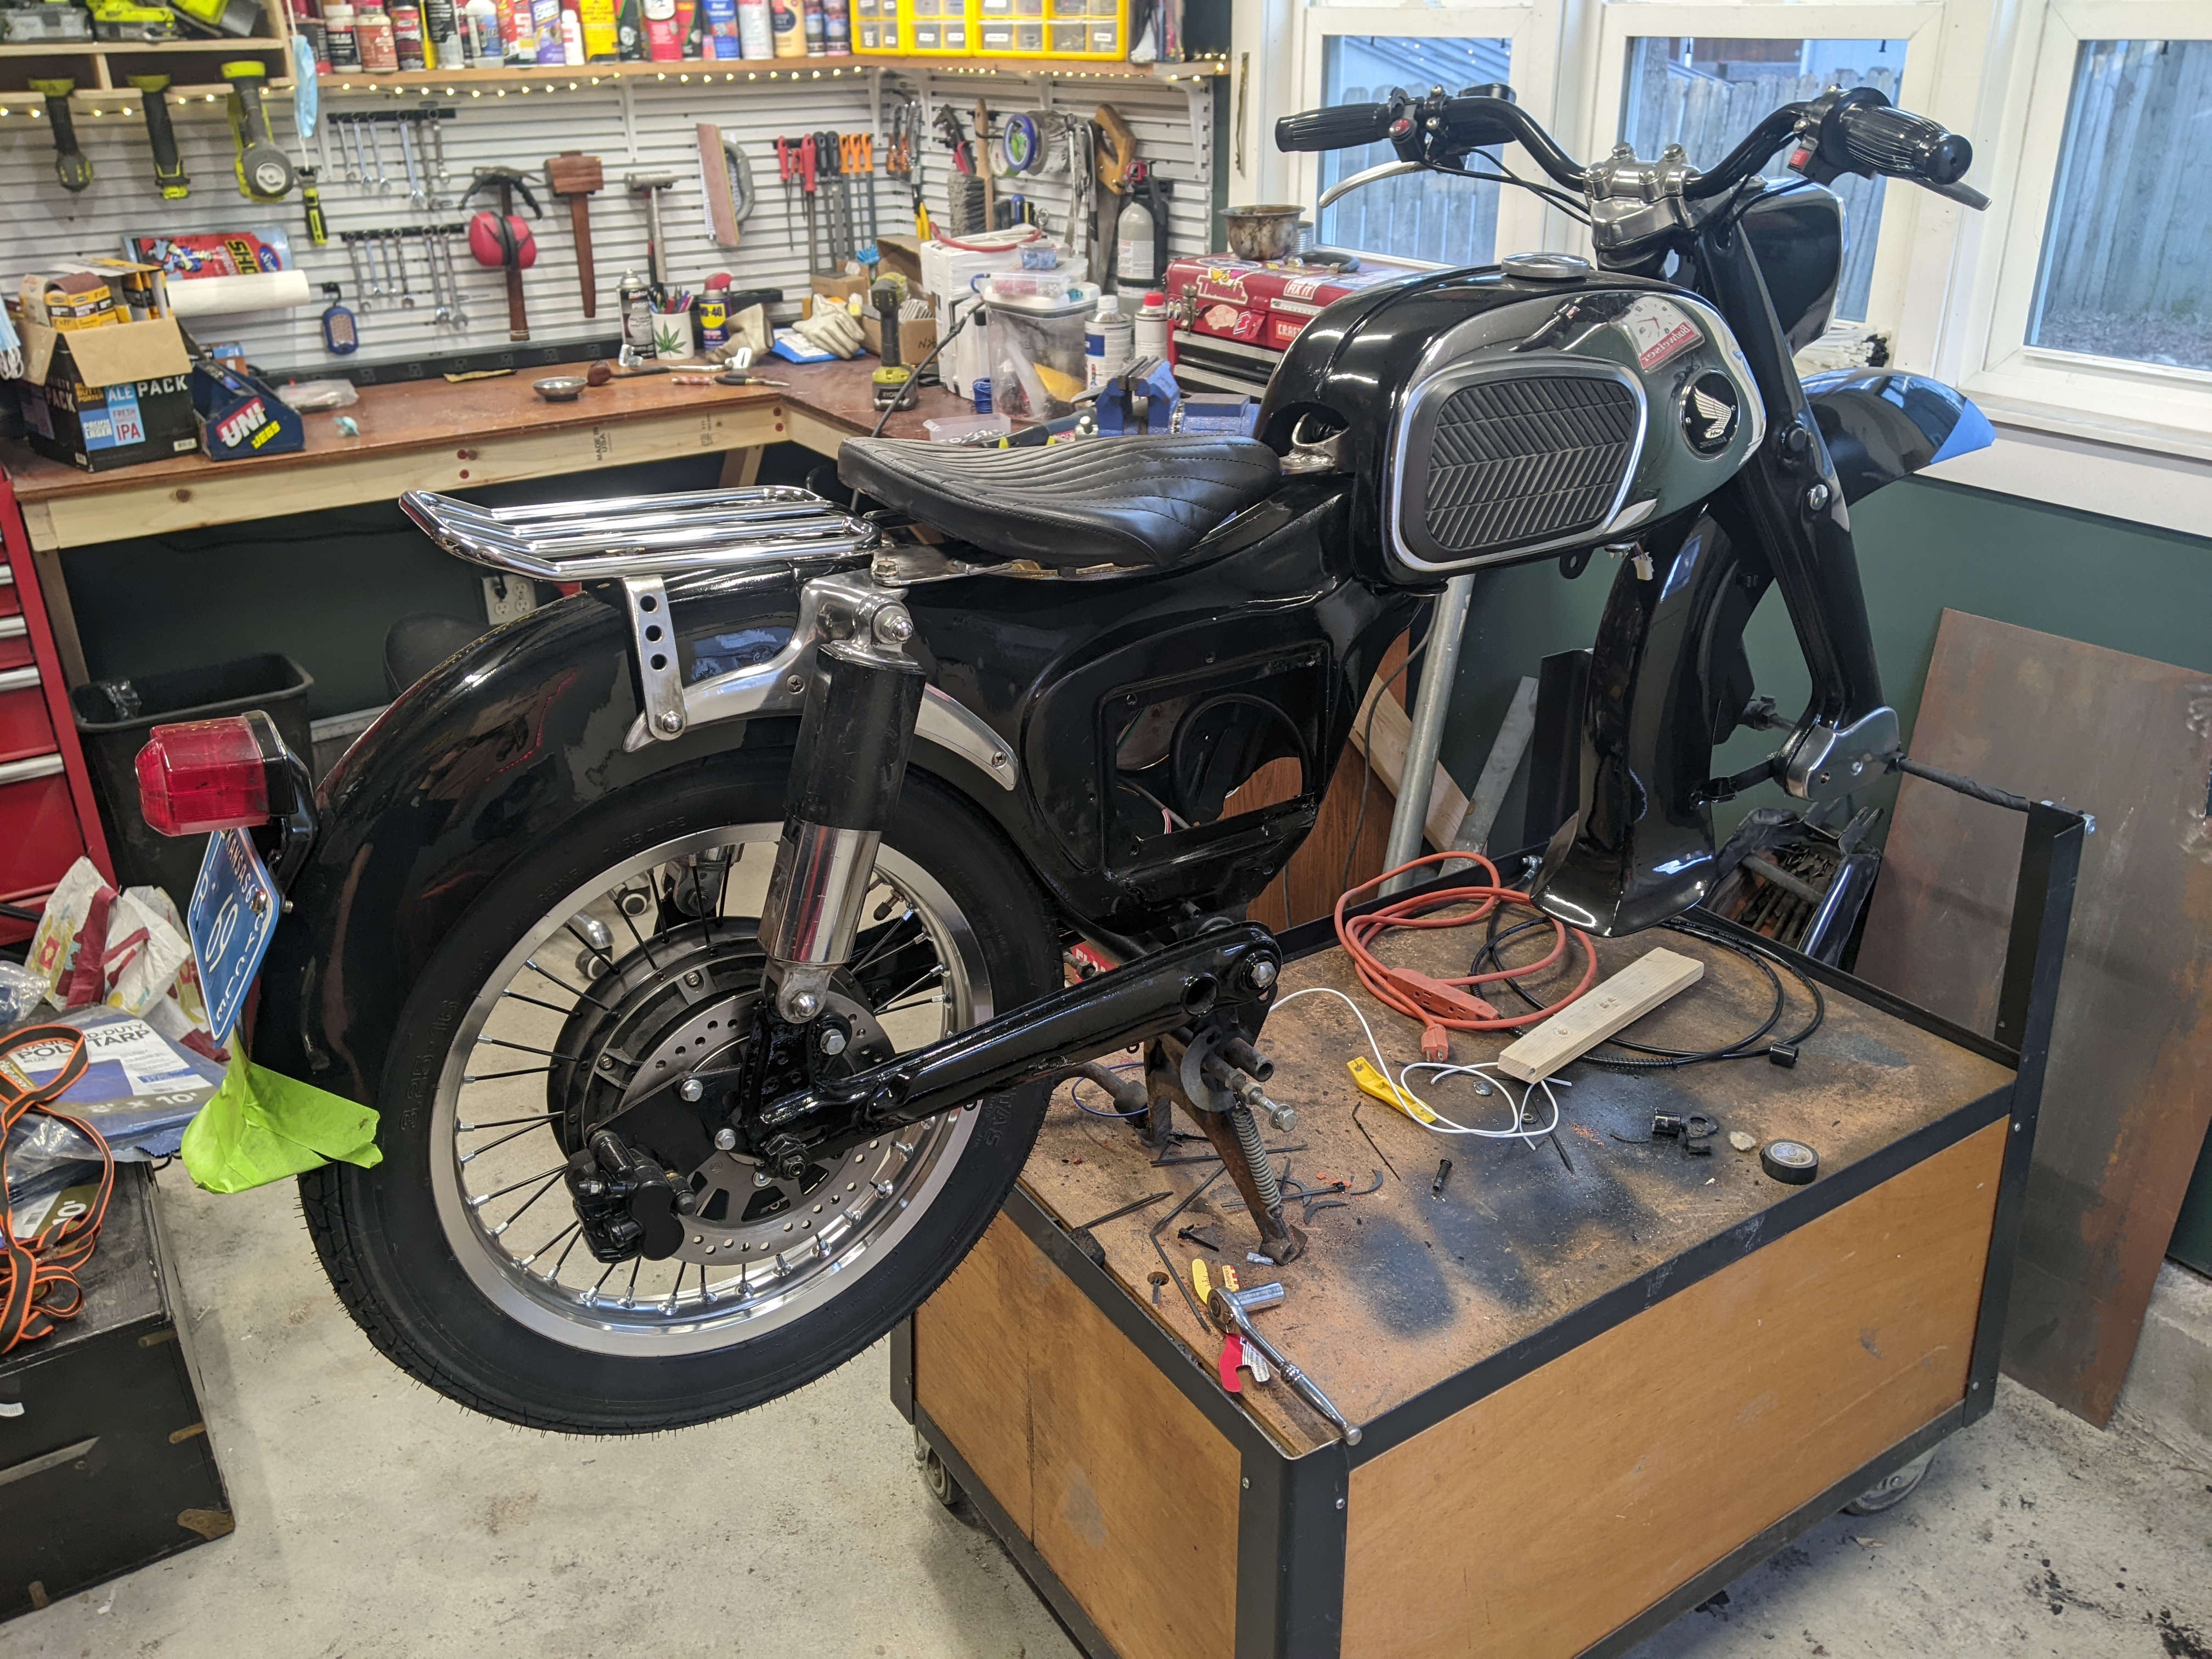
Seat, Luggage Rack, and Hand Controls
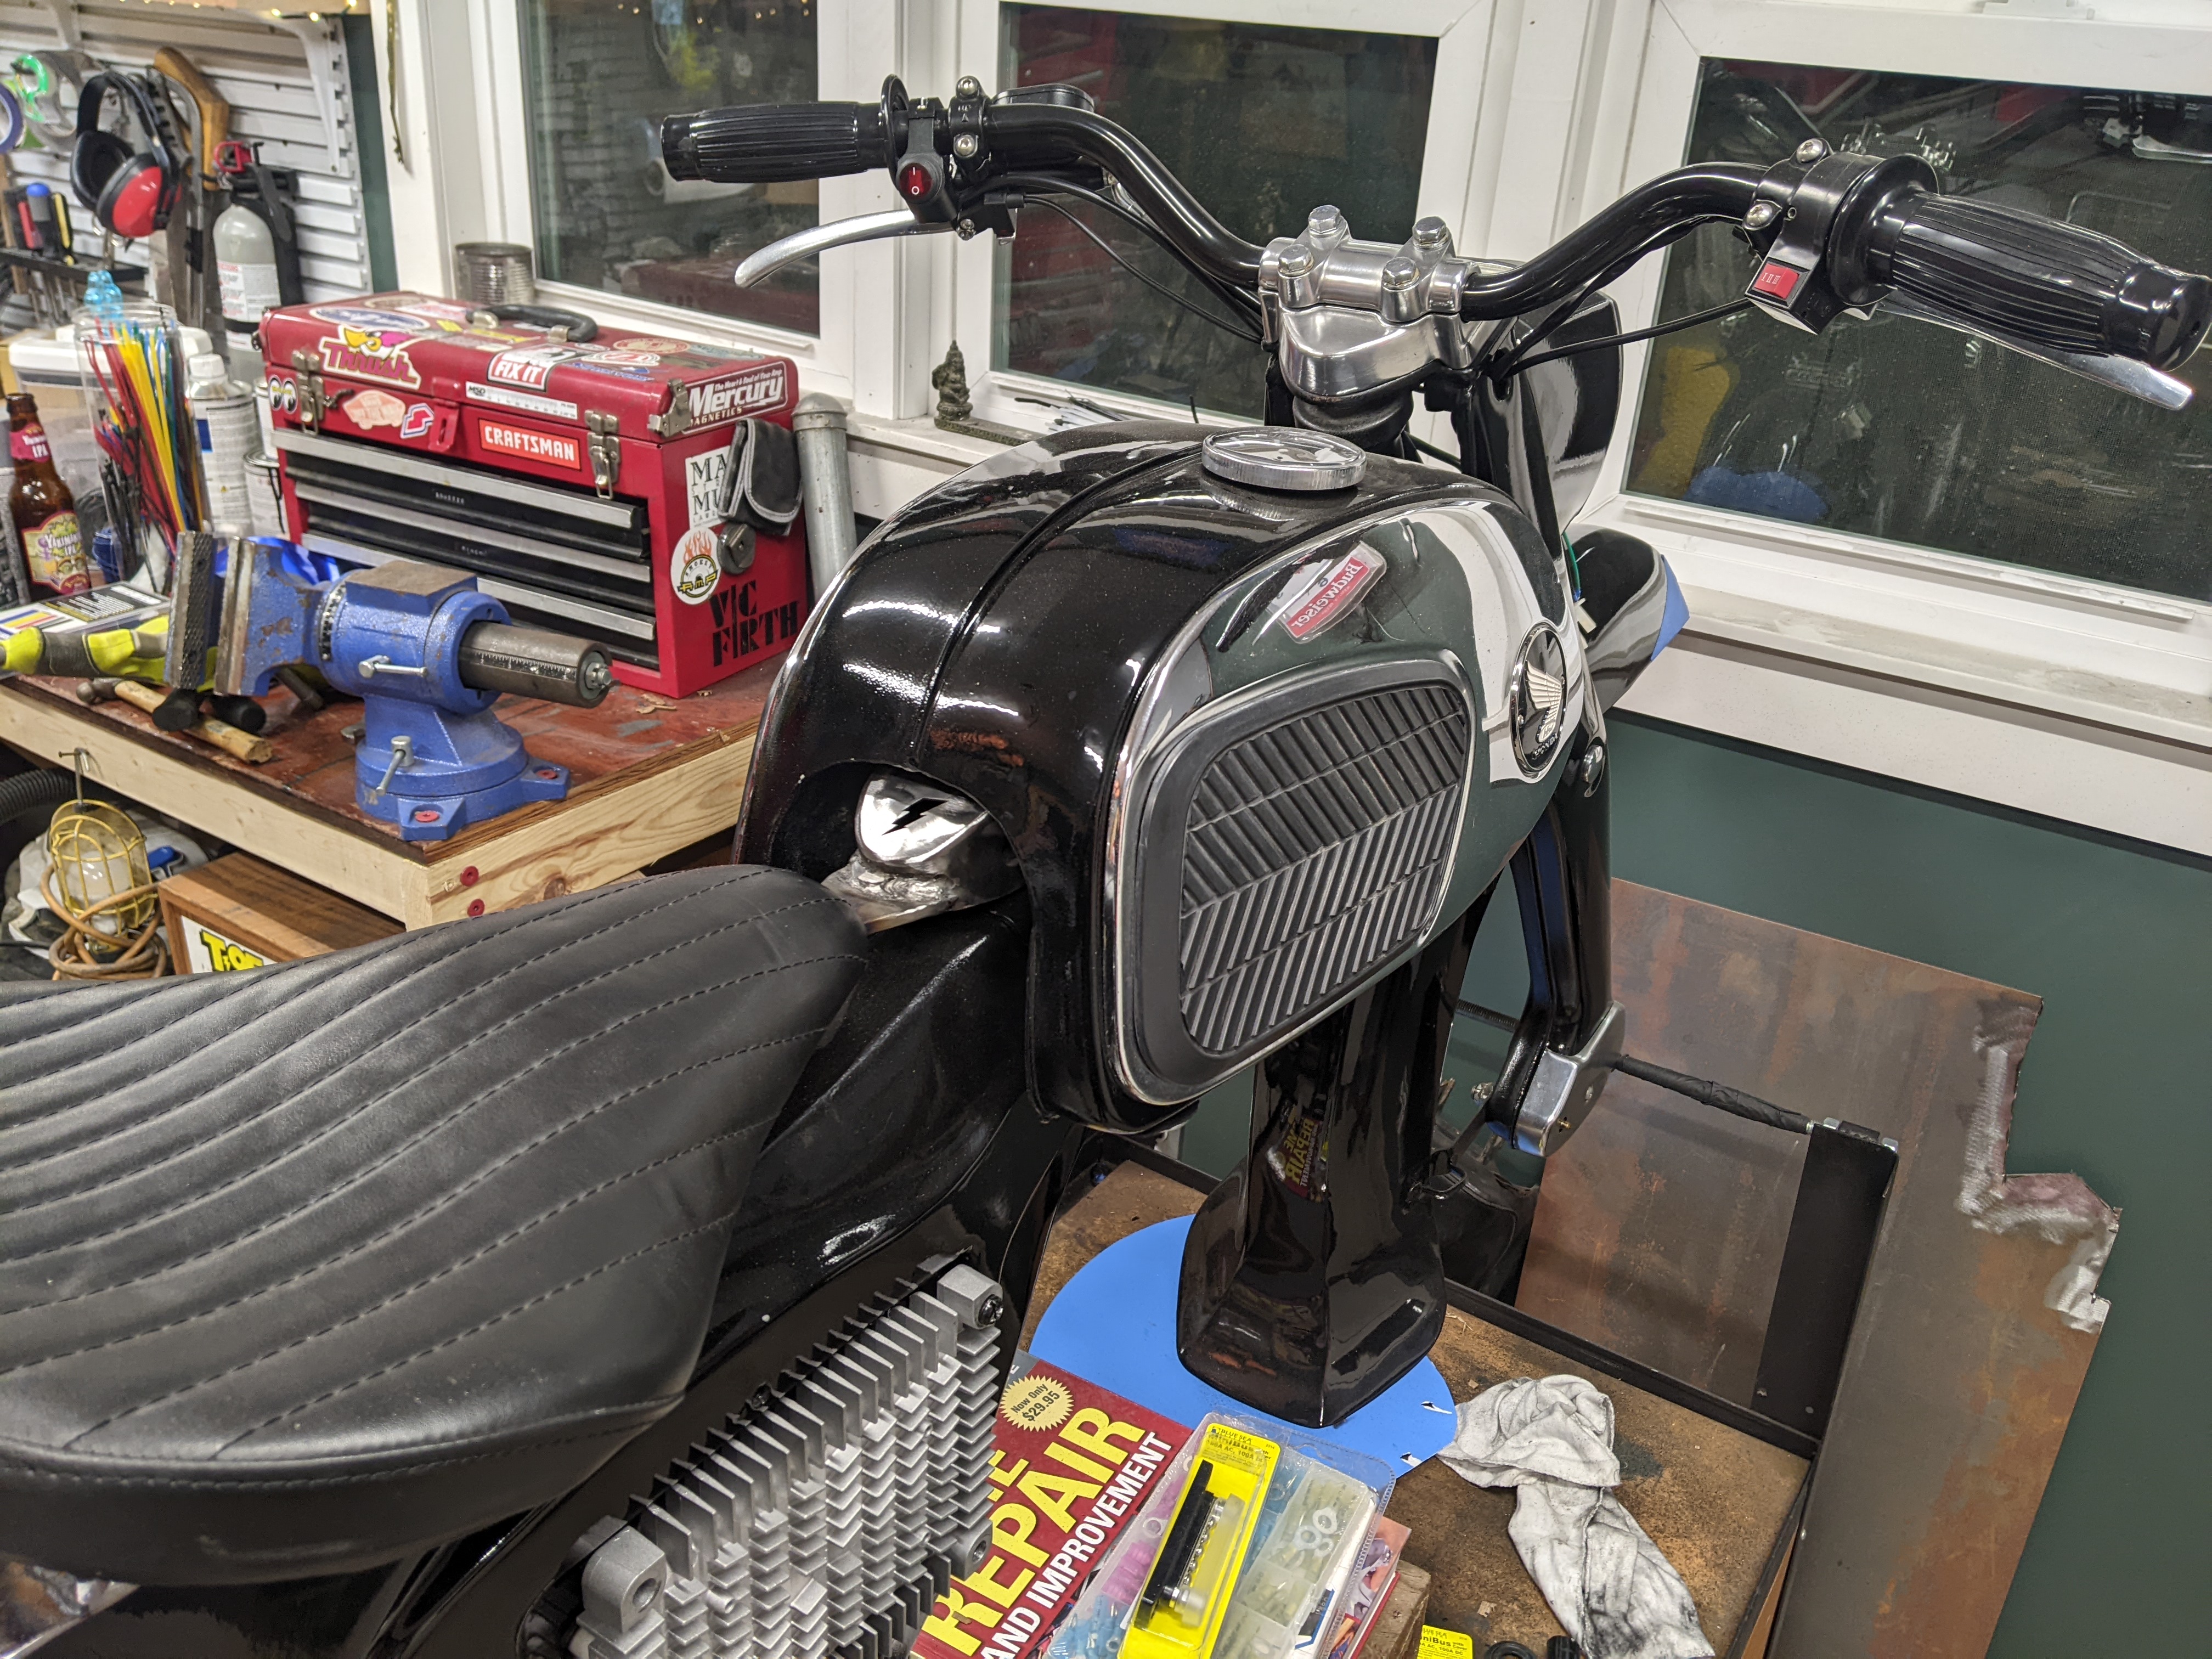
I finally got the right set of handlebars. Third try was the charm! These are the Emgo euro bars and they're perfect.
The switch next to the left grip is the kill switch, very important to have on a DIY EV build, needs to be easy to push with both hands still on the bars, in case something goes wrong such as the throttle wires short out and cause wide-open-throttle.
The switch on the right which came built into the throttle will be used for the turn signals.
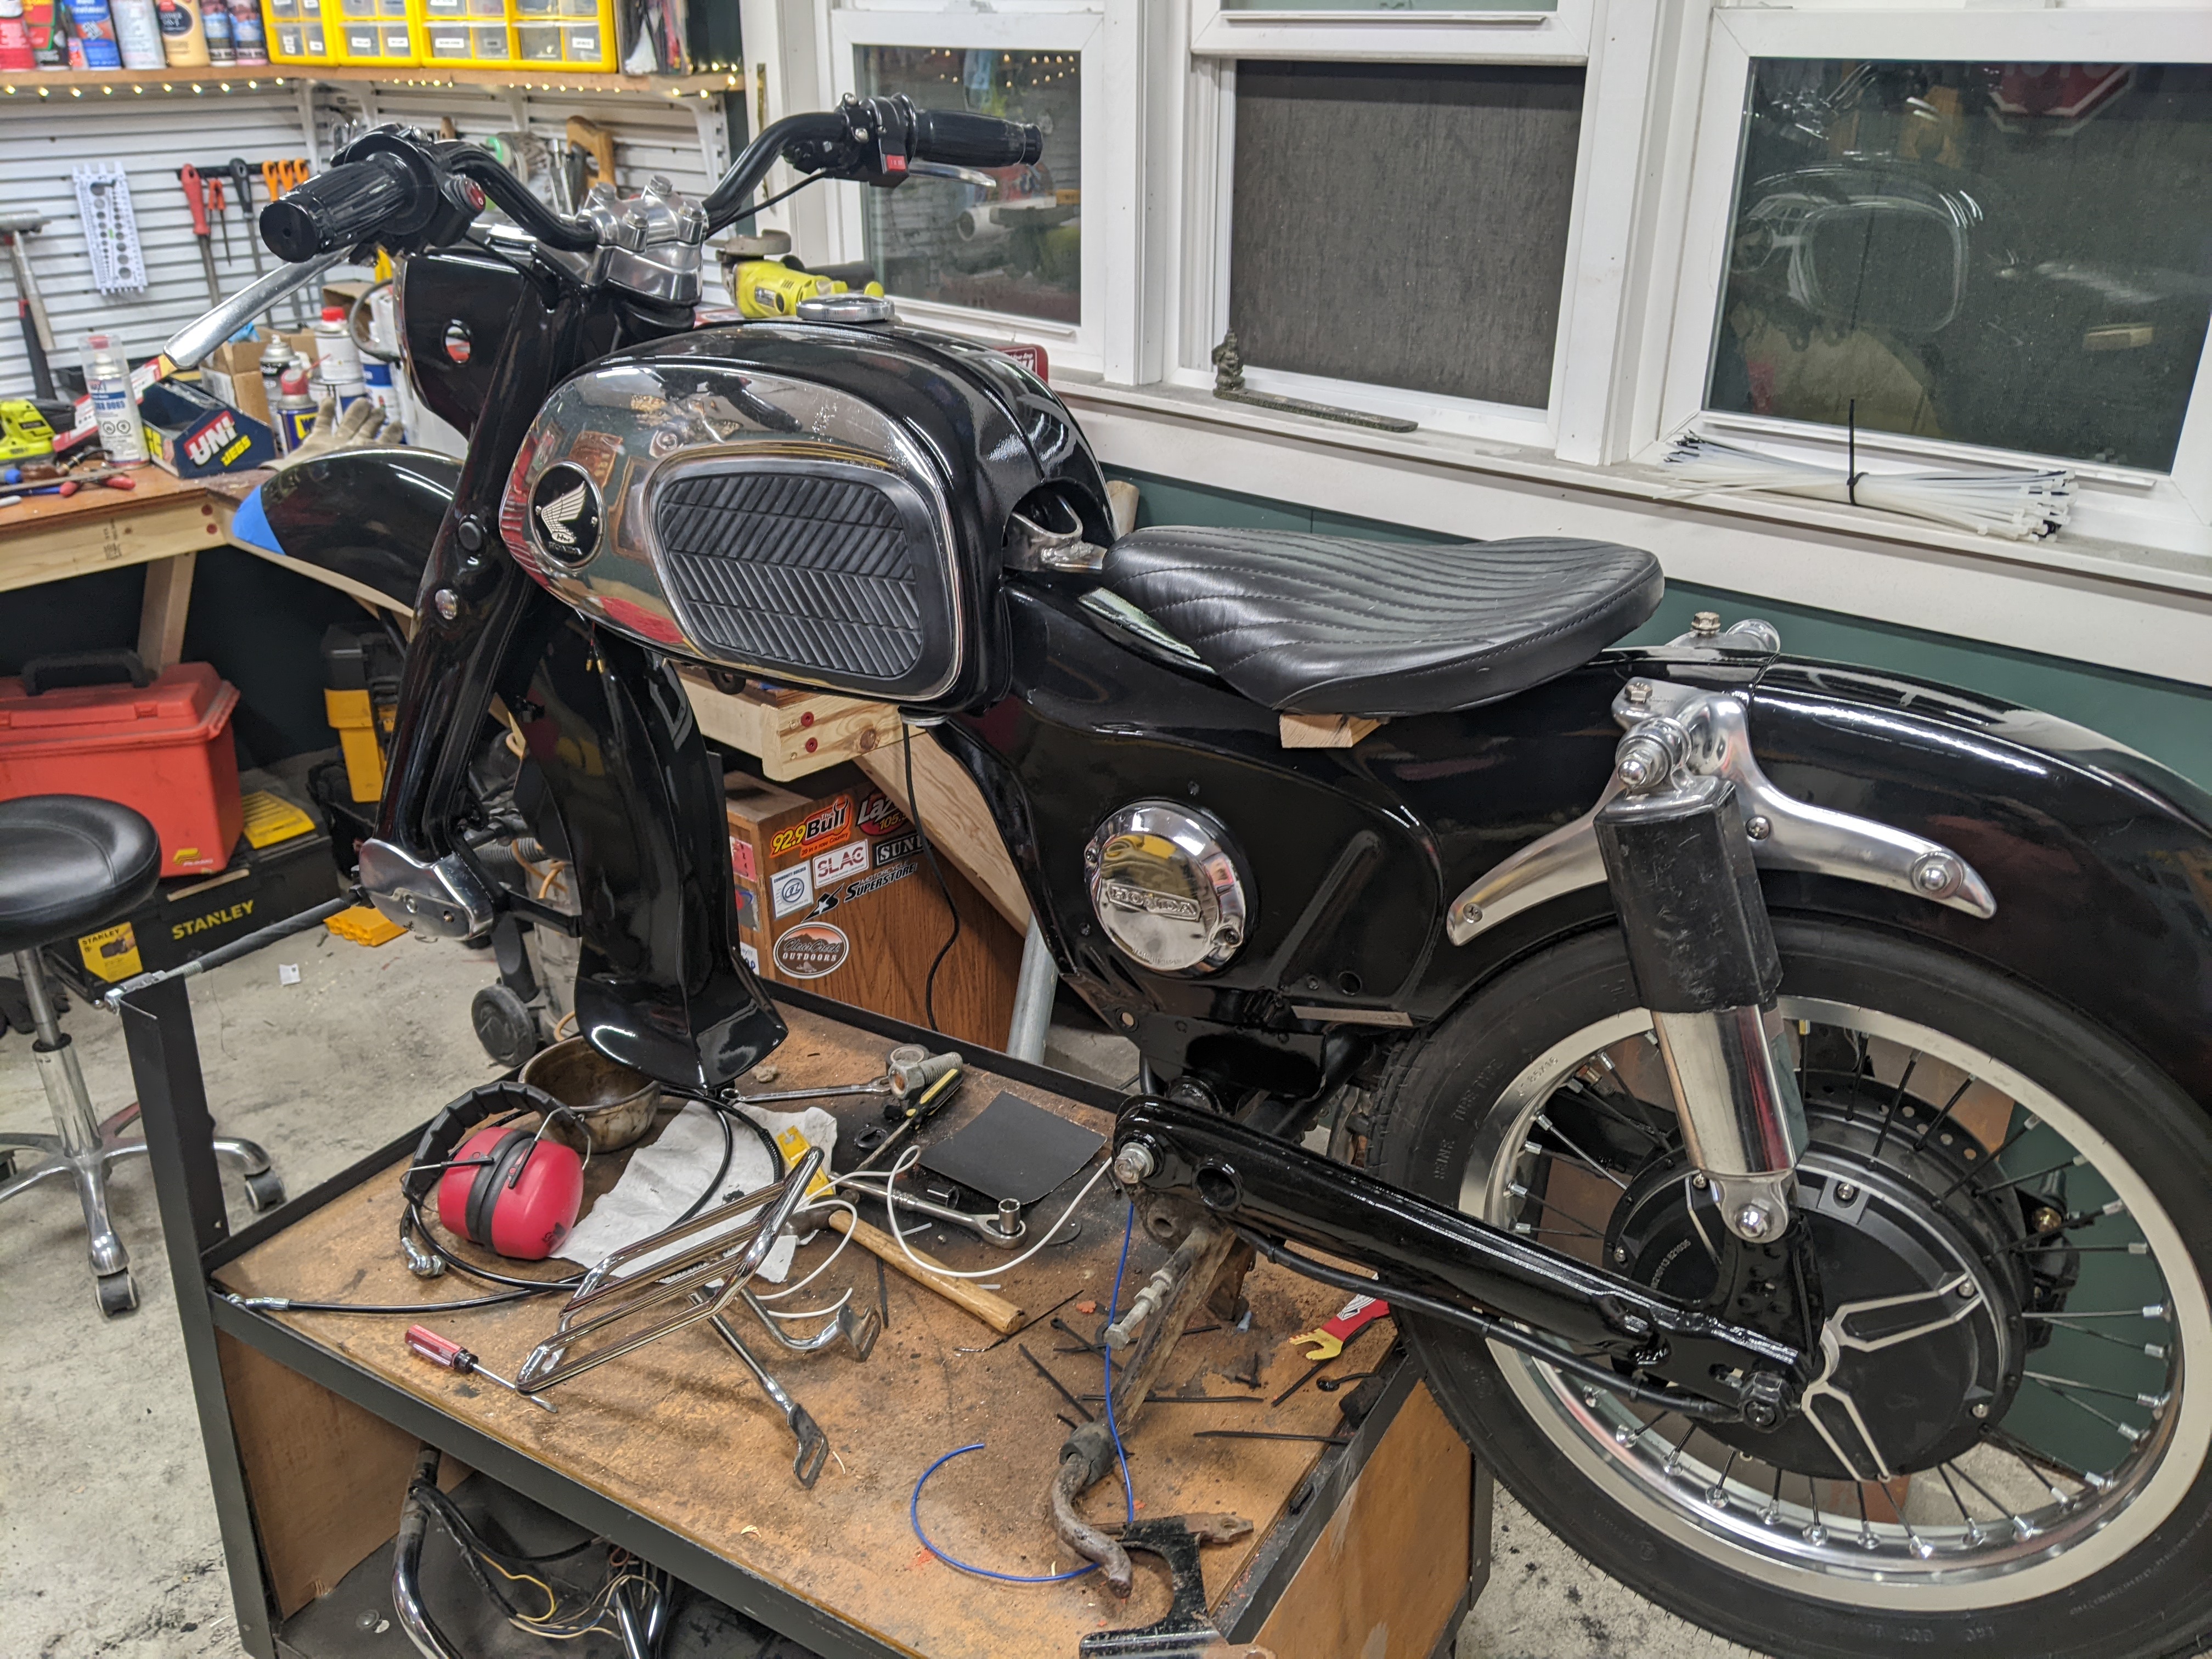
I'm using this solo seat that I found at a swap meet for $50.
I'm making seat brackets that attach to the bushings that the OEM seat used. Gotta make sure my fat ass doesn't break the welds so I used my 240v stick welder on the 3/16" steel.
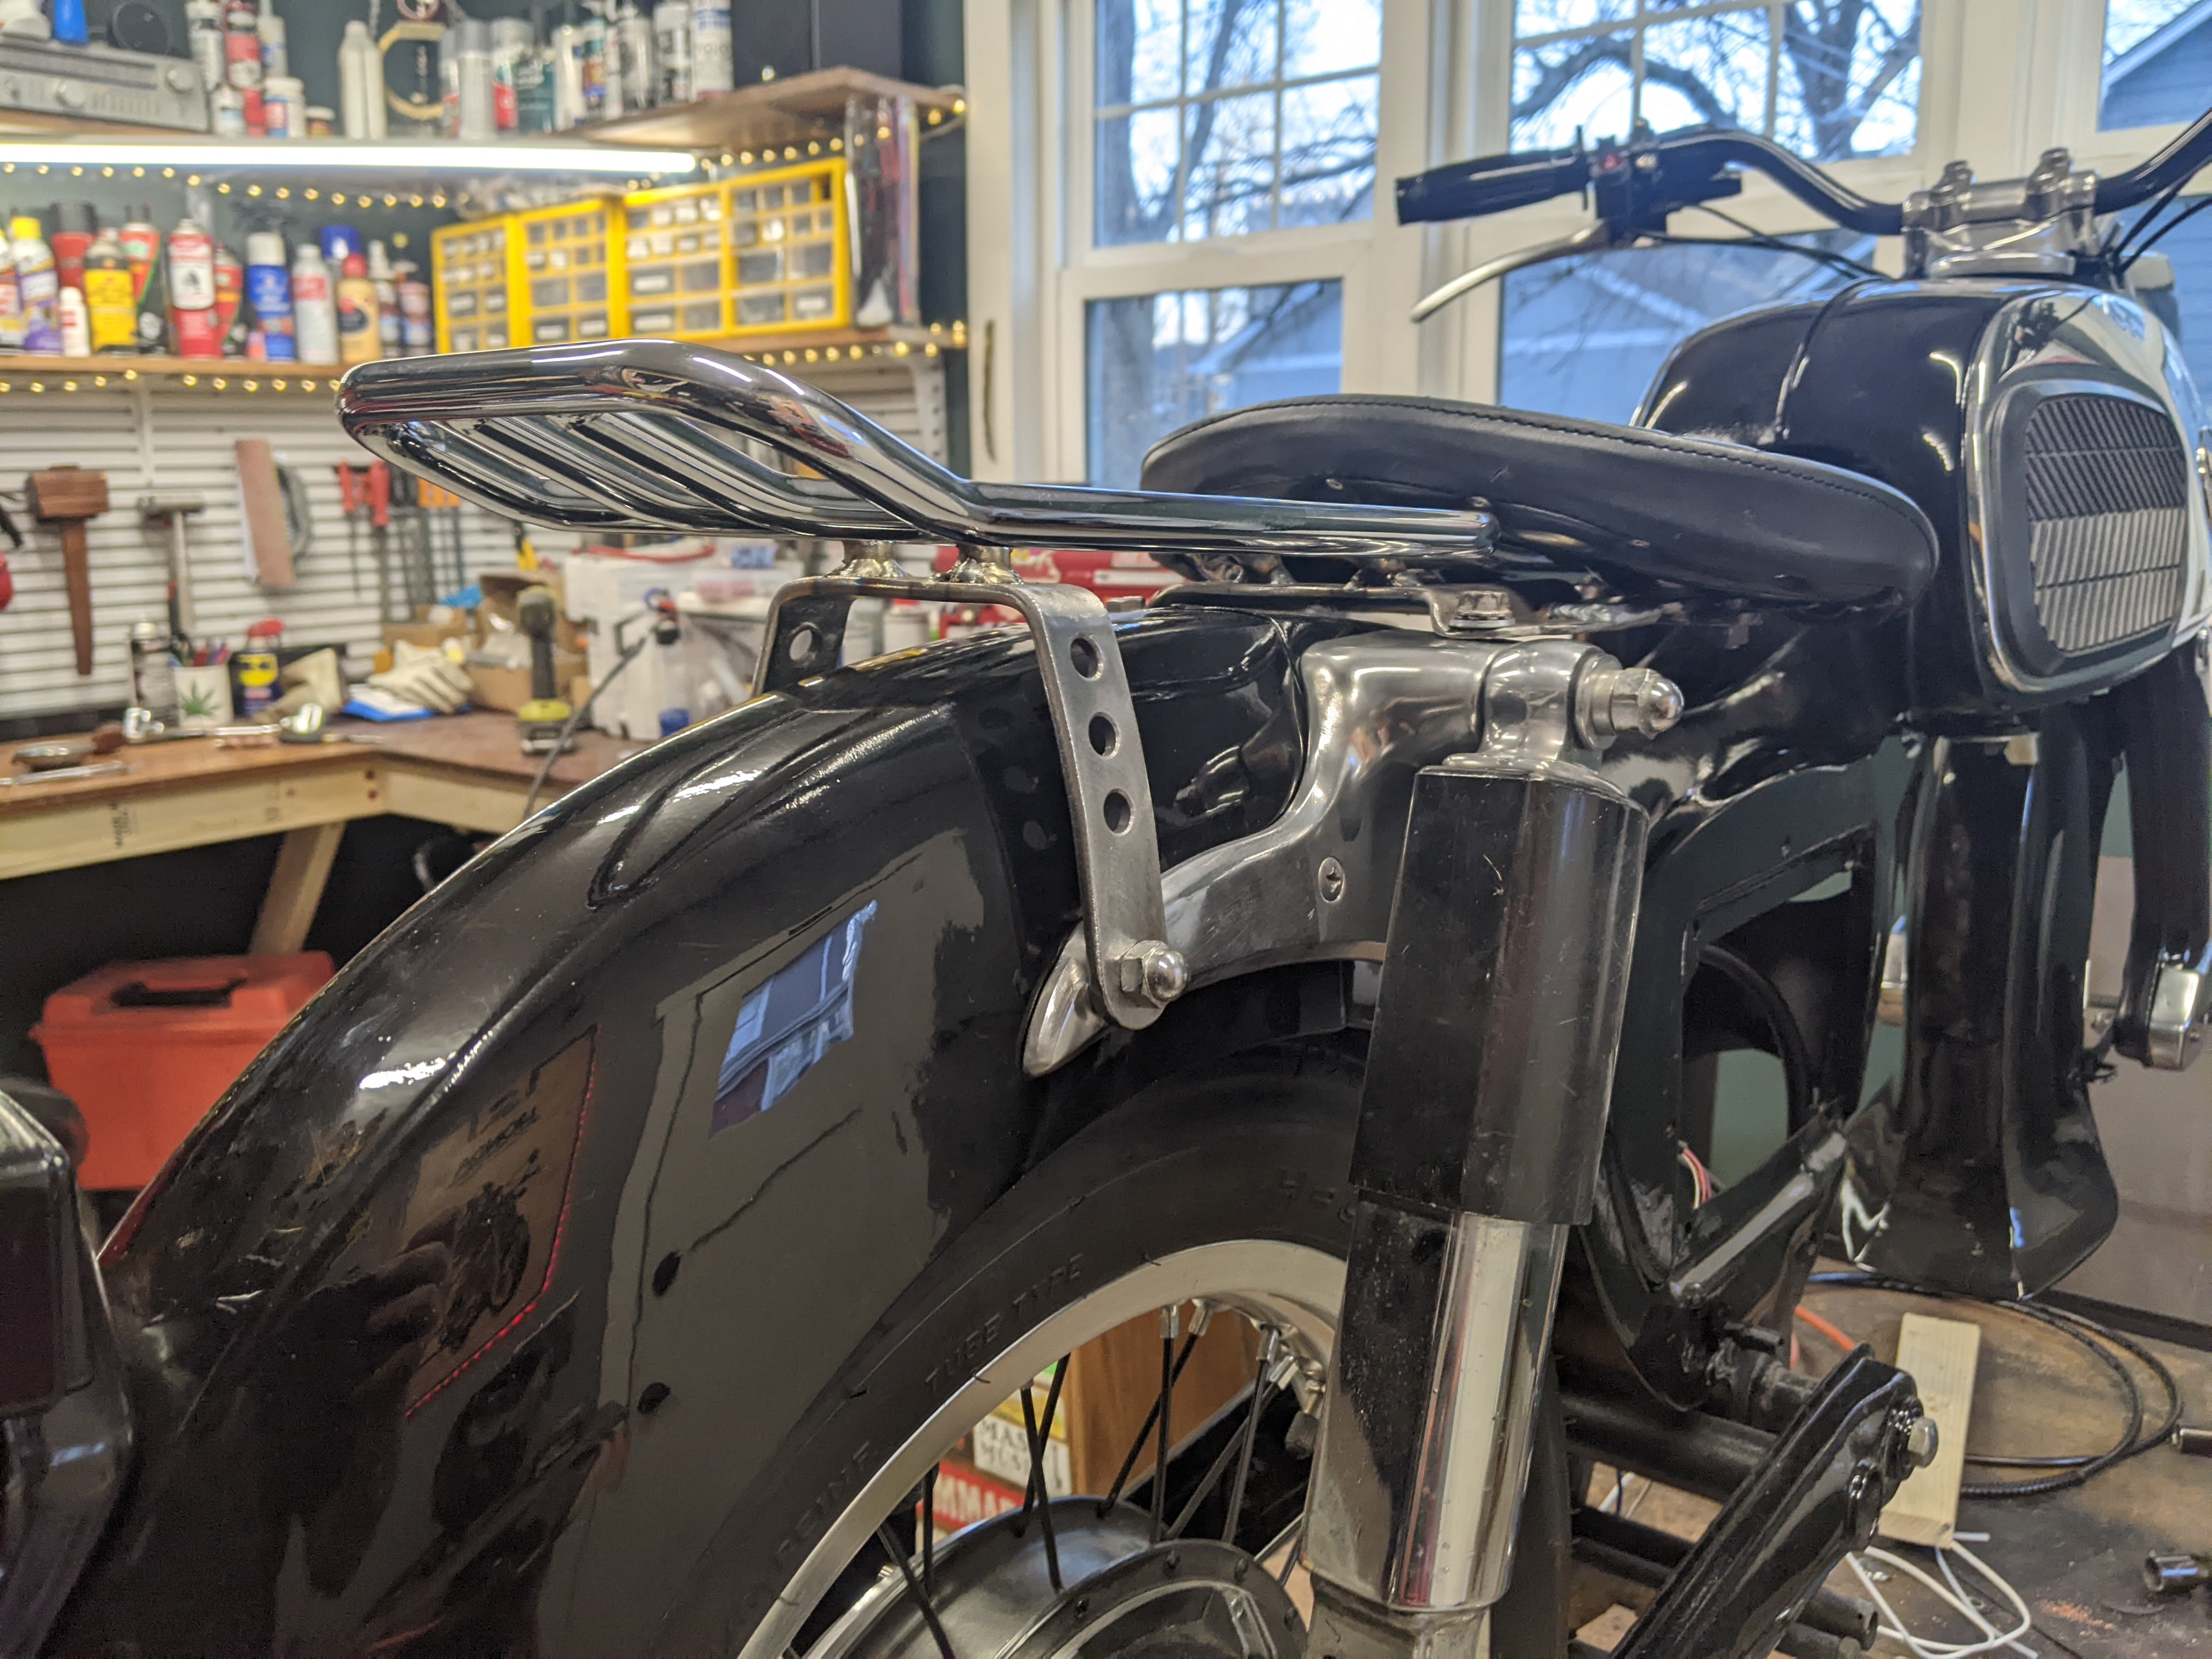
And I found this luggage rack at an antique mall for around a dozen dollars. I cut off the universal brackets that were going to work for me and welded it to my DIY brackets.
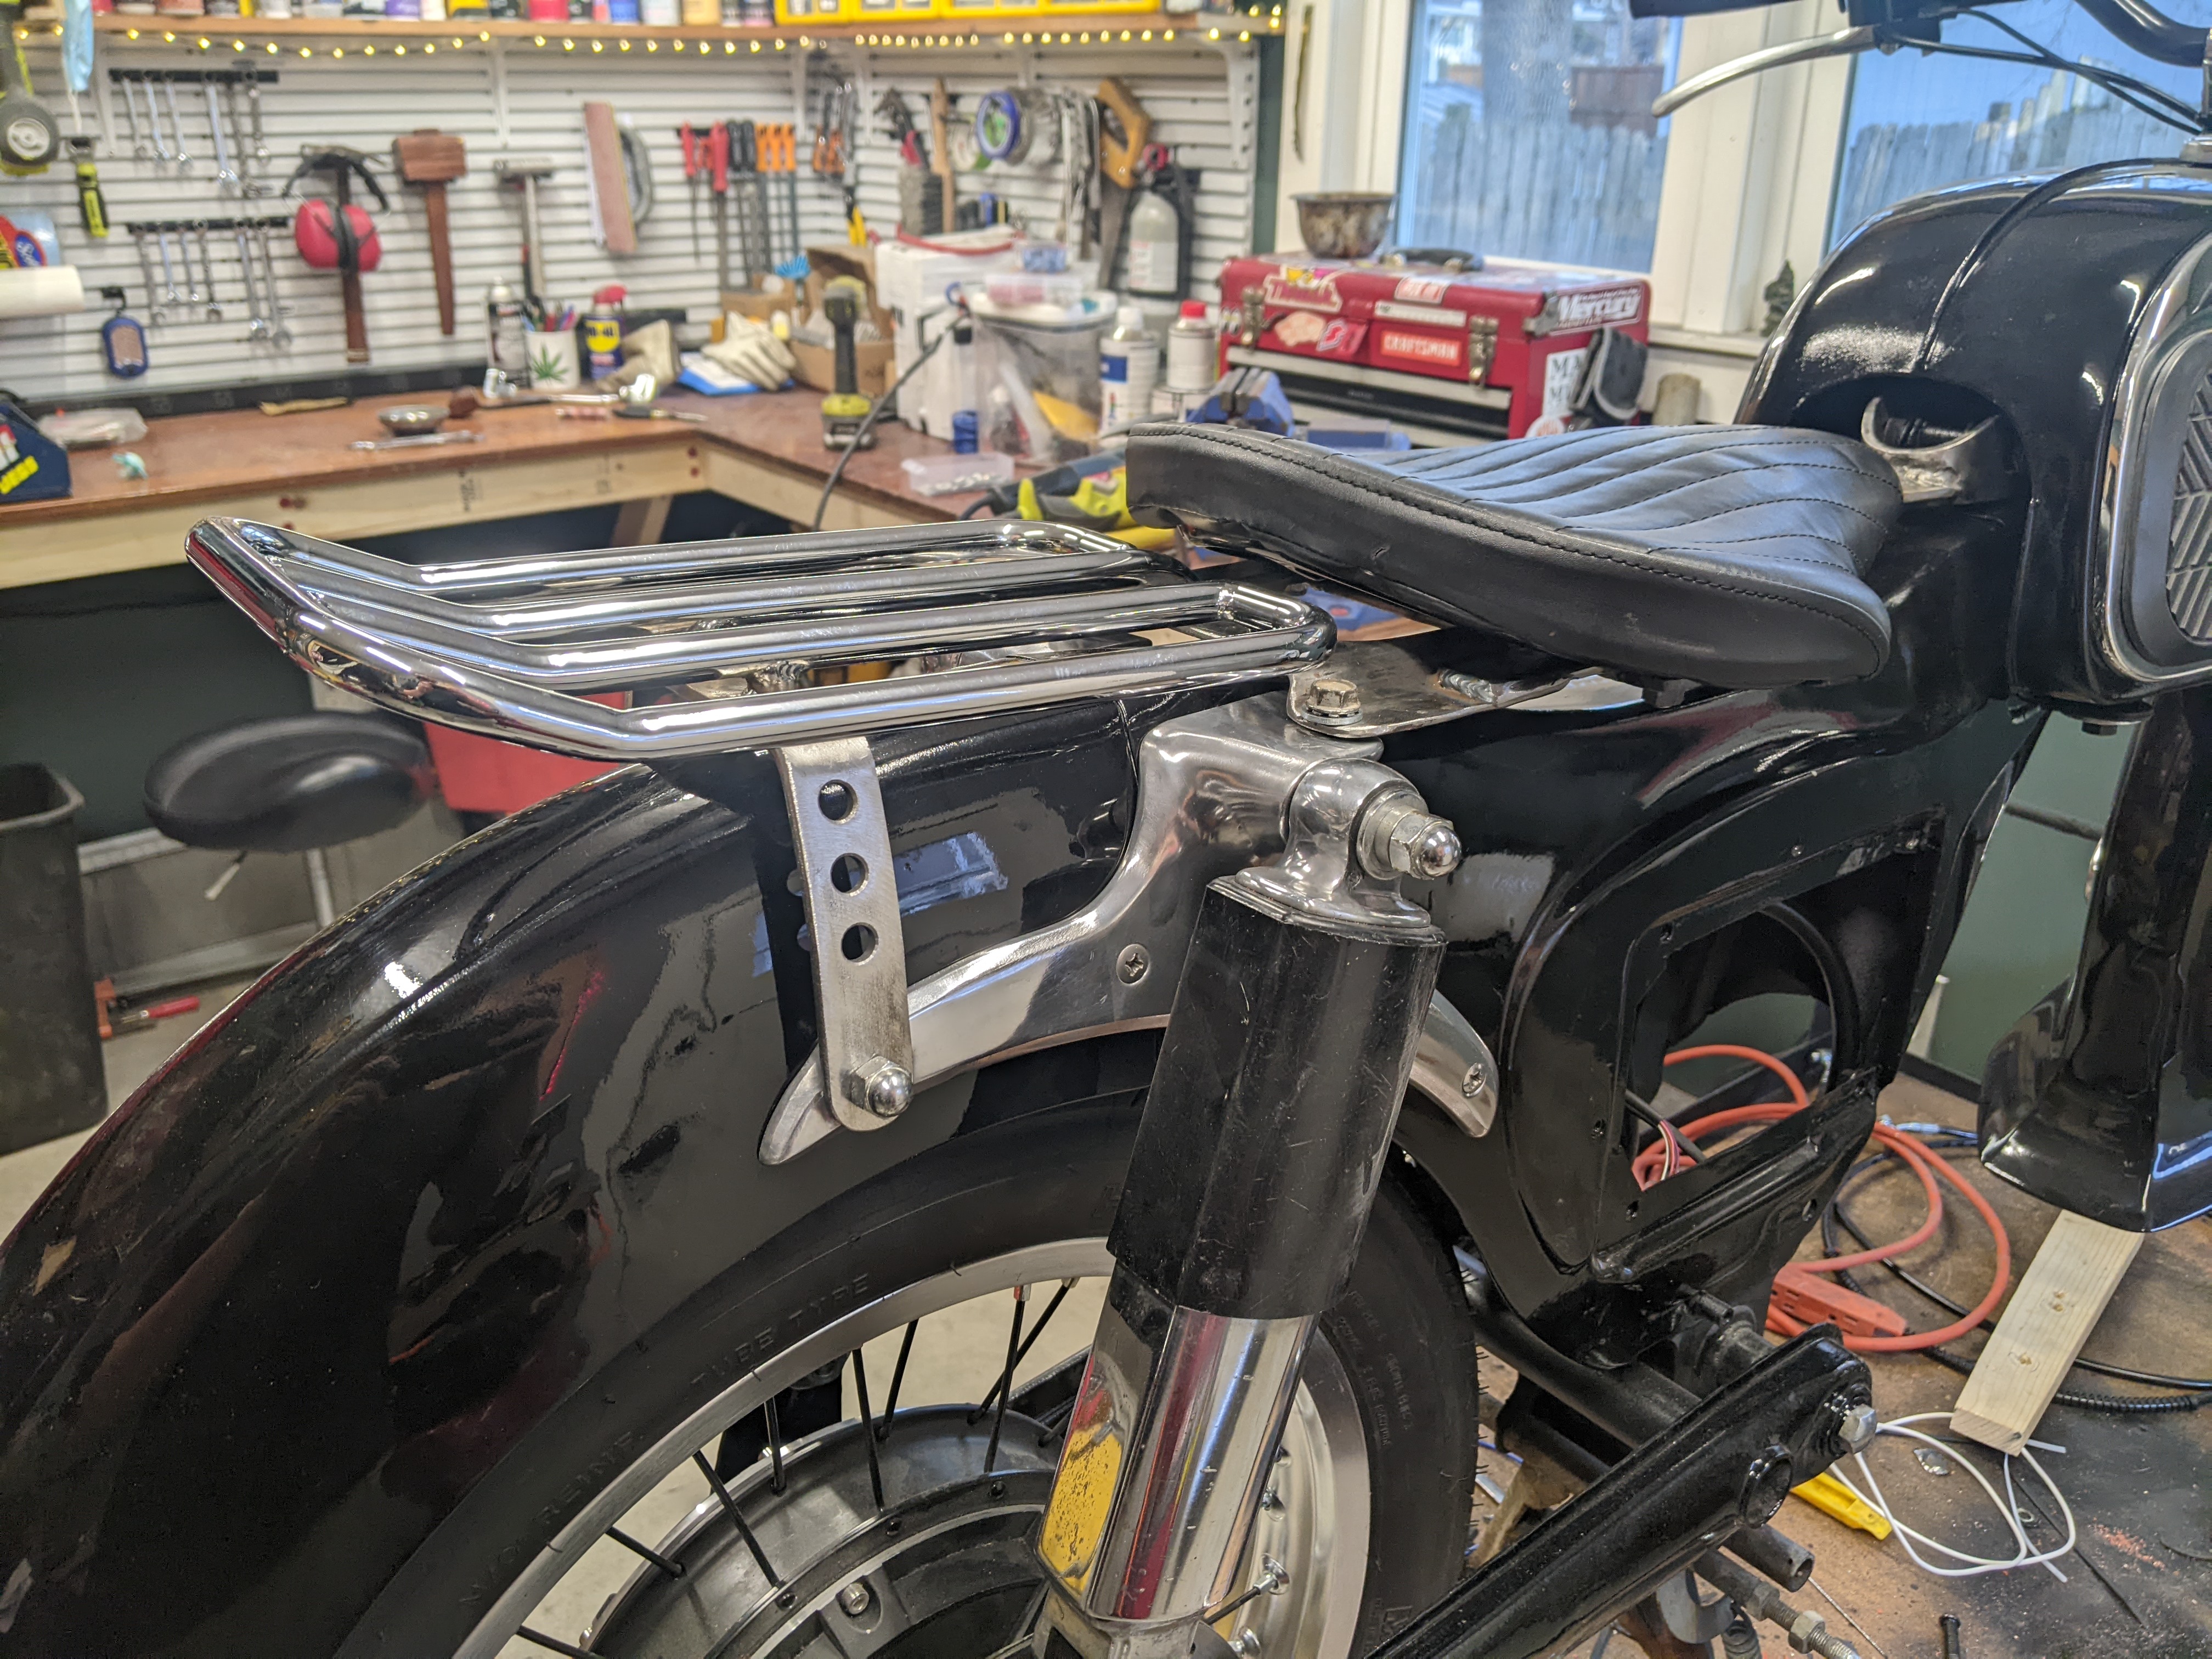
The seat bolts to the bracket that bolts to the frame and is welded to the luggage rack, which also bolts to the frame.
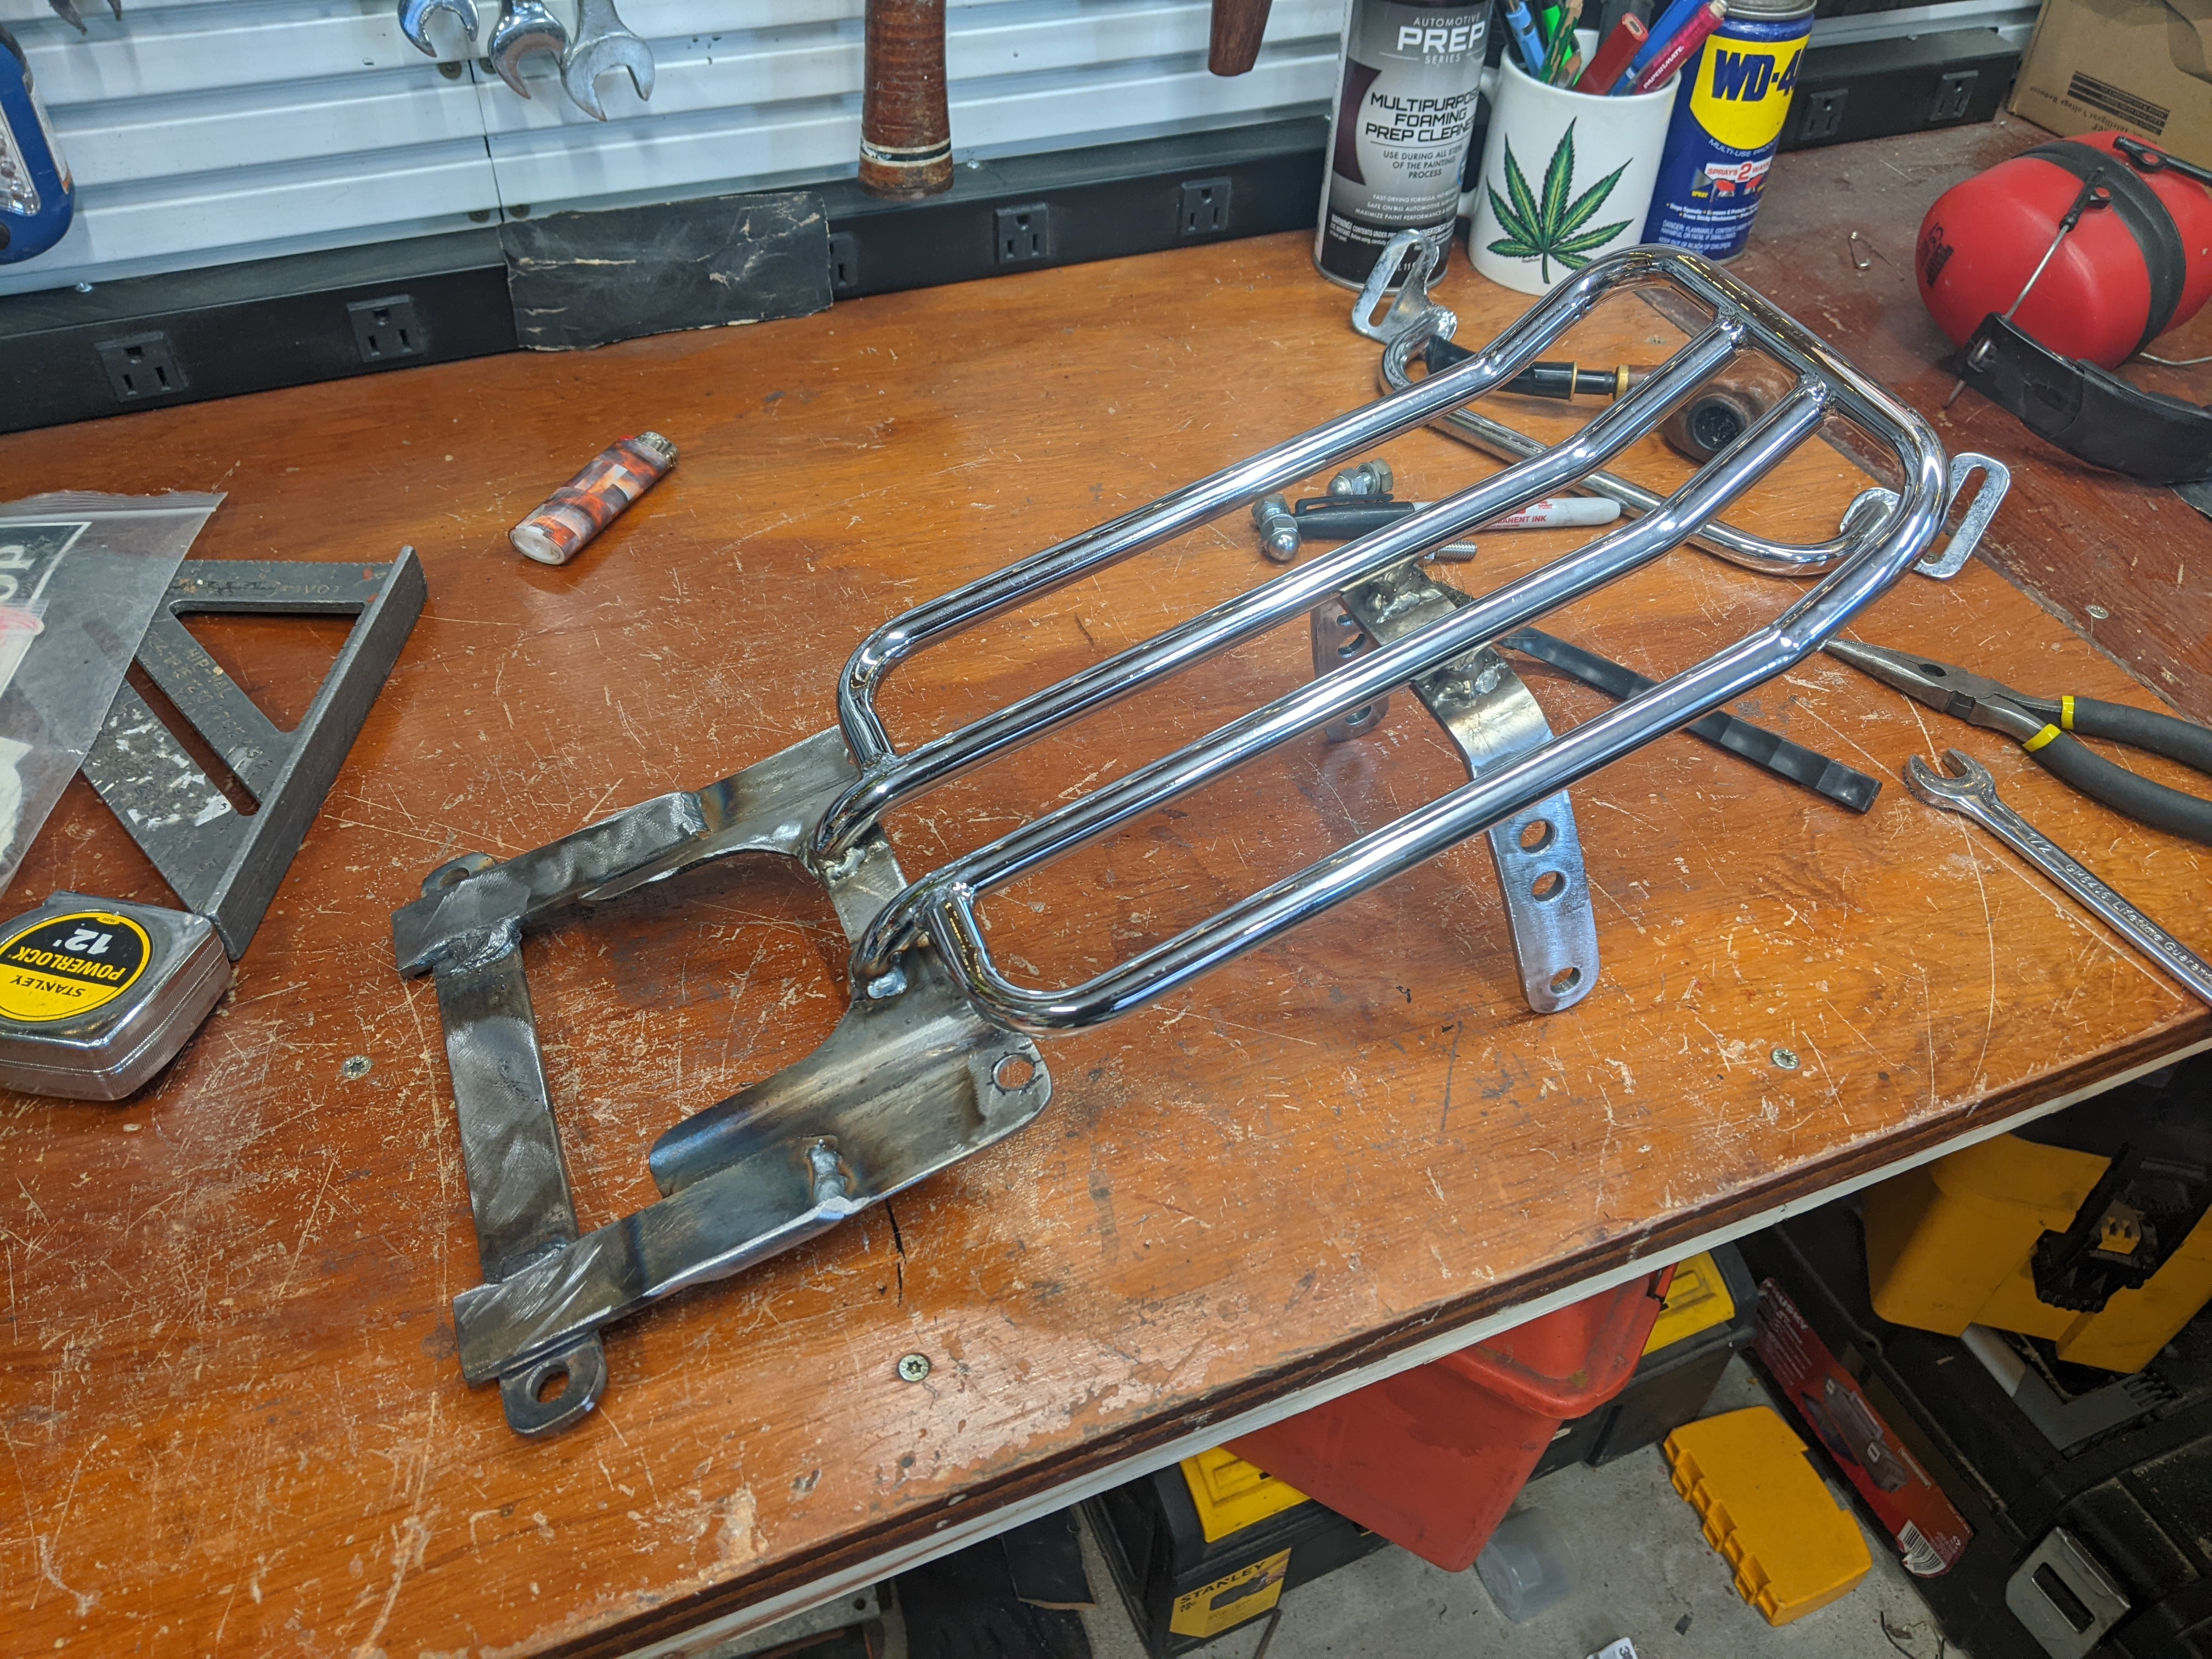
Everything feels very strong and secure.
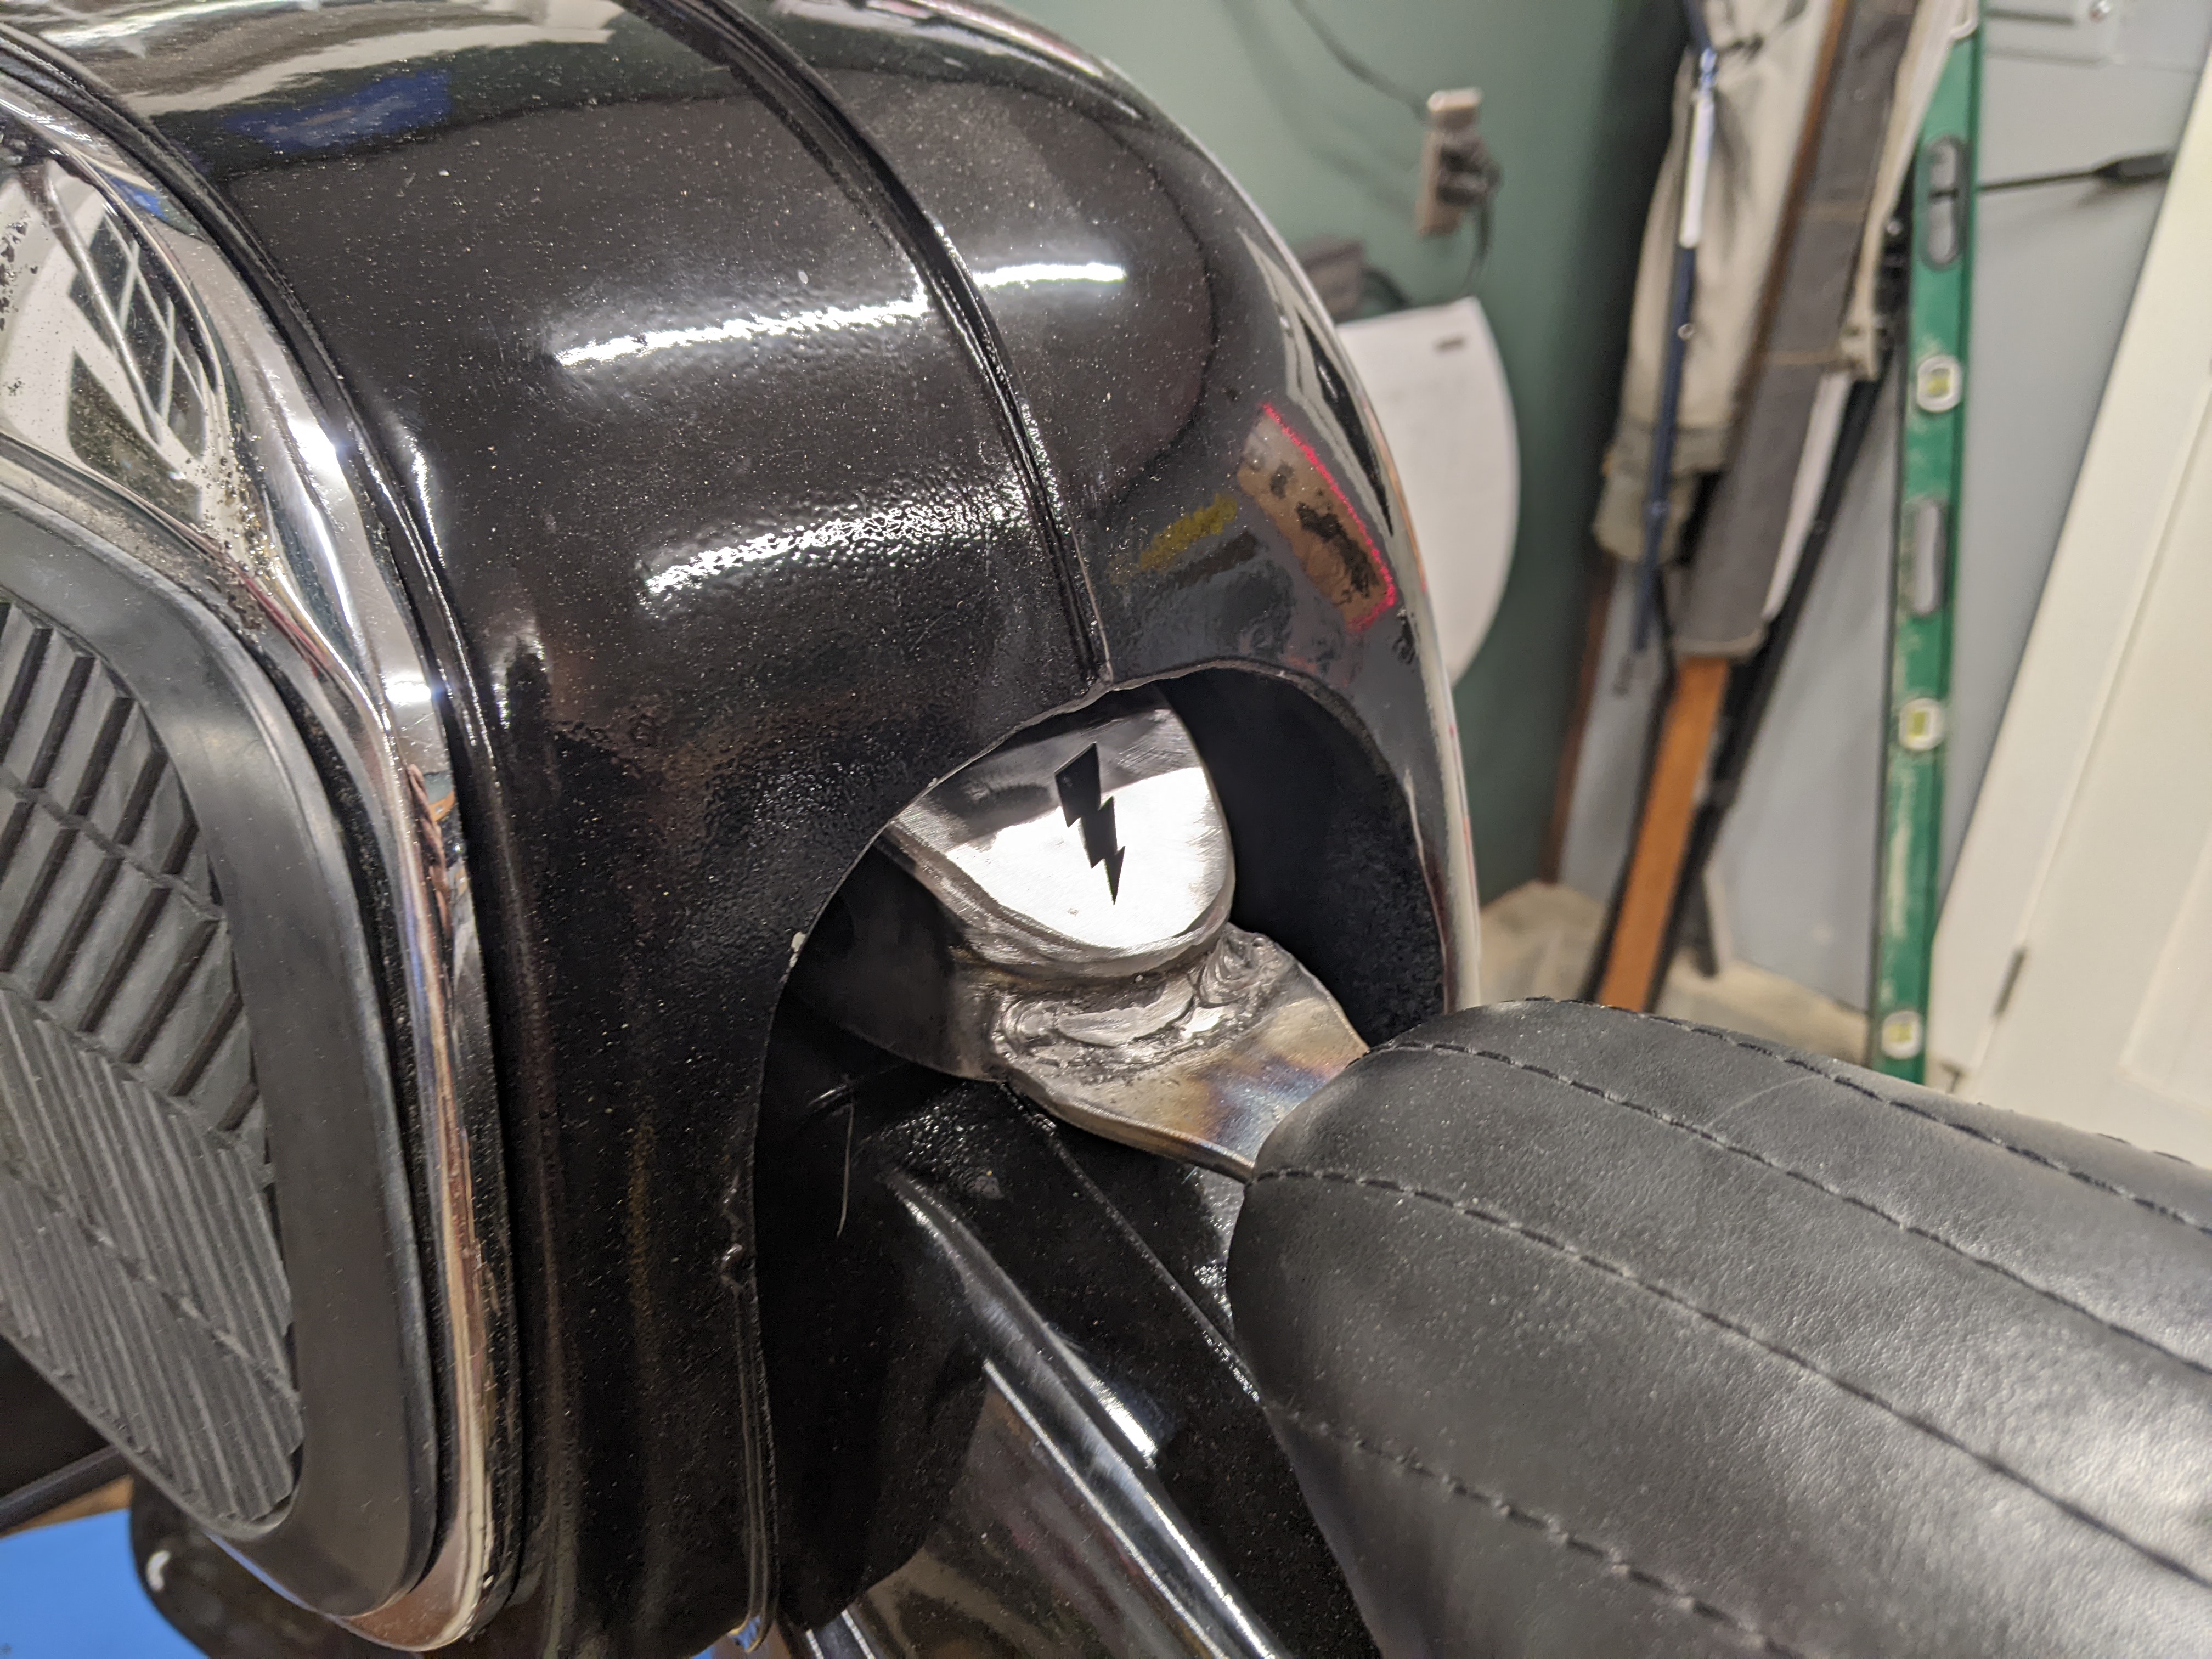
The pièce de résistance was this laser cut lightning bolt that I got from sendcutsend.com
Now the seat frame just needs paint! But will do that later.
Up next, wiring!