I'm converting a 1967 Honda CA160 classic motorcycle to electric and I'll need a 72v battery back that can continuously supply around 50 or 60 amps to my 4kw QS hub motor.
I decided to go with these used LG Chem pouch cells from batteryhookup.com. They're taken out of rack mount units and I believe they were used as battery backup units in server rooms. The should have around 2/3rds capacity left. When new each cell had around 15ah with a 3c discharge rating giving a discharge of 45amps. But at 2/3rds capacity remaining, each cell is now capable of 10ah and 30amps continuous discharge.
Therefore I will wire them into a 20s2p configuration to get 72v, 20ah, and 60 amps discharge.
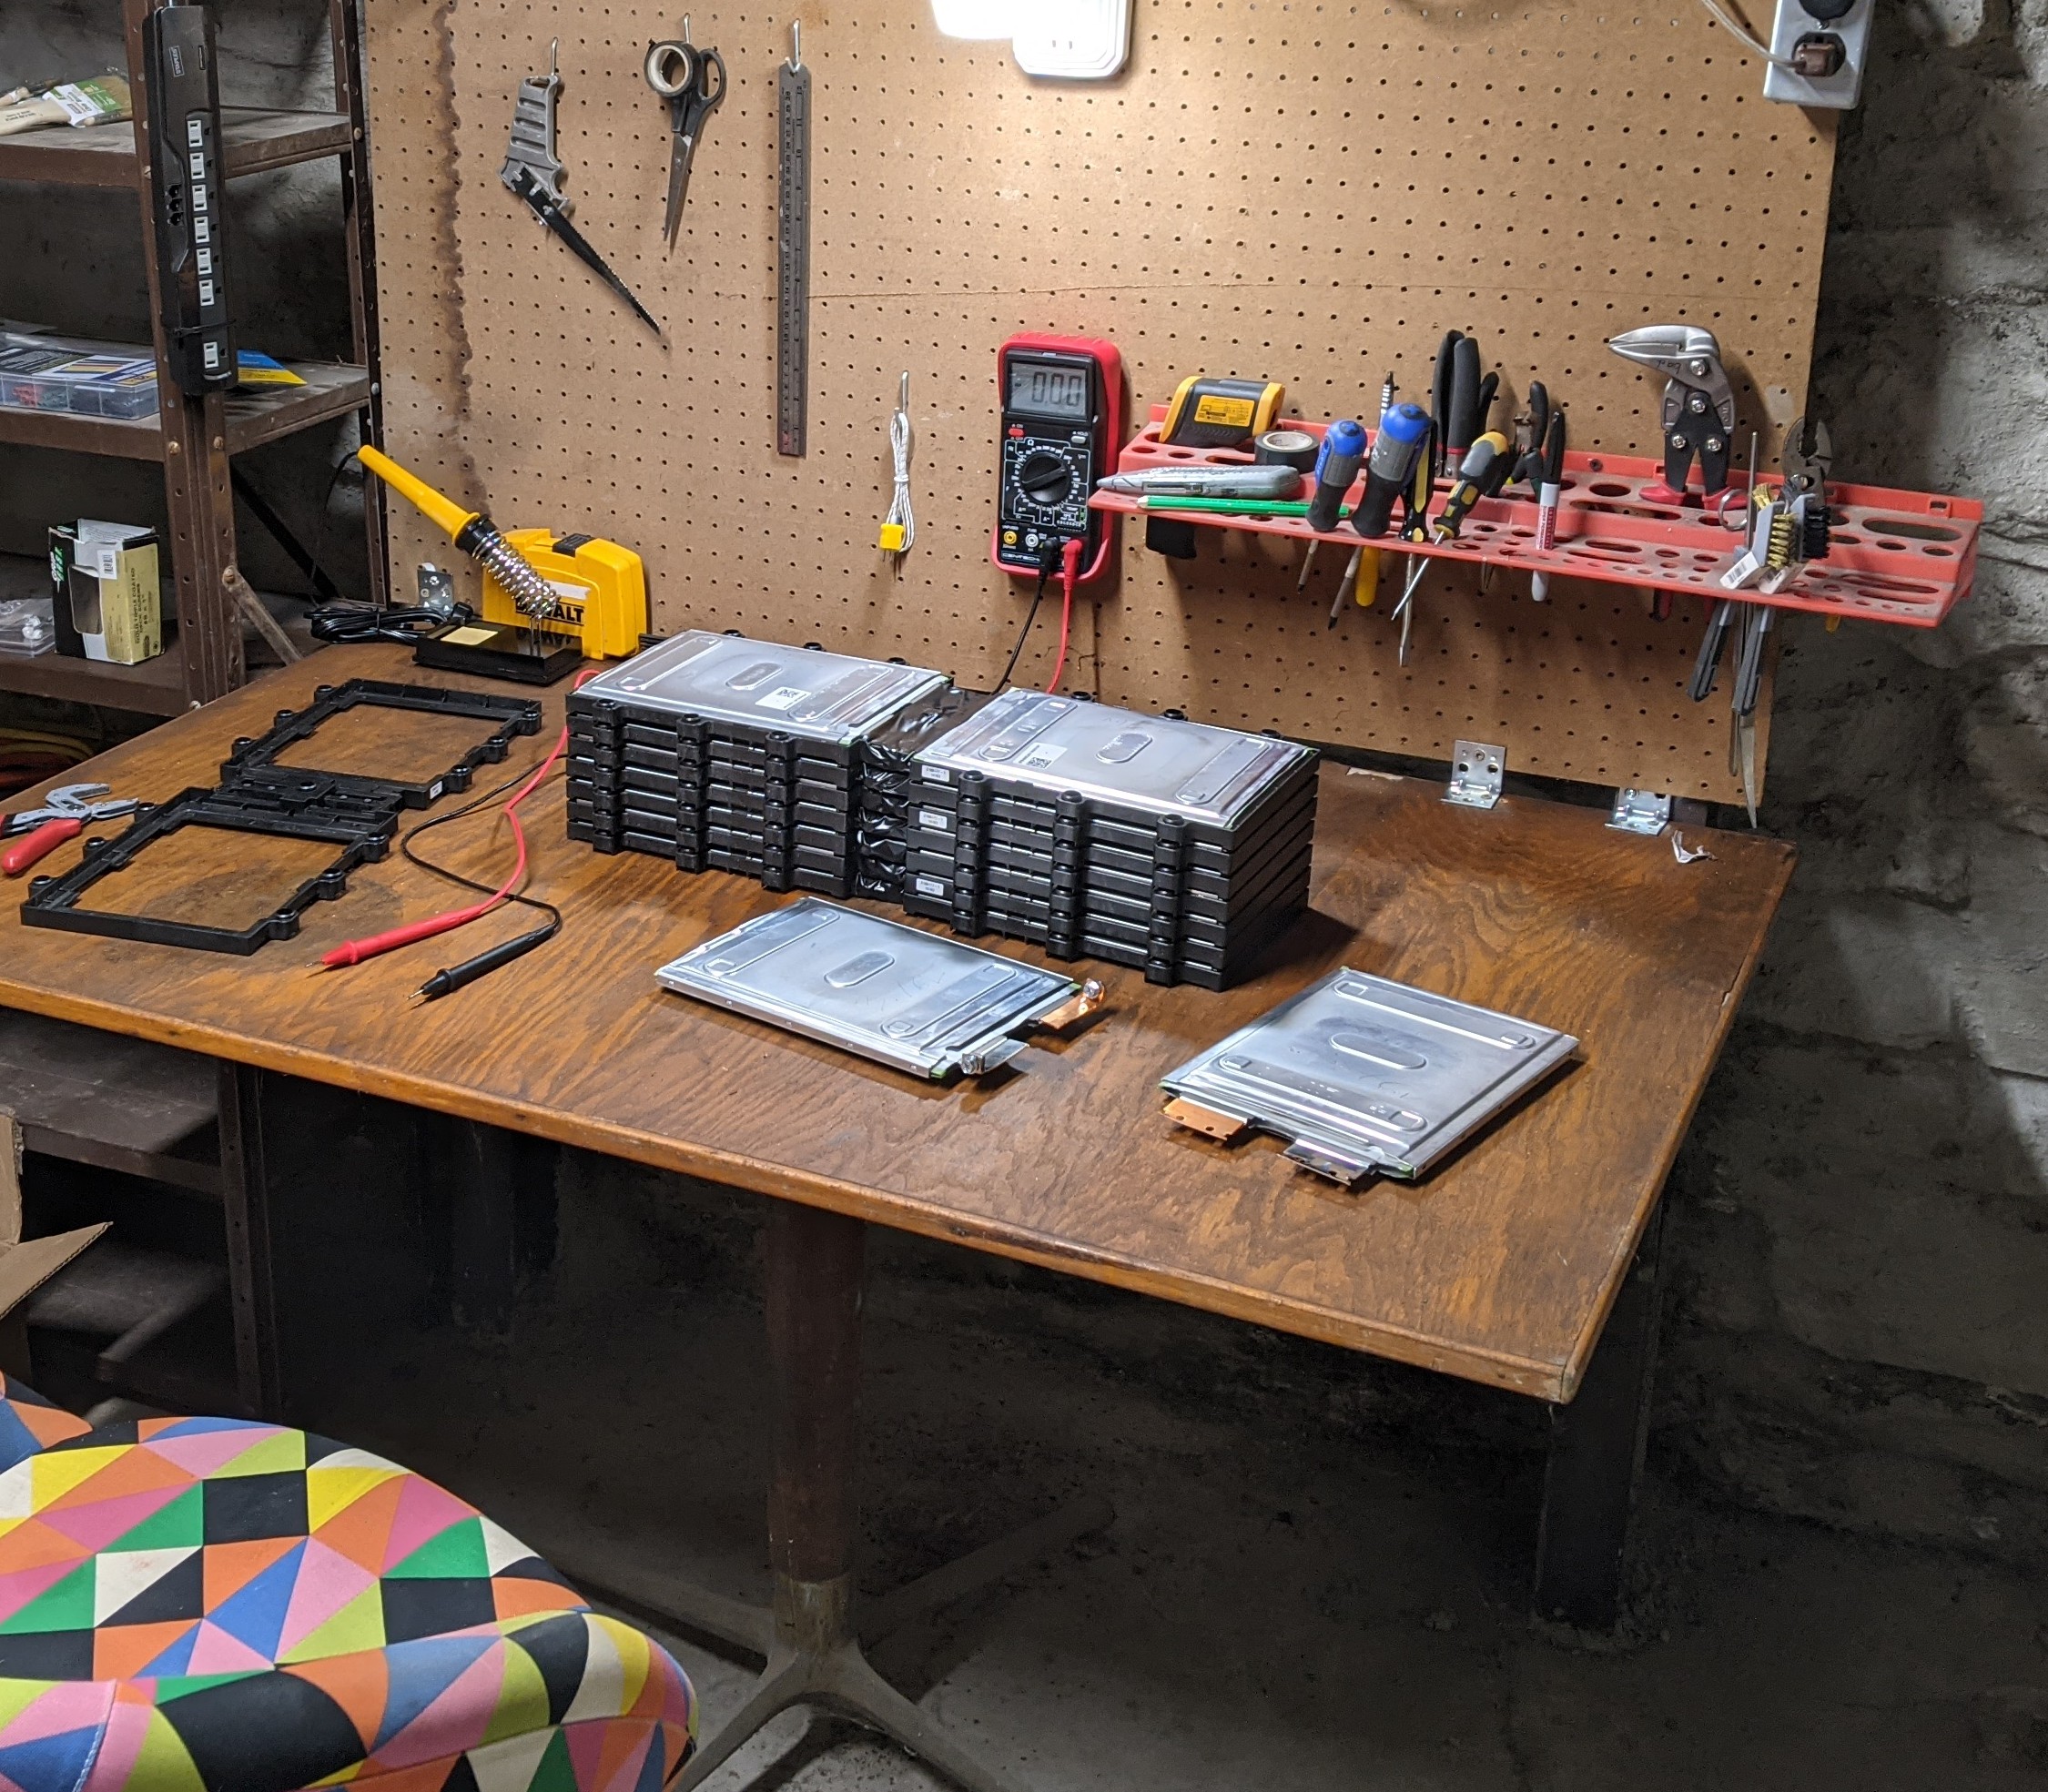
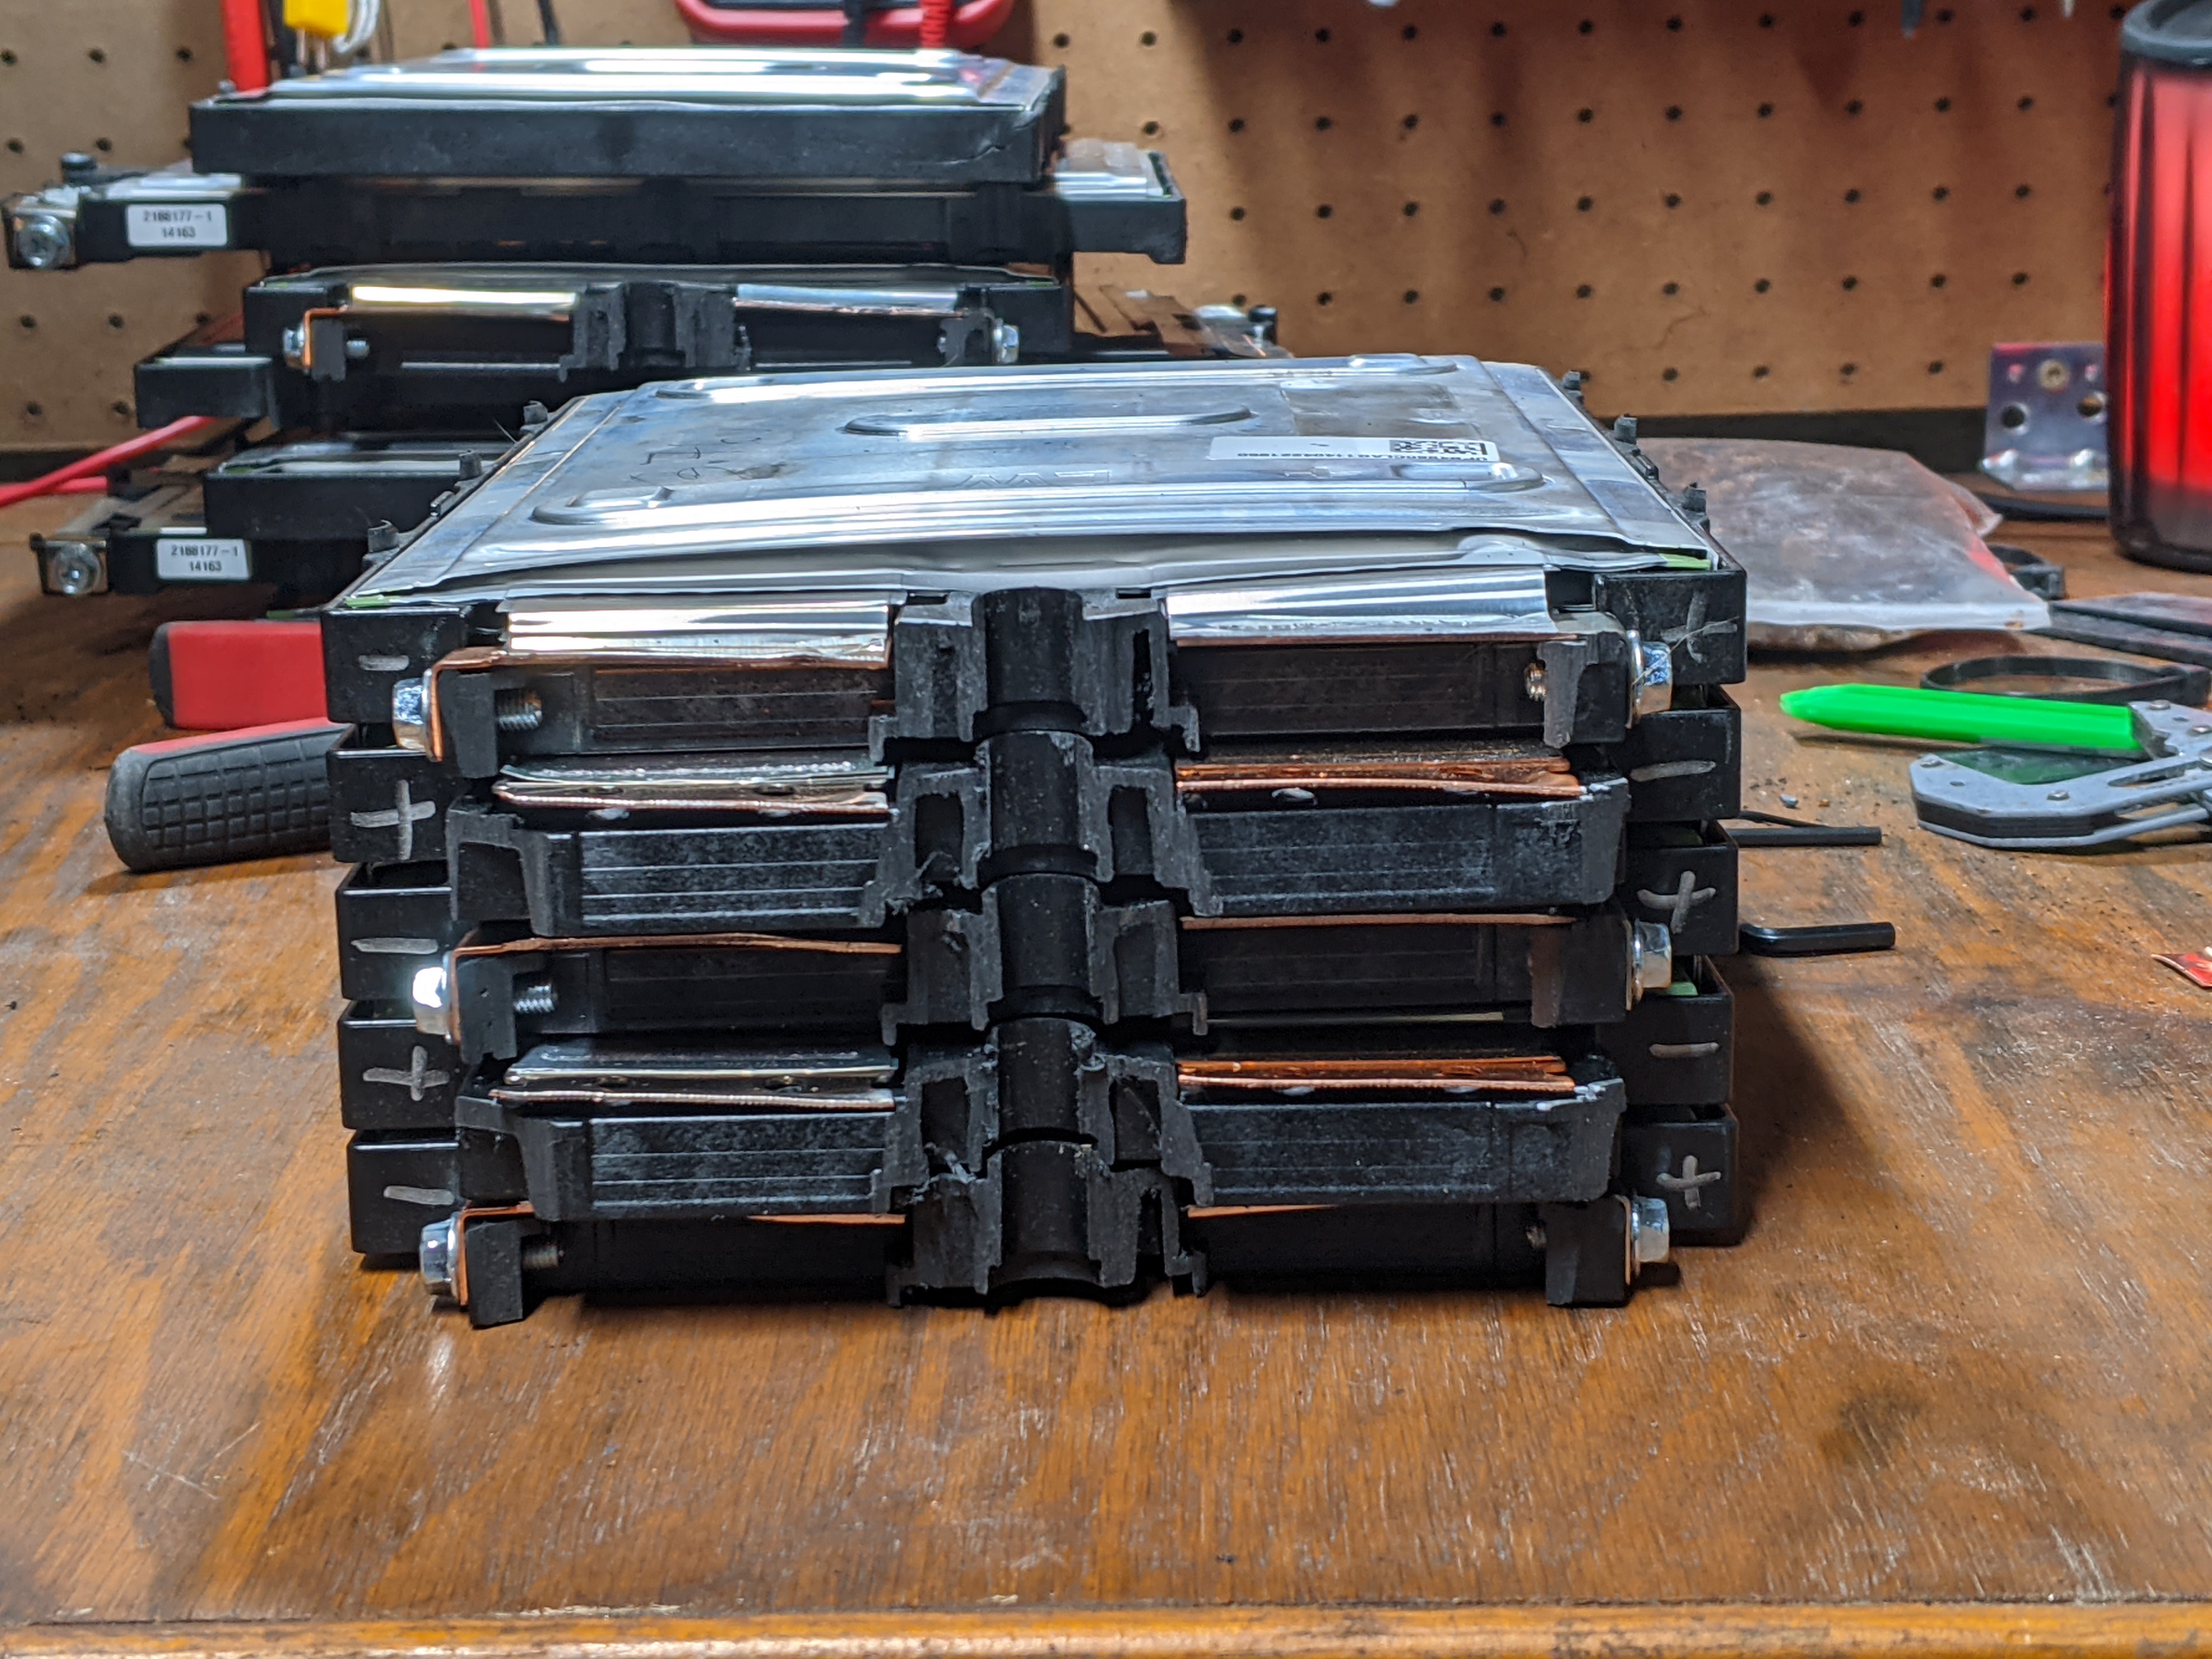
But they come packaged into 4p modules. All four cells are wired in parallel, but two are on one side of the case and two are on the other, and their tabs meet in the middle are are laser welded to two busbars. I'll need to seperate them into two 2p modules, and then wire 20 of them in series to get 20s2p.
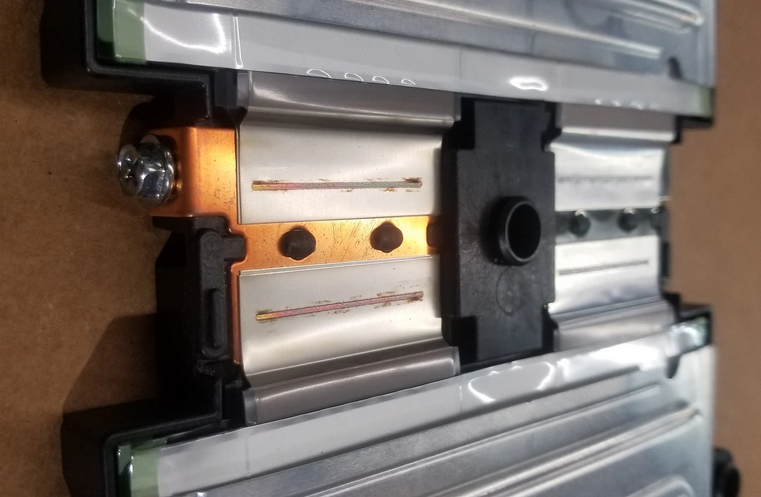
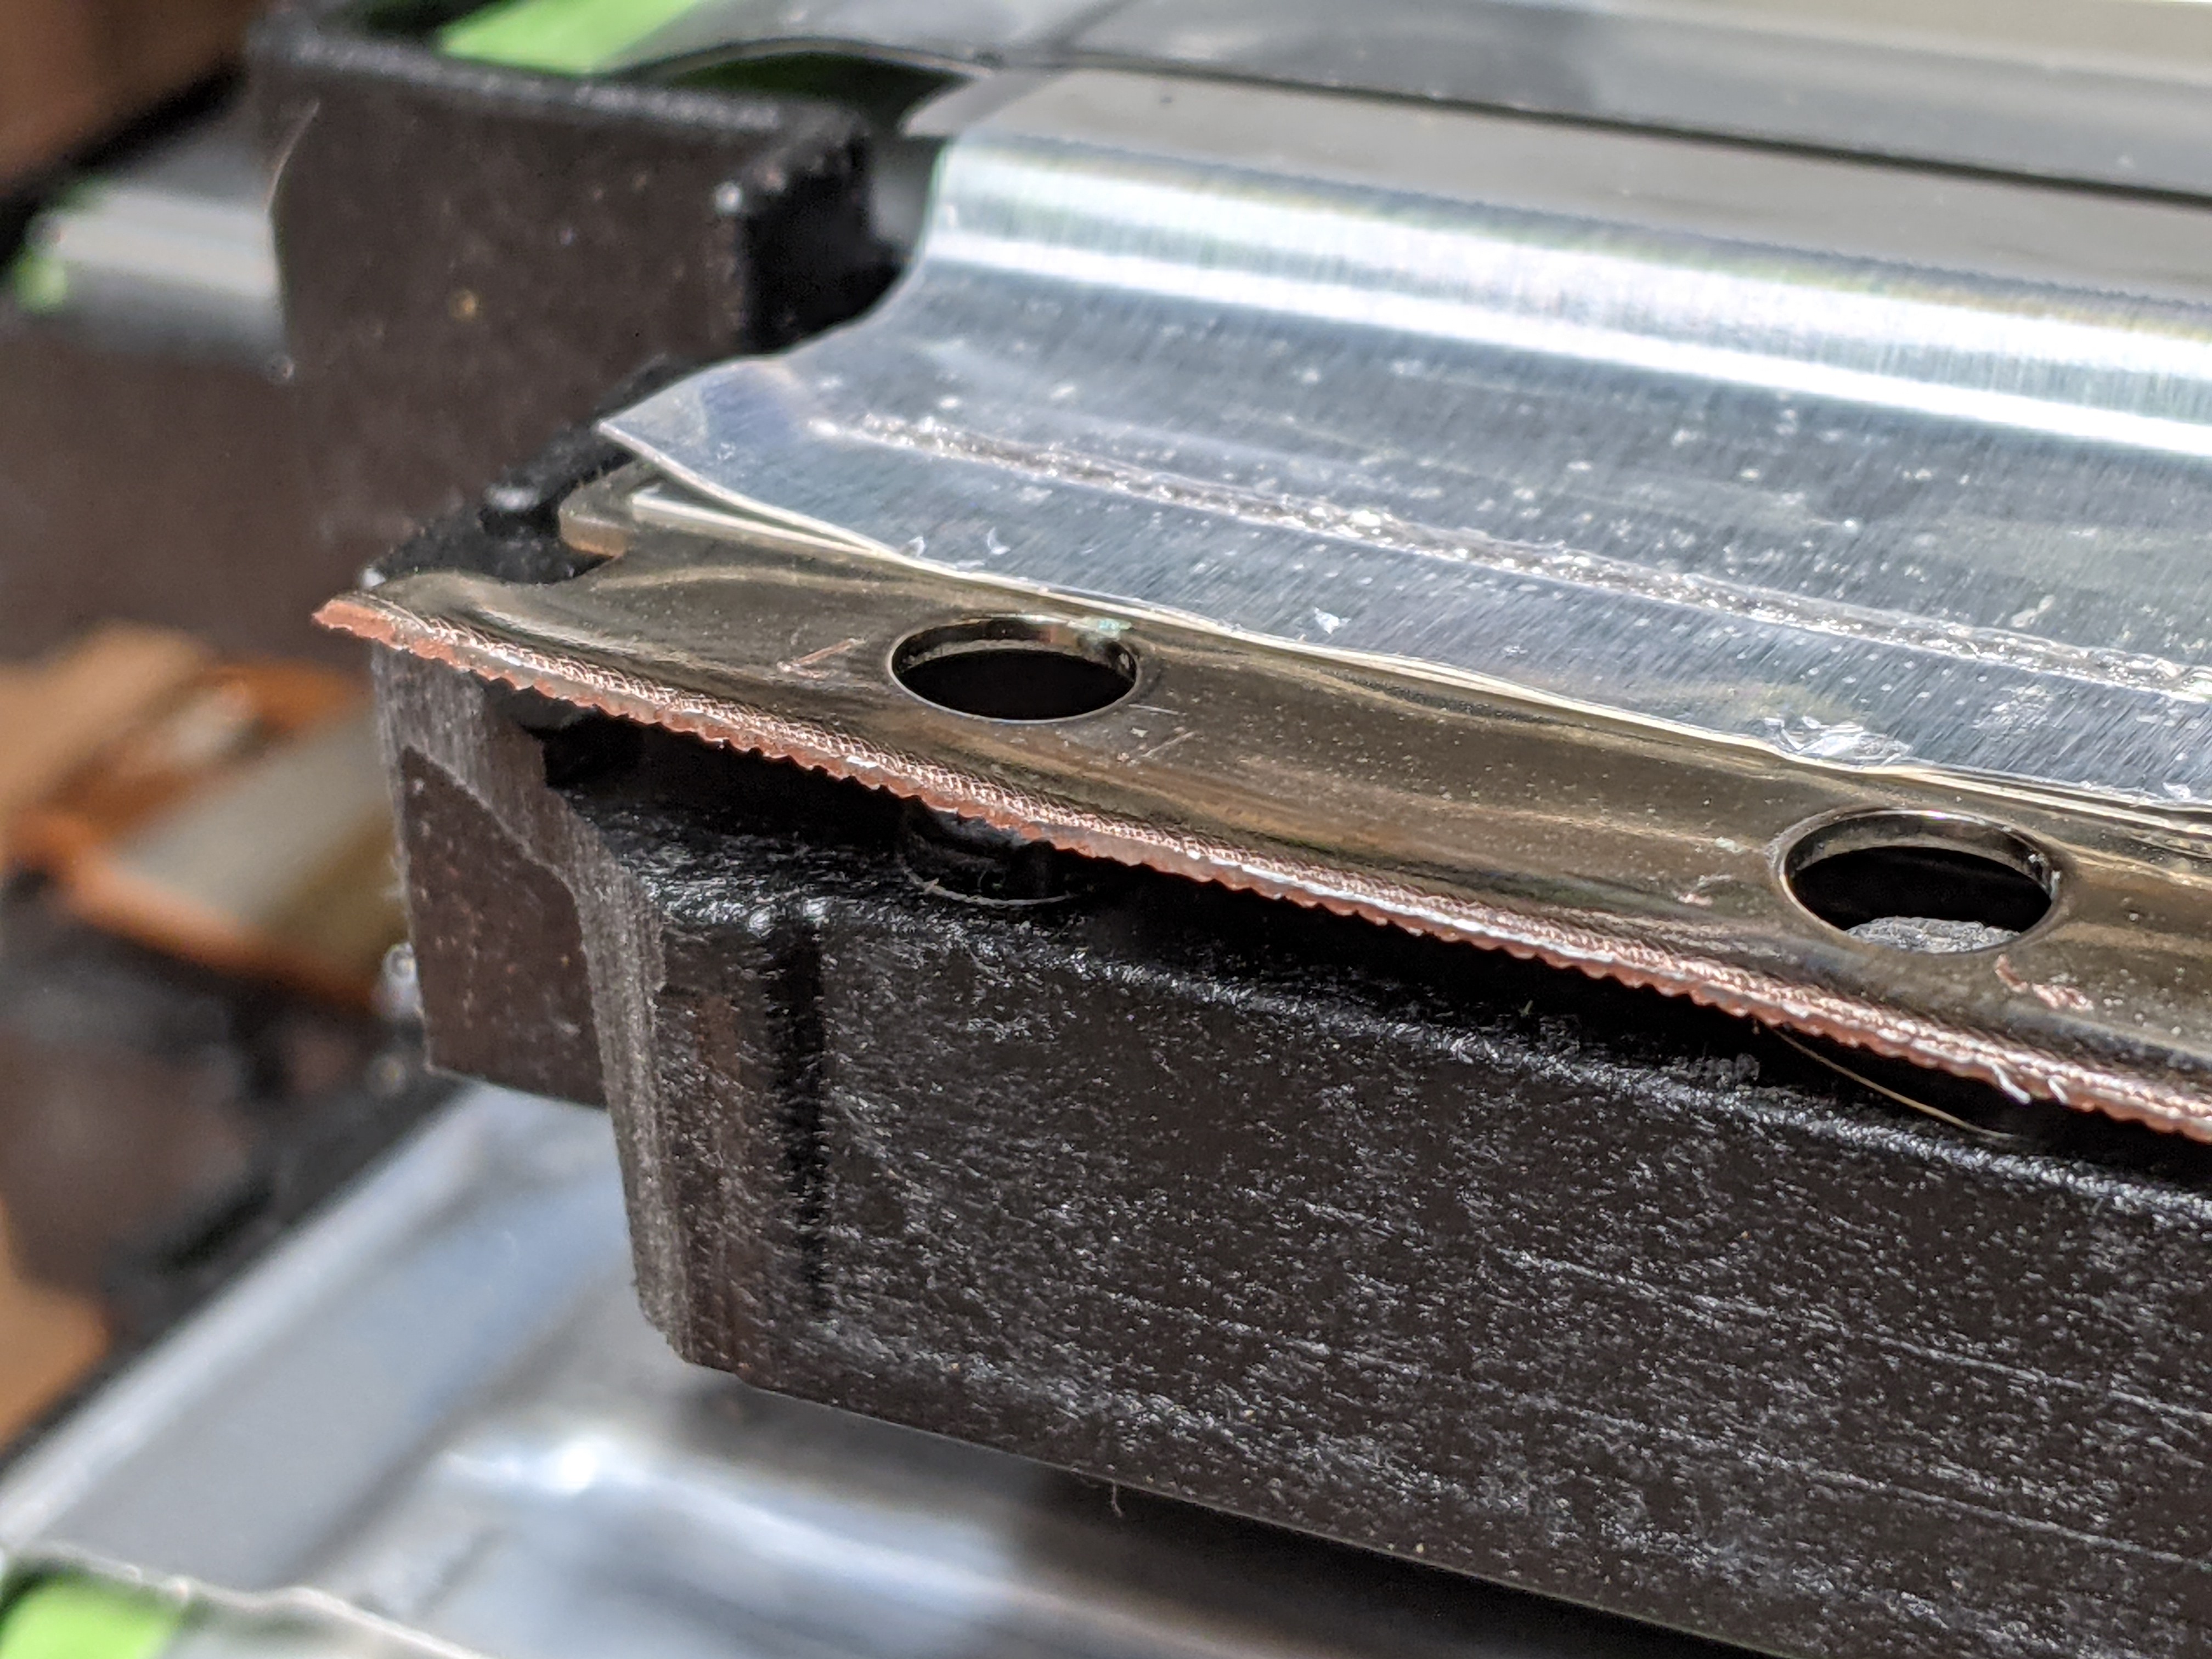
Thankfully, dividing them into halves was quite simple. I just used sheet metal snips to slice the busbars down the middle. Actually it wasn't perfectly in the middle, I intentionally cut one side a little more than the other so that the all the cells where left laser welded to a busbar with hole(s) for easy wiring later on.
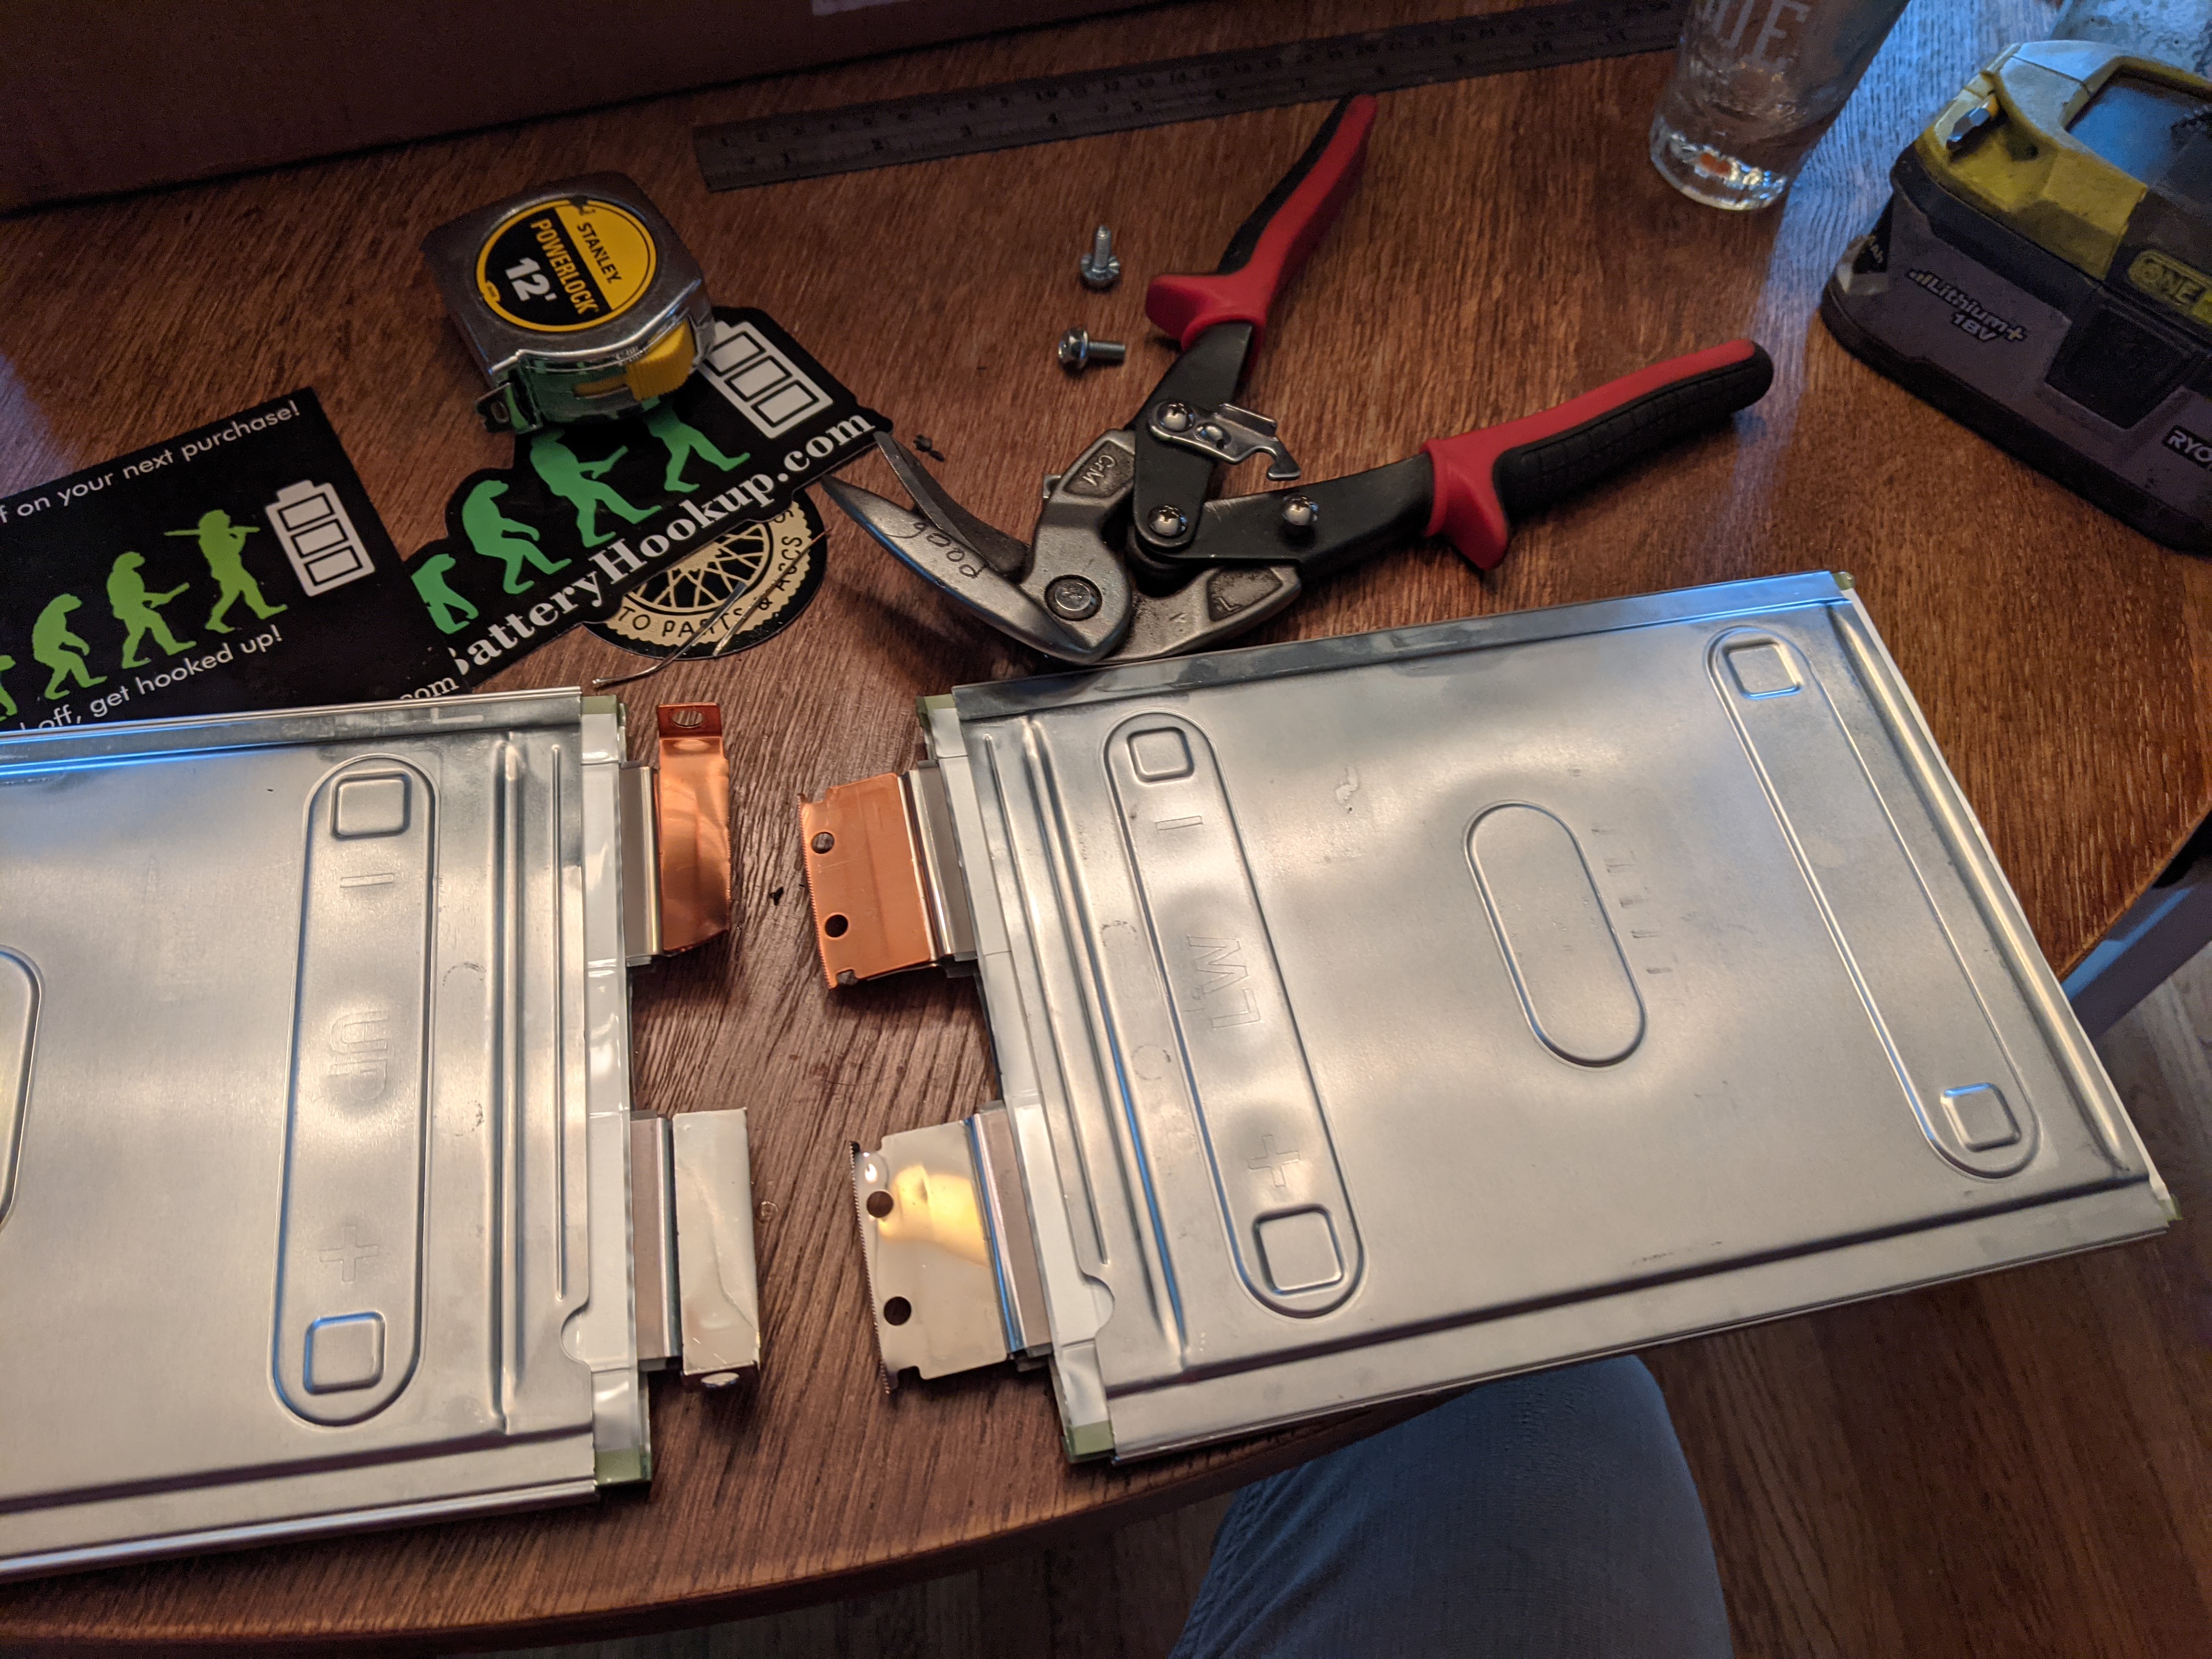
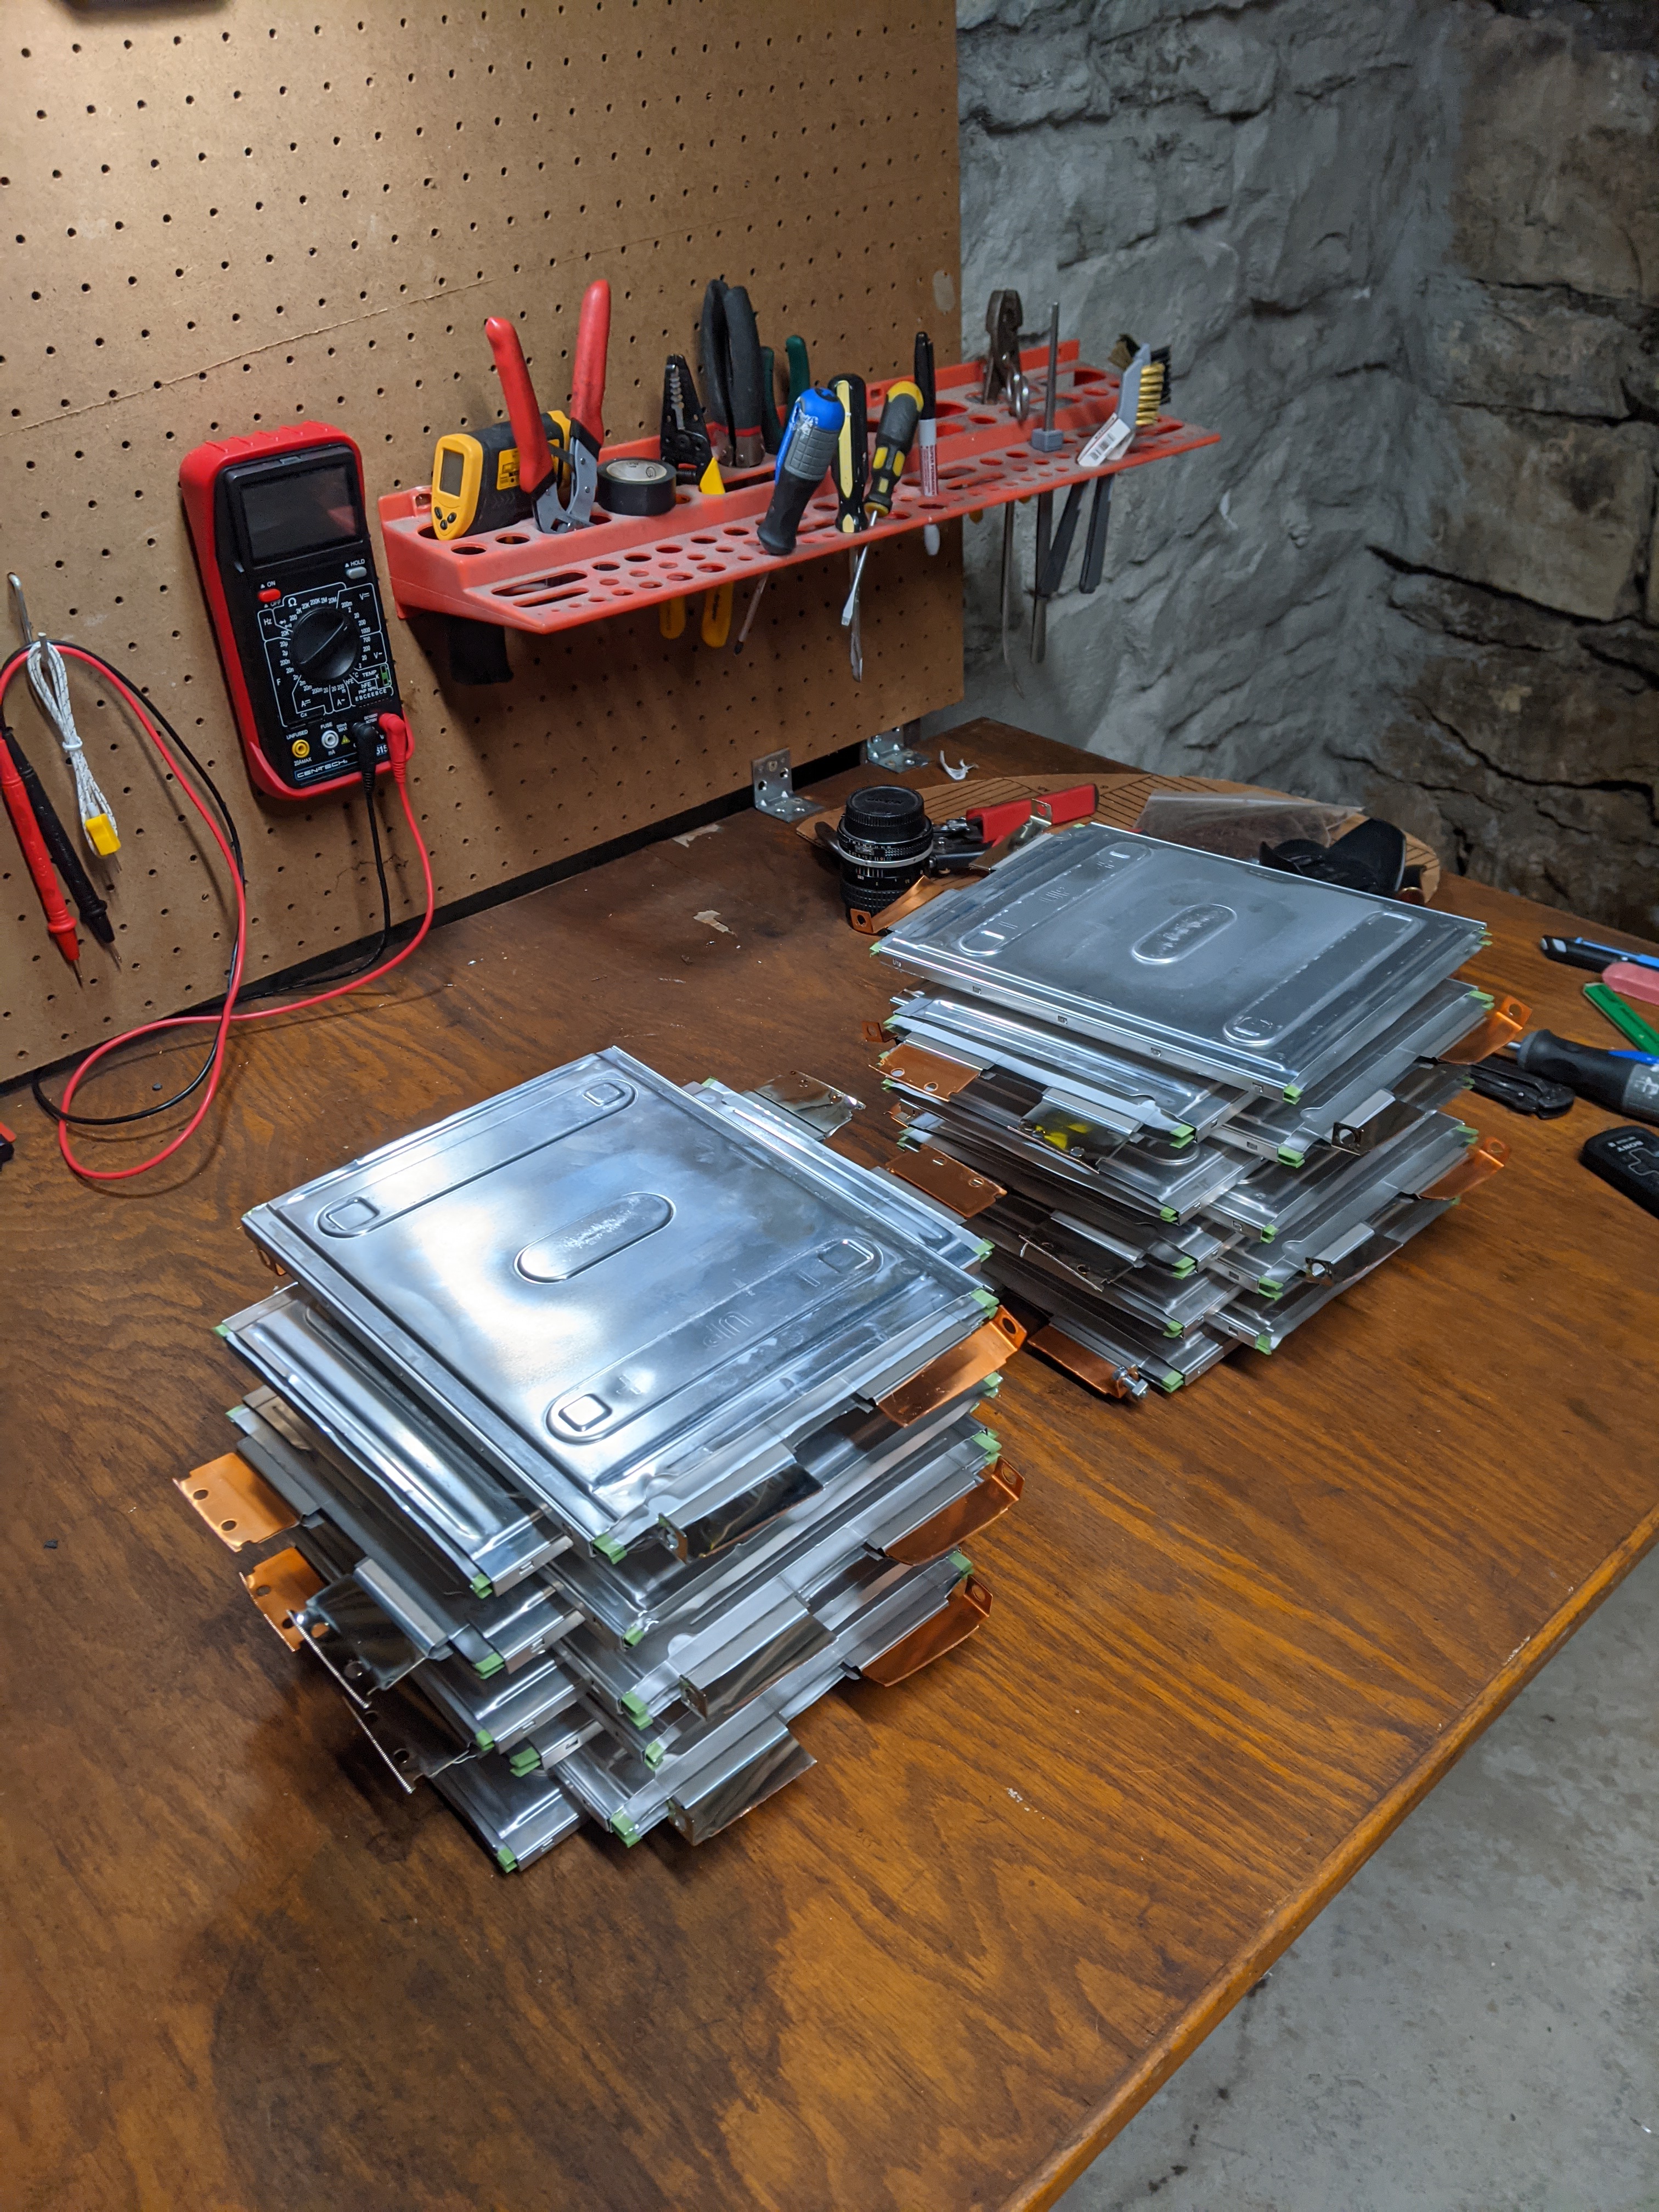
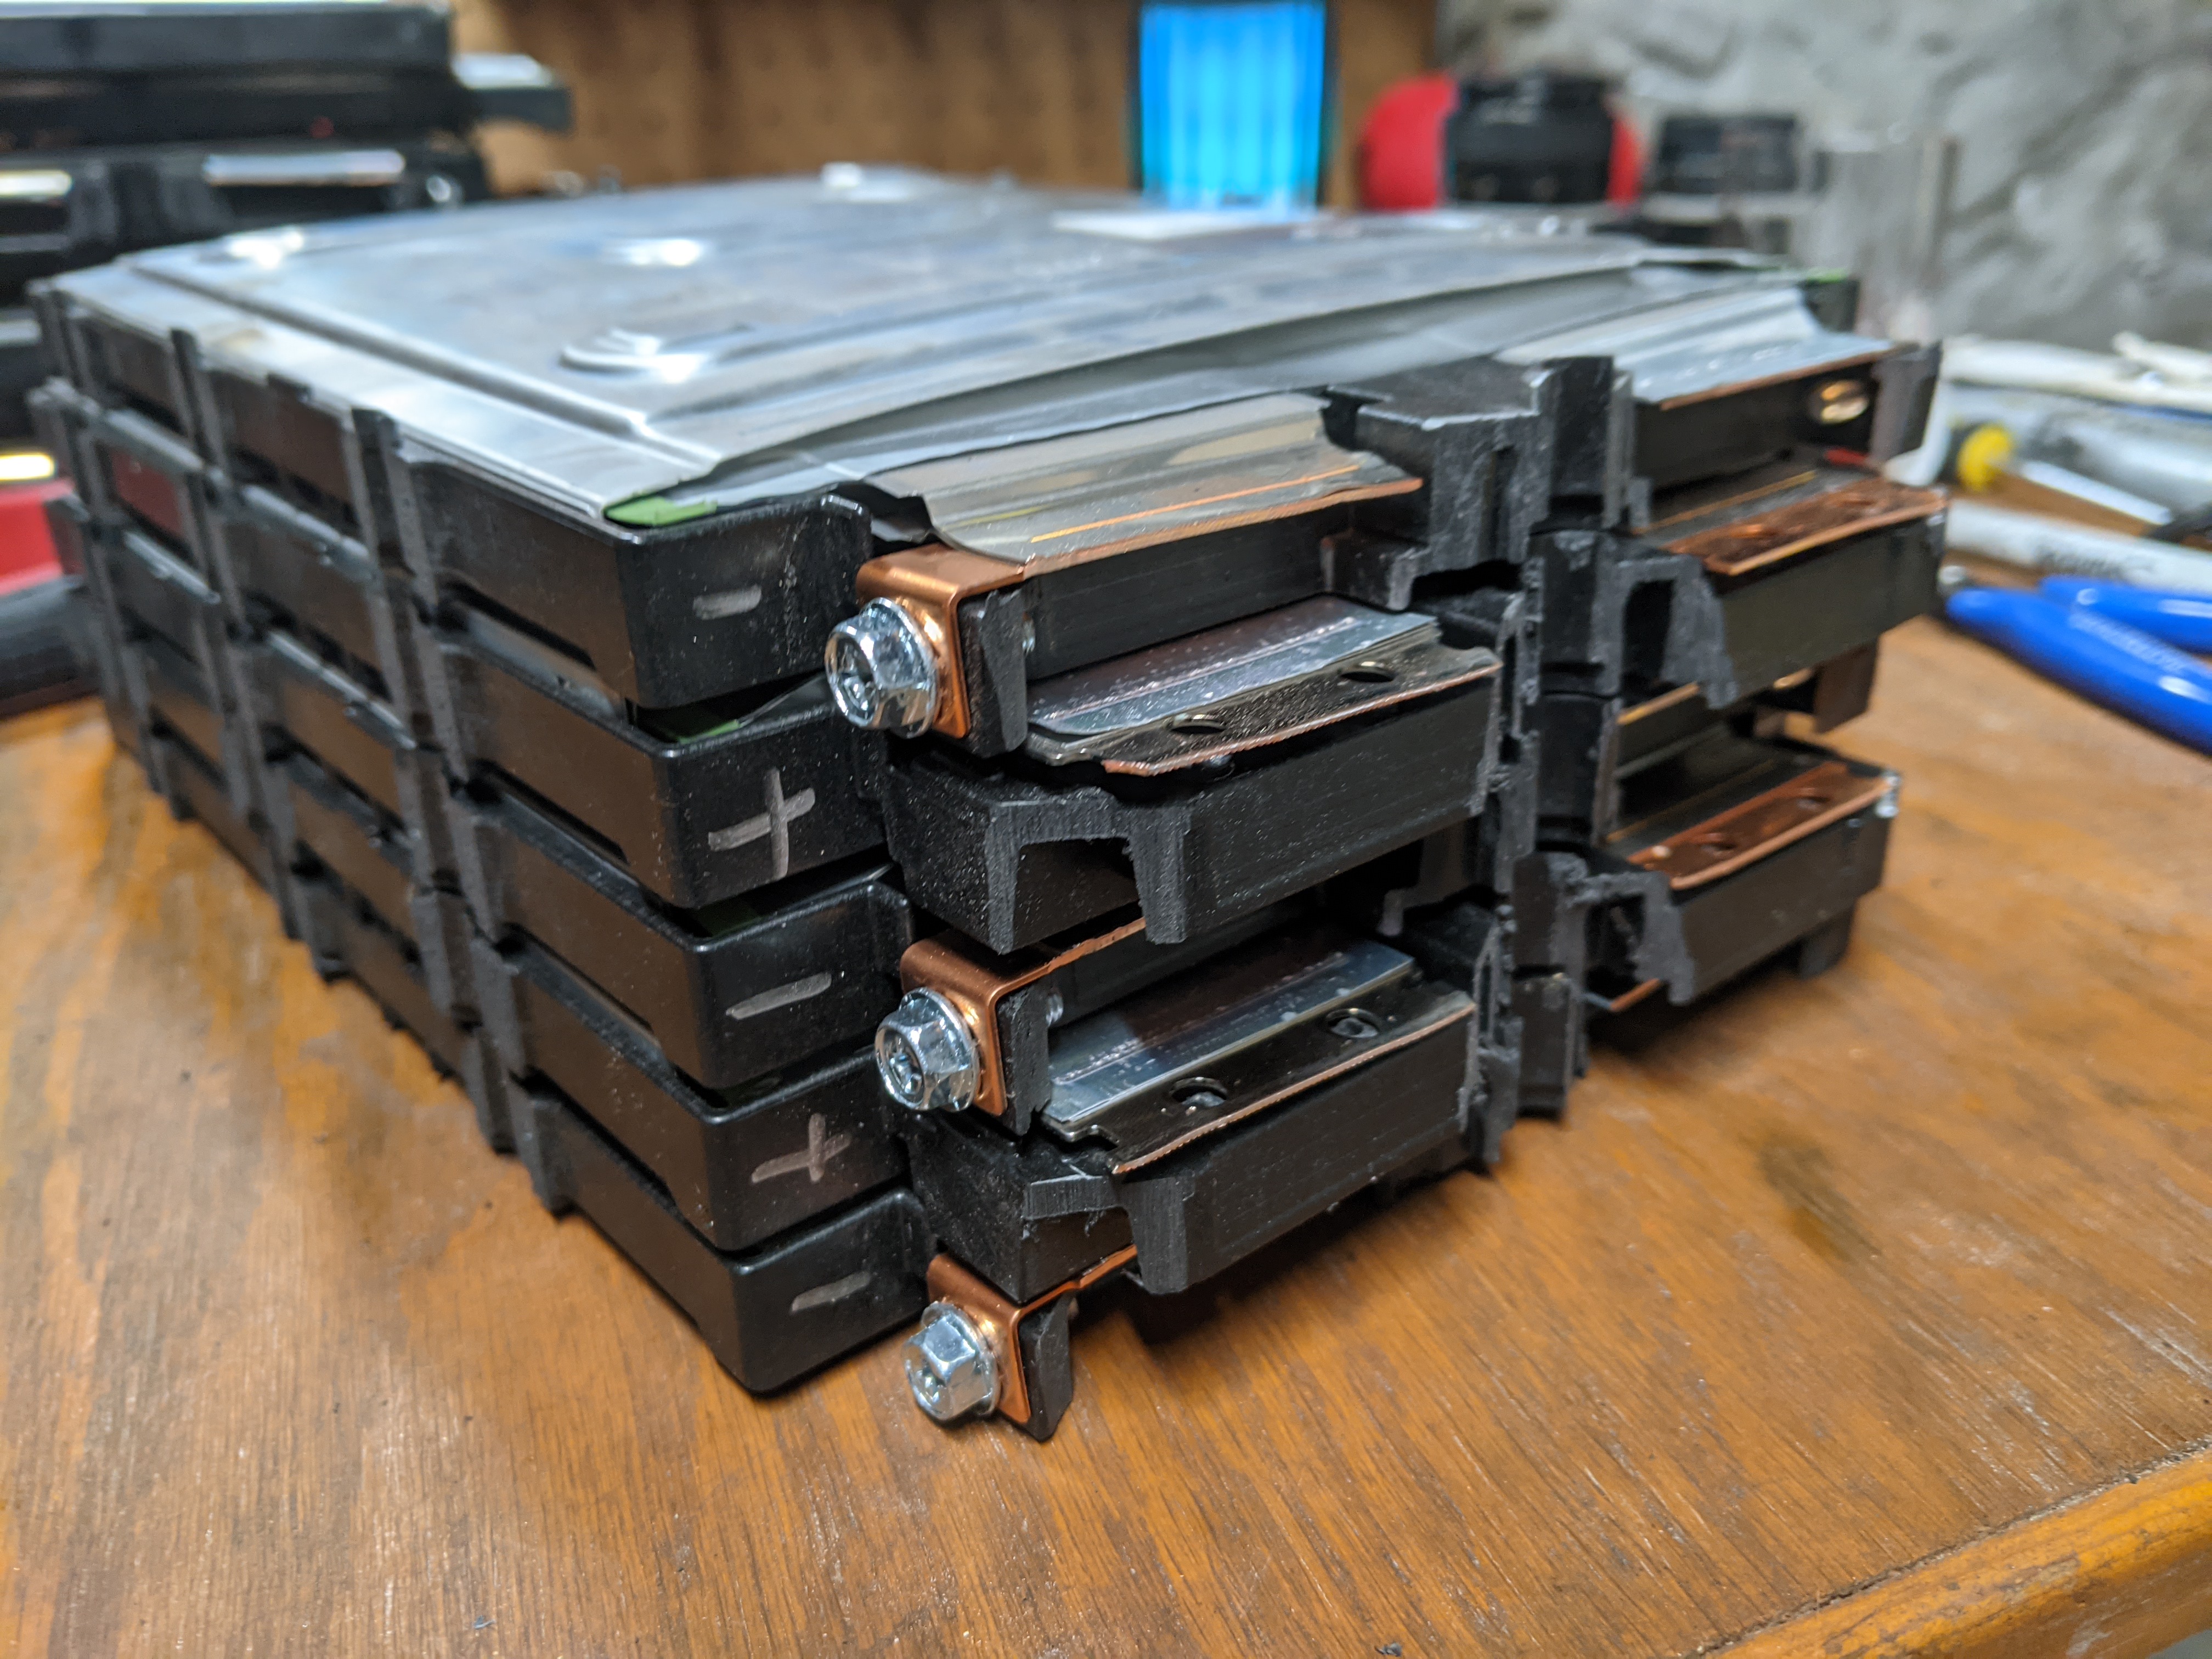
Then I started to cut up the plastic cases too so that I could use them. They'll make packing the cells into a pack much easier than without them. Just like with the cells, I divided them into halves, except I left a little more meat on the side without the captive nut for the busbar bolts. This will let me screw the tabs into the plastic with little screws, I think that will be helpful when it comes time to make the connections.
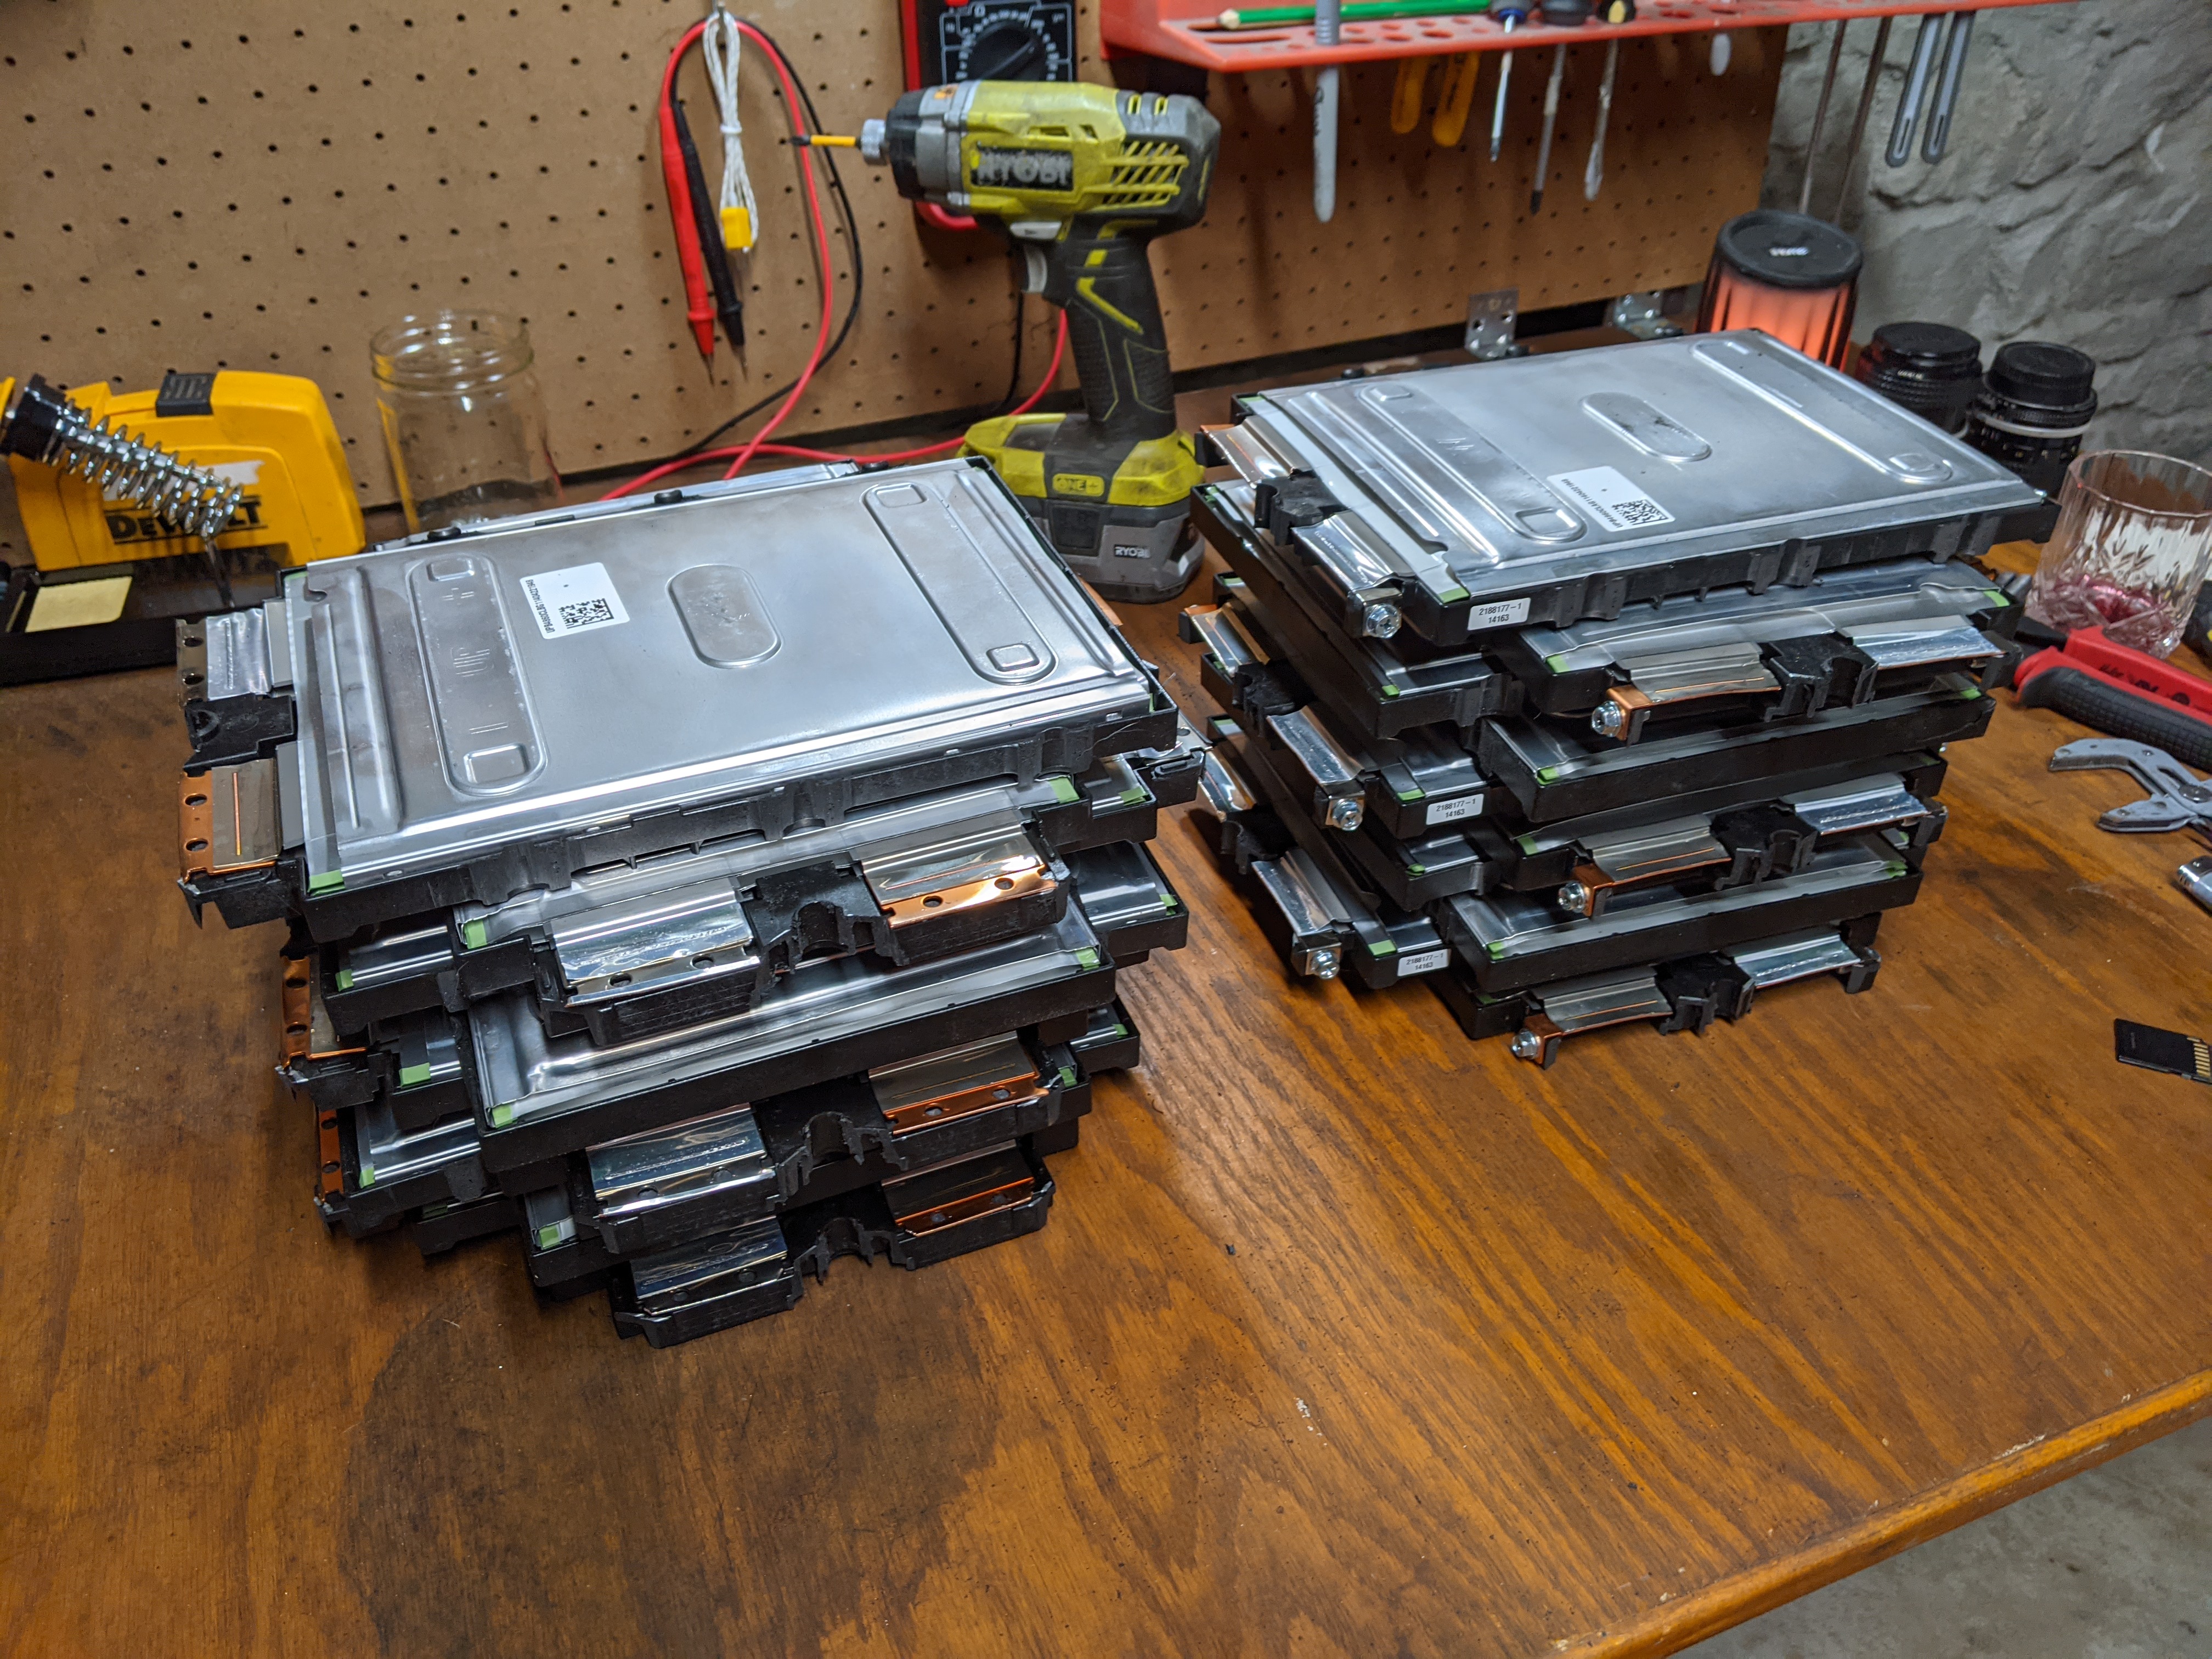
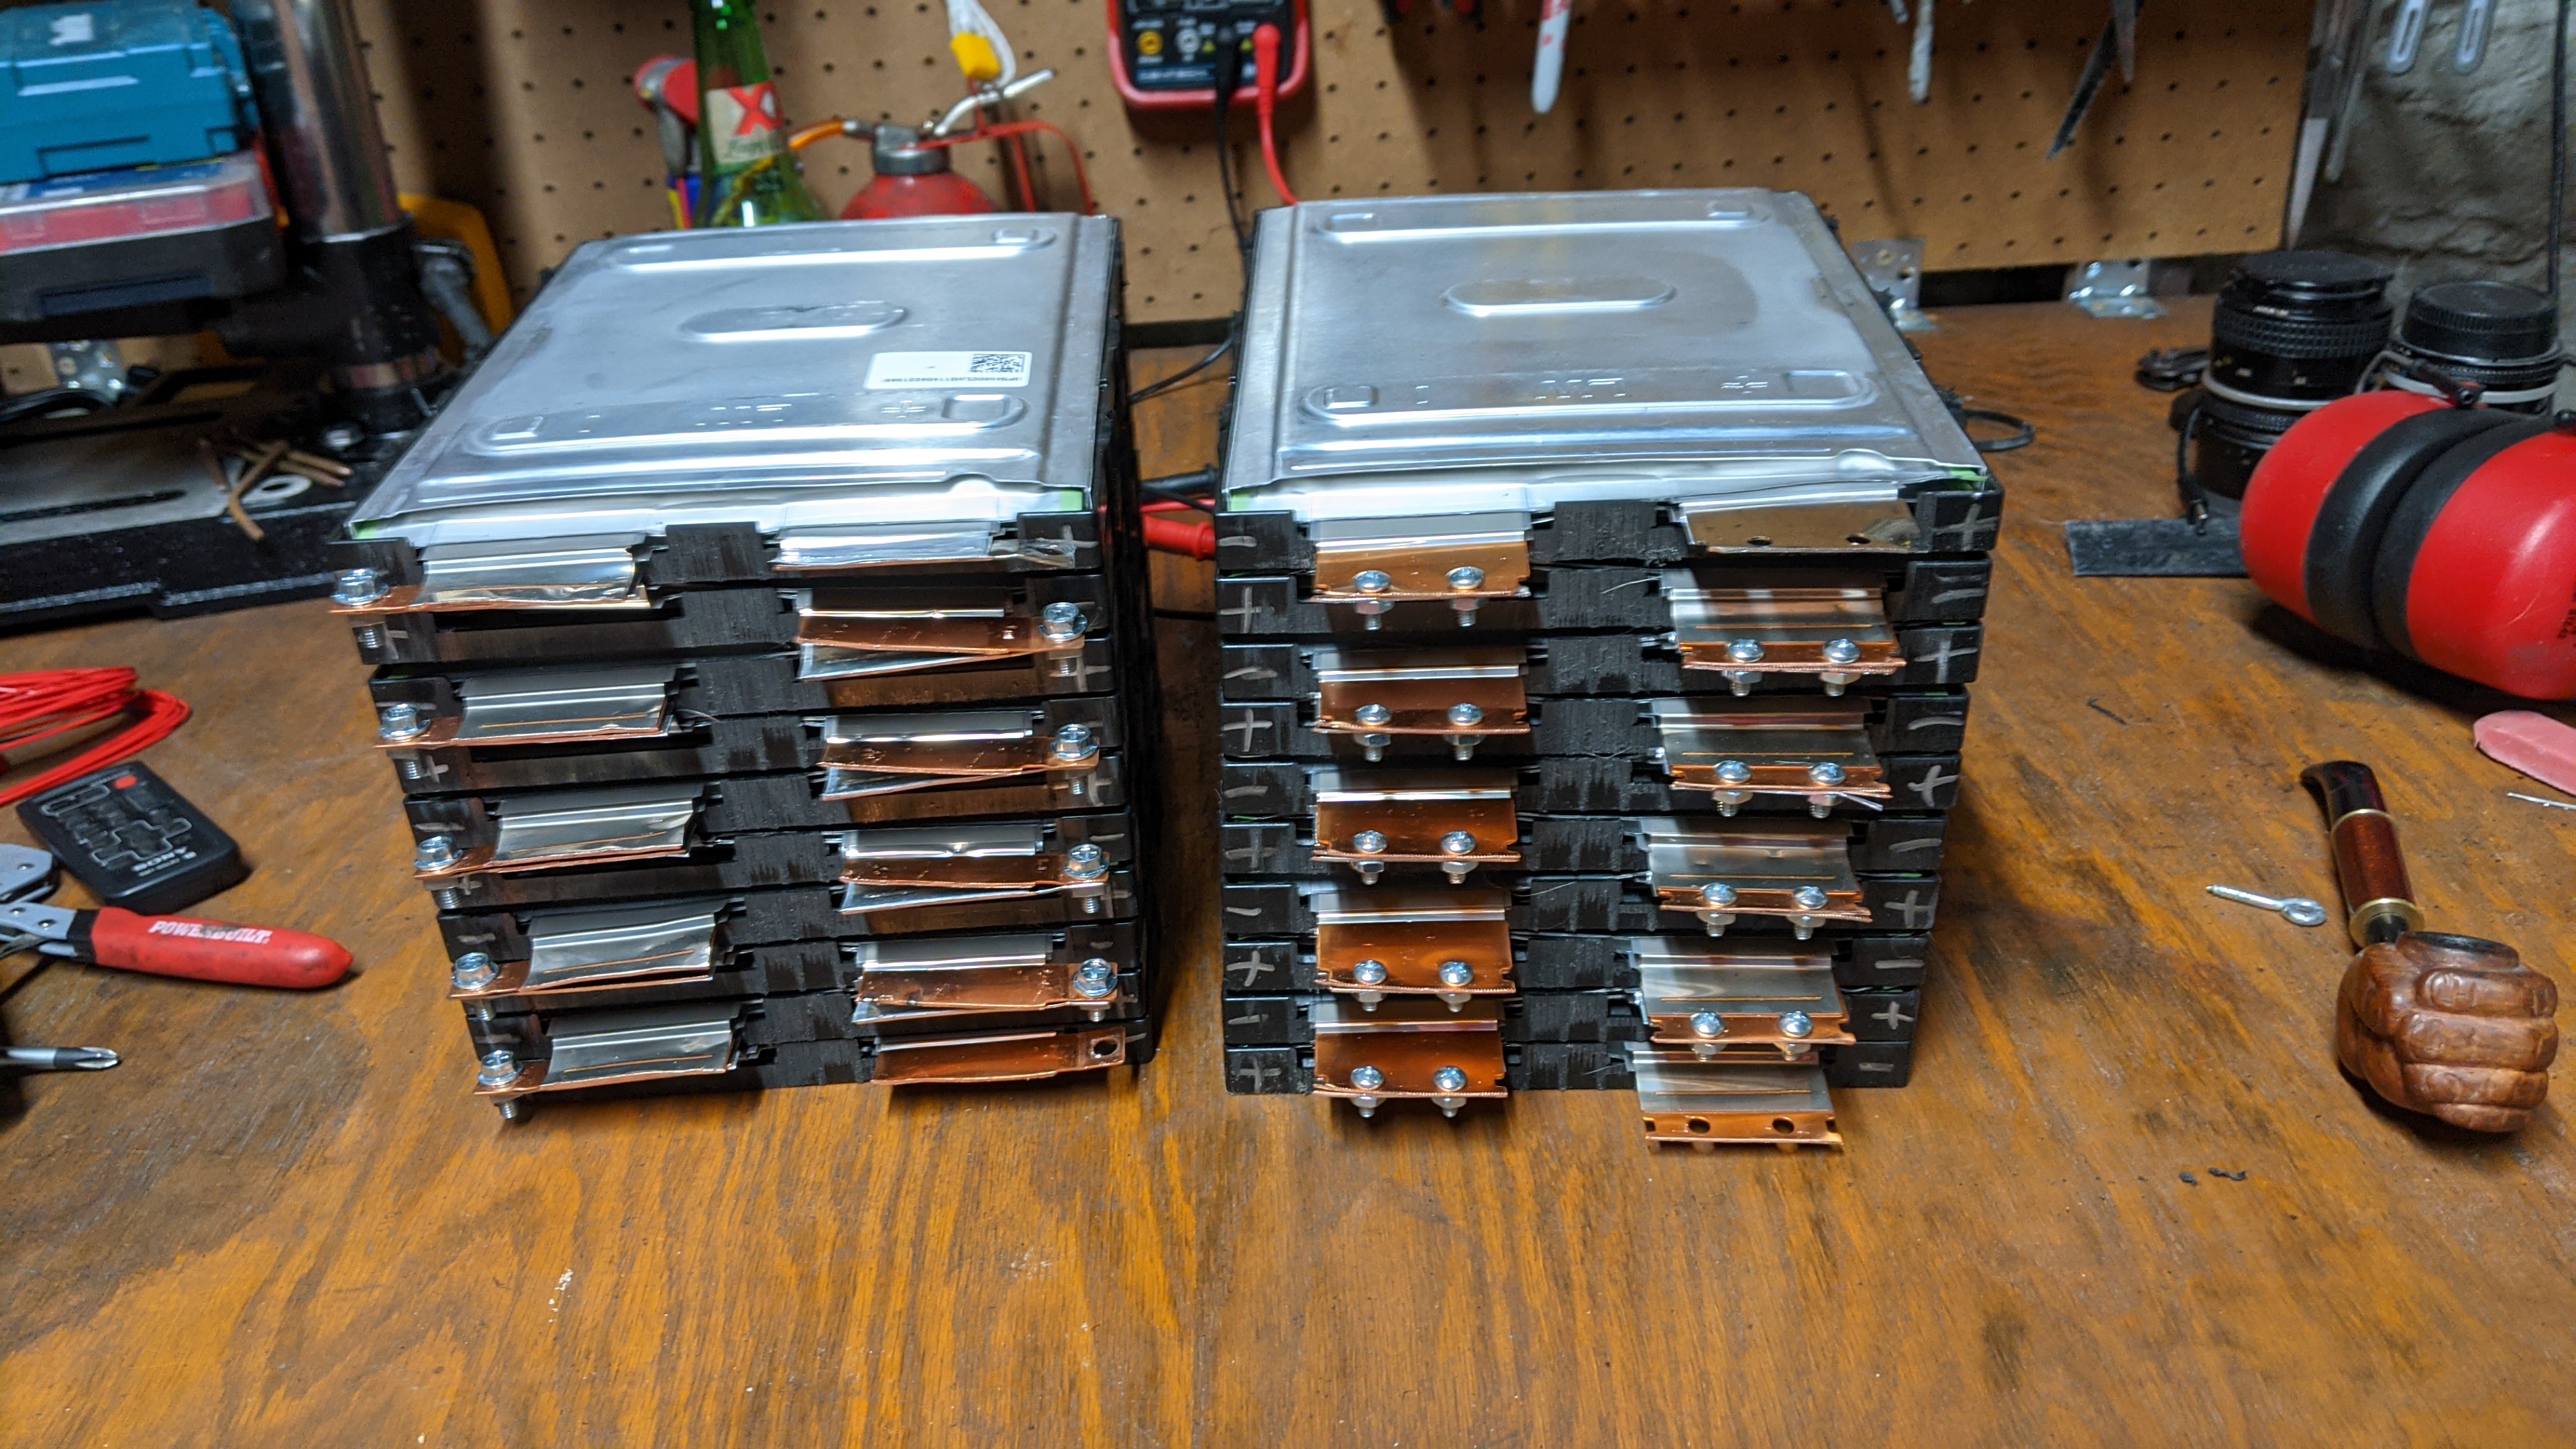
So I have two types of 2p modules: the ones on the left and the ones on the right. The ones on the left were flipped over in their cases so that the positive and negative tabs were reversed. This will make it a lot easier to daisy chain them in series when stacked on top of each other.
The tabs are laser welded to busbars that are about 20 gauge sheet metal - but it is difficult to tell without the proper tool. The negative side is bare copper and the positive side is copper with a nickle coating.
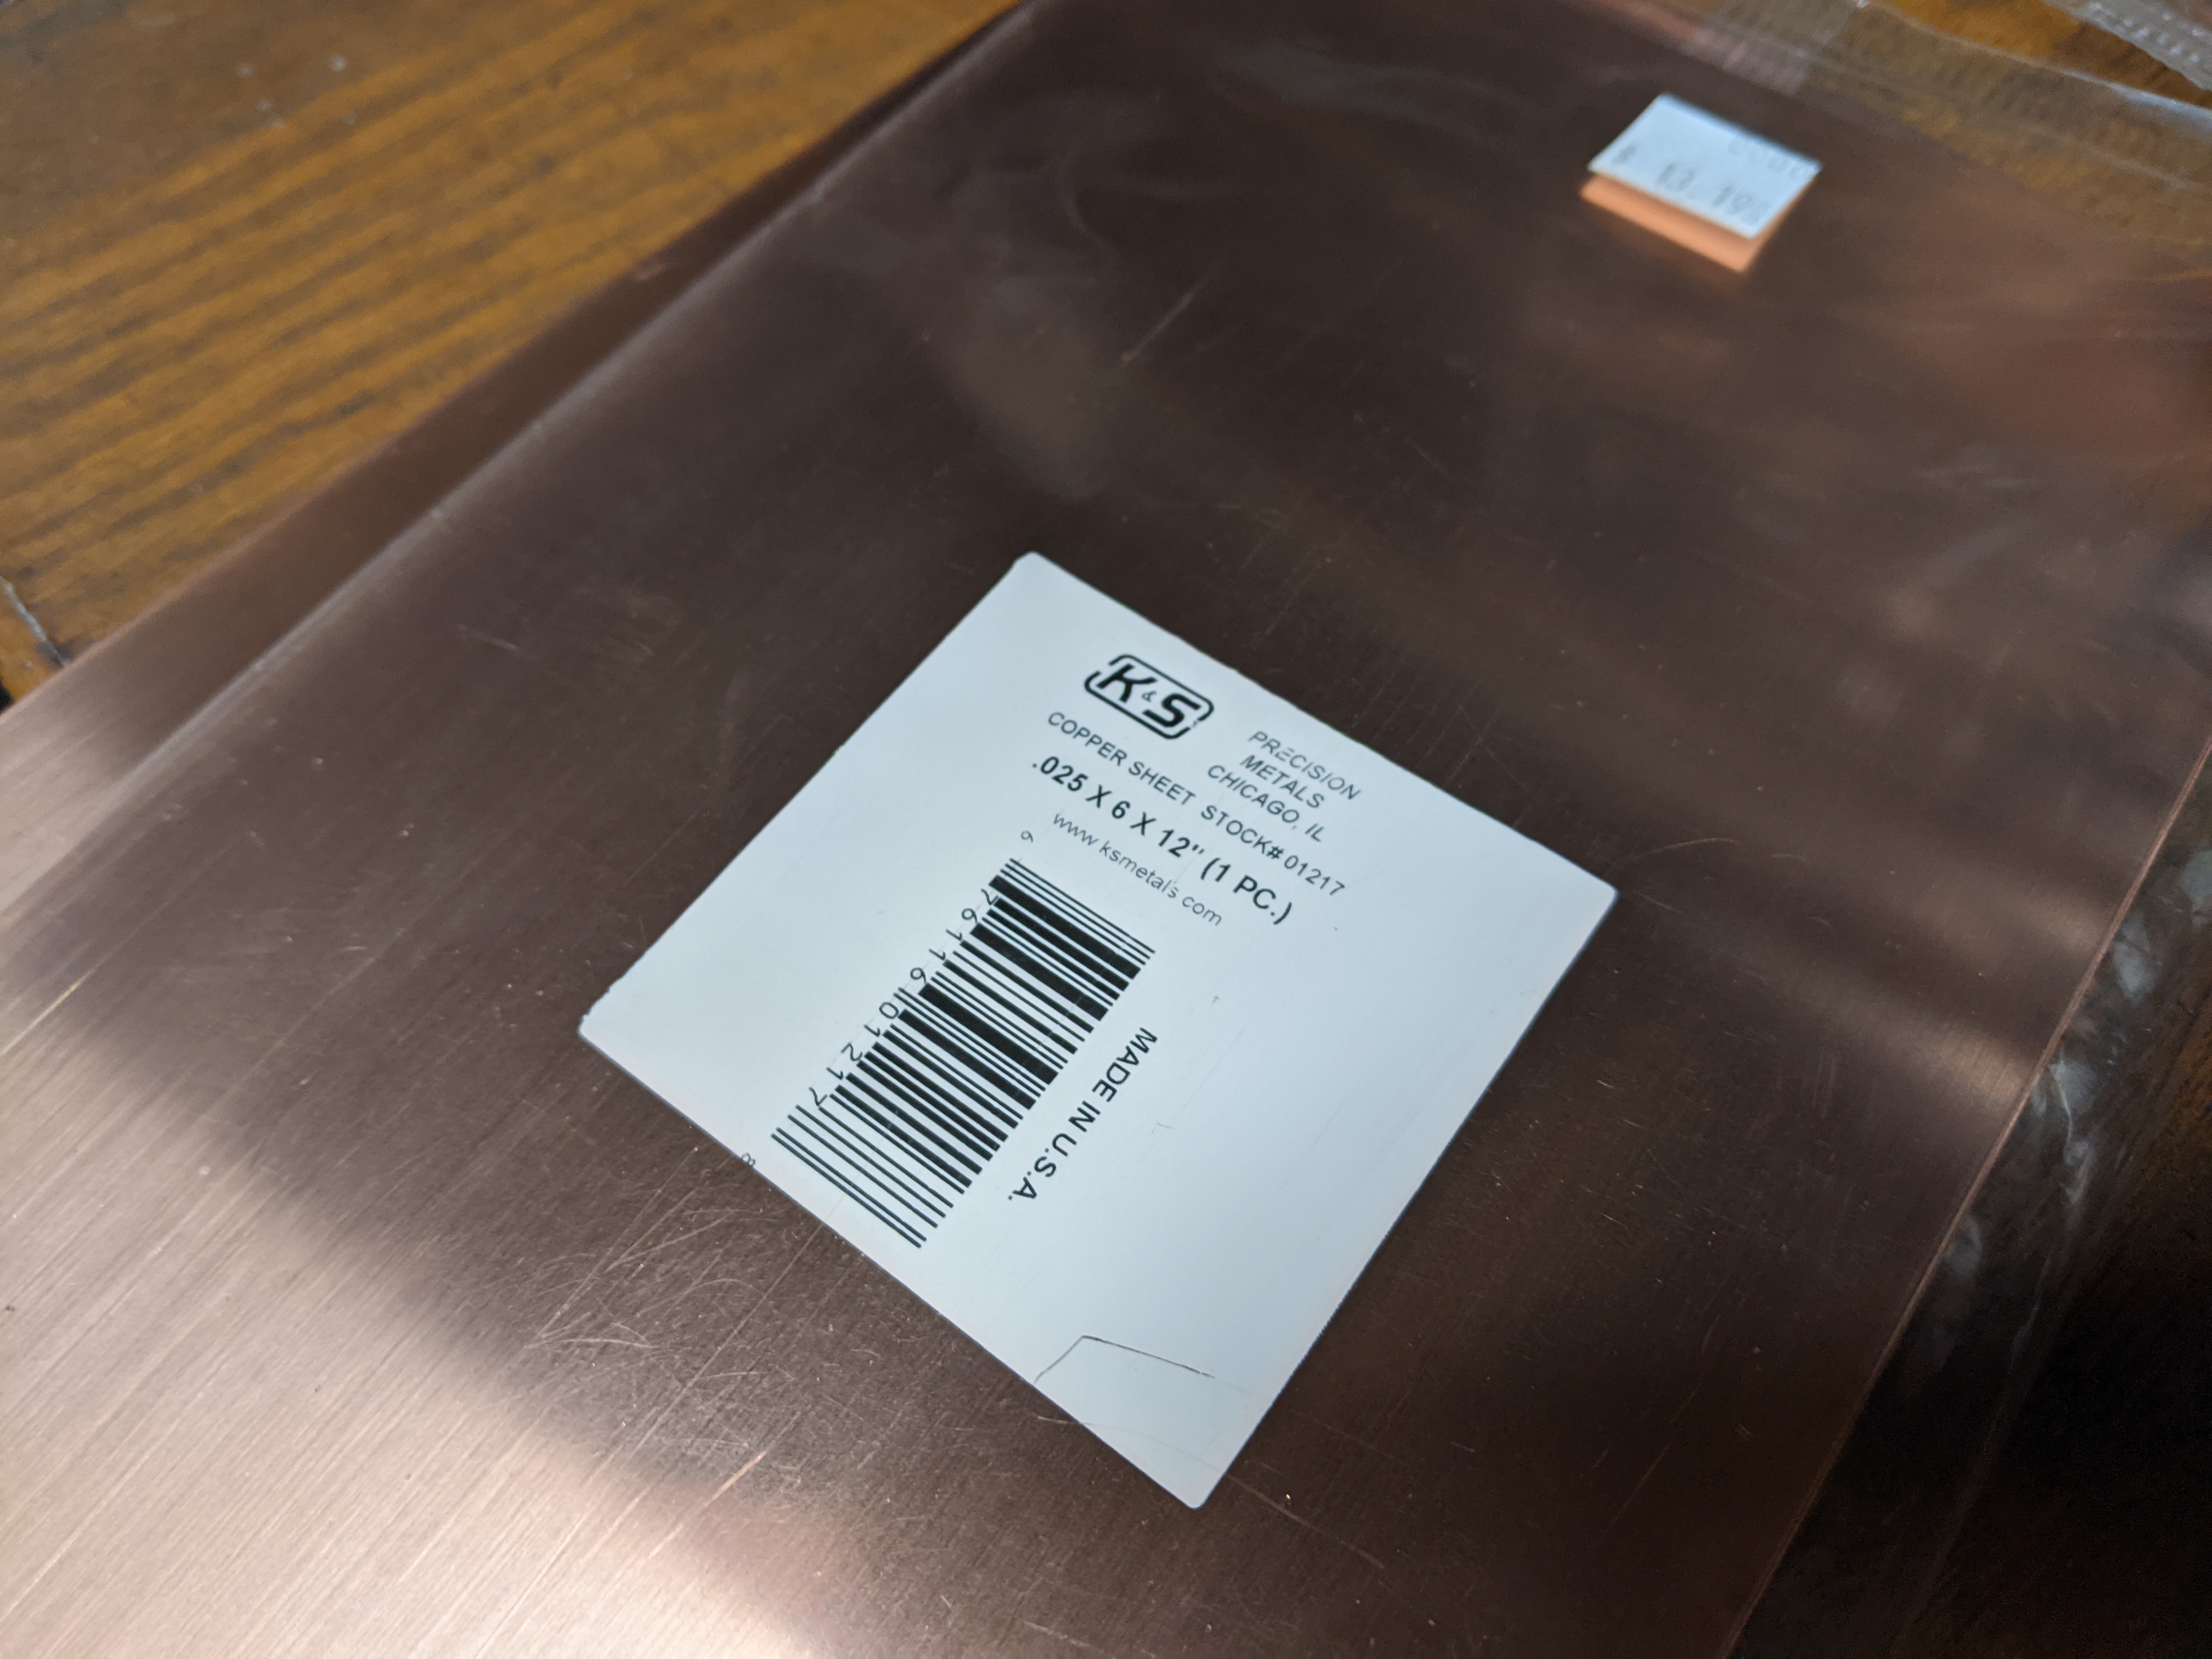
I purchased this copper sheet to make busbar connectors but it might be too thin. It is only 0.025 inches, or 26ga. I also bought some 16ga aluminum which is a lot thicker. I'll also want the connections to be a little flexible because the cells need to be compressed and they could be a little shifty.
So that's where I'm at.
More to come!
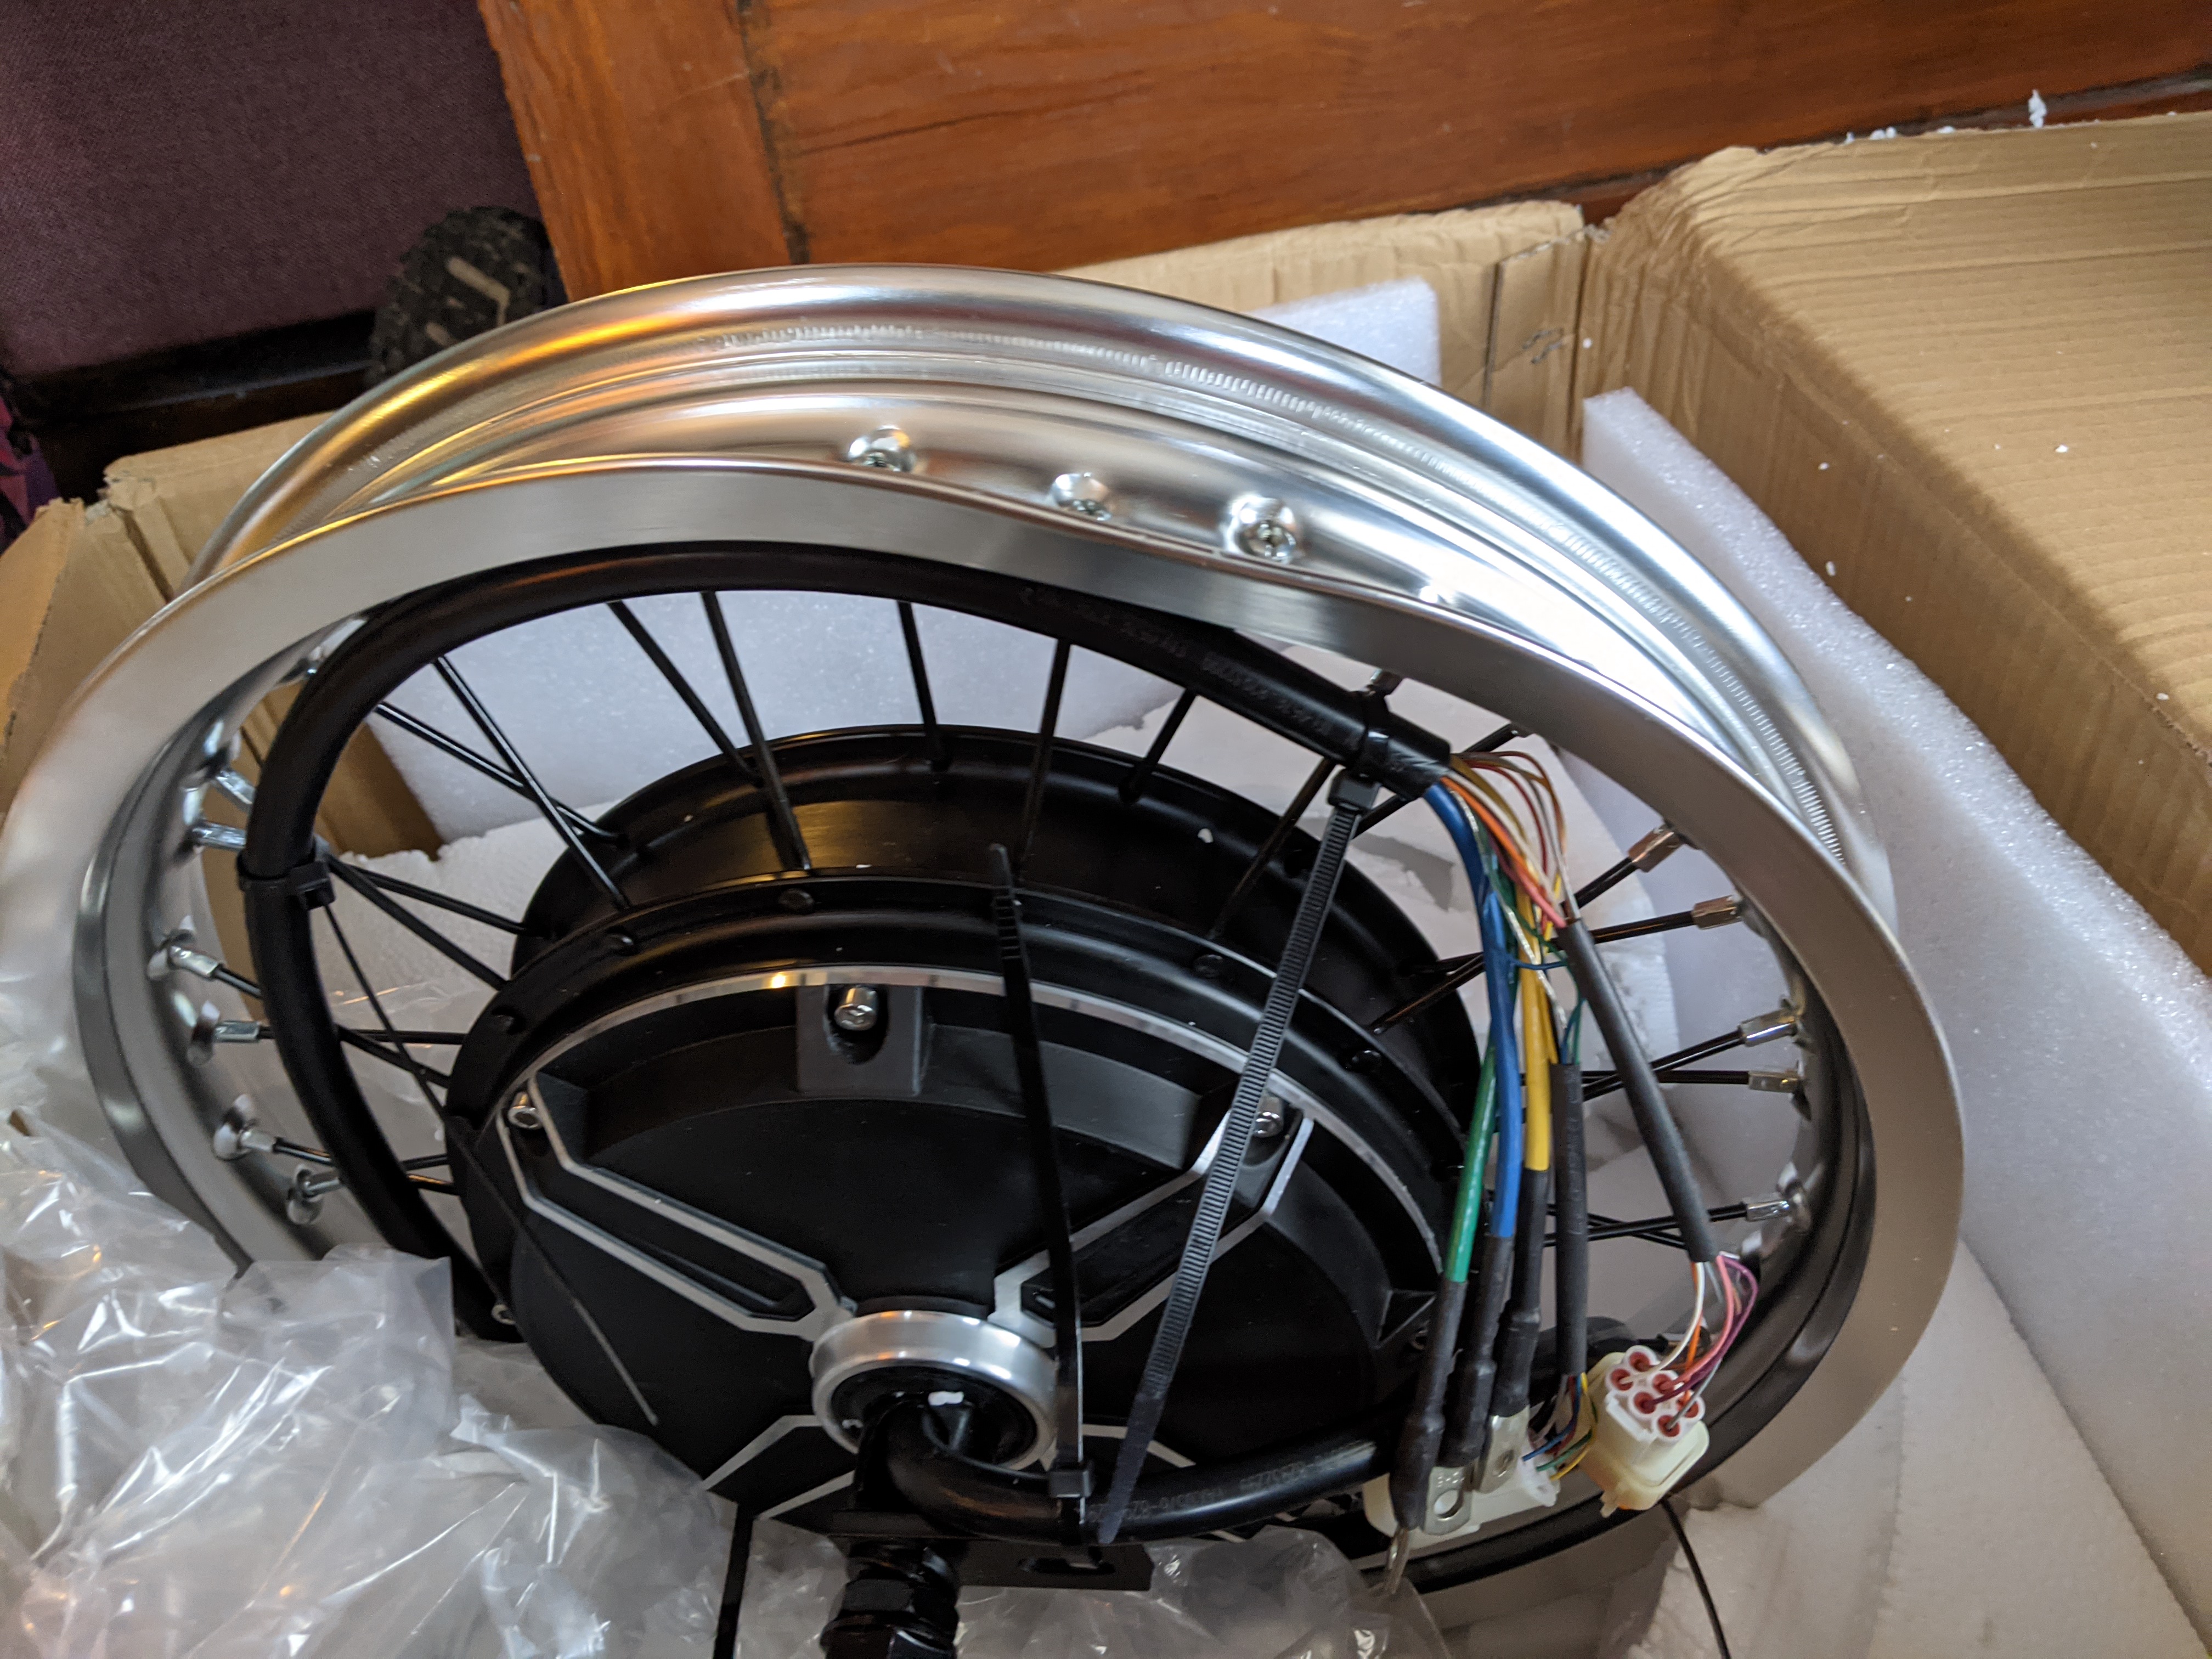
The battery pack will be powering a 4kw hub motor from QS. I ordered it directly from the company in Jiaxing, China, over a month ago. Today I finally received the good, but it was dissapointing. For started, several brake parts where missing: the calipers, brake lever, and brake line. Only the rotter was included.
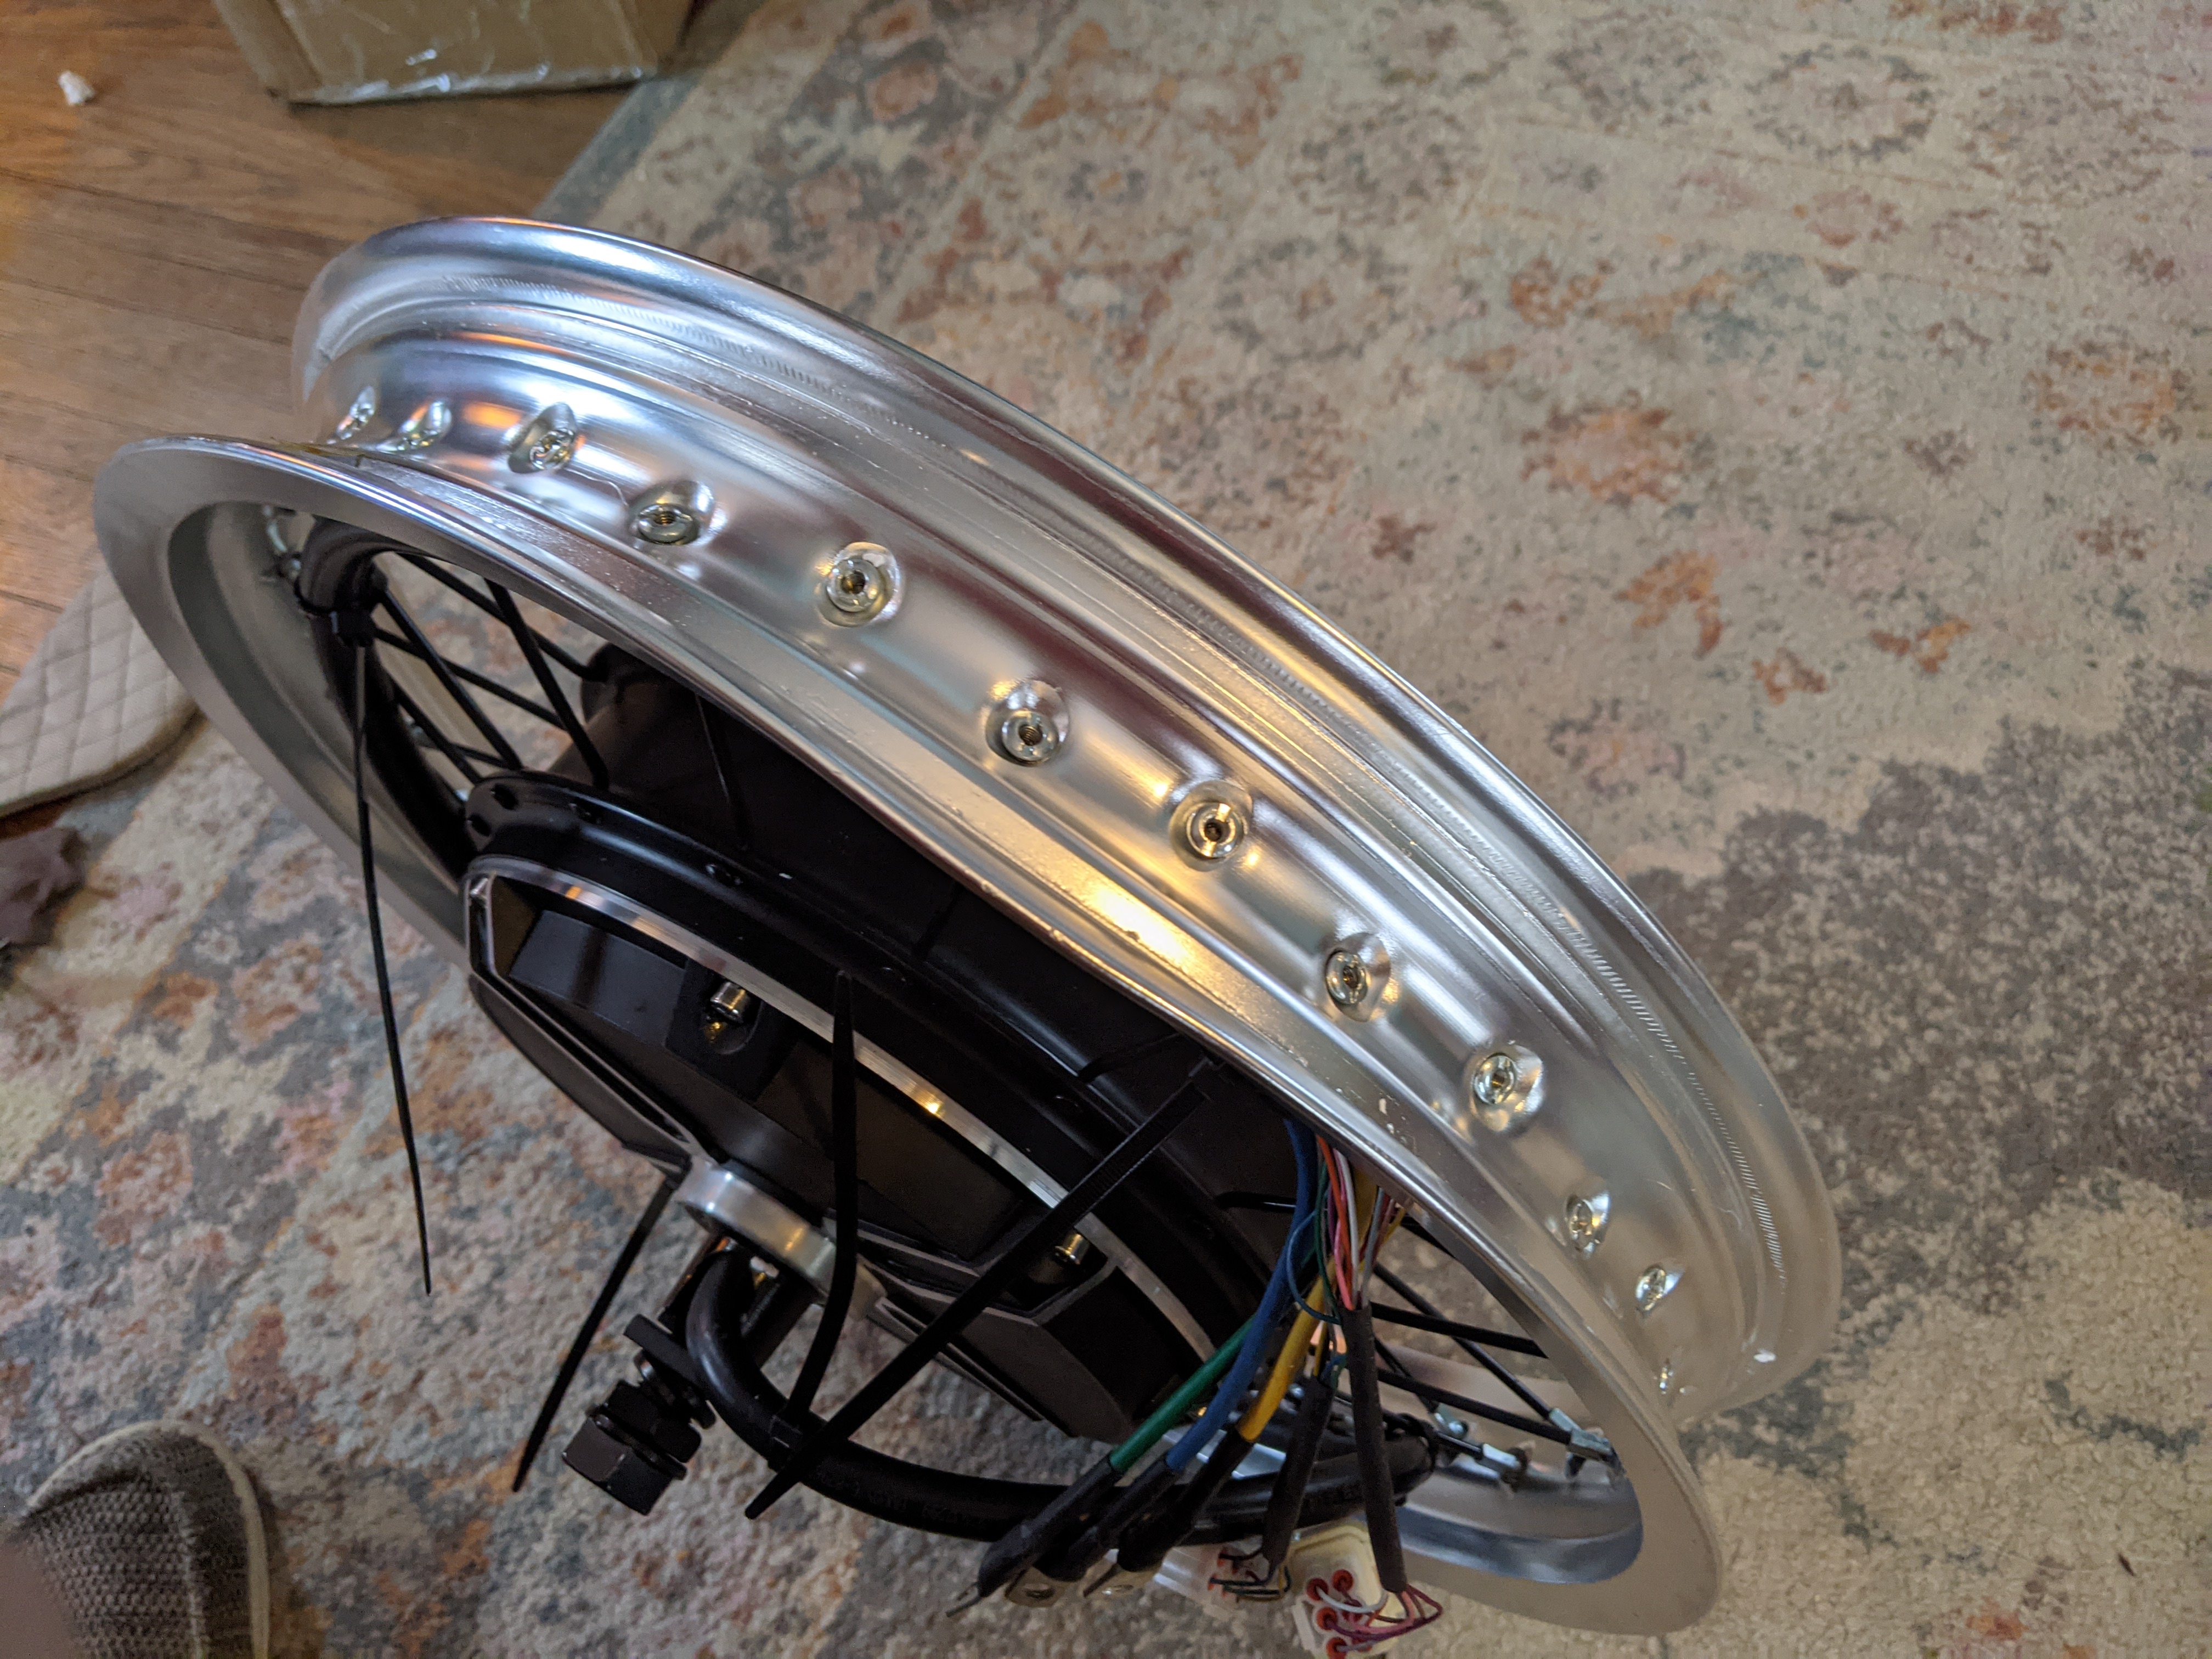
And the wheel's aluminum rim was damaged in shipping.
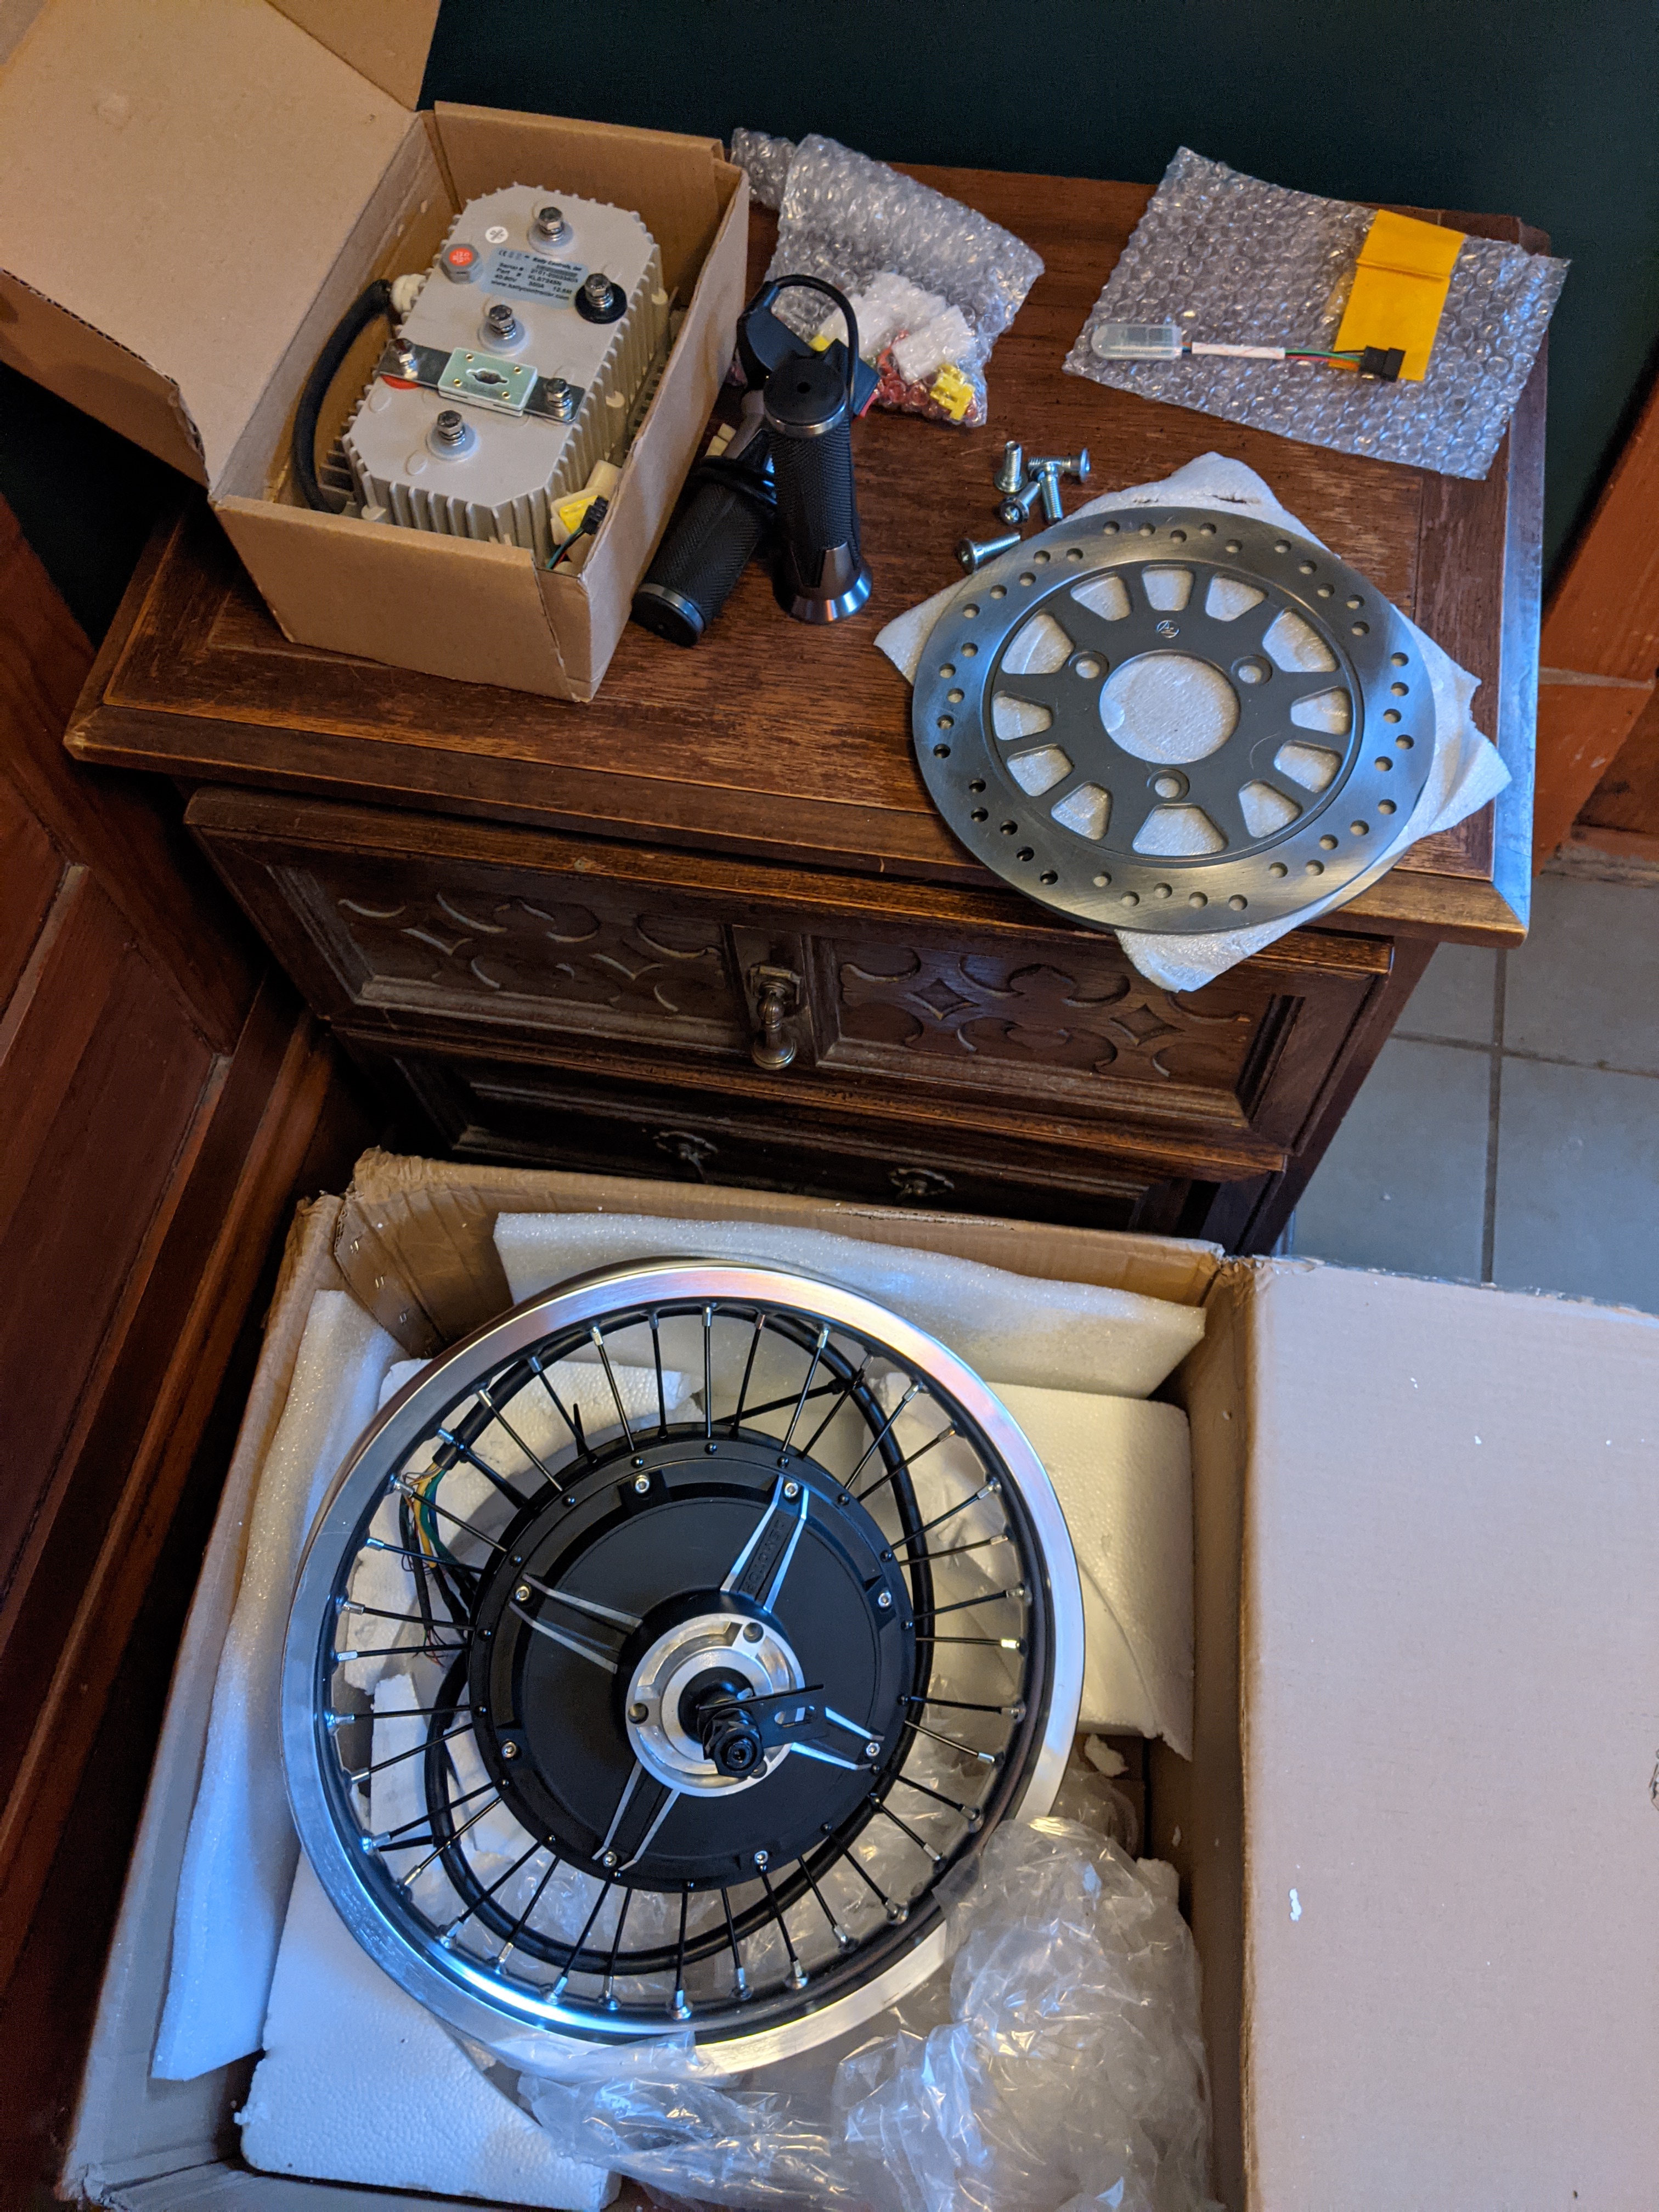
I already contacted the QS saleman and he said they will mail me the replacement parts - as soon as the Chinese New Year is over... which is in like three weeks from now!
Another problem is that the rim is laced incorectly. A radial lacing pattern like this is acceptable for the front wheel, but never for the rear wheel, because it has no strength to resist twisting forces. And this wheel should have a lot of torque so that would be a problem!
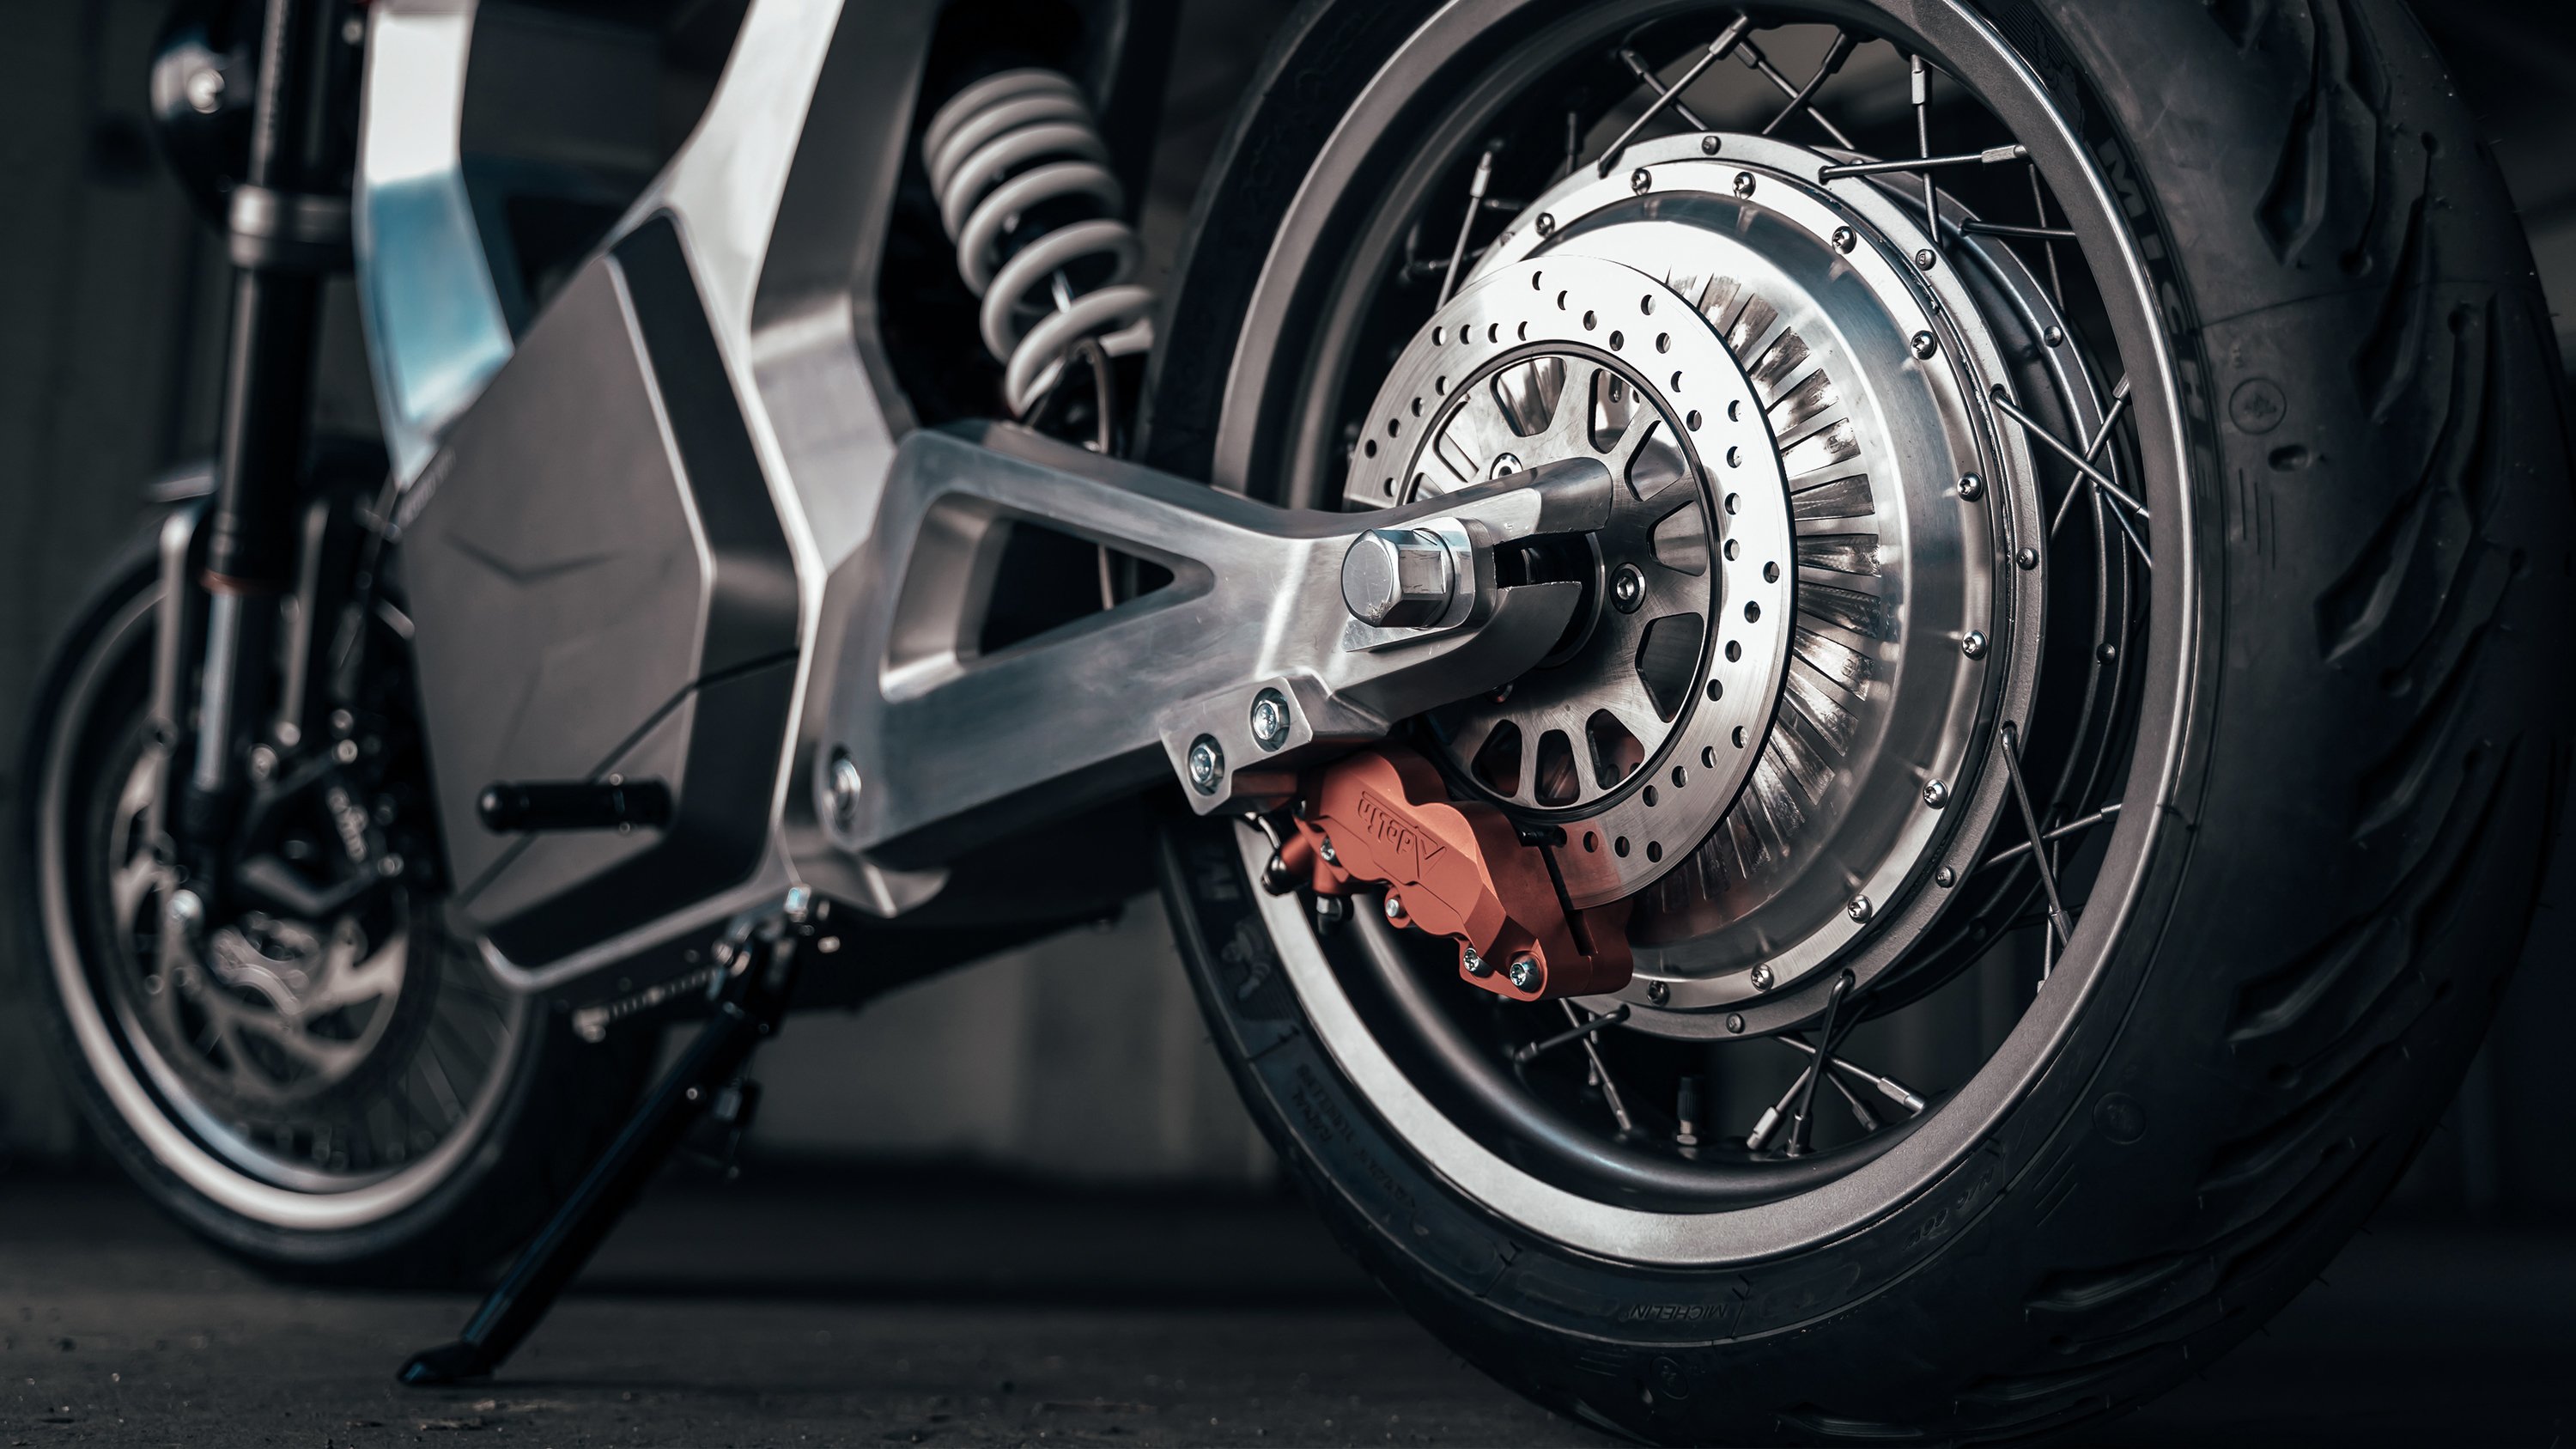
Below is an image of the new Sondors bike's rear wheel. This is an even bigger hub motor than what I have, and they were able to lace it with a criss-cross pattern, so I don't see why QS couldn't do it that way.
So, to say something positive, I guess I will have a lot more time to focus on the battery tank now!
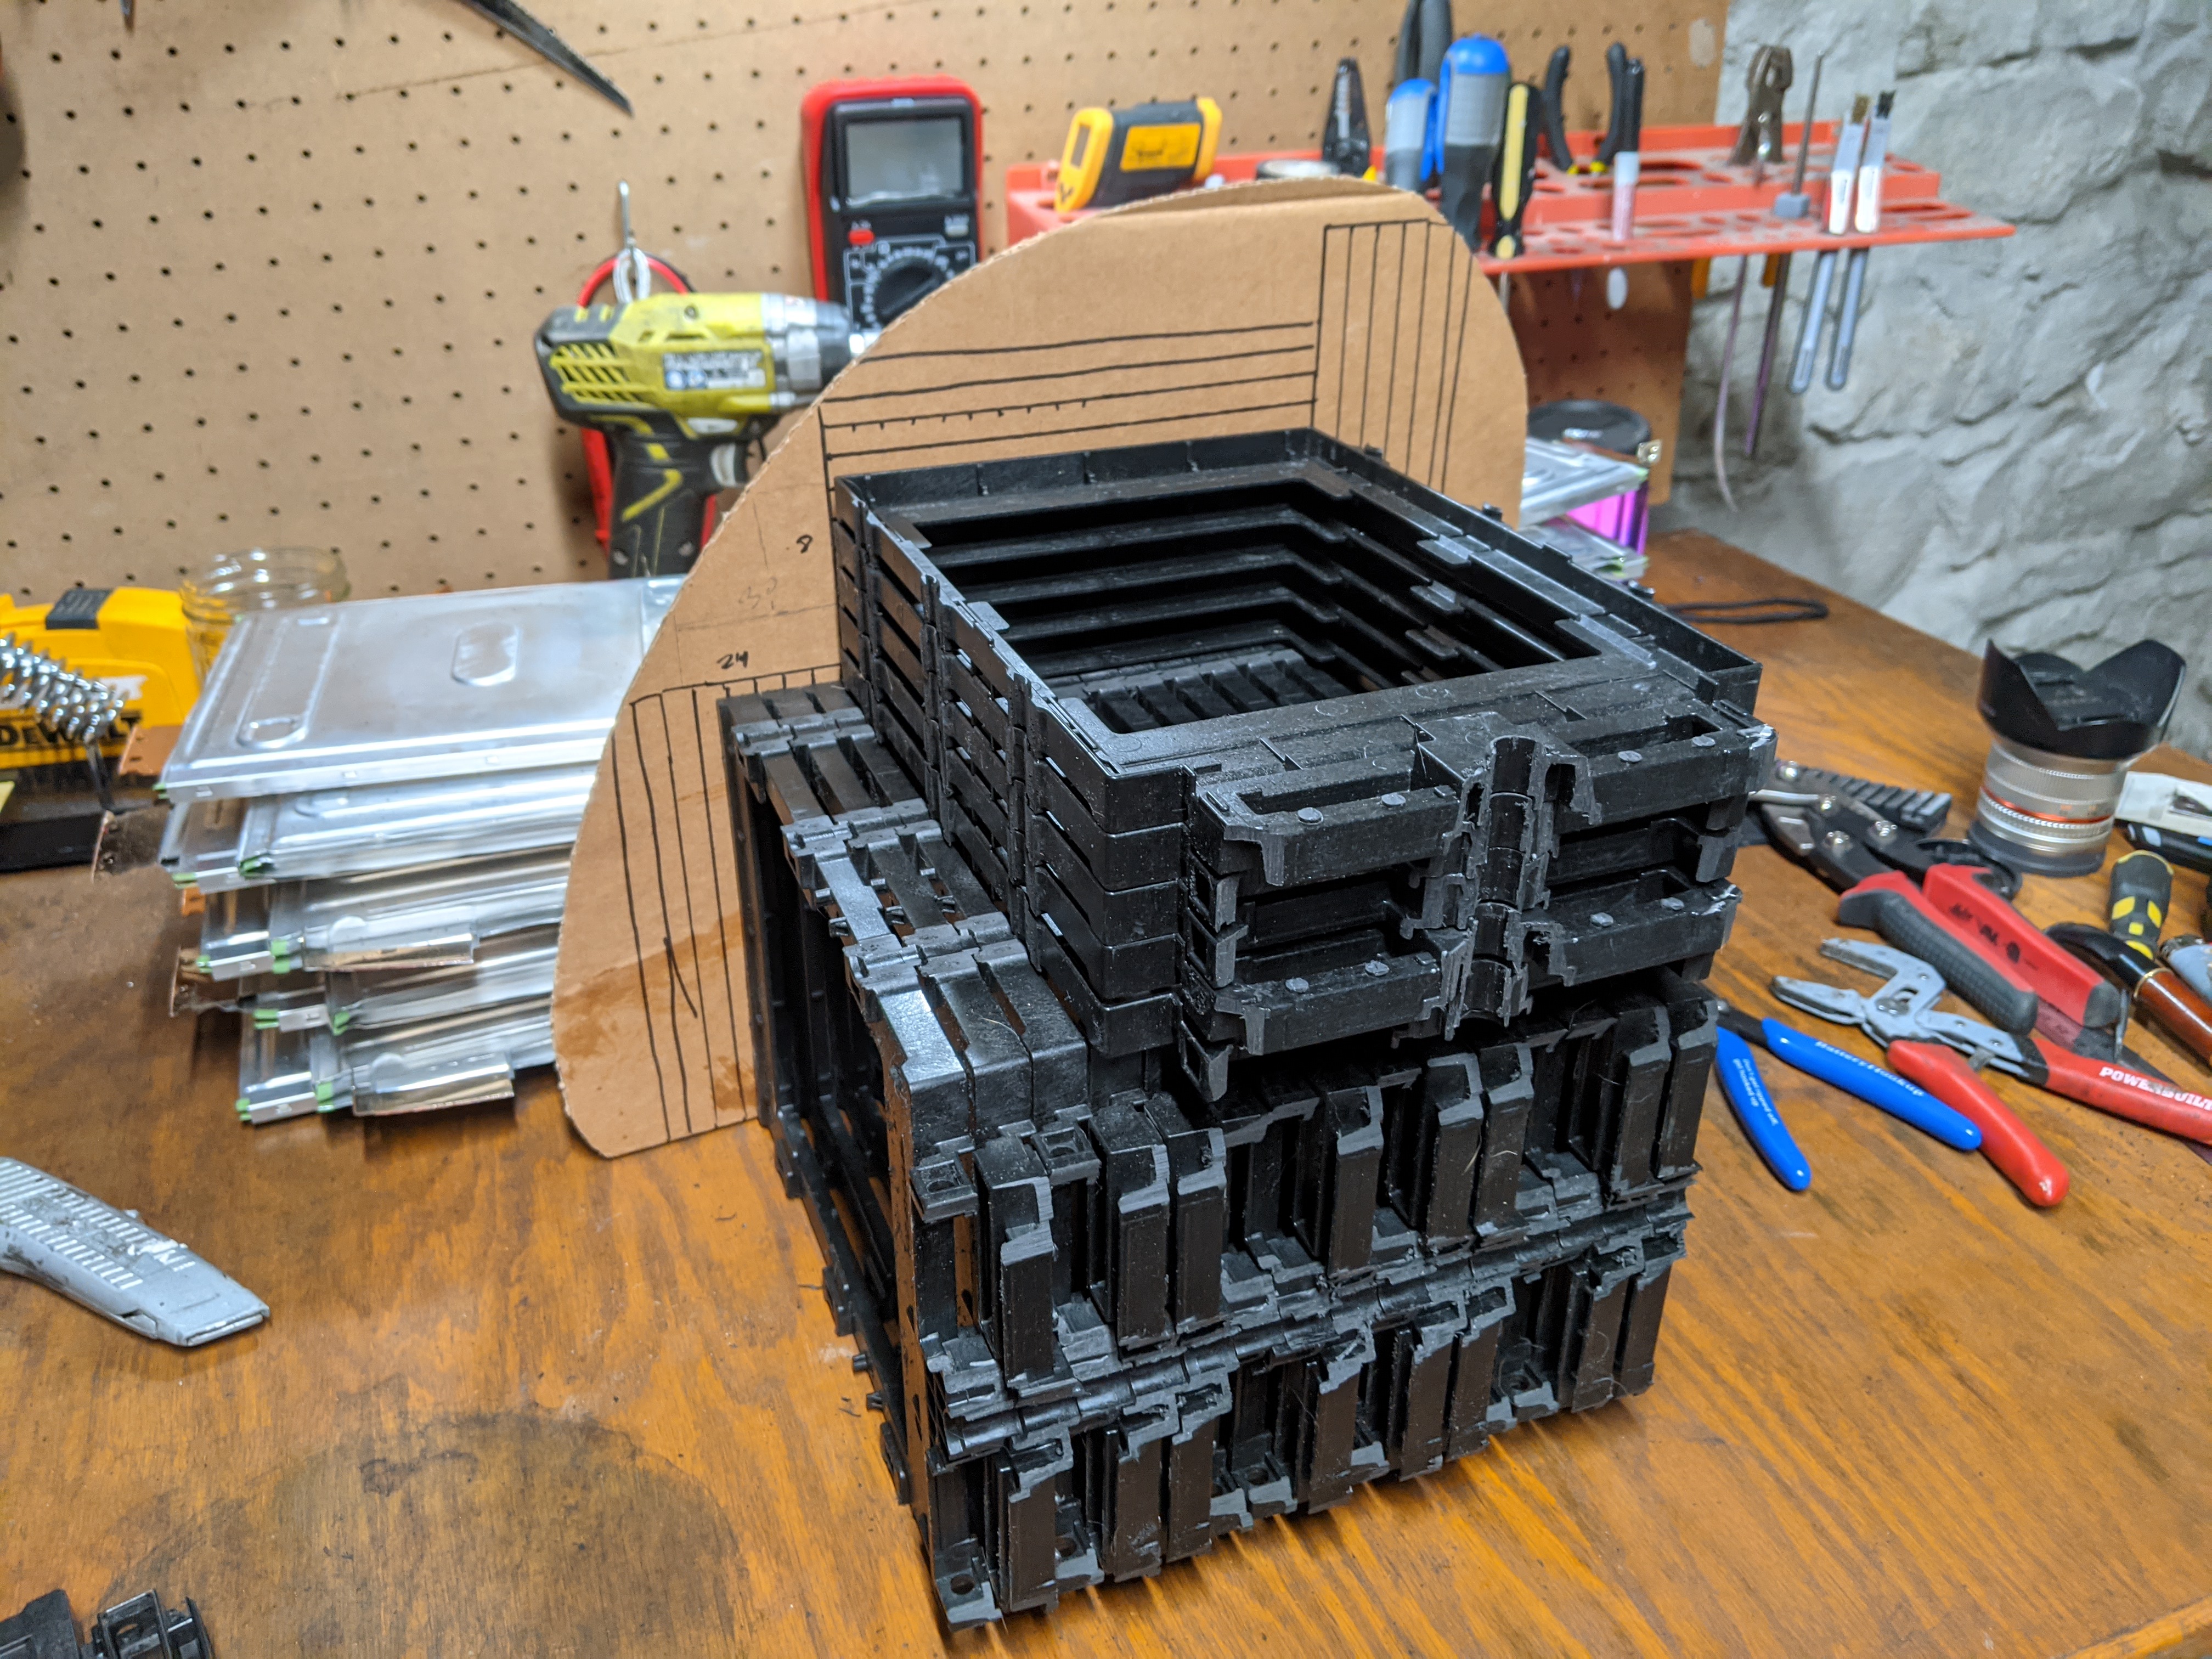
I figured out how to connect the cells in series without even having to worry about busbars. I had to step back and reorganize the problem in my mind, and when I did I realized that I was needlessly constraining myself by stacking them in the original order. If I separated them into two groups as shown below, and I flipped every other 2p cell module over in its case, then I could very easily wire them in series by fastening them directly to each other. Positive to negative, positive to negative, positive to negative.
Then I slightly reorganized them again so they would fit the desired shape, and made two connections with 4 awg copper wire. And I have 72+ volts!

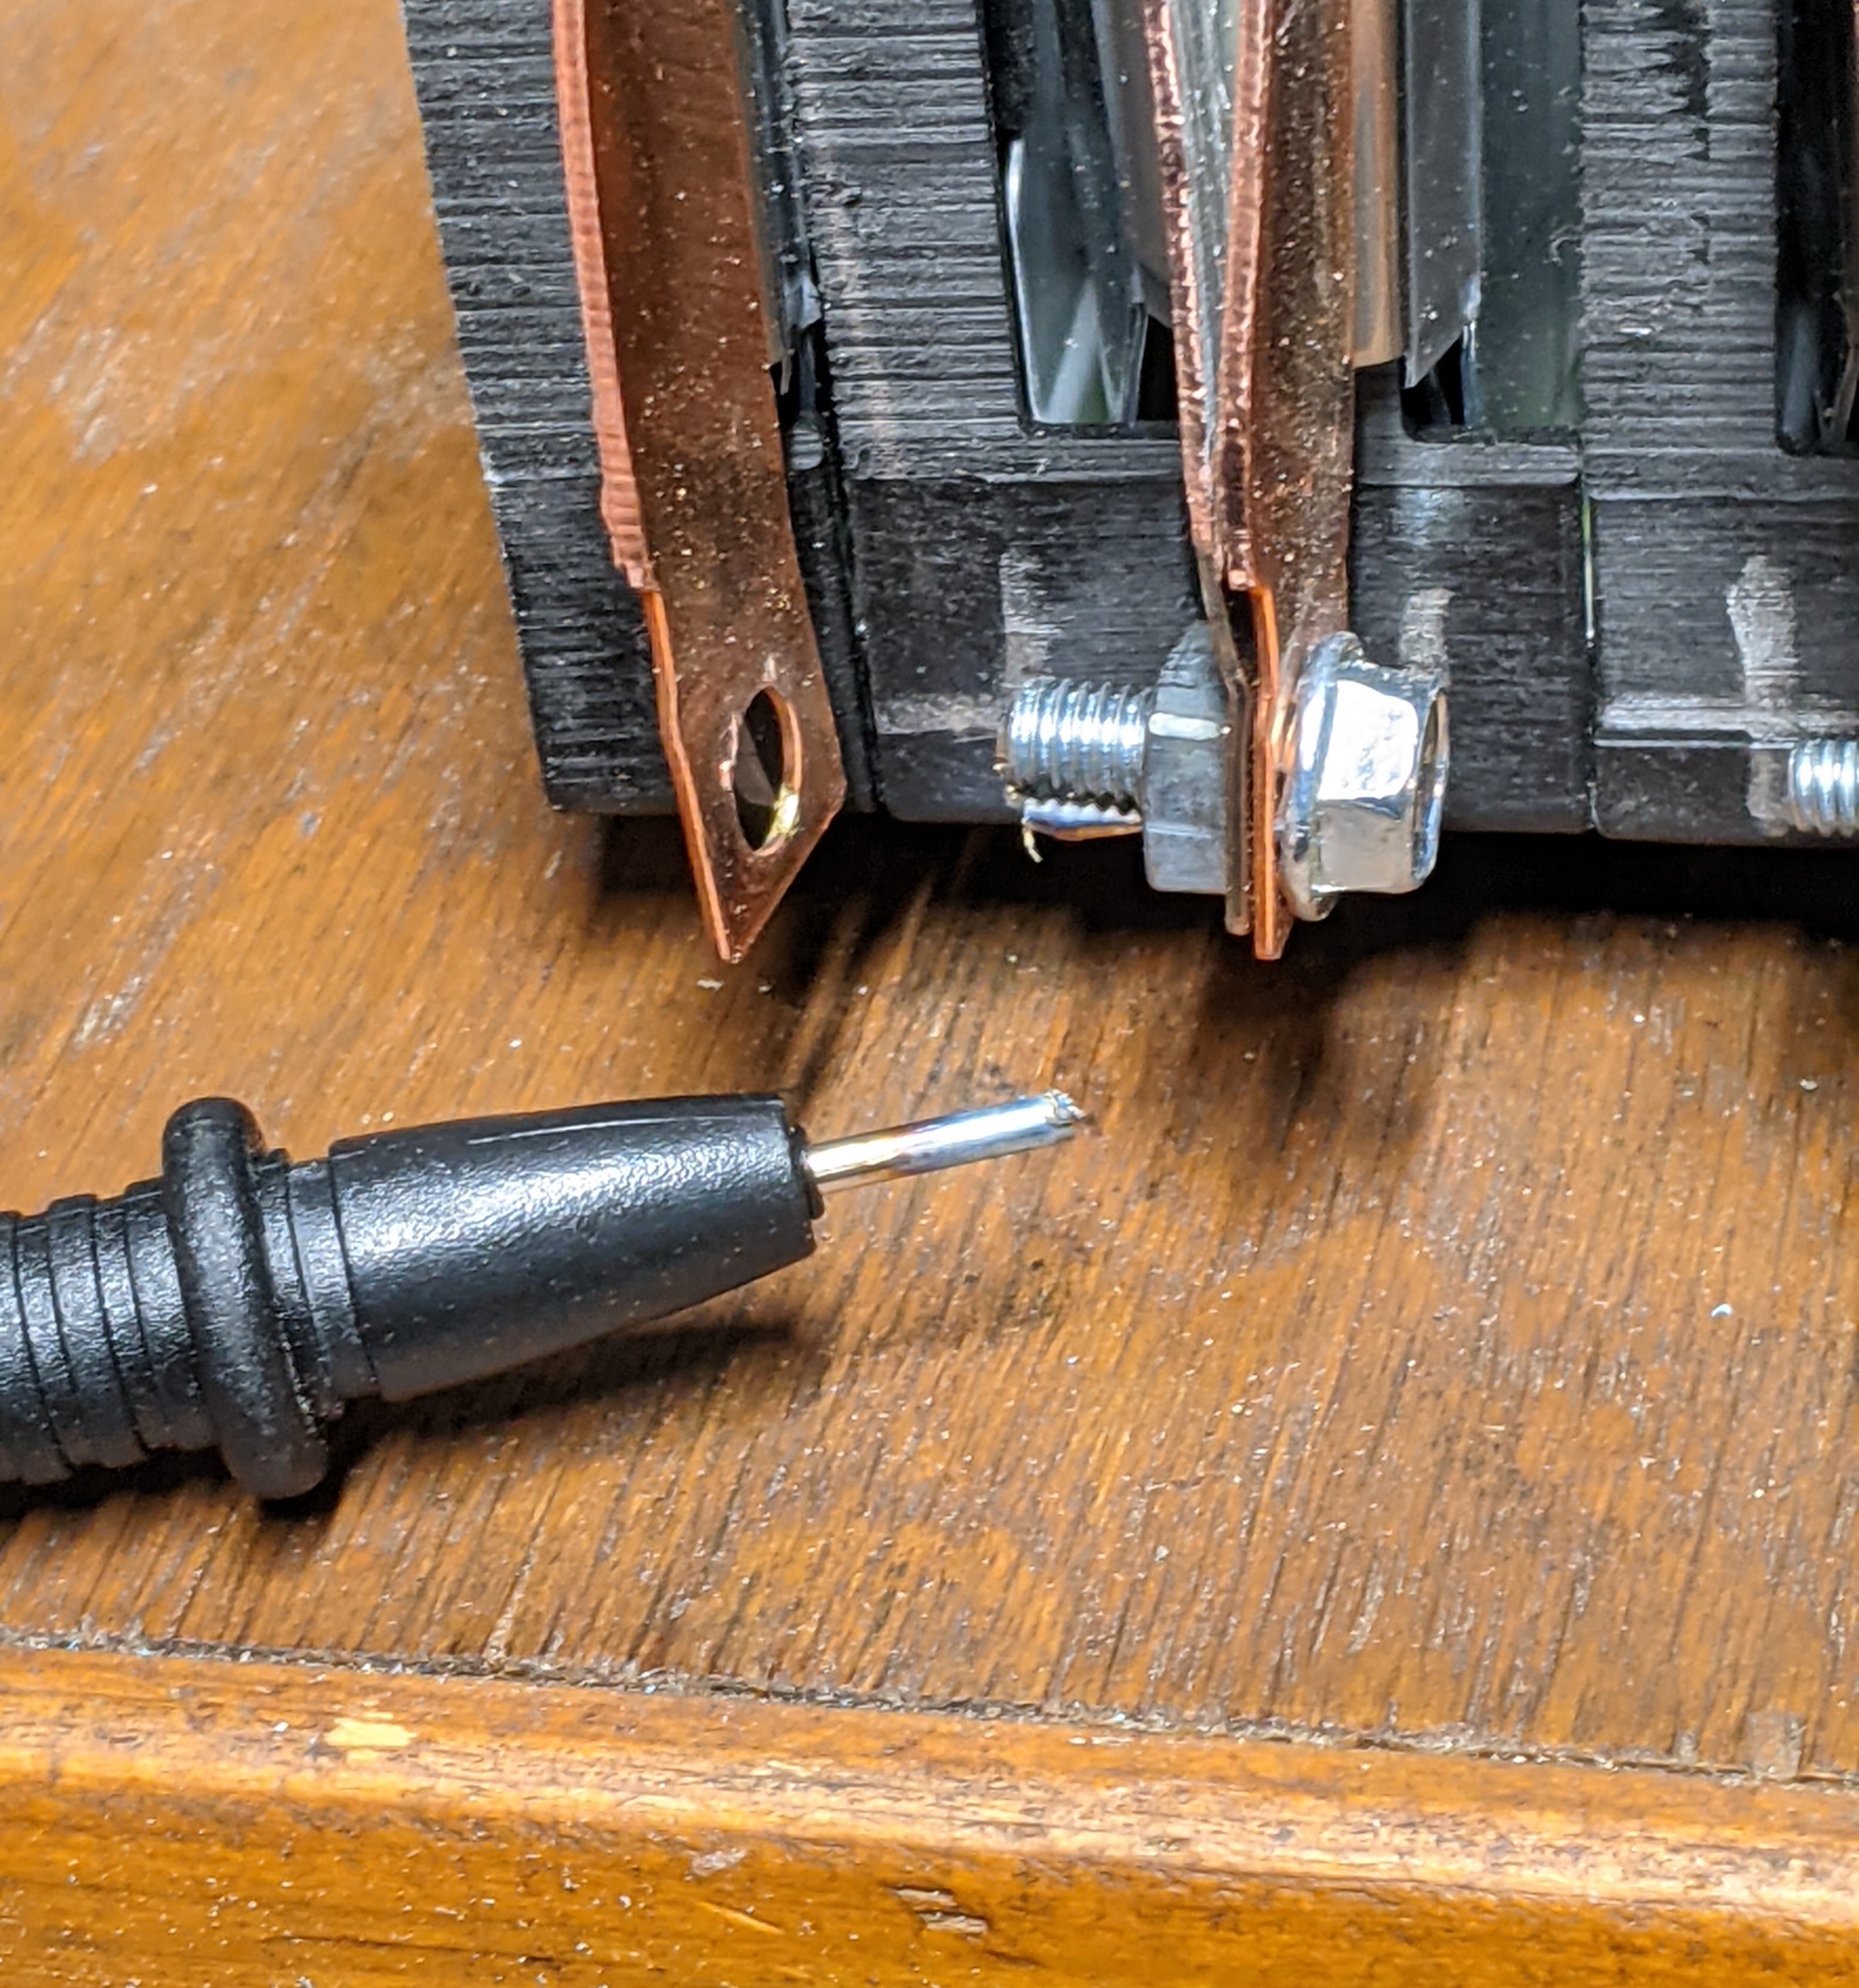
However, to connect them this way I had to cut off more material from the plastic cases. I needed to remove the protective plastic around the tabs. This means that there is now nothing in between the cell tabs, nothing to isolate them from each other and prevent a short circuit. I learned this the hard way when I was testing the voltage, and I accidentally welded the tip of my voltmeter probe to one of the cells.
My plan is to first wrap them in extra thick electrical tape or kapton tape, then stuff foam strips between them, and then wrap the whole thing in more electrical tape.
[update: I'm saying this after putting the bike together and it hasn't caught fire or anything, but these photos make me cringe a little. I took too much off of the plastic cases that not just protect the terminals and stop them from bending but keep them from shorting to another, which would cause a thermal runaway condition if that happens. And burn the garage down. The only thing preventing that now is just a little strip of foam, which might not even be high-temp resistant and now that foam has shriveled up for all I know. So do not follow my example! And I think I'm going to rebuild this somehow, or at least take it out and inspect it. Ok now back to my original text...]
And here is the end result:
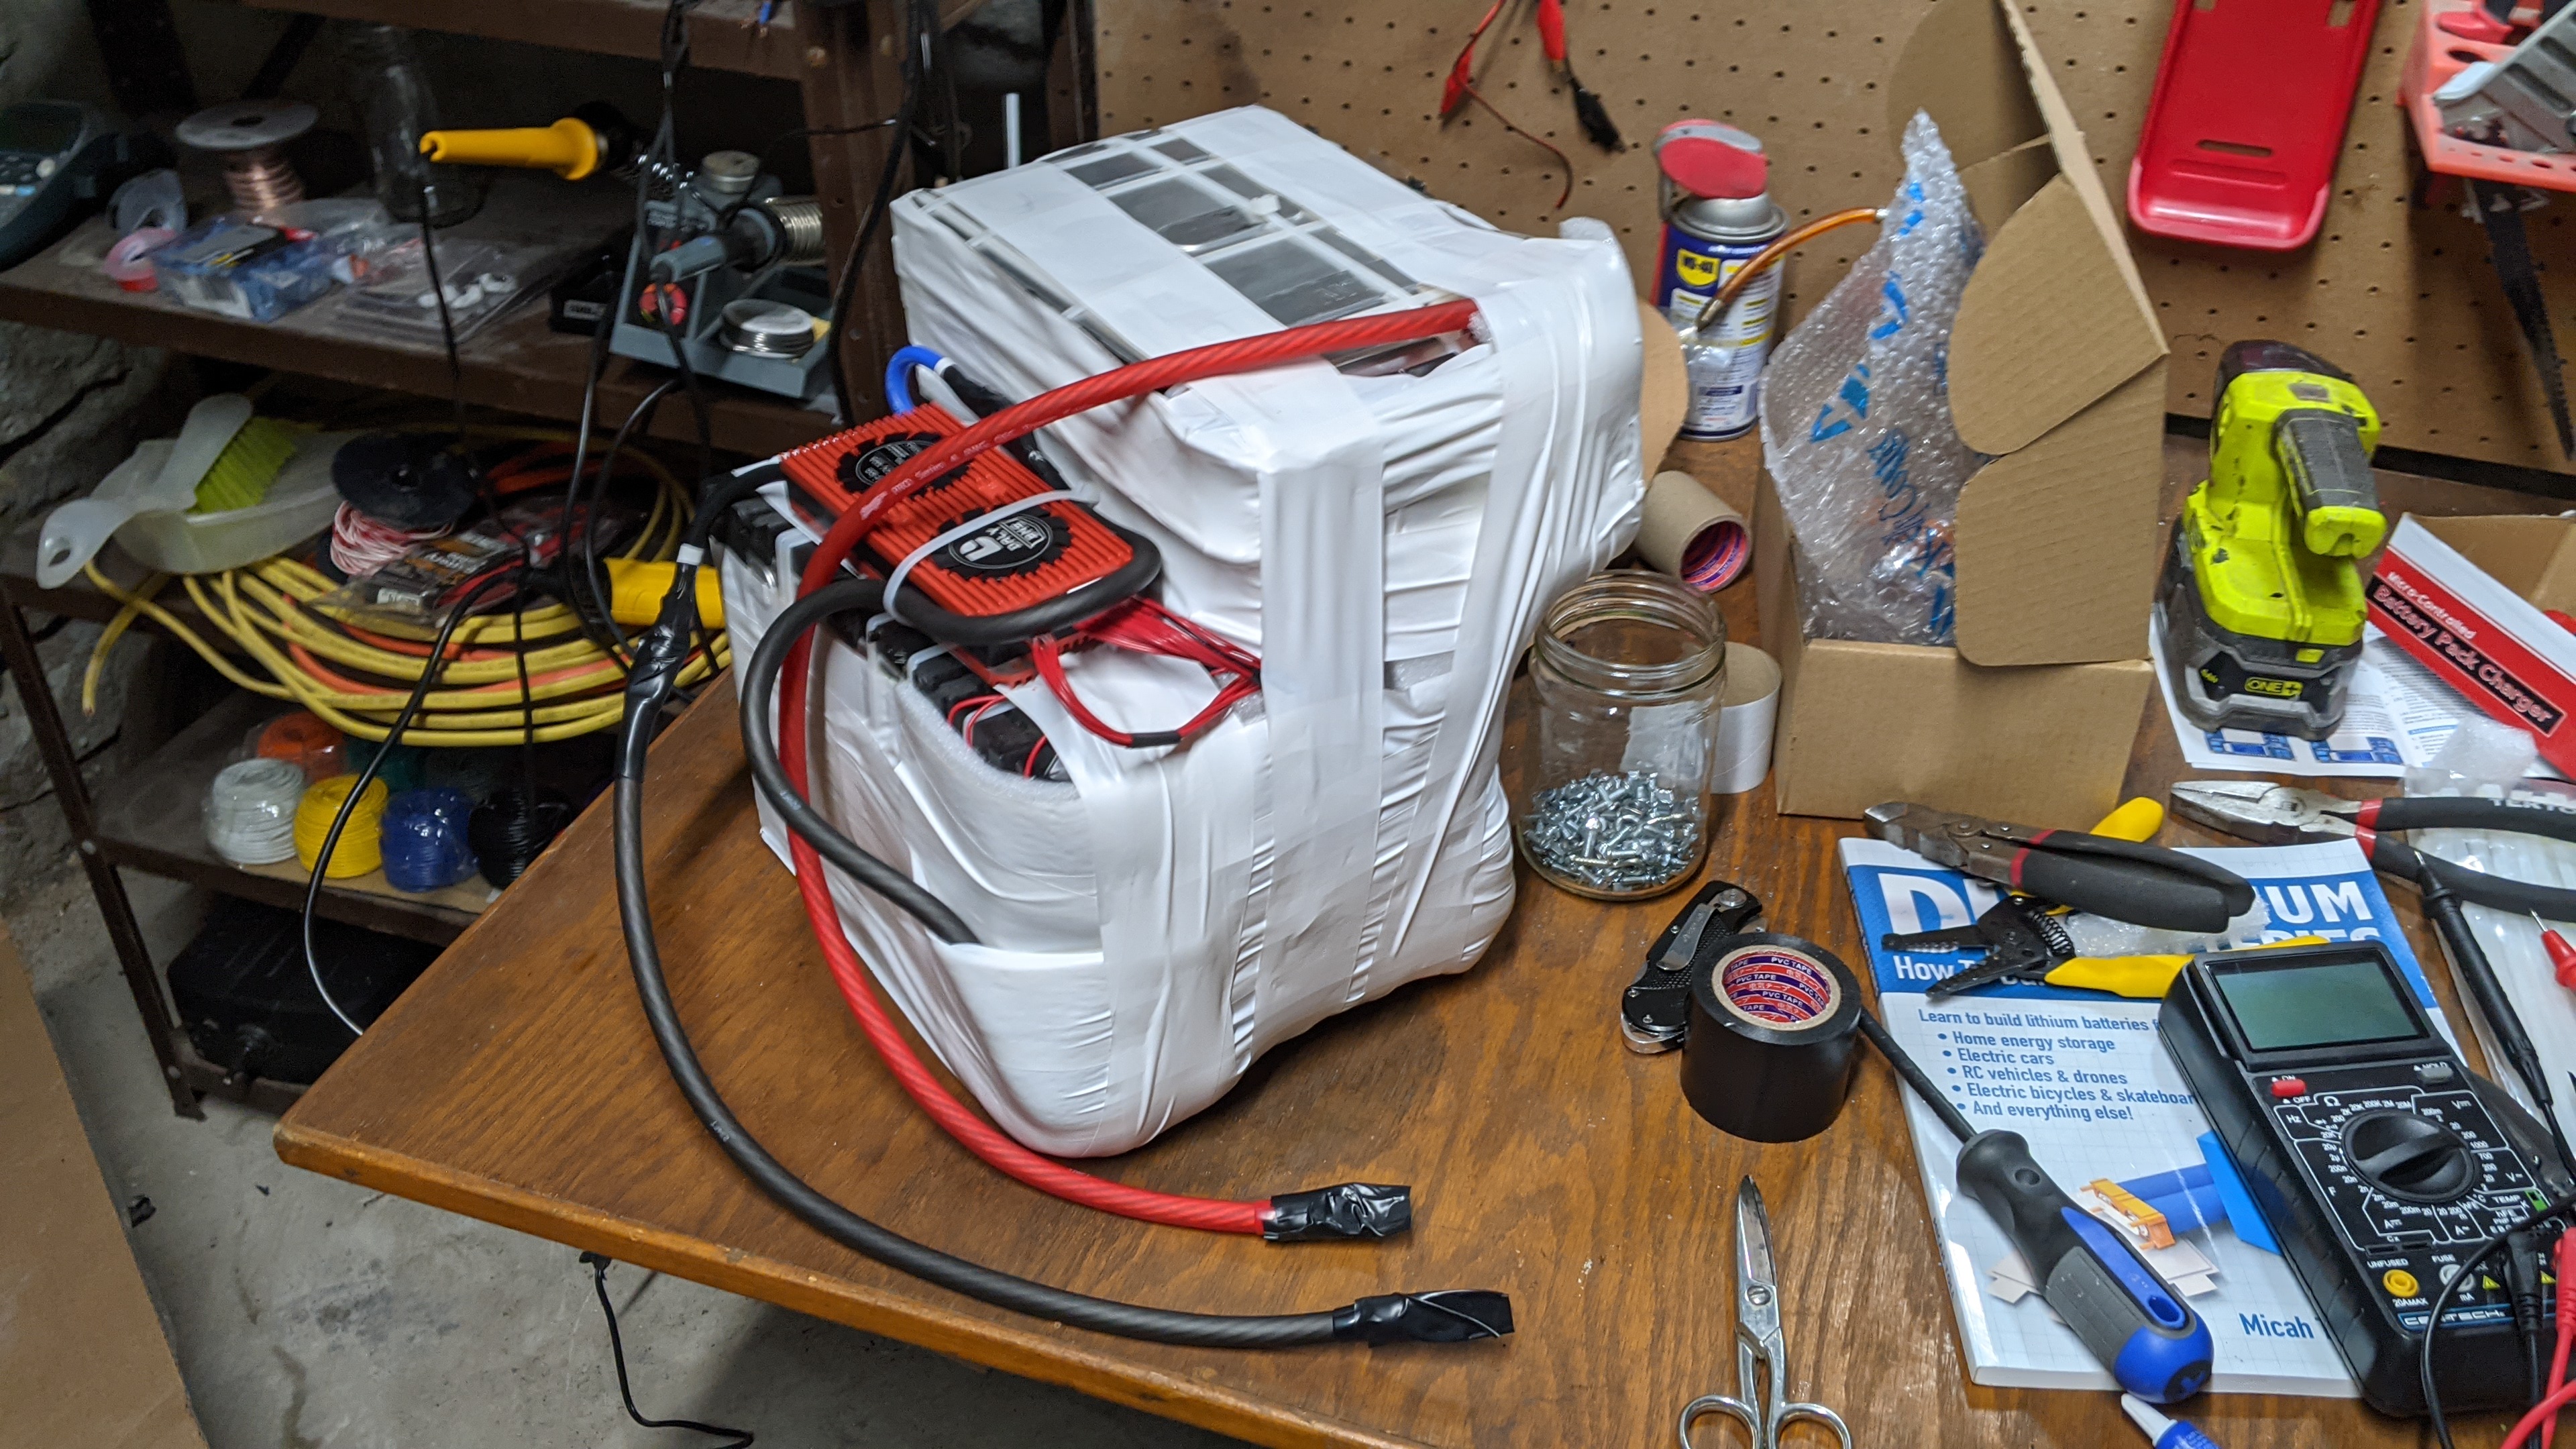
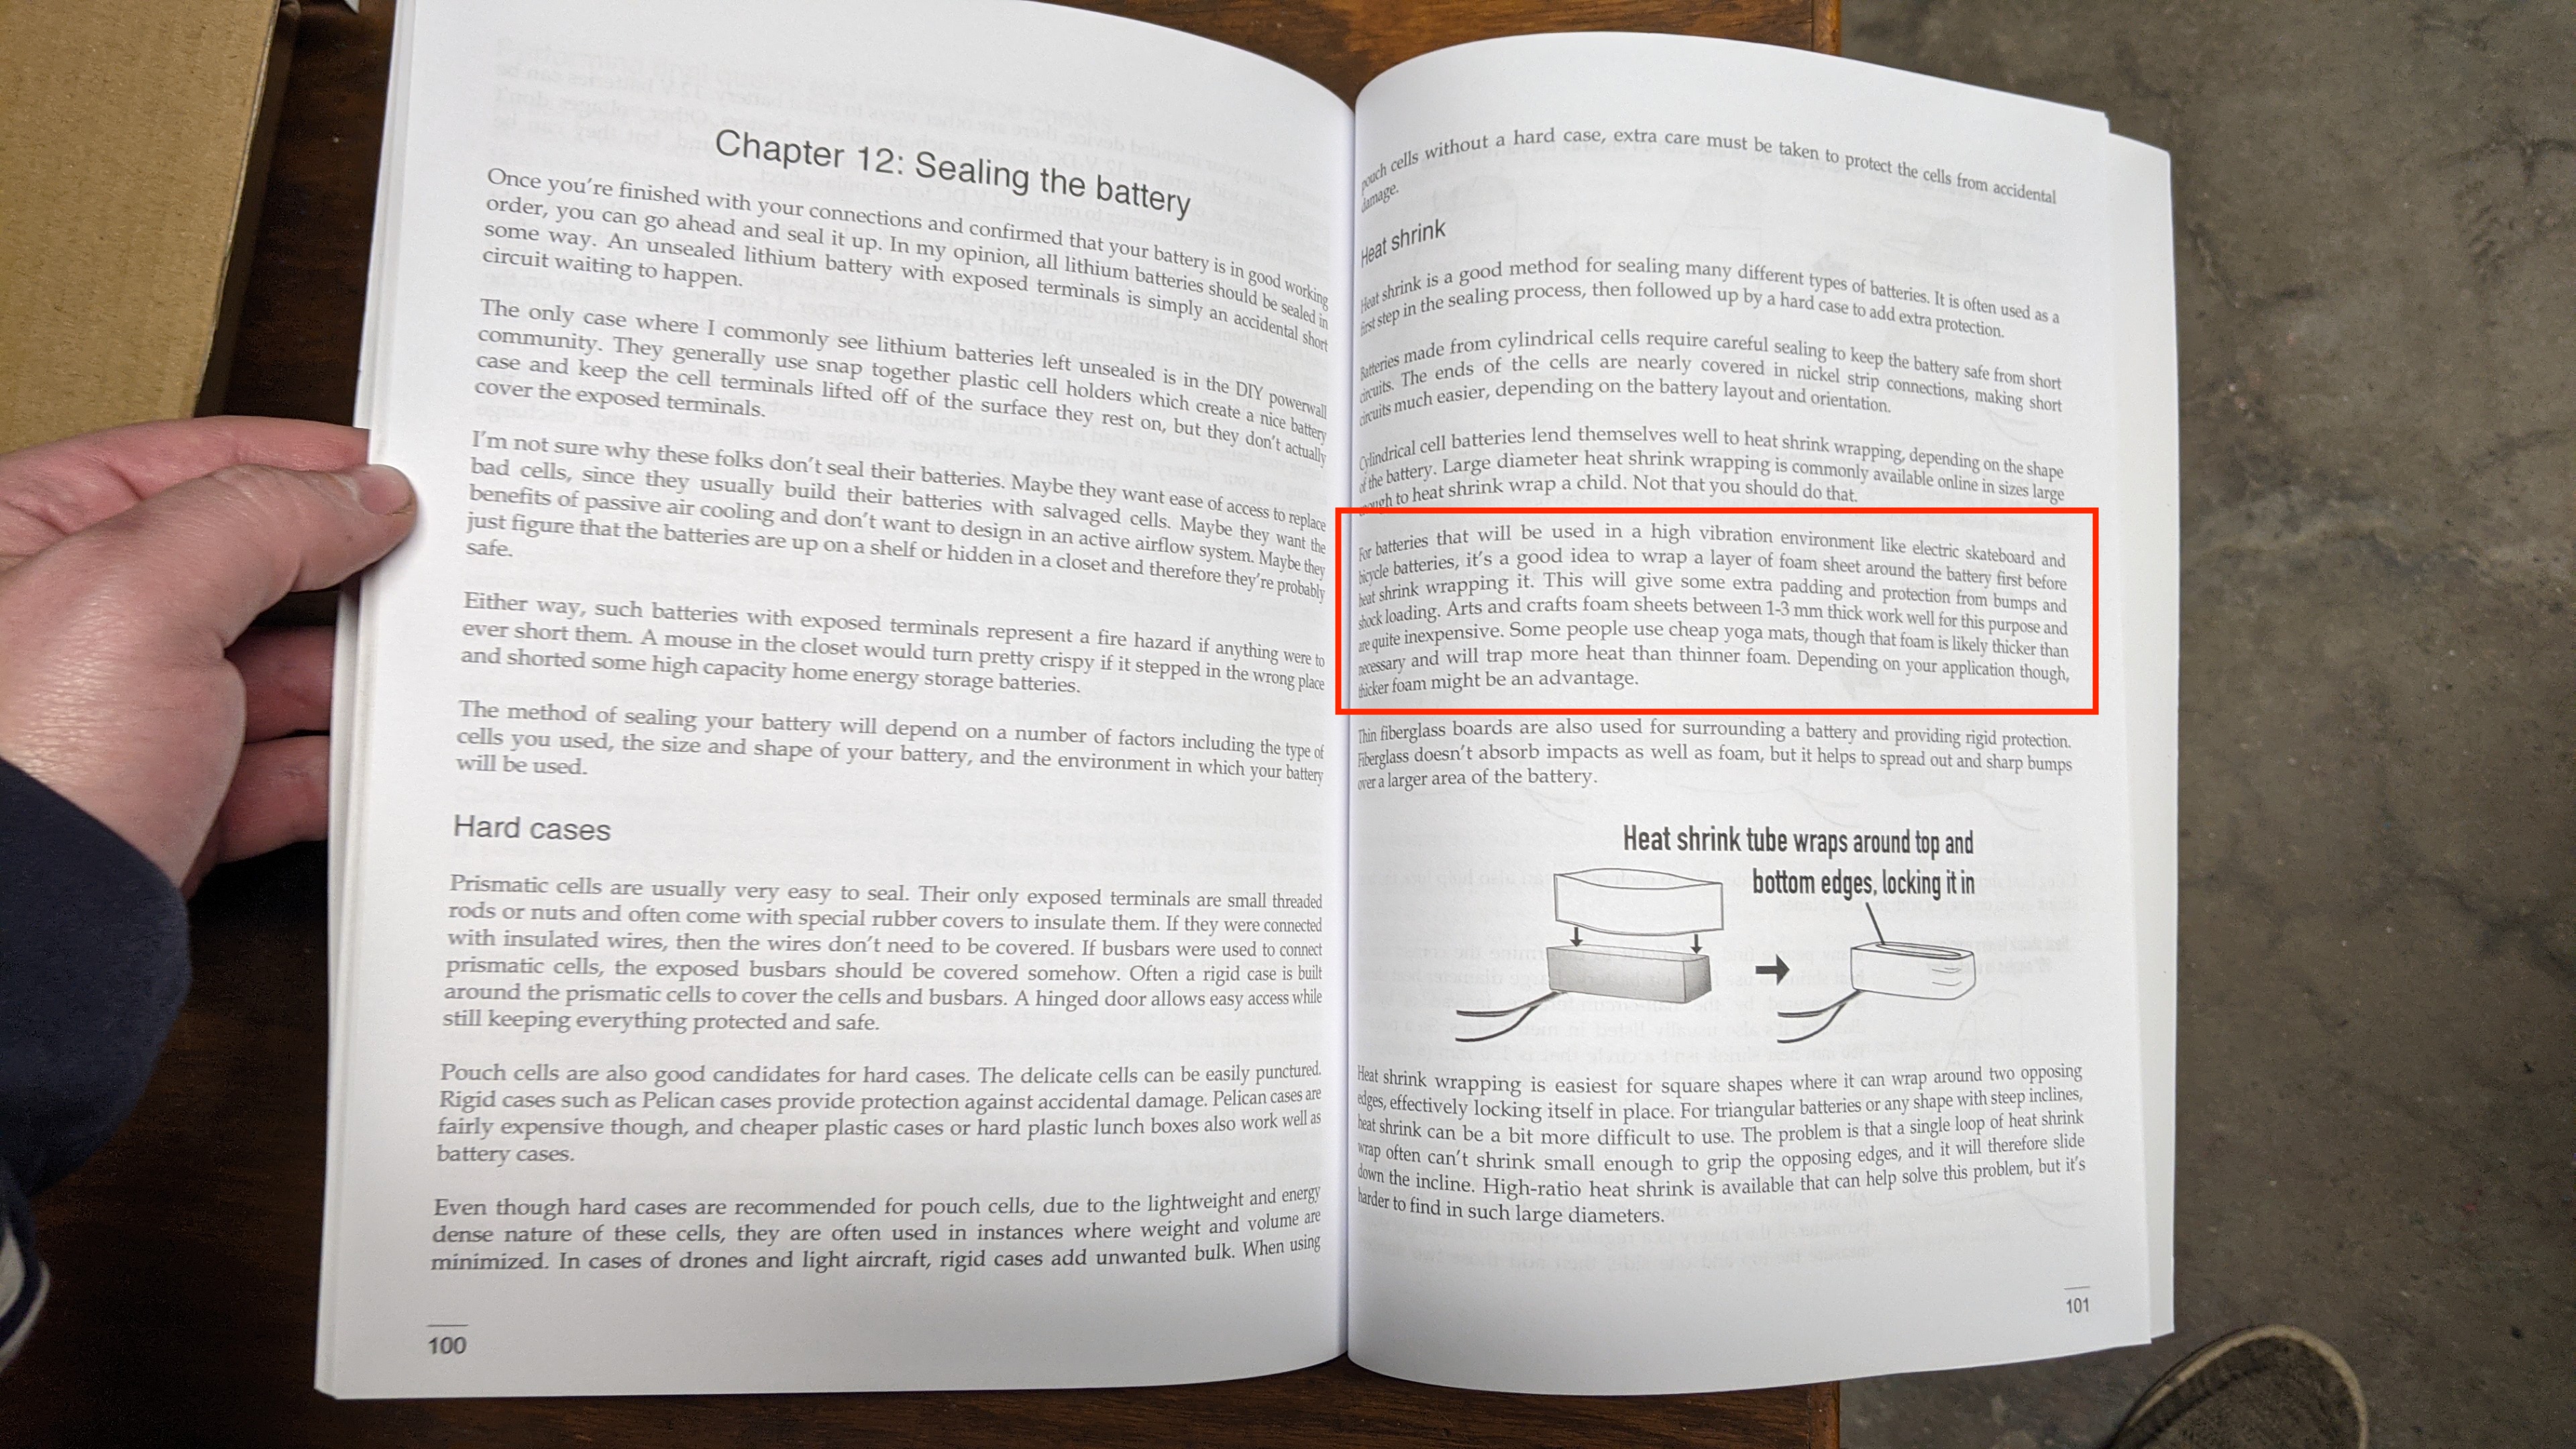
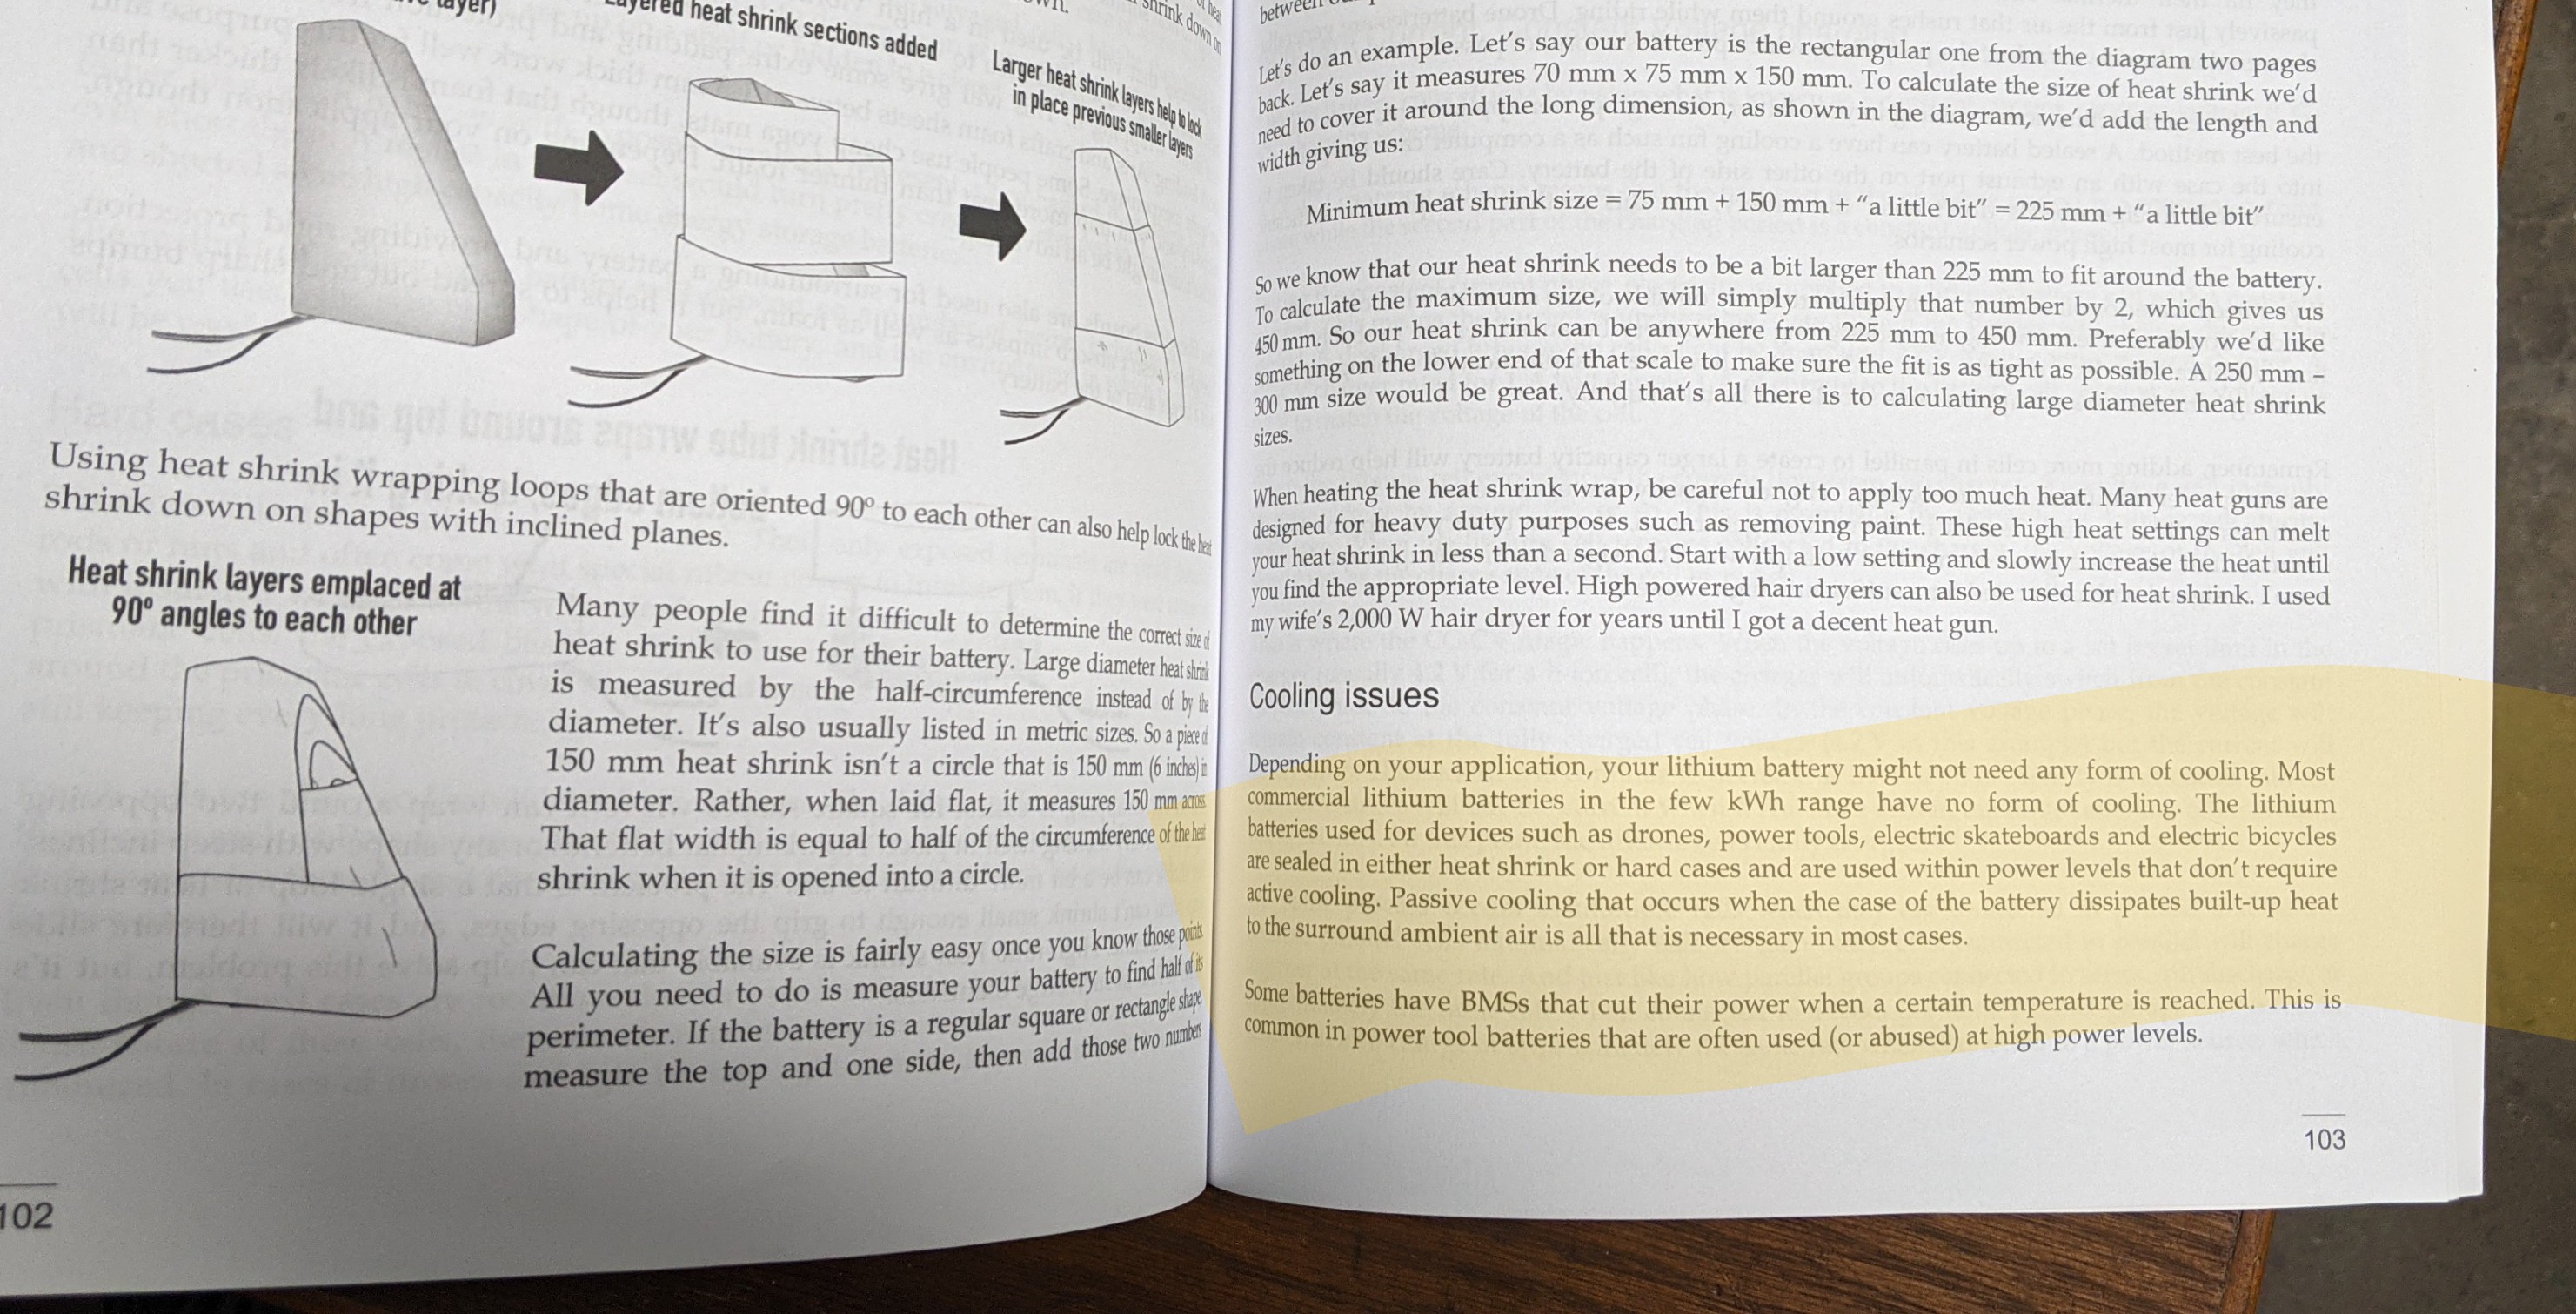
BTW, for any of those worried about the cells getting too hot, I just want to say that I'm following along with the book - seen in the photo above, under the voltmeter, it's called DIY Lithium Batteries by Micah Toll.
So that's it! The battery pack is complete!
Next I will need to build the battery tank, the metal enclosure that the battery pack will go into. And I'll also need to figure out how to keep the battery pack from rattling around in there. I'm going to fabricate it from 18ga mild steel sheet metal, and then then have it powder coated. I'm also going to design large metal brackets that will allow me to fasten it to the motorcycle frame as well as provide strength in the absence of the old ICE engine, and the brackets will be laser cut from 1/2" steel.
So stay tuned for that in the next chapter of this project! Thanks for reading!
Continue Reading:
- Part 1: Converting a '67 Honda CA160 to Electric!
- Part 2: Body Work
- Part 3: Battery Pack
- Part 4: Swing Arm Modifications
- Part 5: The Return of Project Dream-E
- Part 6: The Battery Enclosure
- Part 7: Wiring & Programming the Motor Controller
- Part 8: Final Assembly & Test Driving
- Part 9: Glamor shots, Parts List, & Build Cost