I'm cutting my car in half, making it 6" longer, then putting it back together again. Why would I want to do this? I'm extending a Mazda Miata's wheelbase 6" so I can use it as a chassis for a '73 Super Beetle body shell. Called project Meetle. No, I'm not an automotive engineer and I don't have a commercial shop and hundreds of thousands of dollars in equipment. I'm just a guy with a work shop containing just enough tools to get the job done and a desire to have a very unique vehicle that is what I've always wanted. And I'm doing this methodically and well thought out so that it is not dangerous to drive. The whole point is that it will be safer to drive than a stock '73 Beetle, a.k.a. a "death trap." Safety is definitally one of my top priorities.
The specific car is a 1990 Mazda Miata MX-5, which is a front-engine rear-wheel-drive vehicle. But it is also an independent-rear-suspension (IRS) vehicle, so it has a part called the Power Plant Frame (PPF) that is an aluminum truss connecting the transmission and rear driveshaft, similart to the "torque tube" on Corvettes. There's no transmission crossemember and the rear differential is only supported at two points, so without the PPF both would flop to the ground. A front-wheel-drive vehicle would have been immensly easier, but I couldn't find one as small as the Miata enough for my project.
(BTW, I keep saying that it needs to be stretched 6", but the real difference between the Miata and Super Beetle's wheelebase is 6.1")
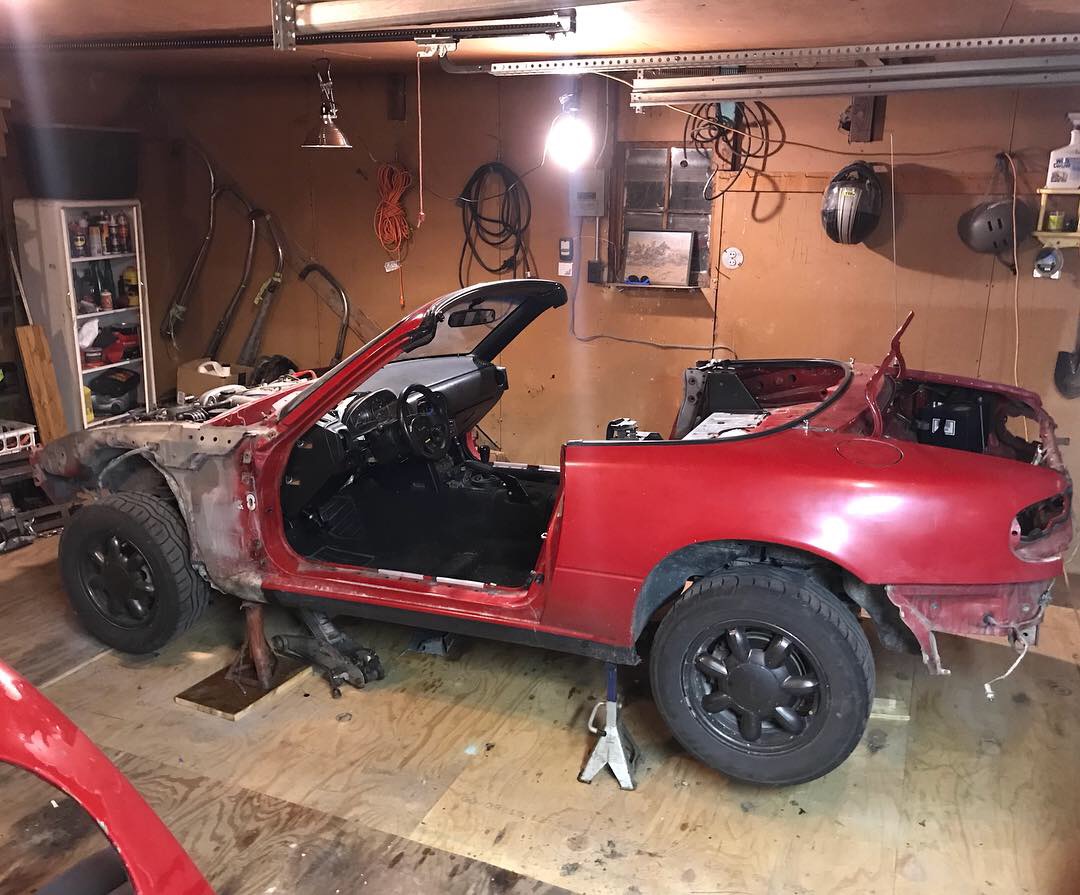
Let's get started! Here's the victim:
First thing I did was remove the exhaust and the driveshaft. Both were pretty easy to extract. Using the E-brake helped with the driveshaft so that I could control the driveshaft rotation while unbolting it.
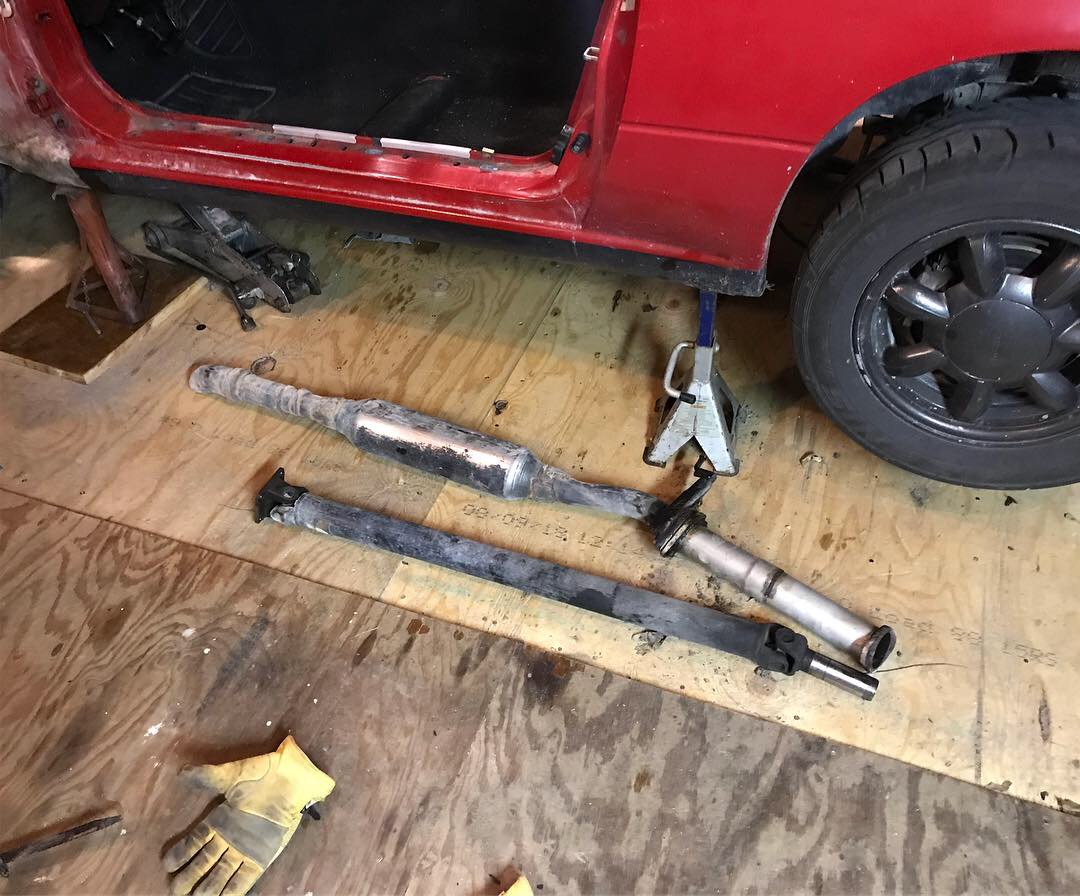
The driveshaft will be taken to a truck shop to be lengthened after I complete the wheelbase stretch and measure from transmission oil seal to the yoke mounting plate on the differential. And the exhaust will be extended with a new muffler. At the moment it only has a small turbo muffler and does very little to muffle the 4-banger.
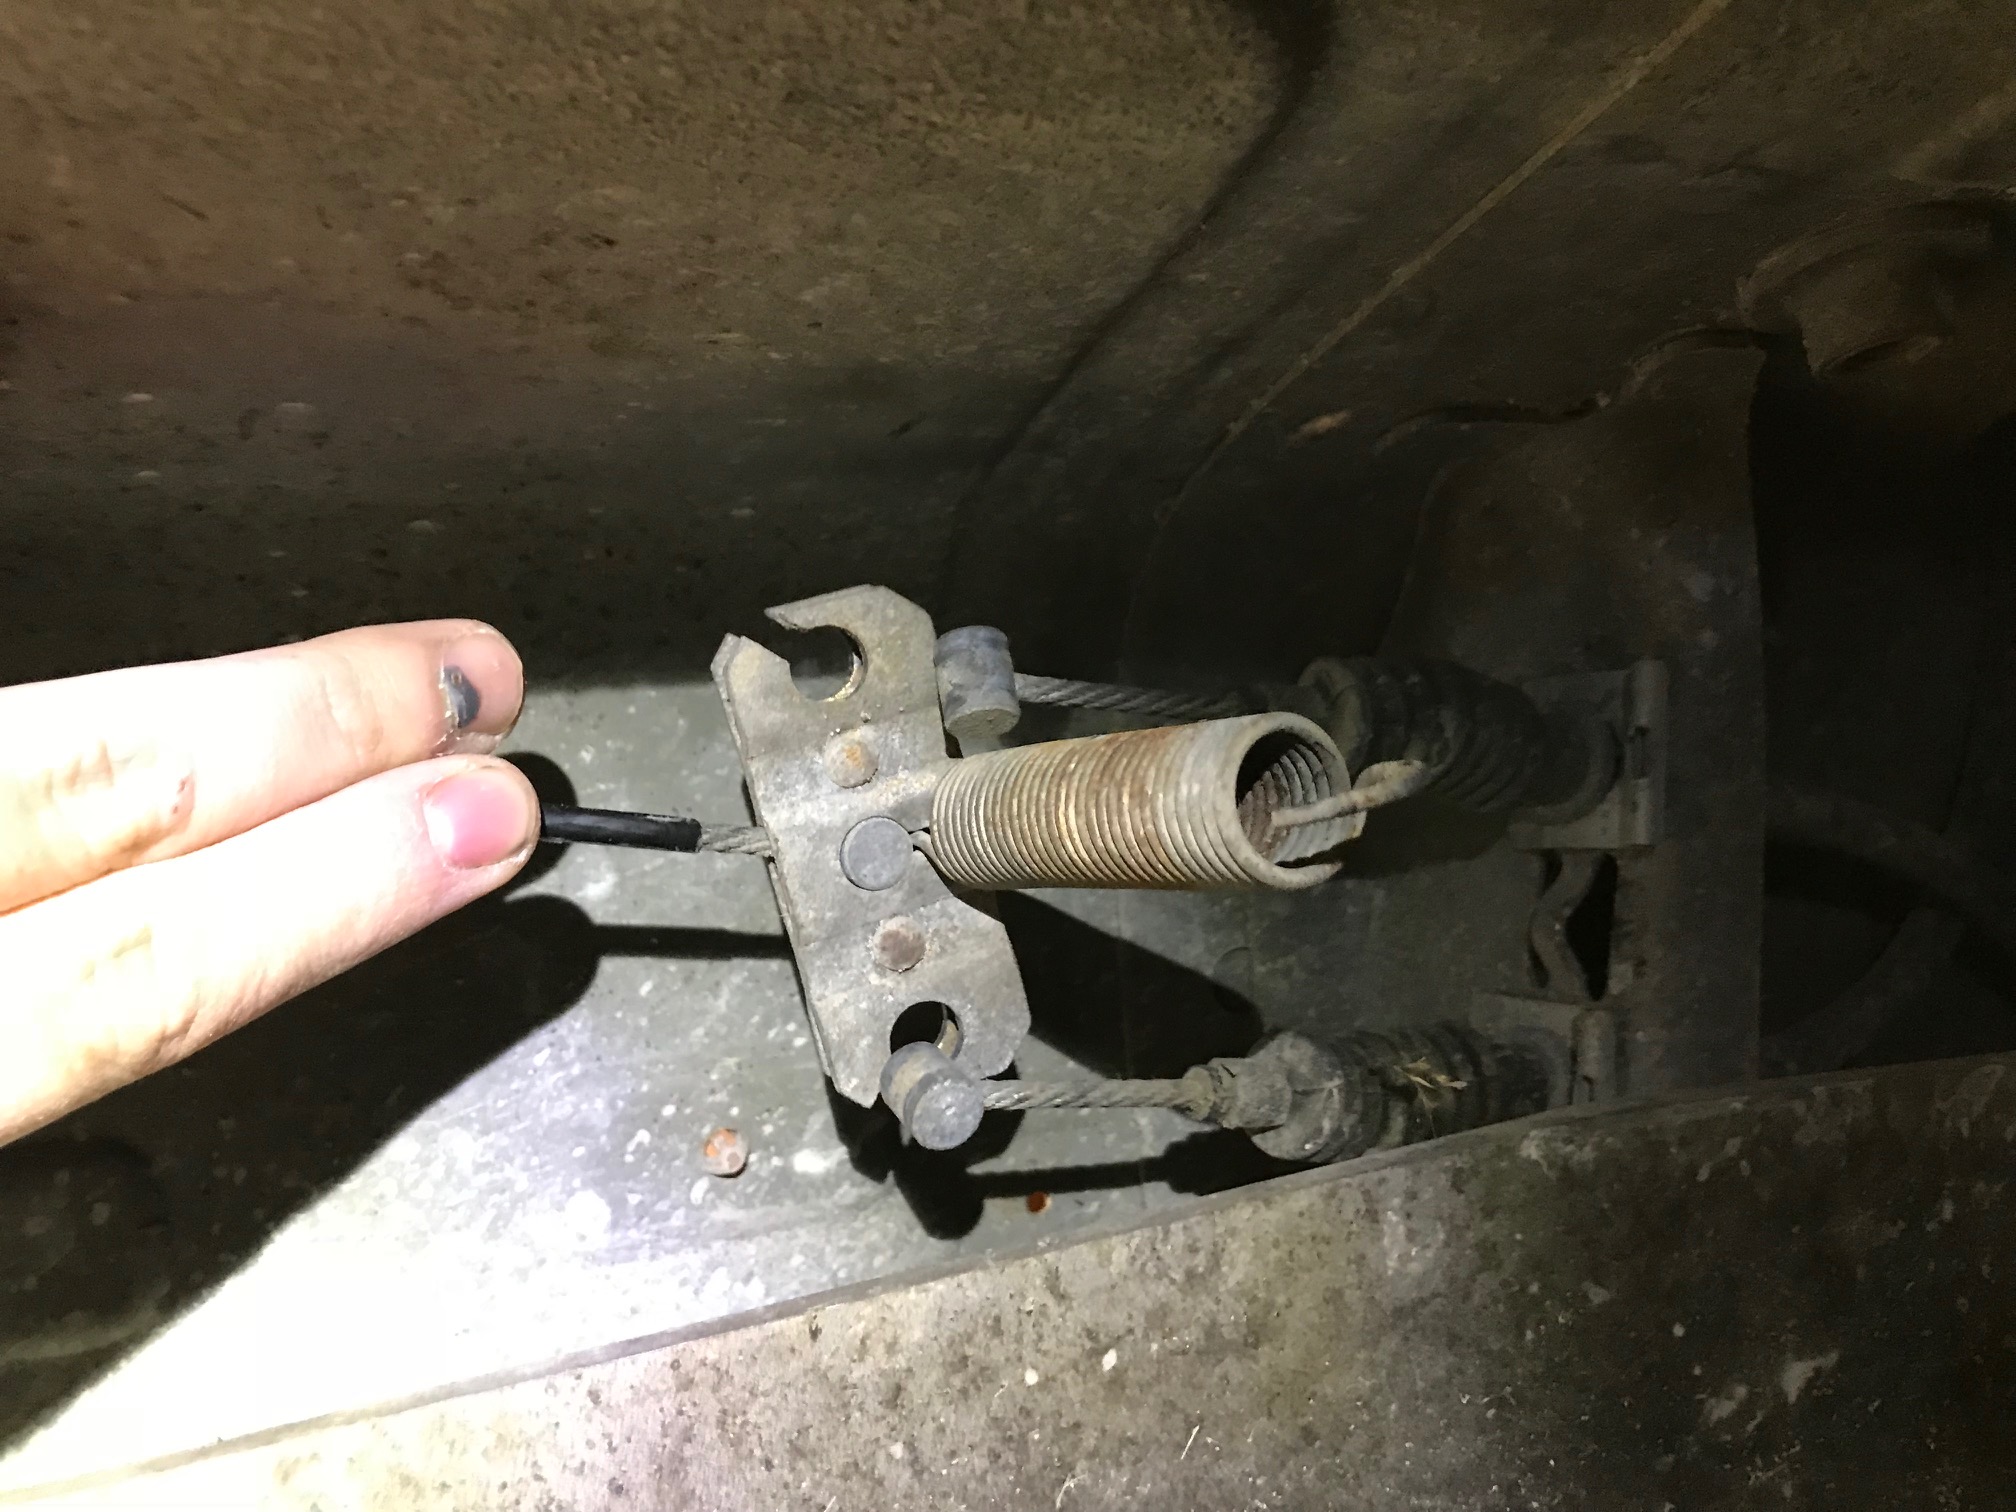
Then I carefully pulled away the rear of the car's wiring harness - mostly for the tail lights but also for the gas tank - and I also unclipped the battery cable (the Miata has the battery in the trunk) and put it aside. Then I unclipped the emergency brake cable. You don't actually need to unbolt anything, you just need to losten a big long nut by the e-brake handle until there's enough slack in the line to twist the cable ends and pull them out.
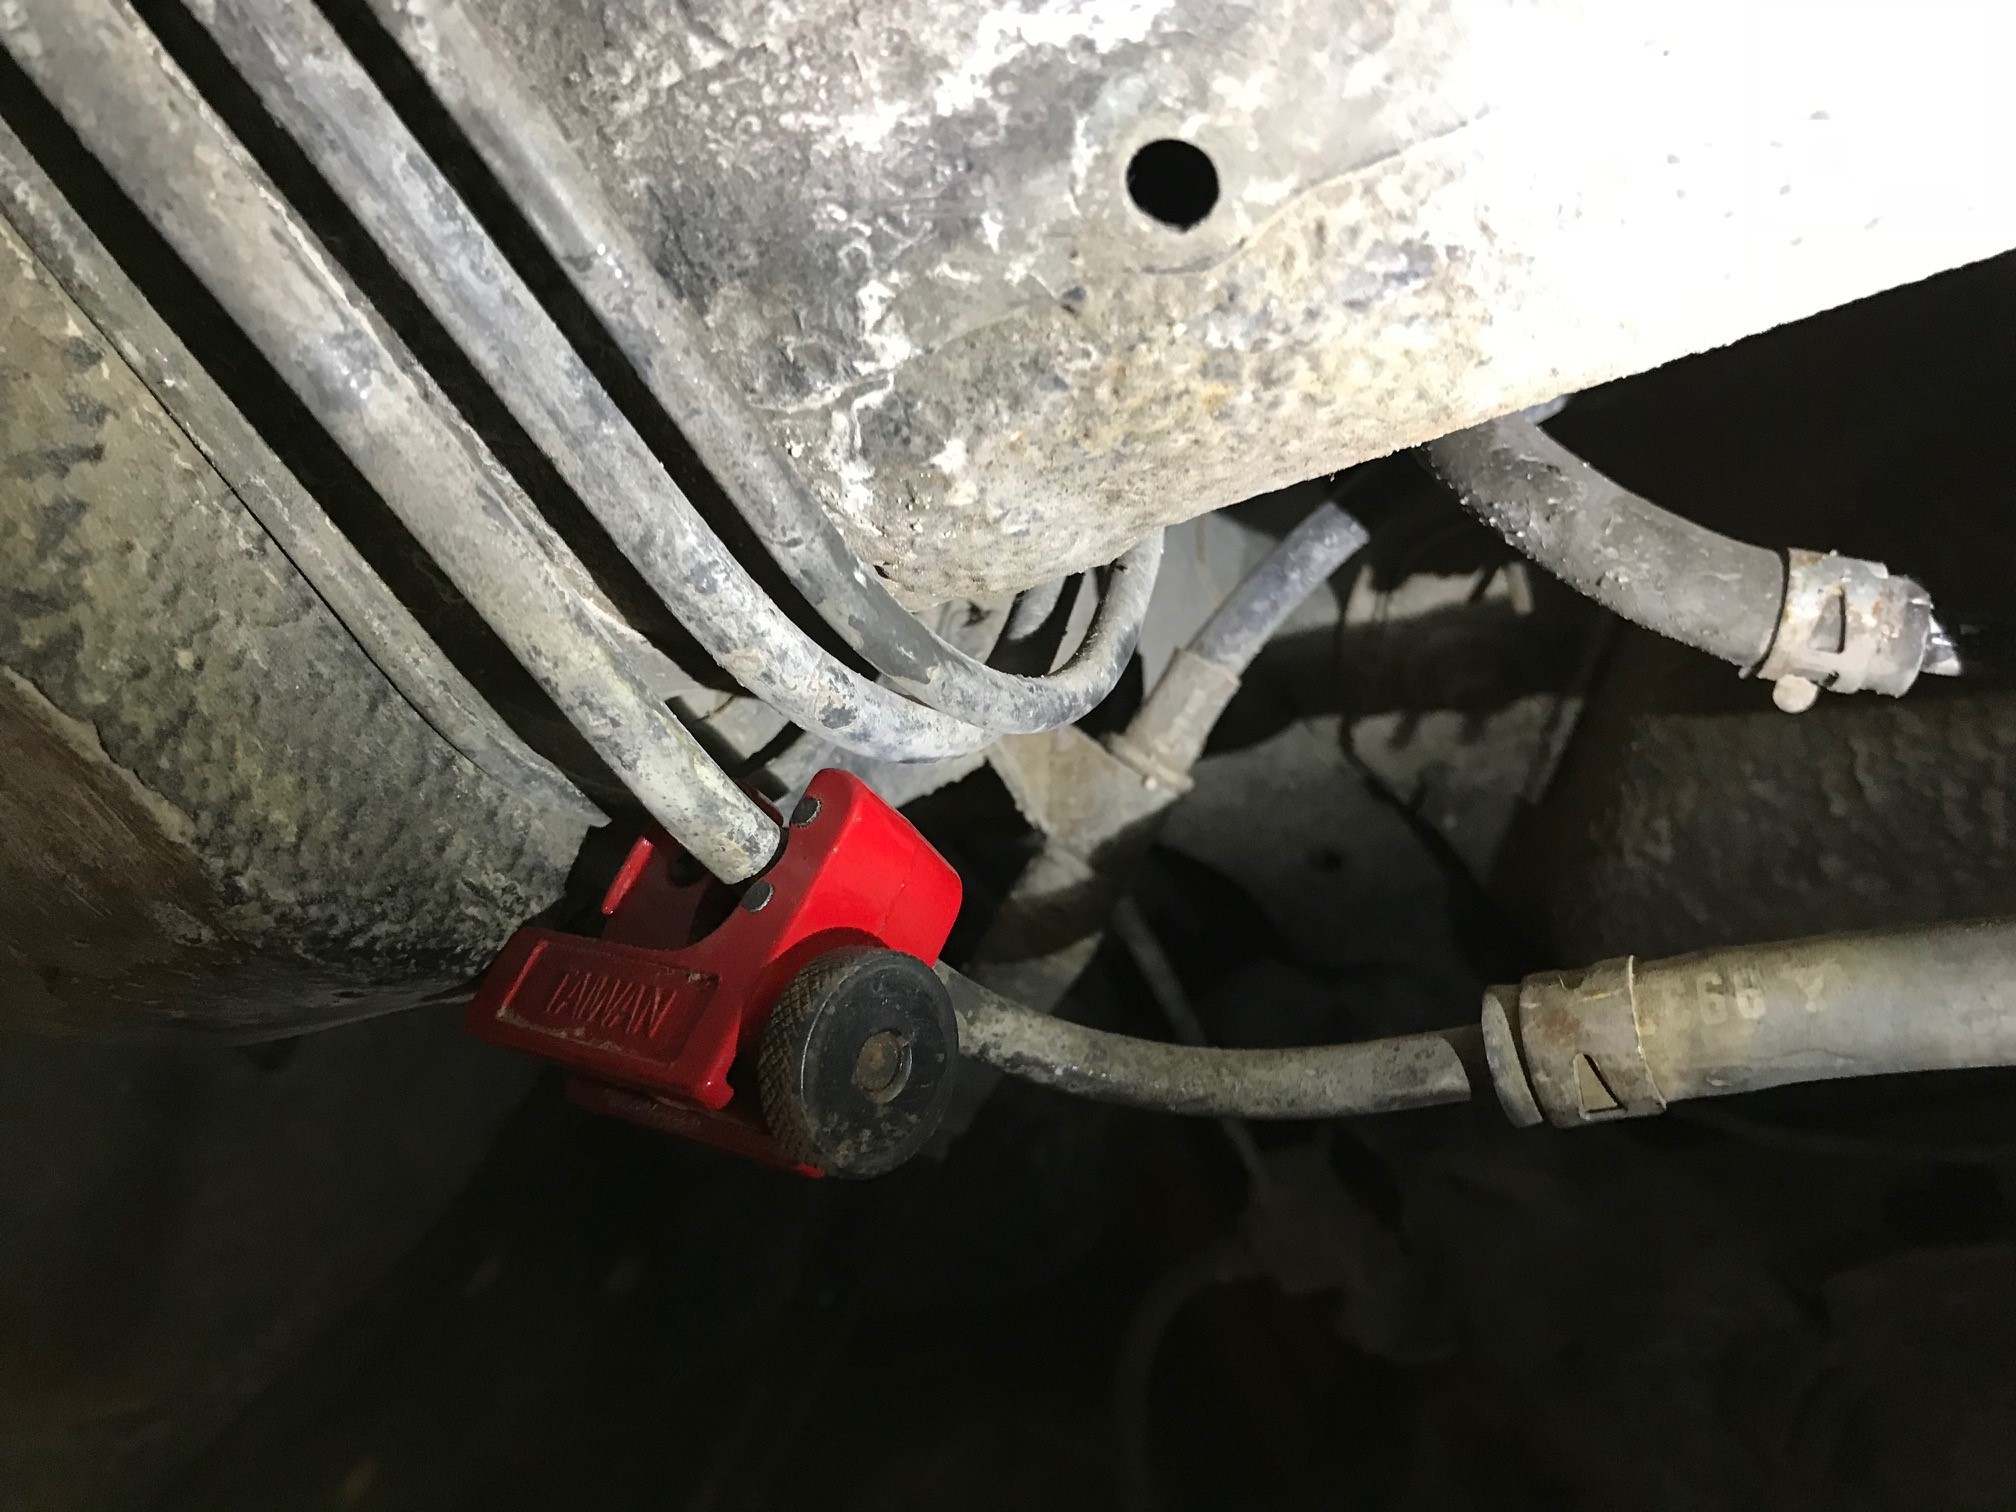
Before I could cut the hard lines, I needed to drain the fuel tank and brake lines. I got as much brake fluid out of the master cylinder as possbile with a turkey baster, then I lostened the bleed screws and, with little hoses on the bleed screws leading to a bucket, I pumped the brakes a bunch of times until nothing came out. For the fuel system, I wanted it to be completely bone dry. I started with draining the tank (obviously) and lucky for me there was a drain plug bolt on the gas tank. Then I disconnected the send and return fuel lines at the engine's fuel rail and blew them out with compressed air. Finally, I left the fuel lines open and the gas cap off for a few days to let any vapors out.
With the lines drained The only safe way to cut the hard lines without creating sparks (and starting a fire) was to use this little pipe cutter tool. It was a little pain to use use but wasn't that bad.
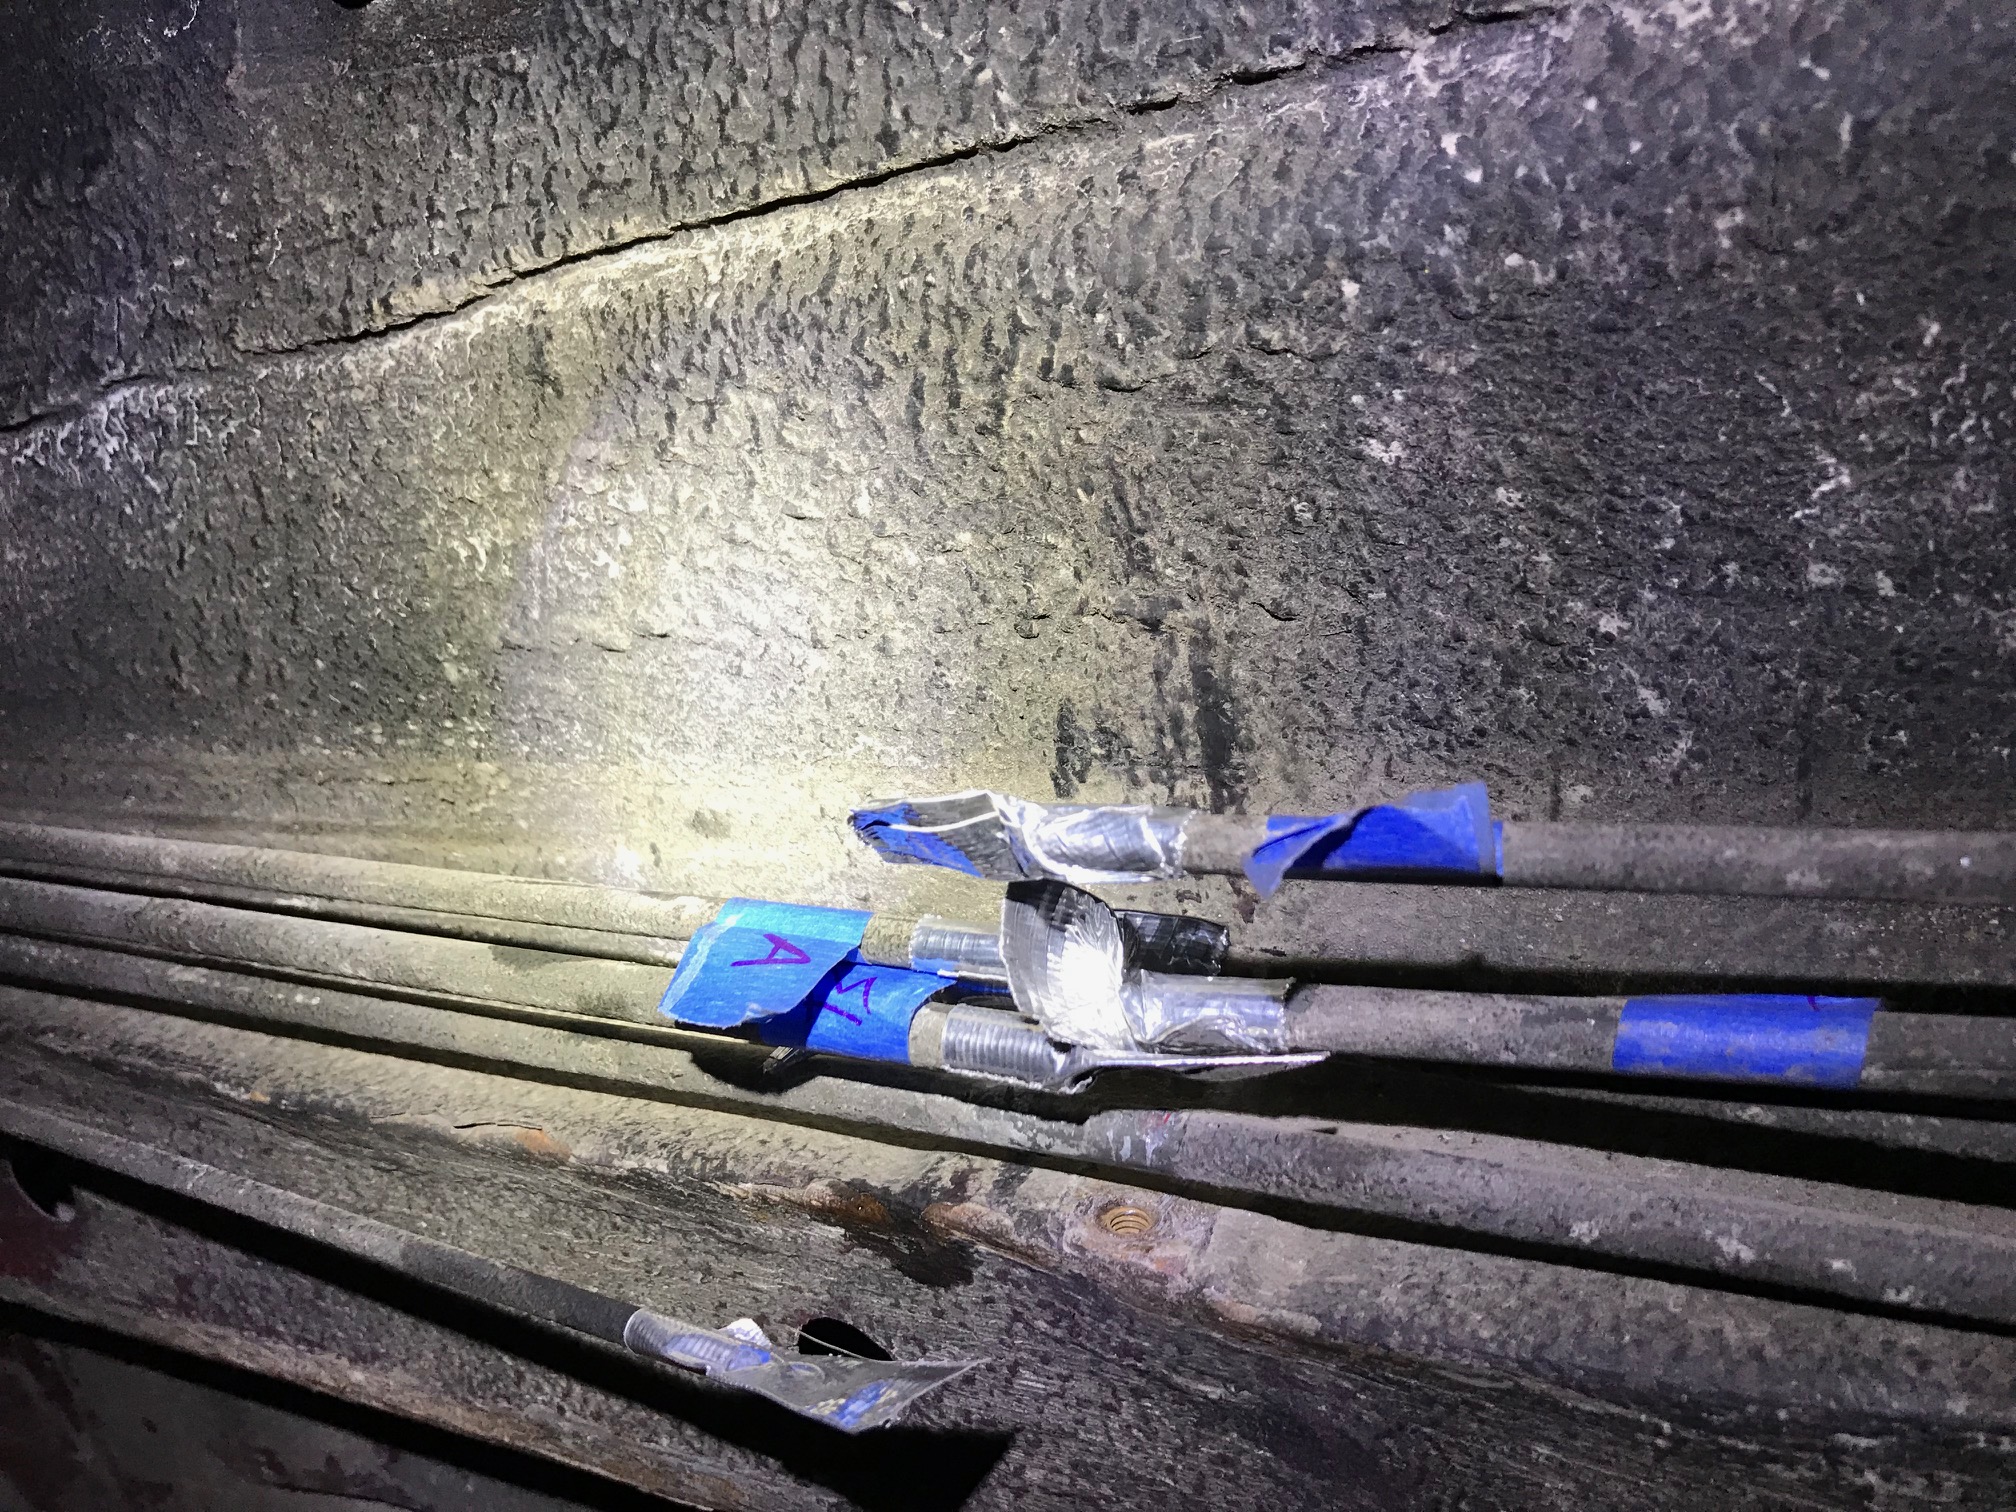
I sealed them shut with duct tape and labeled them.
I got impatient and started hacking at the fenders:
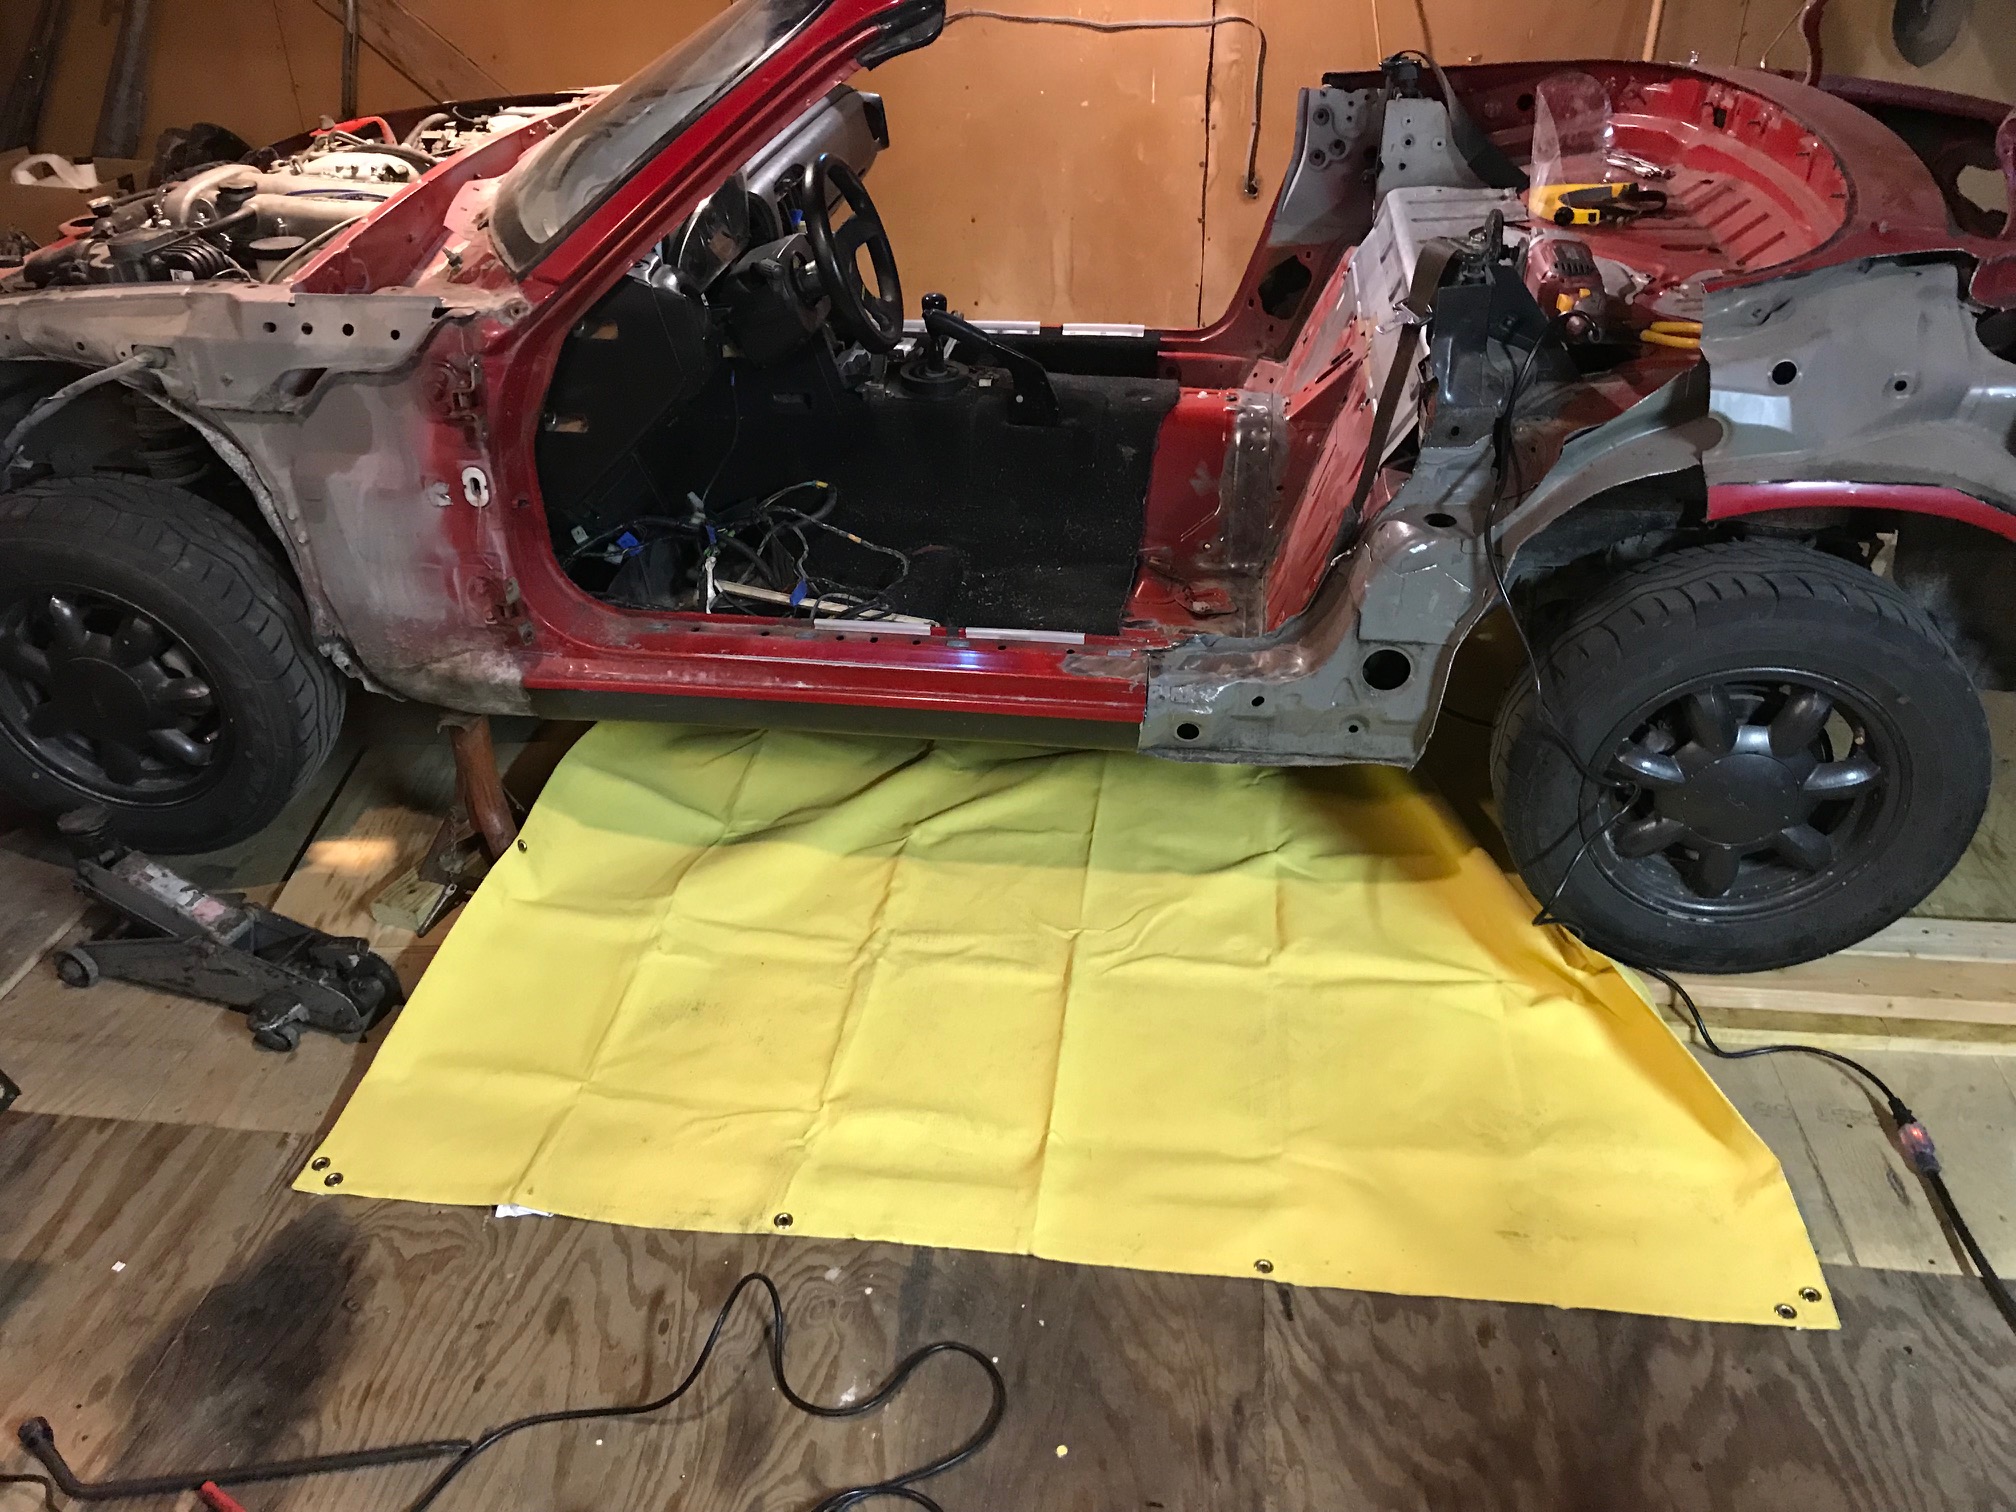
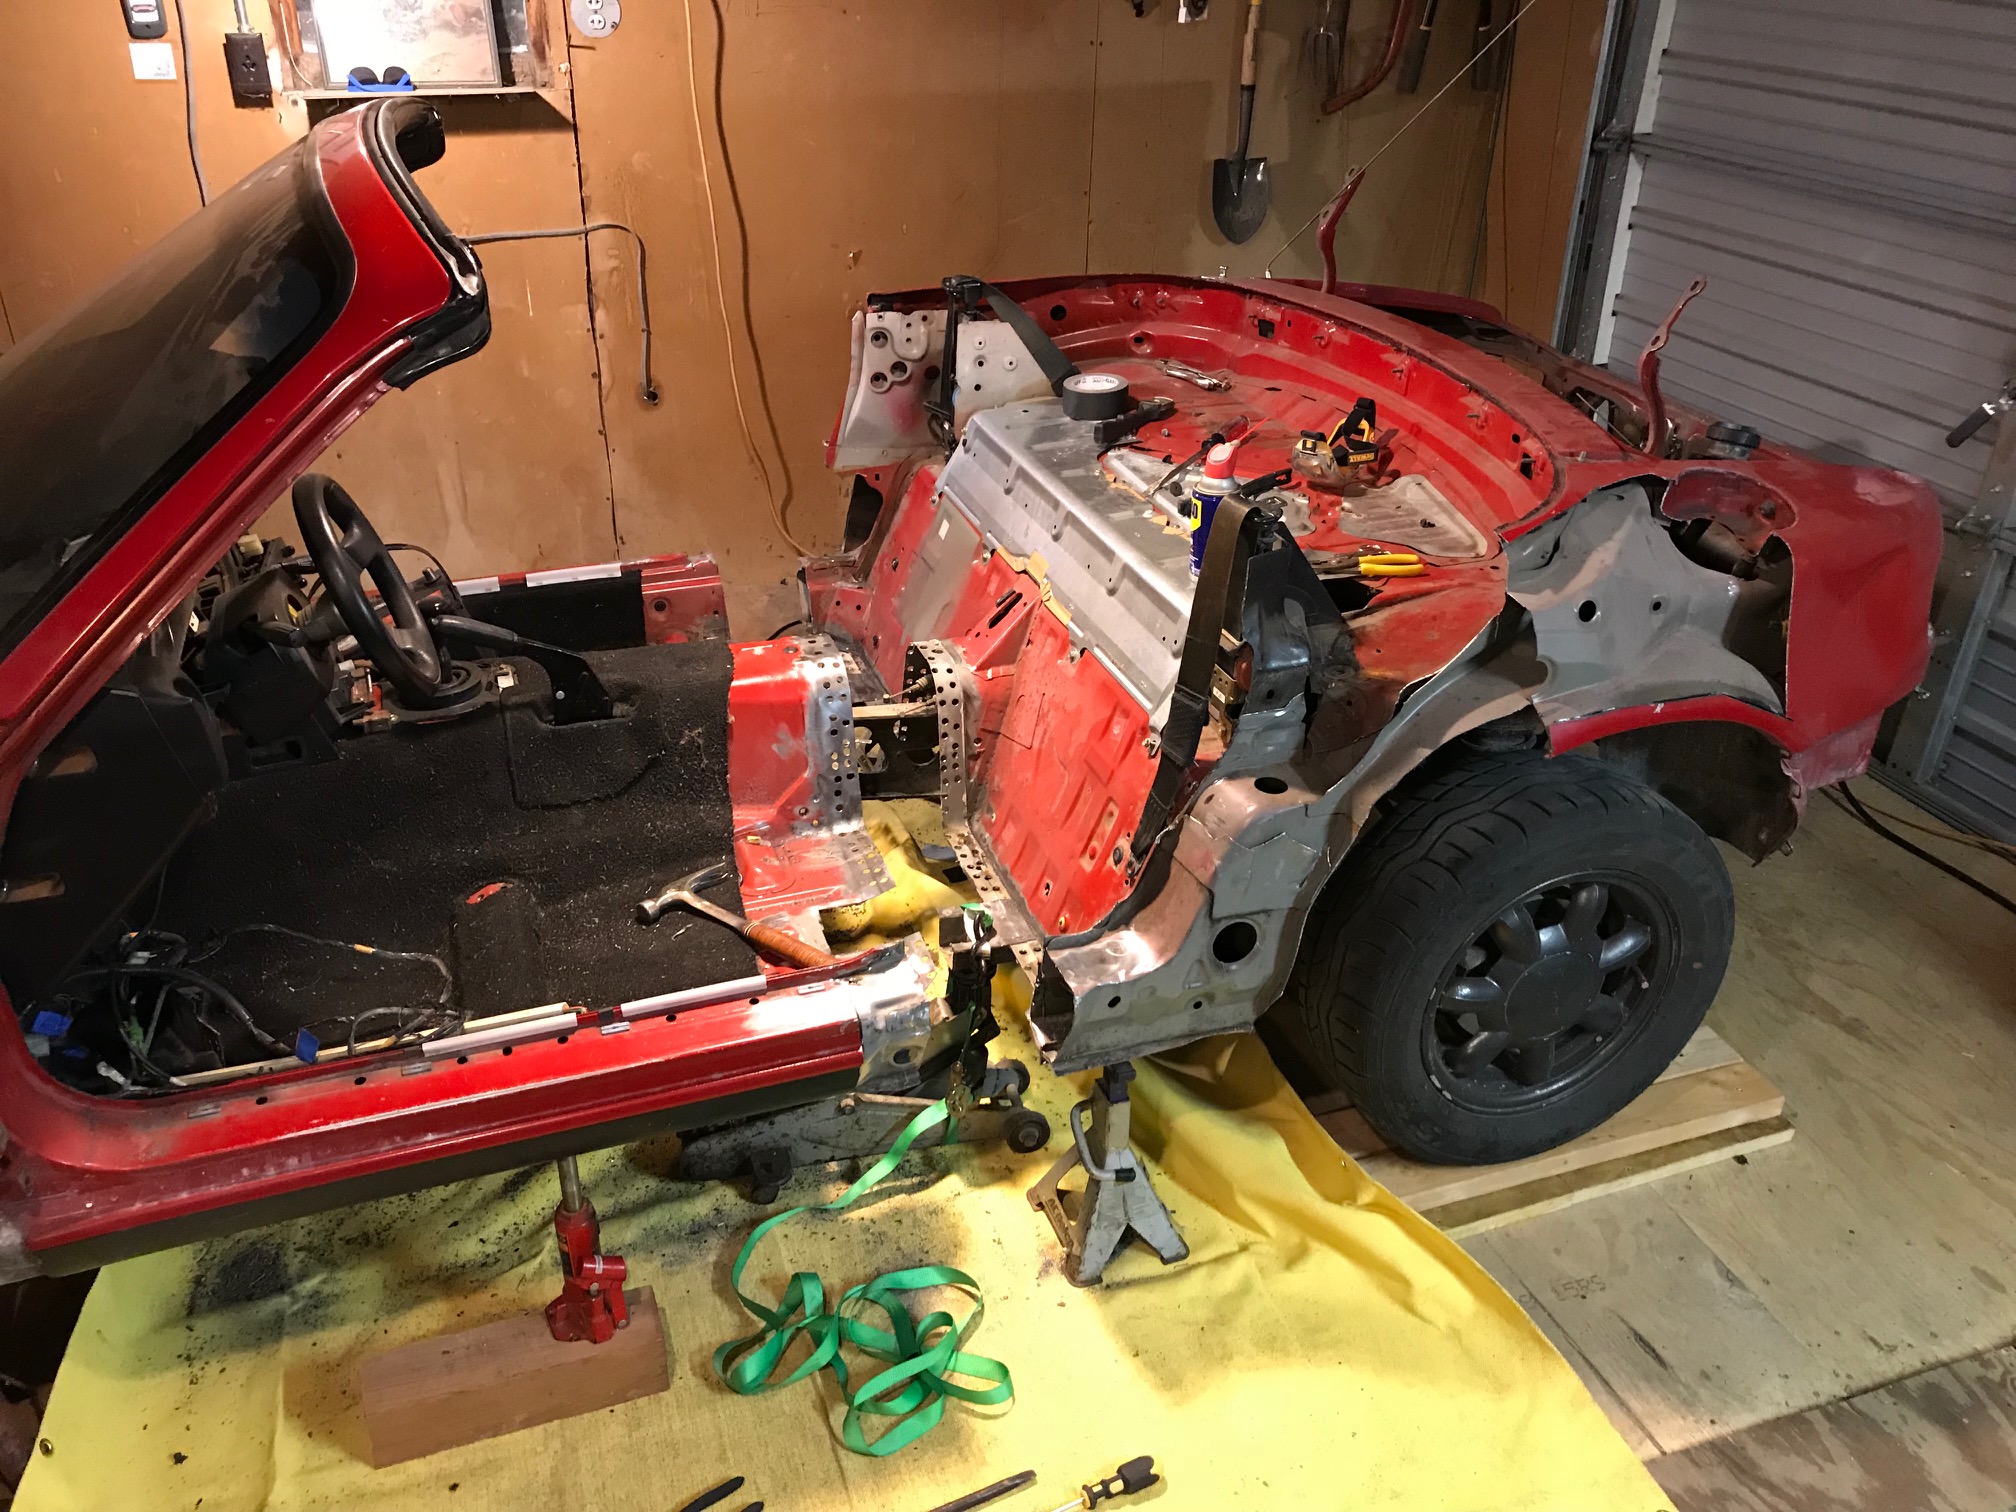
Before I started cutting any more of the body, I wanted to get it set up to be pulled upart. What I did was I jacked up the front end and put it on jack stands and used a bubble level to get the it as level as possible by putting strips of wood under the jacks. Then, in the rear I jacked it up but instead of jack stands I used blocks of wood under the wheels, with blocks of wood long enough for the wheels to roll back a foot. The floor is not level so I used different thicknesses of wood to achieve level. I also put miscellaneous jack stands, wood blocks, and bottle jacks around the car so that when it's cut in half, nothing will crash to the ground. At last 4 jacks on both halves. Yeah I wish I had a frame table but building one would have been out of the question for me.
I also had to add a welding blanket because of the wooden floor. Sparks and MIG berries might not ignite wood on their own, but some WD-40 soaked into the wood, with a little sawdust or something, would be more than enough to help. Safety first. I also bought a very large fire extenguisher. The only good thing about the wood floor was that I could screw the wood blocks down so they don't get kicked out of place on accident.
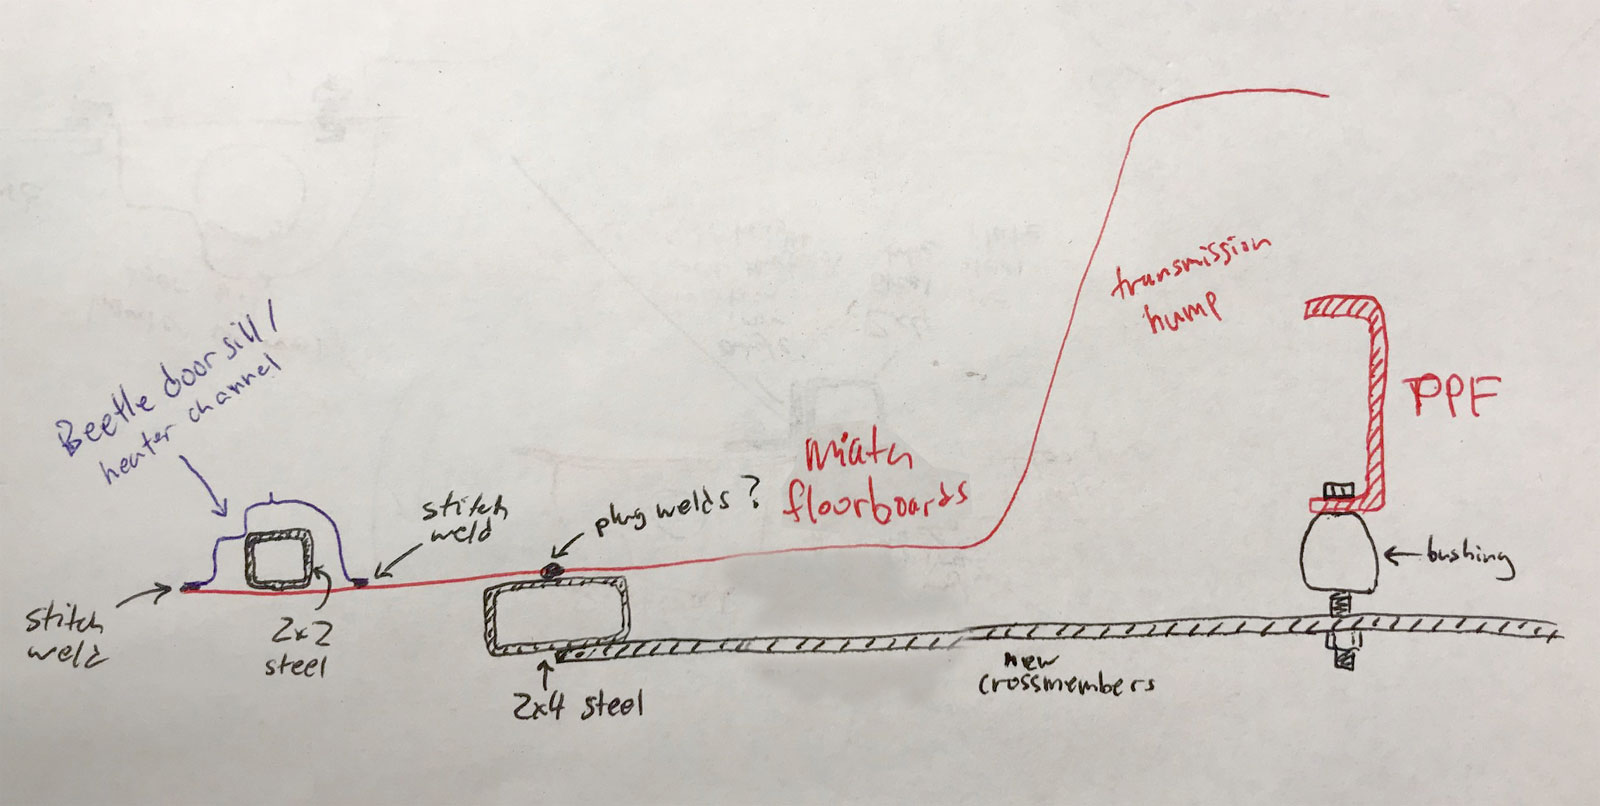
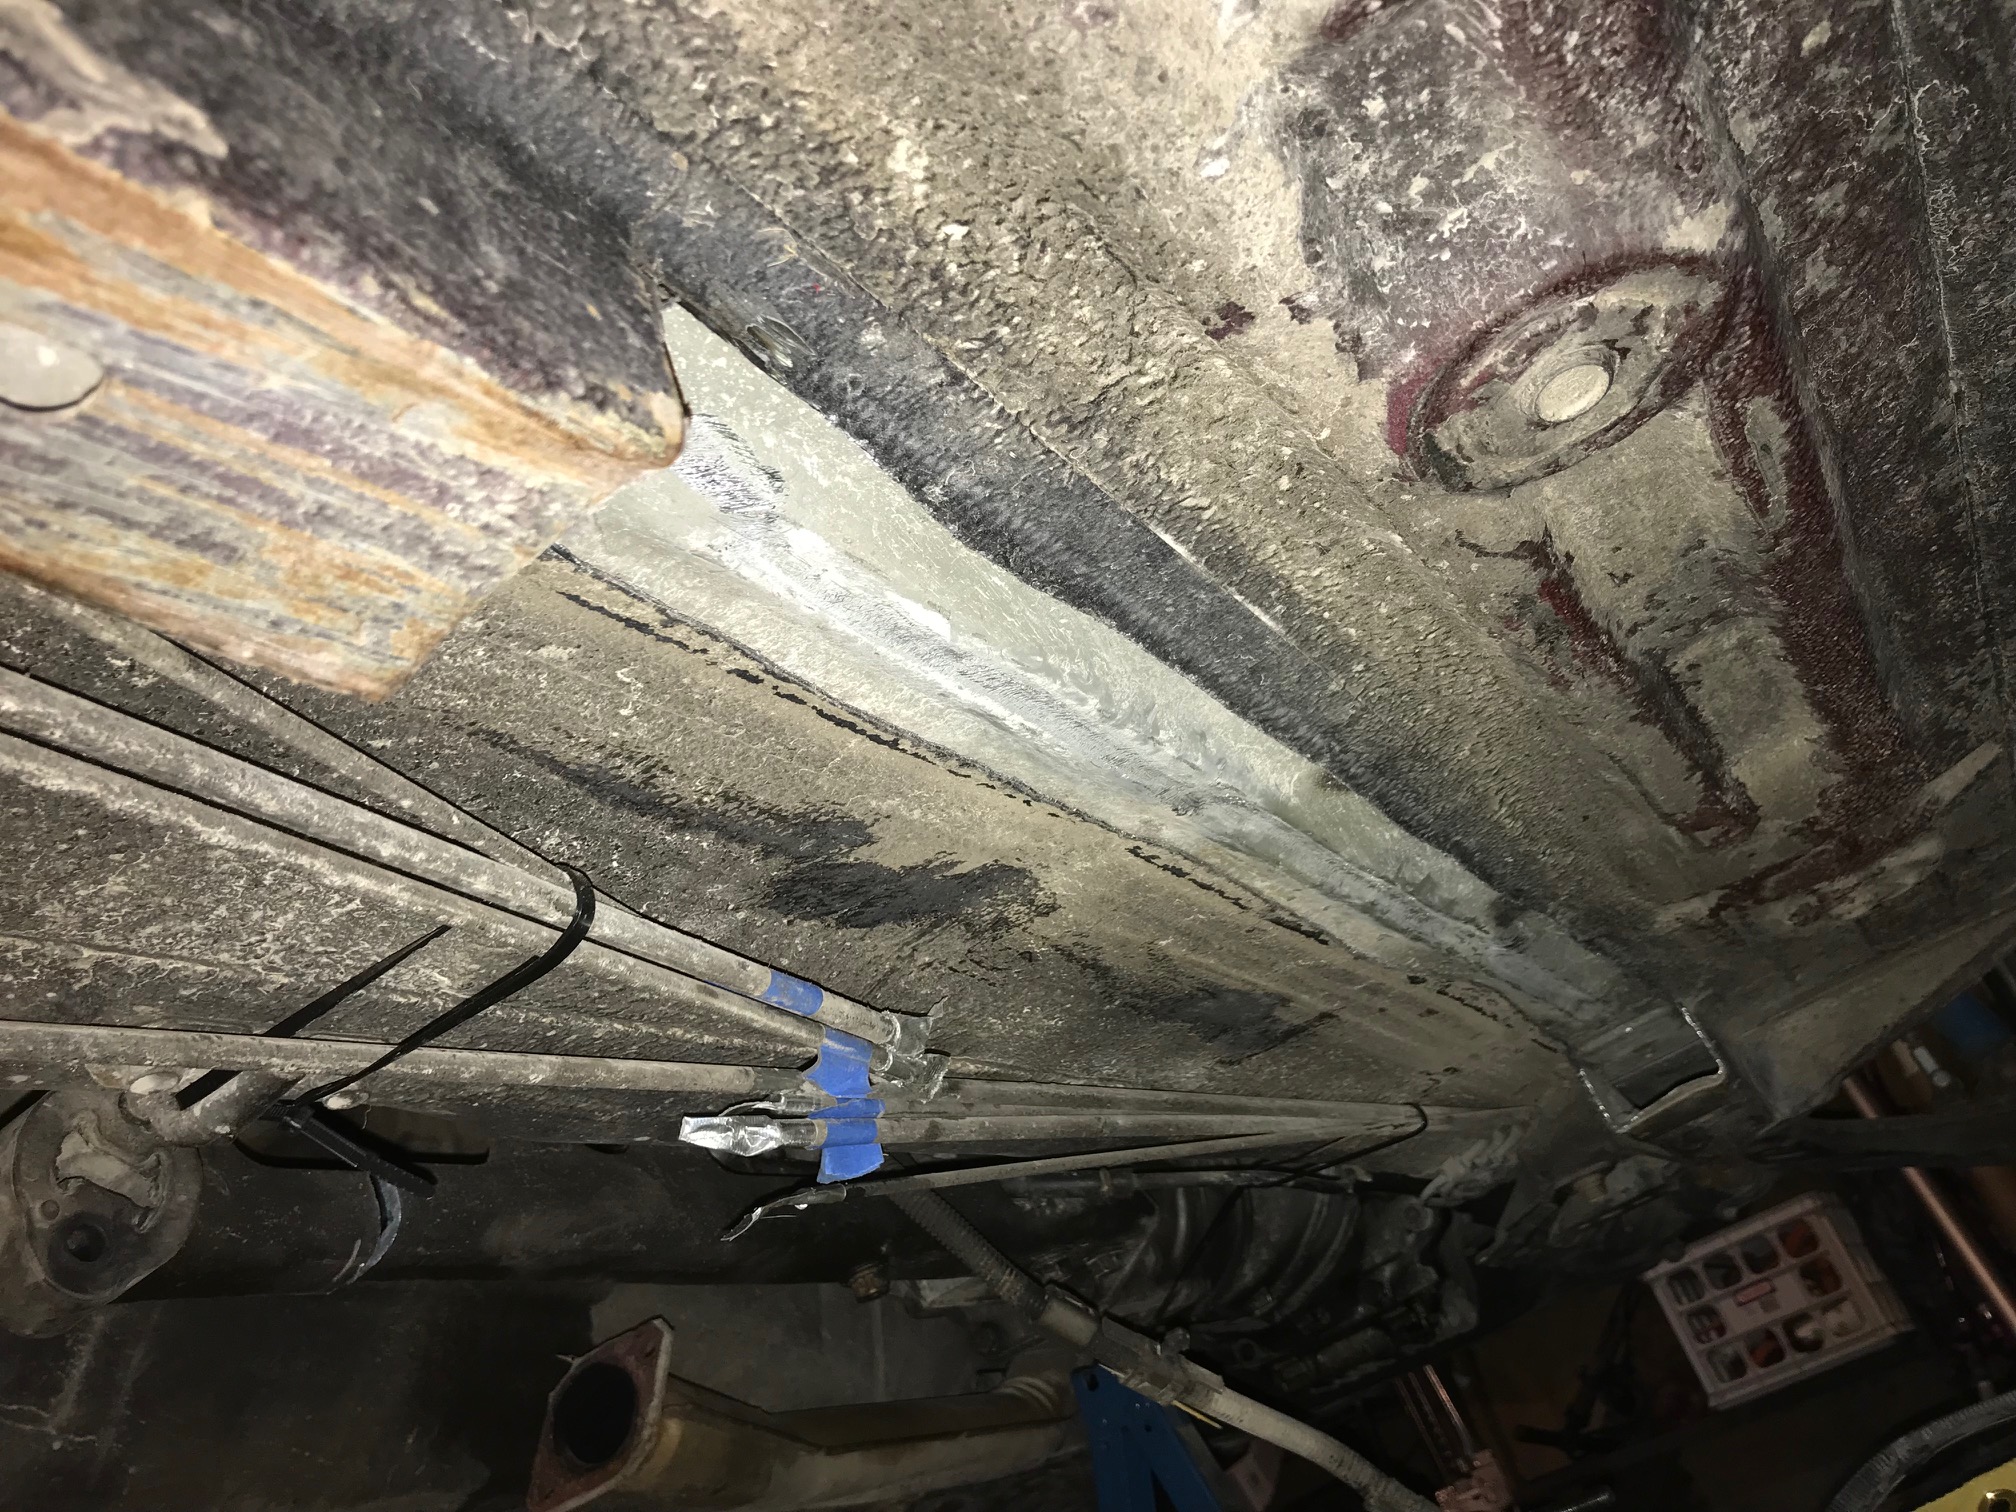
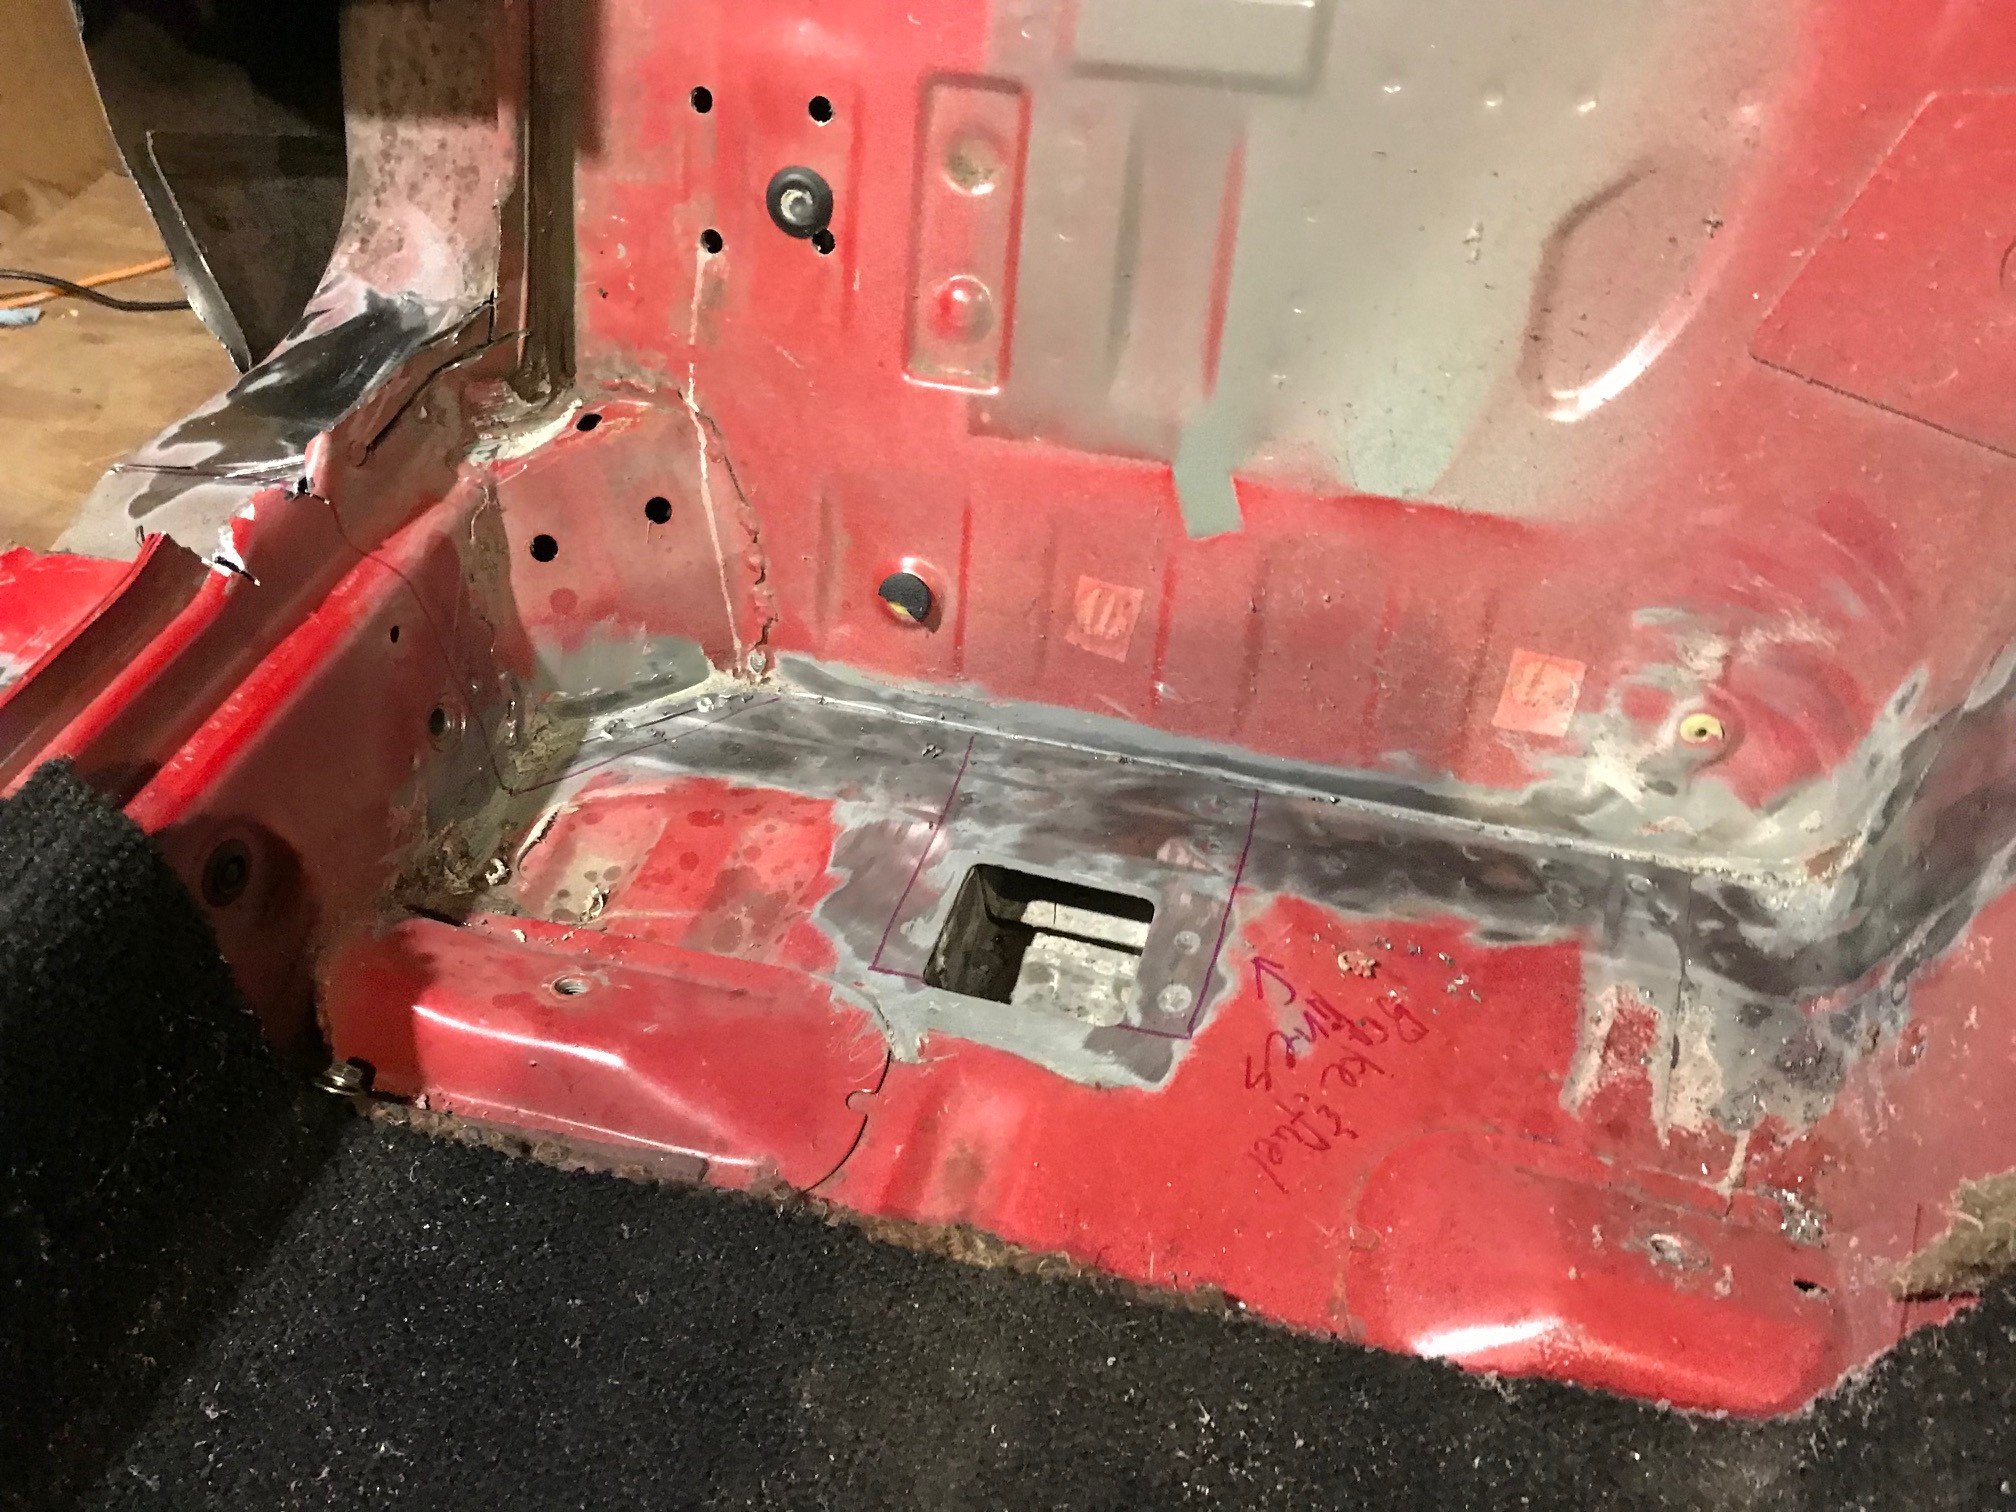
Around this time I figured out what I wanted to do with the PPF as well as how to keep the chassis strong (I'll have to completely remove the Miata door sills for my project becuase the Miata is just a little bit too wide for the Beetle to fit over). There is a stamped, tubular length of sheet metal under the floorboards and in a straight line between the front and rear frame rails (where the engine, suspension, and rear differential bolts to). I'll cut both out completely and replace with thick 2x4 steel tubes. Or maybe 2x3. This will essentially convert the unbibody to a framed vehicle, at least in the middle of the car.
As for the PPF, I'll cut it in the middle and then extend it with a length of large steel plate bolted to the PPF. But I will also add at least one crossmember that fastens it to the new frame rails, with a bushing in there to reduce vibrations. It will be on the differential side of the cut, because that is the side that will push with a lot of force. I'm not a physicist, but my understanding is that when the engine spins the driveshaft which in turn spins the rear axles, that same force will either cause the wheels to spin or cause the axle/differential housing to spin in the other direction. This is called wheelhope in the car world, and it's normally not a problem because the rear axle is usually mounted to the frame/unibody at 4 or 5 points for most vehicles. But for IRS (independent rear suspension) vehicles like Miatas and Corvettes, there's only two mount points. That's why the PPF is so important. So on hard standing-start launches, there's a tremendous amount of force acting on the PPF, so I will need to build something strong to ensure it doesn't flex or break.
With that all figured out, I need to cut off the sheet metal tubes under the floorboards to make room for the new frame rails. Notice the thicker metal at the end, that's what the new frame rails will be welded to.
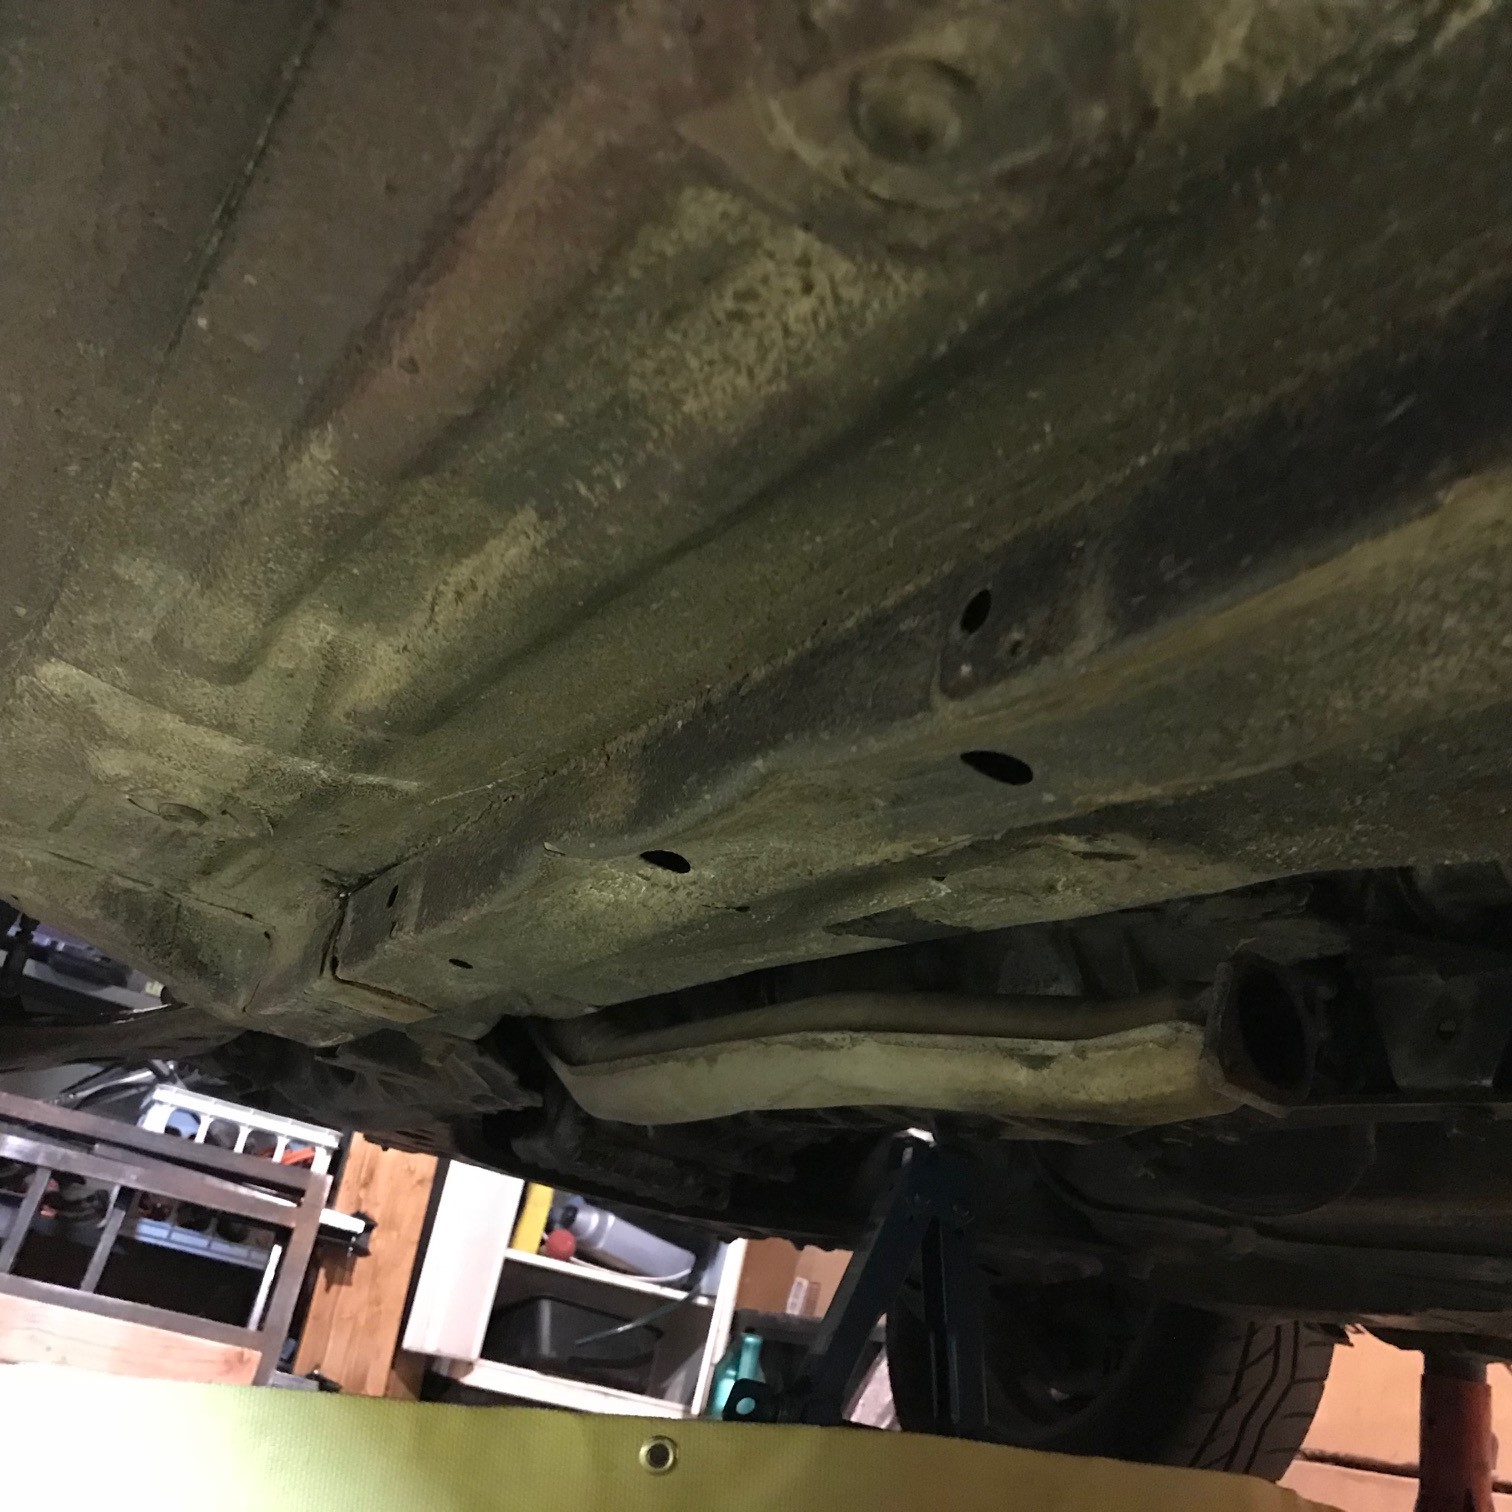
It was floppy and crushed and was probably sacrafised when a previous owner landed the car on a crub or something.
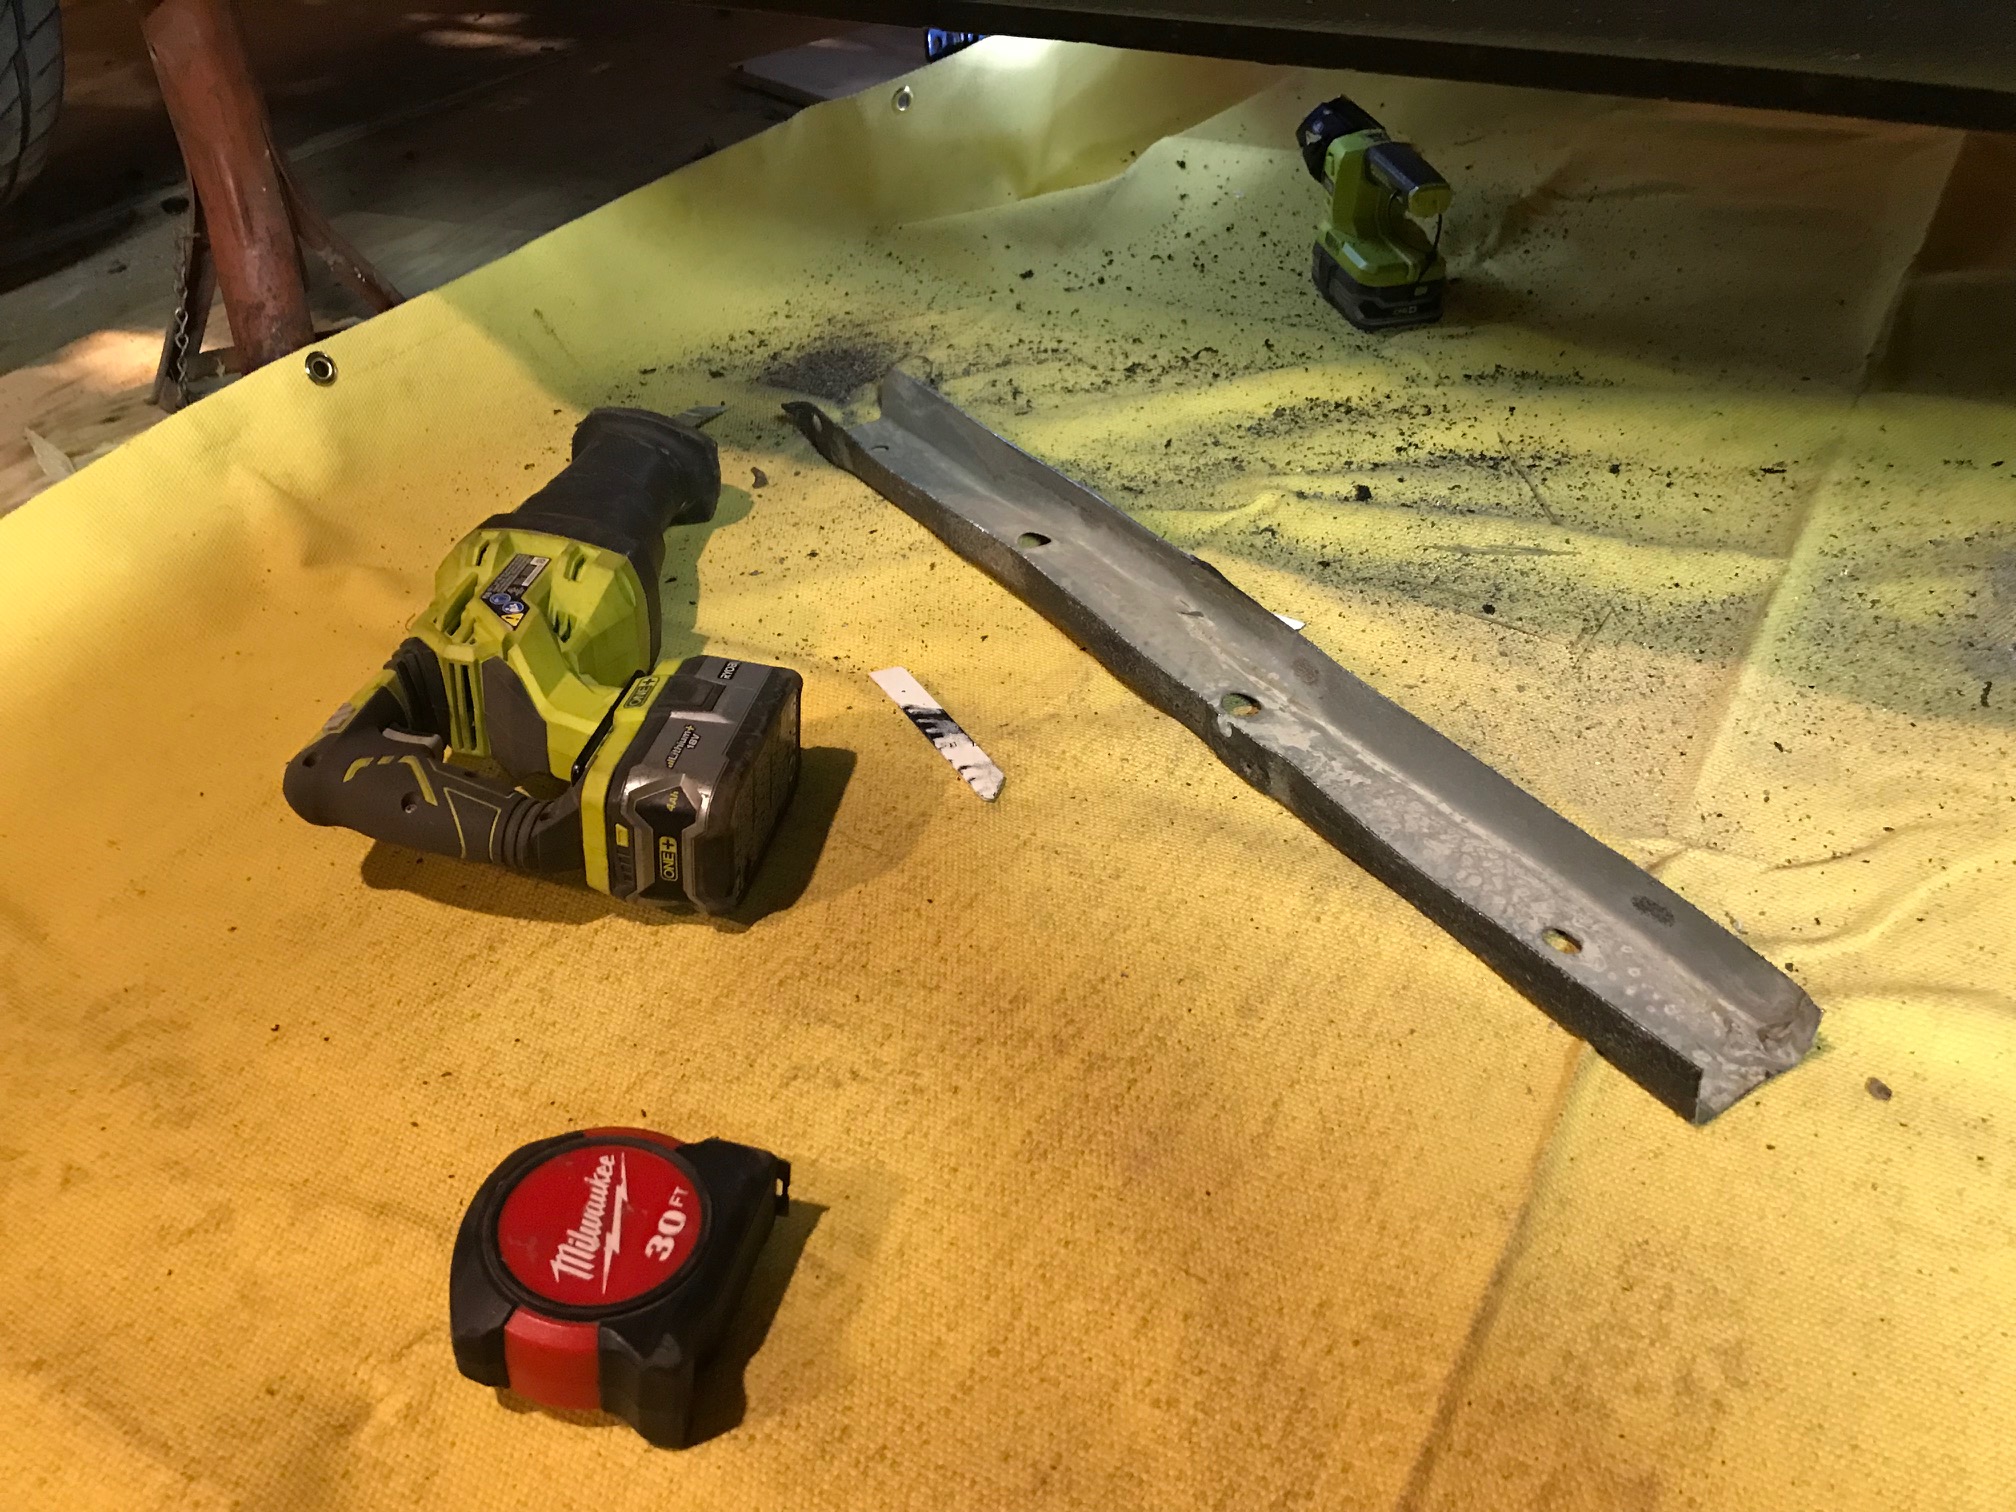
The last thing to be severed under the car was the PPF itself. I cut it at the location of the catalytic converter. This will give me plenty of leverage at the differential end. A fine-toothed sawsall blade was not doing the job, I had to switch to an all-purpose blade with larger teeth. The transmission was suppported by a scissor jack and the PPF by the diff was hung with a tow strap rather than on a jack stand or something which would be problematic when rolling the back half of the car back 6".
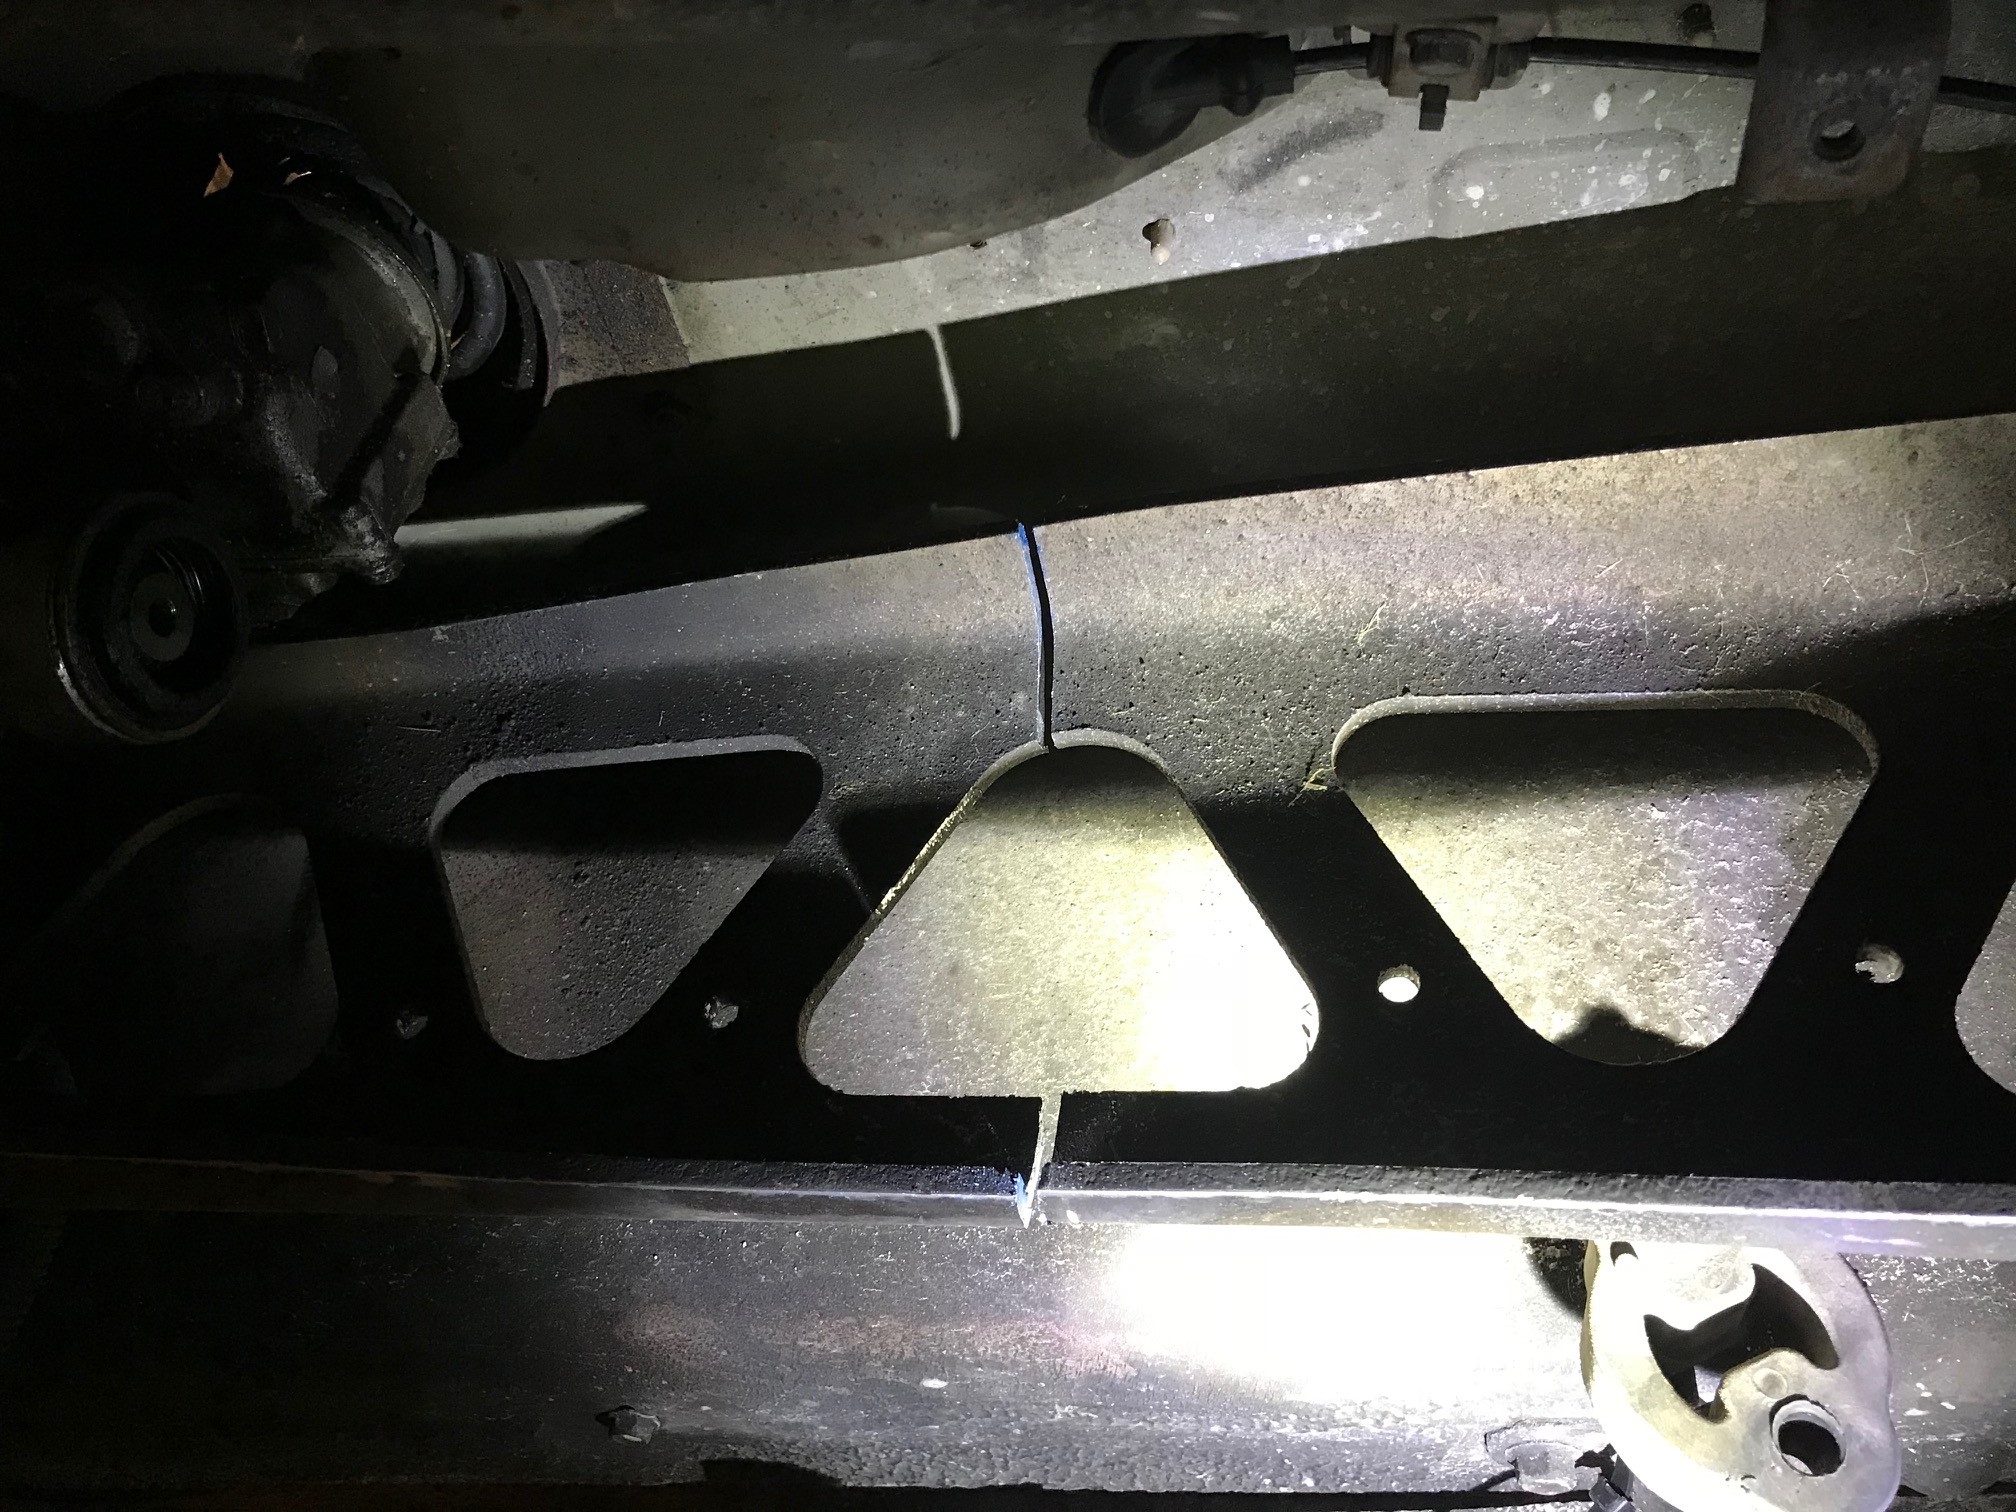
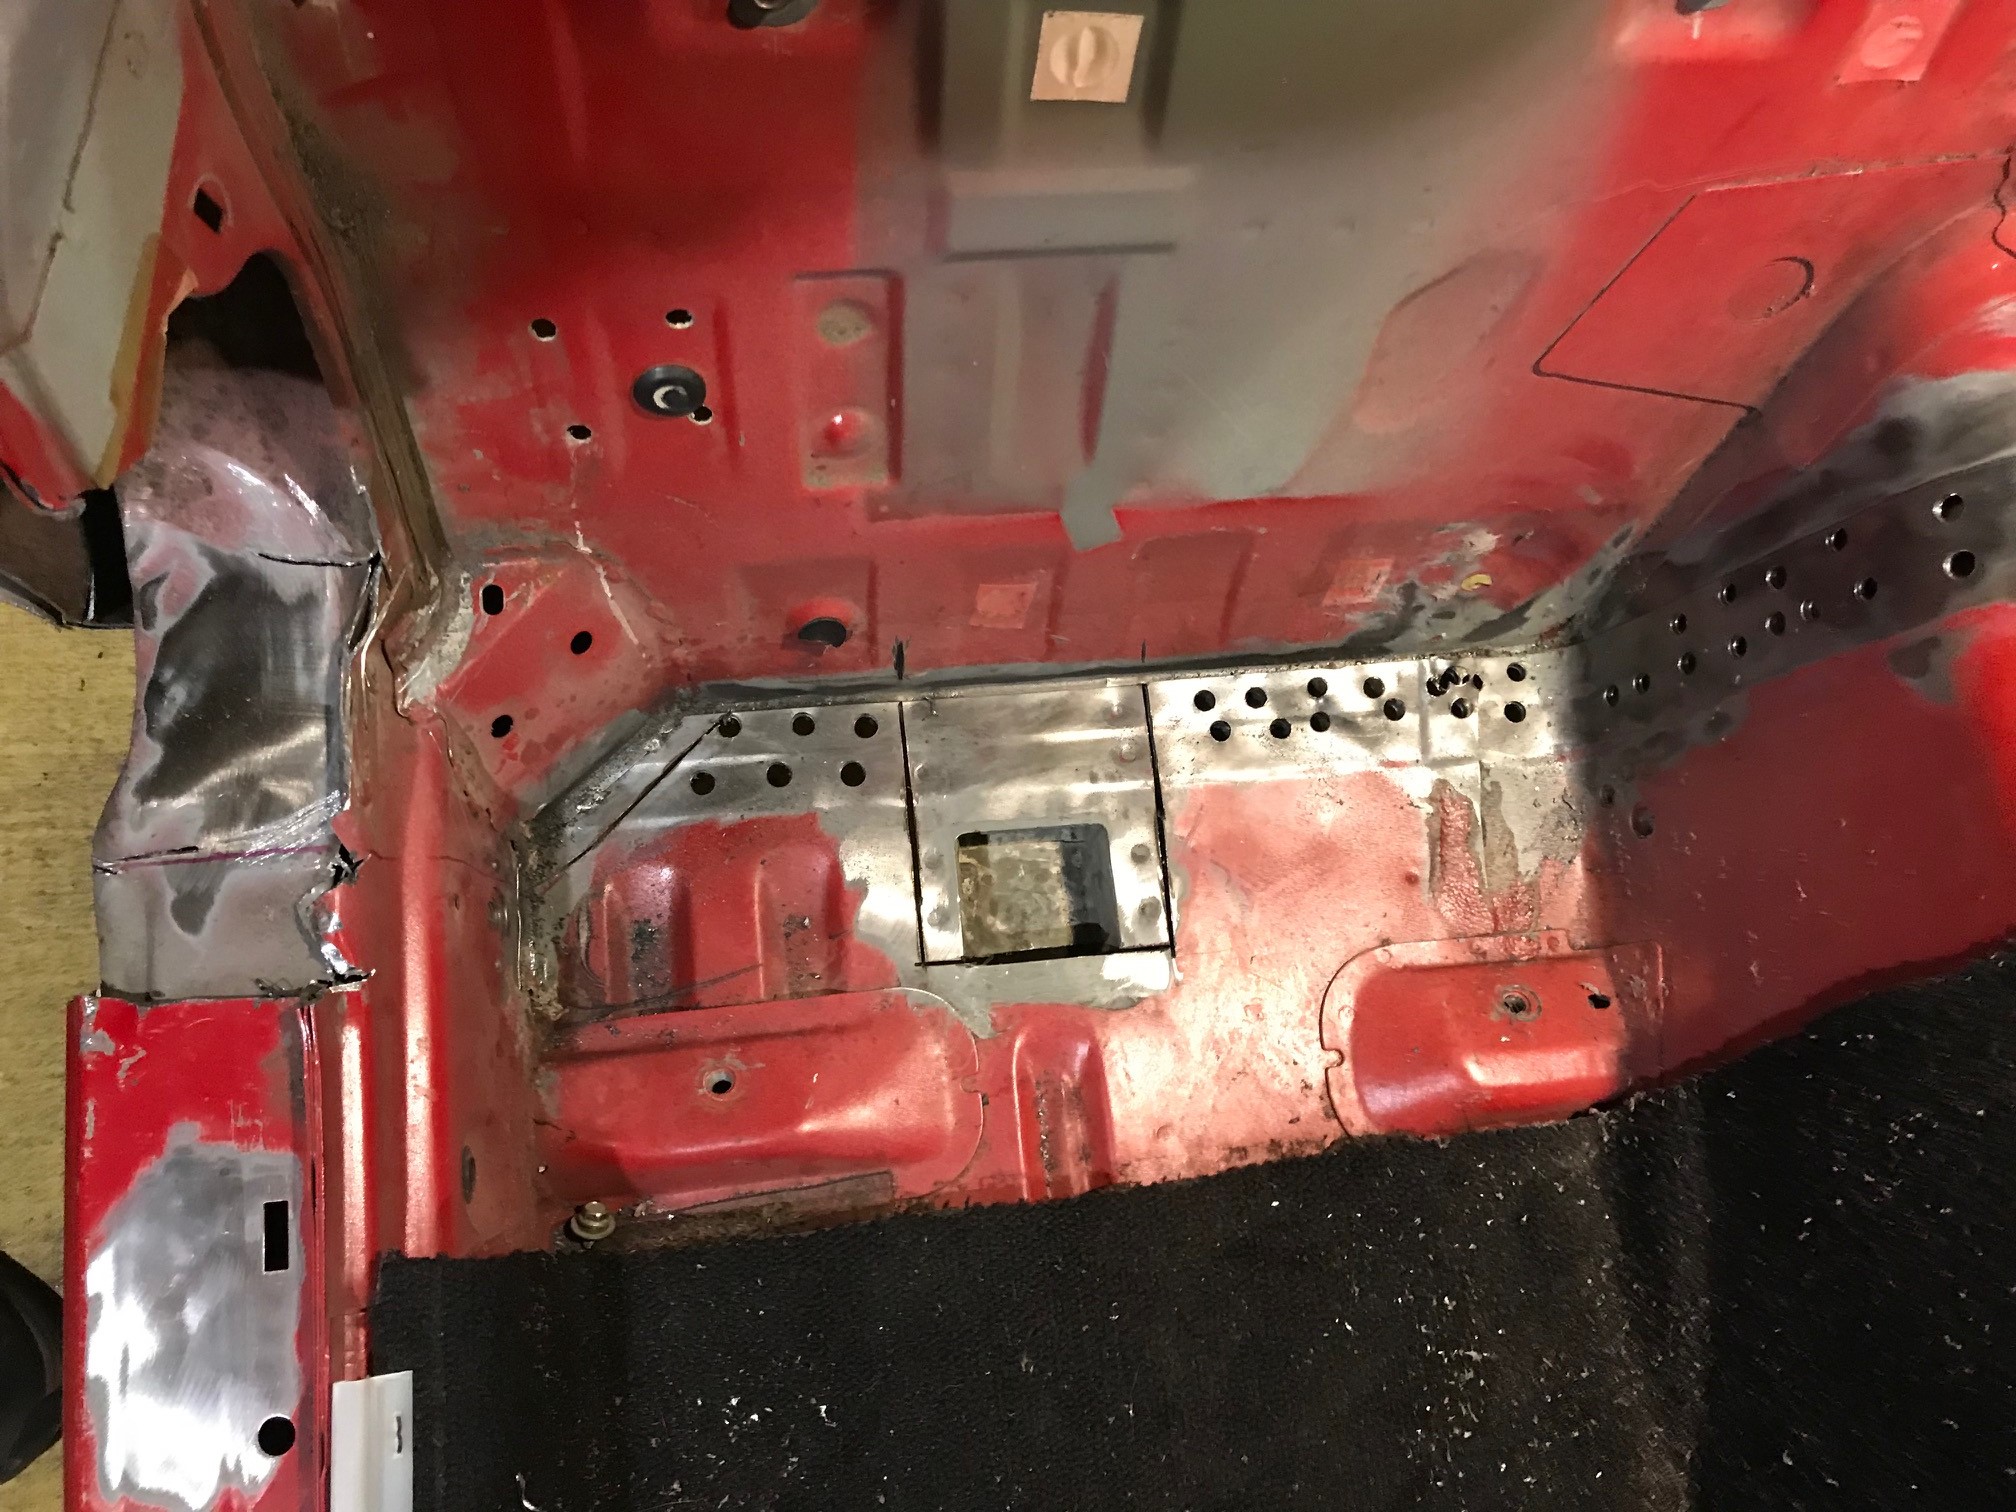
I contacted a guy on Instagram who is working on a similar project (a 2000 Miata NB and a VW Type 3, both a little wider than what I'm working with) on how to stretch the Miata. He said to drill out the spot welds in the floor pan, and that this would provide a better surface for welding the new sheet metal to. The idea is that if I were to cut it instead, there would be a lot of seam sealer in between the layers of sheet metal and when I would go to weld on them, the seam sealler would catch on fire and make a big mess that would be very hard to weld to. This is his image:
He aslo confirmed that my idea abou the PPF and frame rails was the right idea because that's what he's doing as well. Unfortunitally he's not finished yet so I do not know how well it worked for him.
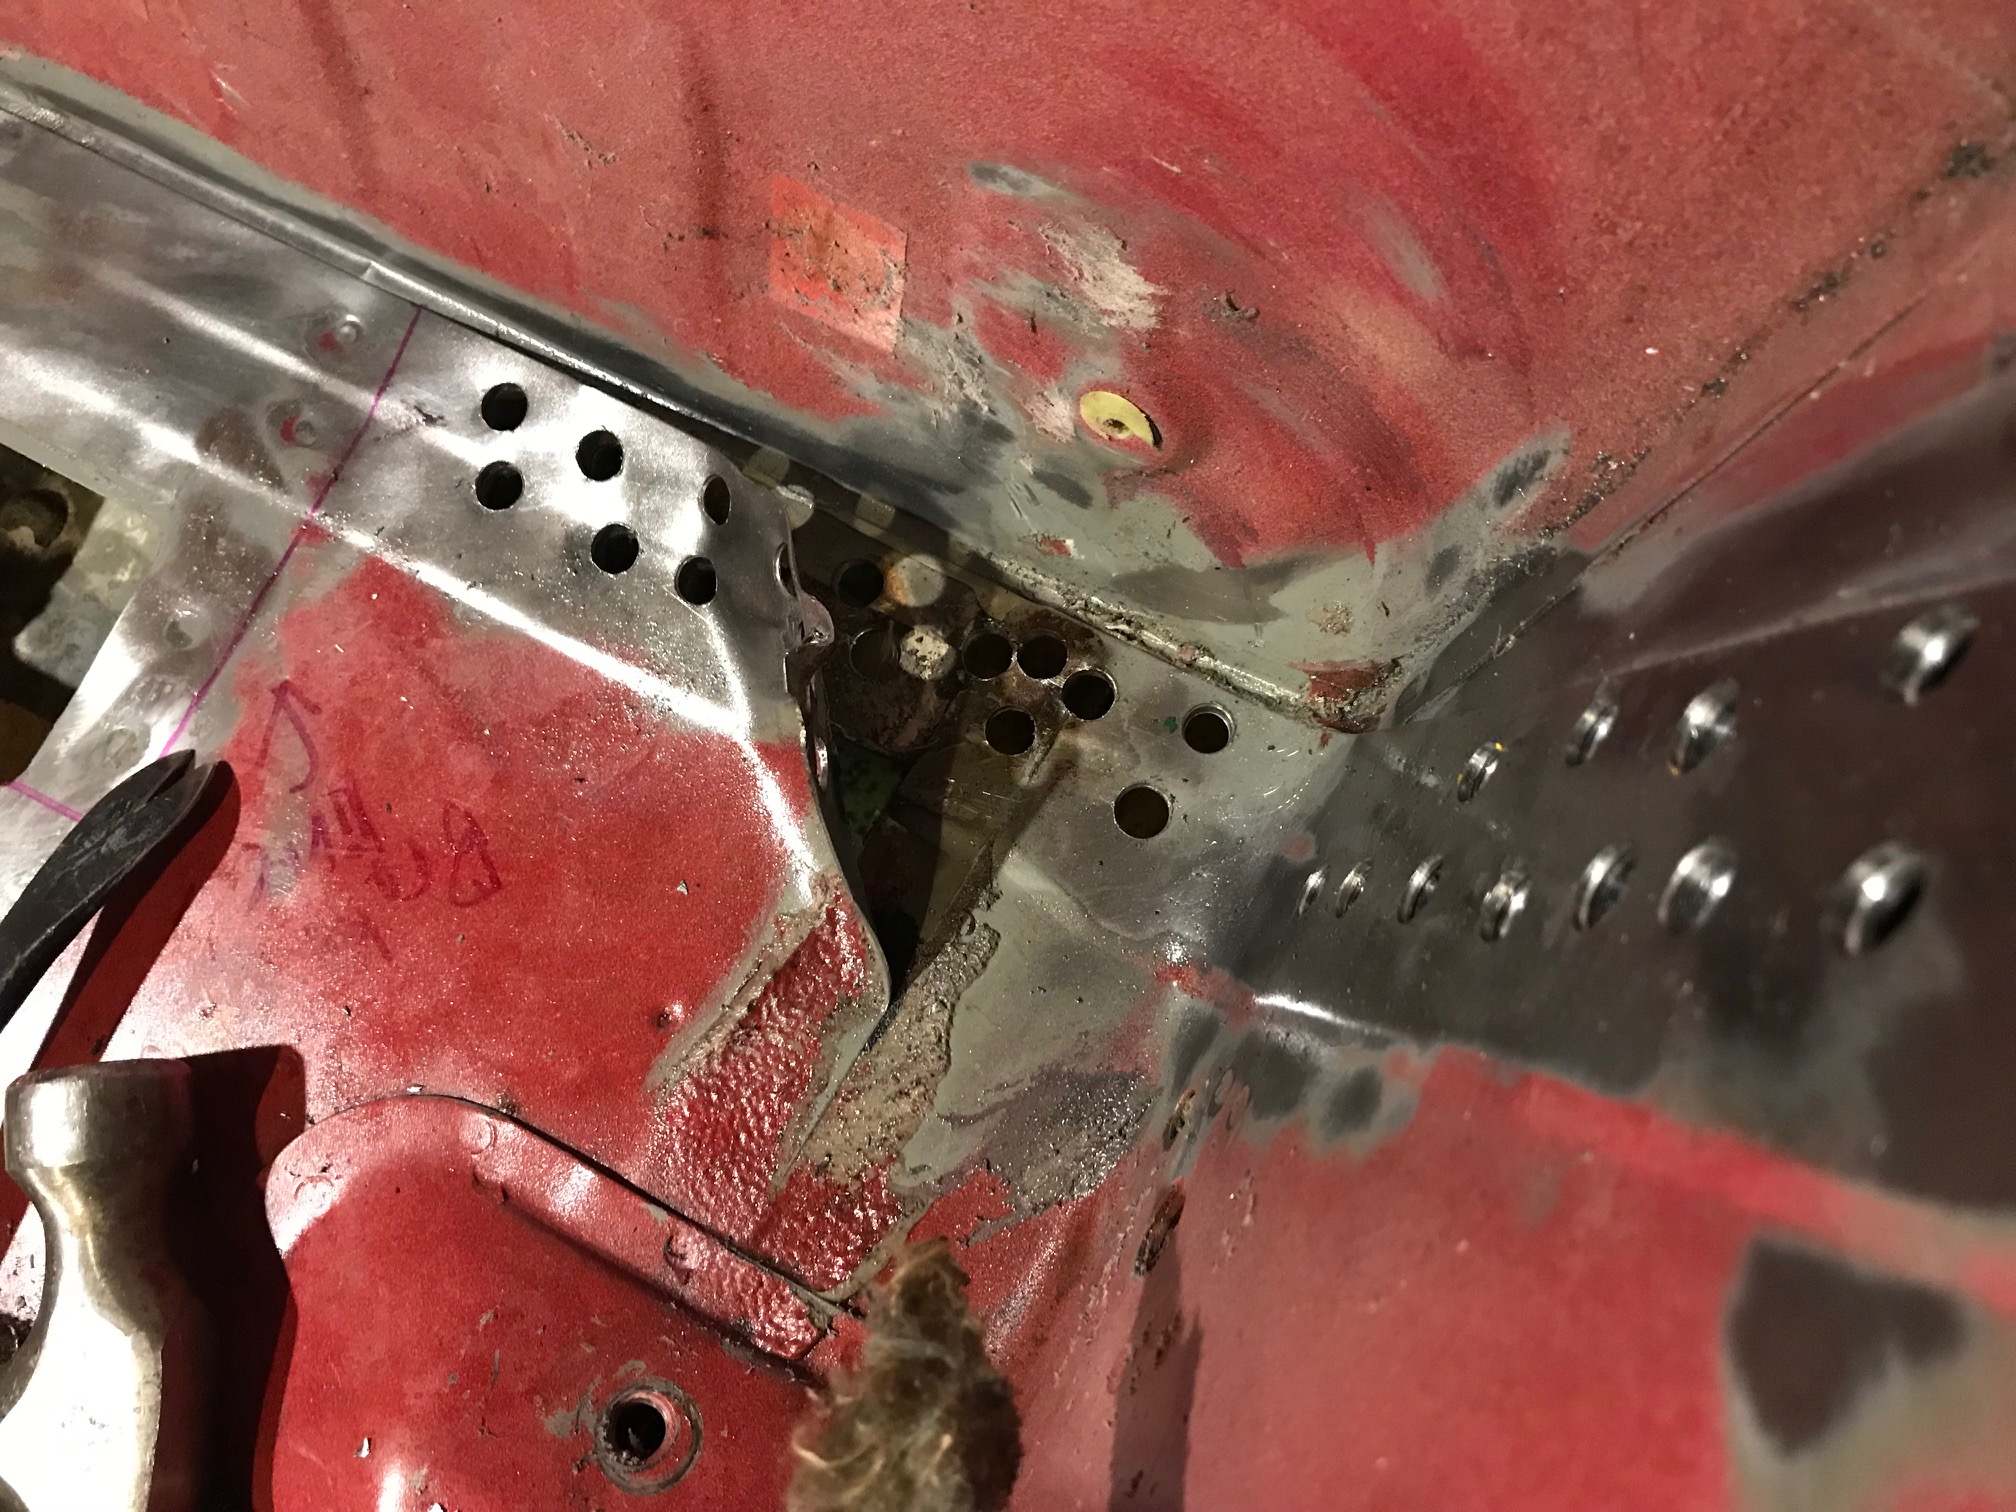
But of course I still needed to make some cuts. But I didn't want to cut through the steel tube that the new frame rails will be welded to, so I had to cut around those. And I also cut around the corner braces. The red line is everywhere that needed to be snipped:
Then I started drilling. I used a 1/2" stepped drill bit, and I had to be extra carefully around the hard lines for the fuel and brakes. That wouldn't have been a problem if I was using a proper drill bit for cutting out spot welds.

I made sure I made large enough holes and didn't mess any by prying up the sheet metal where I could.
Then I made the cuts with an angle grinder and a sawsall.
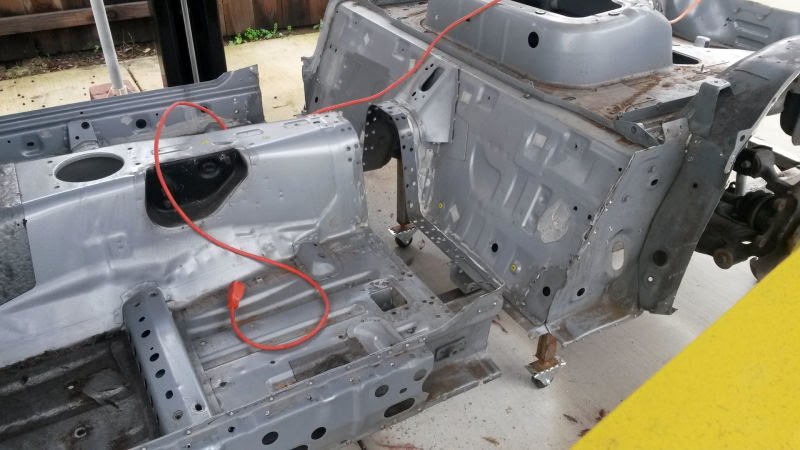
Finally it was time to cut the door sills.
When I severed the door sills, the two haves were totally sperated. The nose of the car, ie the radiator, went downward (look at where my jack stands are behind the front wheels), and the trunk area wanted to go up. Thankfully I had plenty of jack stands around the car such they it only shifted about an inch.
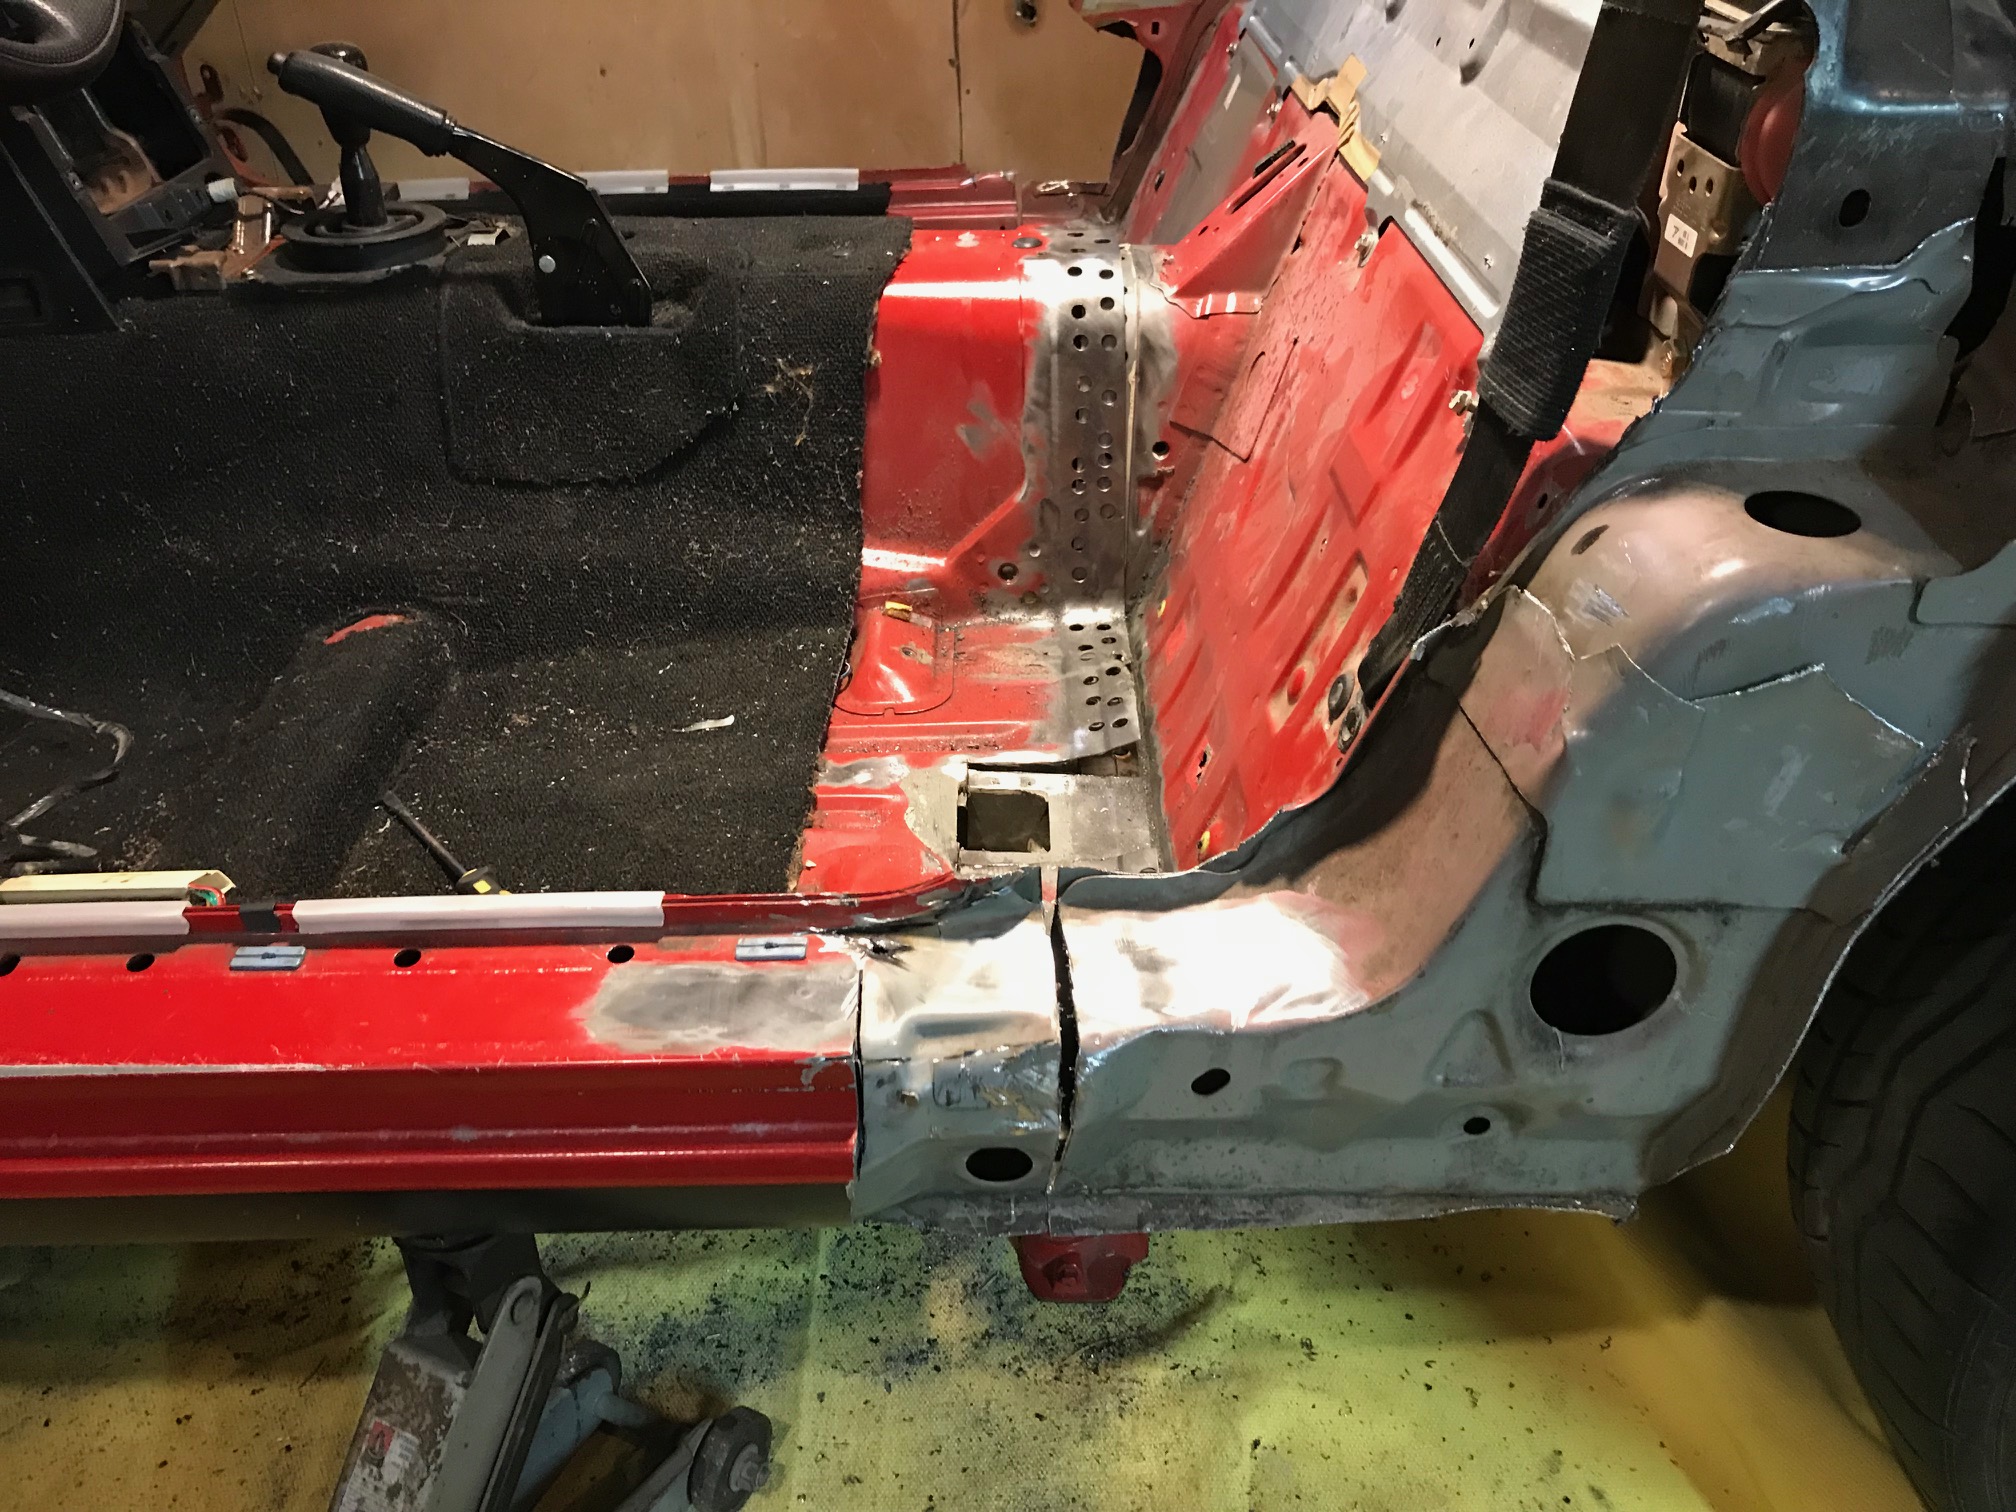
Finally I could carefully pull it apart. First I put my floor jack under one of the "frame rails" with its wheels lined up with the car, and then I snugged it tight to the car with a tow strap, as shown in the picture below. Then pulling it apart was as easy as giving it a little tug!
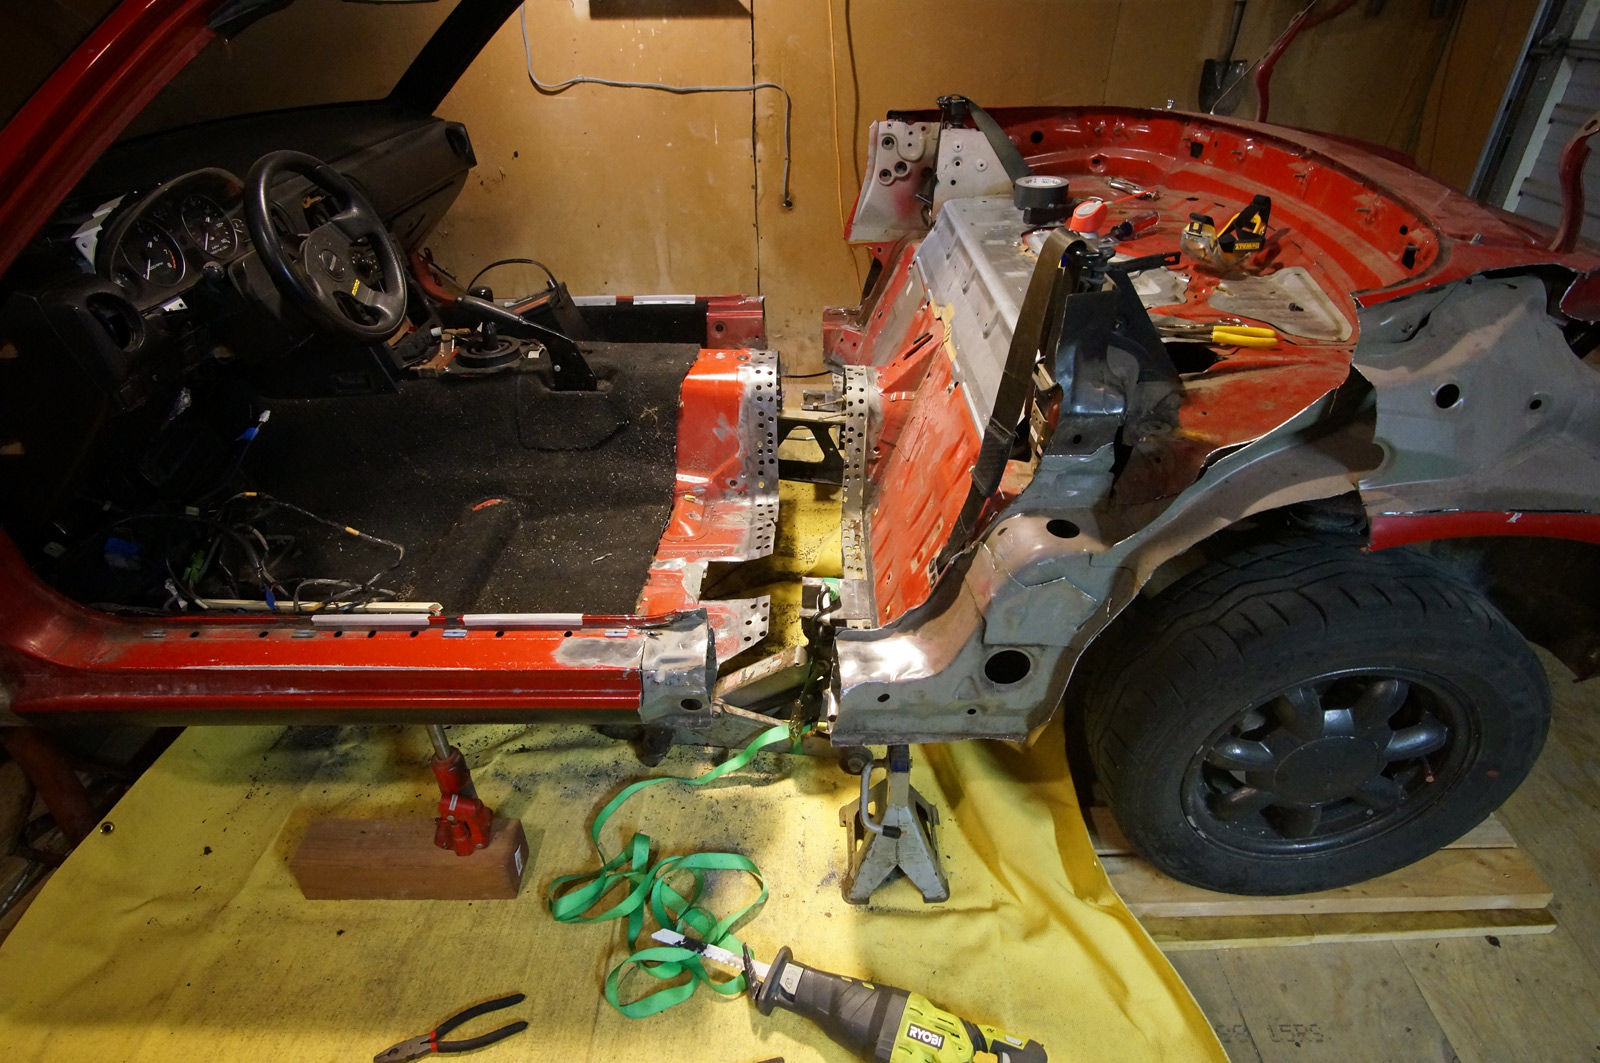
And that's how it will sit until my new MIG welder comes in the mail.
Here's all the steps to cutting the Miata in half and then putting it back together again but 6" longer. I've got 8 out of 16, so half way through!
- Drain the fuel and brake fluid
- Cut/disconnect/remove the exhaust, driveshaft, brake lines, gas lines, rear wiring harness, emergency brake cable, and battery cable
- With the front of the car up on jack stands and leveled, put the rear tires on two level tracks that the wheels can roll down 6"
- Support the transmission with a jack stand, put a strap or something under the PPF near the rear diff, and then cut the PPF in half while it's still attached to the car.
- Cut out the thin sheet metal tube under the floorpan
- Drill out the spot welds in the rear seam of the floorpan
- Sever the door sills. The car will now be in two pieces
- Weld on some angle iron onto the door sill pinch seams of the front half, such that the angle iron pieces are extending about a foot towards the rear.
- Get both halves of the vehicle perfectly aligned 6" apart, and then tack weld it solid at the door sills and tack weld some support bars to keep it stiff
- Weld on new frame rails under the floorpan connected the front and rear subframes with 2x3 steel, effectively making it a framed vehicle.
- Stitch/tack weld in new sheetmetal in the floorpan gap. Primer, seam sealer, paint, ruberized undercoating.
- Measure the distance from the transmission to the yoke on the diff. Take the driveshaft to the truck machine shop with this measurement. Pay $200?
- Bolt a steel extension for the PPF, and also add some crossmembers that secure the PPF to the new steel frame, with bushings to reduce vibrations
- use a flanging tool on the brake and gas lines and slip on some rubber injection hoses
- lengthen the battery cable and wiring harness with new wire, bolt the exhaust back on (for now), install the new driveshaft, extend the e-brake cable
- bleed the brakes and add gas
- take it for a test drive
I will admit that it is more work than I anticipated when I was brainstorming the project a few weeks ago. I had planned on doing a front-wheel-drive car but I couldn't find one with the front and rear track narrow enough to fit between the beetles fenders. Only the Miata would work. And when I bought it, I didn' t know a thing about PPFs and IRSs. And it is a lot of work for only 6" but I still think it will be worth it. I've seen pictures of someone who put a Beetle body on a Miata chassis without stretching the wheelbase and it was not a good look, to be honest.
I started a YouTube Channel for this project! Here's the video showing how I cut it in half:
Coming soon: how to put it back together.