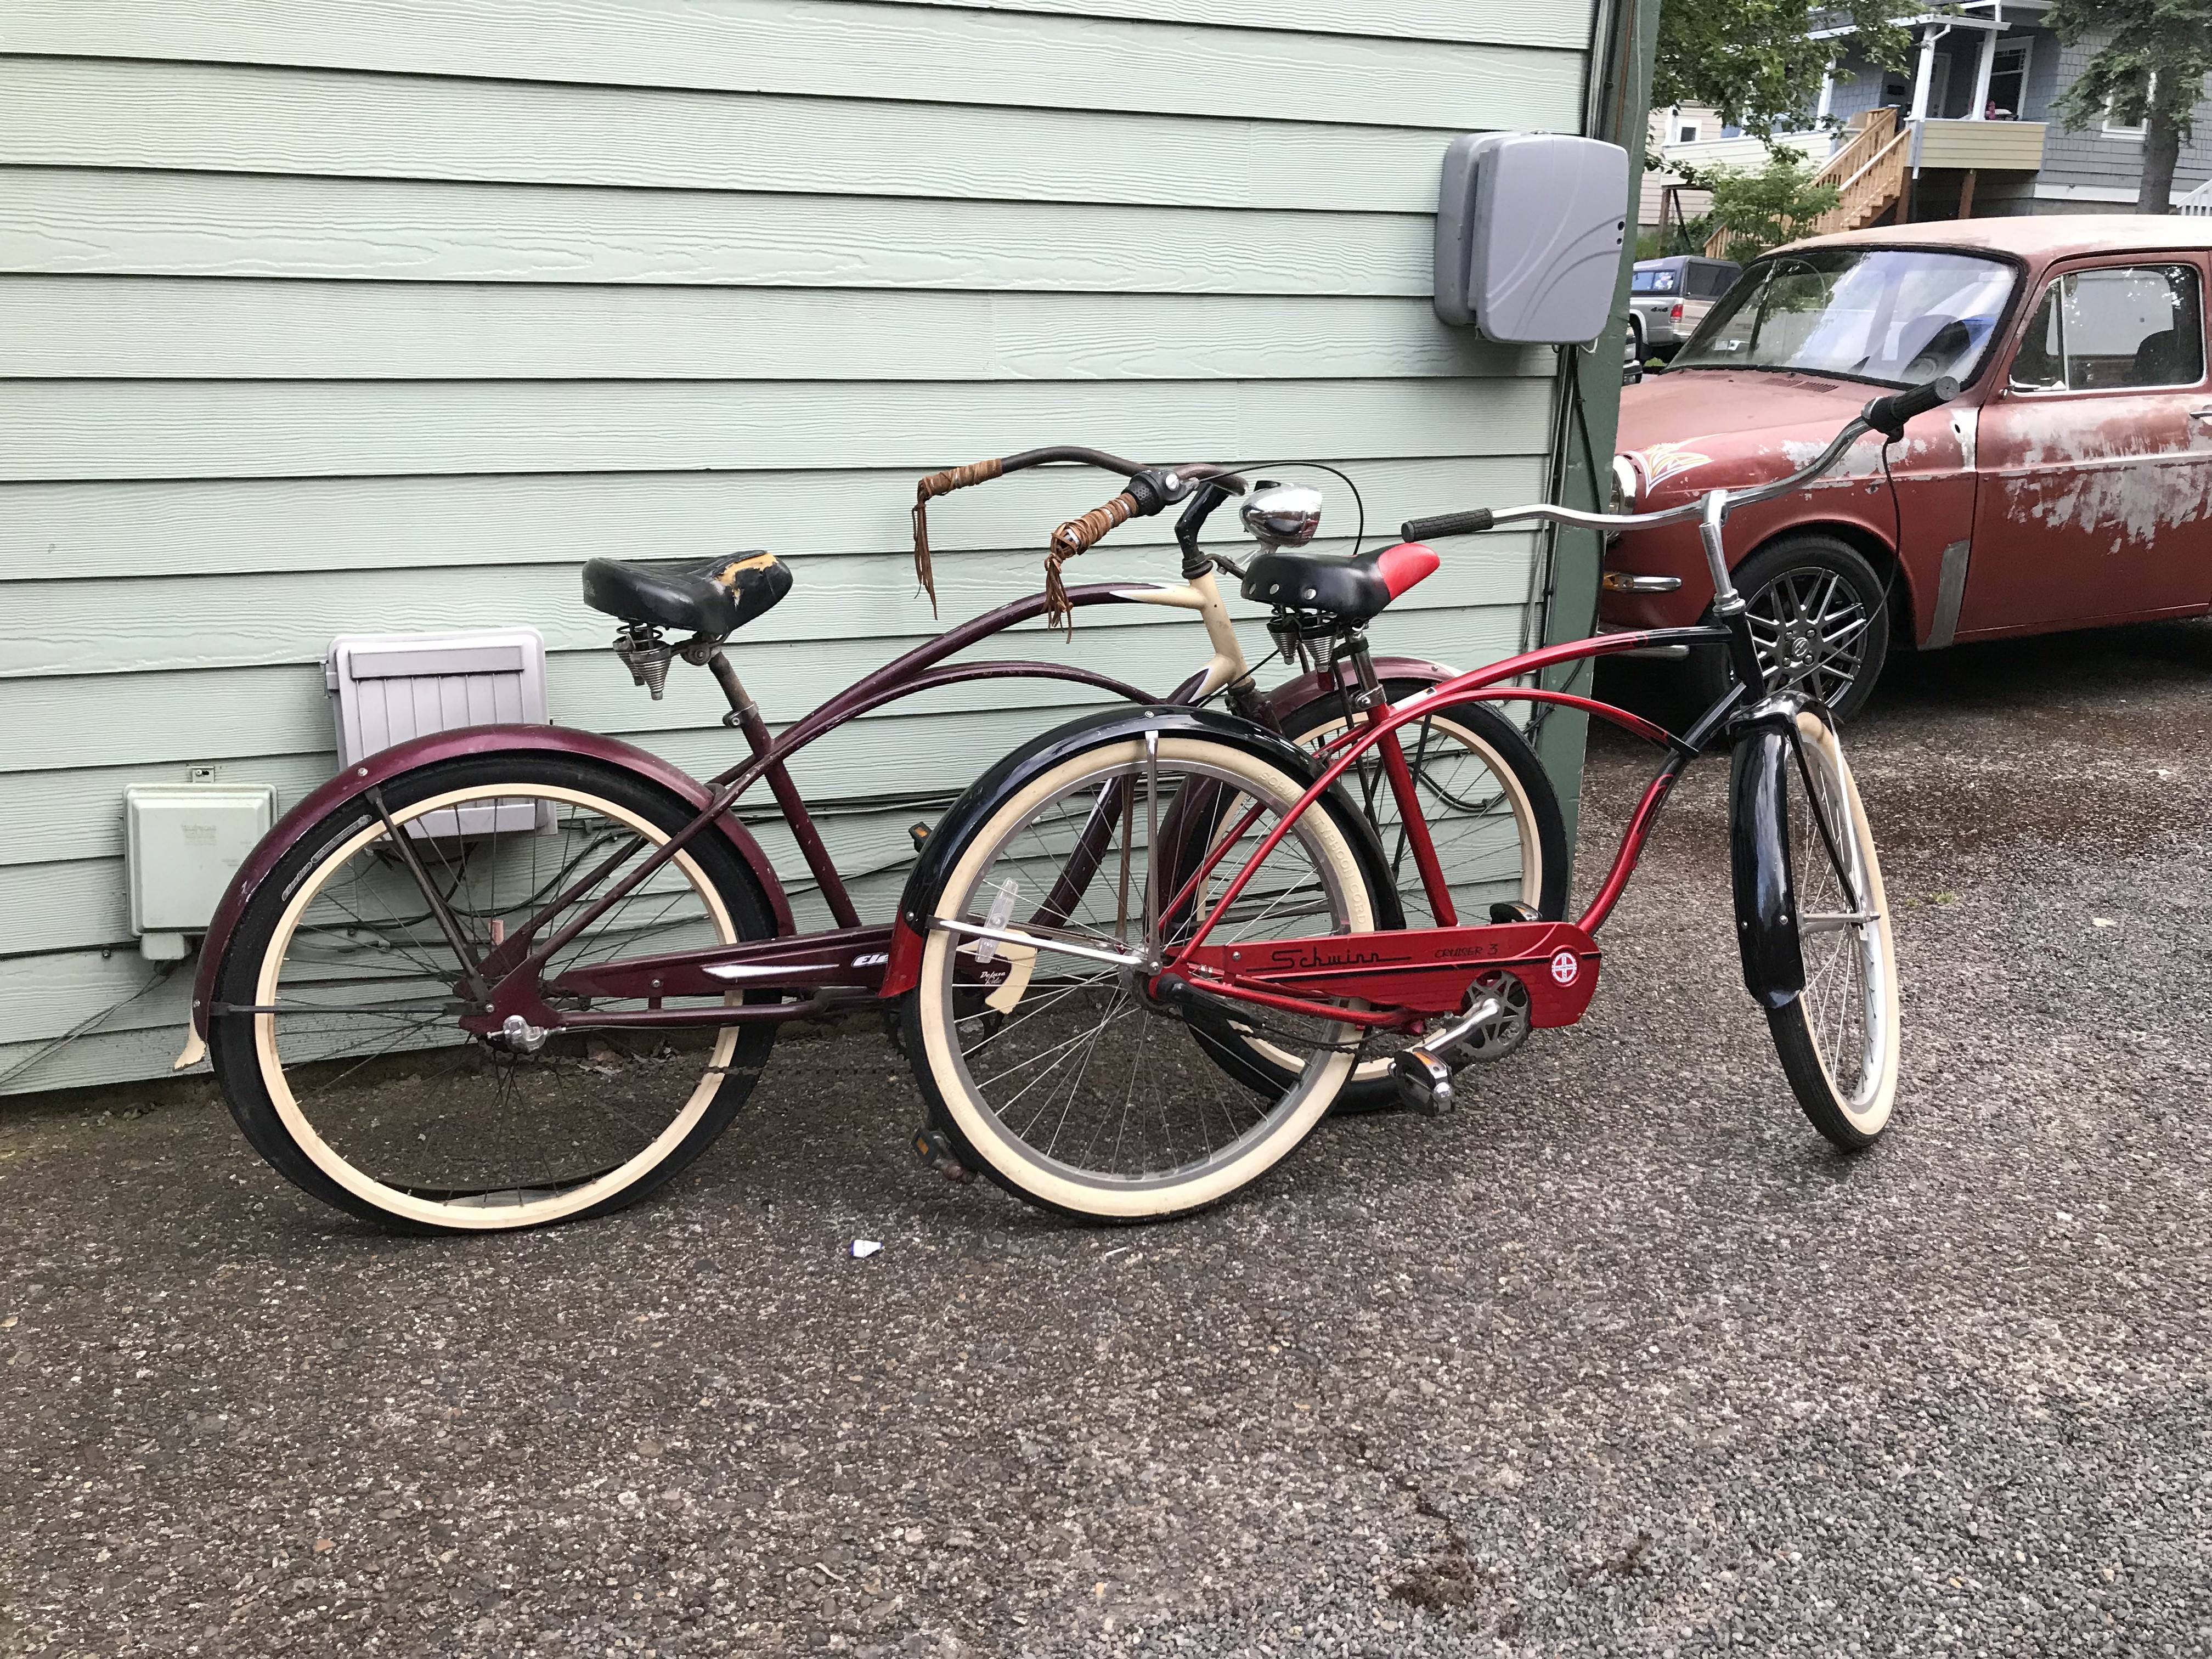
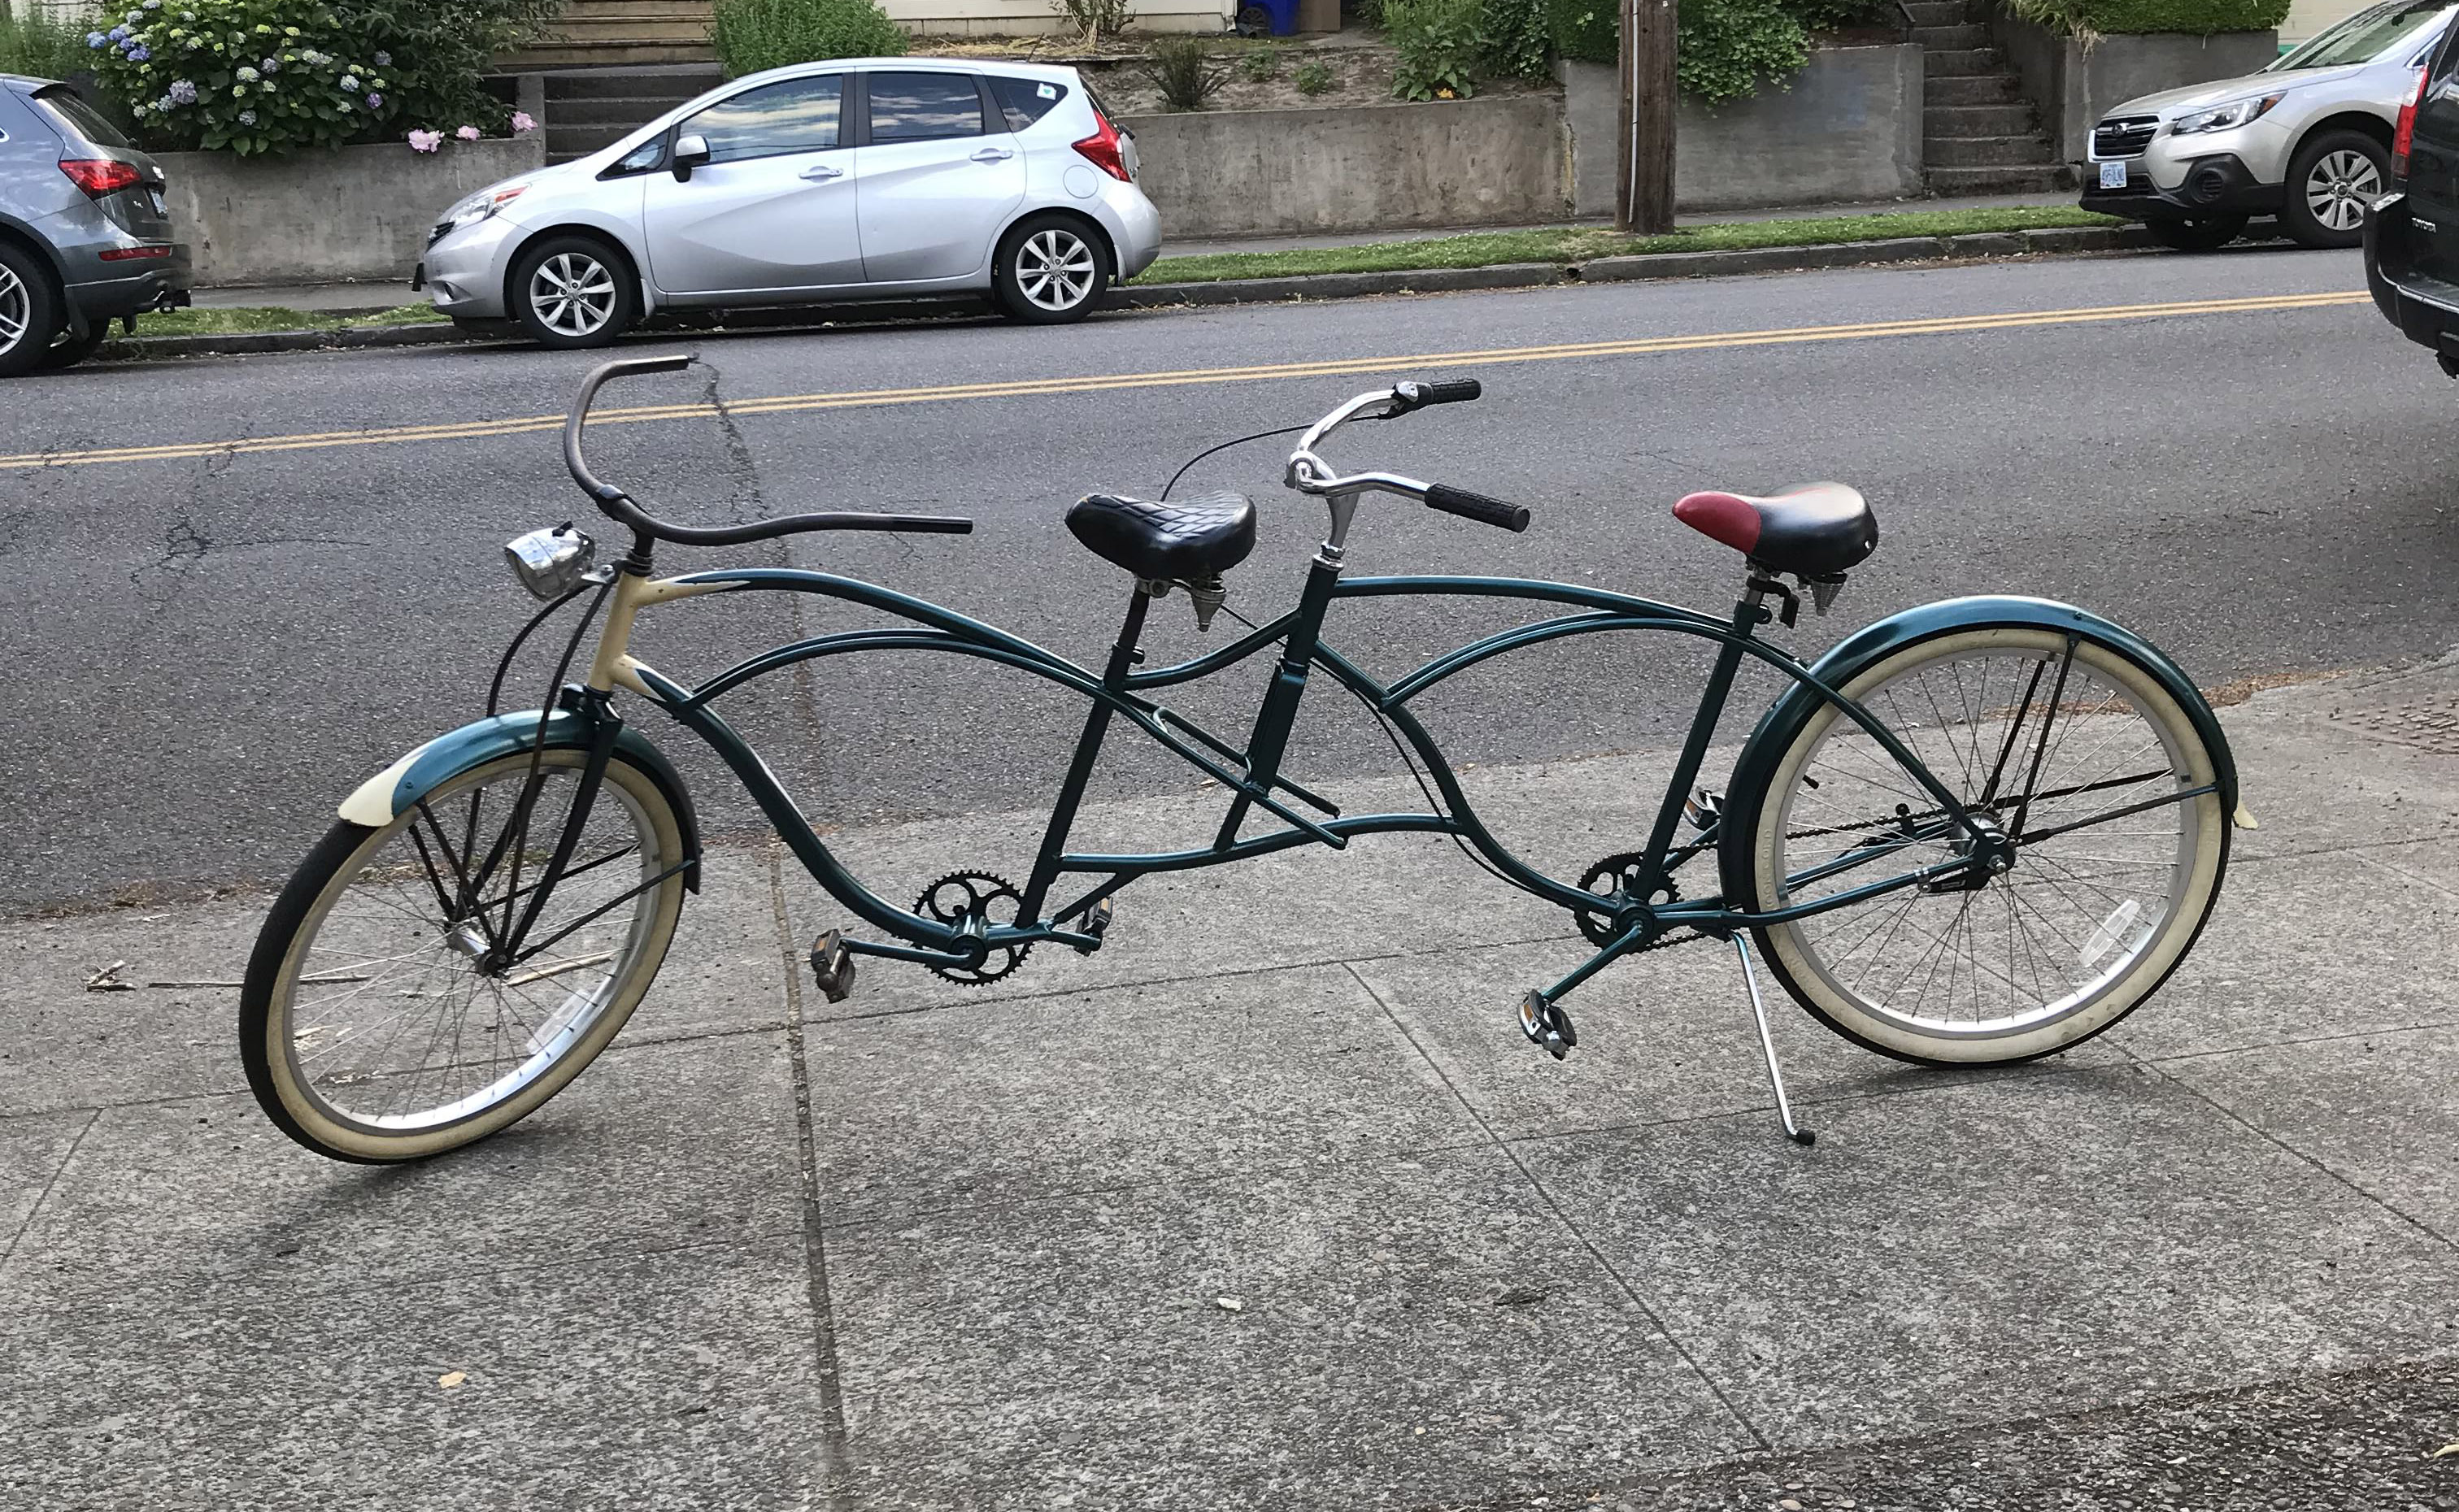
Building this thing was kind of a spontaneous idea. I had this old steel bike with a flat tire and I wanted to do something with it. Having just moved to Portland, OR, I though it would be fun to use my welding skills to build a wacky contraption and ride it around in the city's many bike-focused events. And I also wanted to build something for my wife to enjoy and not just me, so a tandem bike was a no brainer!
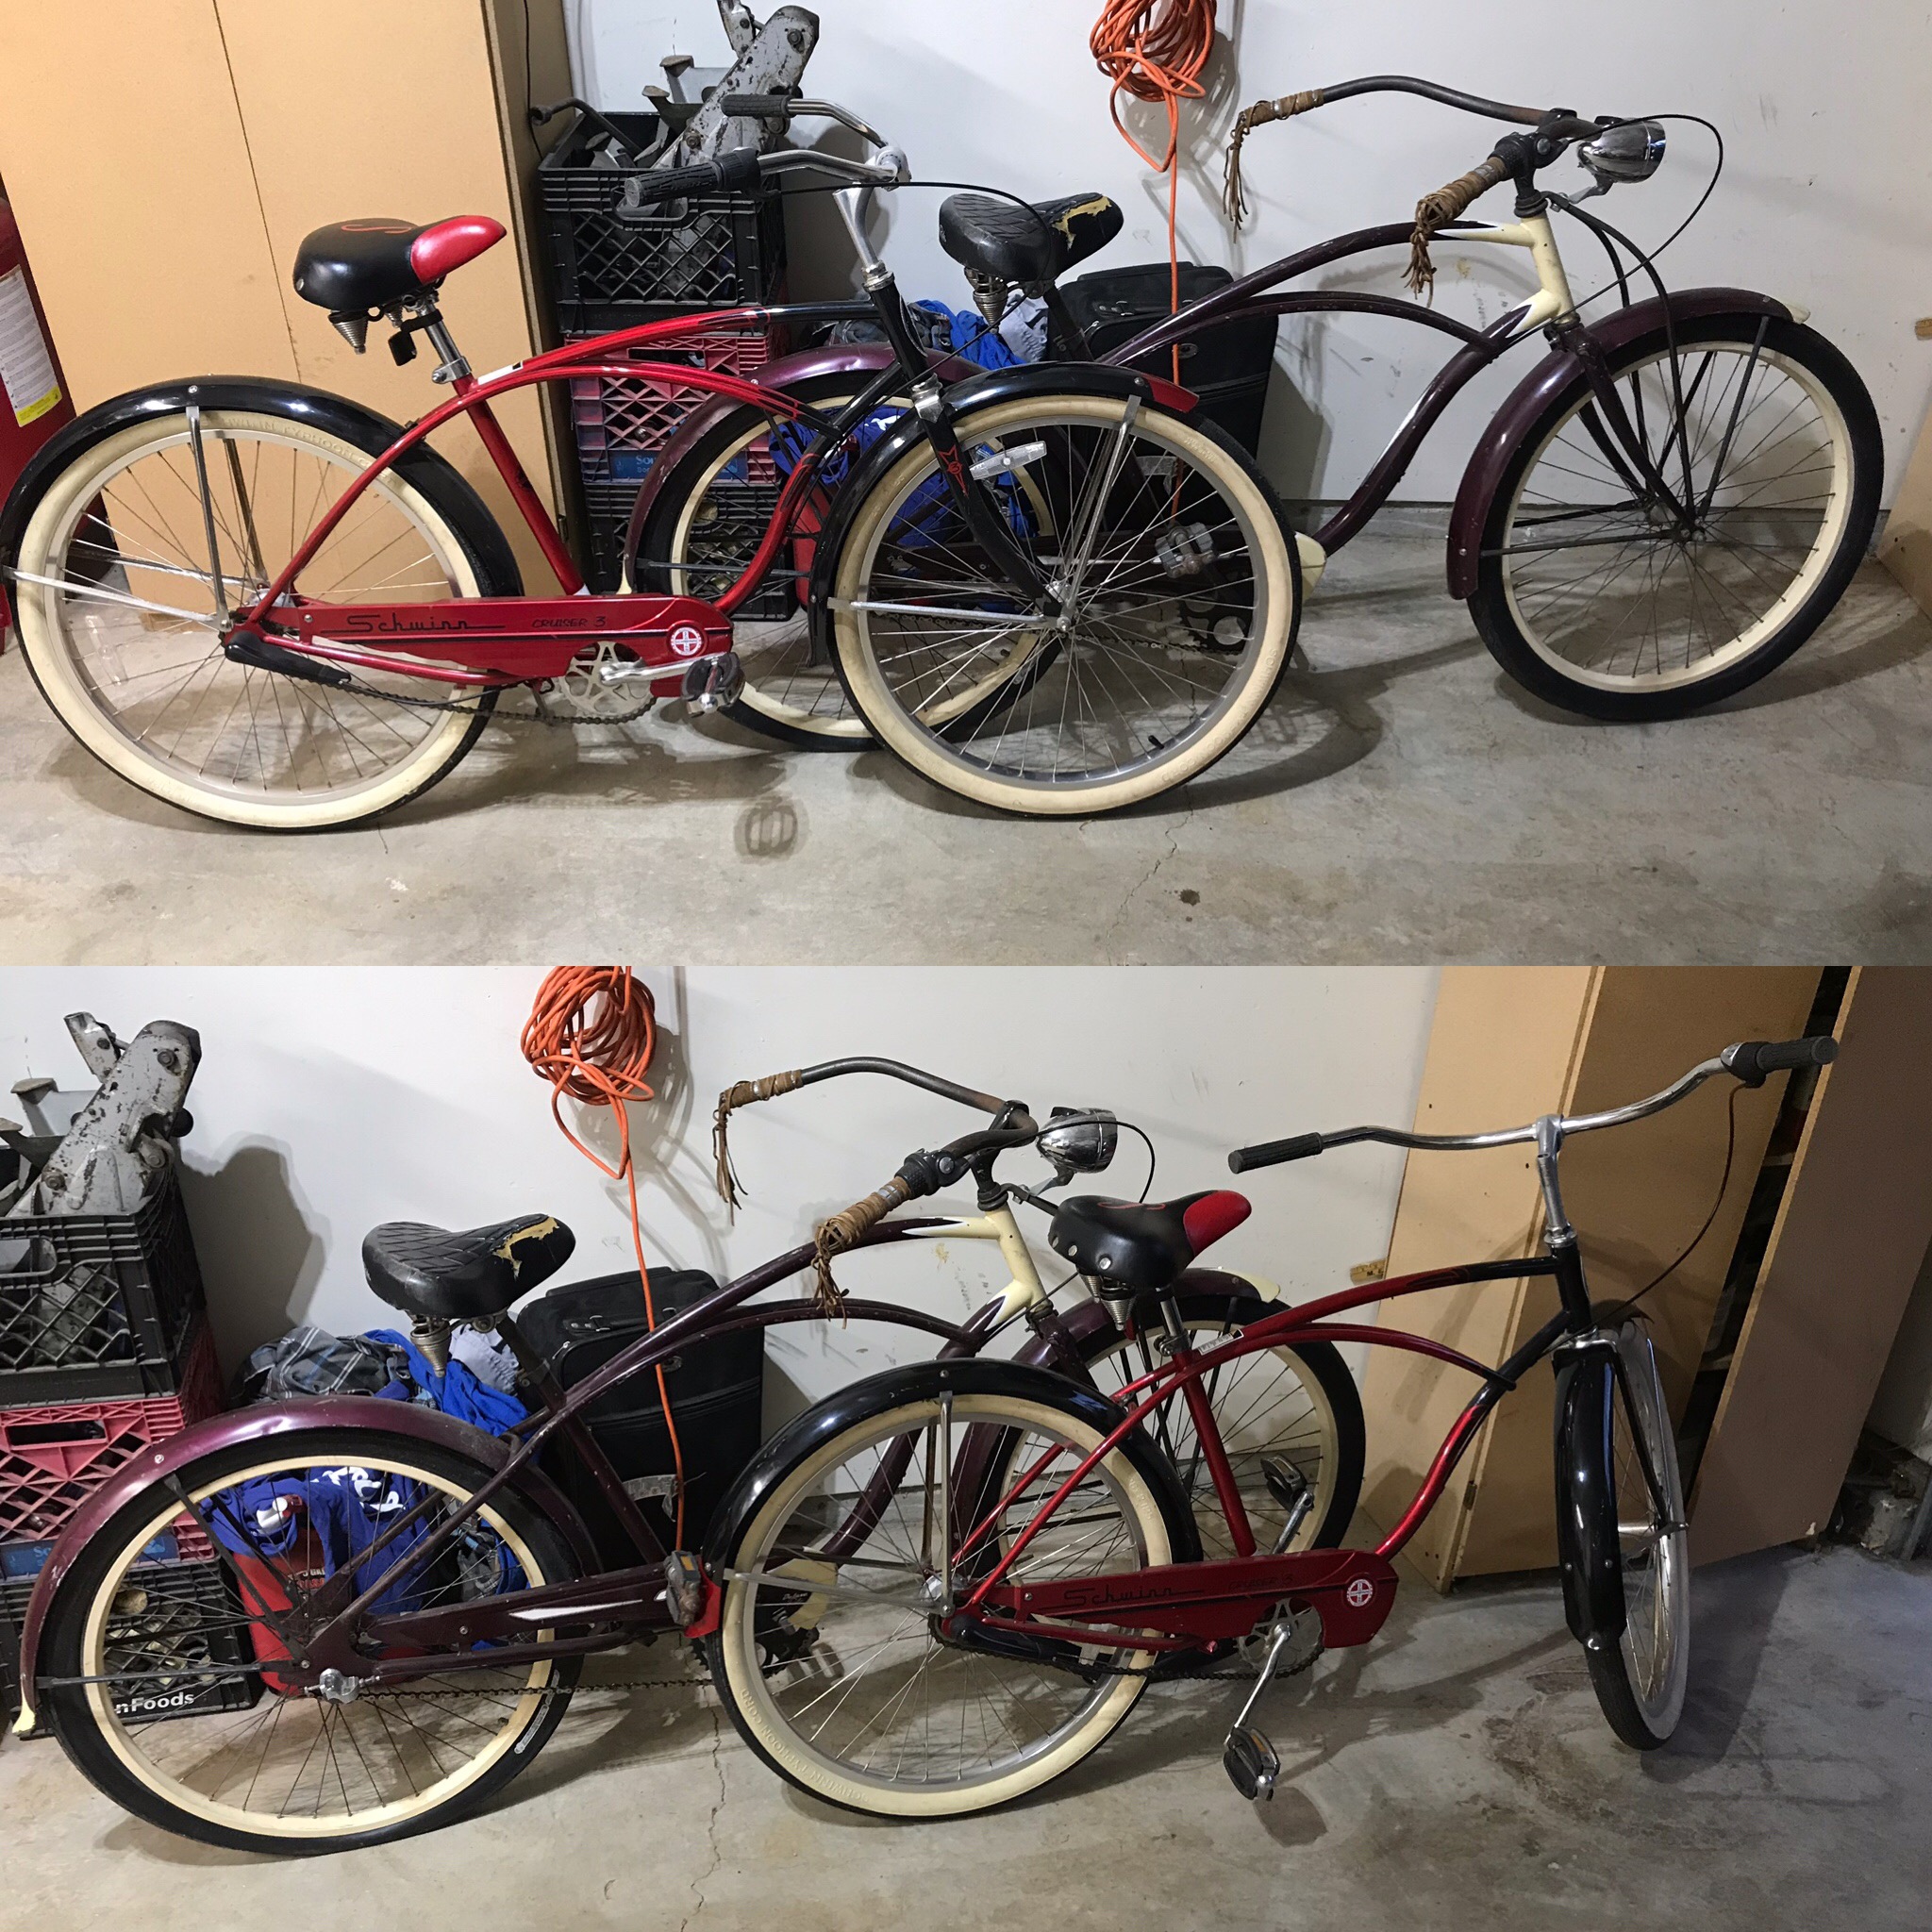
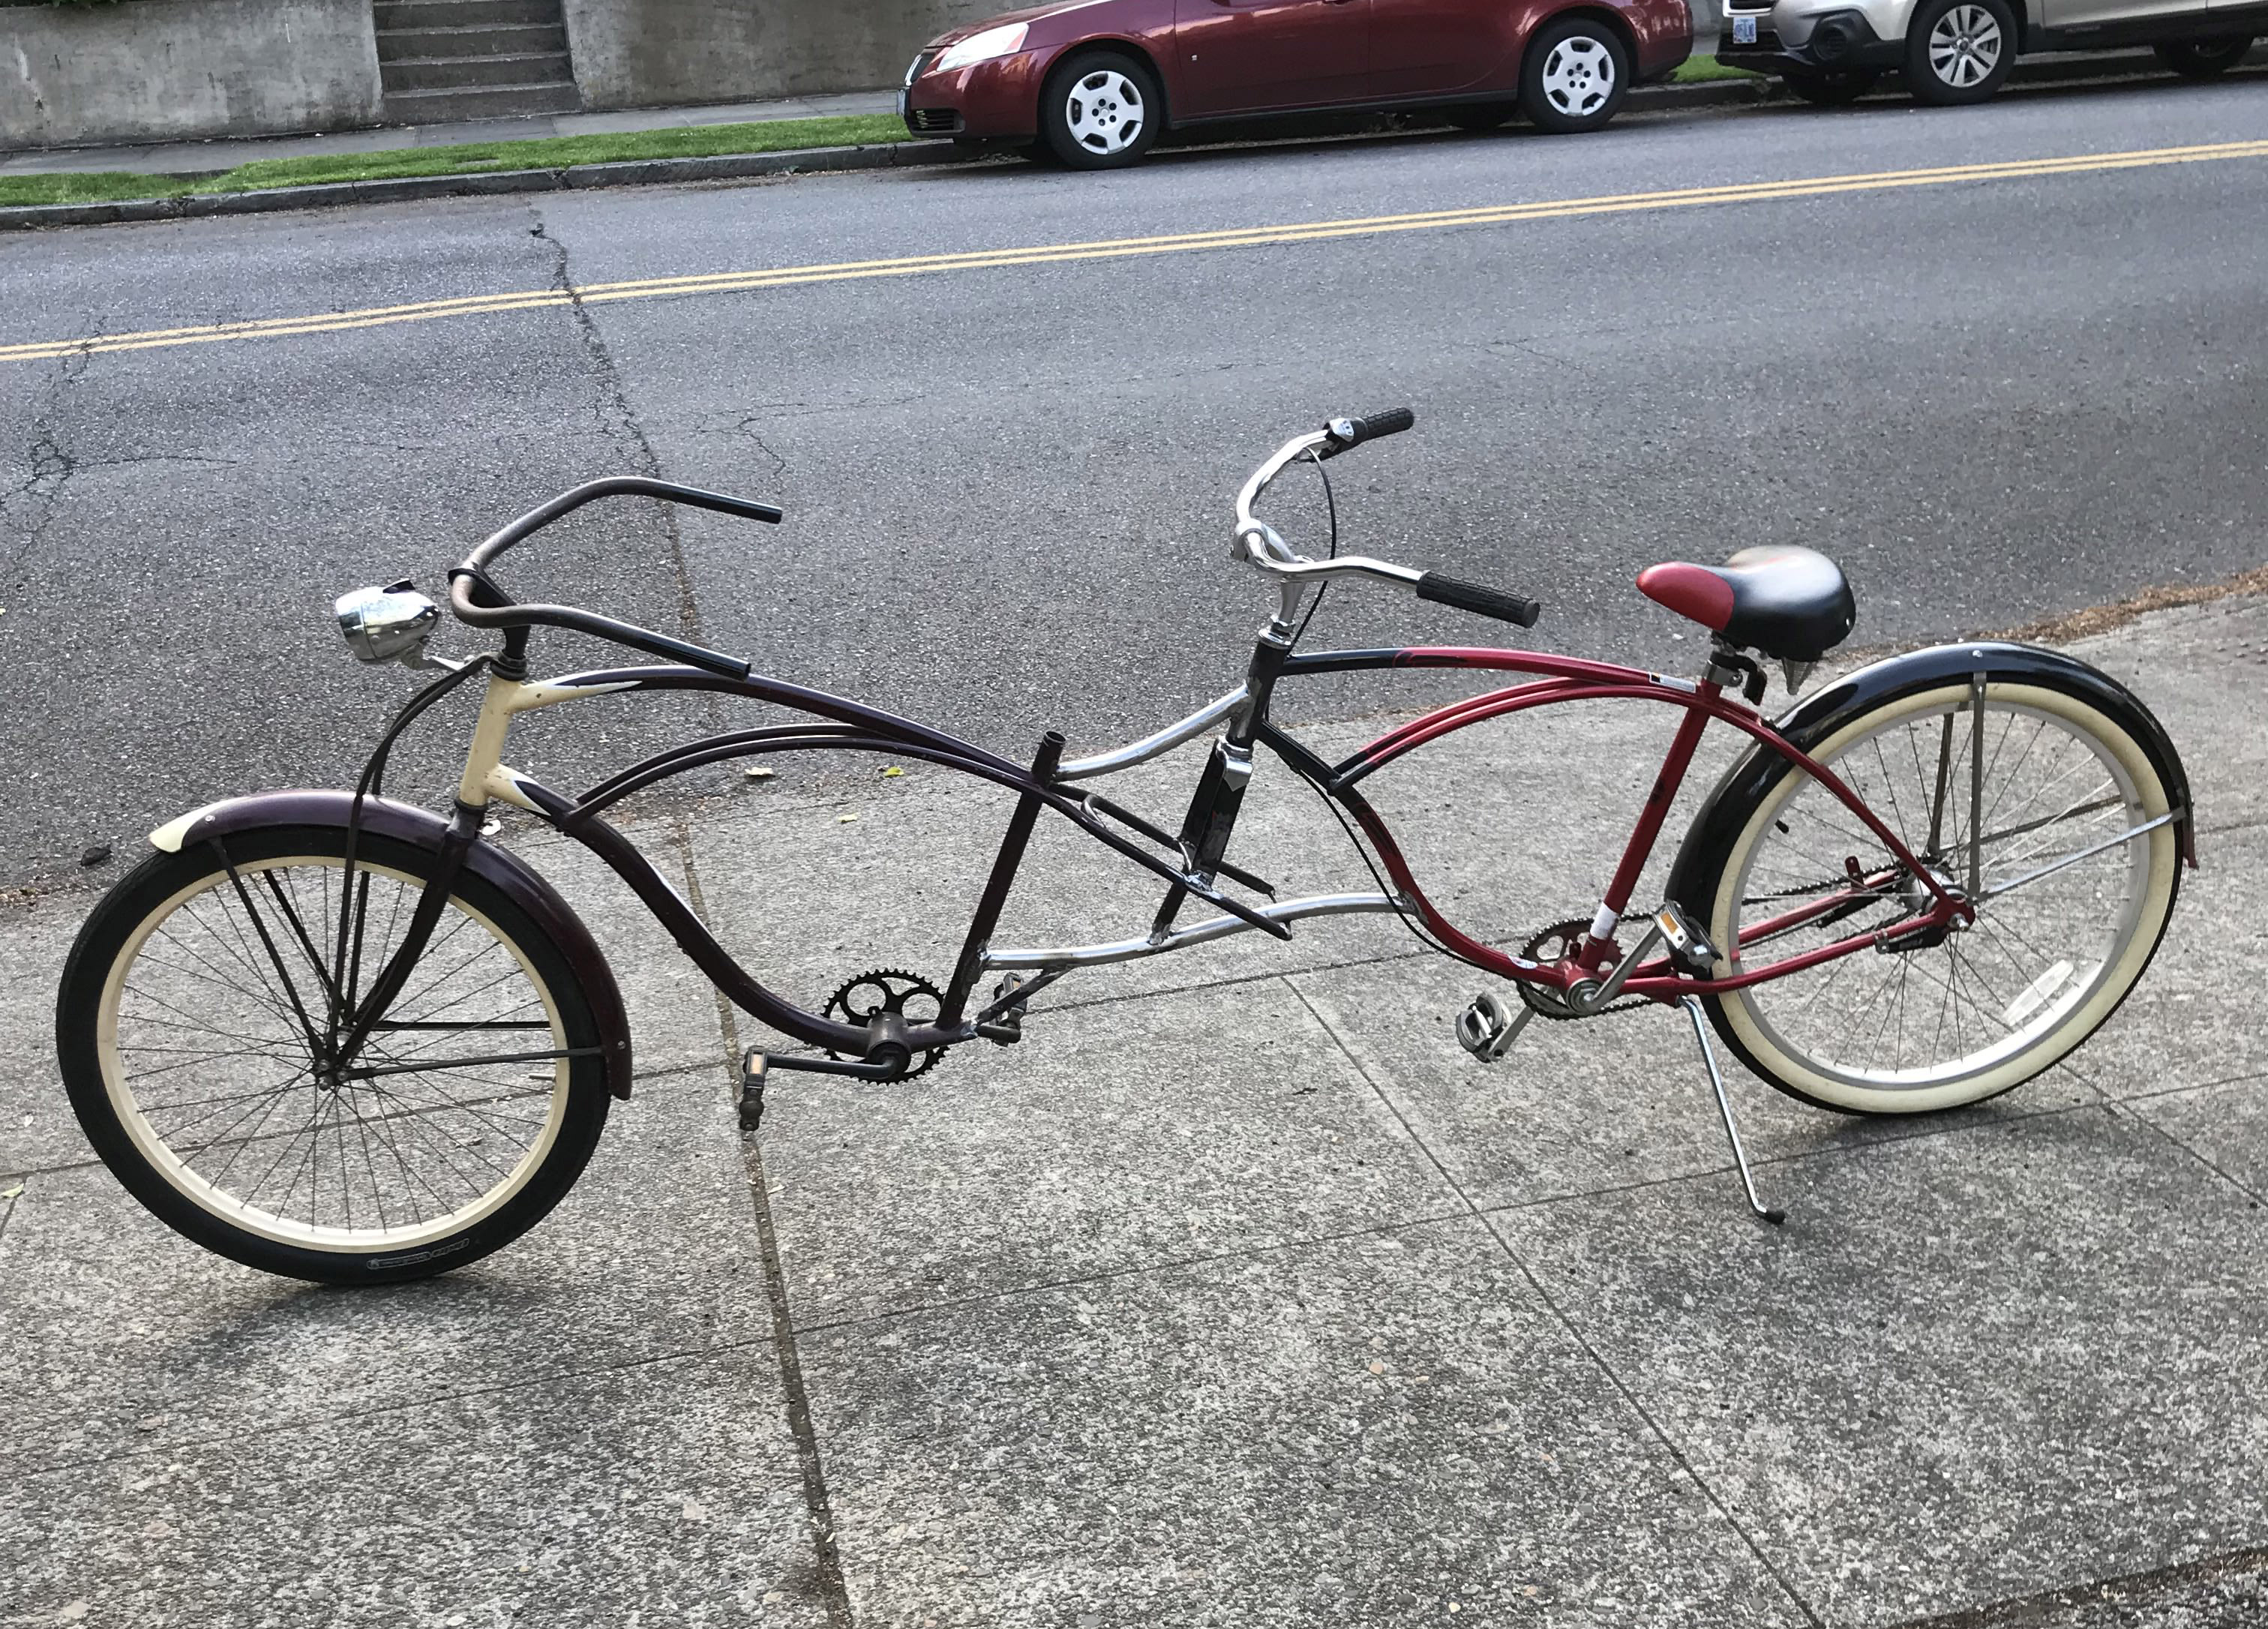
I checked out craigslist and found a suitable companion bike for only $50. In the image bellow, the Electra on the left was the original one I had, and the Schwinn on the right was what I bought for this project.
I played around with which bike should be in front and which should be in the back. The frames were very similar but not identical.
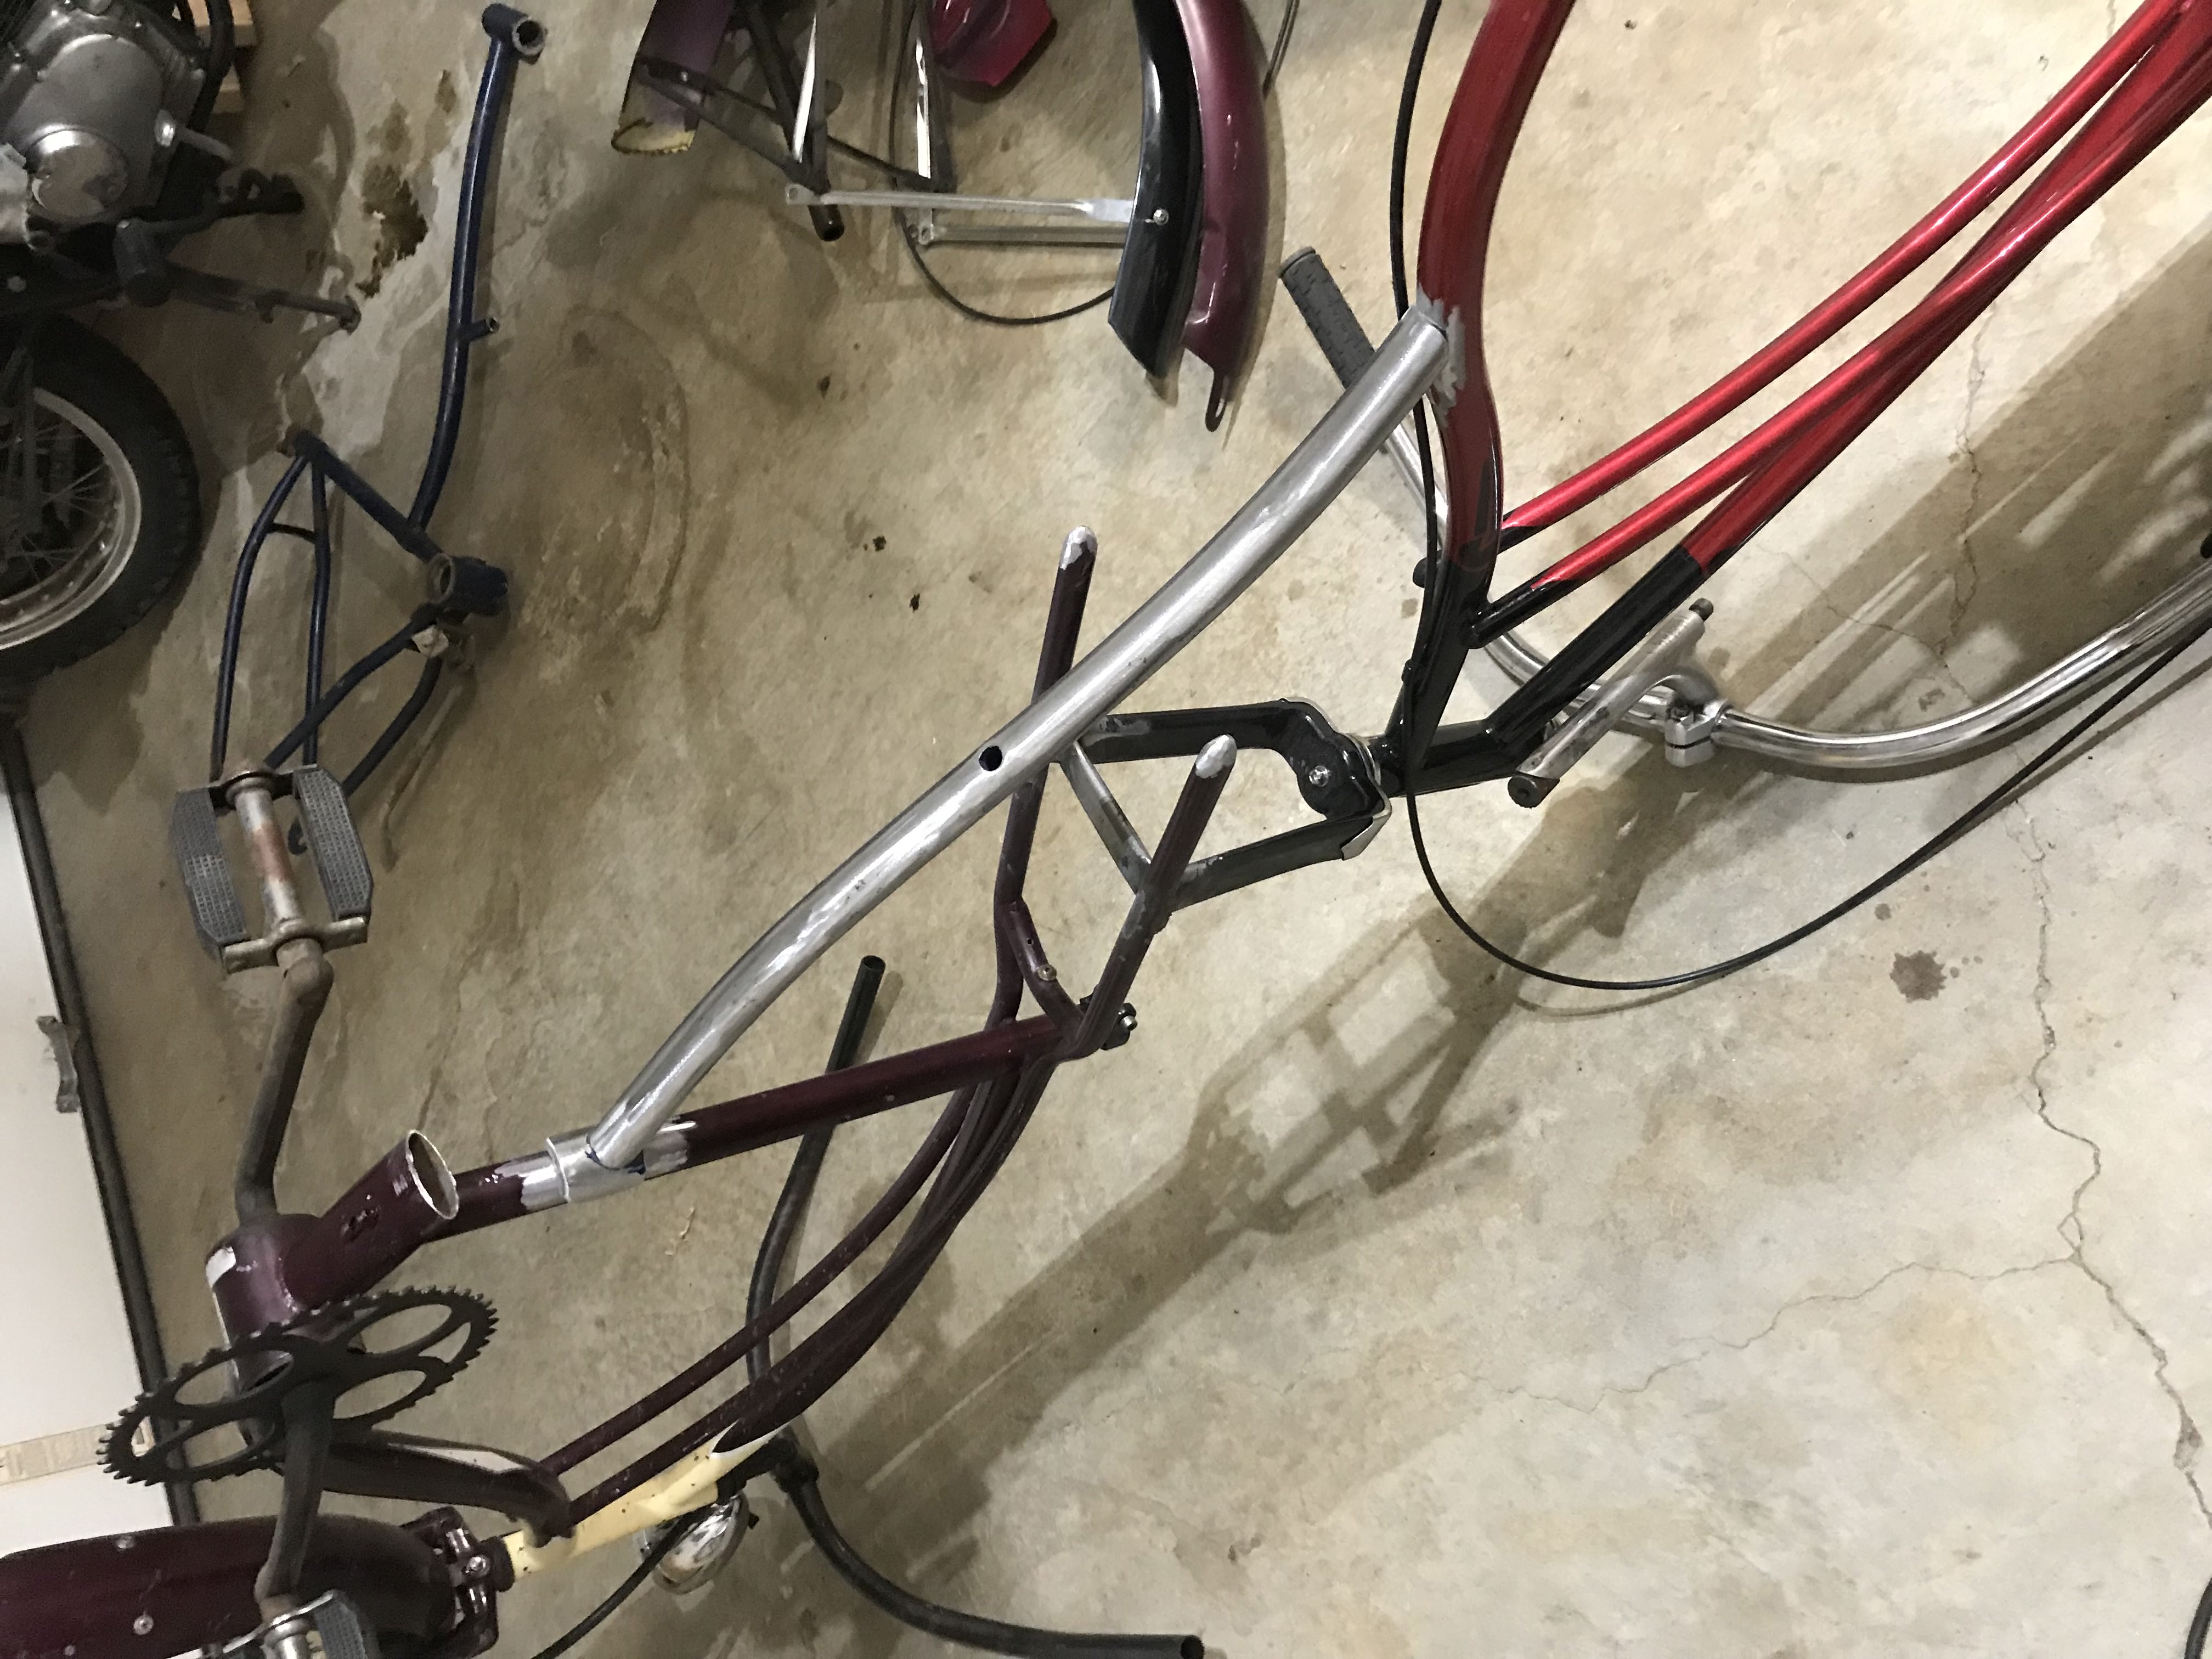
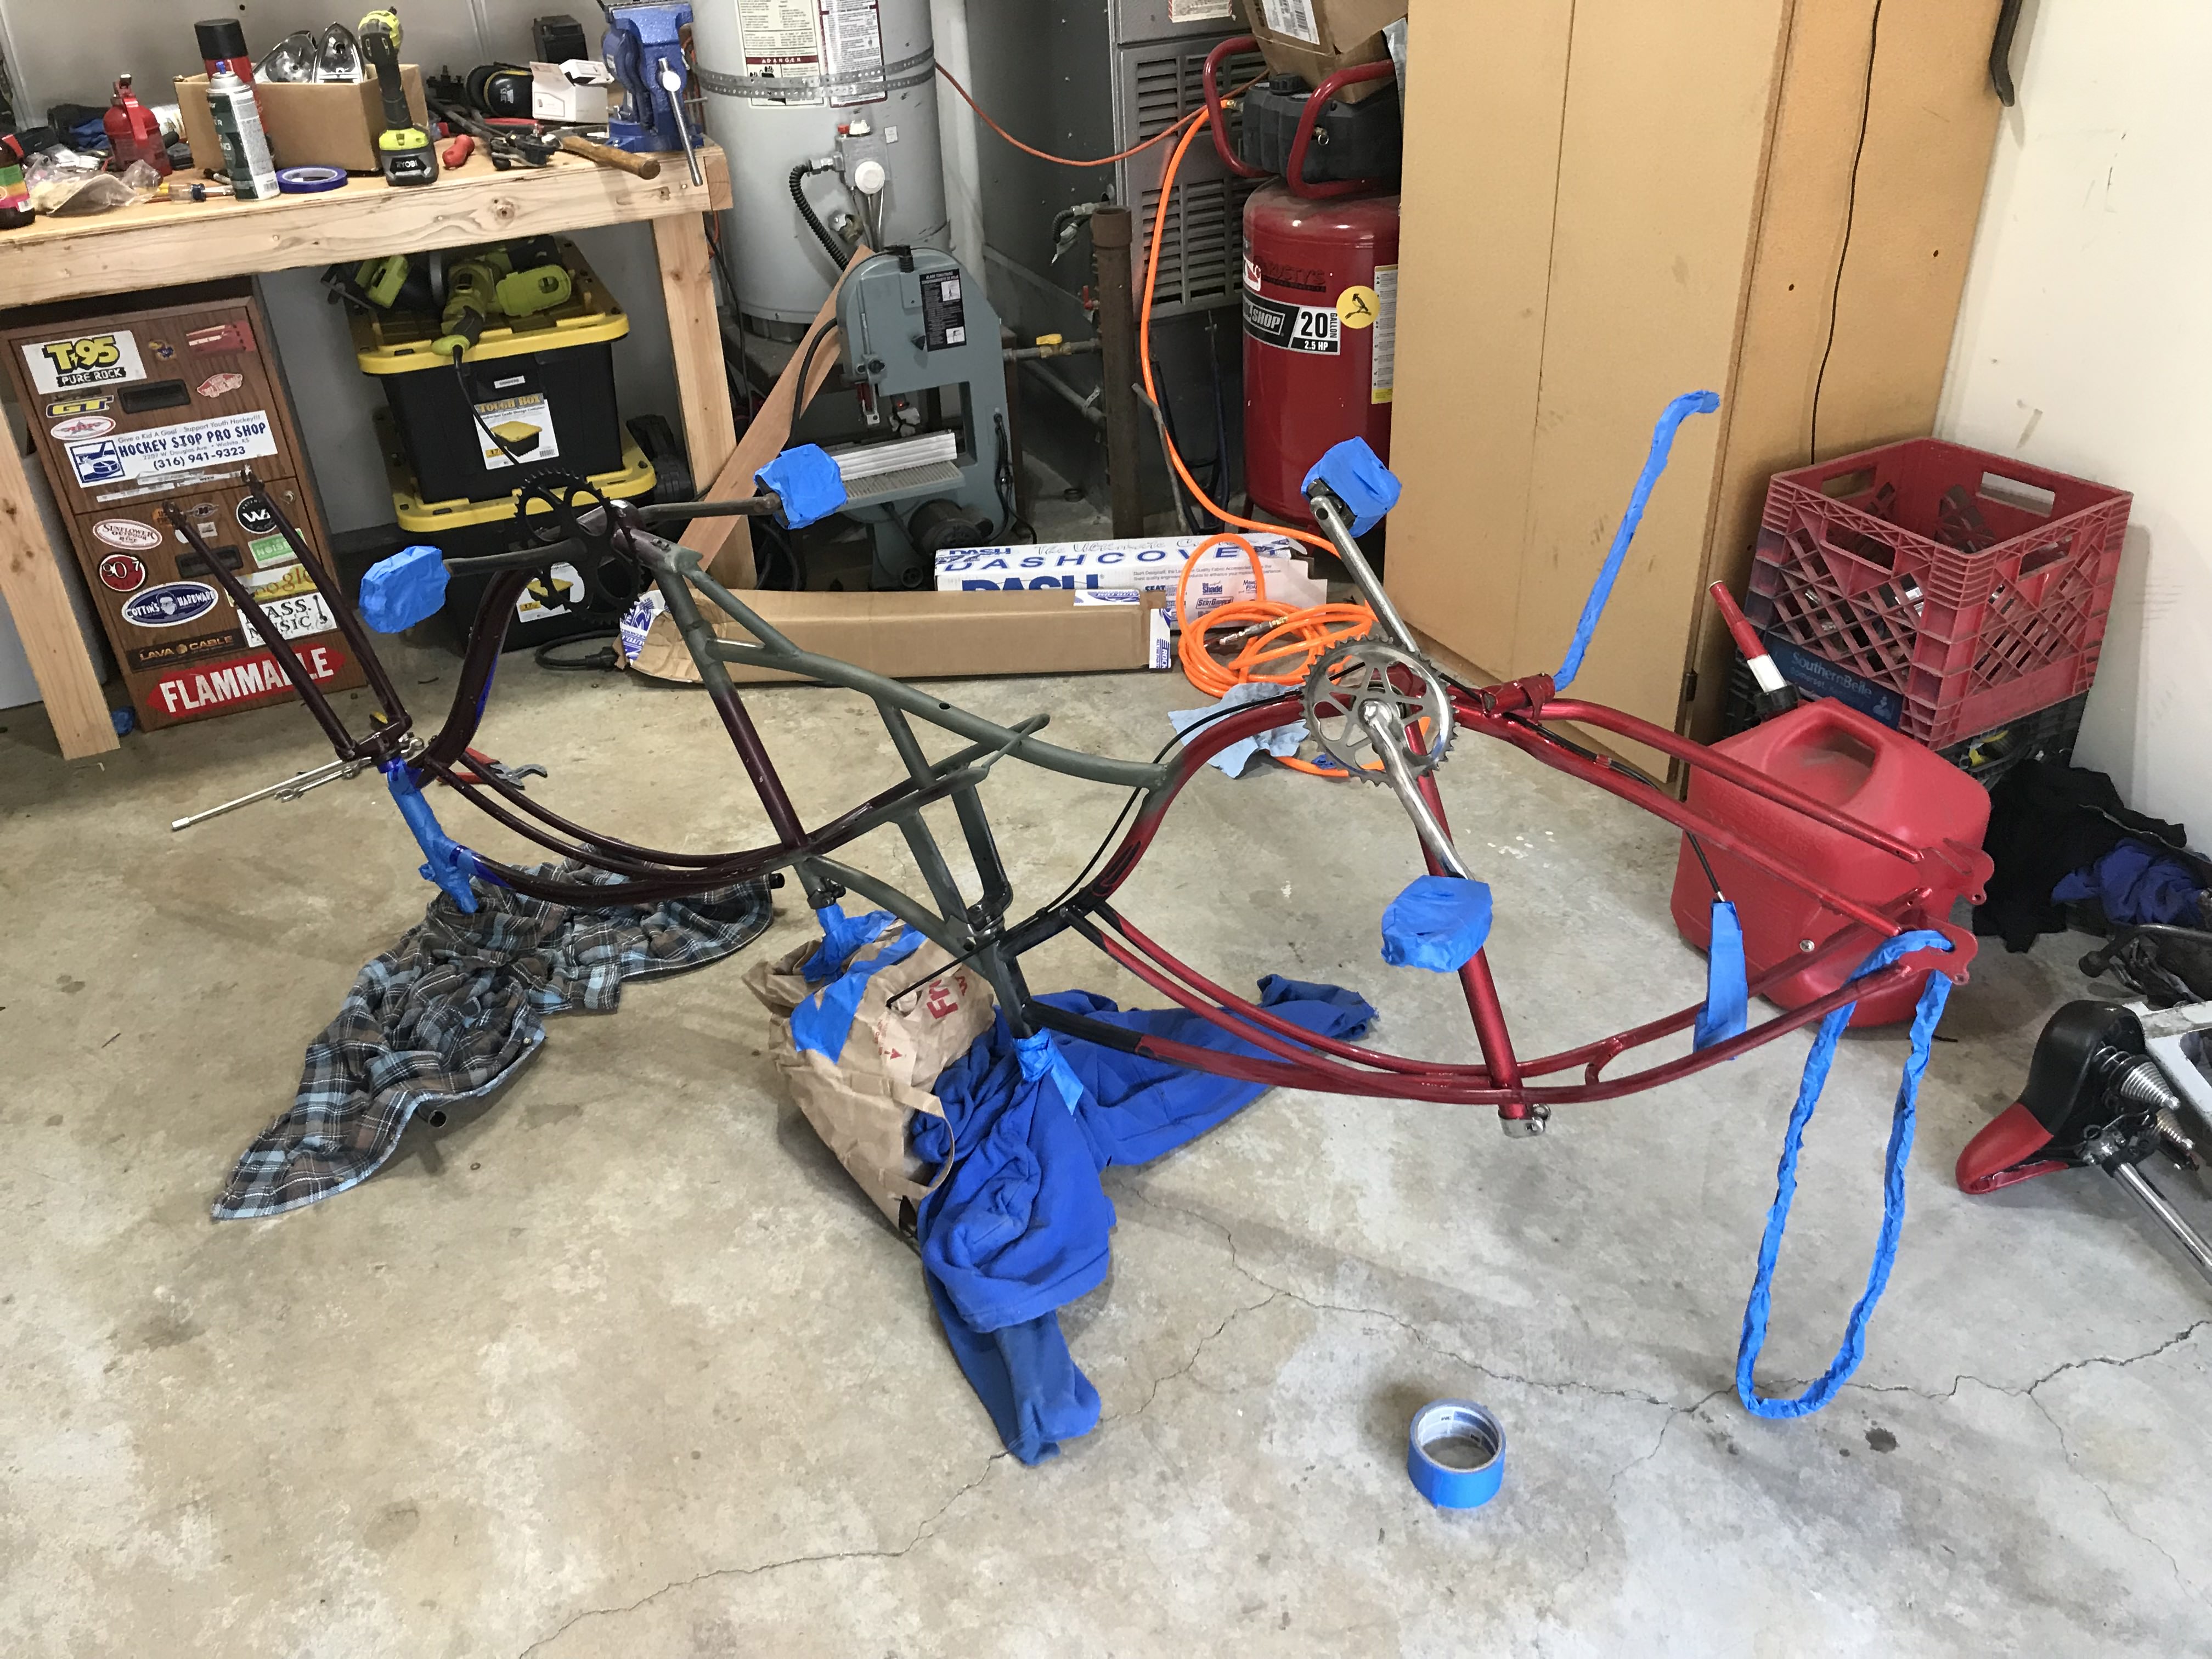
Once I knew which bike I wanted in front, I didn't wast any time and I started welding them together! I though that welding the fork of the bike in the back to the chainstays of the bike in the front would work pretty well and give enough space for the passengers. Usually, the headtube of the rear bike is welded to the seat pipe of the front bike frame, but that would not work for these bikes.
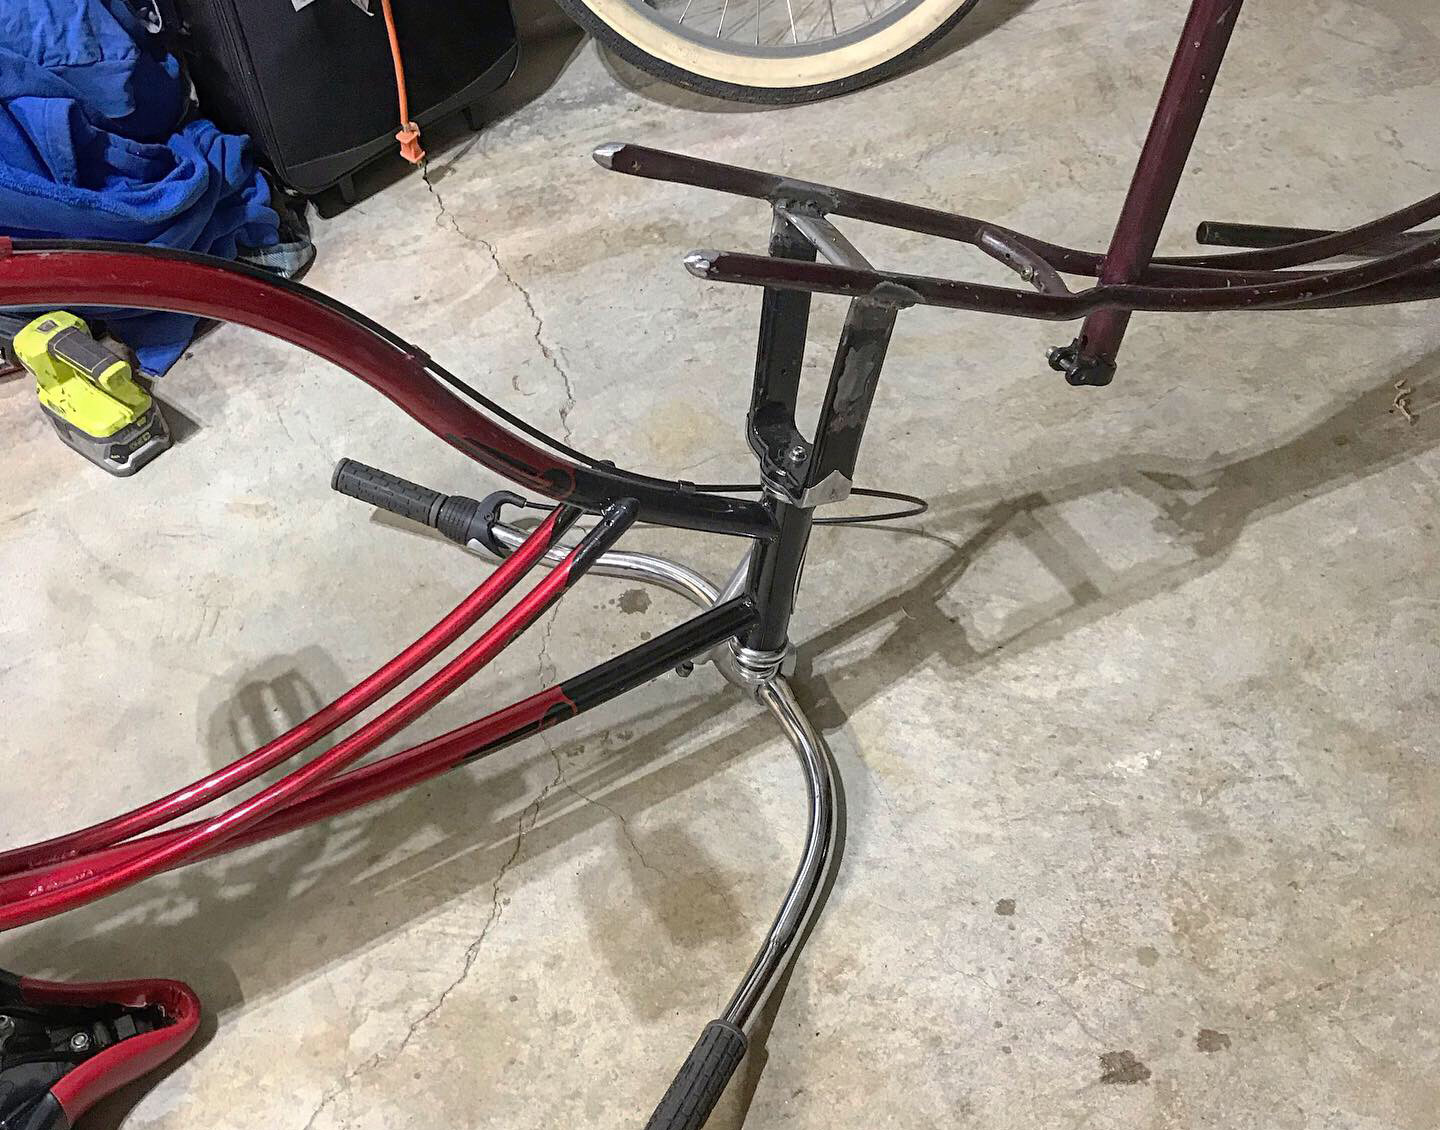
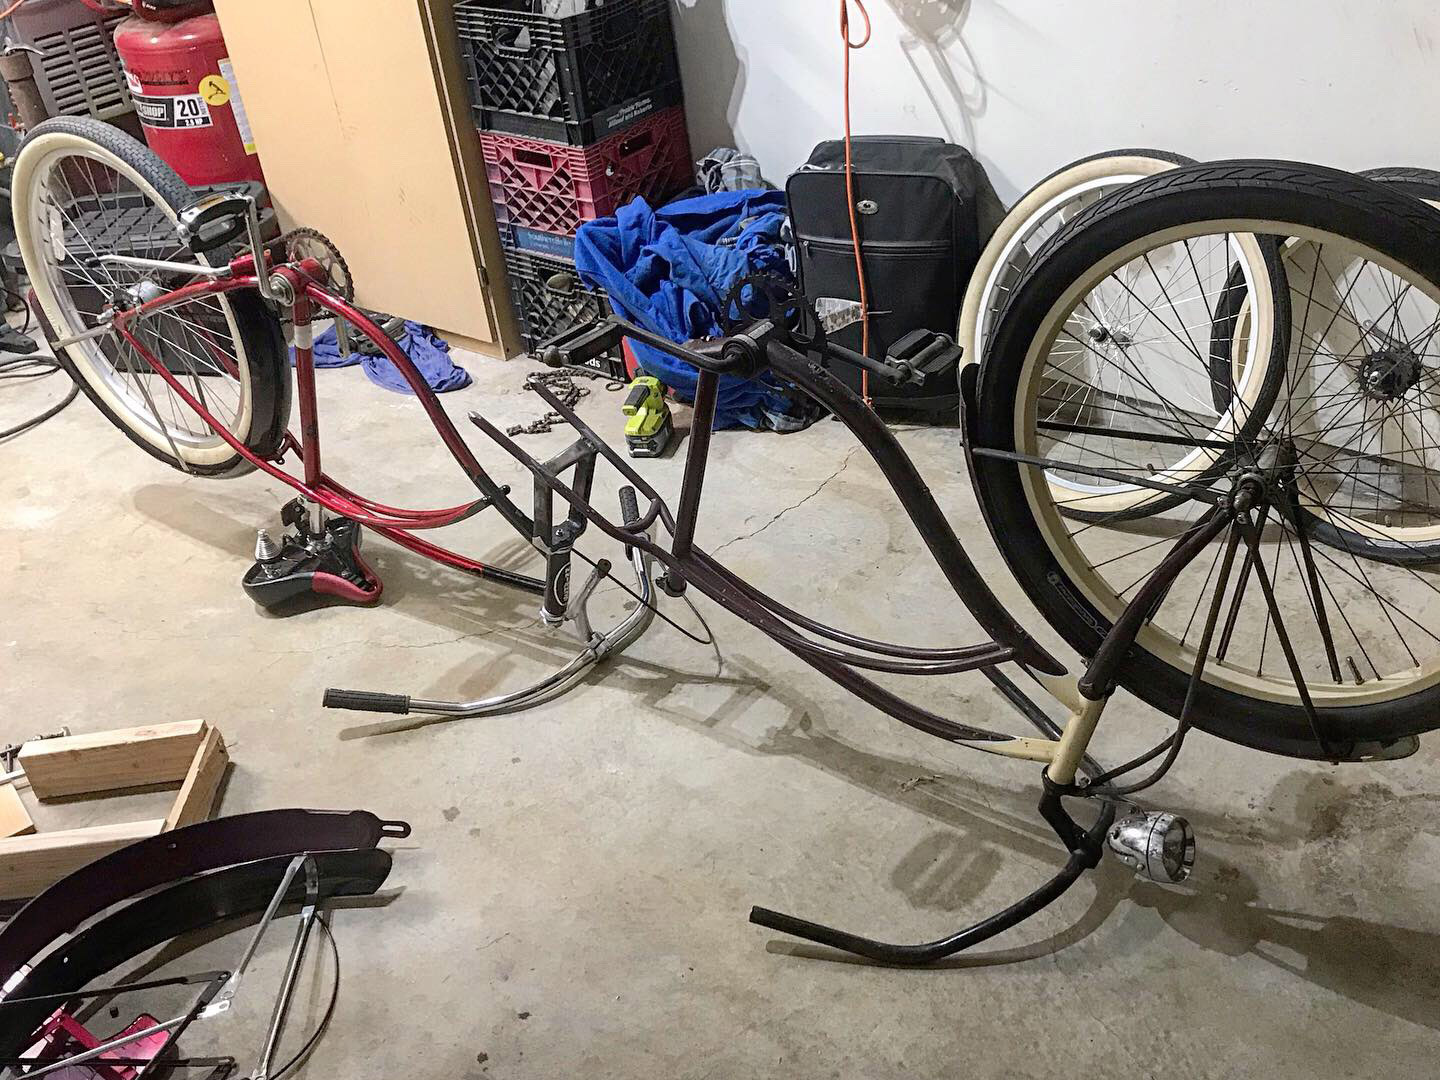
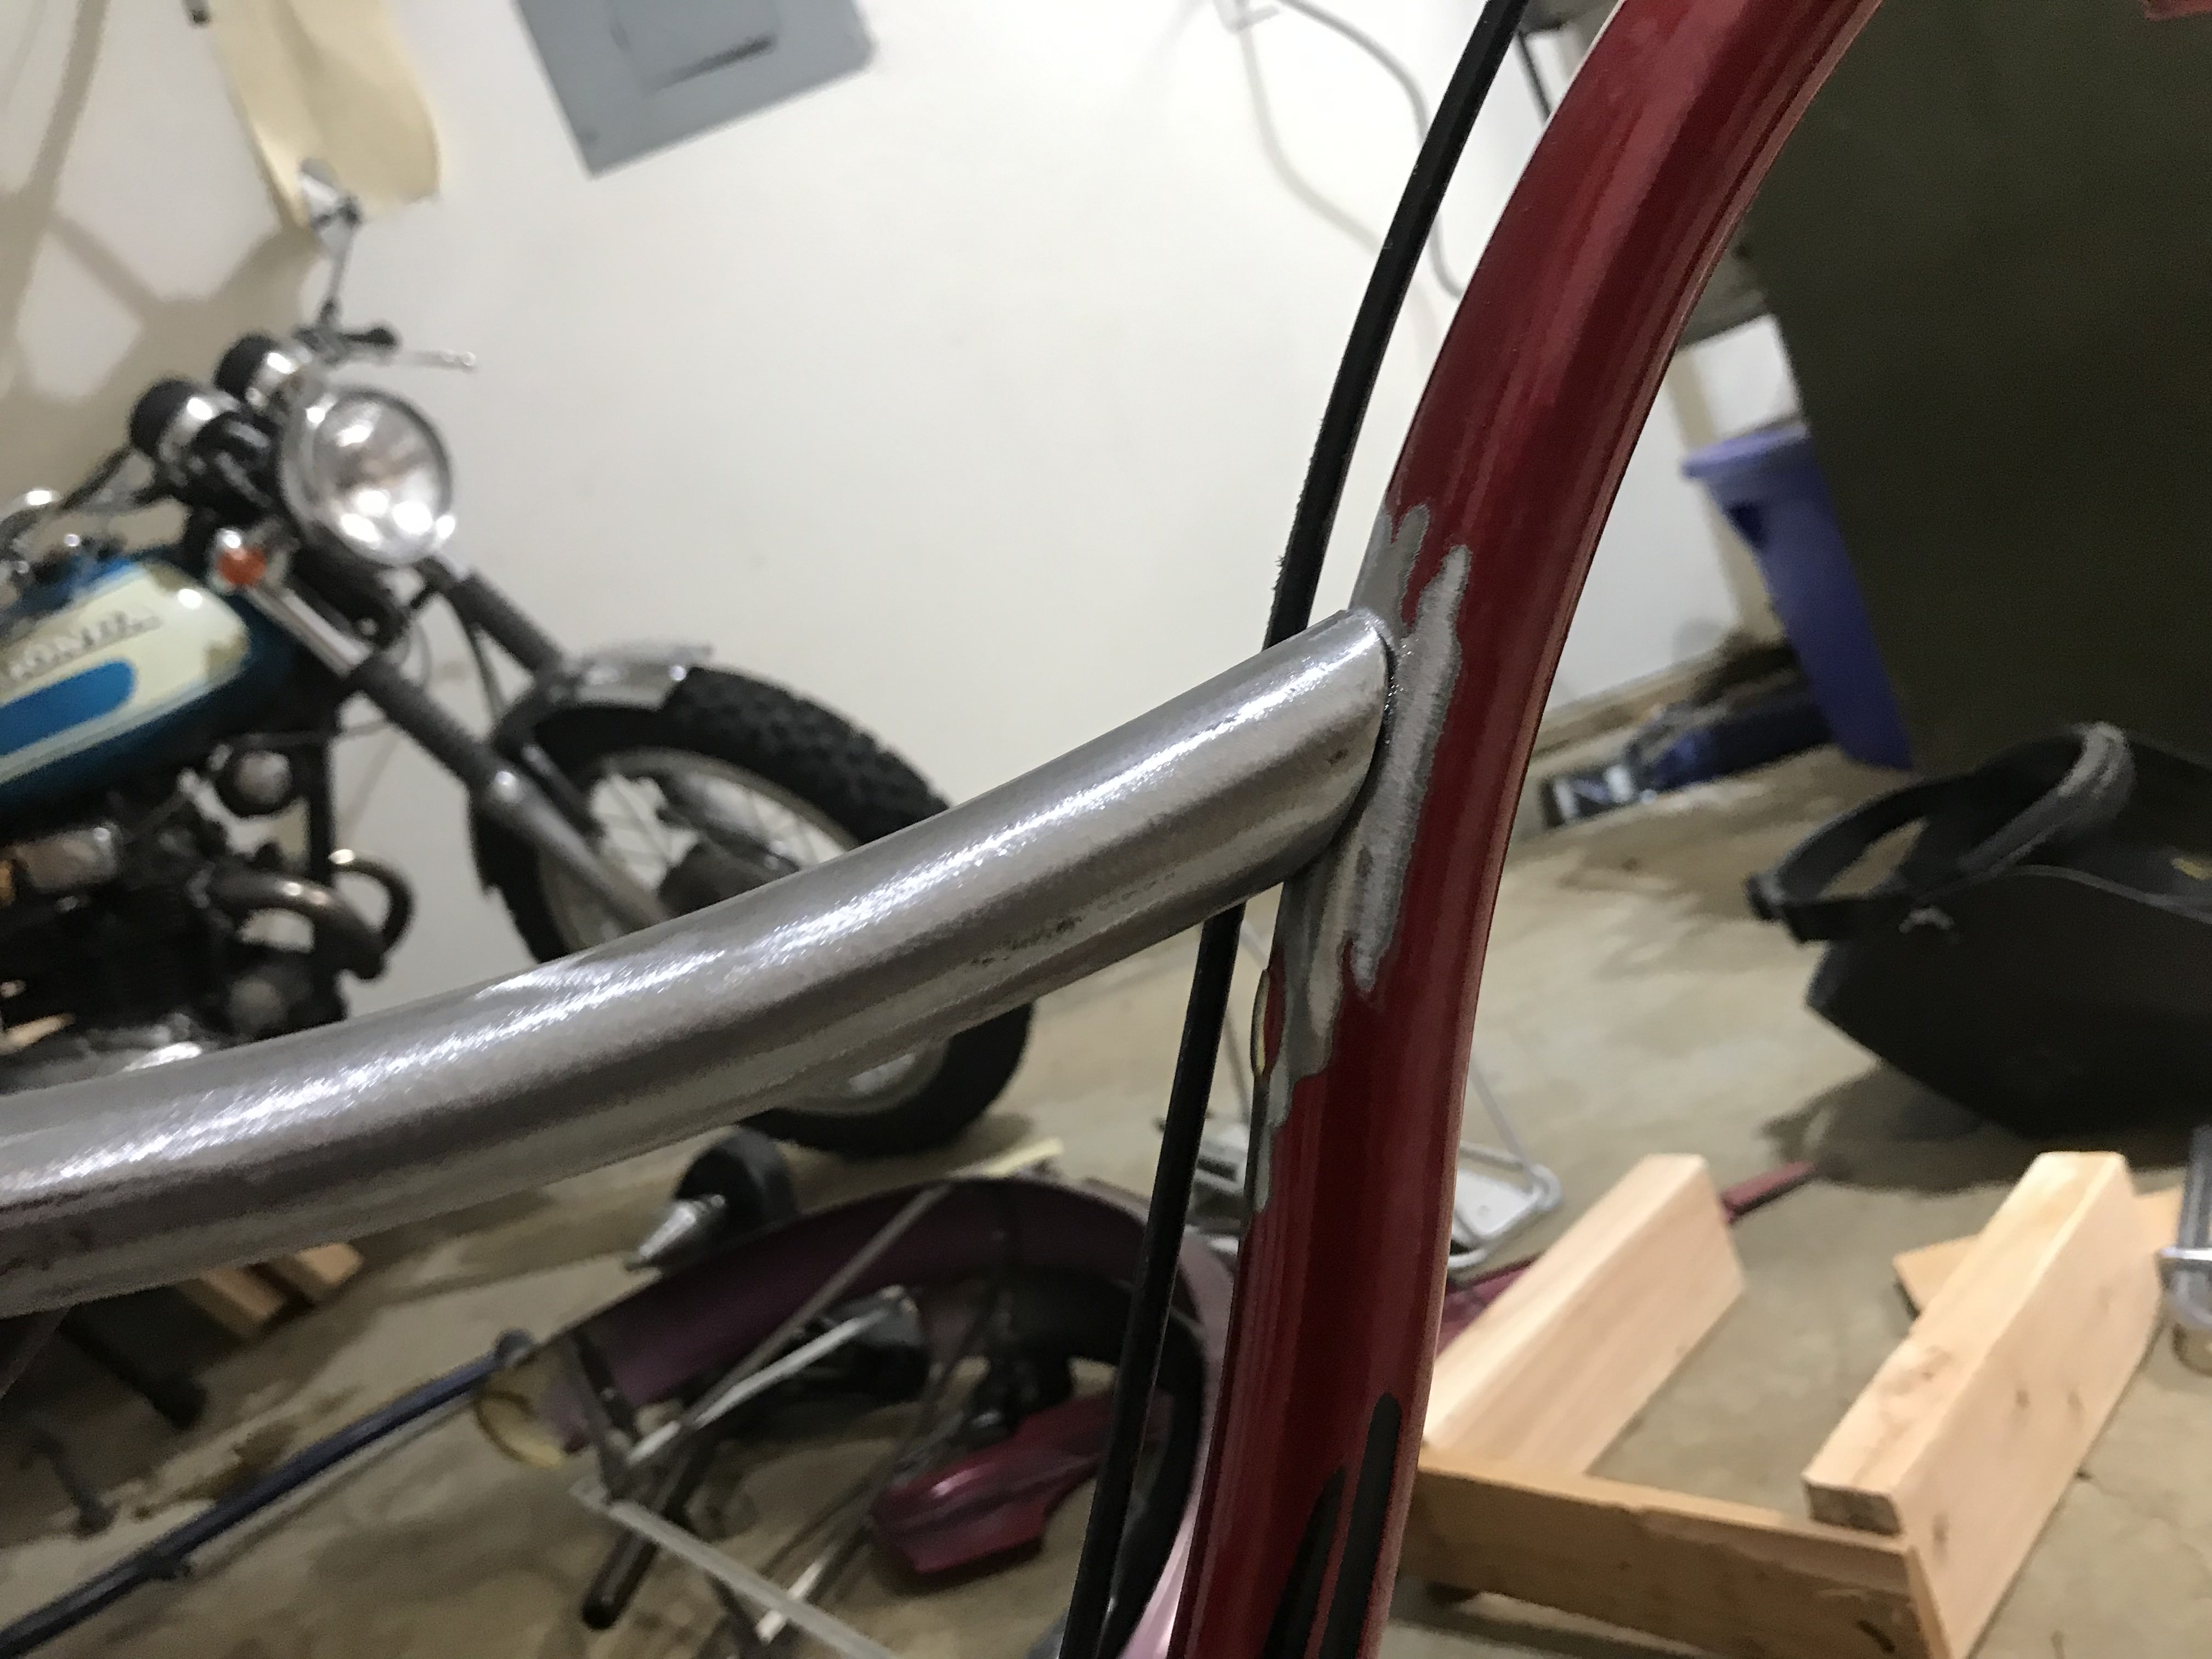
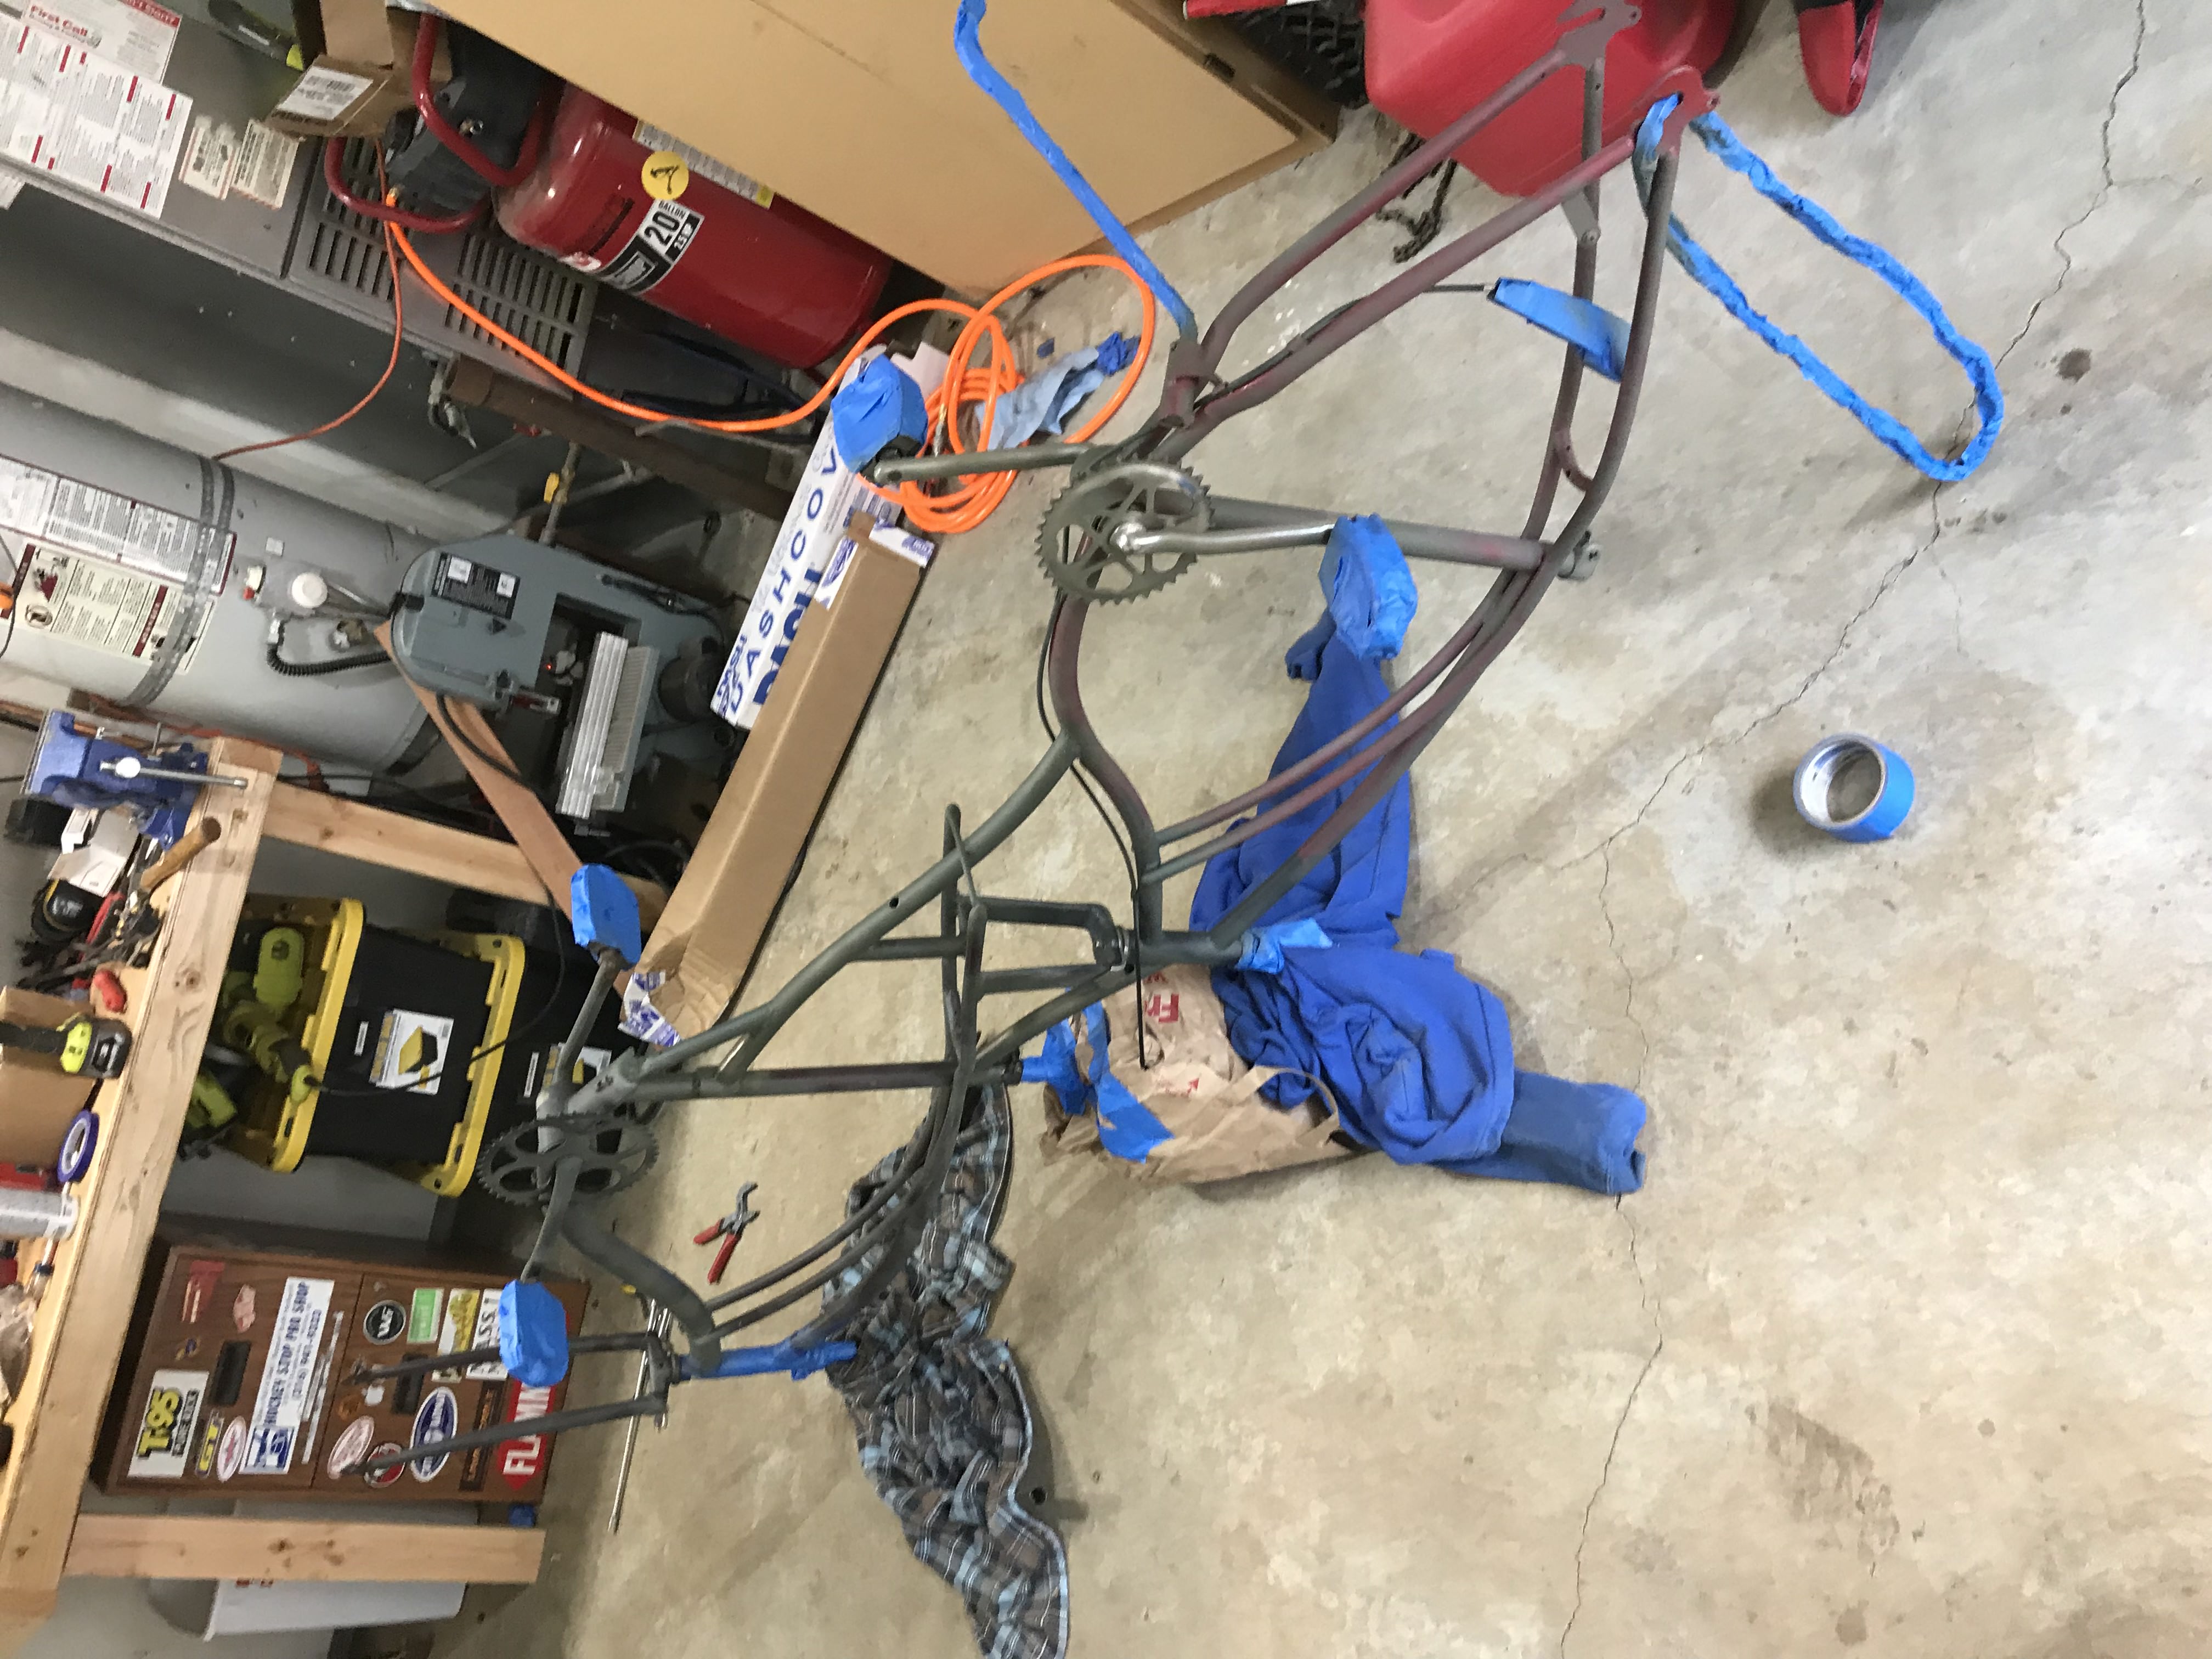
Then I picked up a third bike from Craigslist. Actually just an old bike frame. So I could chop off some of its curvy metal pipes and use them in the new tandem frame I'm building - to give it a sculptured look. You can see the remnants of the sacrificial frame to the left in the photo bellow.
Fitment is everything! I welded everything using a 120-volt MIG welded with C25 weldig gas.
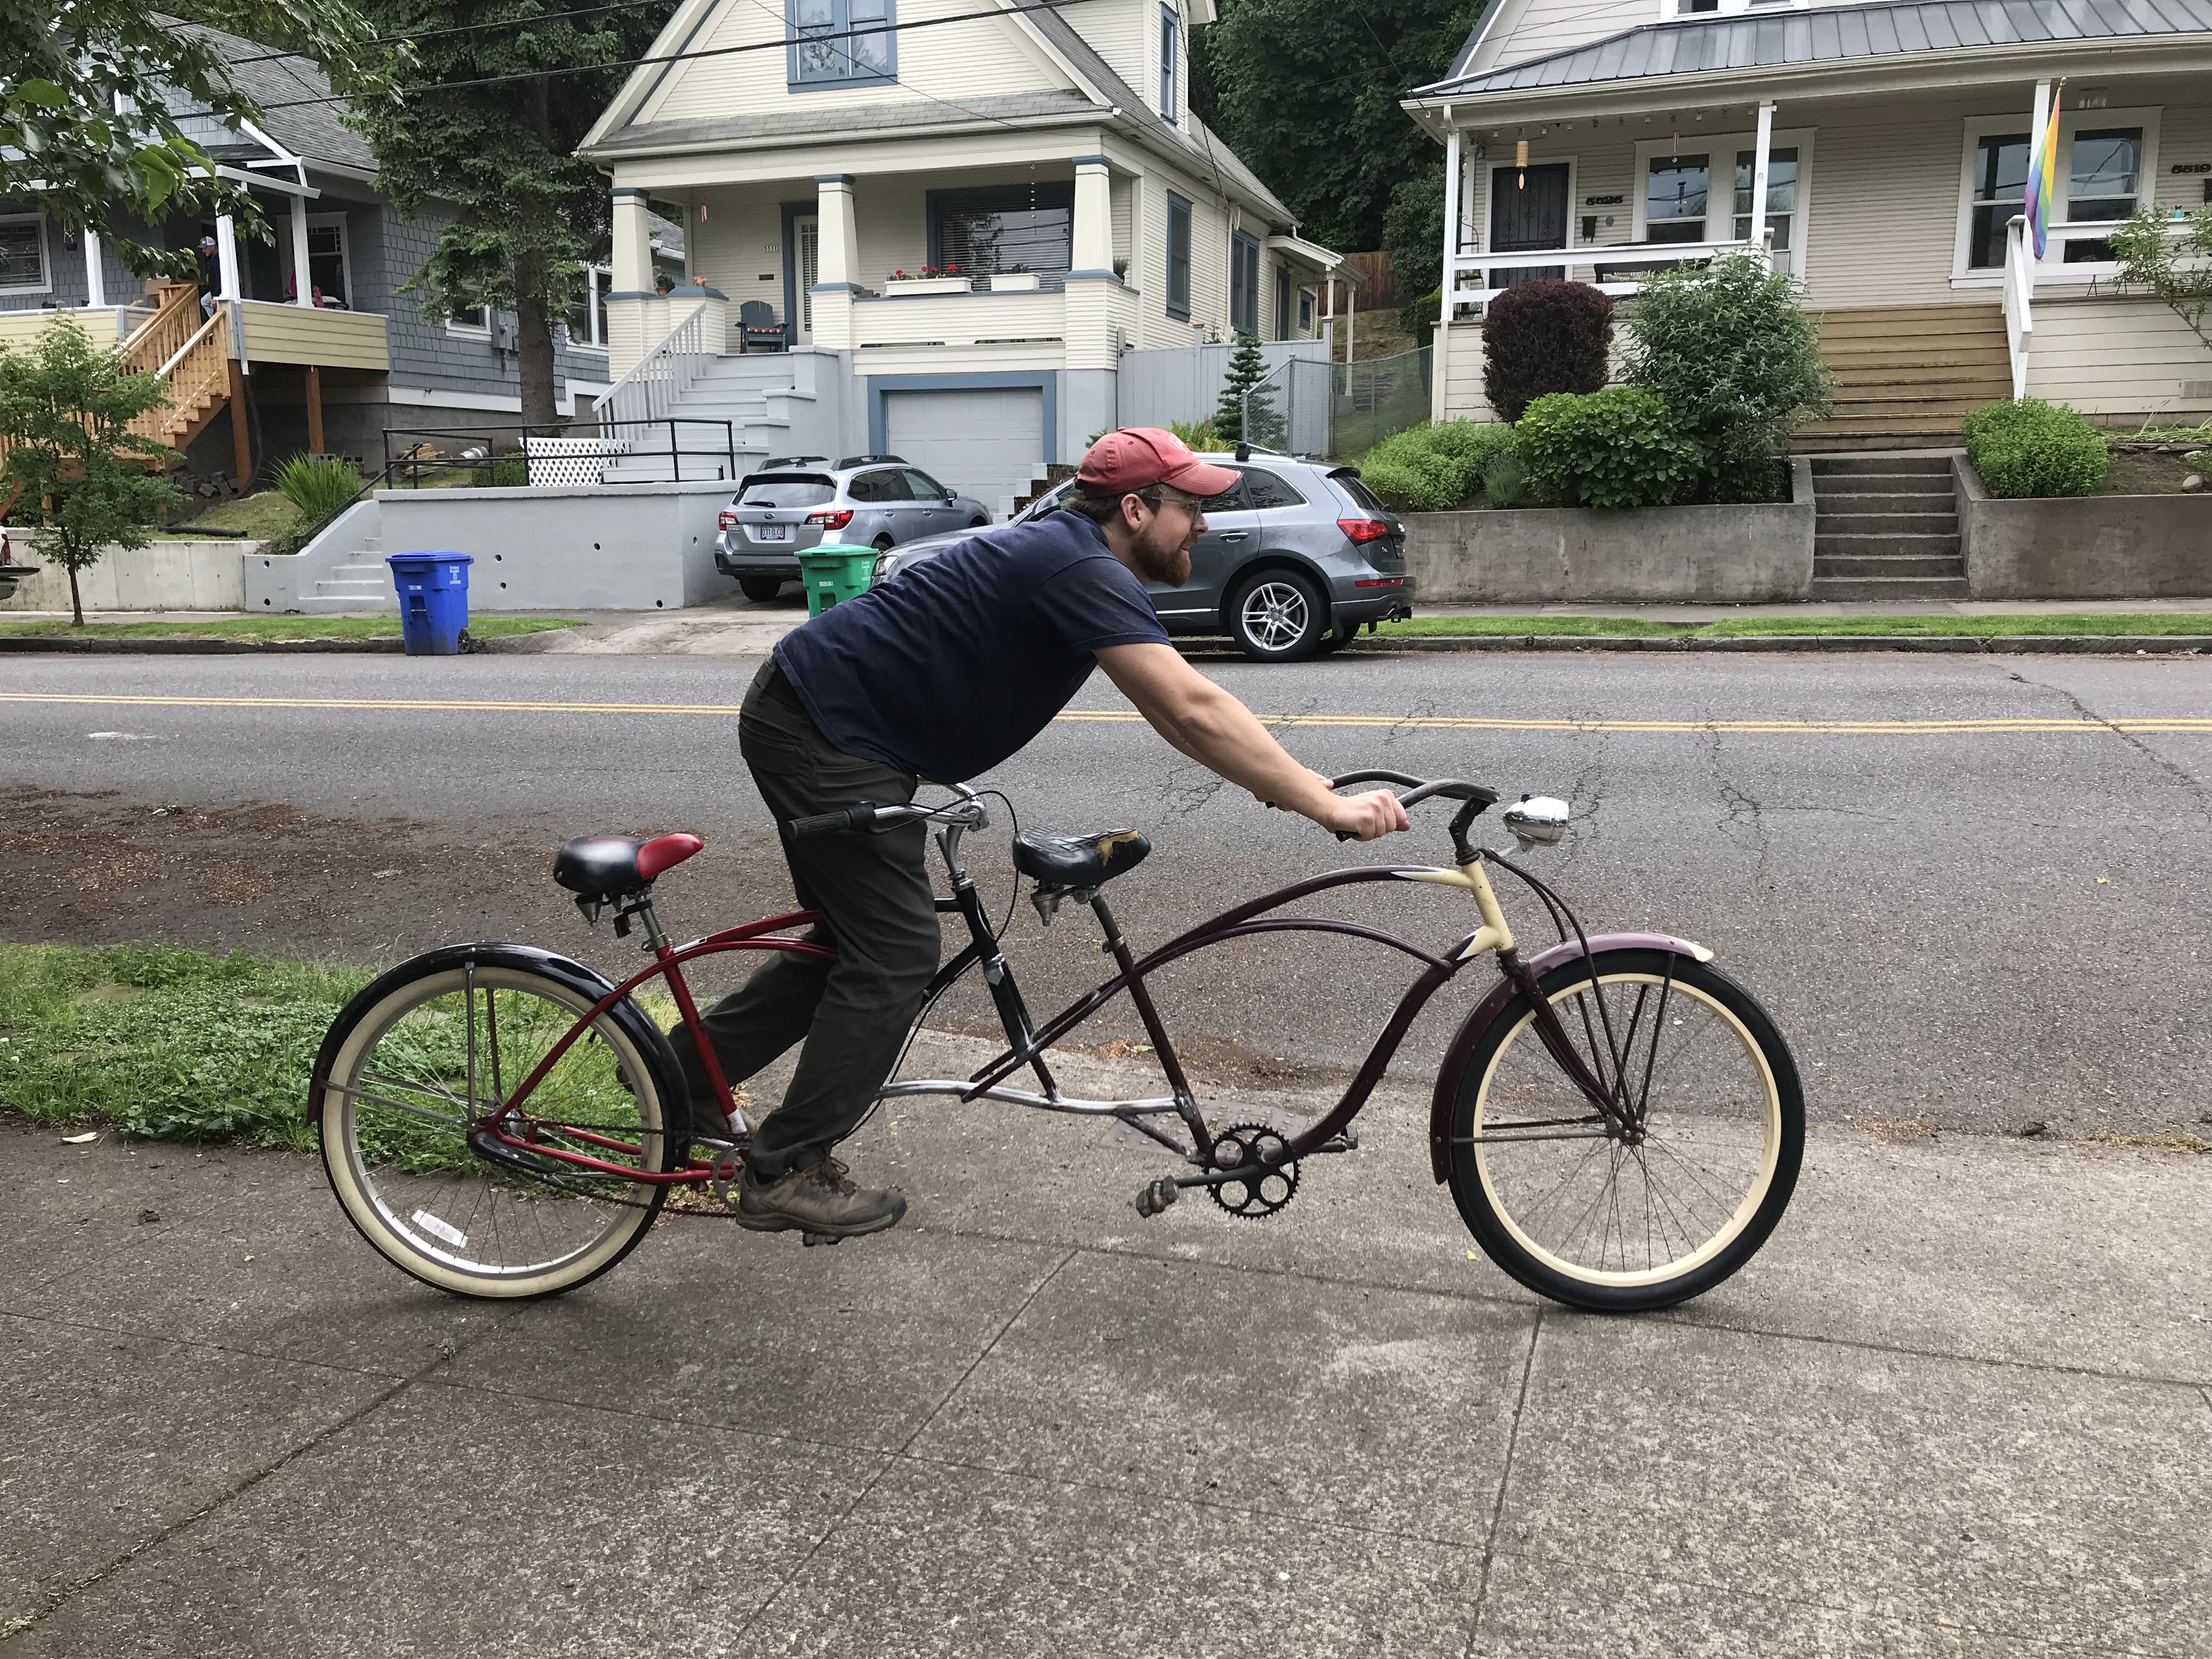
Then I had to take it out for a spin! A little premature as I wasn't done welding yet, but the frame held up fine with only my weight.
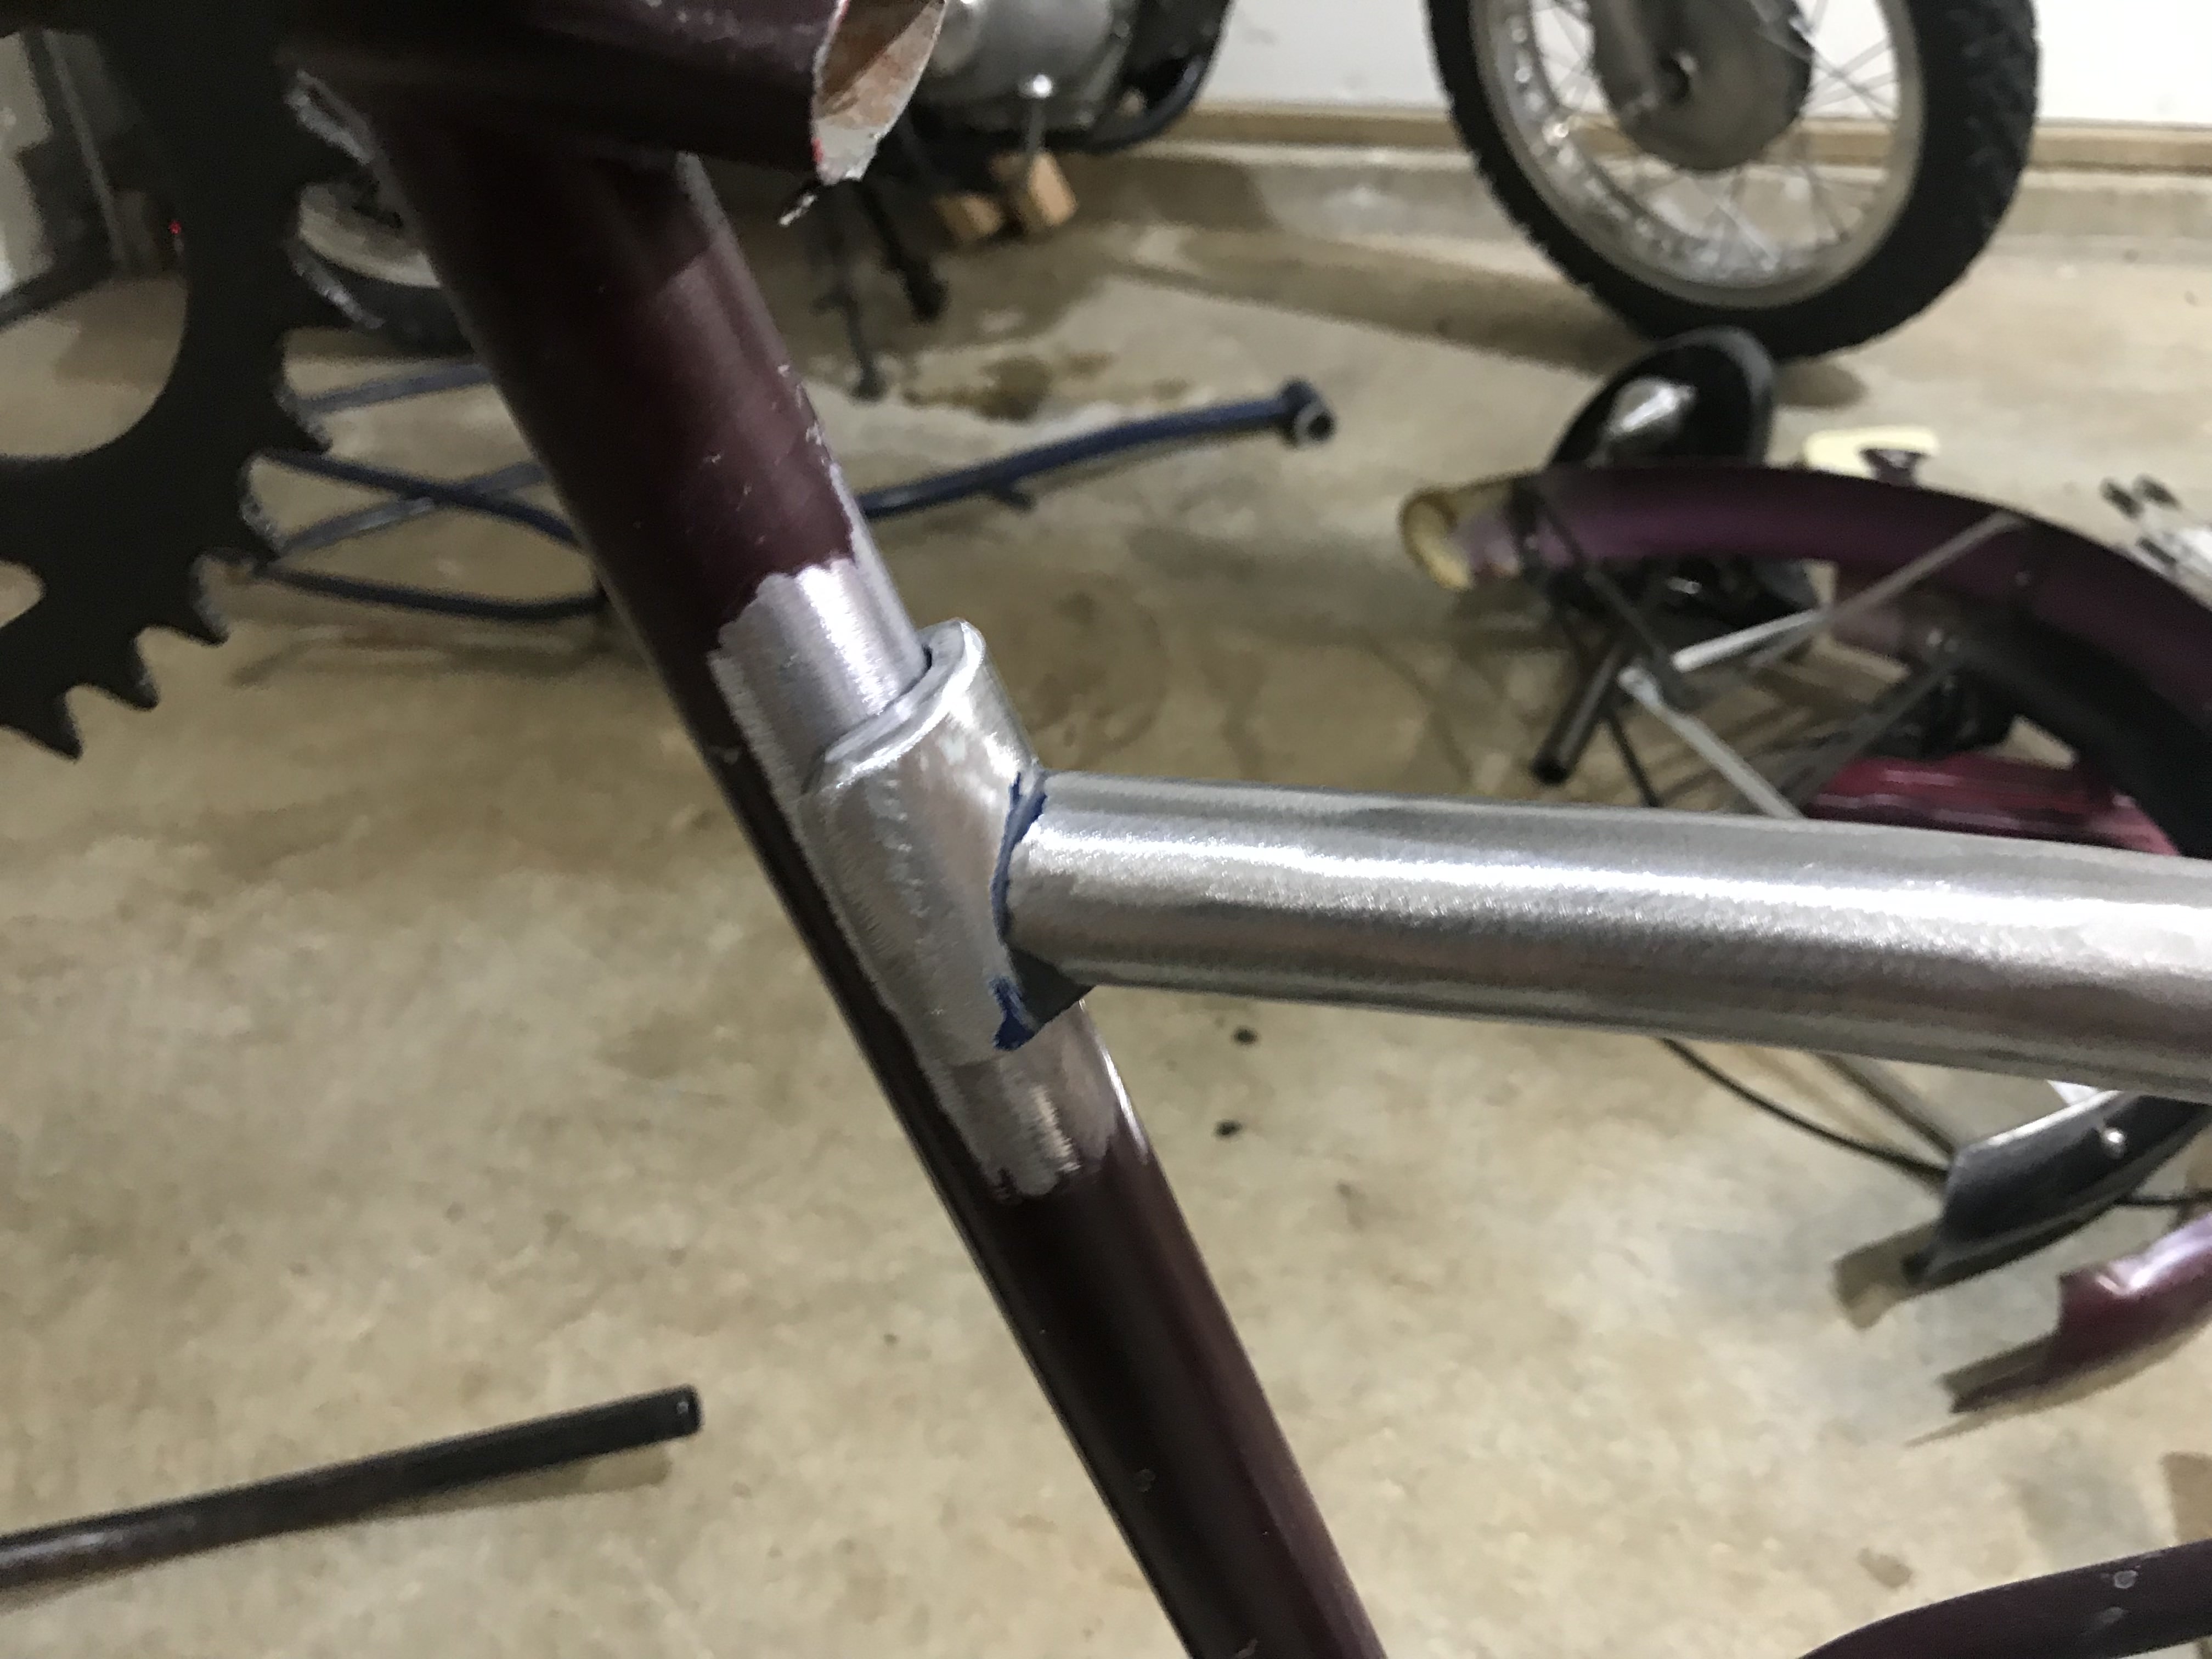
Next, I added one more tube between the two frames. I'm not a structural engineer (but I did get a bachelor's degree from the University of Kansas's School of Engineering) but I'm pretty confident that this frame will be plenty strong for two people.
Time to paint it!
First up, prep it...
Then primer...
And then paint it... I used Duplicolor "Perfect Match" in their pacific aqua met... or something like that.
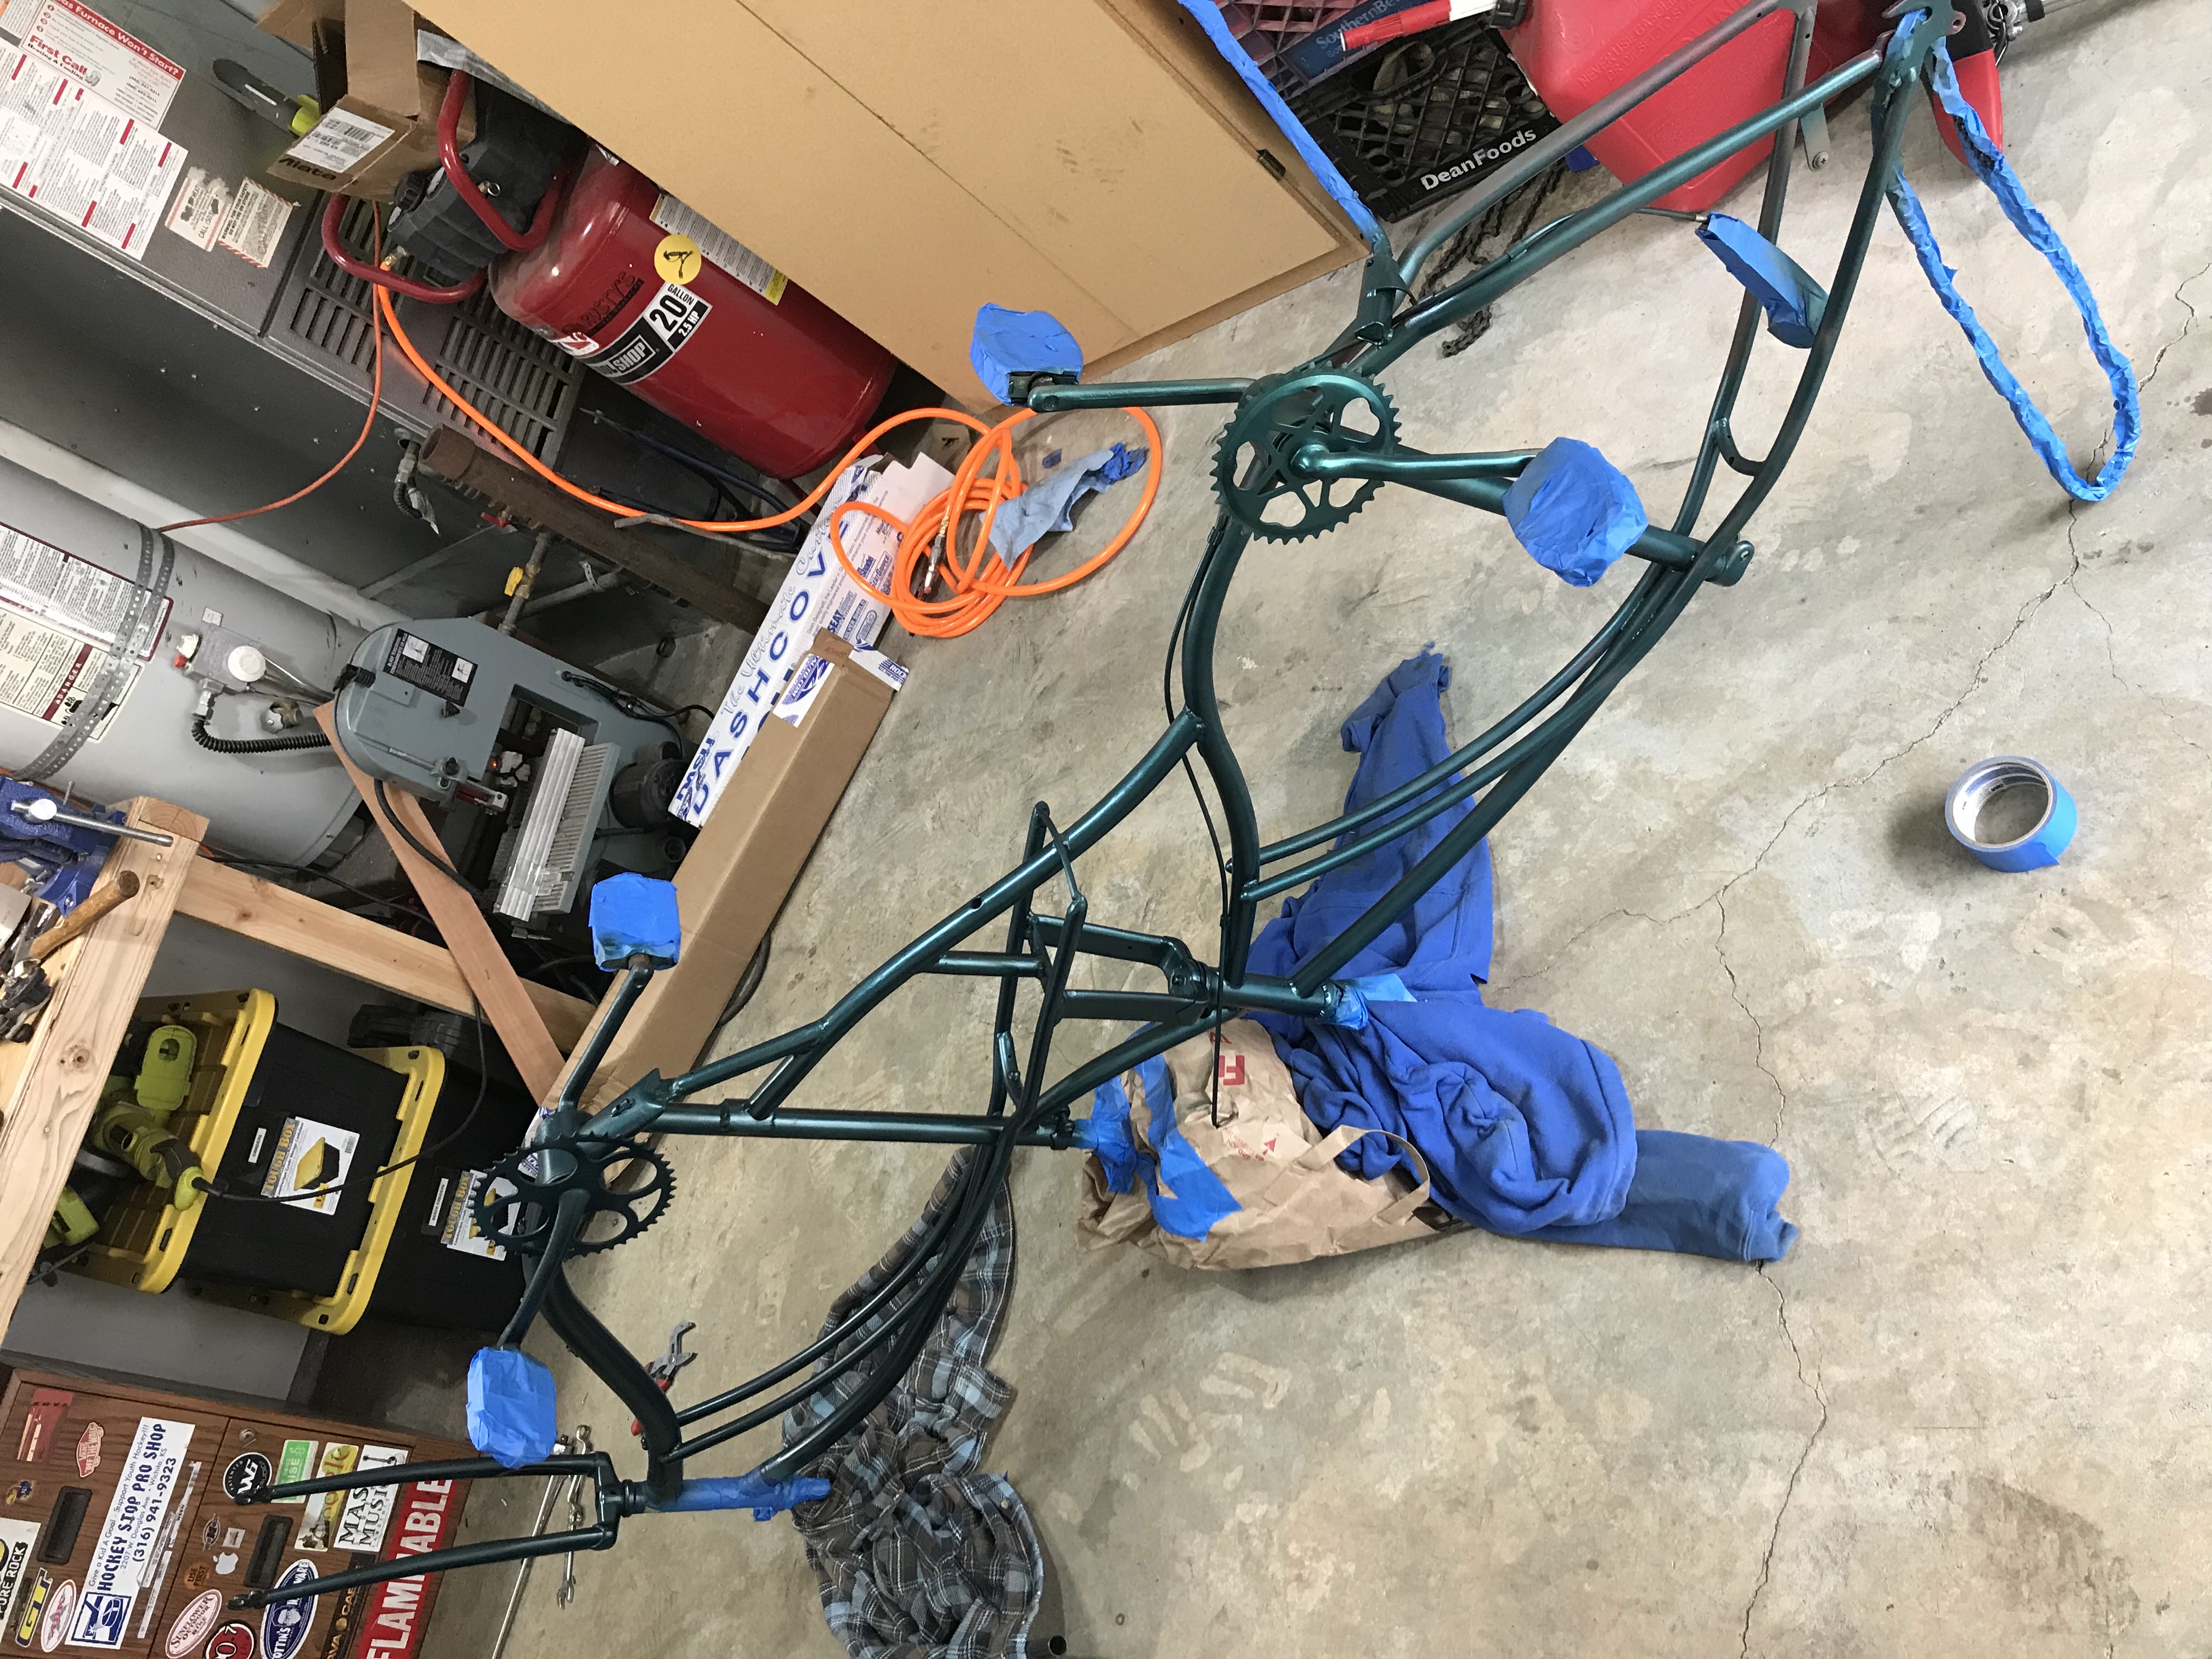
It came out great!!
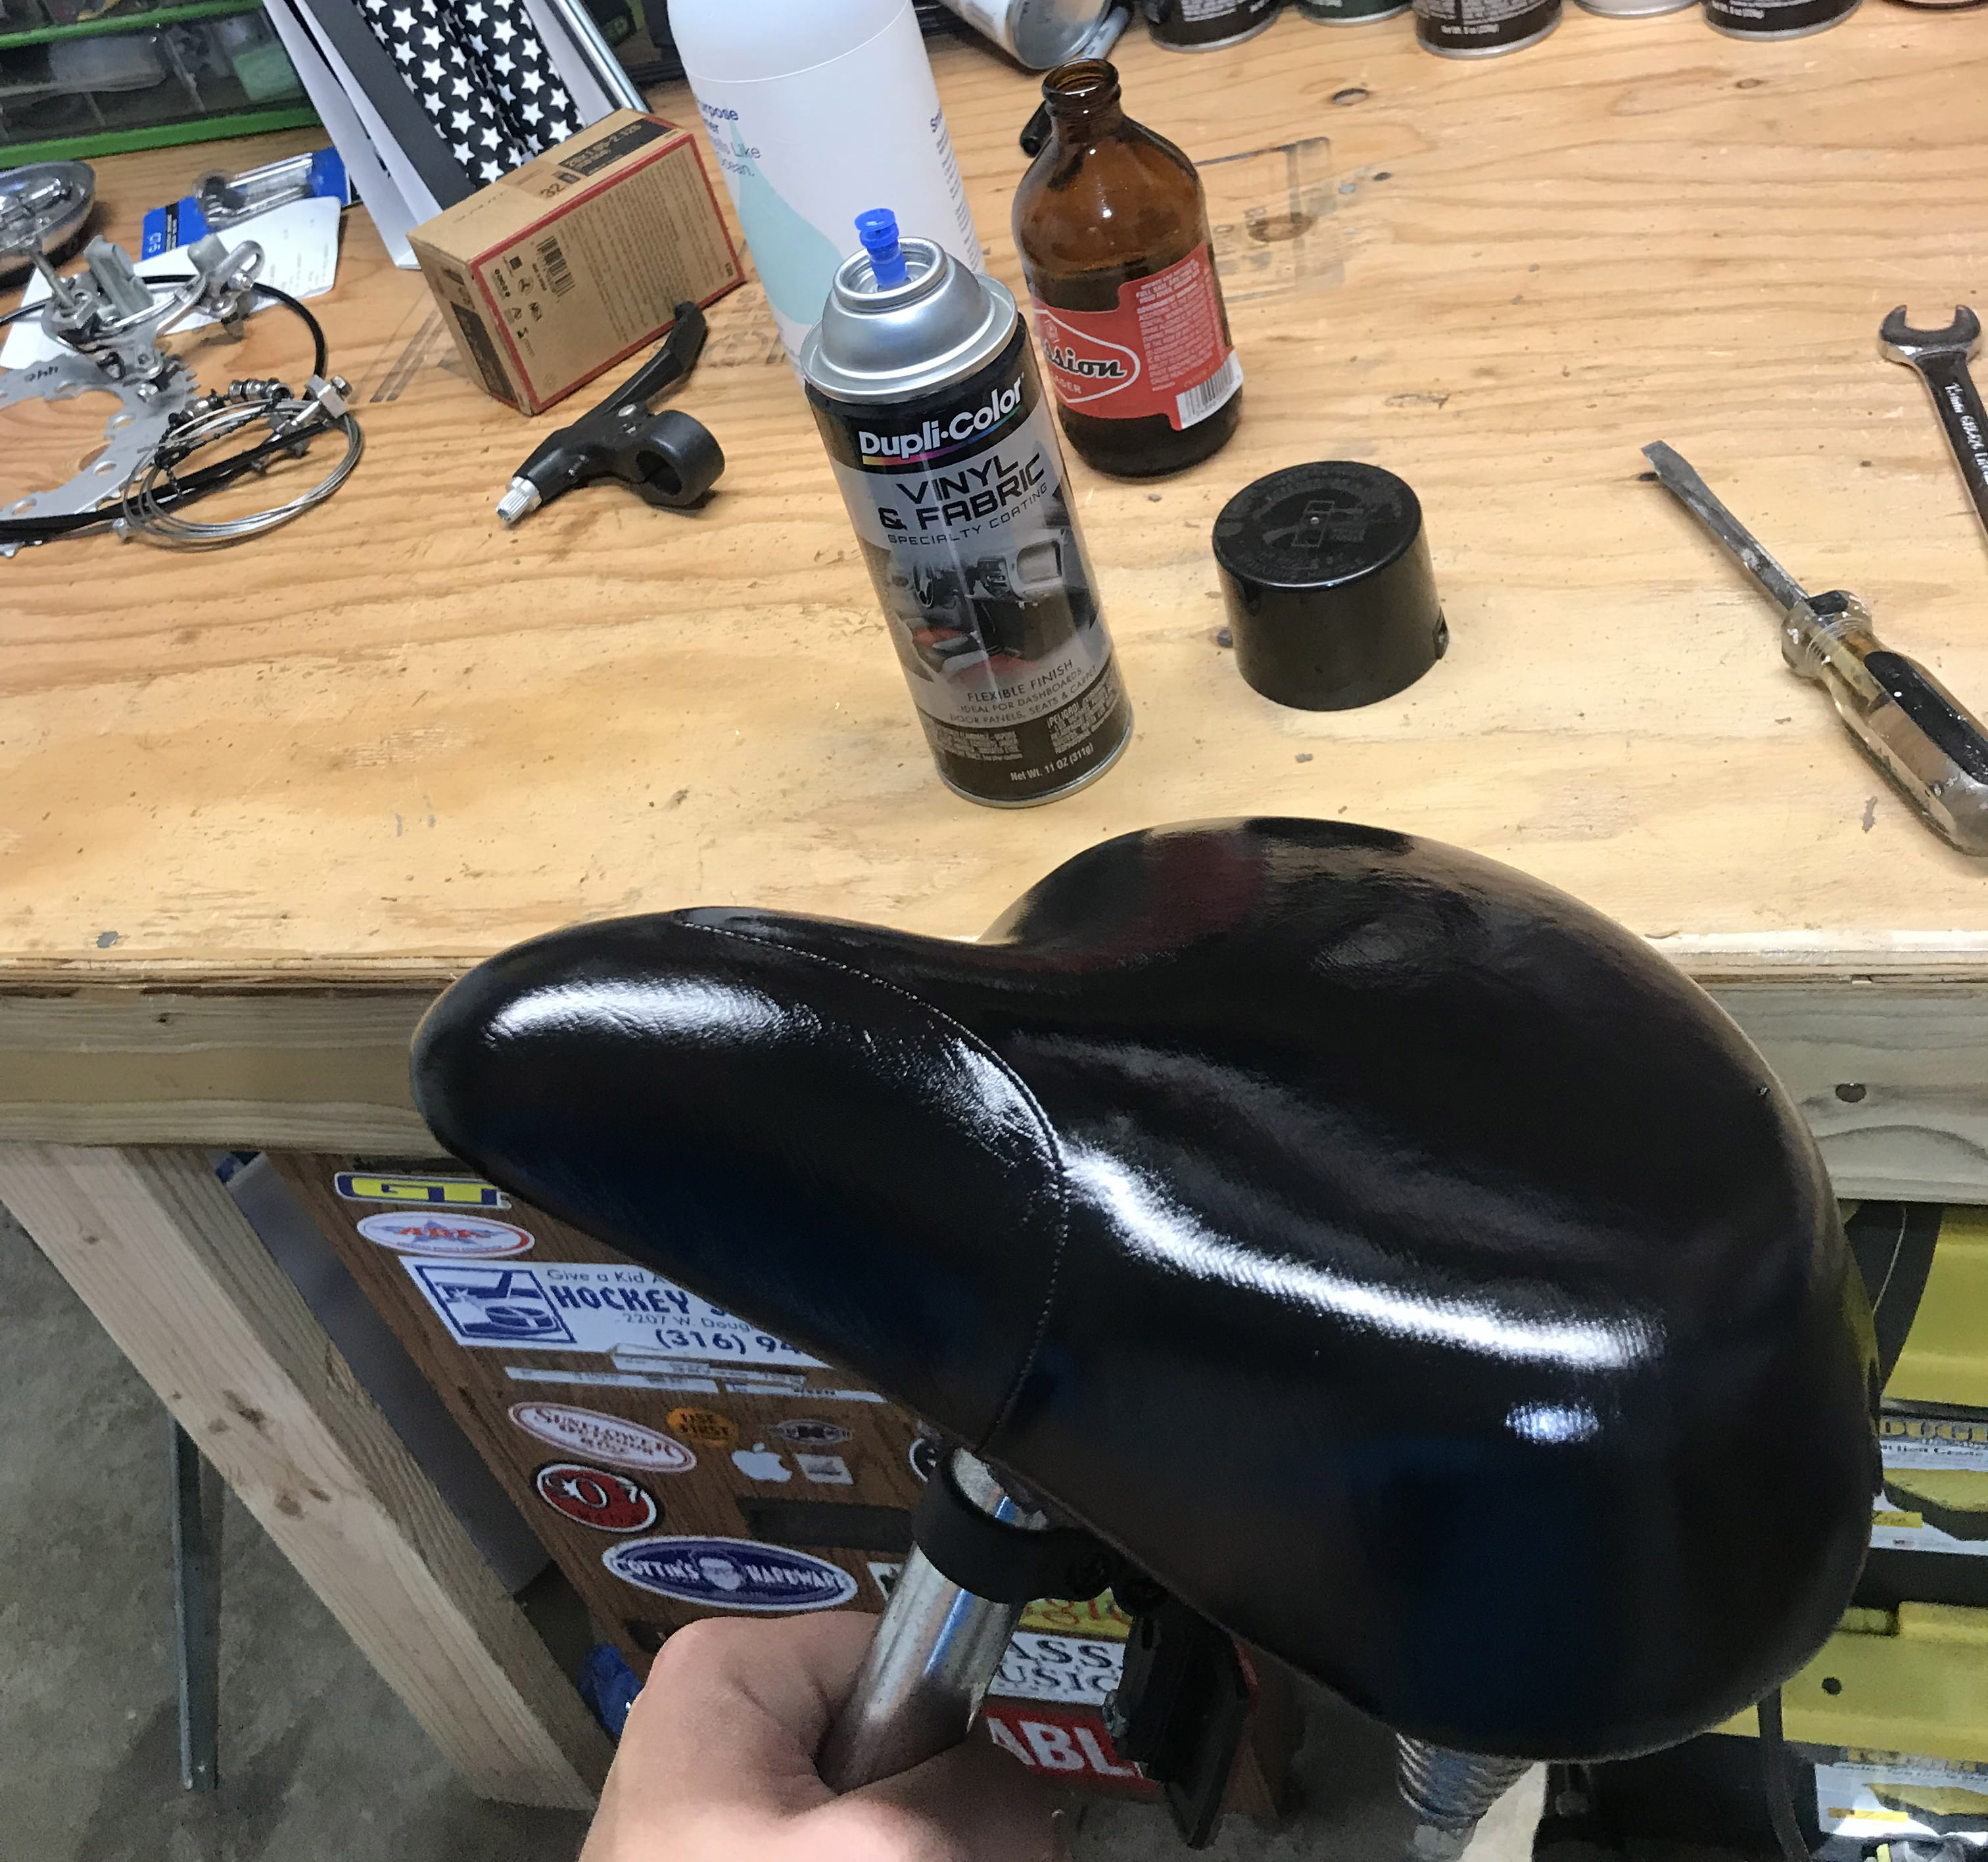
The back seat was red so I fixed that with some car interior paint.
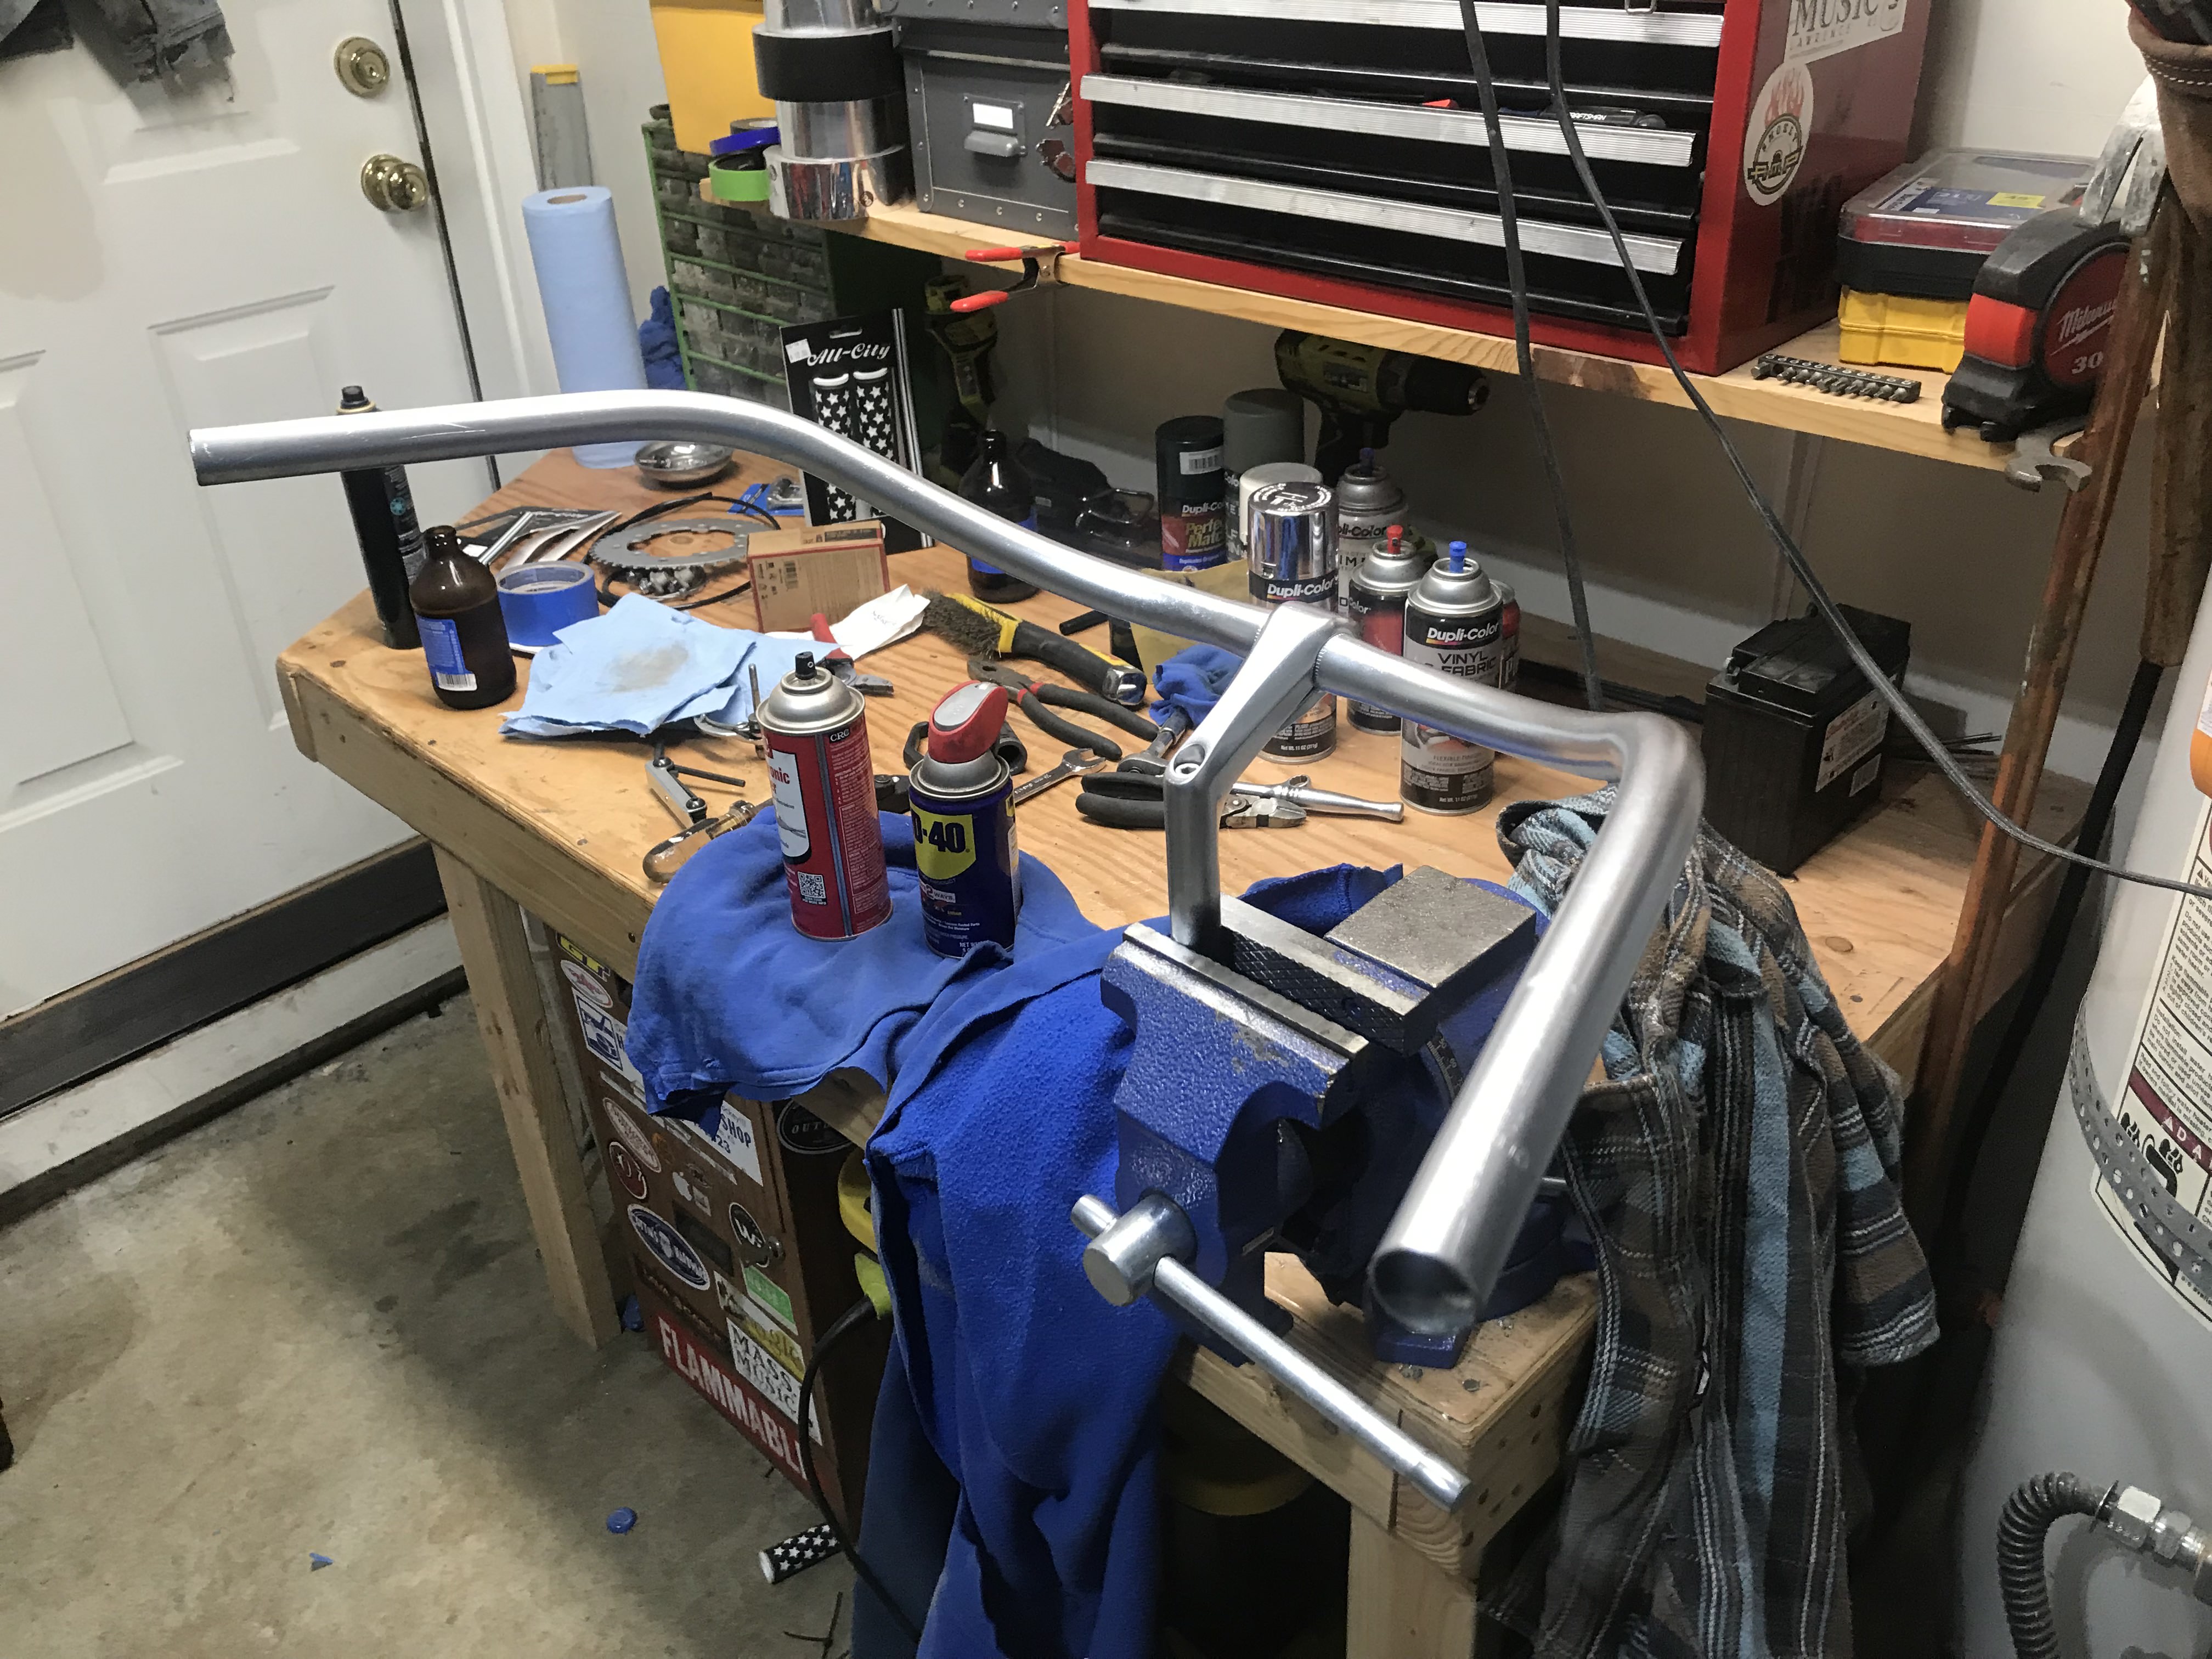
And the front handlebars were black (and rusty) and not matching the back ones, so I fixed that with some "chrome" paint.
Onto the mechanical stuff!
So the front chain ring needs to be connected by a chain to the rear chain ring. For this, I went and bought one that was the same tooth-count as the front chain ring. Unfortunitaly it was aluminum so I couldn't weld it on. So instead I welded on some nuts that would allow me to bold it onto the back chainring that's connected to the sprocket/hub.
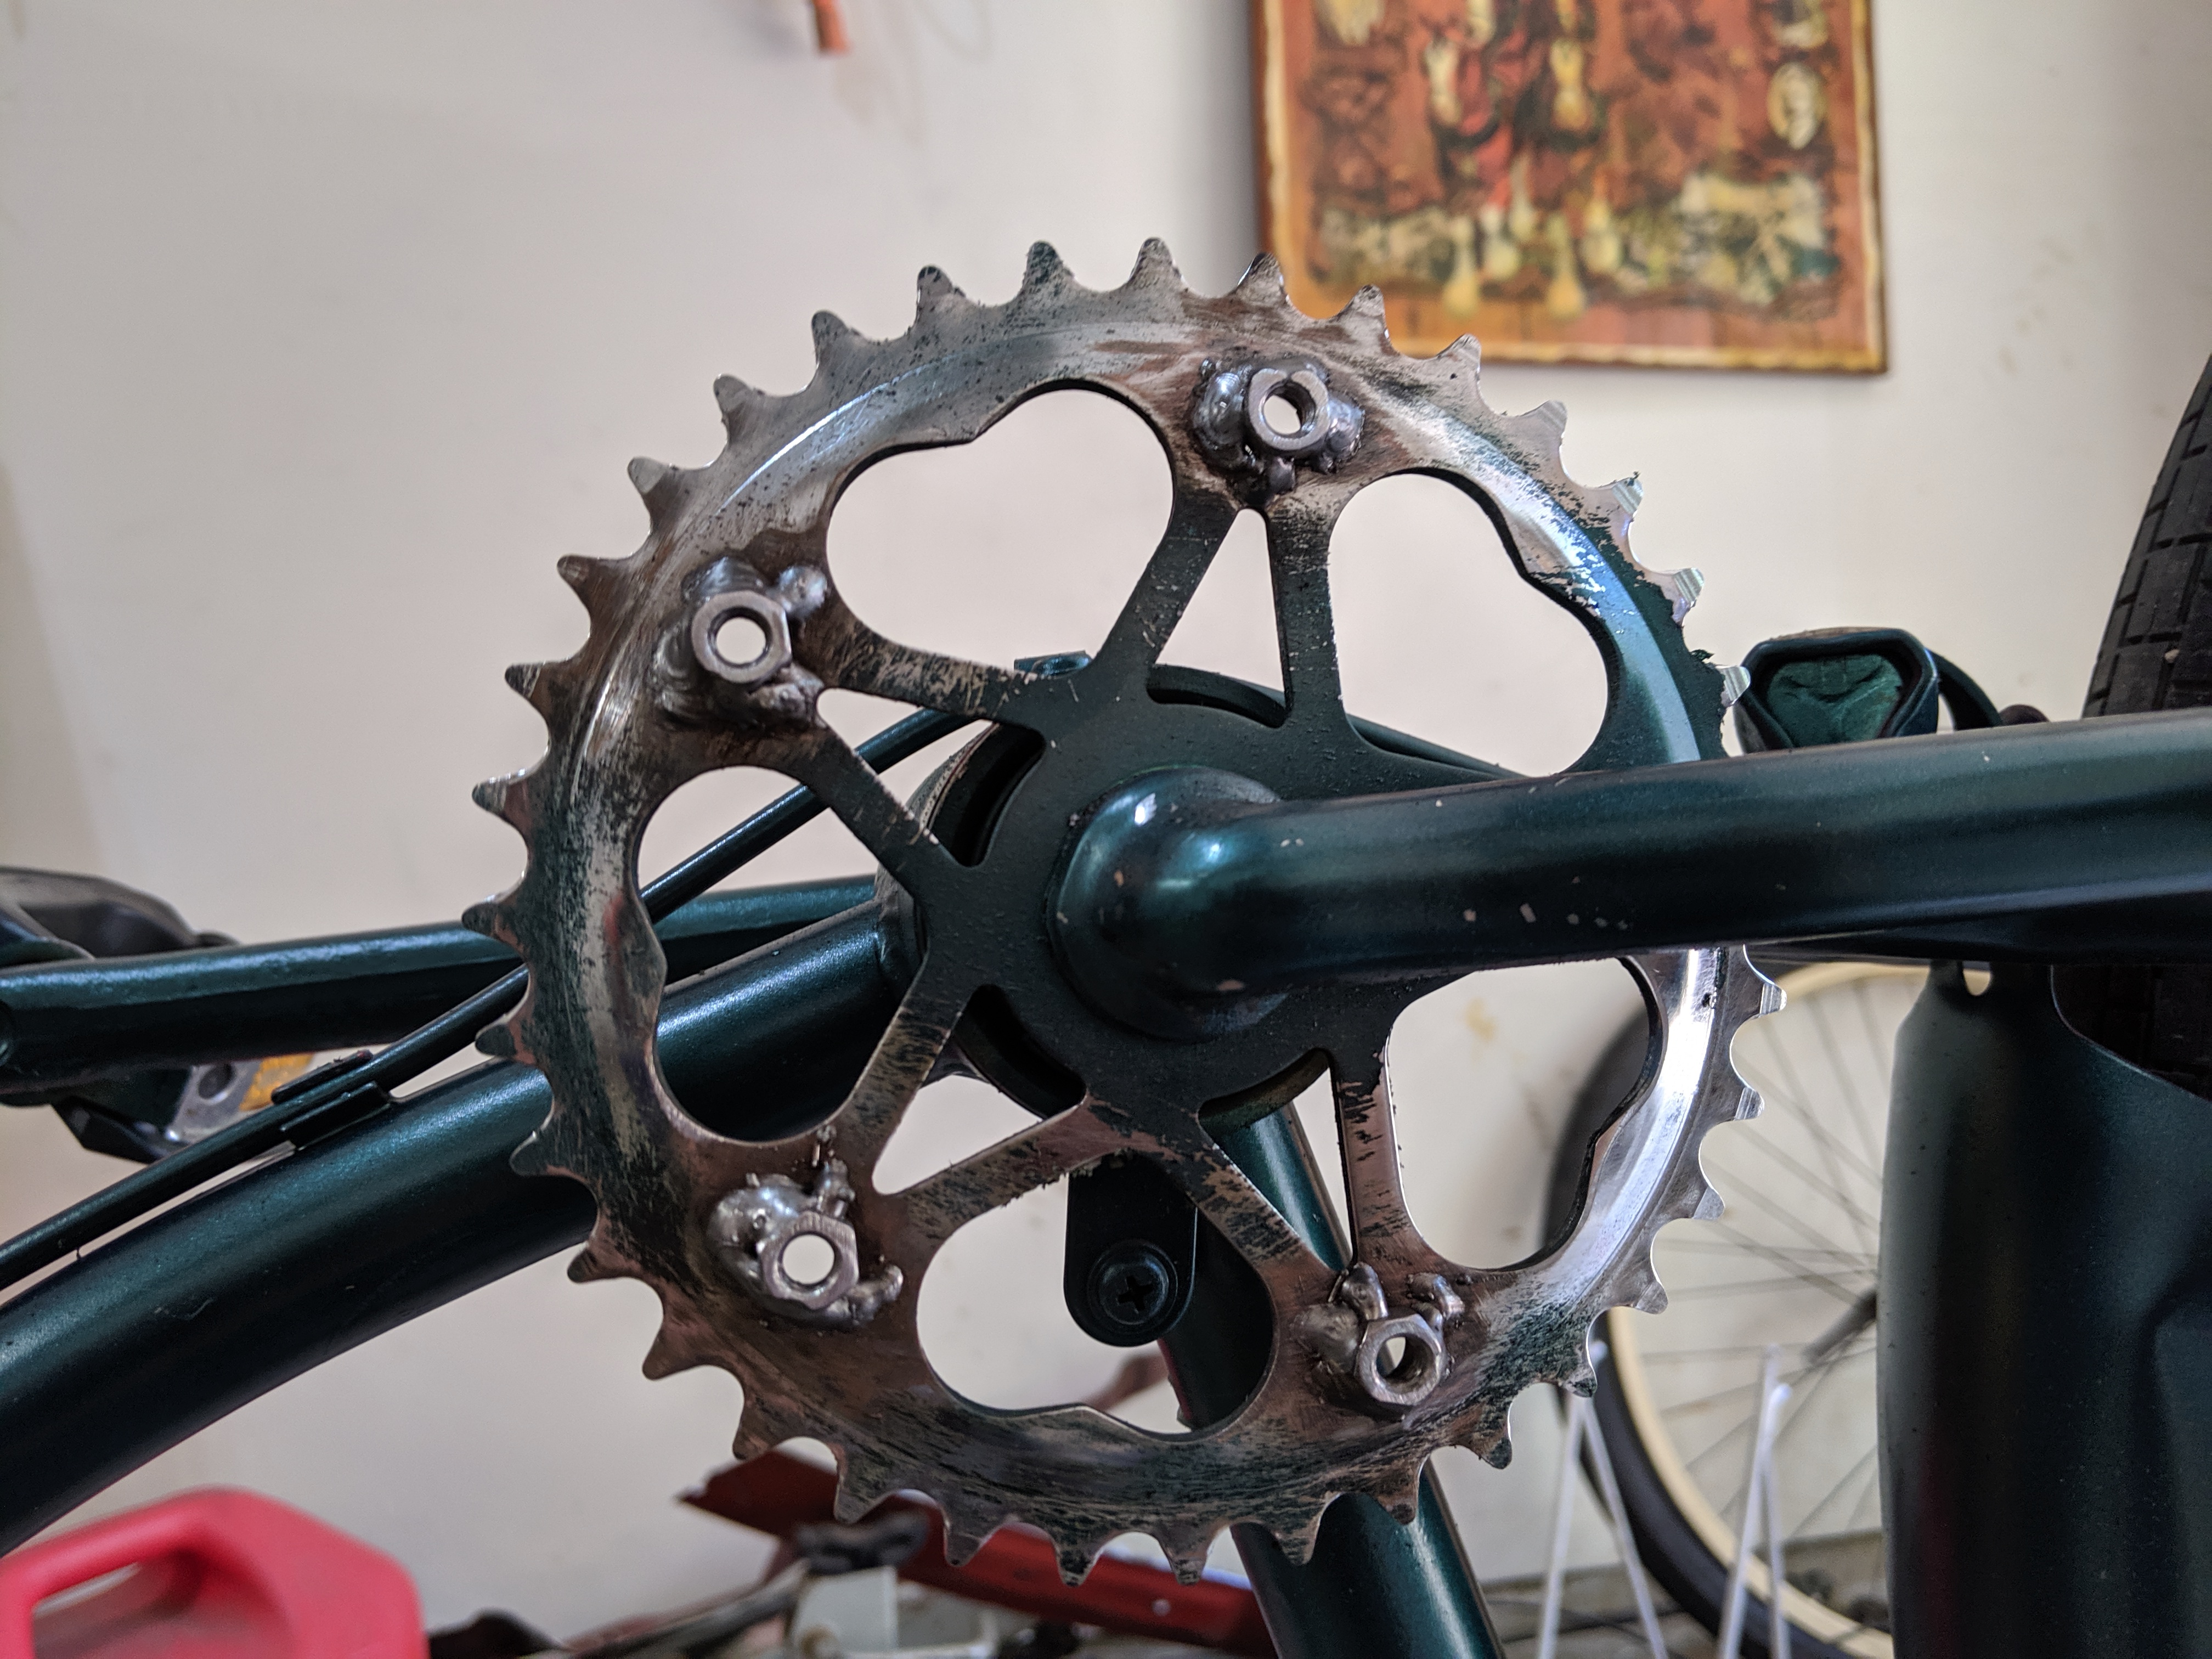
I used my eye-caliper to get it centered...
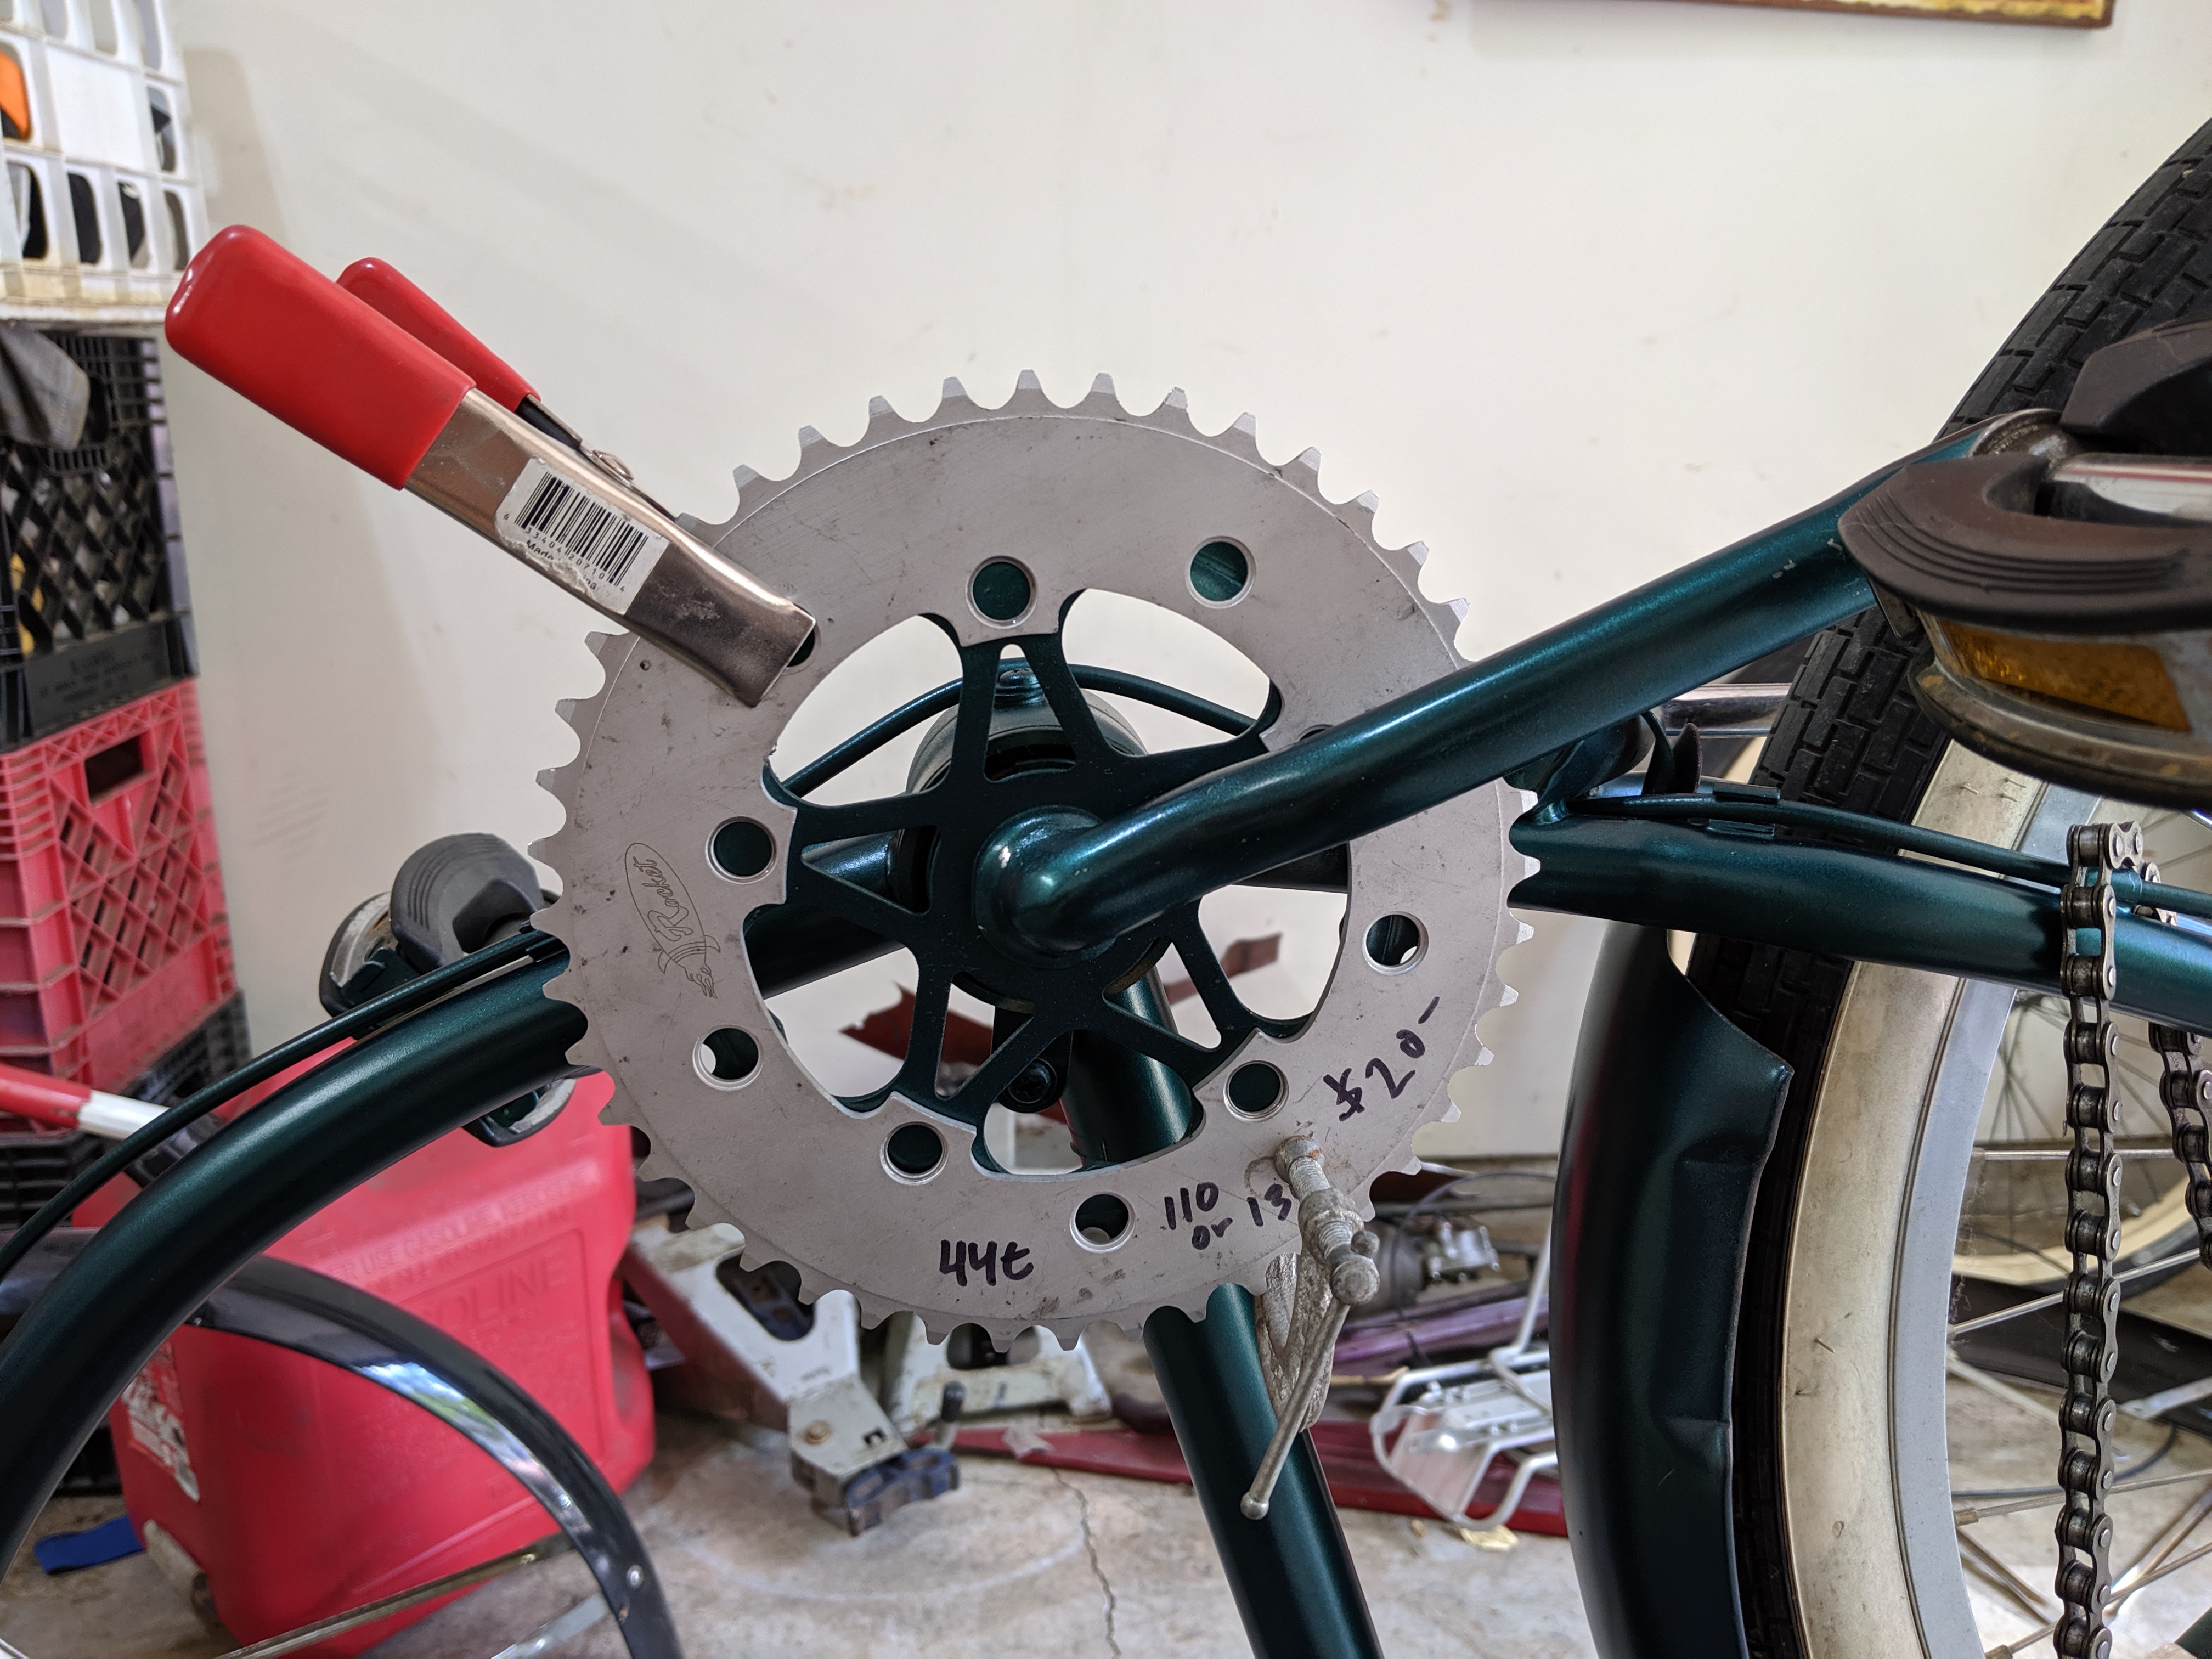
...then drilled the holes...

Here's where my genius knows no bounds, as Jeremy Clarkson would say. In order to weld the nuts onto the chain ring in exactly the right spot so that everything is a perfect fit, I first assembled all the hardware together before welding. Then I used an extra set of nuts to fasten it to the chain ring that I just drilled the holes in. I actually could have left it at that and not done any welding, but that seemed lazy.
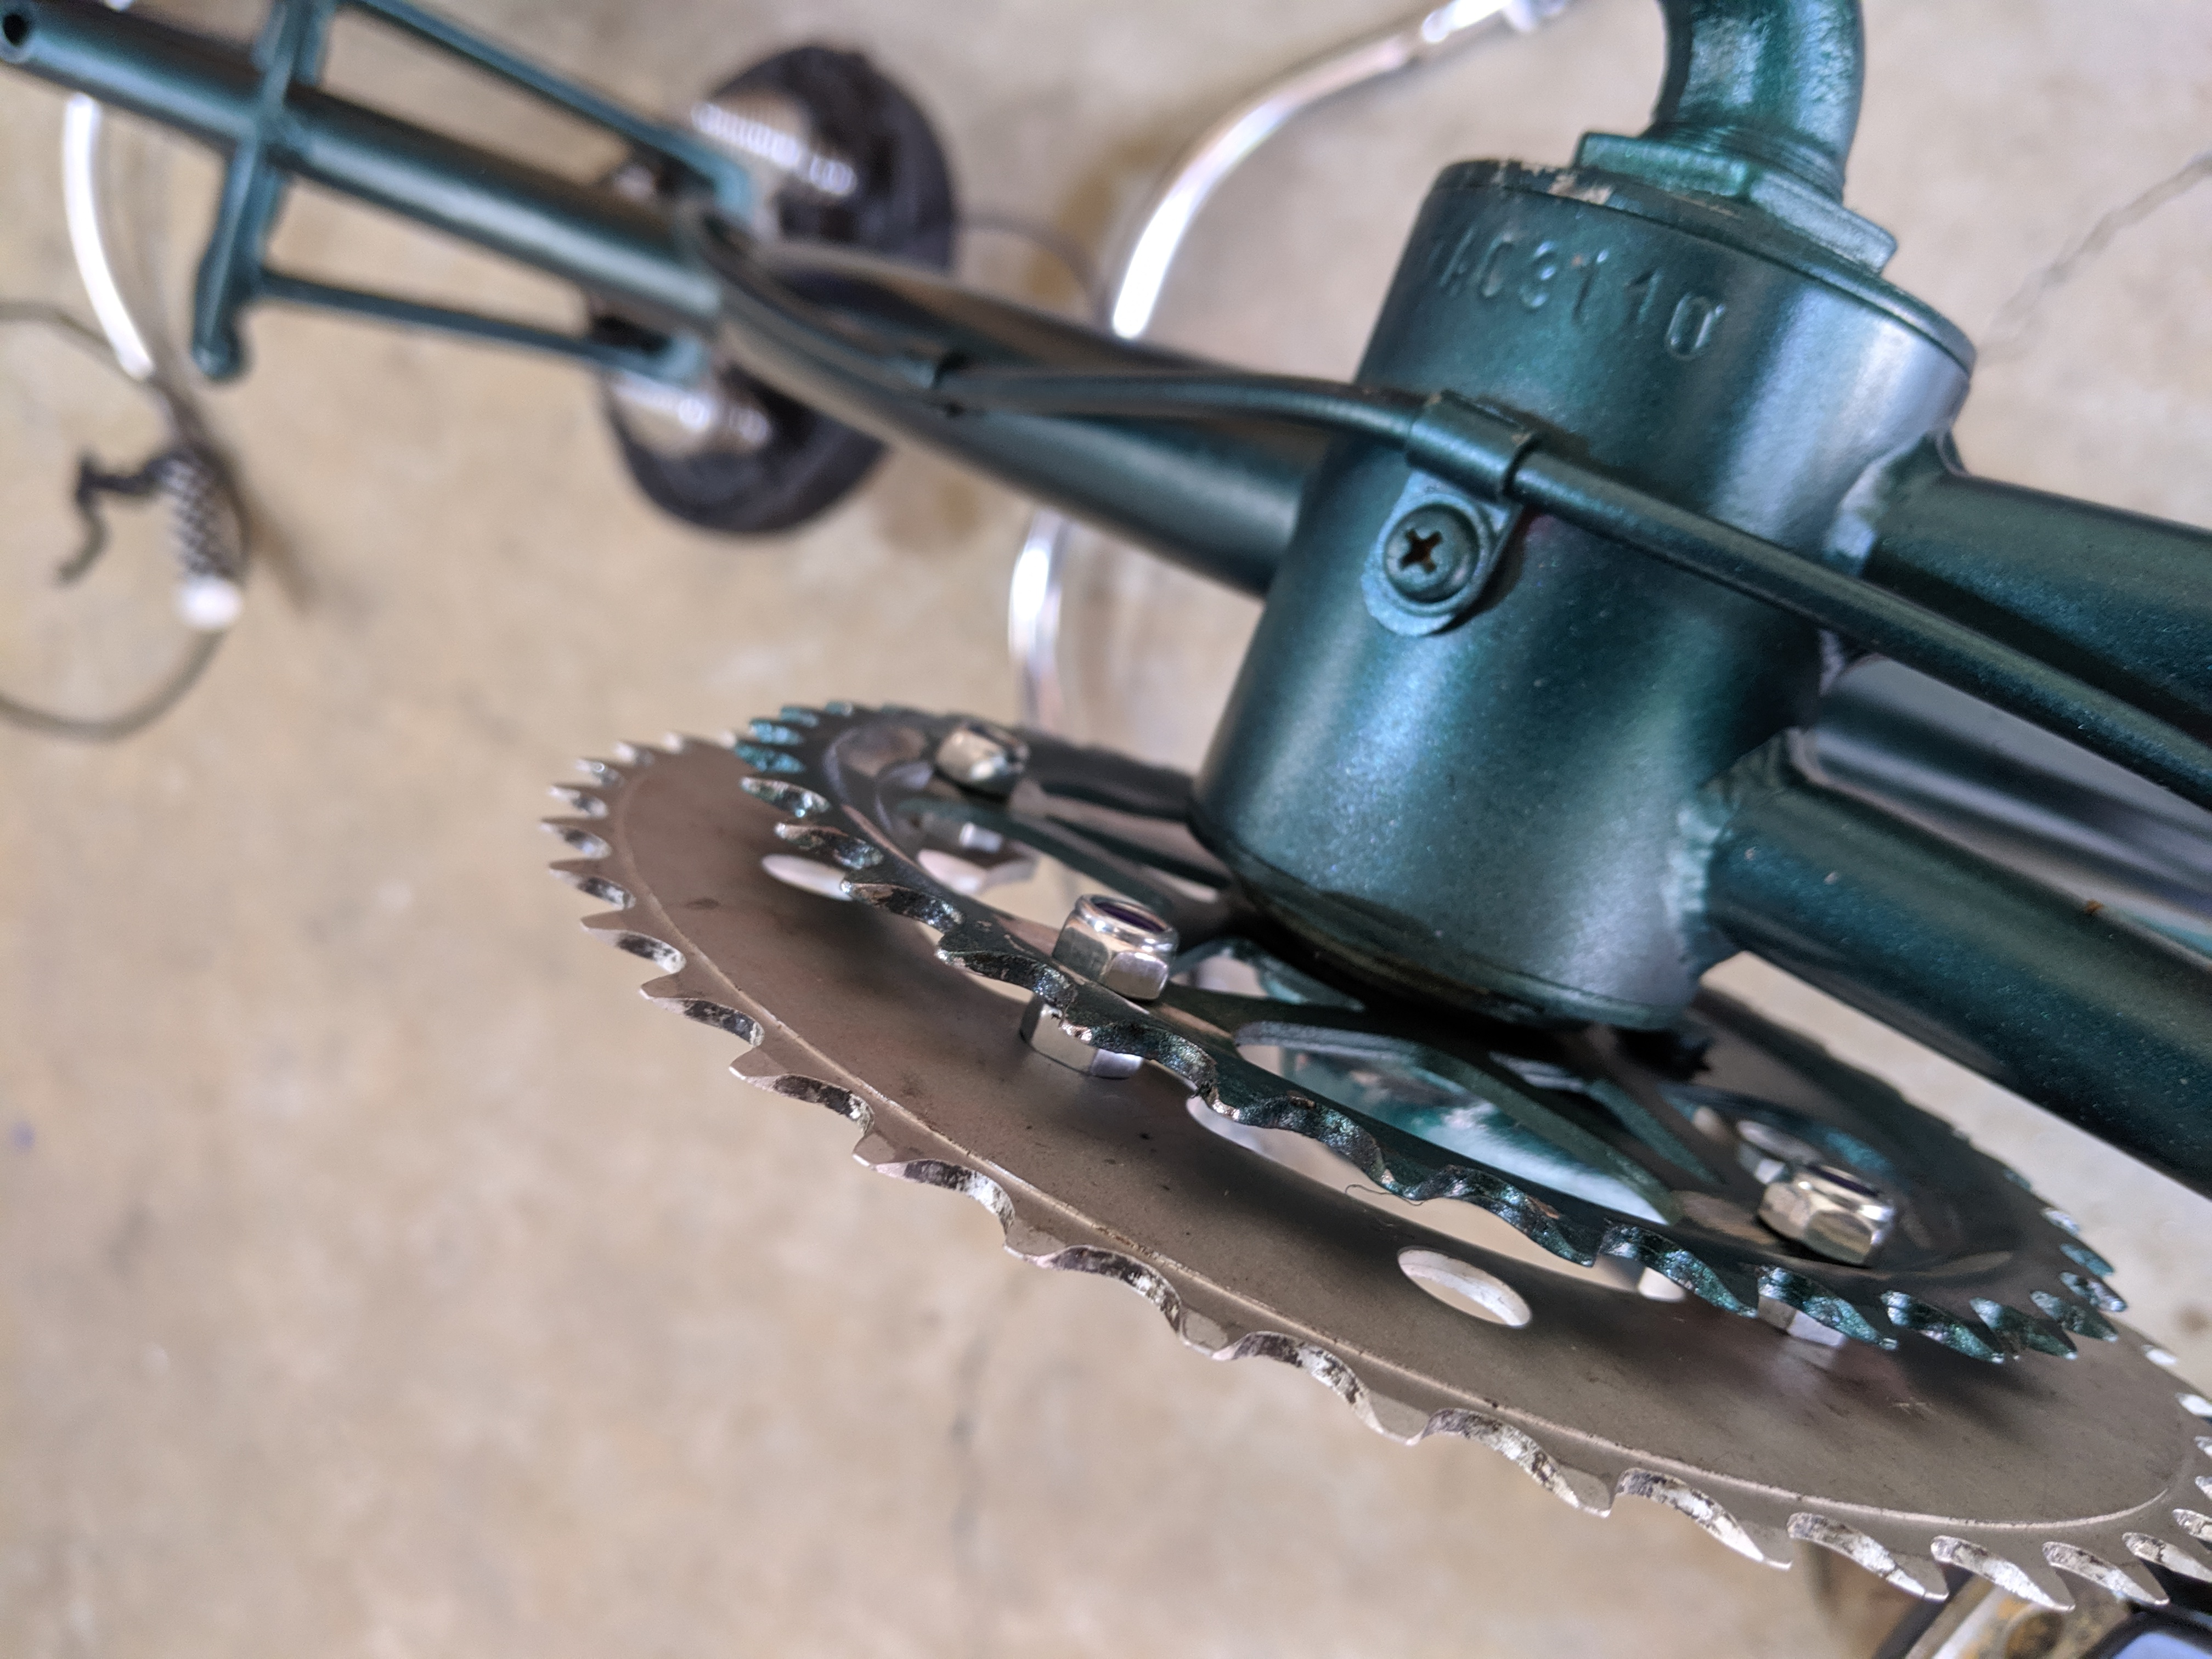
Then I tacked the nuts onto the steel chain ring, unbolted the new aluminum one, and finished welding them on. Not my prettiest welds, btw, but it doesn't have to be pretty to be strong.
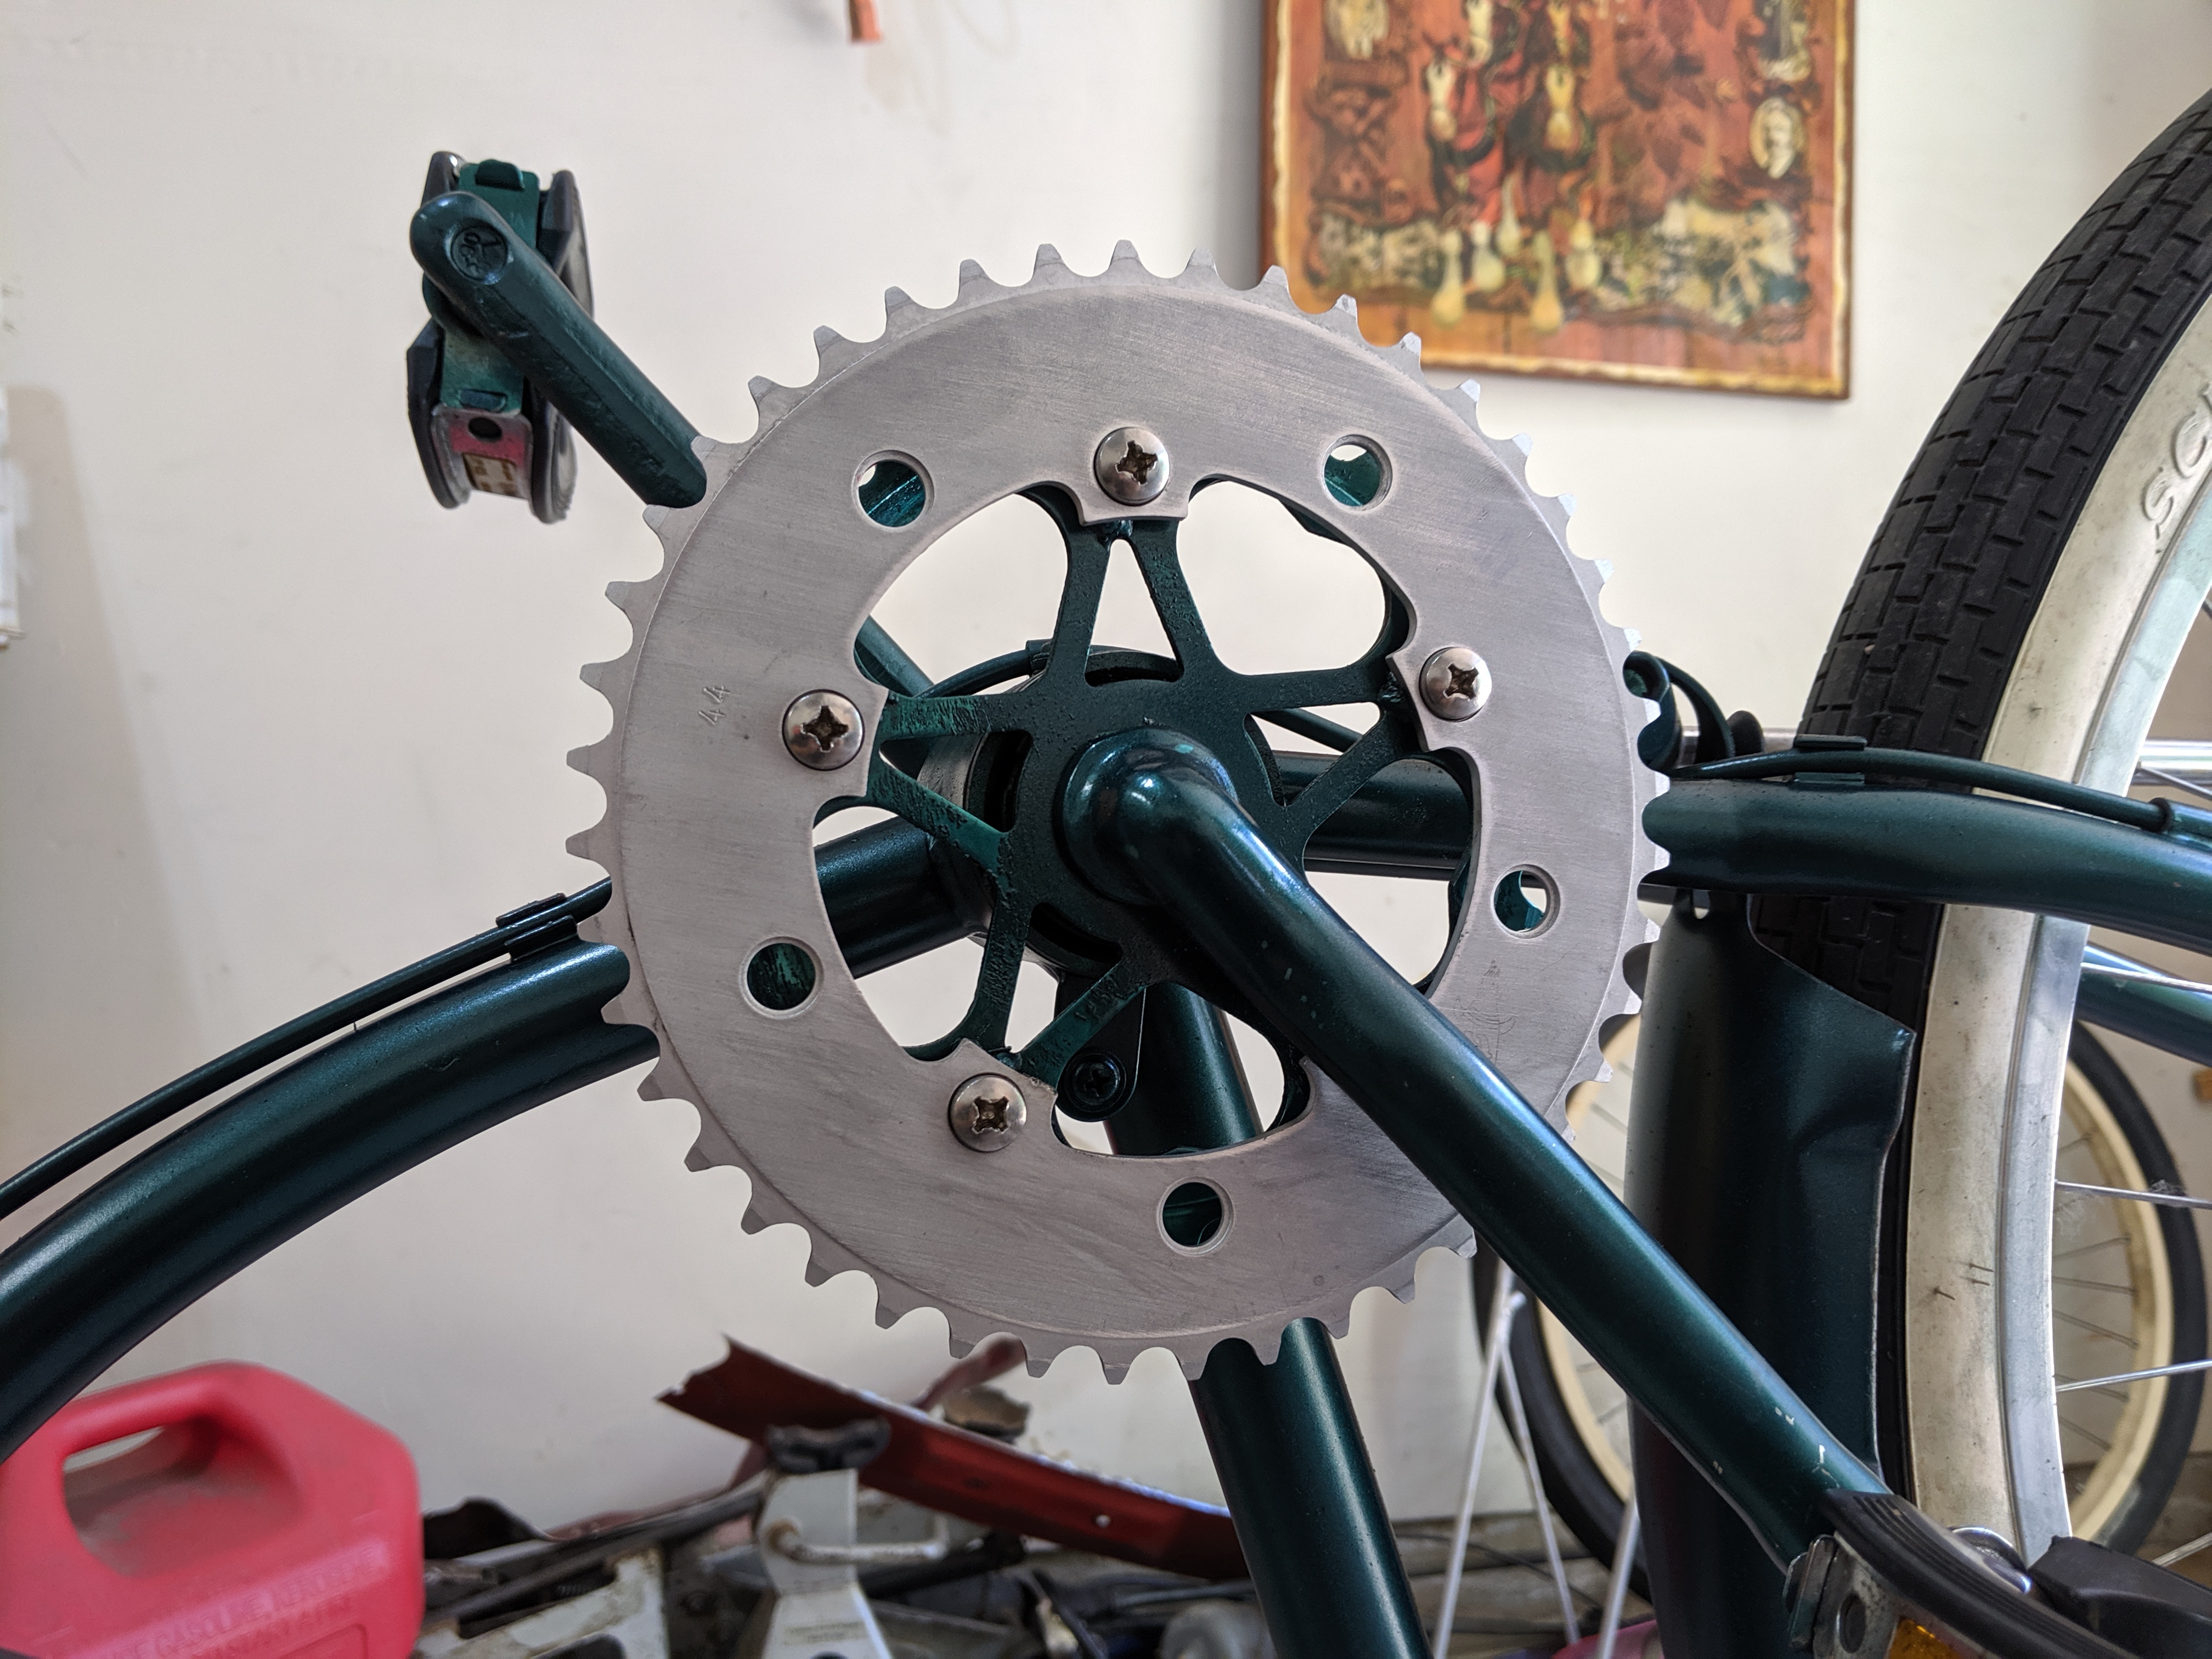
Finished up with some paint.
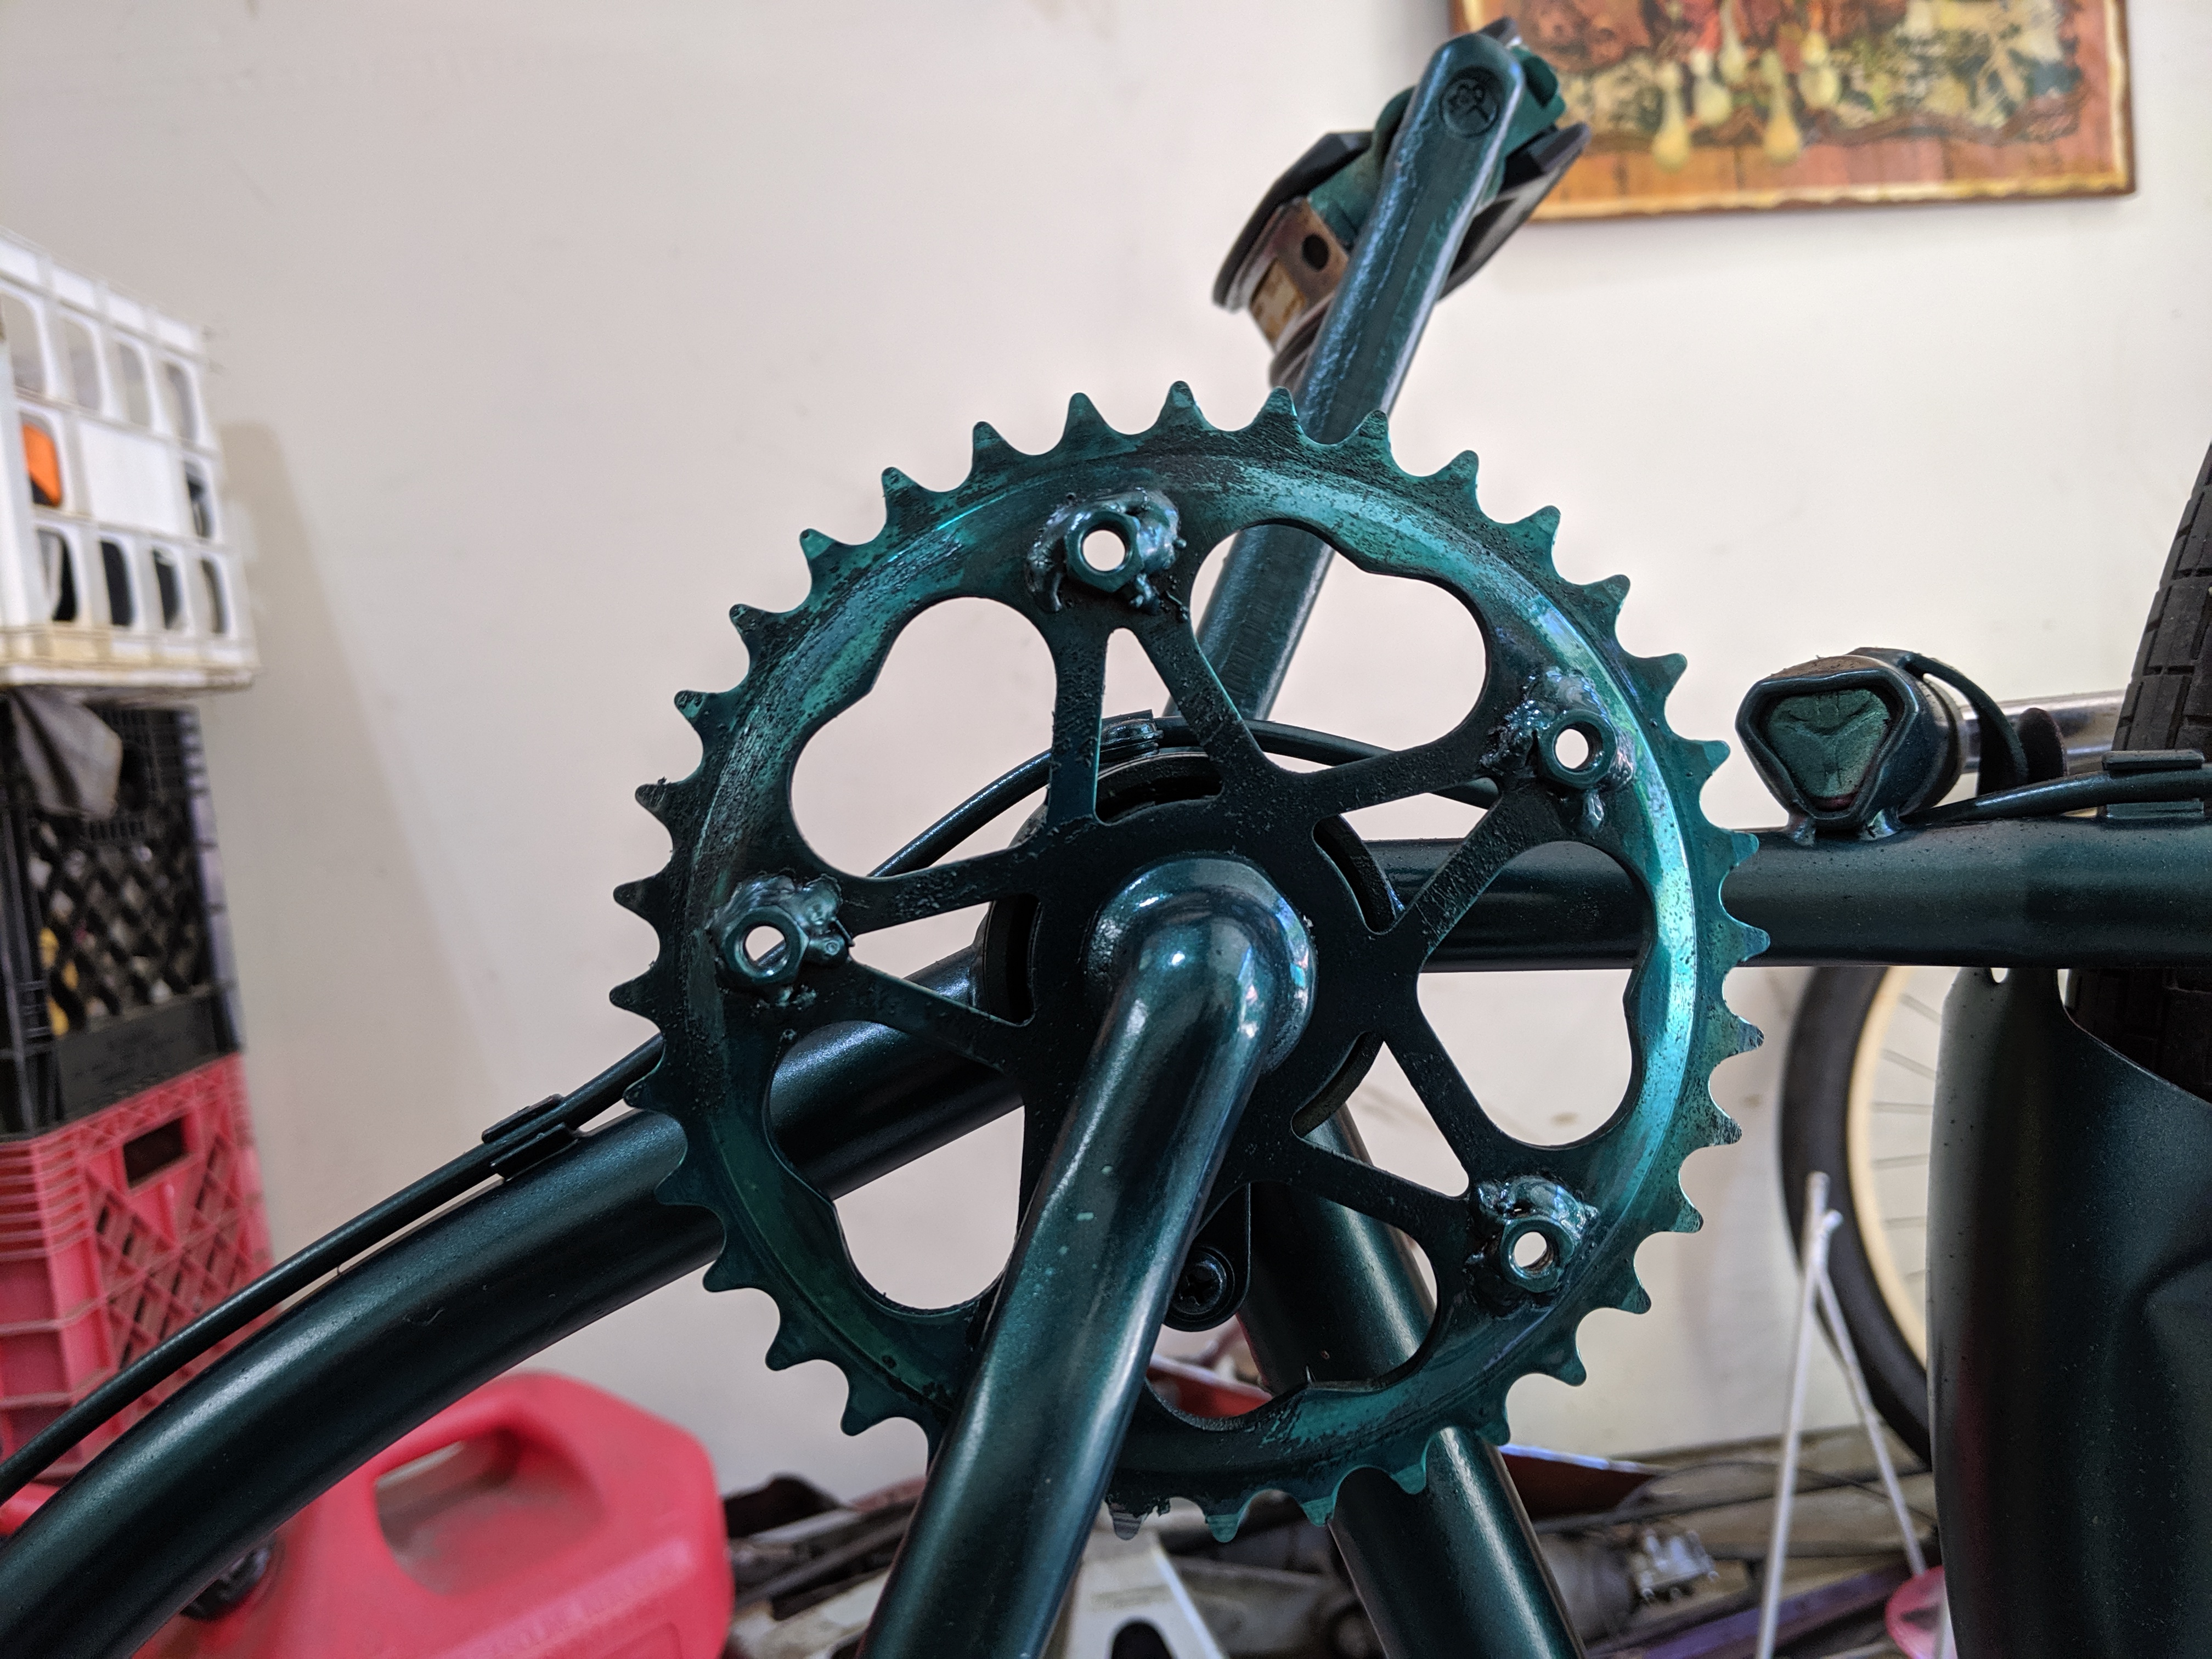
Viola! I'm using bolts with round bolt heads that are exactly the right fit for the chain ring so that there's no movement. And I used red threadlocker to make sure it says that way.
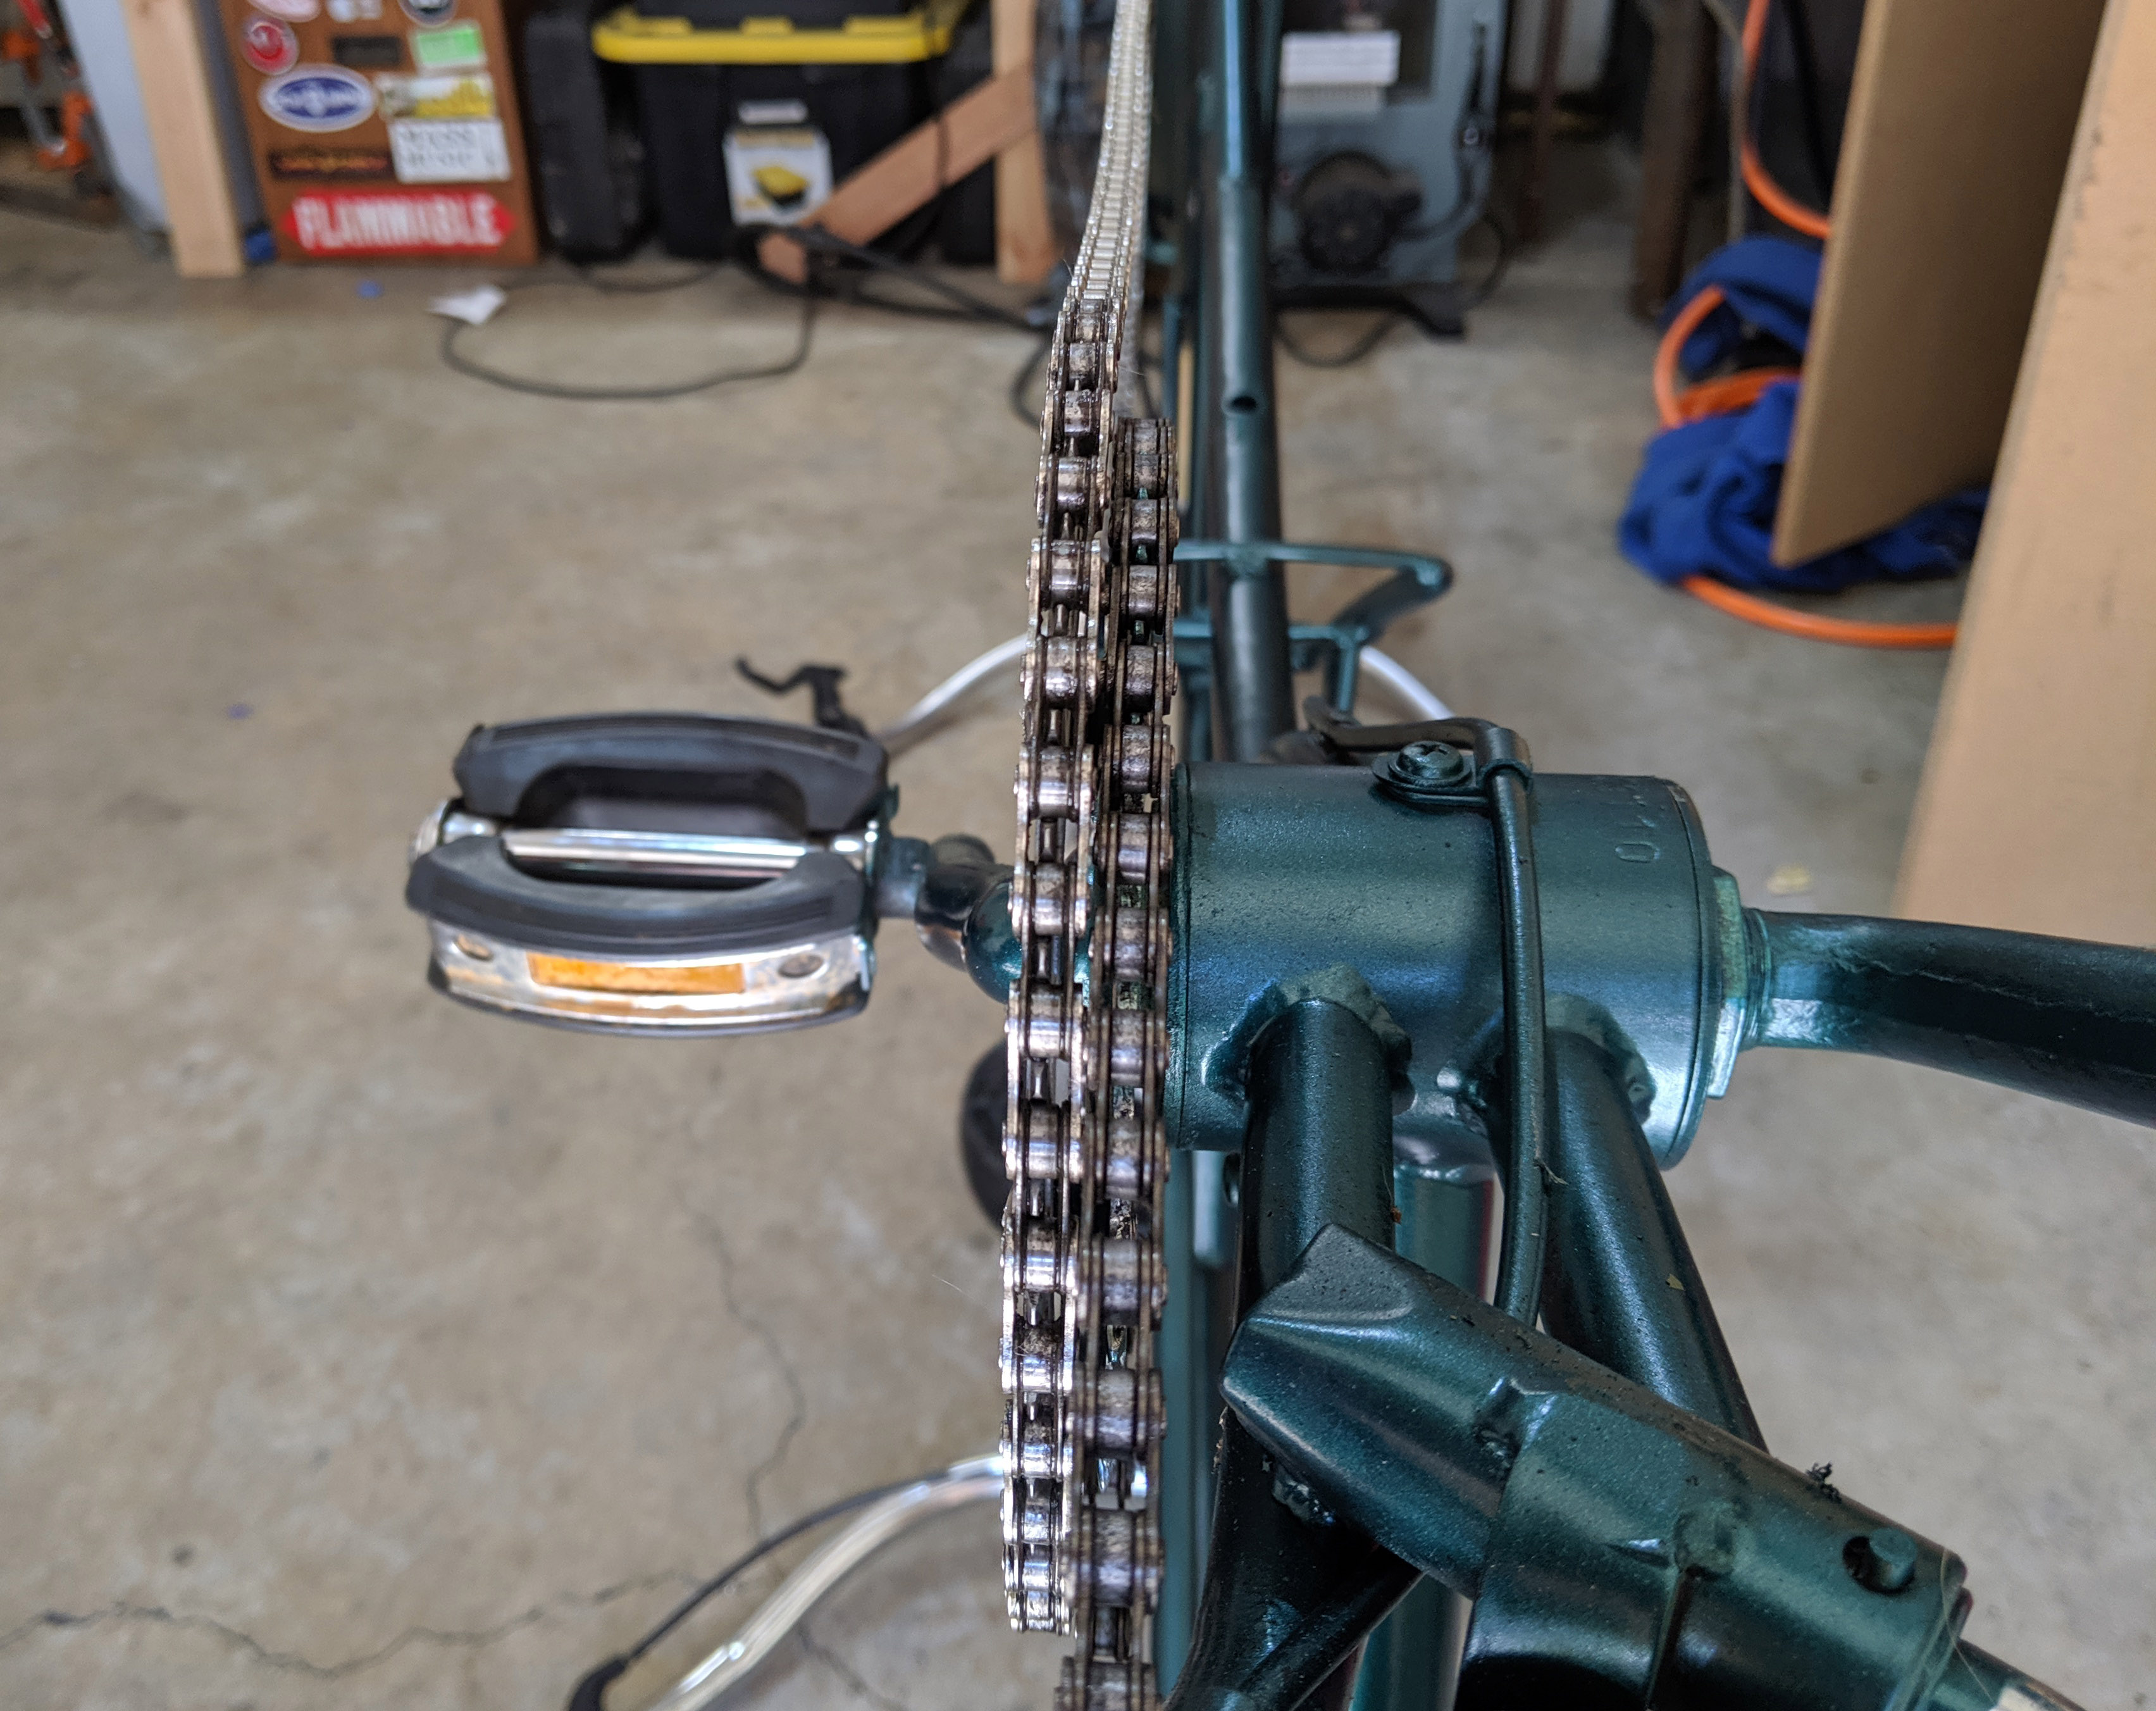
Next, I made a chain long enough by linking two chains (that are the same width, in my case 1/8") together. The world's longest bike chain? Probably not but it's pretty long.

It doesn't look like it, but that's as taut as I could get it by removing links. If I removed another link, the chain would be impossible to go over the chain rings.
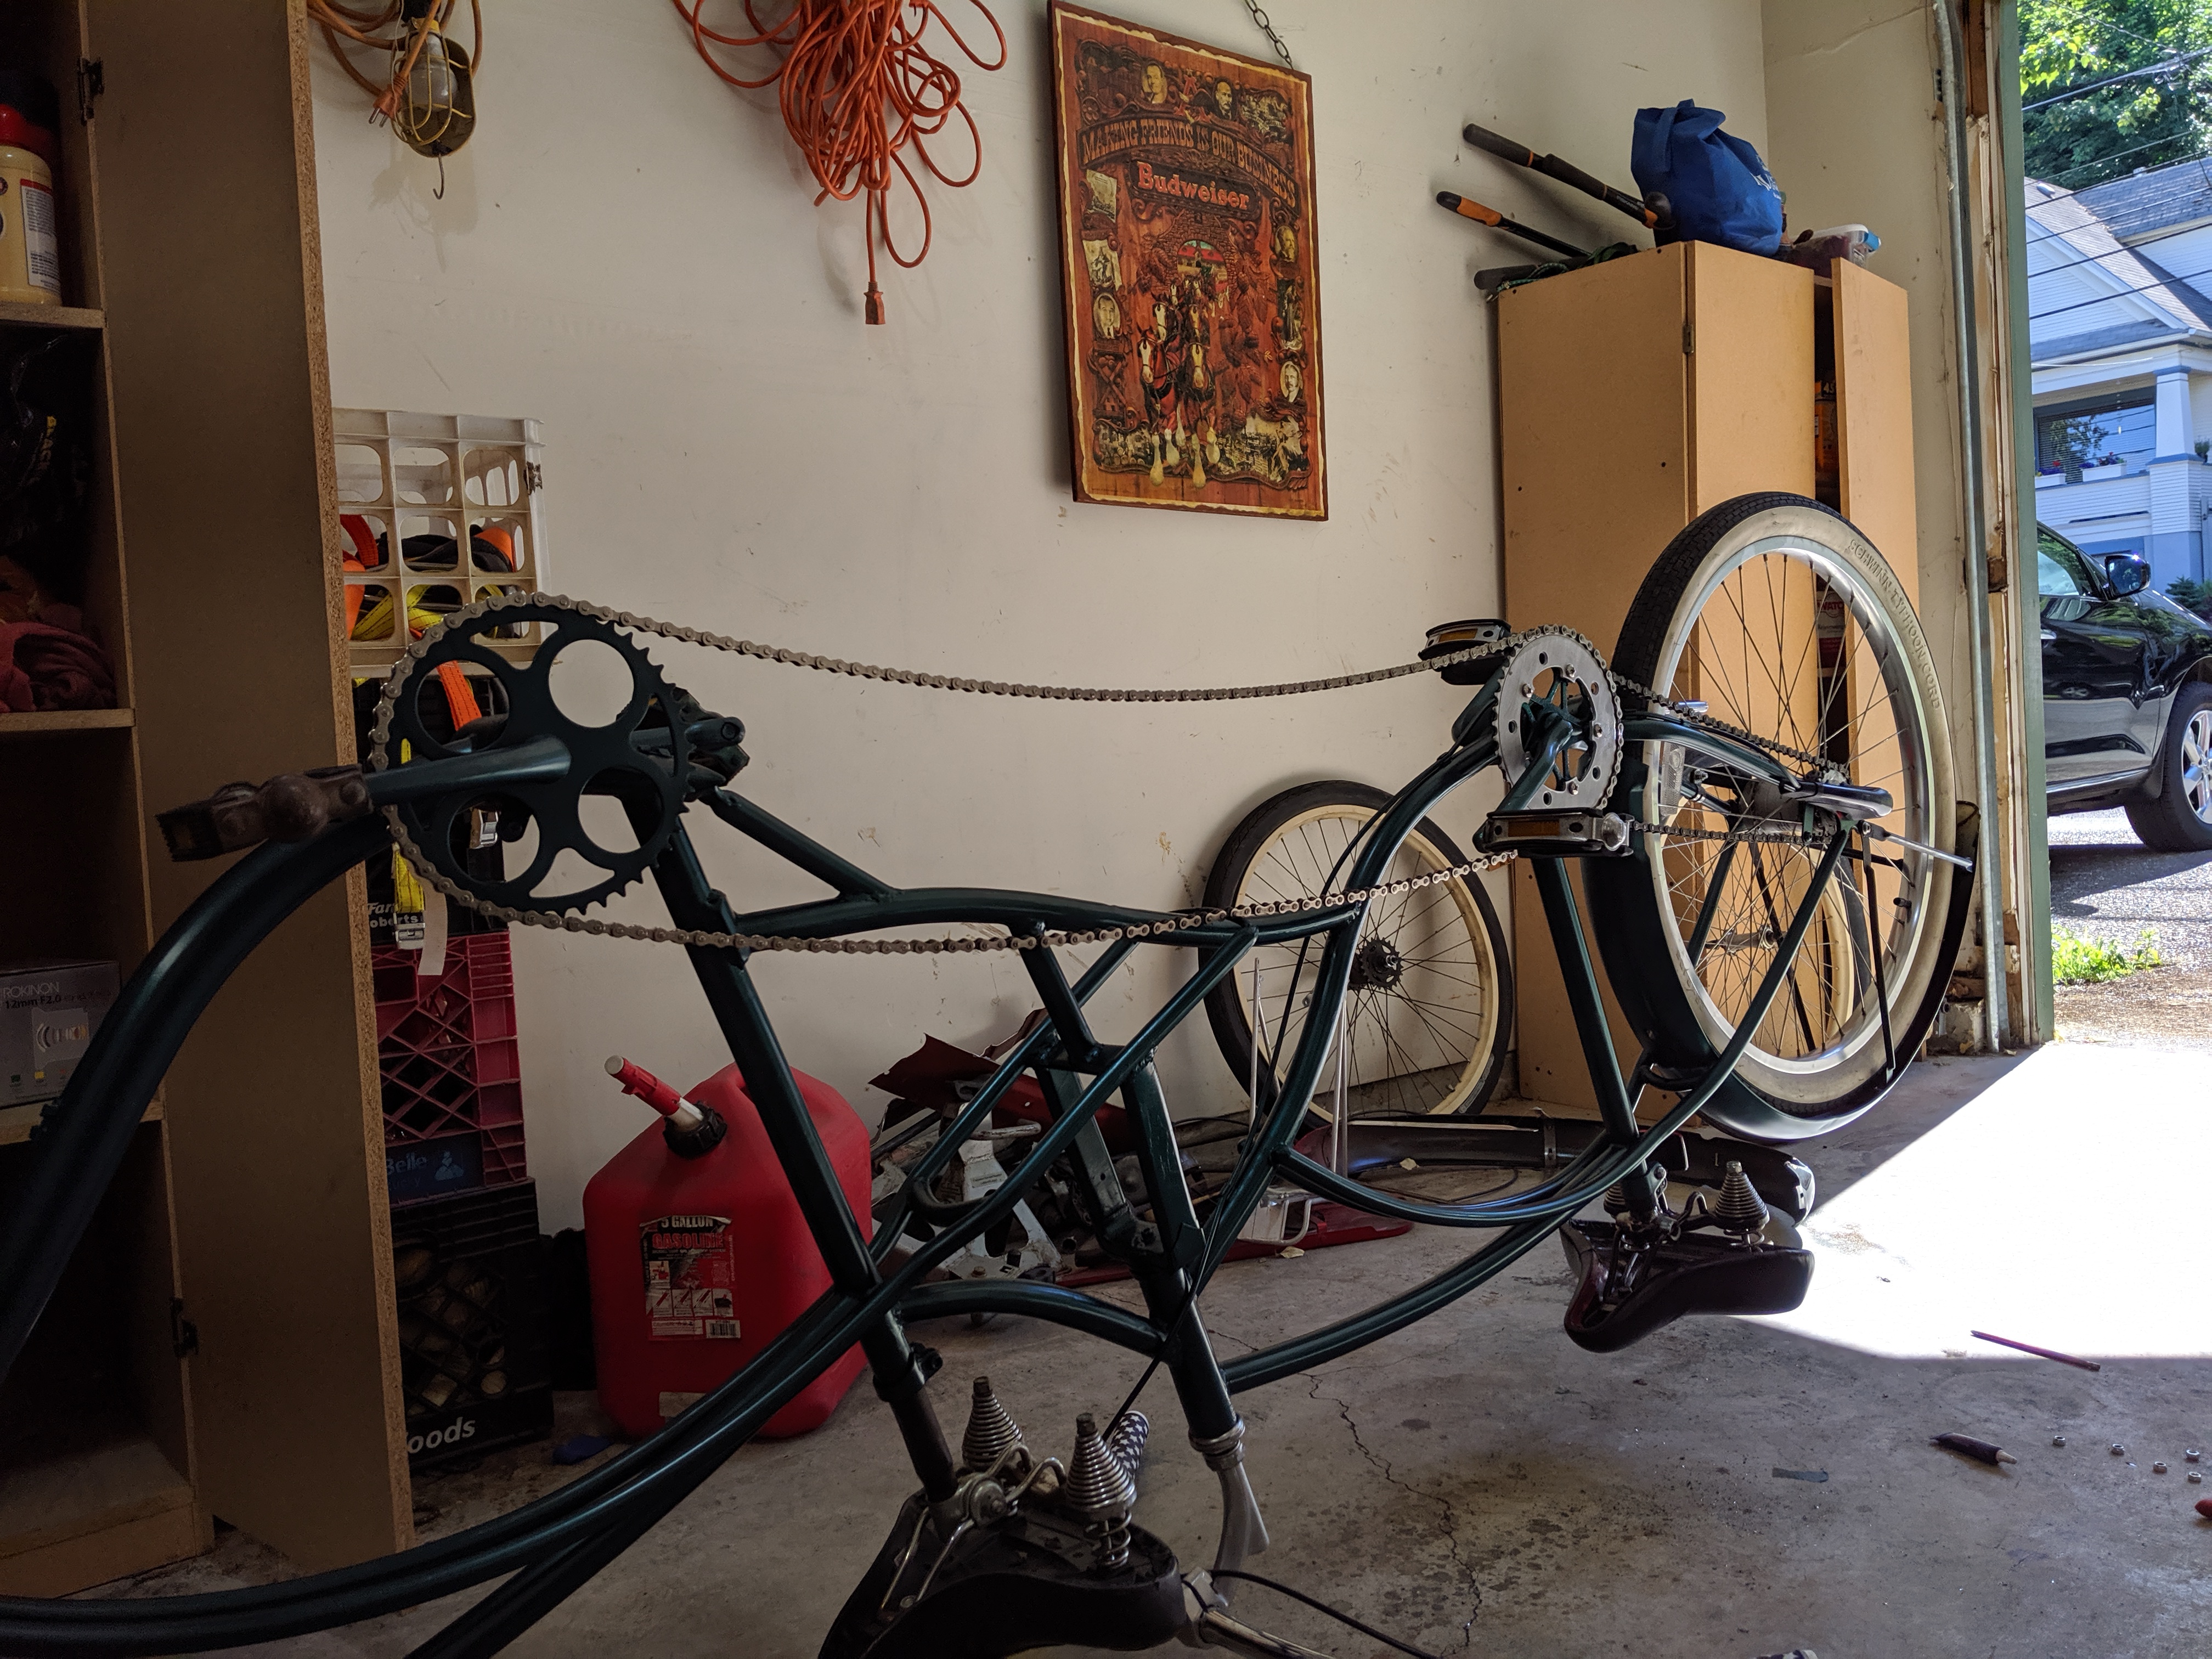
But with the chain on I could see that the two chains were rubbing against each other. I added some washer in between the steel and aluminum chain rings and that's all that was needed.
Up next, brakes!
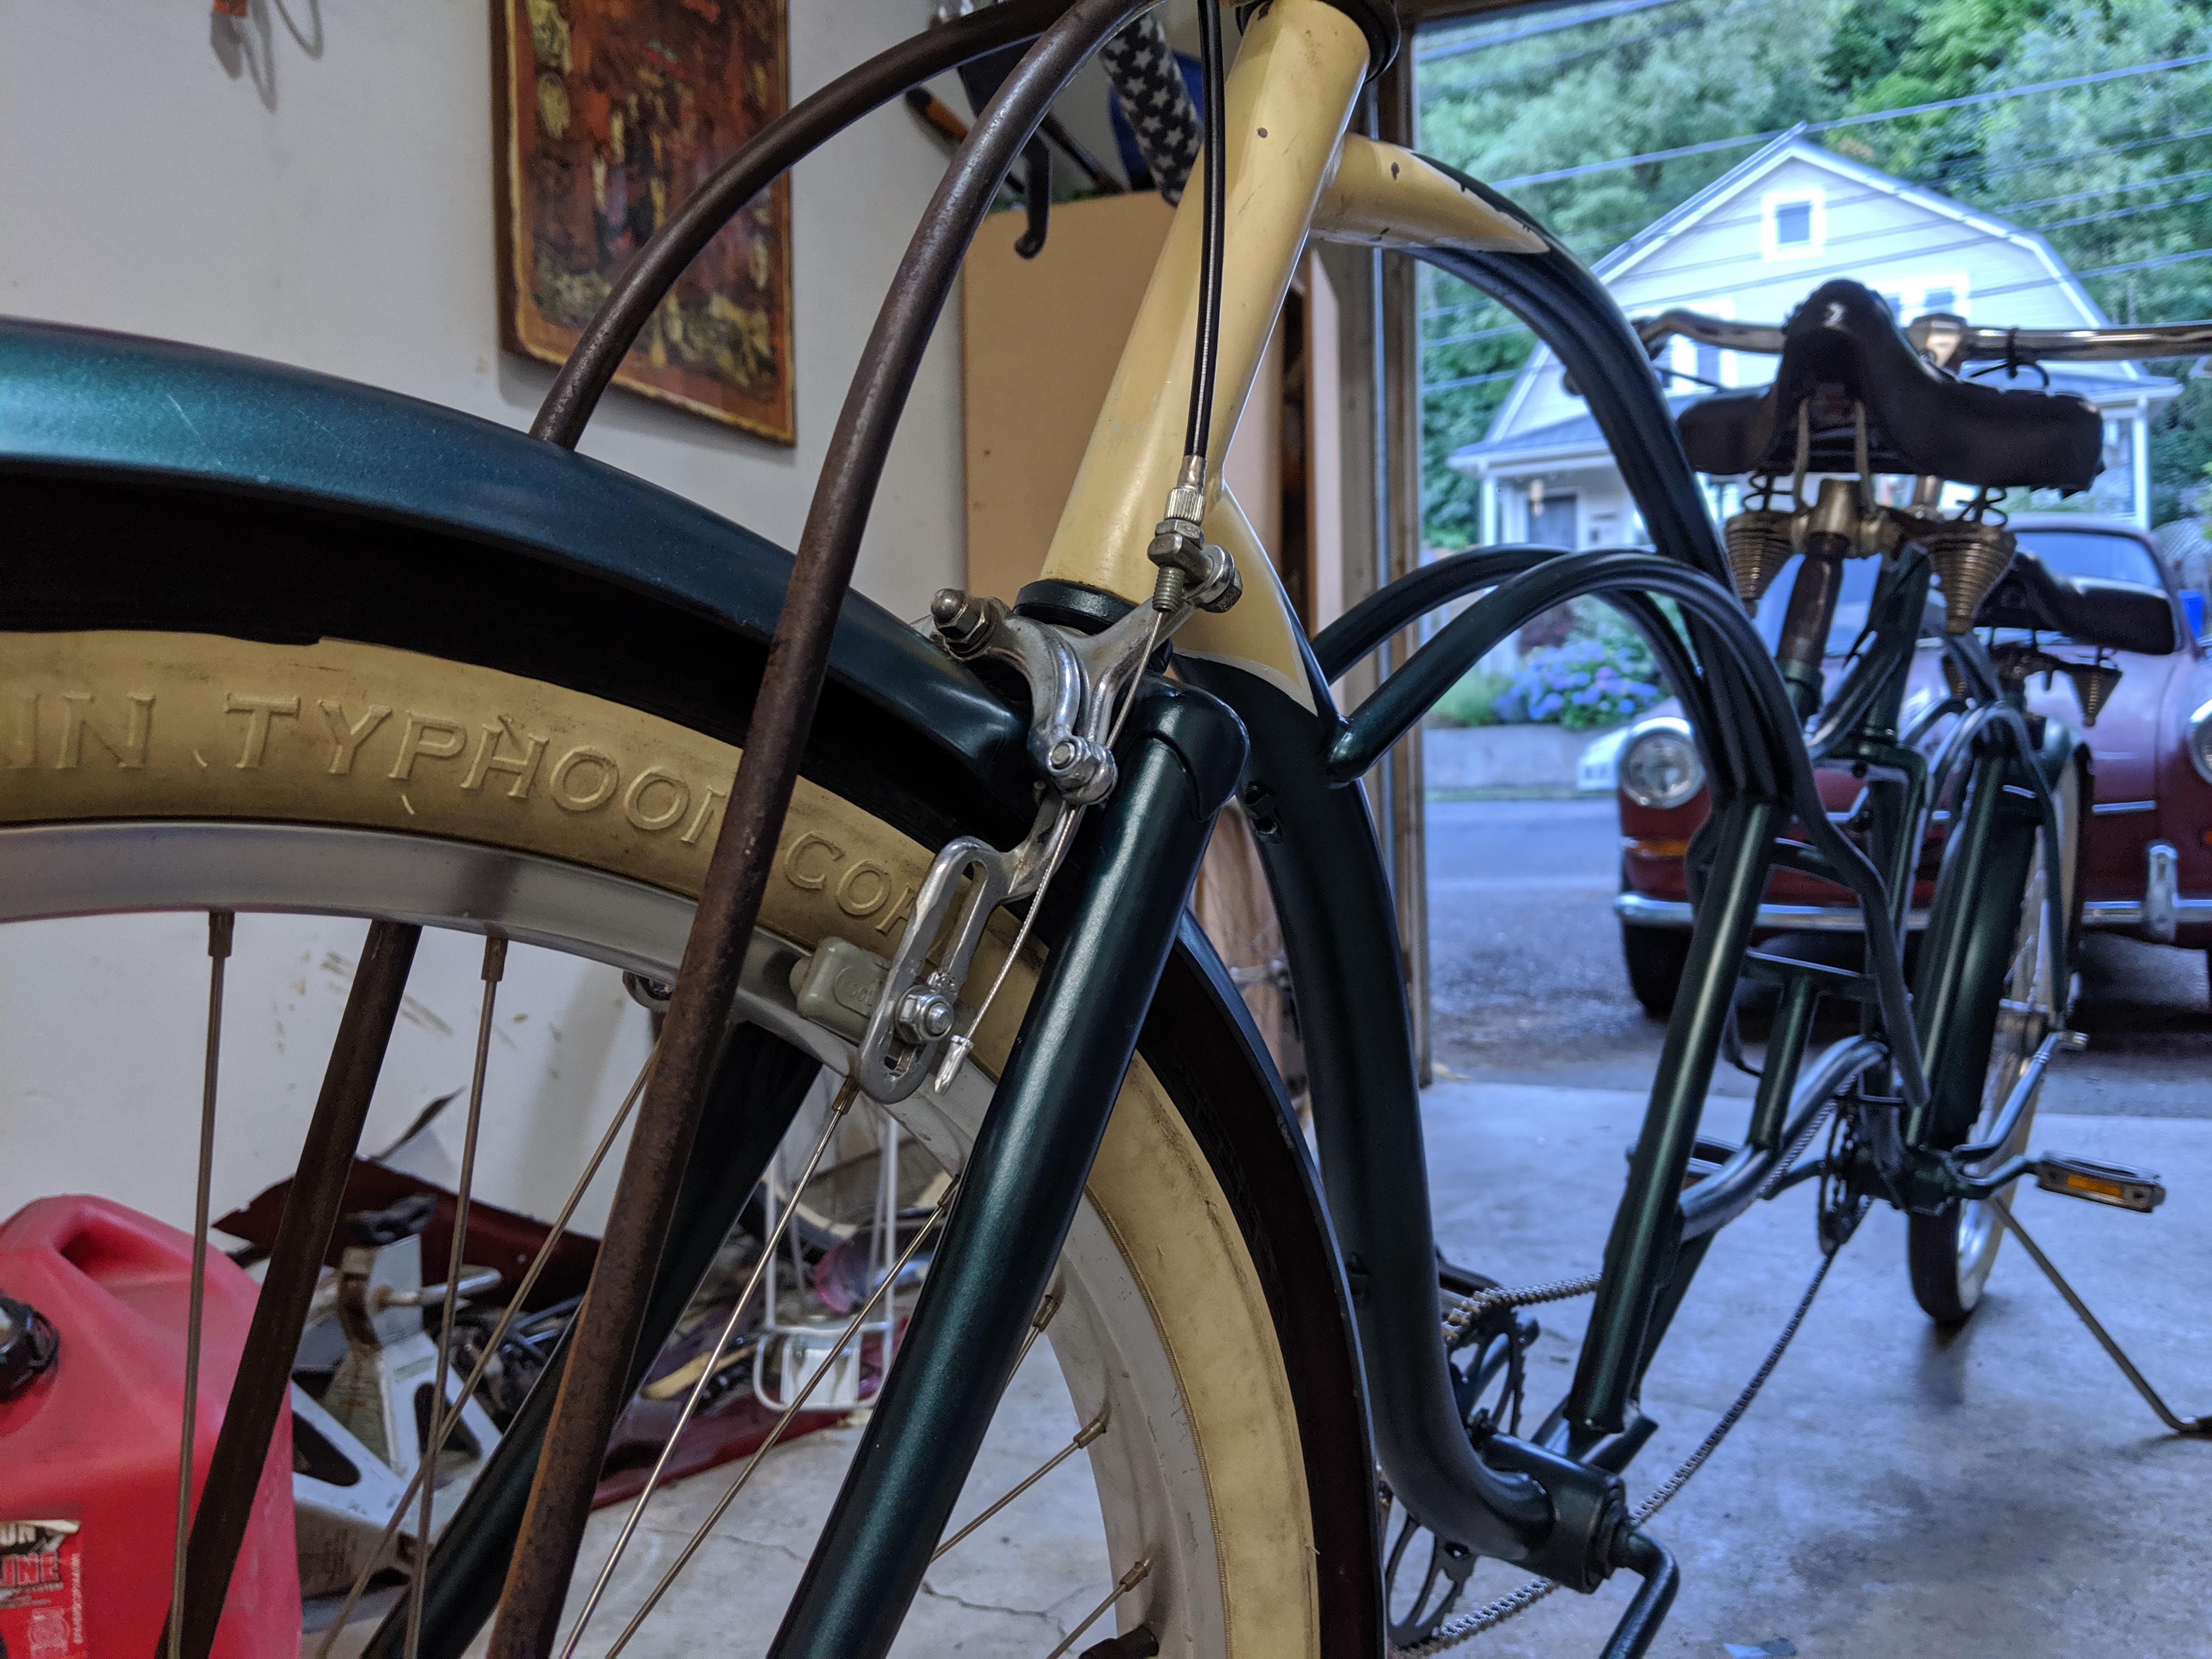
With two riders instead of one, the braking power needed to be doubled, but neither bike came with front brakes from the factory. So I had to add my own. The front fork had a single mounting hole suitable for caliper style brakes, but not the two posts needed for v-brakes. So I found the largest caliper brakes I could find and they were still not large enough to fit over the front fender and to extend down to the brake surface of the wheel rim.
To make them large enough, I had to fabricate some extensions and weld them on. You can hardly tell in the photo bellow because I used some more of that "chrome" paint.
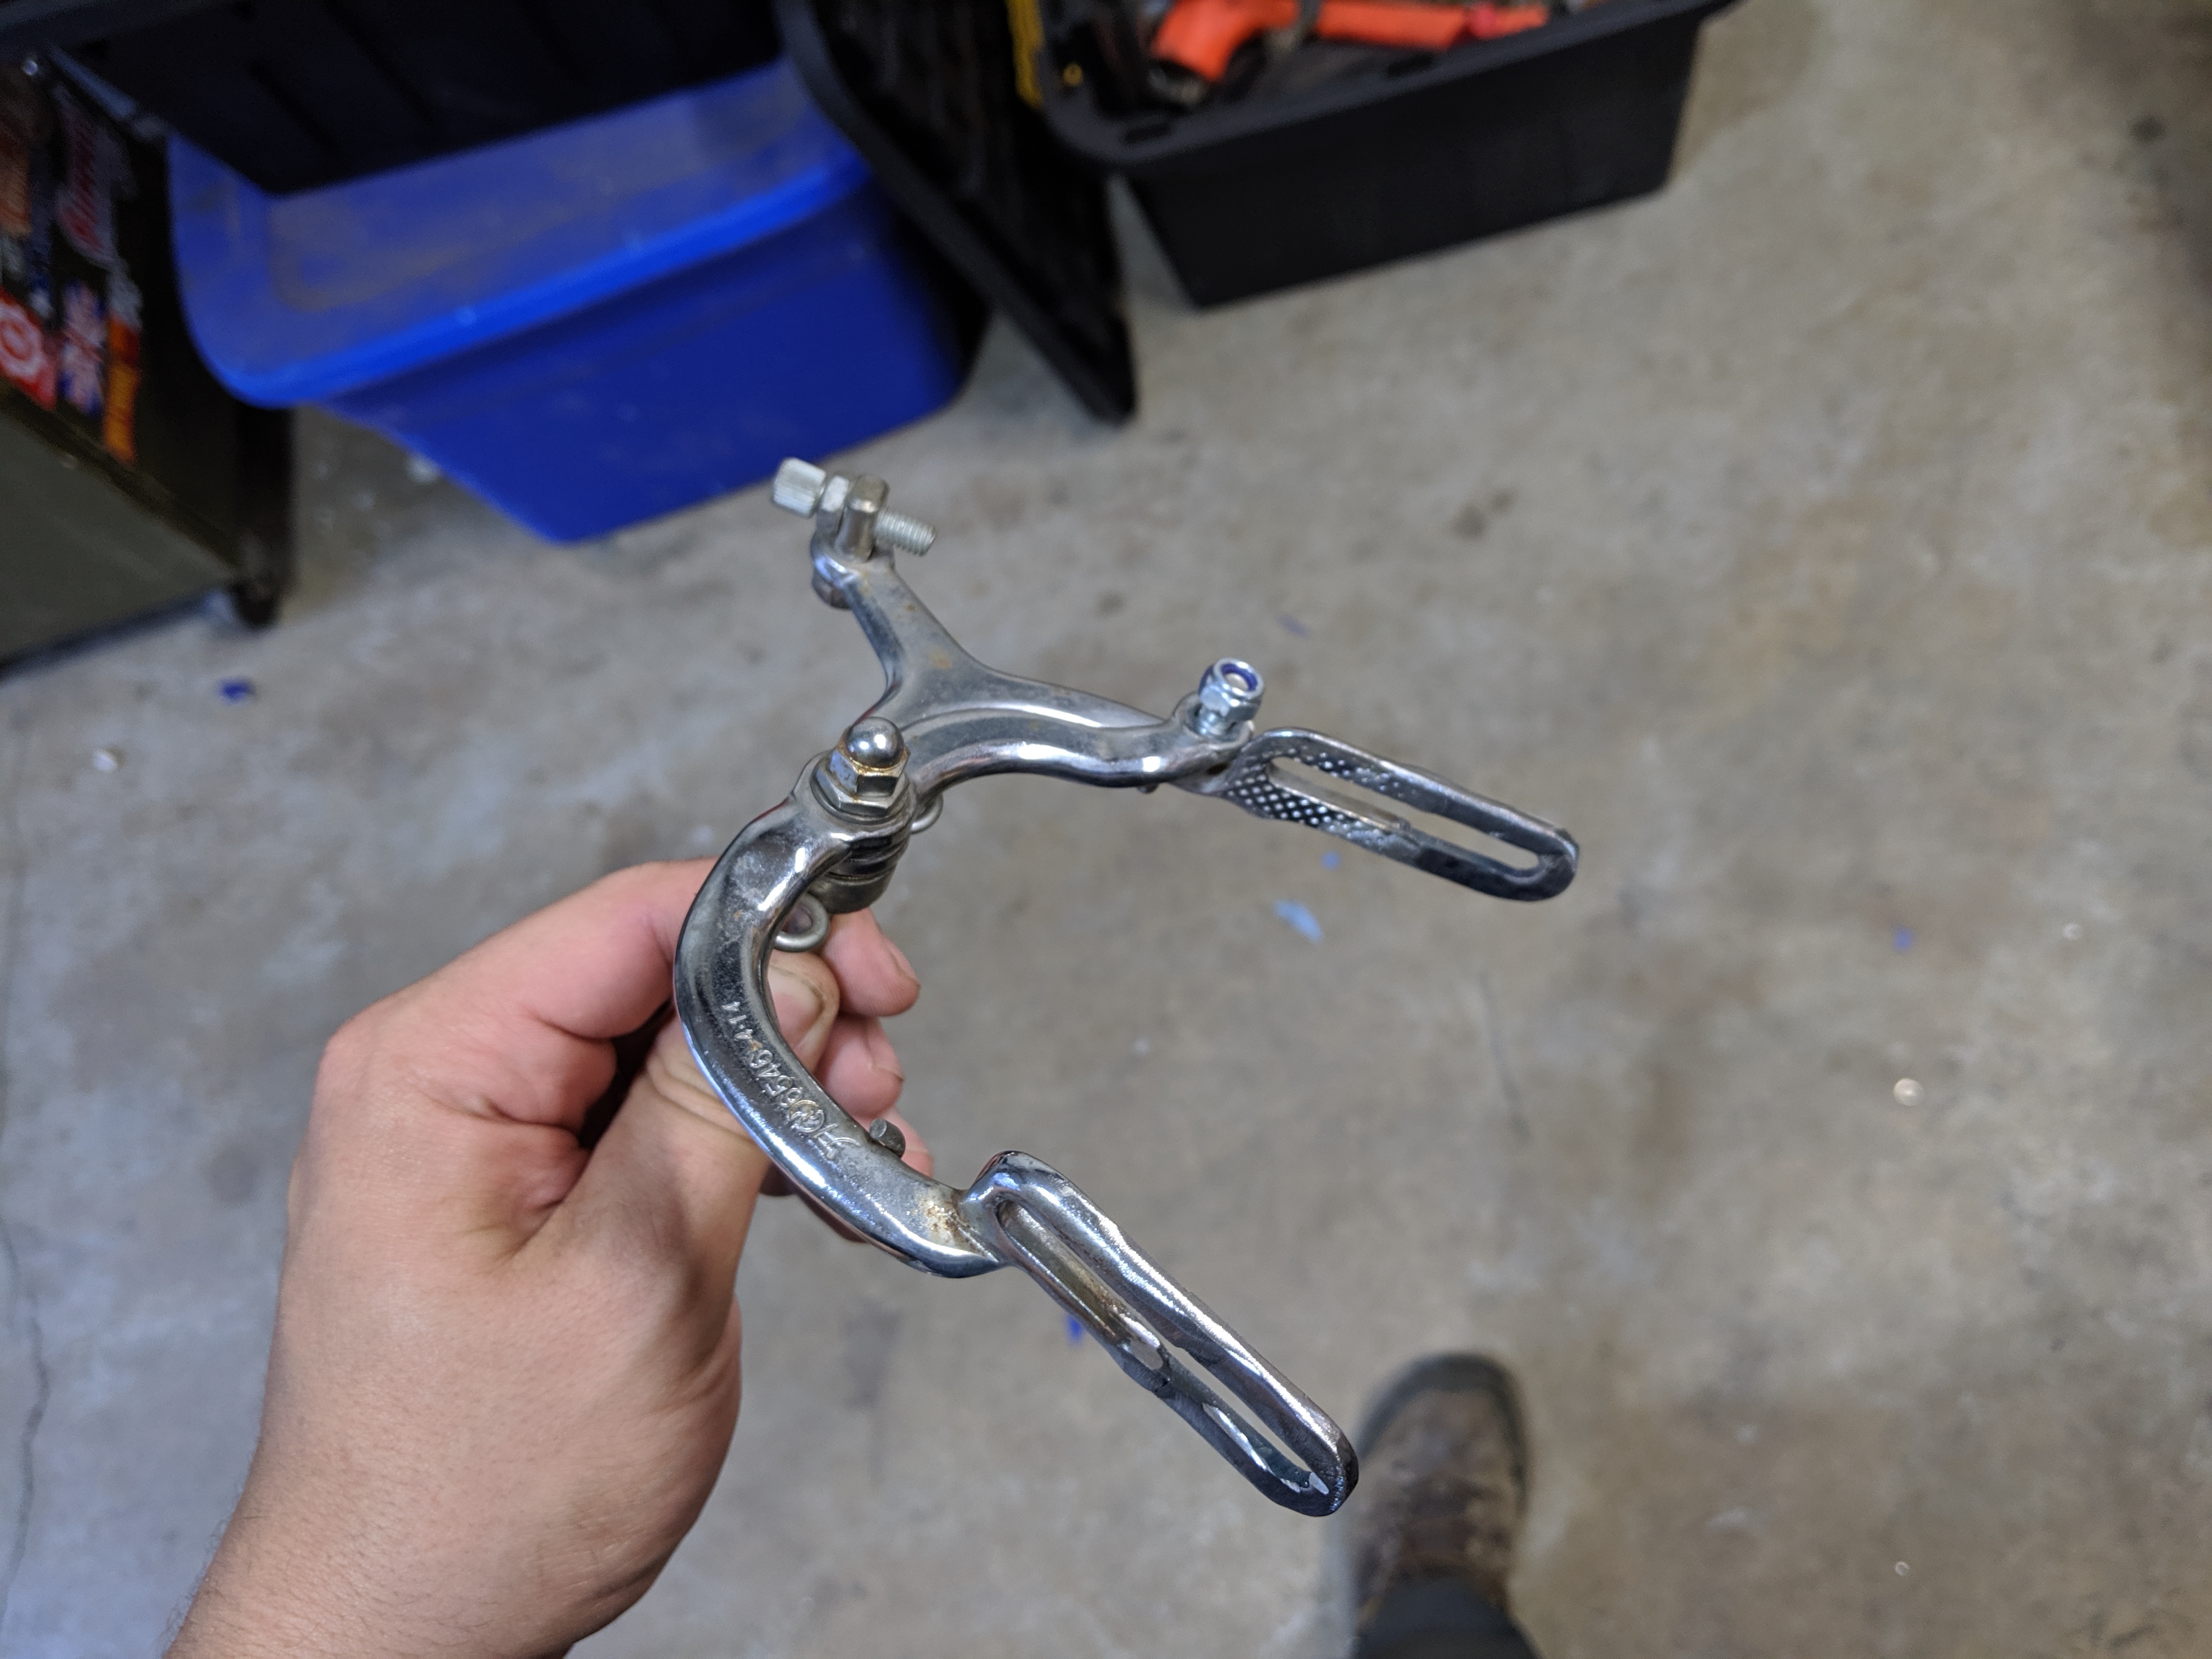
And I made them fit over the front fender by bending the fender to fit the brakes, rather than the other way around. Problem solved!
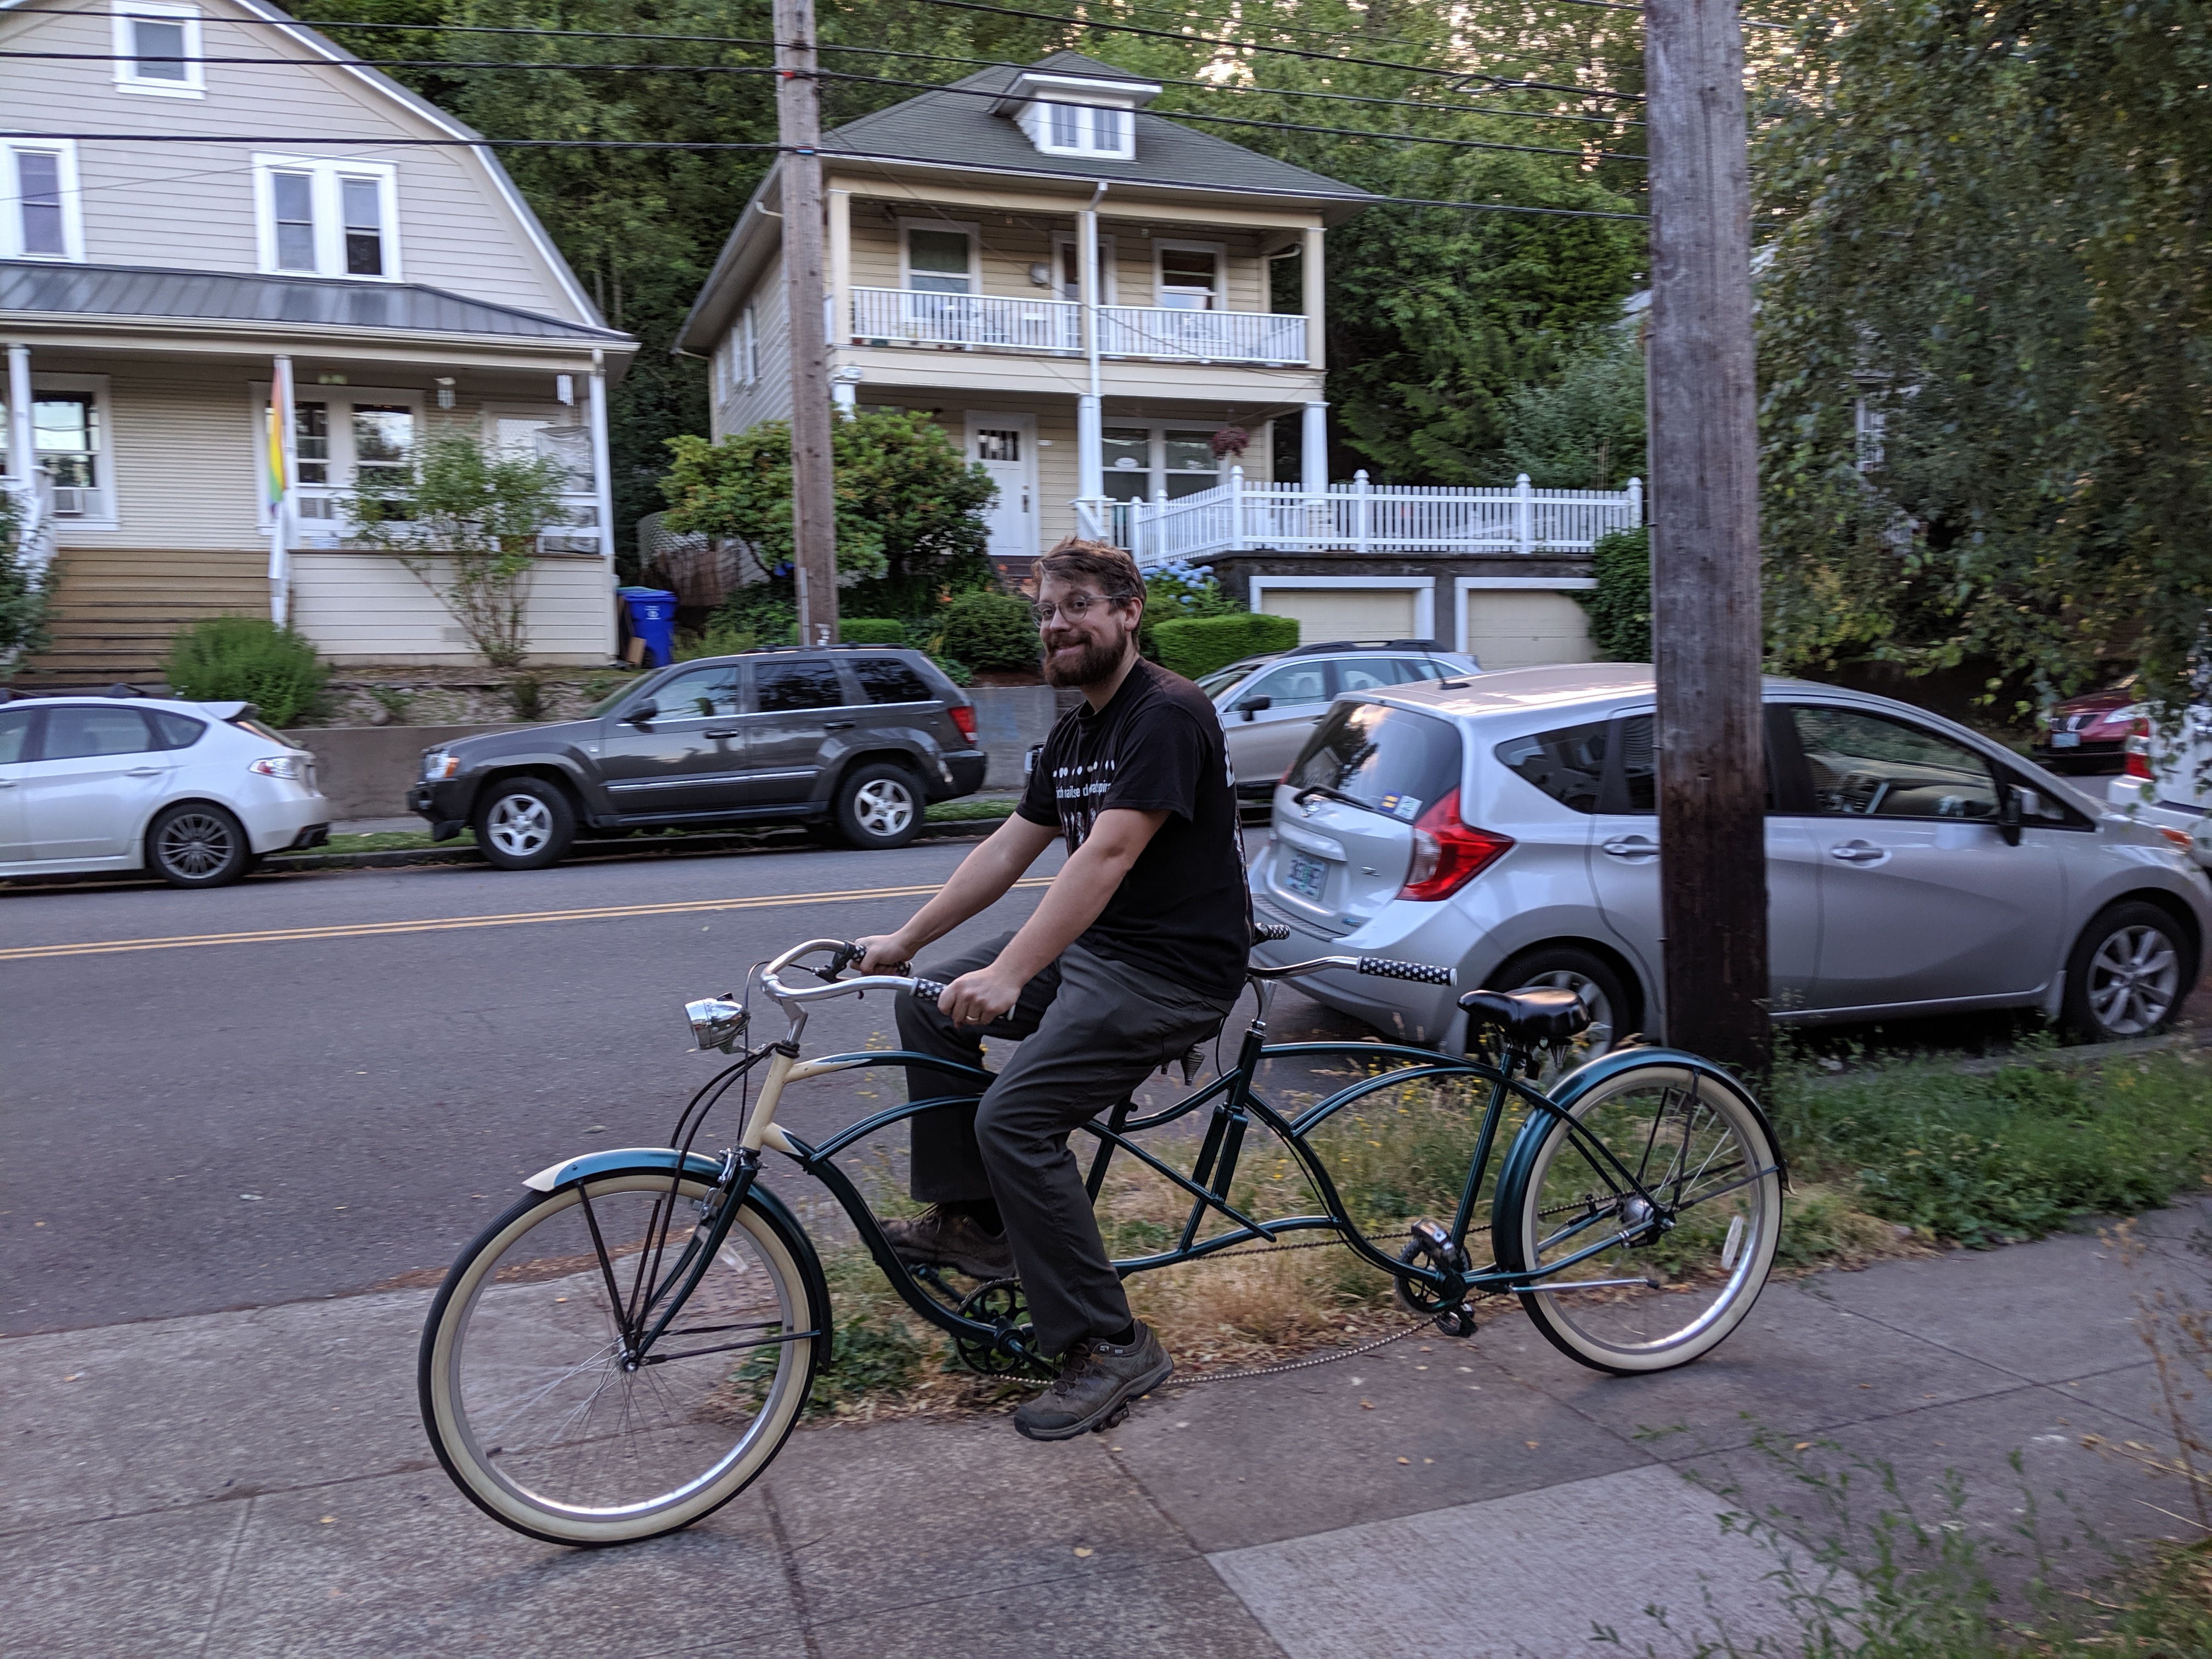
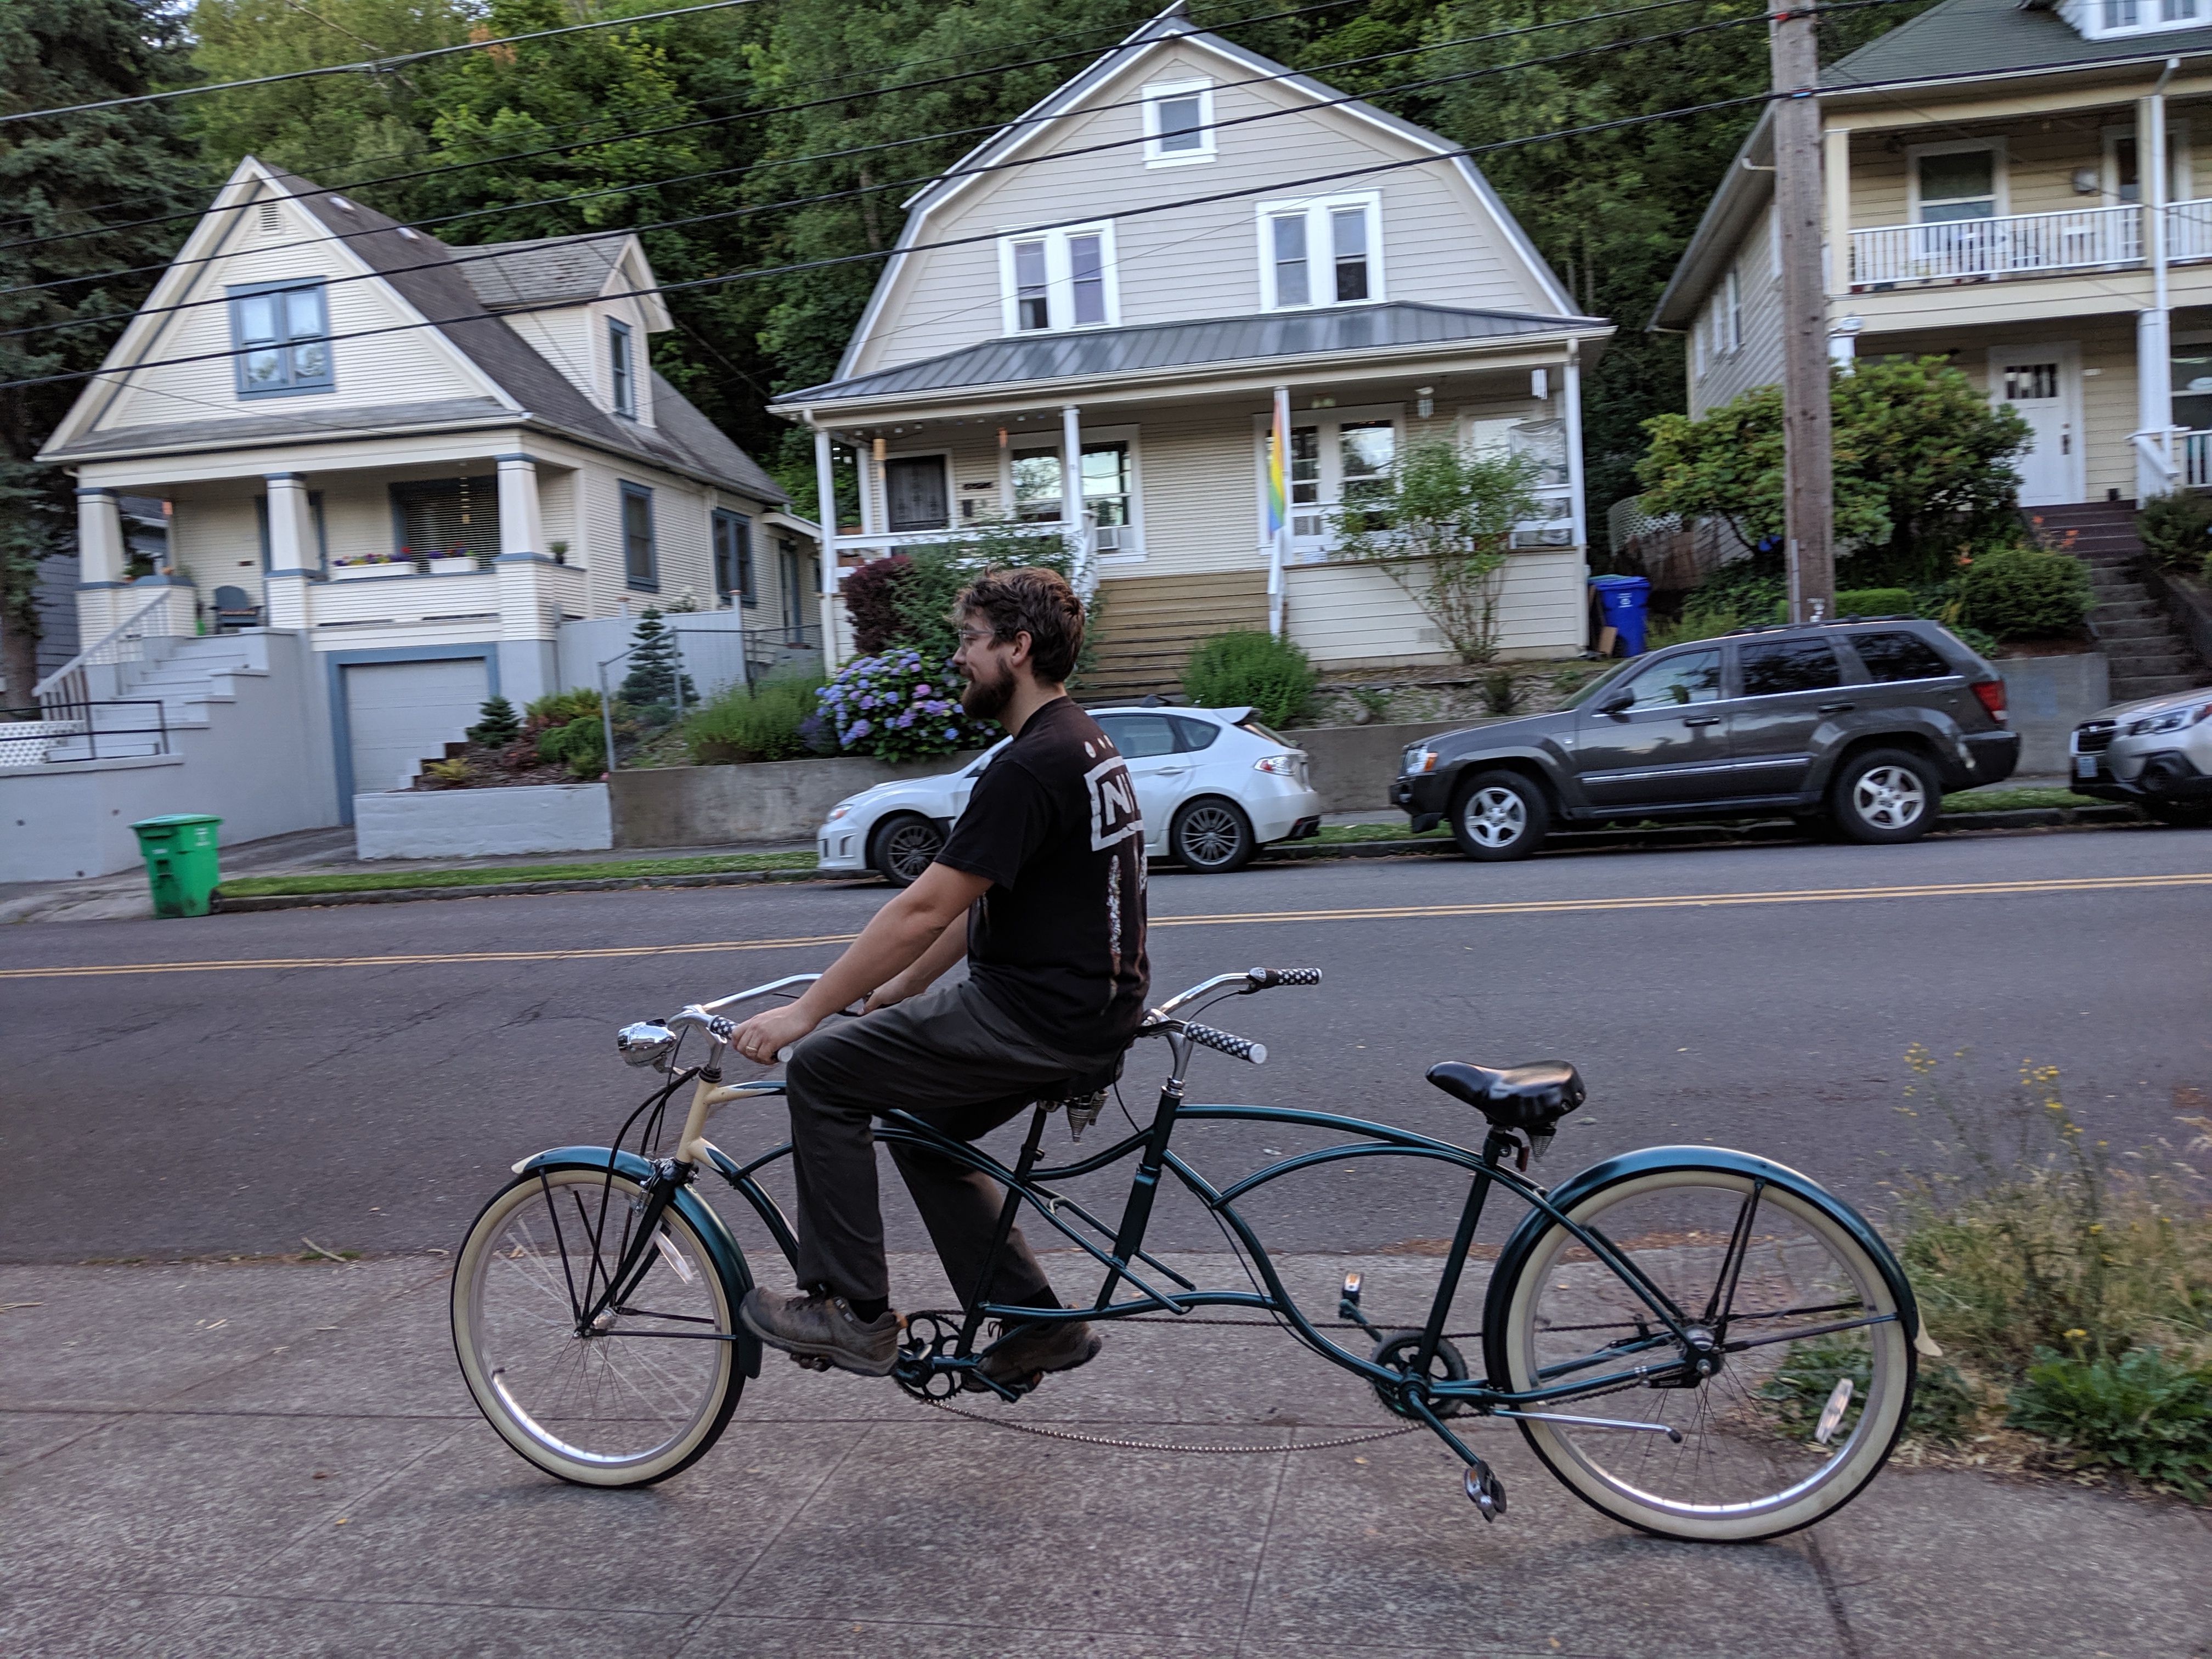
Weeeee!!!
One major problem though was that the chain was way way way too loose. It was popping and jumping and skipping.
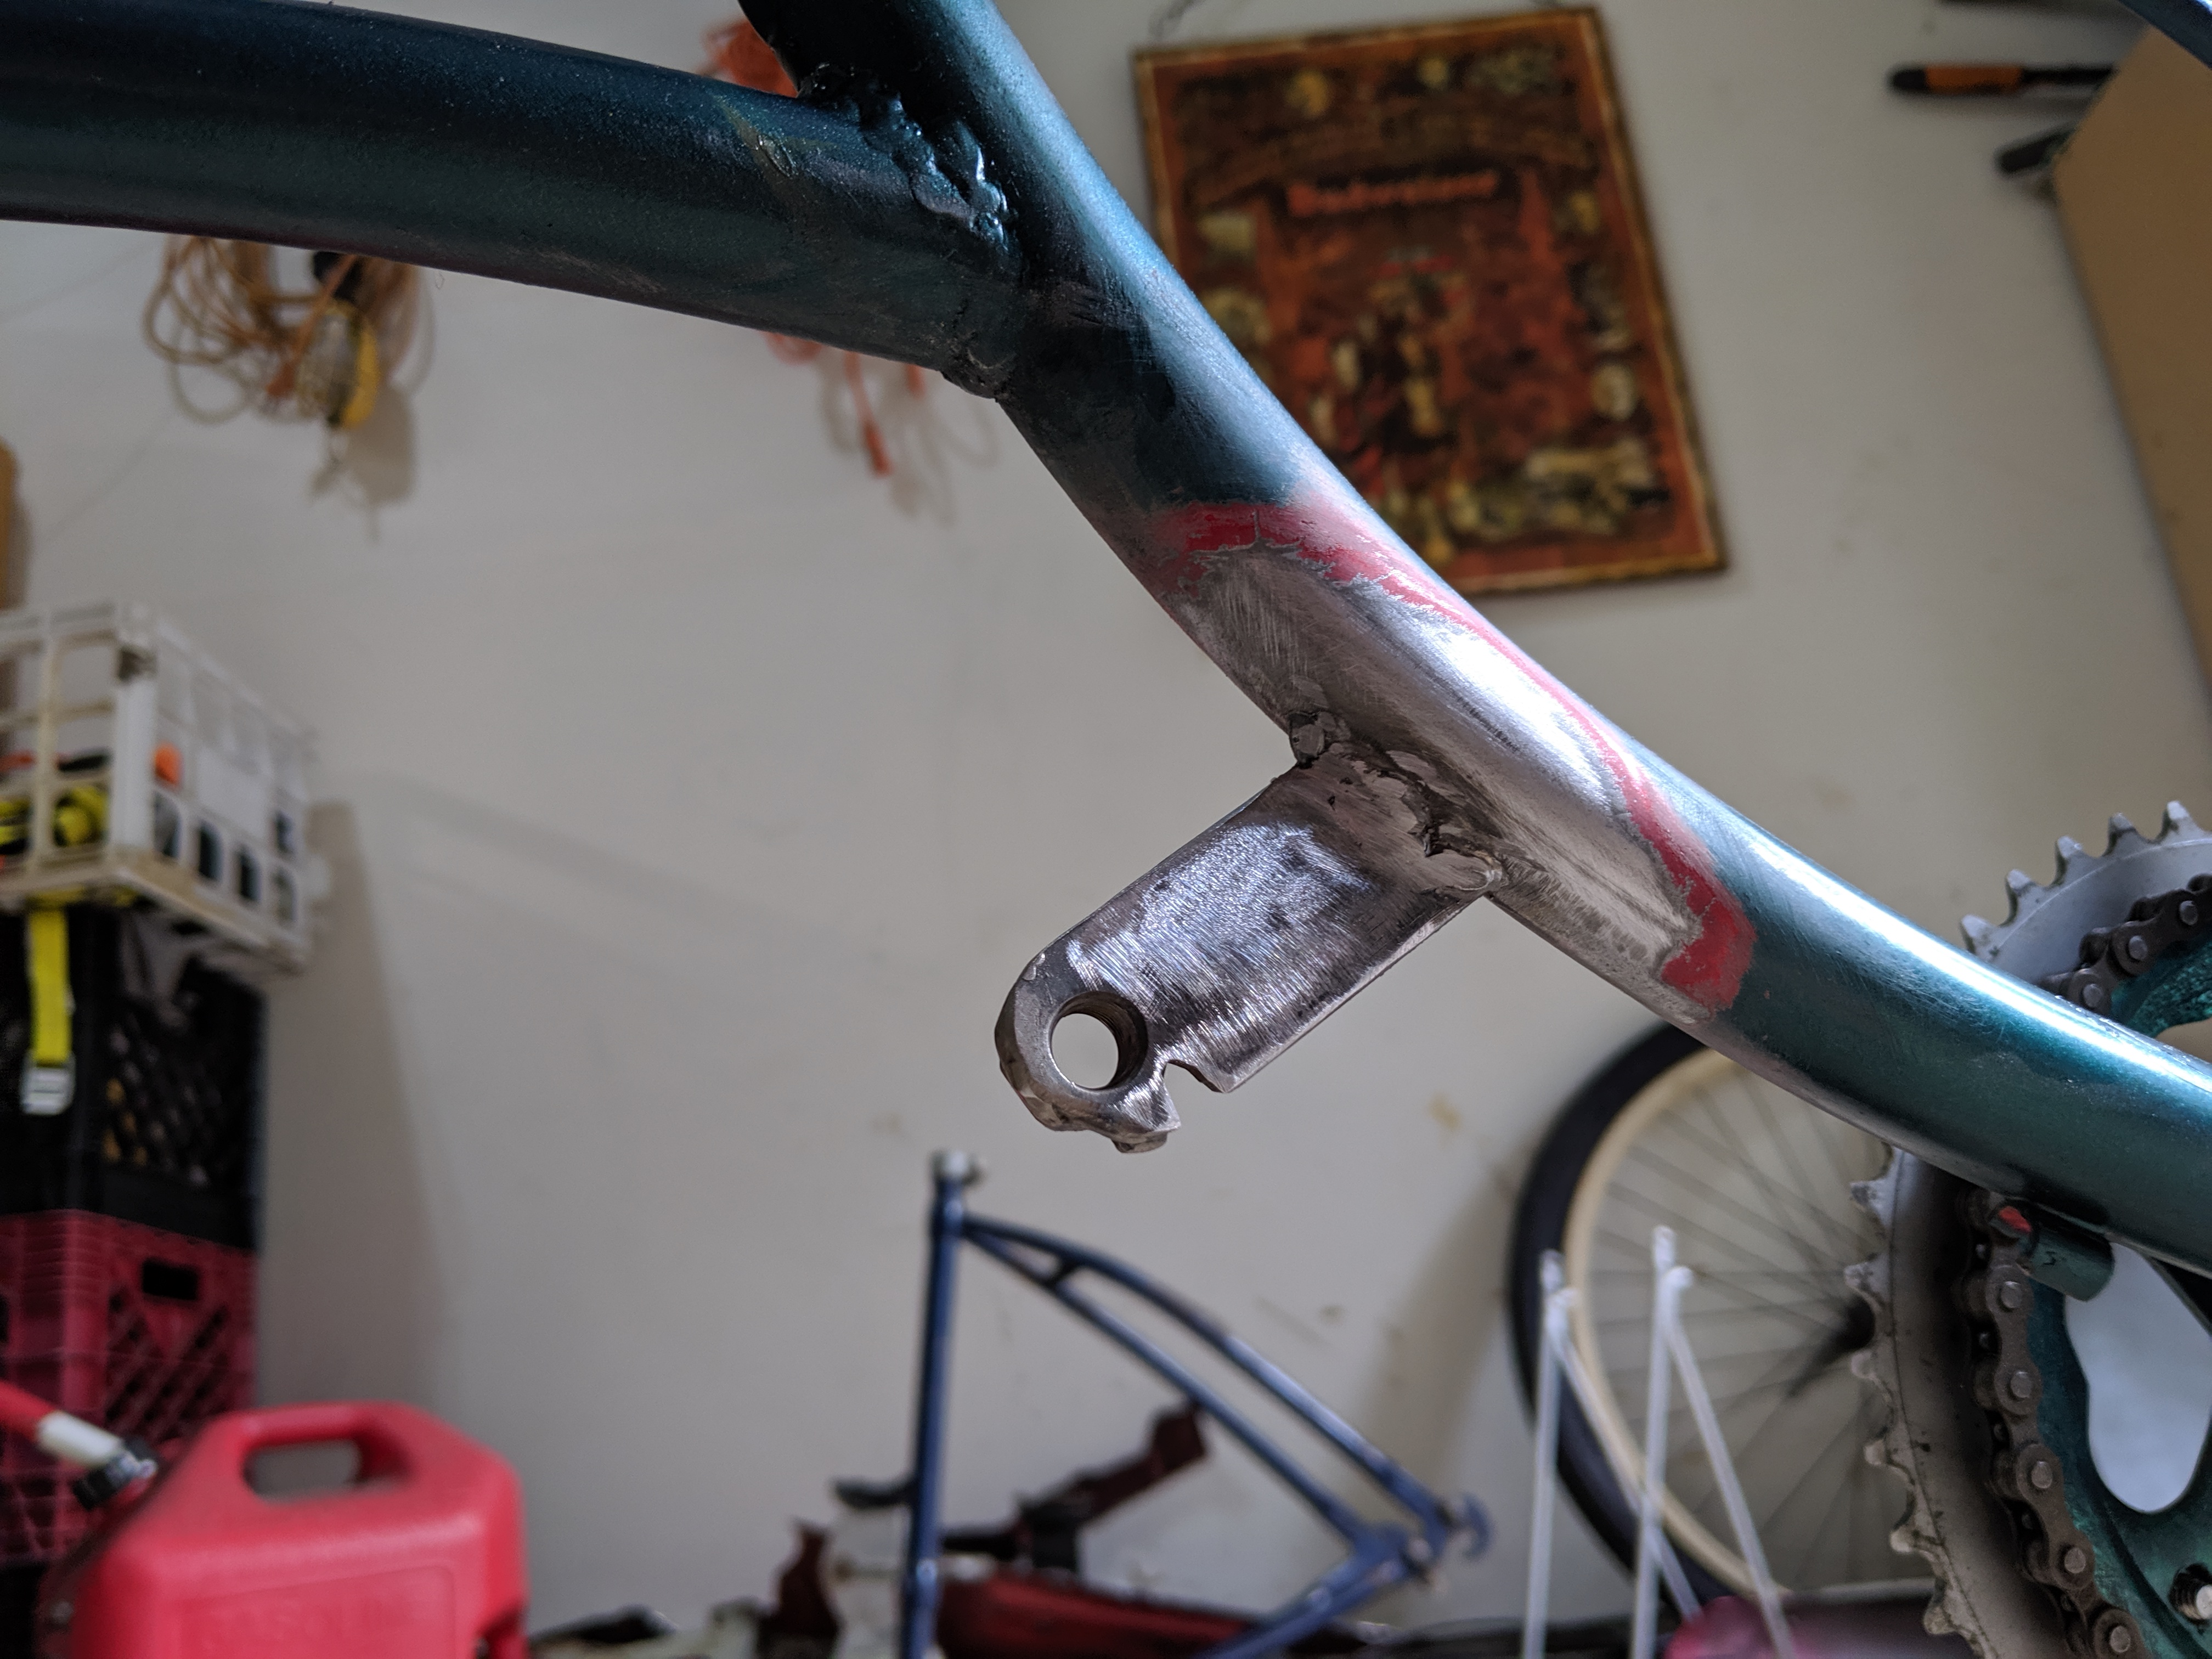
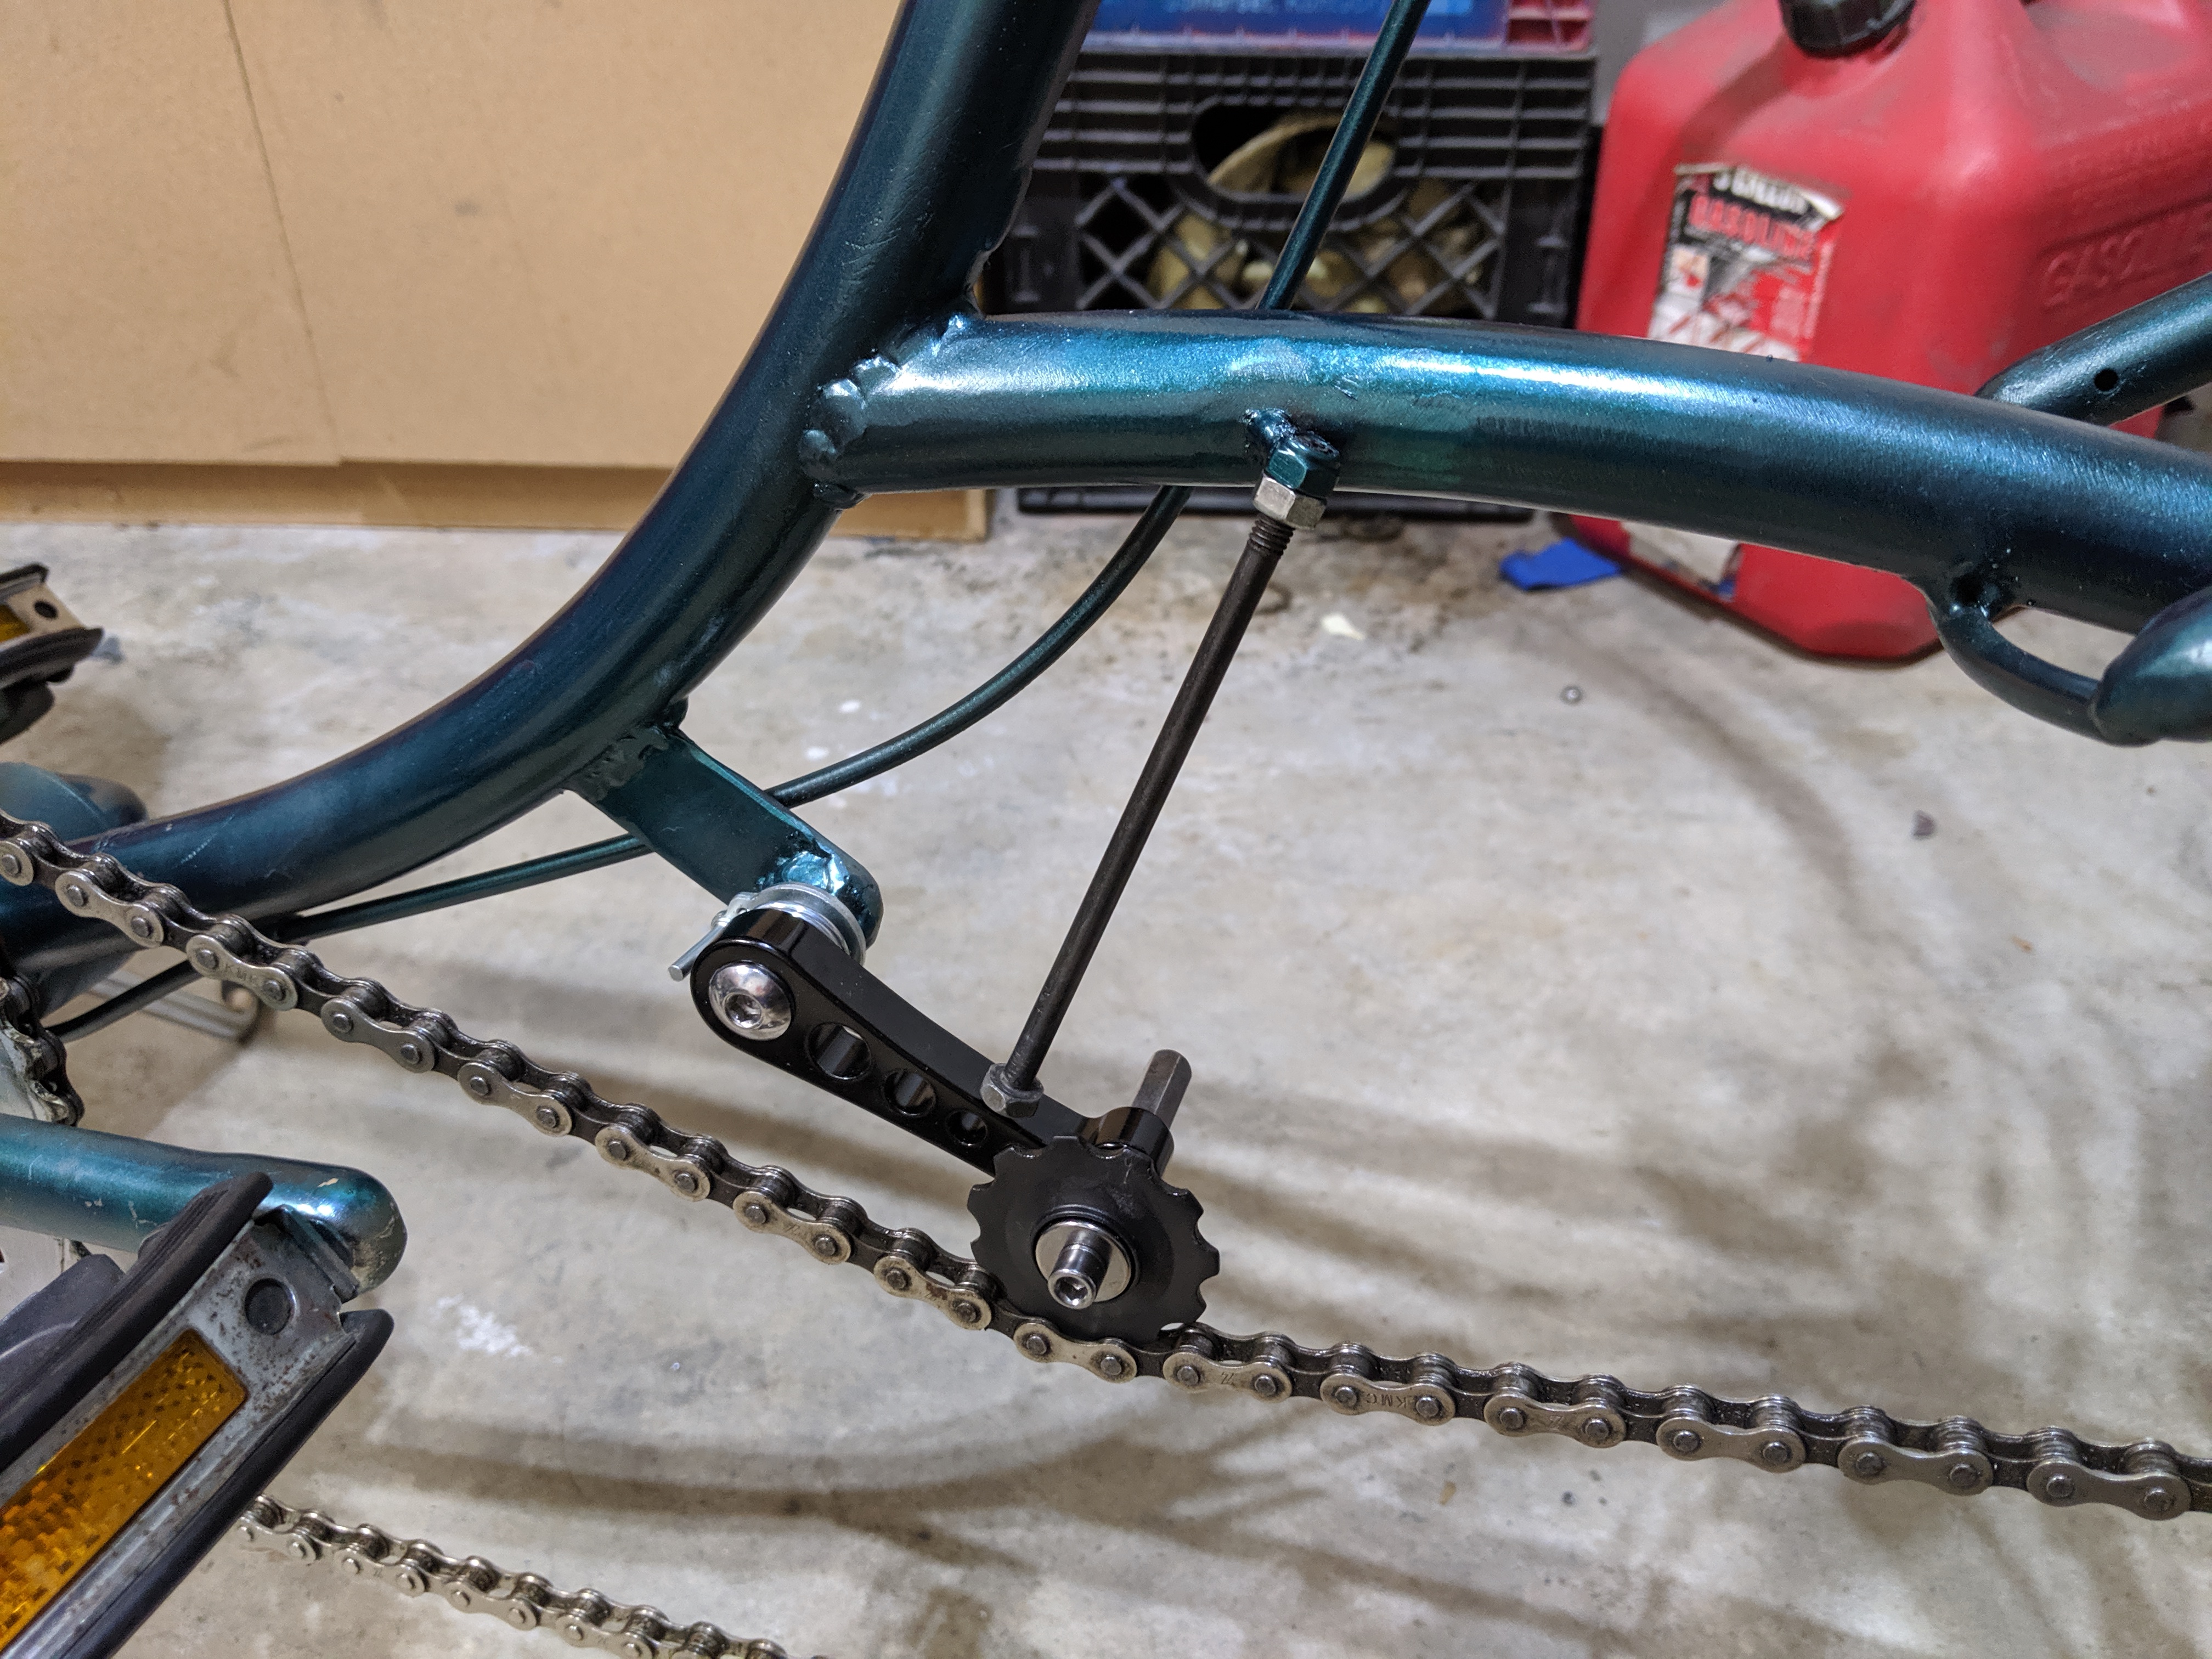
I went to the parts store and found a chain tensioning idler pulley thingy that's made for converting a geared bike to a single speed bike. It bolts to a hanger on the frame that the derailleur would bolt to. So I made my own derailleur hanger out of steel and a nut that's the right size for the chain tensioner and welded it on.
Followed up with some paint. My wife says "it's definitely a boy bike now!"

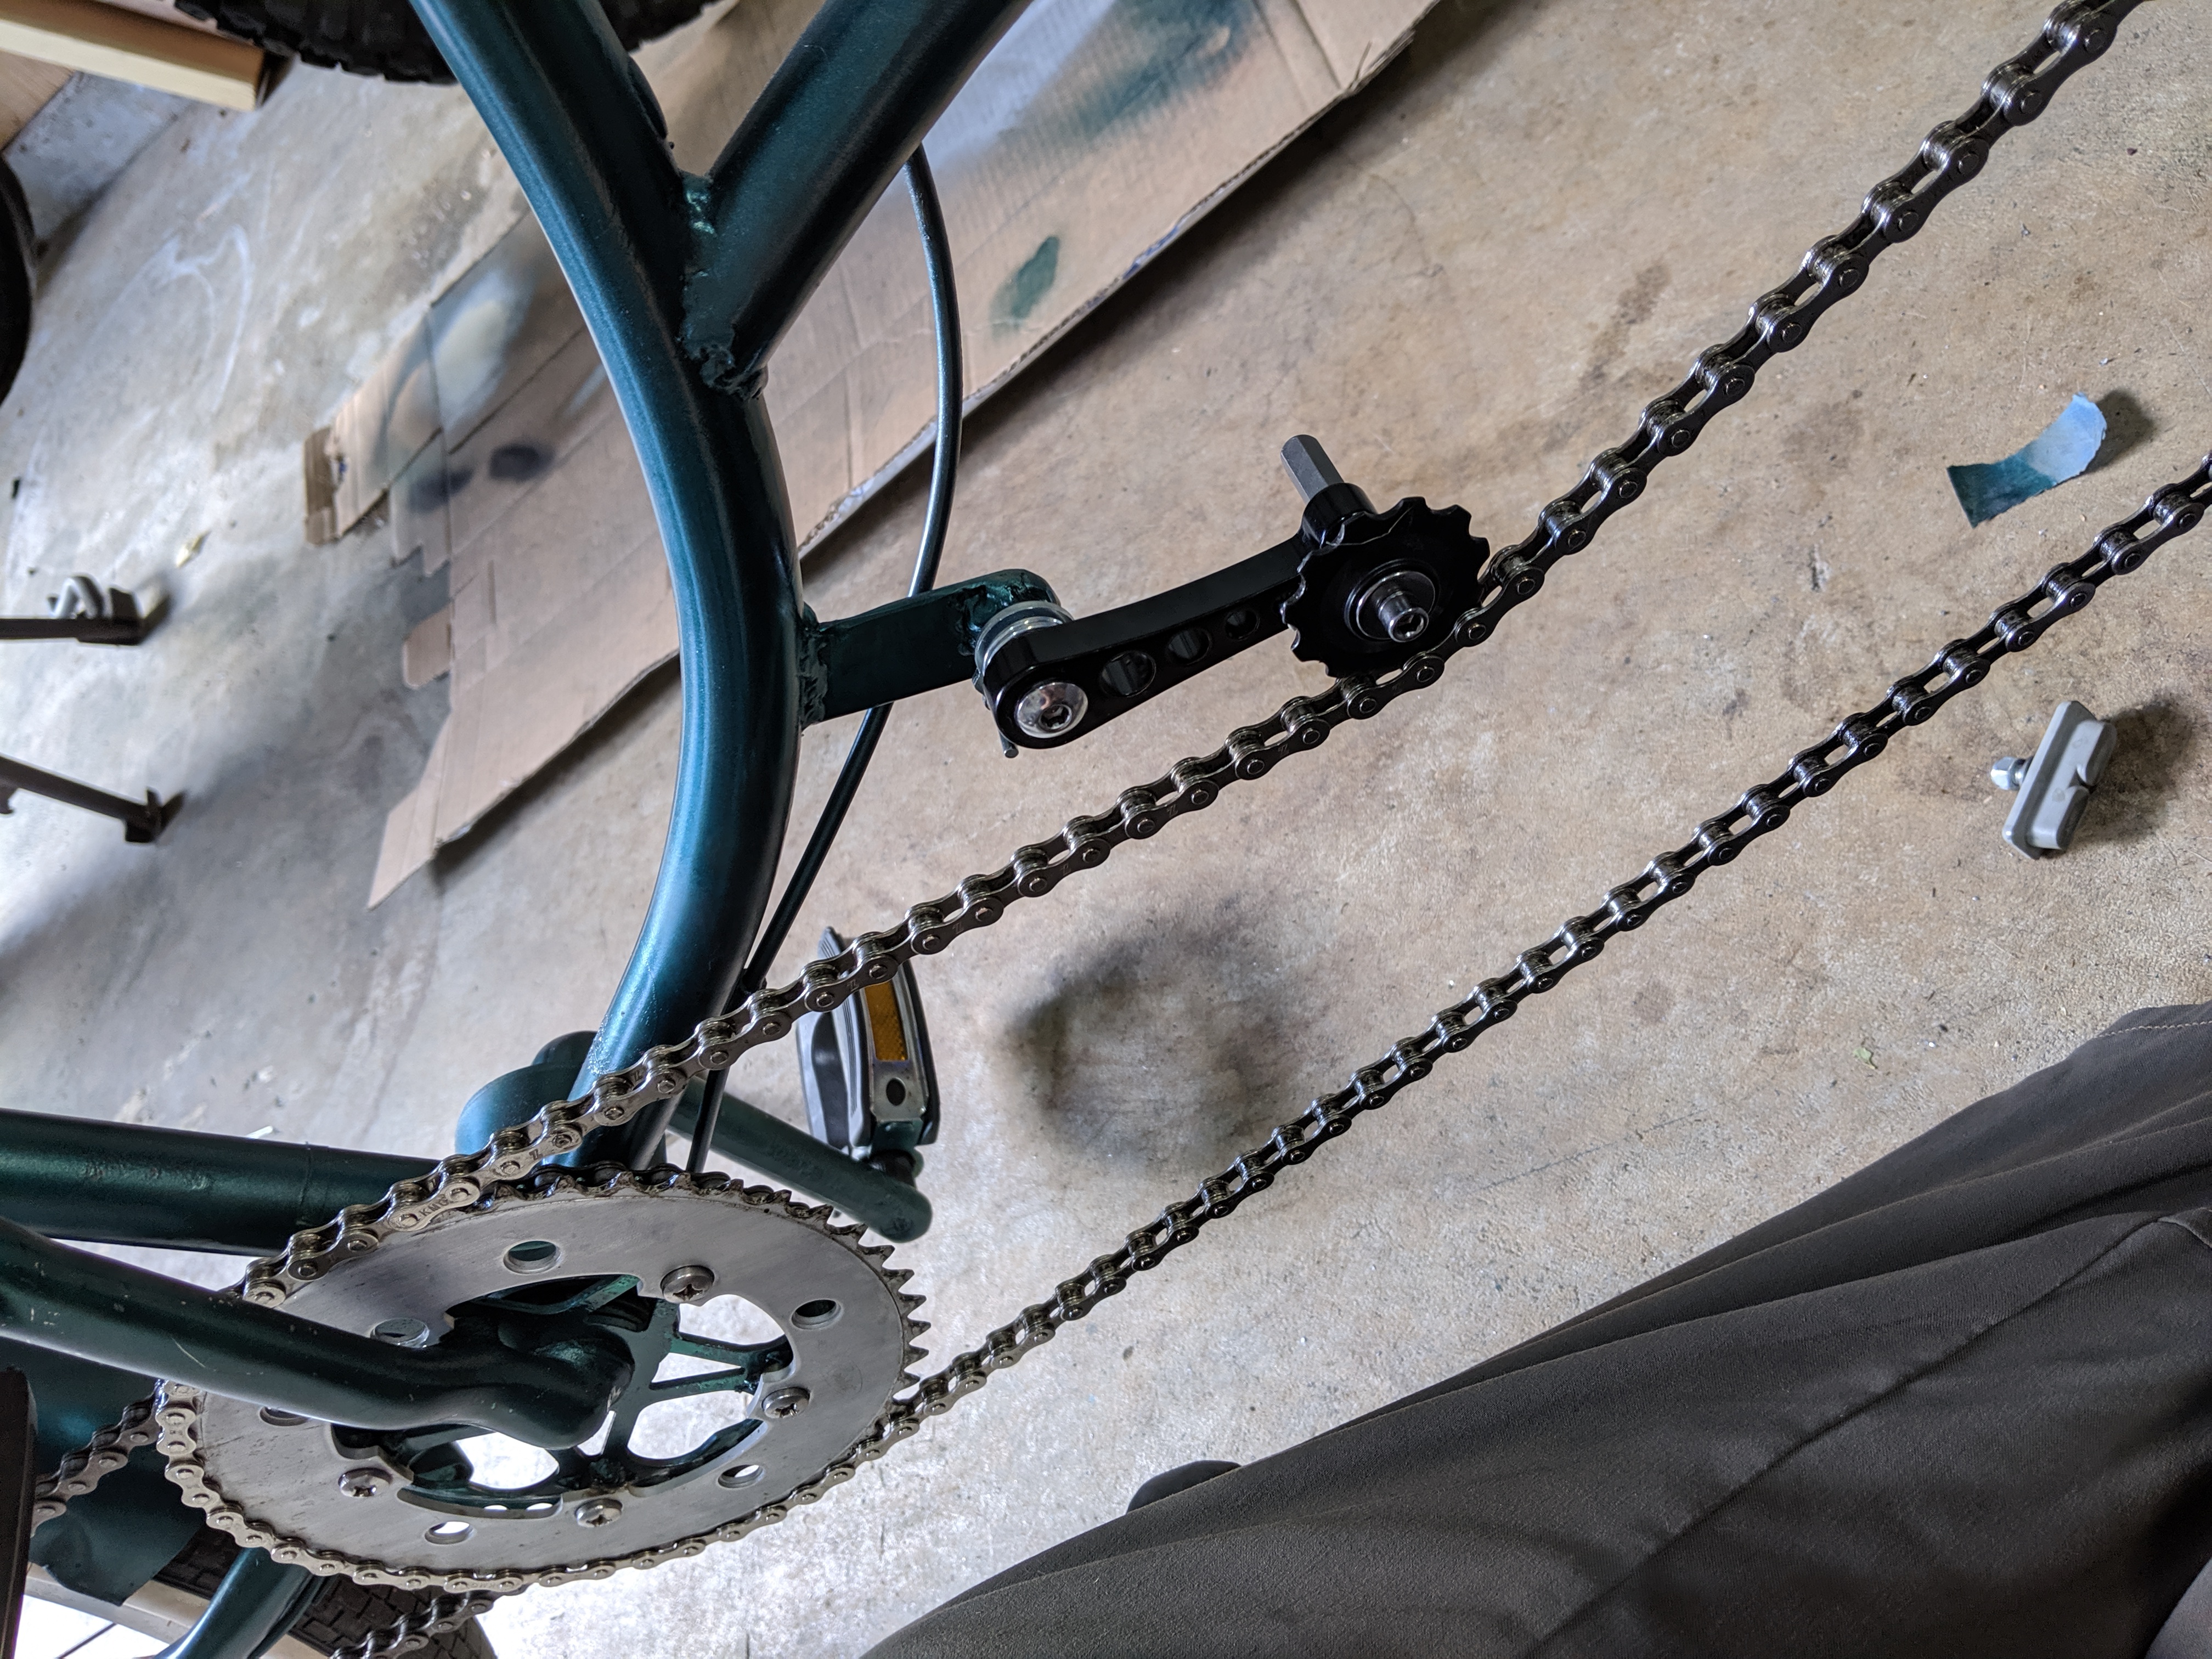
It did the job of tensioning the chain at rest but there was a major flaw in my design: when the front passenger cranks, the spring-loaded chain tensioner would not be powerful enough to keep the chain tight. The chain would return to the shape shown in a few photos up of me riding the bike - the top half of the chain would be straight and tight and the bottom half would go slack. If I had put the tensioner on the bottom path of the chain rather than the top, this wouldn't have been a problem. But if I had done that and if the rear passenger was cranking while the front was not, then the problem would be back but it would be mirrored. The chain would to too slack on the top half while the bottom half would go straight and tight. Make sense?
So my solution was to add an "minimum tension limiting adjustment rod thingymajiger." It stops the chain tensioner from articulating too far up. I simply welded a nut onto the frame so that a long bolt can be held in just the right position. It can be adjusted to get it where needed, and it can be loosened to get the chain off for maintenance. But it also allows the chain tension to still be spring loaded, and to articulate downward to keep the chain tensioned when the rear passenger cranks real hard and if the frame flexes a little.
It worked! Yesterday we went for a test ride and it was very smooth and confidence inspiring. I'm going to experiment with what phase we like the cranks to be in with each other — in-phase, 180 degrees out-of-phase, 90 degrees out of phase... Which ever make the ride less "bouncy." And I'm also going to need to make little adjustments and tune-ups here and there I'm sure.
So that's it, all done!! I love it. Today is Wednesday and the World Naked Bike Ride is this Saturday, so I got it done just in time! Haha, oh boy...
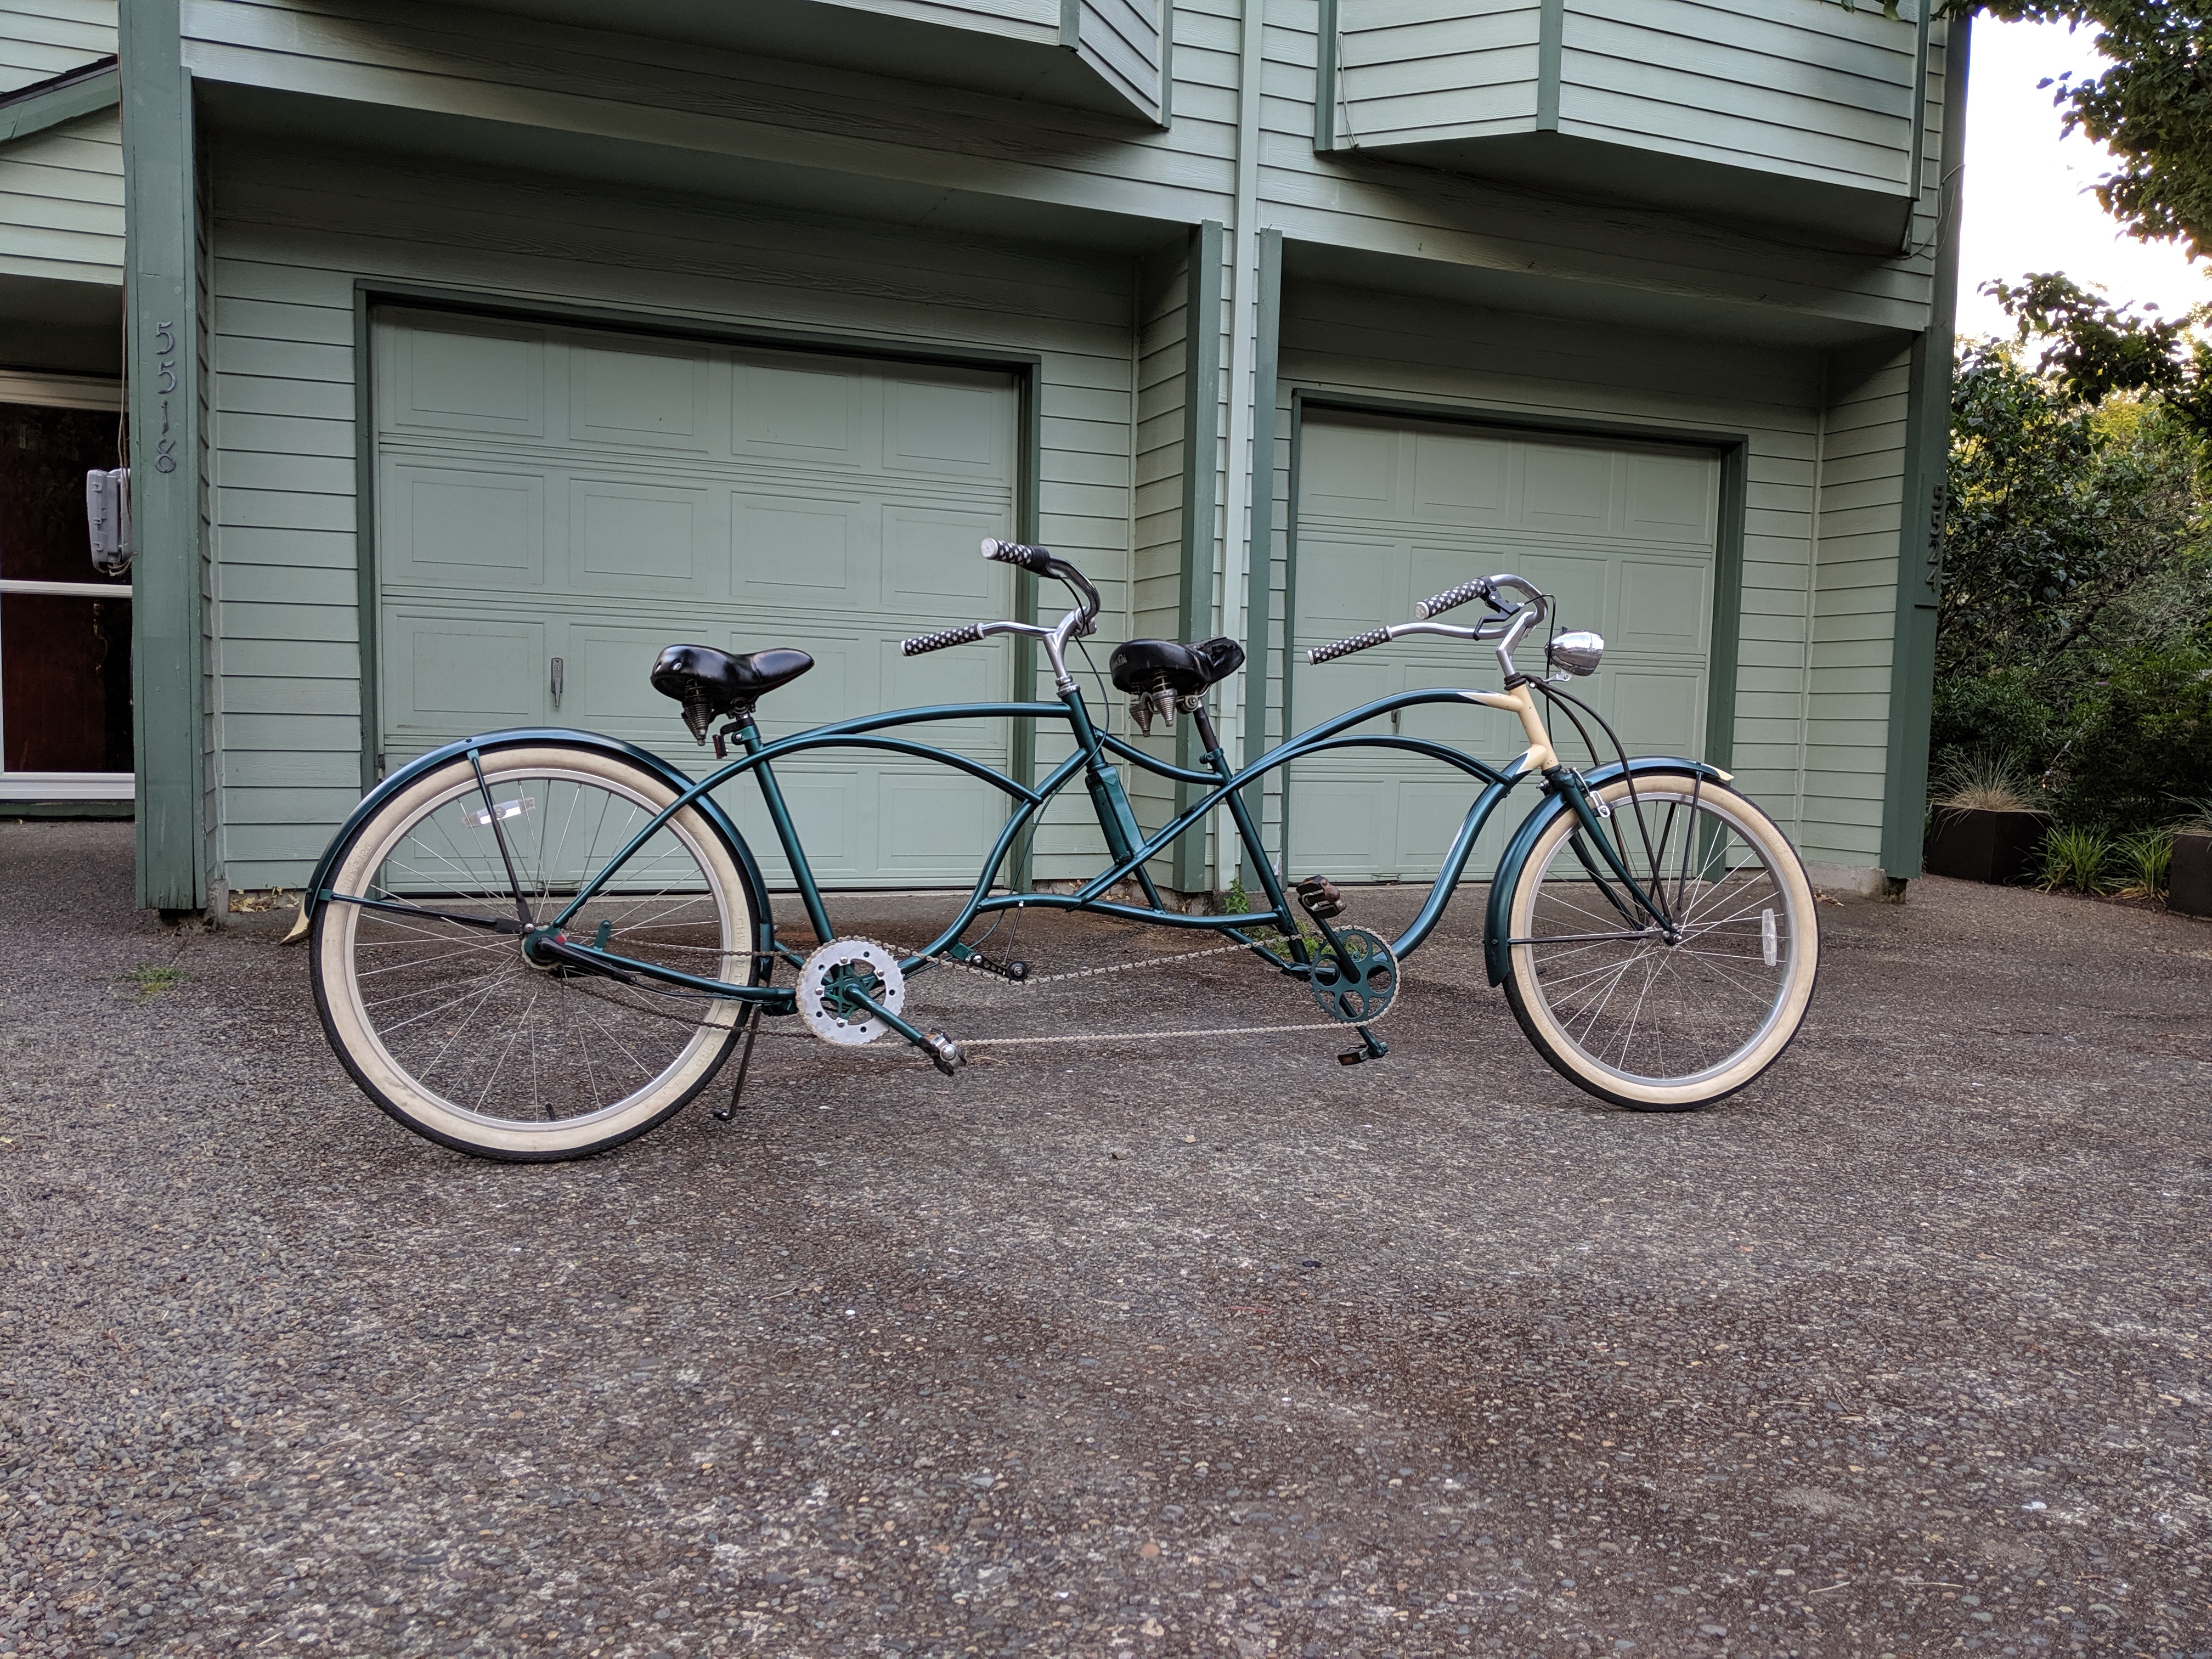
Update: we did the World Naked Bike ride together on this tandem and the bike did great! Damn near 10 miles in total and not a single skip or pop of the chain. And it got a lot of compliments from the 10,000 other nude bikers. What an experience that was...!
I'm going to keep a close eye on the front forks, the welds, and the frame tubes to make sure nothing is bending and cracking. Steel, unlike aluminum, will bend before it breaks so it wouldn't be catastrophic, but, you know, safety first. Or at least second.