This is how I completely repaired the tailgate window regulator, lift motor, panel, seals and window channel felts on my 1962 Mercury Comet station wagon. Note: This will also apply to Ford Falcon wagons, and would also be helpful info for other old Ford/Mercury station wagons like the Country Squire, Galaxy, Fairlane, Mercury Meteor, etc.
Most Comet and Falcon wagons came with window cranks on the exterior. But there must have been an option for a rear power window, and that is what my Comet has. Only it doesn't work and likely hasn't worked in decades.
Getting it Un-Stuck and Open

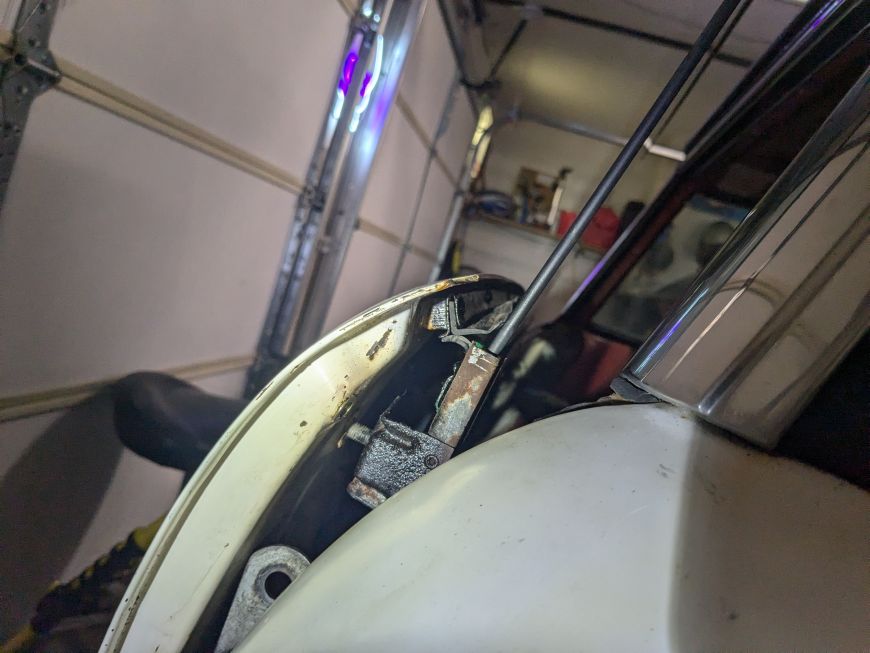
Just getting it open was an ordeal. The way it works is the rear window rolls down (either via the switch in the dashboard or the key-operated switch on the exterior of the tailgate), which allows you to access the interior lever that opens it. If you try to open it from the inside and with the glass still up, it can't open because the glass goes into the window channels. And the window's motor and regulator was totally jammed up and not budging even slightly.
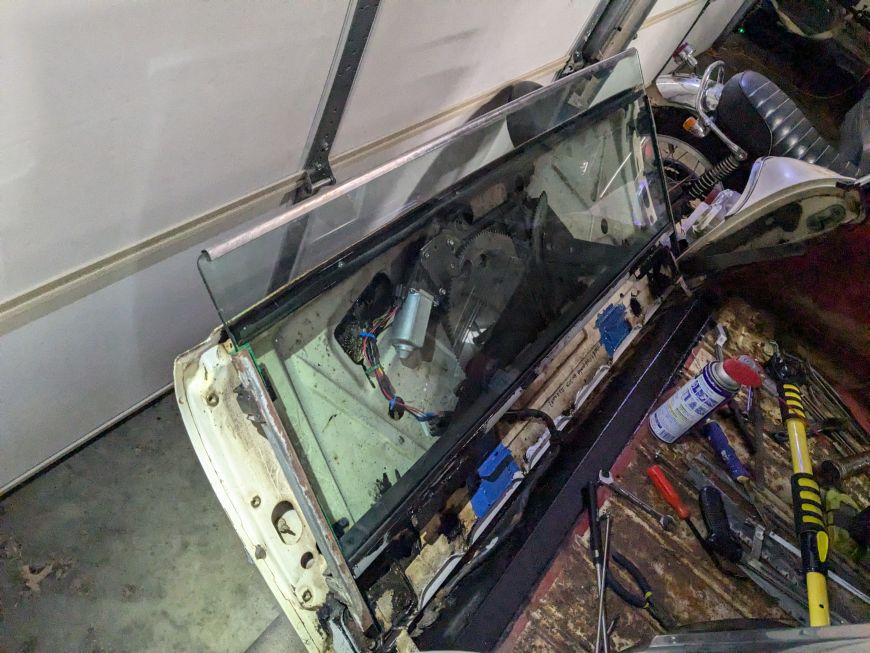
So I had to crawl inside, unscrew the window channels, and then carefully push it open with the glass still up. First time the tailgate had been opened in maybe 40 years! Then I could pull the glass out of the tailgate, unscrew the interior panel, and take out the window regulator and motor.
You can watch the whole ordeal in this youtube video.
Window motor and wiring
It turns out the motor has two field coils - one for up and one for down. Now-a-days the motor would just have two wires and you reverse the polarity to change the motors direction. So this means I couldn't use the switch(s) and wiring harness unless I wanted to buy a NOS motor which sells for around $300. No thanks! Plus, the key I have for the car doesn't fit the key switch on the tailgate for some reason.
So I decided to get a doorman window motor and rig it to the regulator (after cleaning it up) and redoing the switch and the circuitry. I found a good video that explains how it works with two-wire motors and I adapted it to this schematic:

The two relays allows me to keep the OEM switch on the dashboard, otherwise I would have to change it out for a momentary DPDT switch. It WOULD be possible to wire the keyed switch on the tailgate to this circuit. Just wire it exactly like the dashboard switch, and connect it to the black wires from the relays.
I placed the relays at the rear of the vehicle so that only four wires were needed to run the length of the car. This allowed me to re-use the original wiring harness for the optional rear power window. The yellow and green wires were repurposed as the two ground wires going to the switch, the larger red wire with the yellow stripe was used for the yellow wire in the above schematic, and the smaller red wire was used as the white (grey) wire in the above schematic.

And for the wires going to the motor itself, I reused the large black wire and the large red wire with yellow stripe. It didn't really matter which wire connected two the red and black wires coming from the new doorman window motor. Because one throw of the switch will send the motor spinning in one direction, and the other throw will send it spinning in the other direction. So if down was up, then all I would need to do is swap the two wires on the switch for each other.
I got started on wiring that last night, I just need to wire up the switch now, add the fuses and temporarily connect it to a lead acid car battery, and then connect it to the new window motor. Here's the new window motor graphed to the old window regulator, it of course didn't fit right away but I was able to... correct it, sir. (That last part was to be read that in the voice of Grady from The Shining).

BTW you can also see the old window motor in the photo above, as well as the OEM momentary toggle switch.
For those who are reading this because they too want to graft a new motor to their old regulator: I used a window regulator that Rock Auto said was for the tailgate window of a 1969 Ford Ranch Wagon, DORMAN 742251. But to make it fit, I had to flatten the plastic surface around the three mounting holes, and modify the regulator a bit where the motor bolts to it (i.e. drill new holes and cut off some of the metal). But after that work, the gears where not hardly touching/meshing at all because the gear from the new motor needed to be a bit taller. So what I did was I removed the C-clip and removed the gear from the new motor. Then I added a spacer, only 1 or 2 mm thick, onto the shaft that the gear slides on, then I put the gear back on. It now sticks out 1 or 2mm and can mesh with the regulator gears, but it still meshes with the gearing in the motor. So far it's working great!
Now I just need to finish up the last bit of wiring then I can test it out. But I won't be able to put the glass back in until I receive the new window channel felts in the mail, but that is OK because I also have a lot of rust I need to fix first too. I've been leaning pretty heavy on Por-15 for much of that kind of work, but gotta draw the line somewhere.
[a few days later...]
I just finished the wiring at the regulator works perfectly! Took a little while to get it mounted back onto the tailgate because I had to get the two lift arms perfectly parallel, which is hard to do.
Still a lot more work to do though. Patch the rust on the interior panel, repair the horizontal piece that holds the glass (it's broken and rusty), and add all new seals and window channel felts. Clean everything up and put the window back in and take it for a spin!
Tailgate Panel
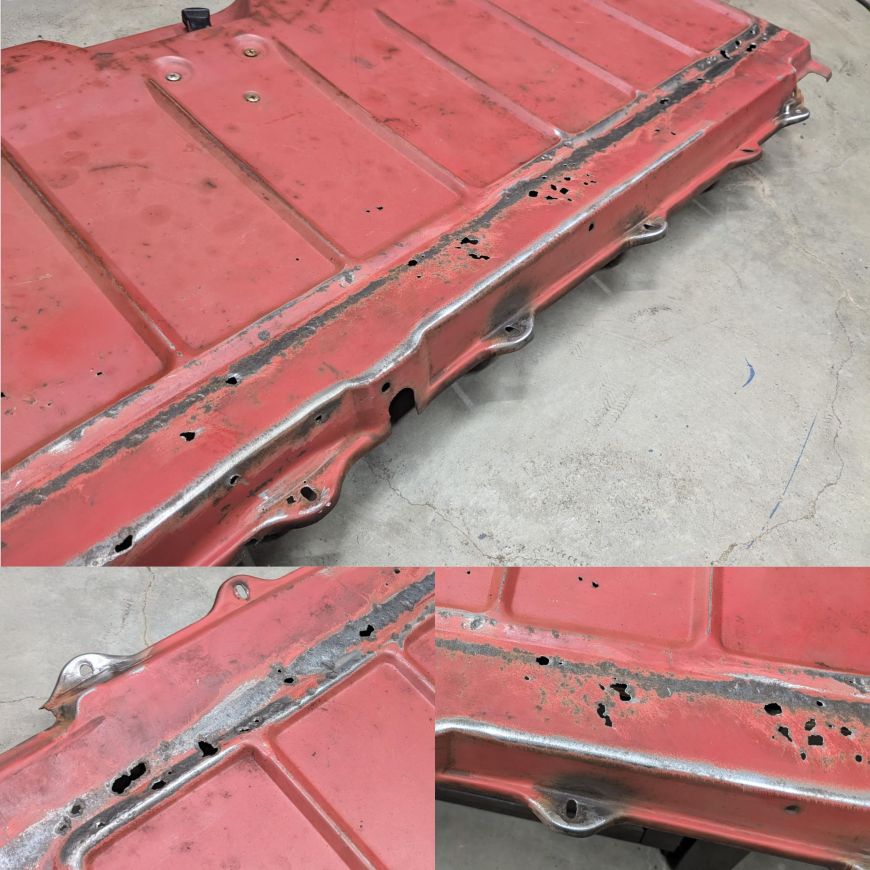
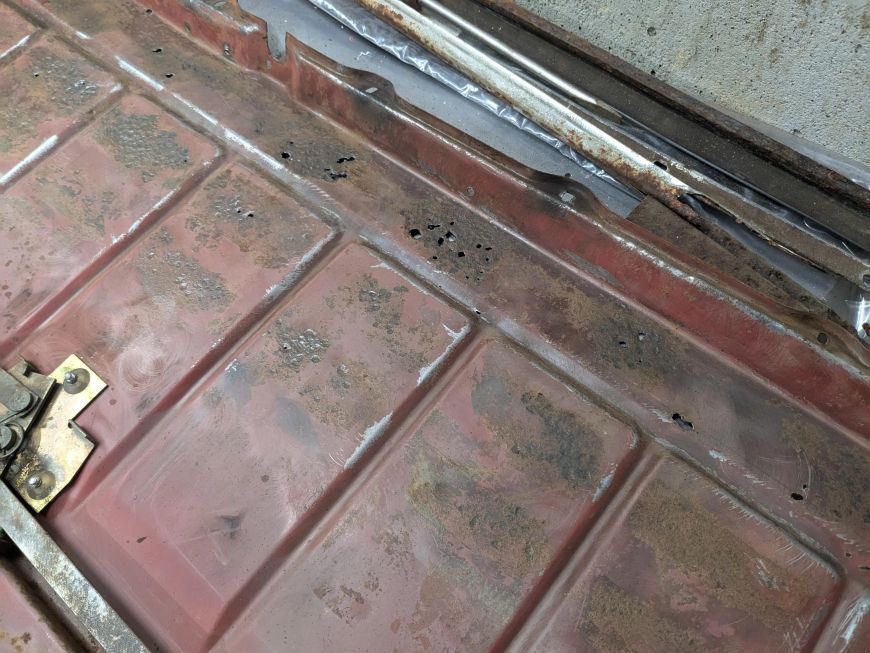
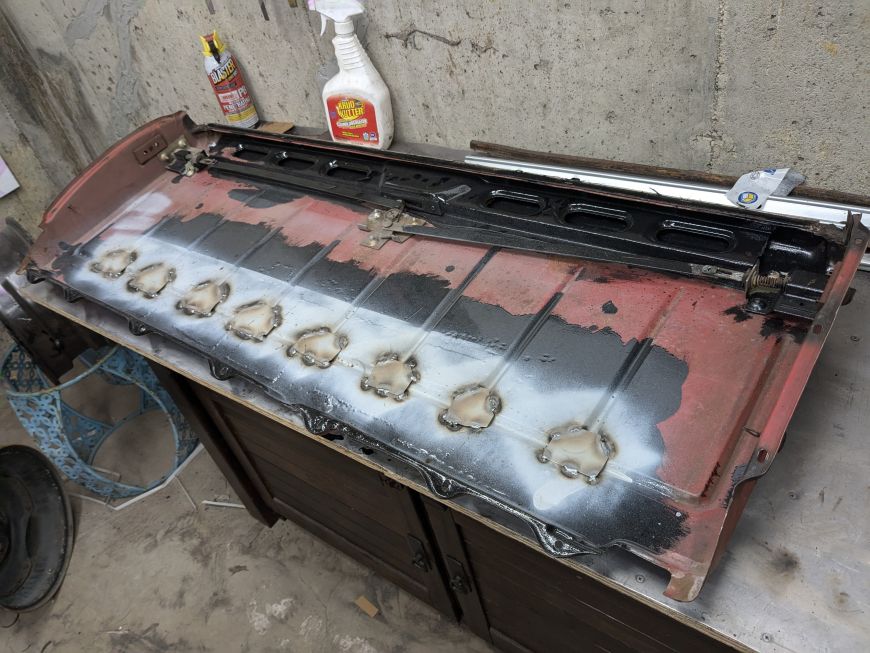
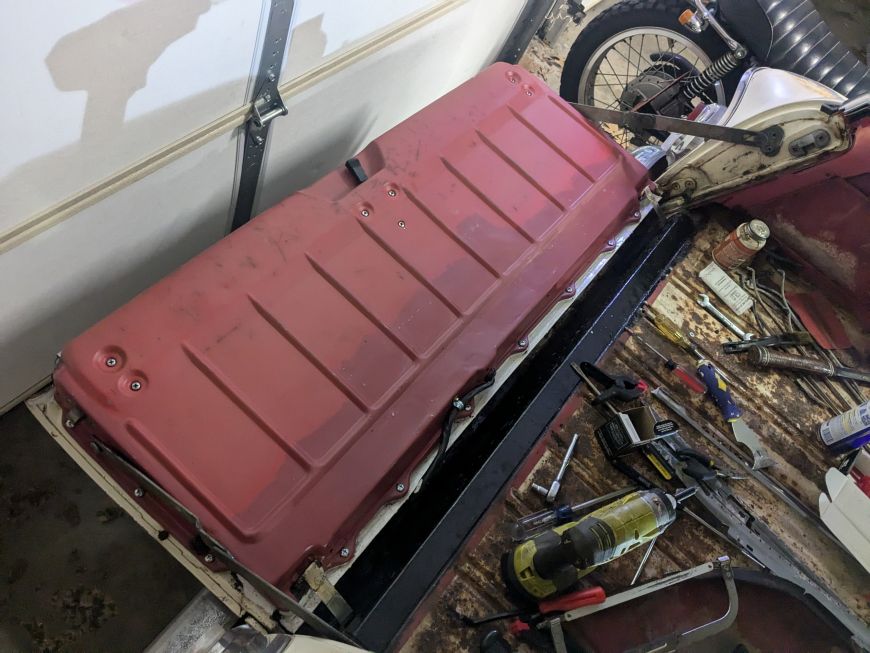
Here's the panel. I can't find a replacement, so I'll have to repair what I have.
Some of the rust came from the inside, some from the outside.
All photos are after hitting it with a knotted wire-wheel on an angle grinder.
[one eternity later...]
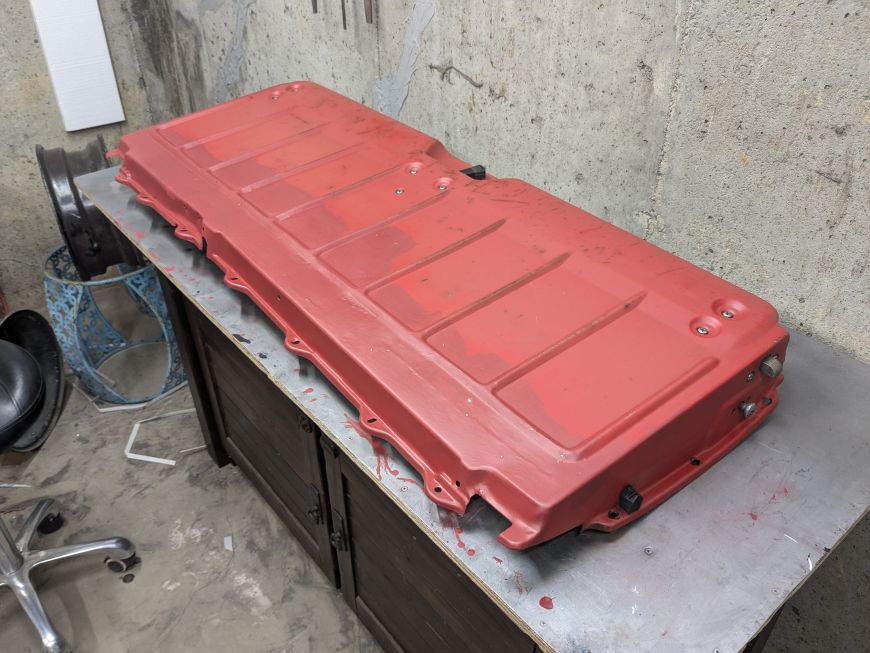
I just brushed on some Rustoleum enamel that a blended up from a few different shades of red, but I should have tested it for color match correctness before fully committed. Problem was it darkened as it dried, so it looked spot on a first and then was obviously not. The next day I sprayed the whole panel with a can of 2k matte clear, so at least the sheen will all be matching.
And clearly I didn't bother with bondo either. This project just couldn't be dragged out any further. Maybe another day.
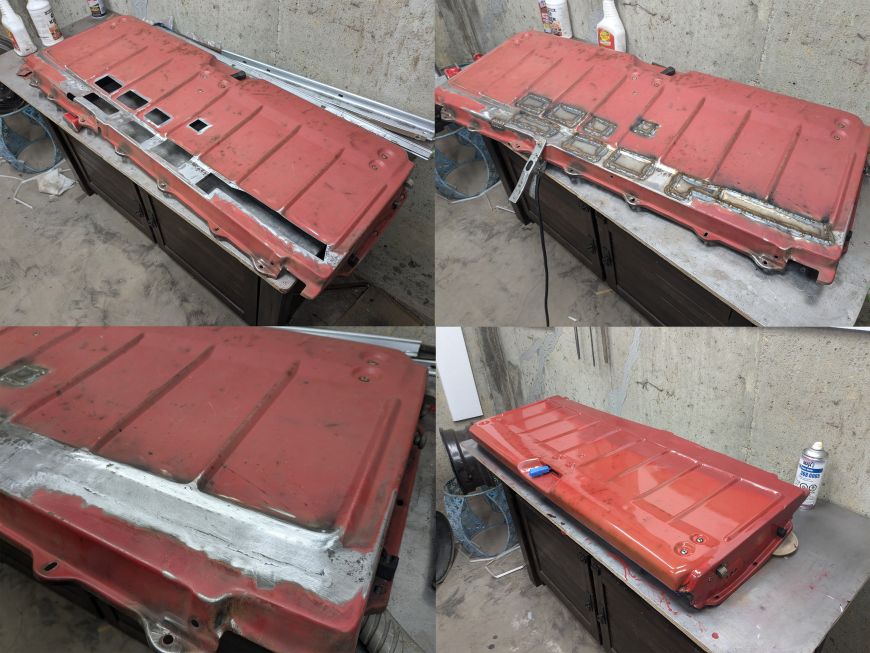
Before I painted it though, I applied some Por-15 to the inside, then sanded a little off so I could weld in some reinforcing plates (after spraying everything in weld through primer).
That should make it much stronger. I would like it to be strong enough for when someone eventually stands on it. Or a big fat person like myself sits on it. I have half-baked dreams of some day being able to take this car out to go tailgating or to the drive in movies or something. IDK. Watching fourth-of-July fireworks while sitting on the tailgate. That sort of thing.
Window tracks, seals, rubber, etc.
I ordered a bunch of seals and window pieces from falconparts.com
- Tailgate glass lower seal
- Tailgate rear window glass weatherstrip
- Tailgate window glass channel
- Plastic window roller (x2)
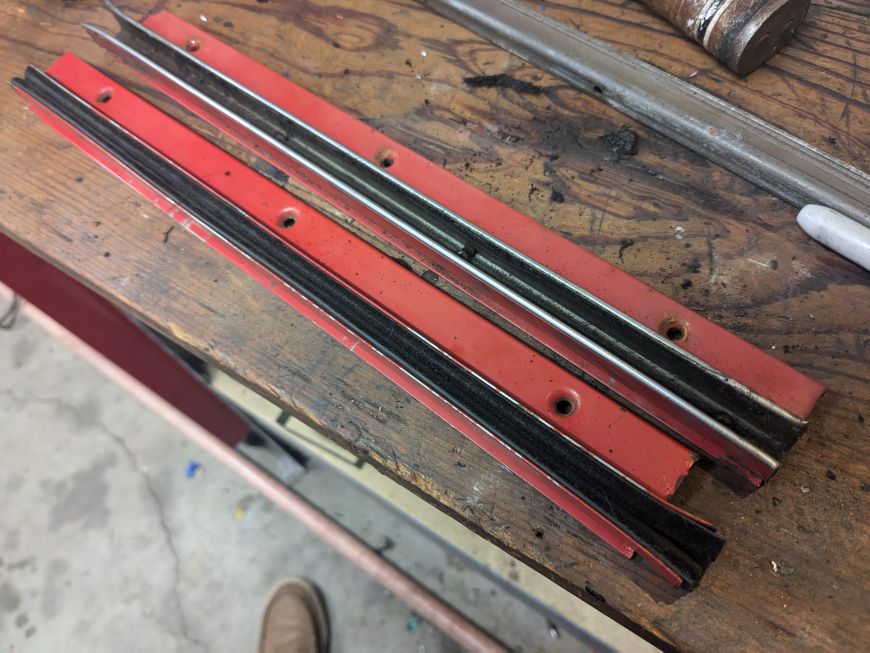
For the upper window tracks, the ones that are visible, the glass channel that came from Falconparts.com did not fit. I had to dissemble them by drilling out the rivets. Next I pulled out the inner steel channel from the painted channel, I widened this just a little bit with a hammer and an anvil, now it was wide enough to fit the glass channel. But first I had to reassemble, I used some 1/4" eyelets in place of the rivets, and I was also able to transfer the chrome strips from the inner steel channel that was being discarded to the painted-red channel.
Only the sides needed this work done. The big horizontal piece was the right width to begin with.
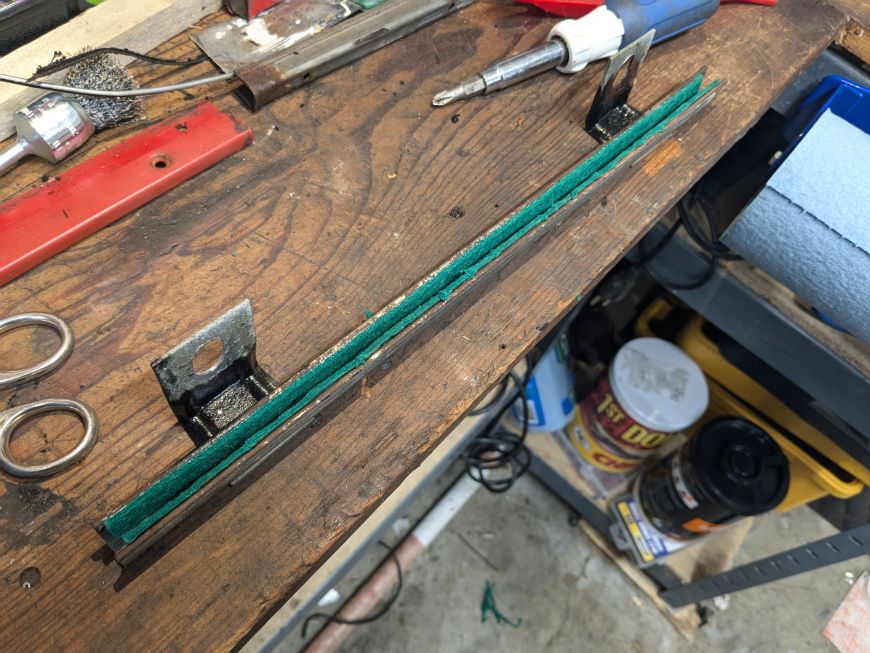
For the window tracks inside the panel, I didn't have two different steel channels to work with and so my only option was to get some self-adhesive "felt blanket" from the hardware store. The inside of the channel had to be cleaned meticuously for it to stick, but once it did it worked real well. Actually, I wish I did this for the two upper vertical pieces so I didn't have to dissassemble them.
Onto the plastic window rollers. These are what slide inside the channels at the bottom of the window, most window regulator only have one but this tailgate window has two.
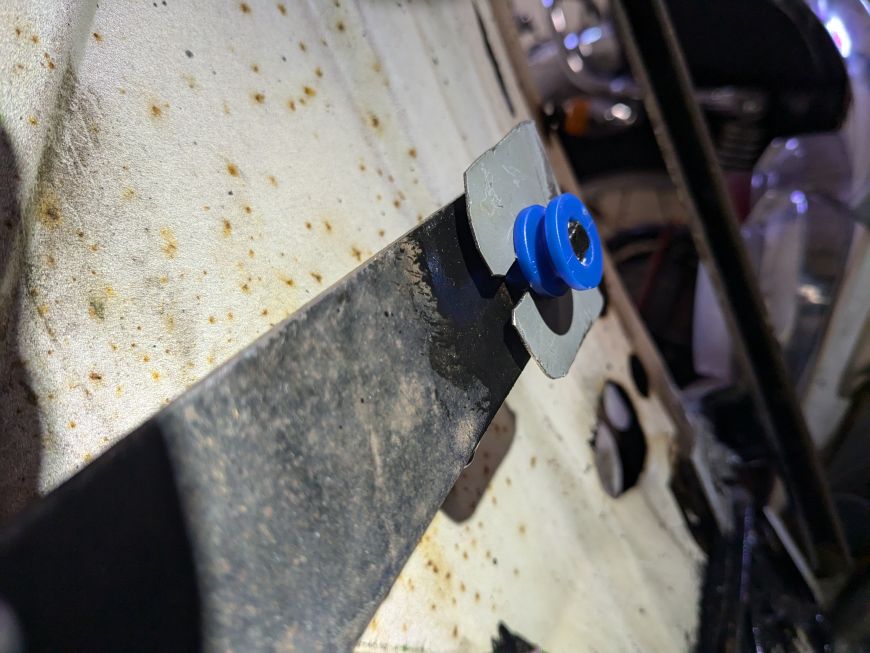
I had to create my own custom clips because the little clips that came with the rollers weren't staying on the studs, probably from erosion. At first I only thought one of the rollers needed this treatment, but, spoiler alert, I ended up having to add a clip like this to the other one because it fell off after a good workout, and I had to take everything all apart again after what I thought was final re-assembly.
Speaker of the channels at the bottom of the window glass, the old metal strip that attached to the bottom of the glass was so rusted and destroyed that I couldn't re-use it at all. So I cut off the channels for the plastic window rollers and welded them to a new piece of steel. I had this piece of galvanized steel that was just he perfect size and shape. But be warned, the channels that weld onto the bottom are not symmetrical!
With that done, I could apply some more por-15 to keep the old channels from rusting any further. Once that was dry, I put in the rubber gasket and the glass and got it good and snug with a rubber mallet.
Almost ready to put the glass back in! But still lots more work to do. When I took the panel off, it was a huge PITA because every bolt was seized shut. I could get a few of them off after lots of propane heat and the use of a hammer driver and a sledge hammer. But after two captive nuts broke loose, I ended up cutting the heads off all of the bolts. Then with the panel removed a hammer and a punch easily removed the captive nuts.
I then could replace the captive nuts with riv-nuts. I used 1/4"-20. Worked perfectly.
Oh, and that painted-blue chunk of angle iron welded on is to replace the totally rusted out piece - it stops the glass from going too far down into the tailgate.
Re-assembly
Re-assembly time! To get the glass back into place, I had to remove one of the lower window channels, then I could slide the channels at the bottom of the glass onto the two plastic rollers, and then re-install the window channel.
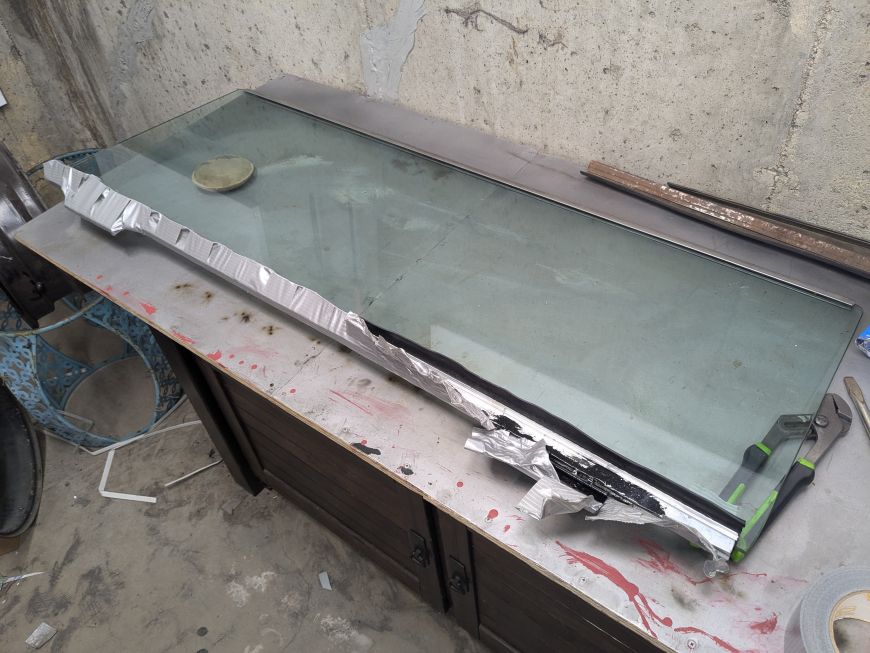
Before putting the panel back on, I checked for proper operation. Good thing too, because the window could not roll all the way up and it was leaving a 3/8" gap. But the only thing that could be hanging up is the new rubber seal at the bottom of the glass. I compared it to the old seal and it was a slightly different shape causing it to meat the other rubber seal a bit too early in the travel.
My solution was to take the glass back out, and use duct tape and a heat gun to curl the rubber strip downward, and let it stay like that overnight. the next morning I removed the duct tape and reassembled the glass into the tailgate, and this fixed the problem.
Finally I could put the panel back on. (But, if you were reading above, you'll know I had to take it off to fix the plastic window roller clips).
All done! That was a huge time suck, but now it's fixed for good. One reason I really wanted to fix this is because I want to be able to roll it down and let my dogs stick there heads out the back as we go down the road. I used to do this in my Toyota 4Runner, one of the few cars with the feature, but the problem on that vehicle was the exhaust gases would draft into the car. So for this old Mercury, I'll have a solution to that. Convert it to electric! Subscribe to my YouTube channel, ThisOldJalopy, to see that conversion project.


