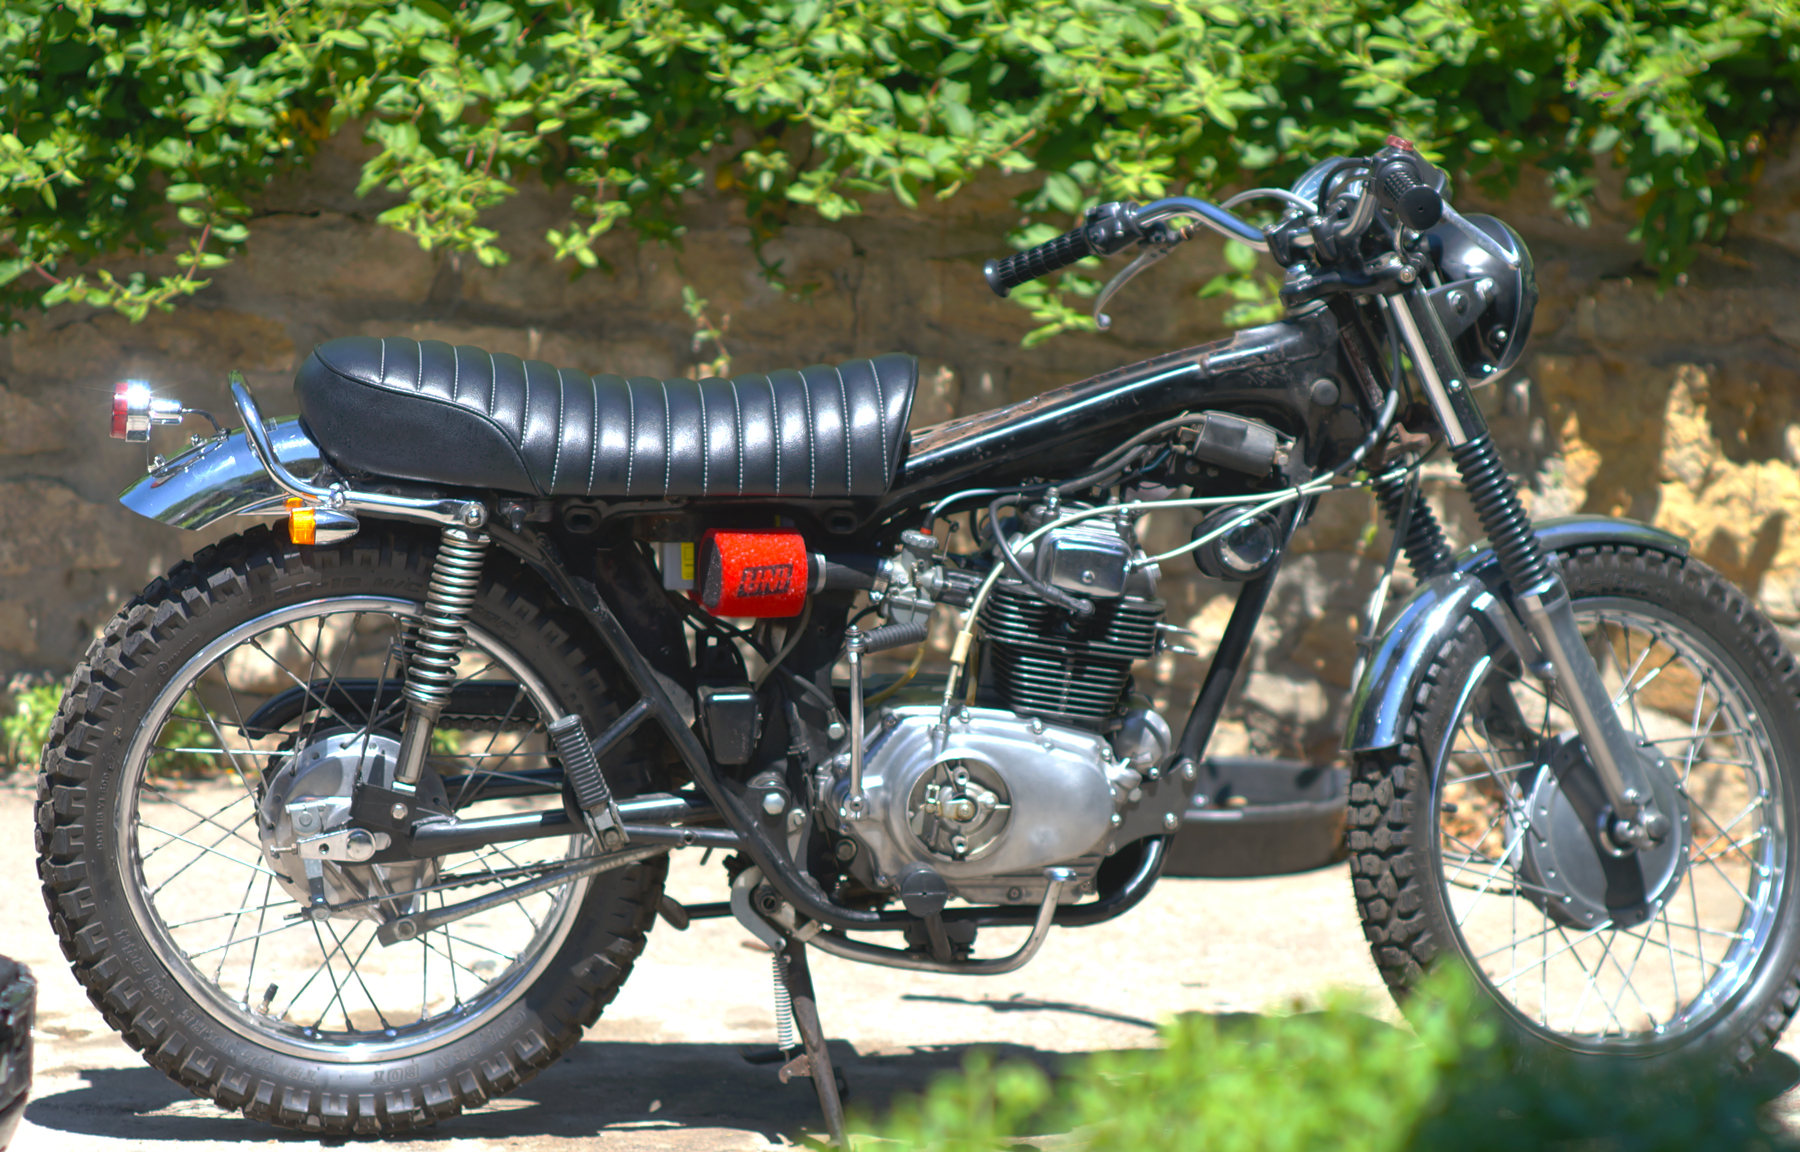
I was driving back from a trip on my CL200 when something broke in the engine. A loud ticking noise suddenly appeared. It was in sync with the RPM (at idle it was around 200 beats per minute, at high rpms it became a constant chatter) and it sounded like it was coming from the head, maybe the right side. So, hoping that a valve slipped out of adjustment, I set off to adjust tappets. All four where perfect. While I was at it I checked the timing too, which I've yet to do properly. Turns out it was slightly advanced, so I corrected it, but I also removed it to inspect the advancer springs behind it (looked good, felt snappy). Finally I adjusted the cam chain by loosening then tighting the bold with the engine in TDC. Then fired up the engine and recorded this video:
OK, so that sounds really bad.
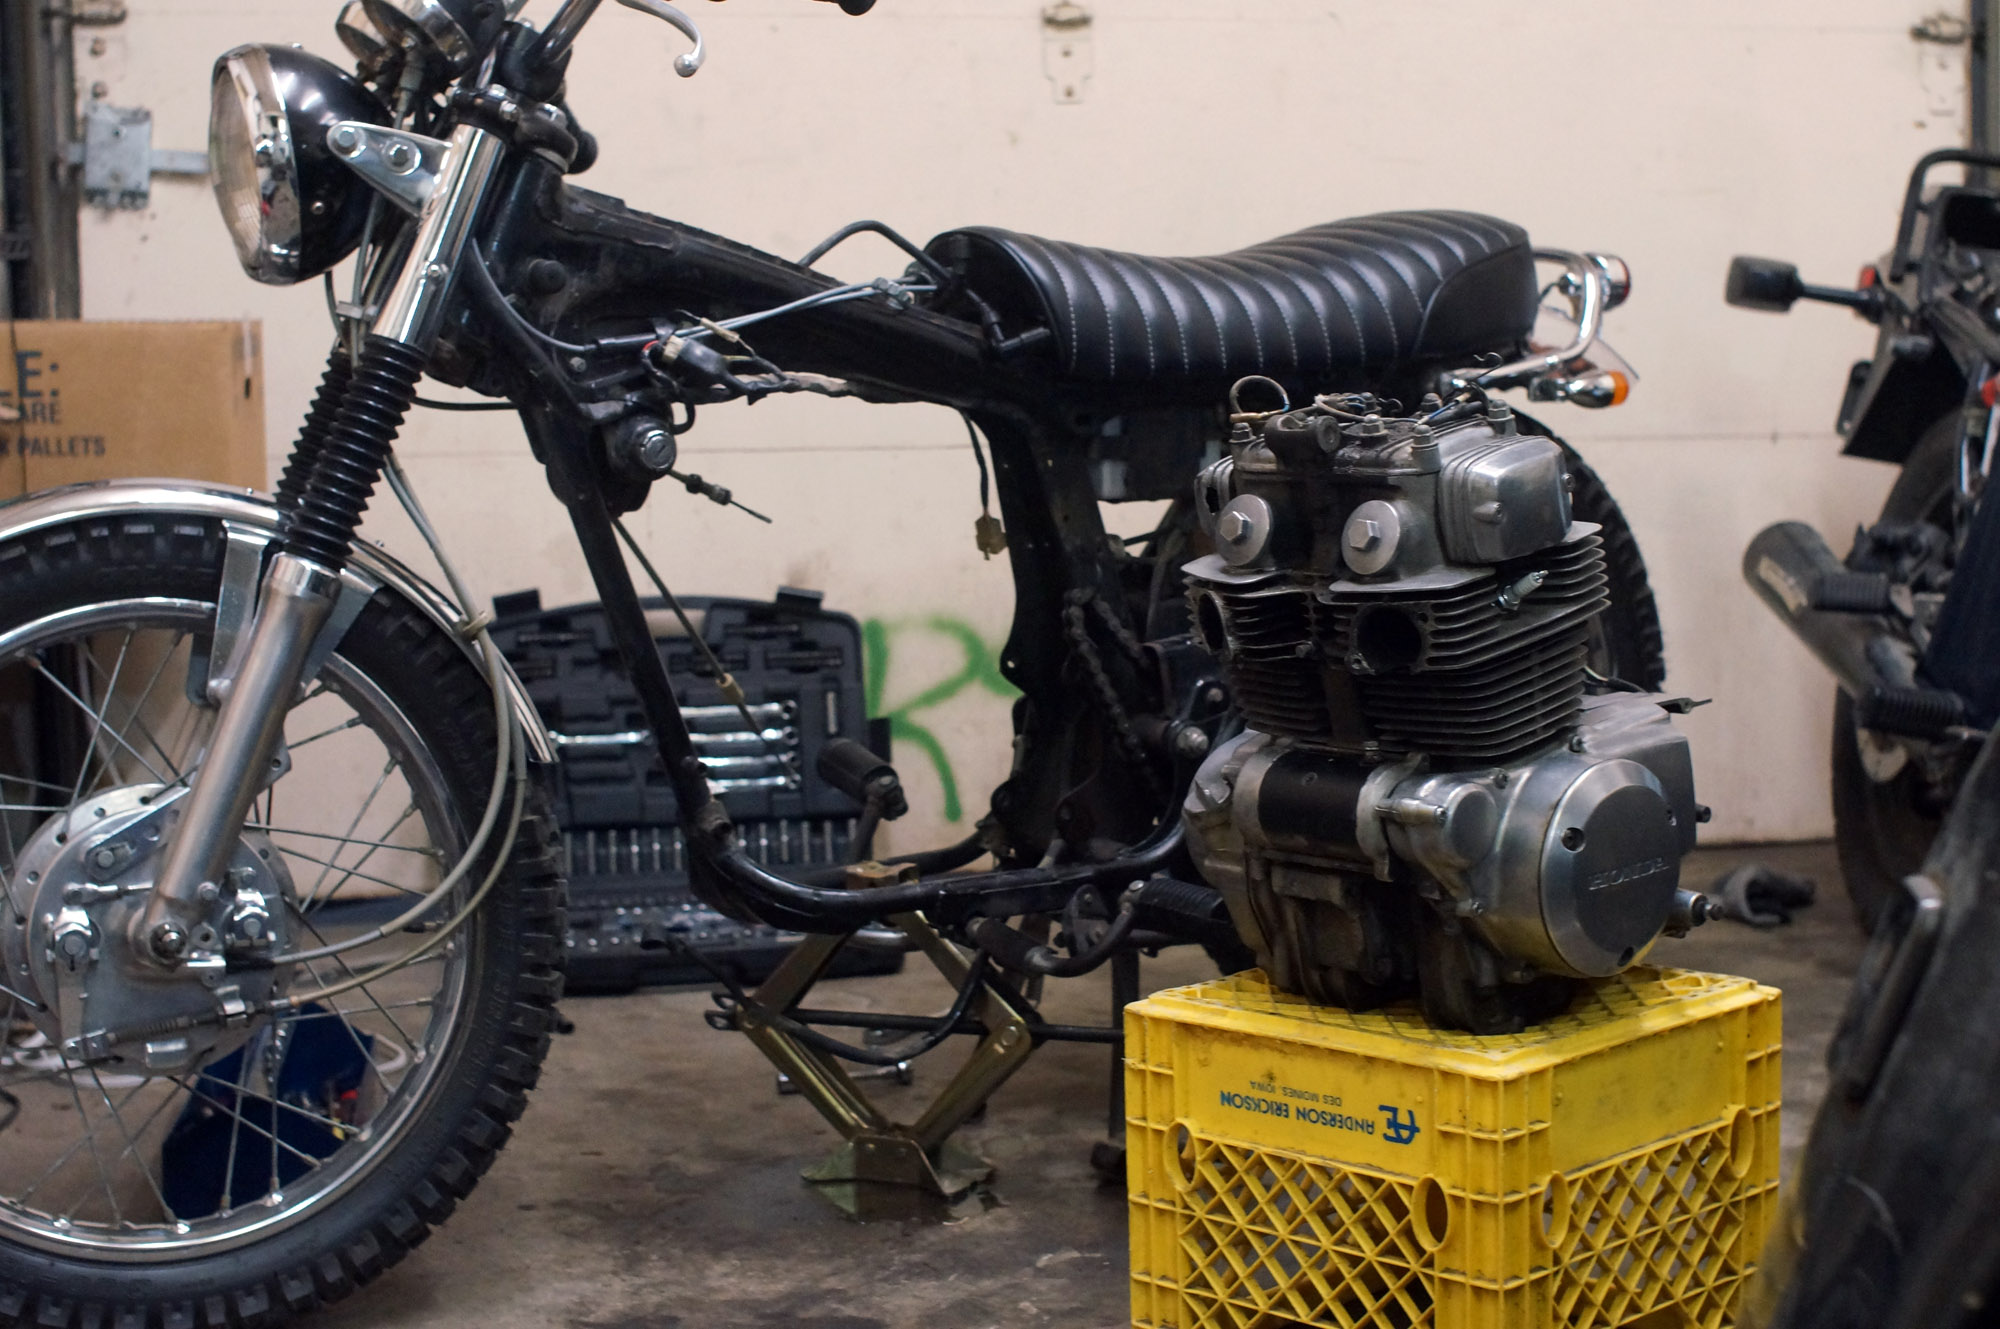
Time to pull the engine and see what's wrong.
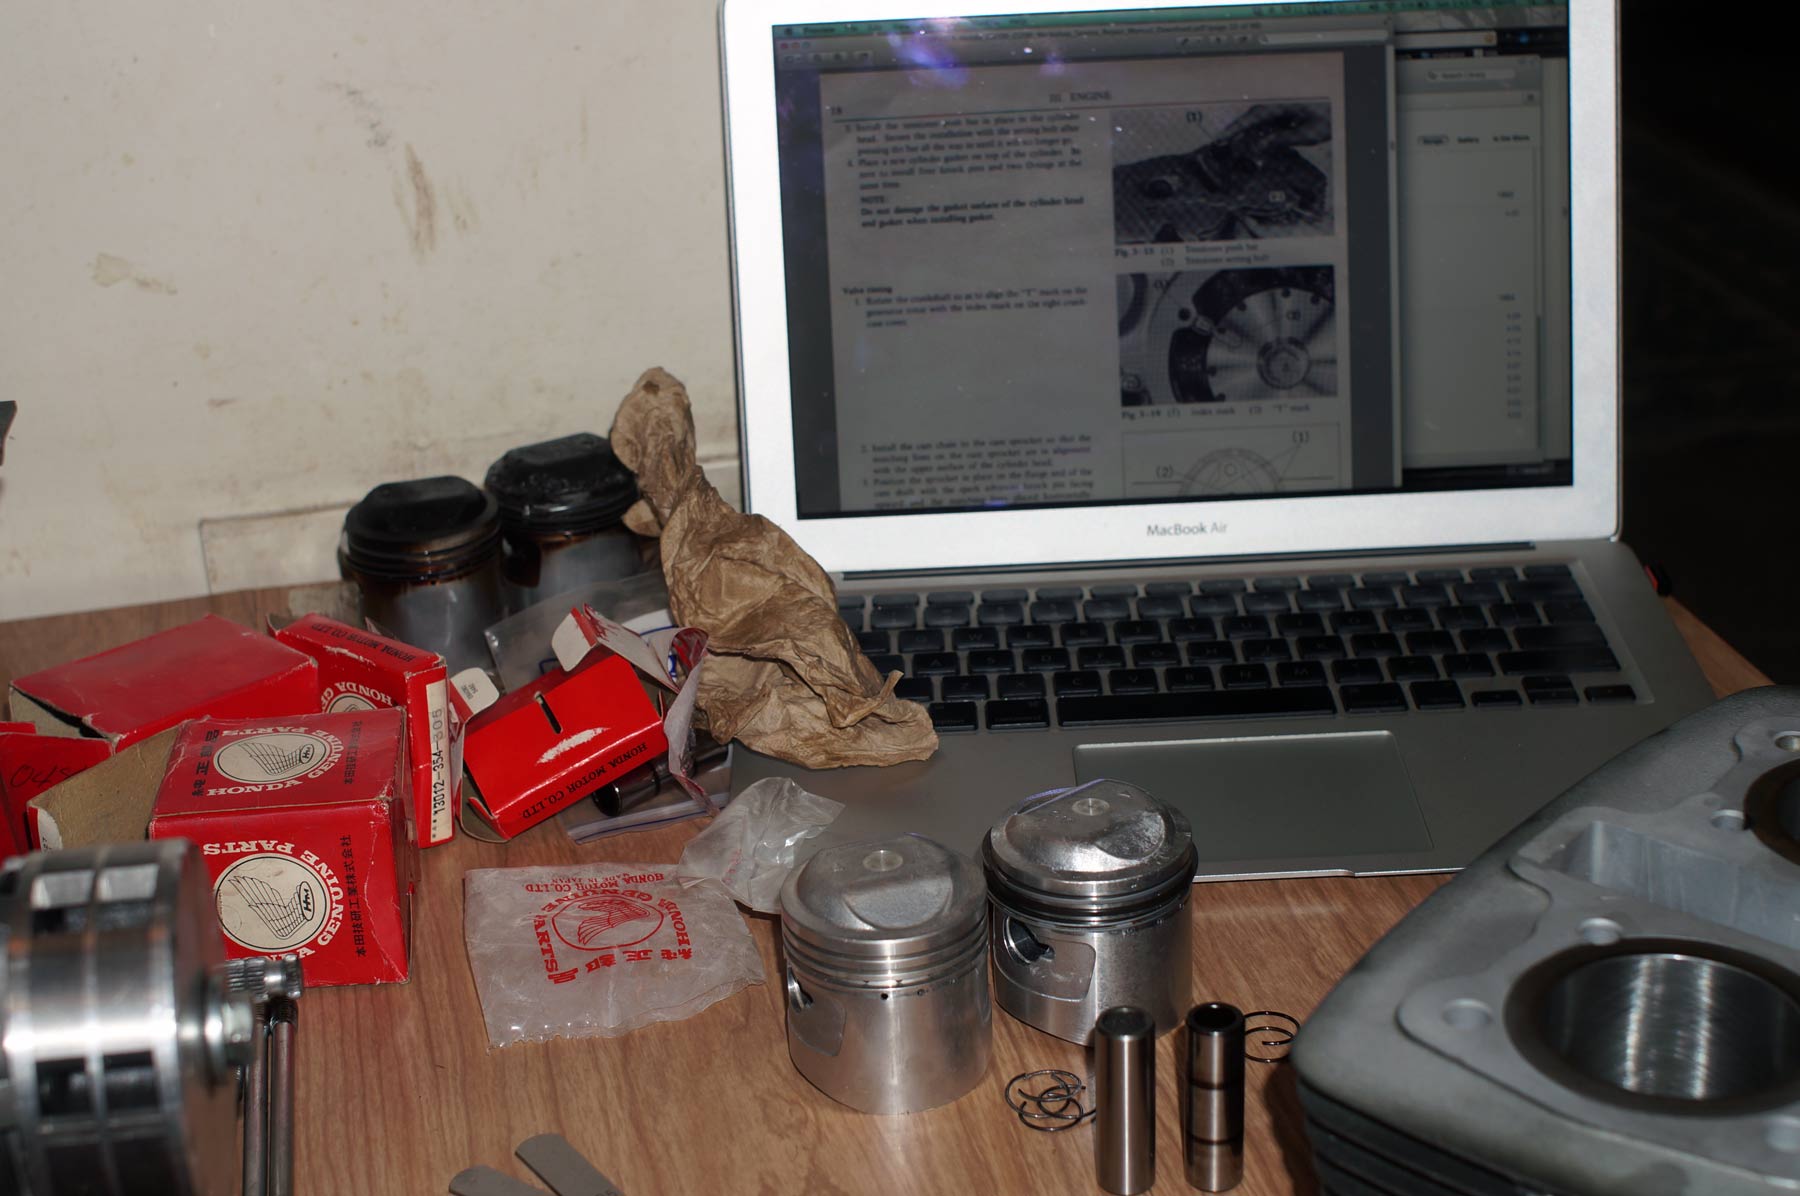
Tools needed:
- Socket Set: 8mm, 10mm, 12mm, 13mm, 14mm, 19mm, 2xmm(for the rear axle nut)
- Torque Wrench: Capable of 0lb-ft up to 70lb-ft
- Oil filter removal tool (special tool, a must have)
- JIS Screw drivers
- Impact screwdriver
- Baggies + Sharpie
- Factory Service Manual (FSM)
- Rubber Mallet
- Libations
- Camera
- Feeler Gauges
- Caliper
- Flash Light
- Razor blades/Gasket Scraper
Chemicals and Supplies needed
- Gasket kit
- fresh OEM oil seals
- Hondabond
- Blue Loc-Tite & Red Loc-Tite
- Acetone
- Brake Cleaner
- Simple Green
- Copper gasket sealer
- PB-Blaster (mmm, I love the smell of PB-Blaster in the morning!)
(Use the affiliate links above to purchase what you need so I can earn a little $$ from Amazon.com, thanks!!)
To get the engine out, remove all the parts and bolts as shown in the FSM, lift the engine about a cm with a car jack, rotate CCW about 70° and then pull it out from the left of the frame. Keep the kickstart lever on the engine to have something to hold onto. You might need to remove an acorn nut from the top of the engine to get it through the frame.
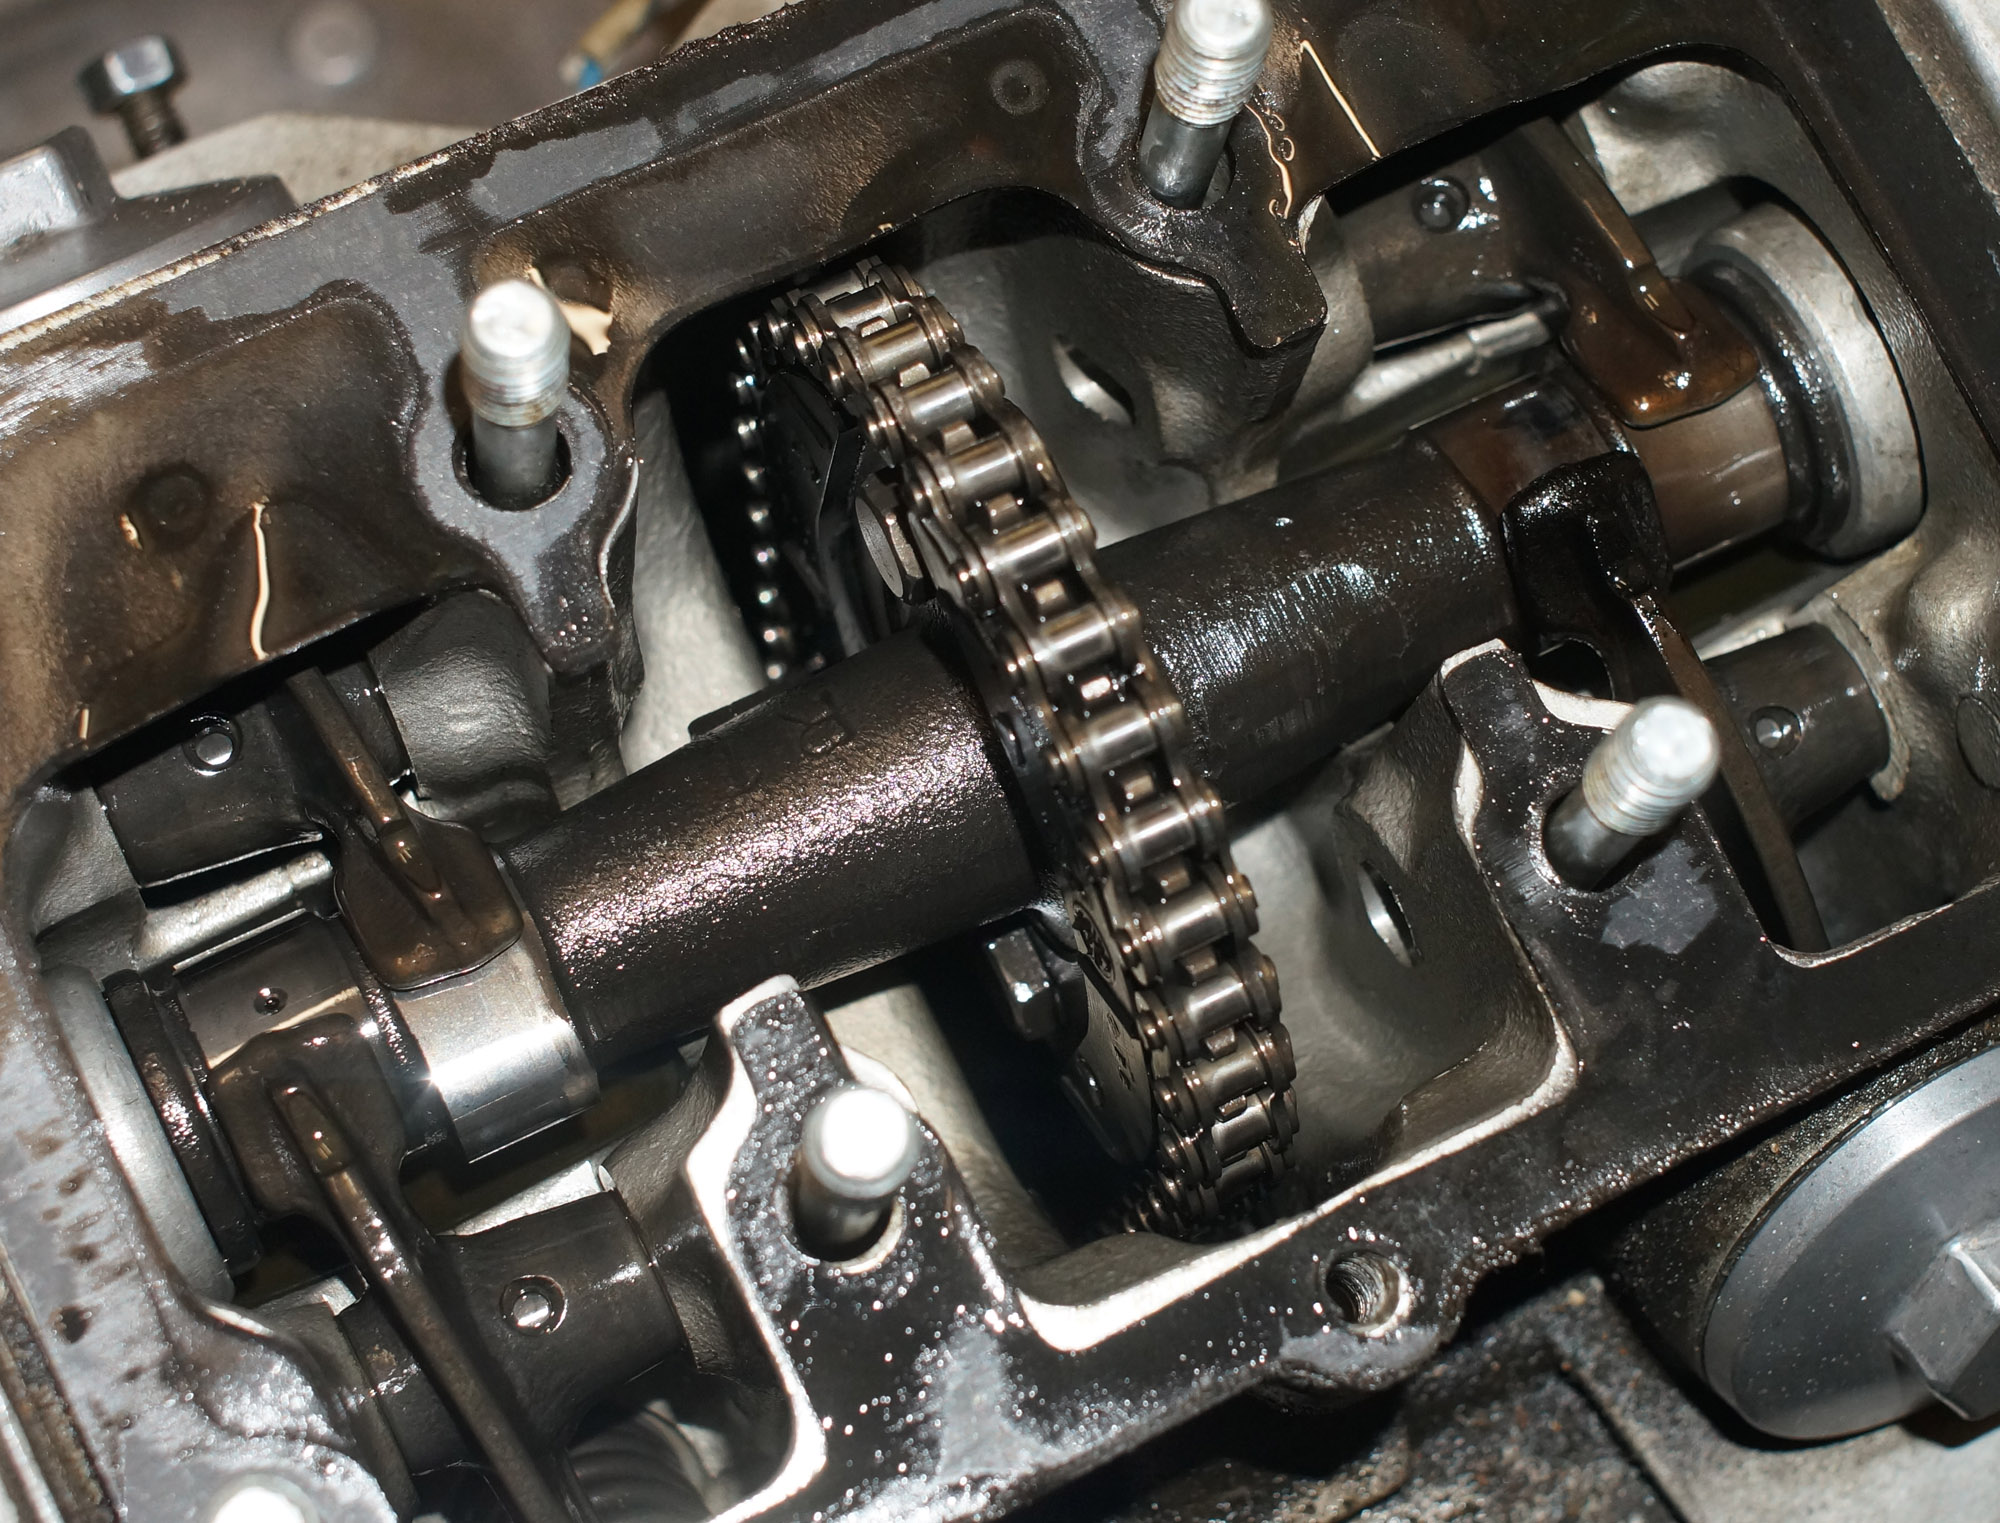
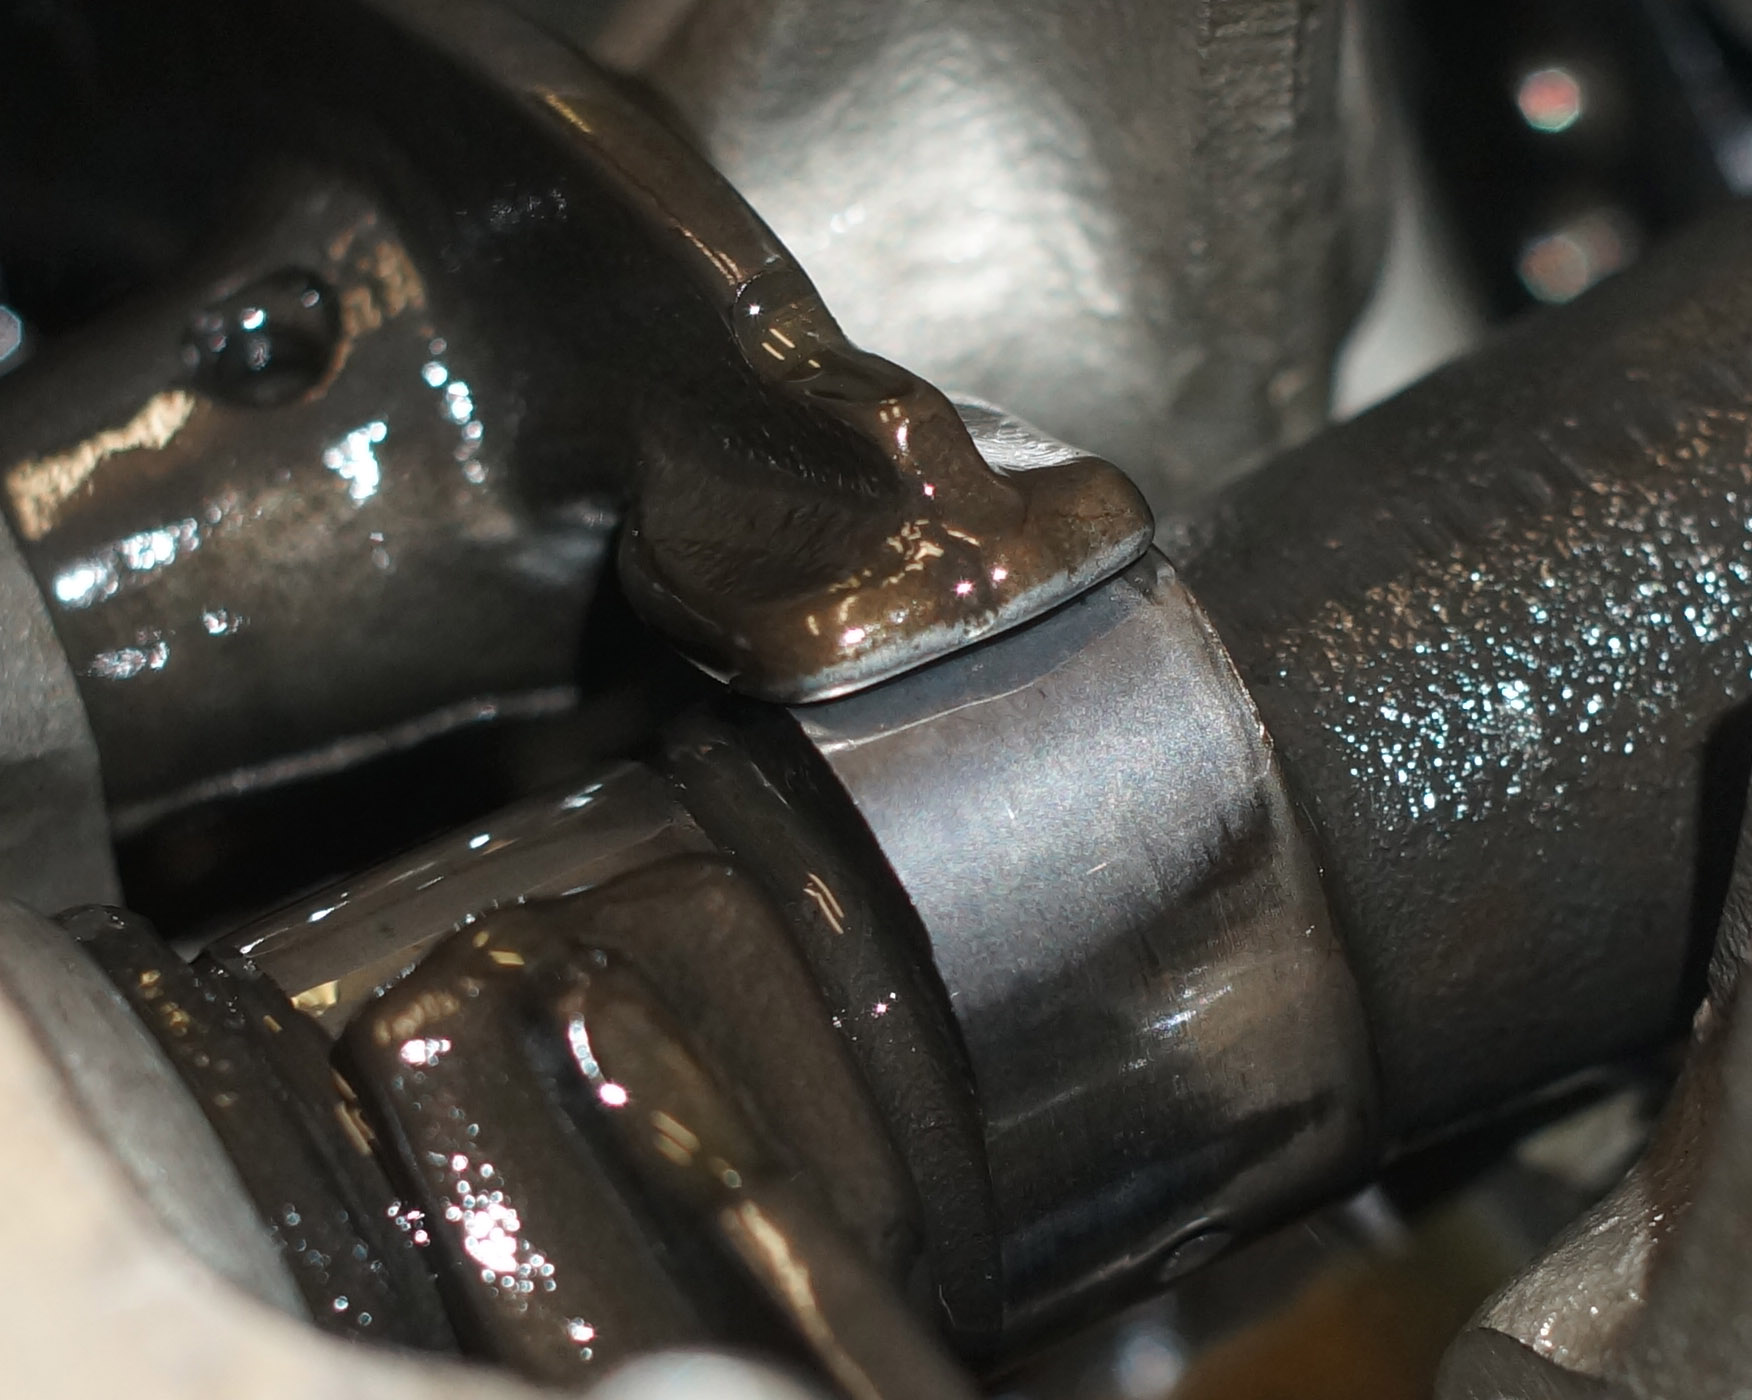
Fortunately for me, the cam shaft, journals, rockers, etc. all looked great. To my surprise, the cam chain looked immaculate, despite the obvious fact that it had been grinding against the head case evident by the large grove warn into the cam chain tunnel.

Next, I removed the head. WARNING: Viewer discretion is advised.
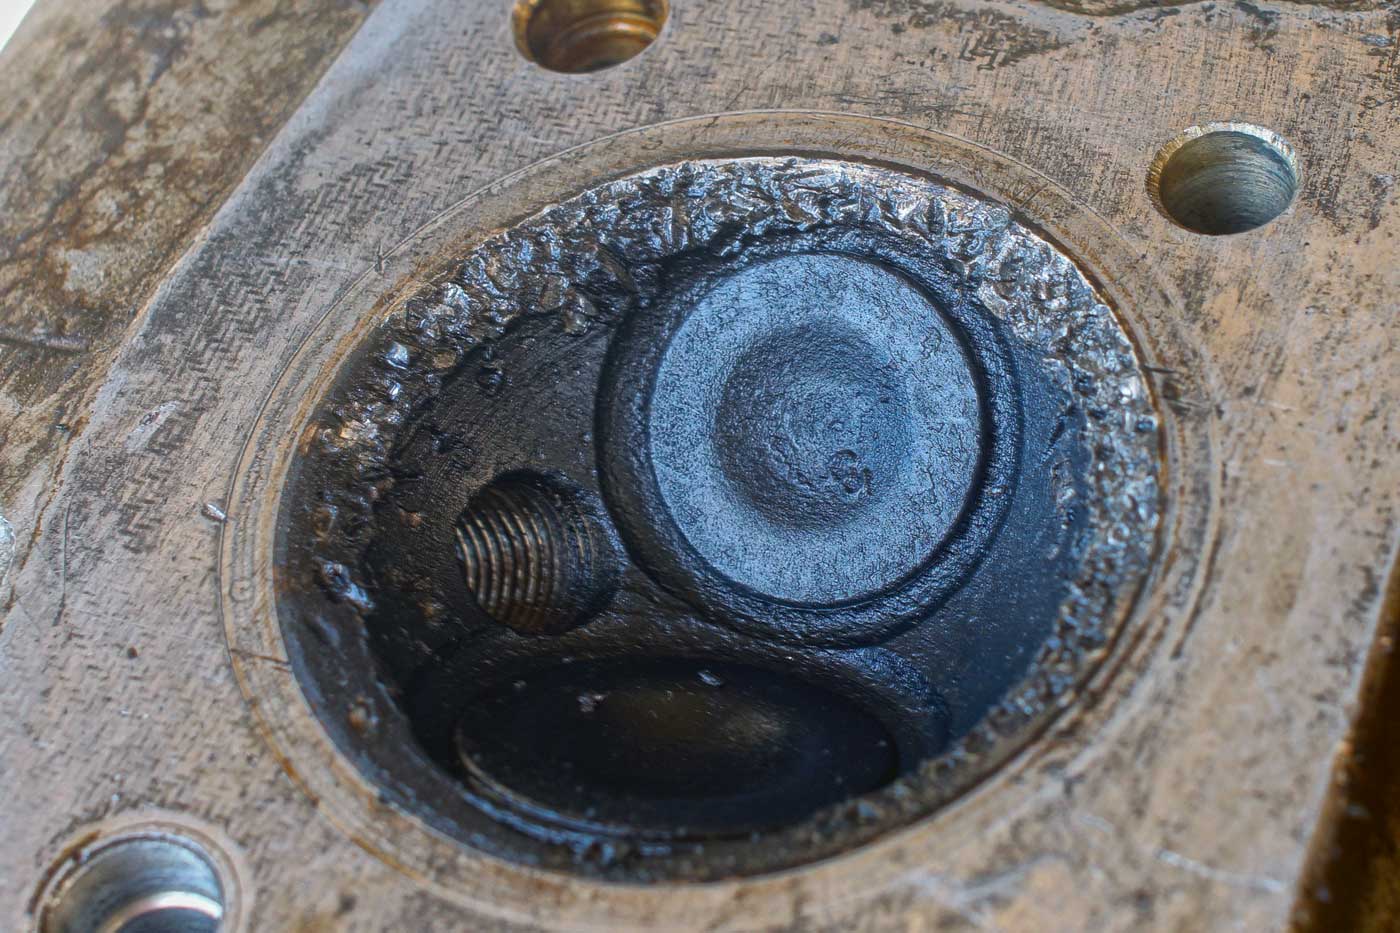
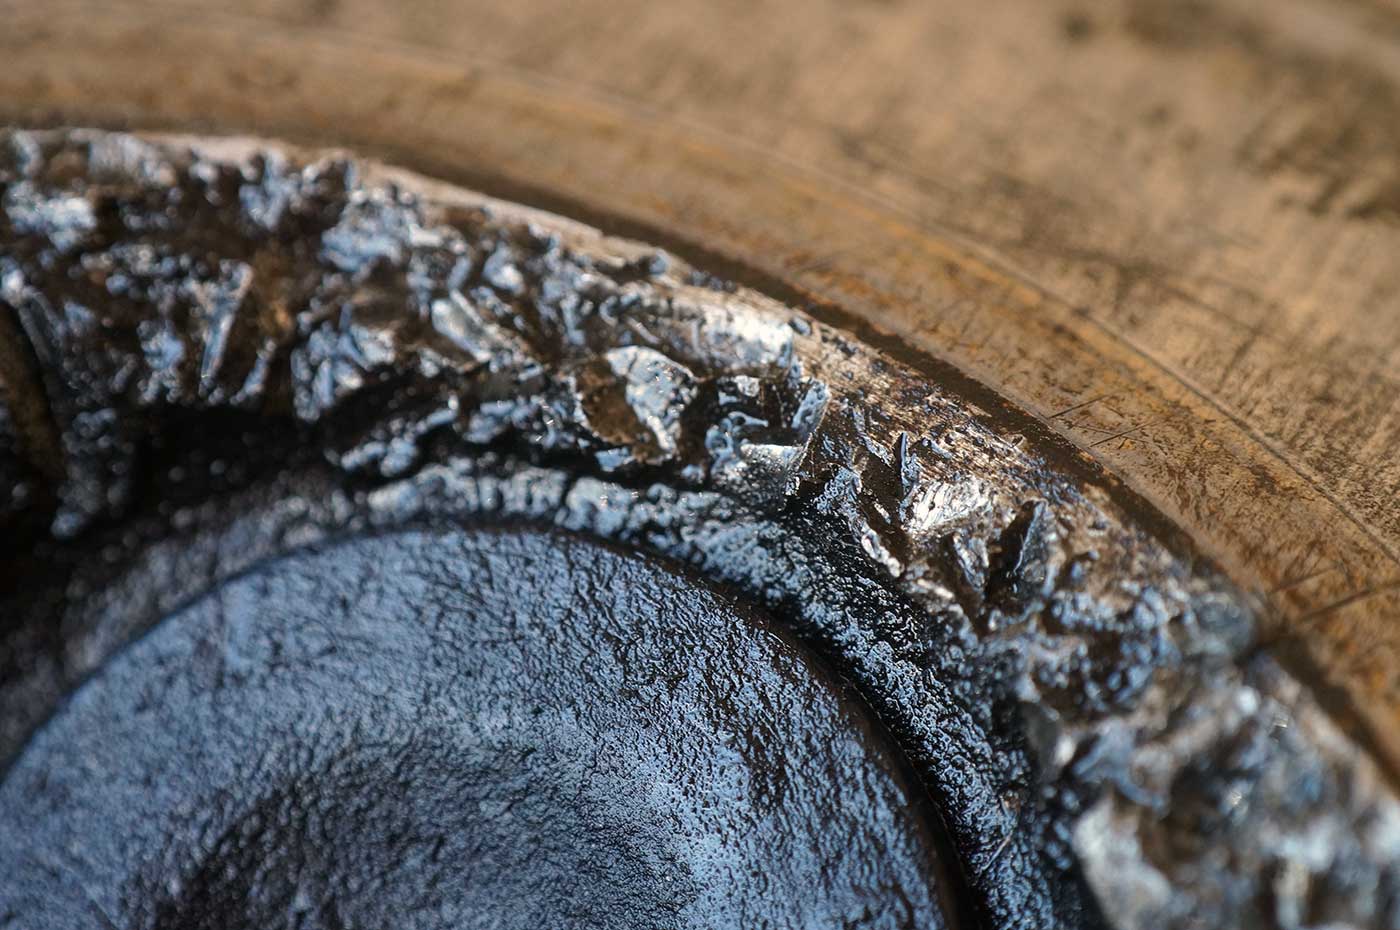
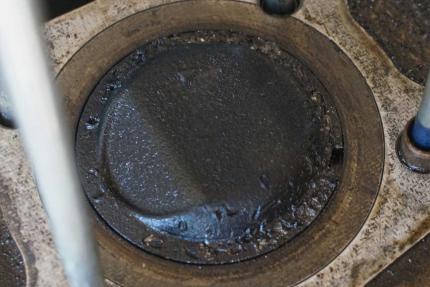
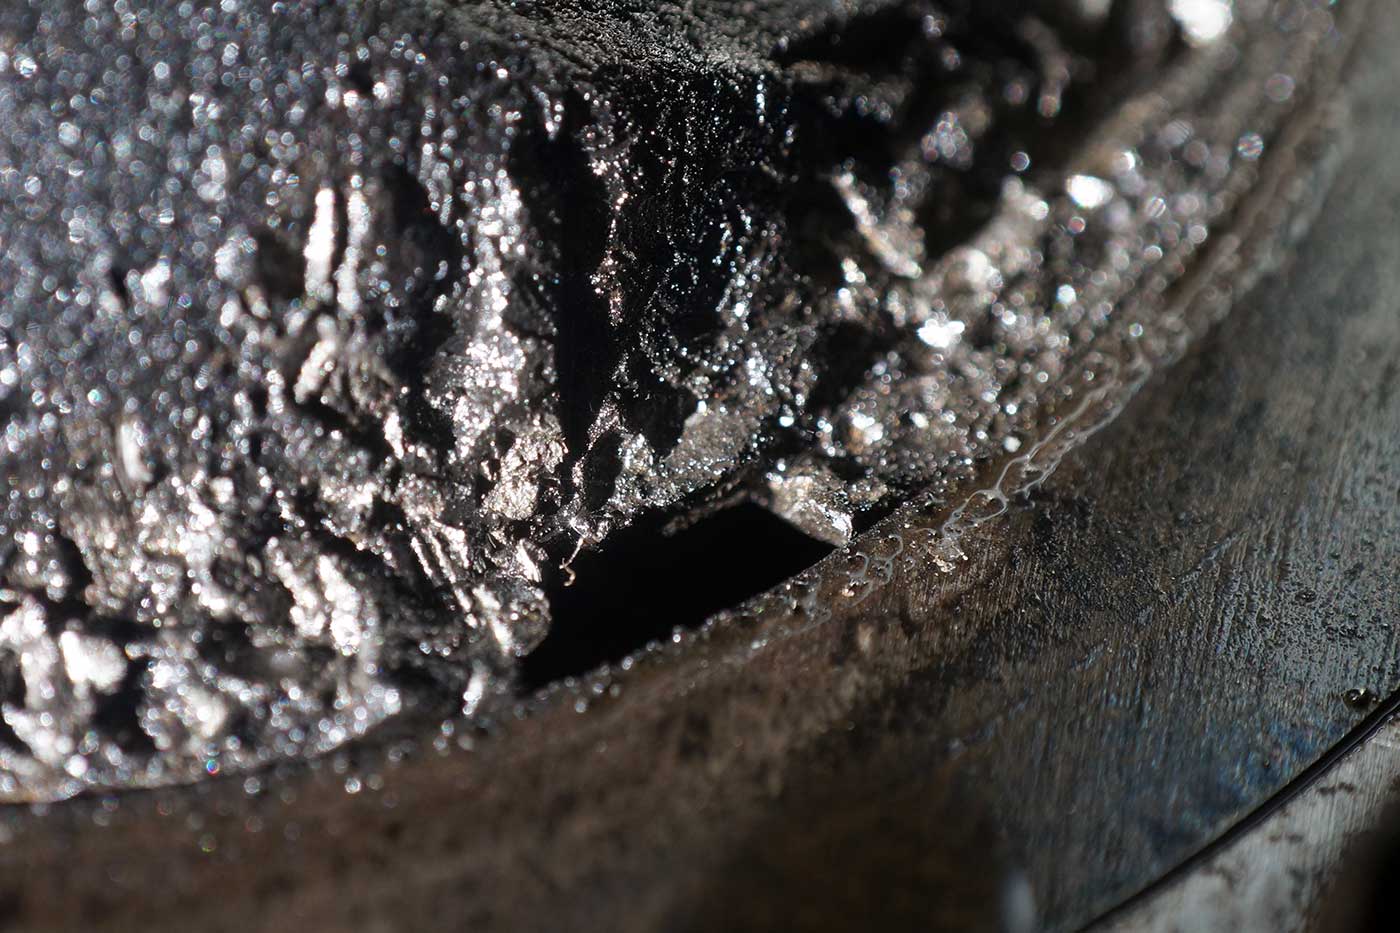
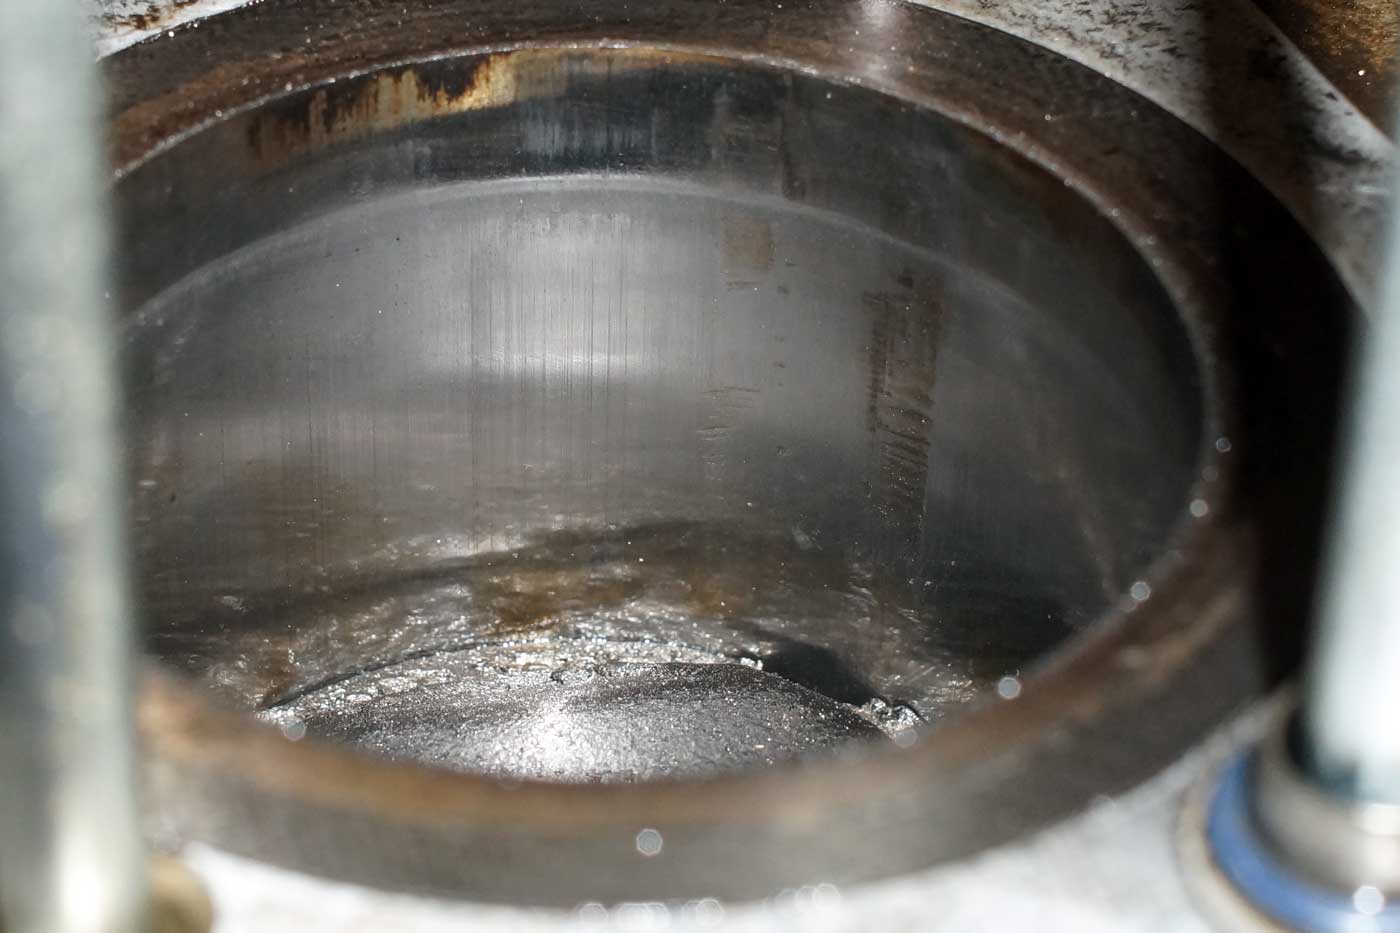

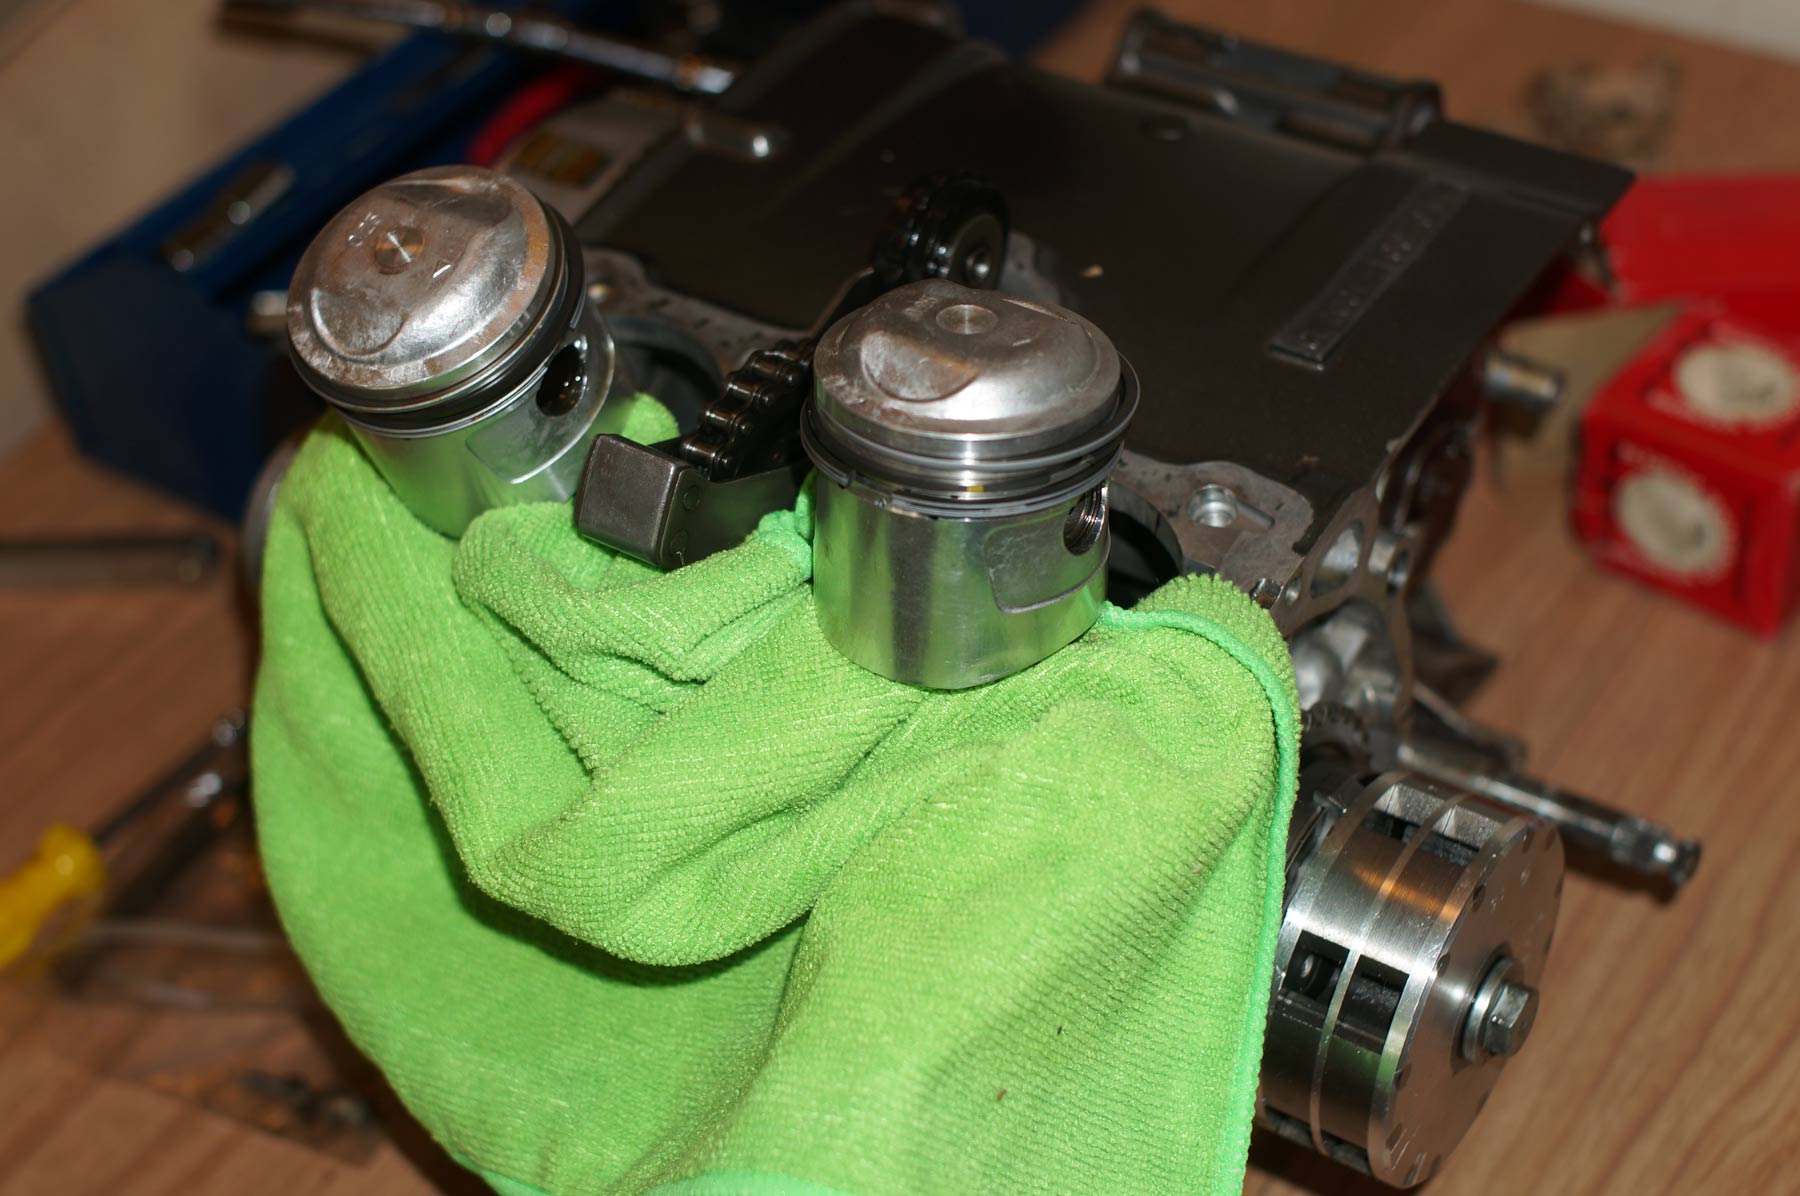
Apparently something had gotten into the right cylinder, or maybe the top piston ring broke and then was able to break through the piston somehow. Either way, the right cylinder, piston, and dome where pretty well chewed up. The top compression rings for both cylinders where broken too. I would need new over-sized pistons and rings, a replacement head from Ebay, a bore job, and a valve job. Pistons for this engine are hard to source! CMSNL.com has the best inventory but the highest prices. A few pistons can be found on ebay but never a matching pair. What I ended up doing was ordering 1 piston and both sets of rings from ebay, and the other piston from CMSNL along with replacement oil seals and some shifting mechanism bits (more on that later).
I also ordered a used head from ebay. Unfortunitally, it was damaged in shipping (one of the exhaust studs broke off and the machine shop had to drill it out), and it was warped and needed to be resurfaced. I could have just used the thrashed head by grinding away the jagged peaks on the cylinder dome (if left like that, the tips could get red hot and cause pre-ignition), however that would remove too much material which would increase the cc of the dome, which would lower the compression ratio. So that's no good. I had a local machine shop bore the cylinder jugs, do the valve job, bead-blast everything except the case, and resurface the head. They needed the new pistons (+0.25mm) before boring the cylinders to get a perfect match.
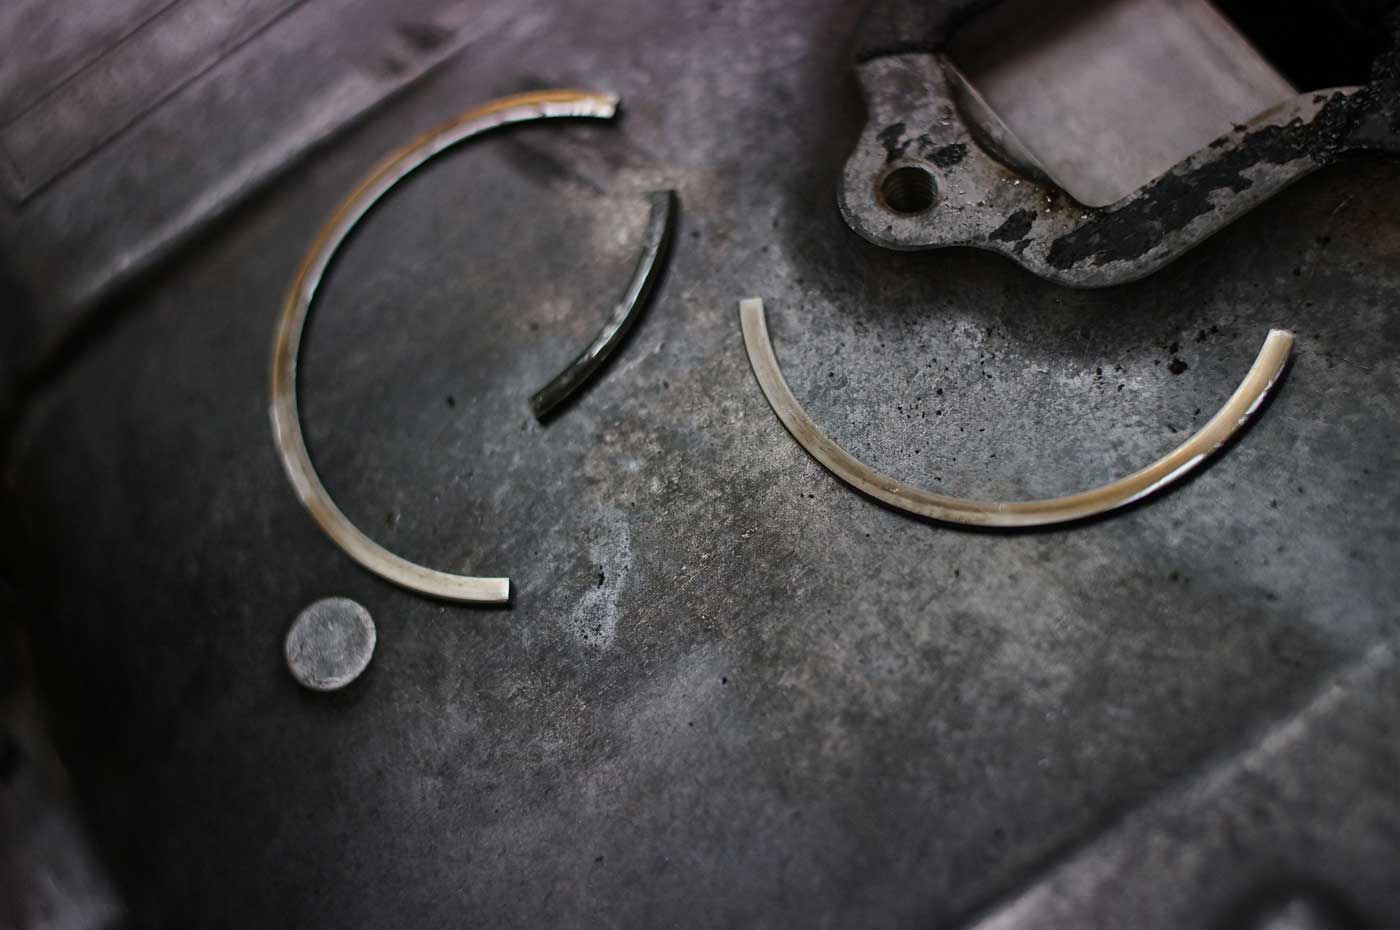
Now onto the case. I decided to take it all apart to make sure nothing had gone down in there, and so I could paint the case halves. The first thing you may be asking yourself is, why did he remove the upper crankcase and not the lower? Well, I had it upside down to remove all the bolts. Then I broke it free but left it like that last night. While I was asleep, my friend (who does know a lot about motorcycles, but not after a dozen beers) decided he'd have a look at it. I woke up with a text message from him saying he thinks I need a new piston (duh) and with the engine now flipped right side up. I was so mad. I found a retaining ring (at first I thought it was half a piston ring) and two tiny cylinders dowels for oiling the crank at the bottom of the case. Thankfully the gasket surface doesn't look messed up. So I just went ahead and pulled the upper crankcase off instead of the lower. Another thing I did that should NOT be repeated is removing the oil pump without also removing the clutch. The reason I did that is that because to remove the clutch you must also remove the oil filter and that requires a special tool (cheap but must be mail ordered). What I did was pull off the rubber boot and screen from the filter so it could be lowered enough to wiggle it out. However, this could damage the pump and/or plunger which would be very bad for oil flow to the head. So, don't do what I did!

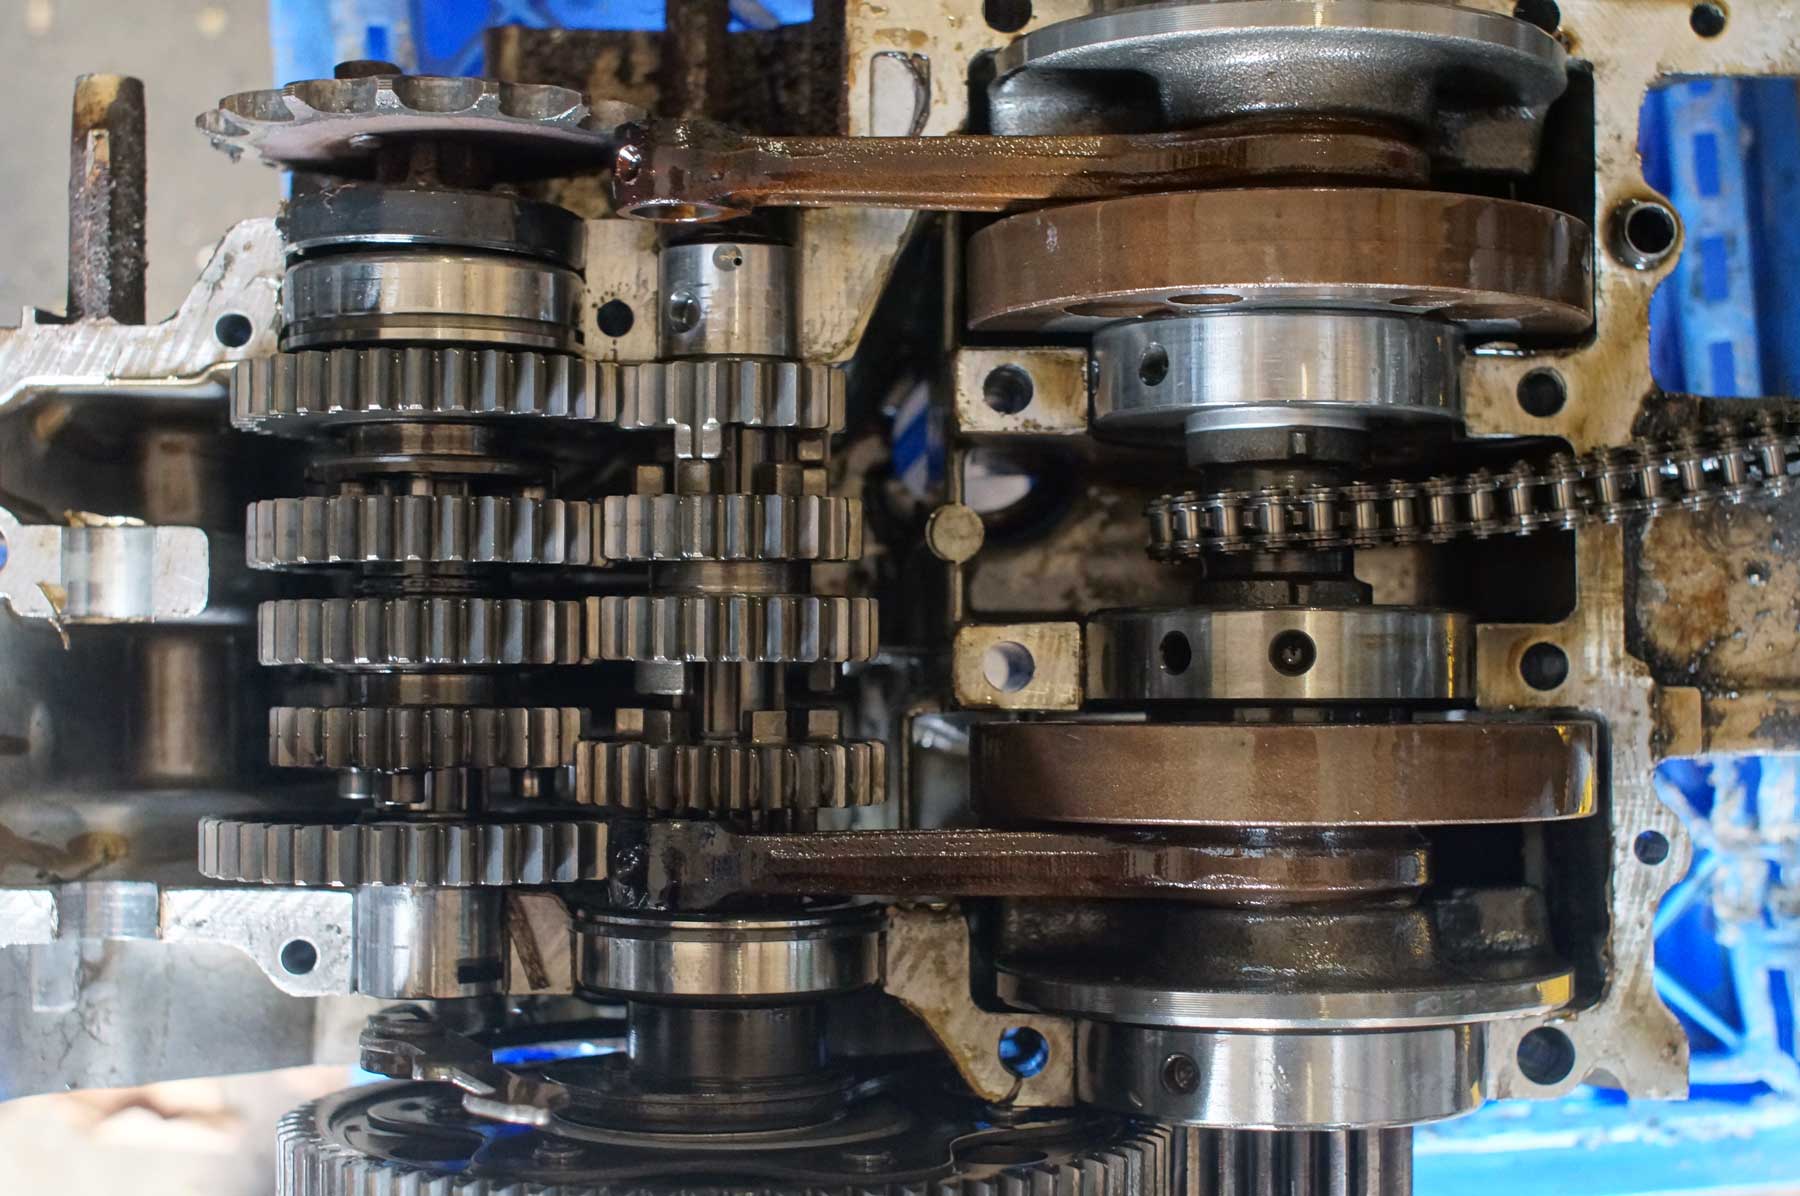
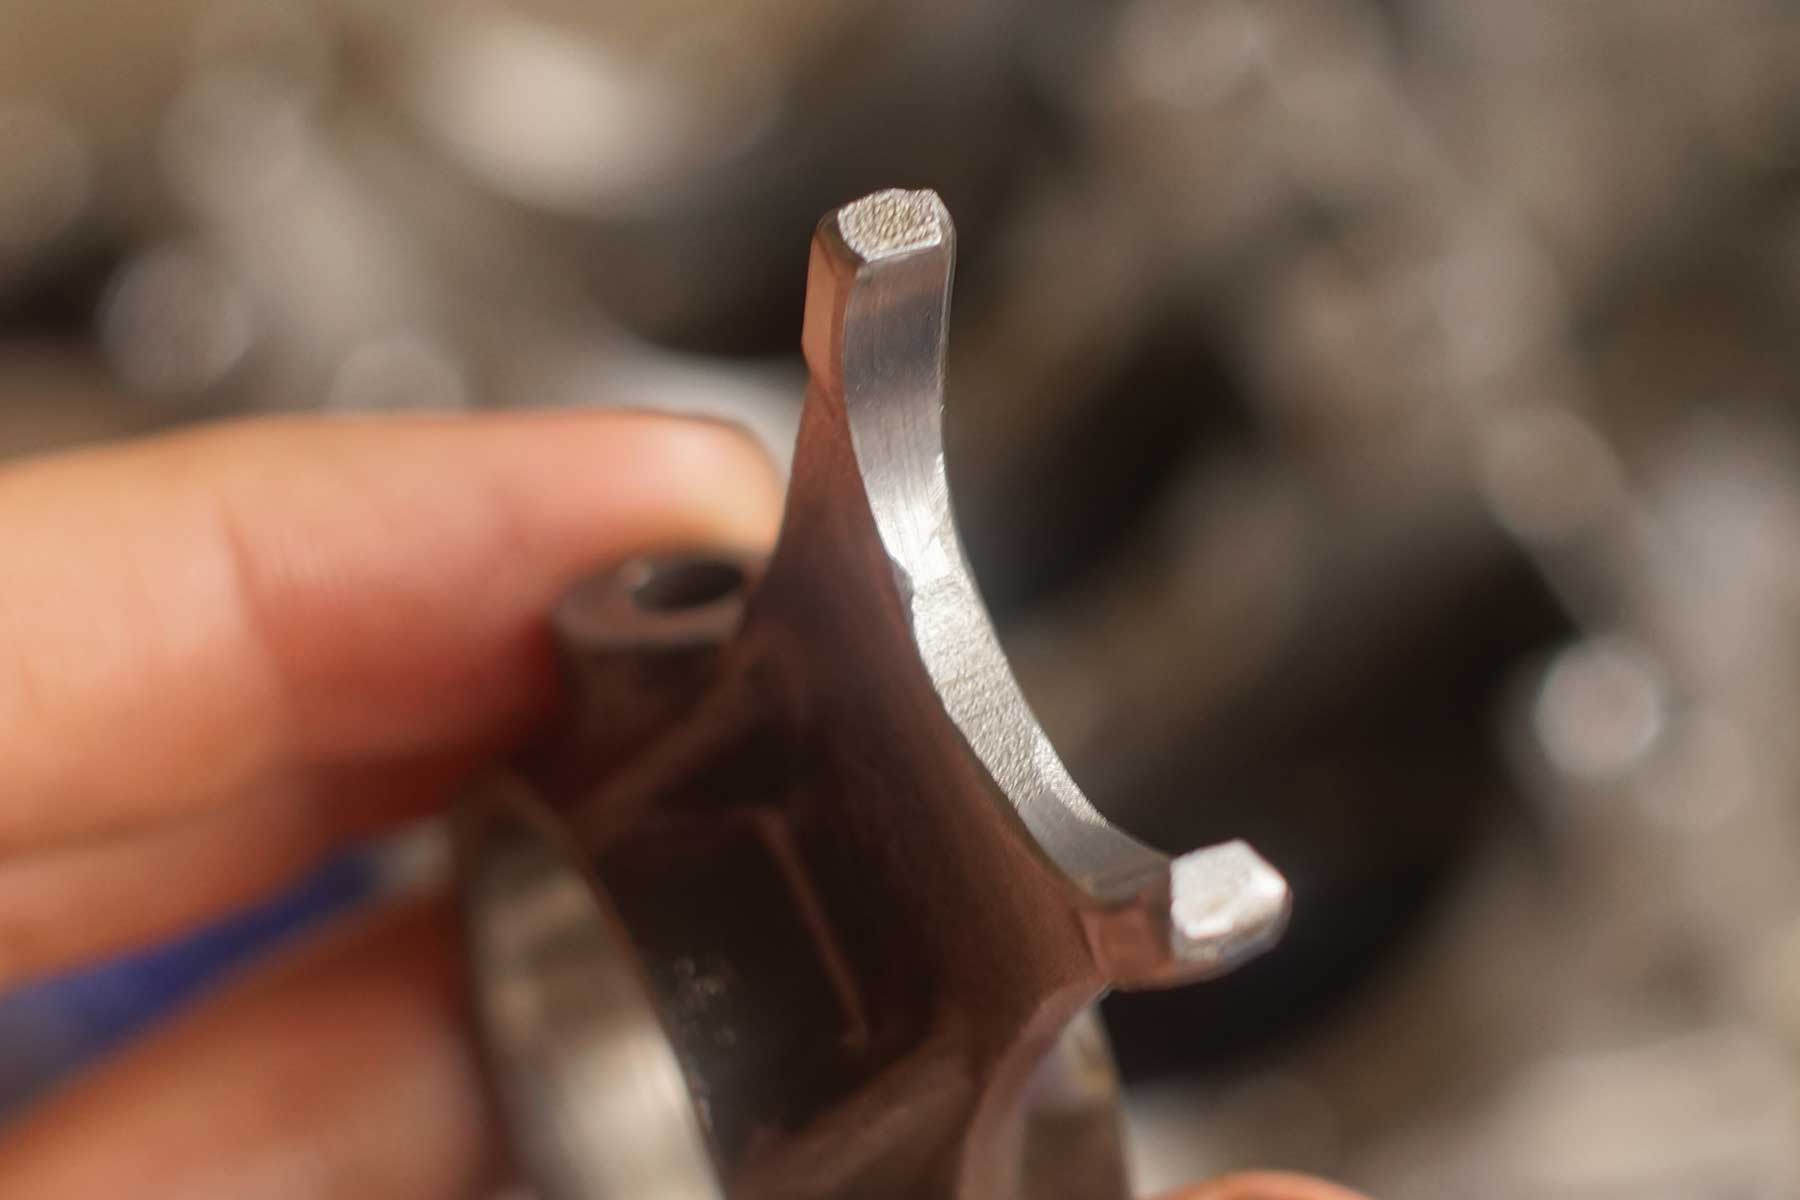
I also took apart the gear shifting mechanism to see if there was anything wrong to explain why sometimes I had trouble shifting. The drum labyrinth was smooth and free of burs and flat spots, the forks looked good, however the neutral stopper arm and detent wheel arm where both a little warn. The problem is that the rivit wears away, becoming oval in shape, allowing the wheel to be off axis. I purchased replacements. [Future note: this didn't fix my problem with the gear getting stuck when trying to shift, but it was worth a shot.]


My plan was to clean and then paint the upper crank case, then transfer the transmission and crankcase to the upper case so that the lower case could be cleaned and painted. This allowed me keep the transmission all together. I didn't want to take apart the main and counter shafts, because I didn't want to accidently put a gear in backwards or anything. I did look over the gears, but Honda build these transmissions to be bullet proof so there was no harm there. To paint both case covers, I first cleaned with Simple Green and a wire brush, then used Aluminum Jelly (from the makers of Navel Jelly) to prep the aluminum. I haven't seen too many other people do this, but it worked well. It contains phosphoric acid, just like self etching primer, so it etched the aluminum as well as eat up any organic matter (oils impermiated into the aluminum pours).
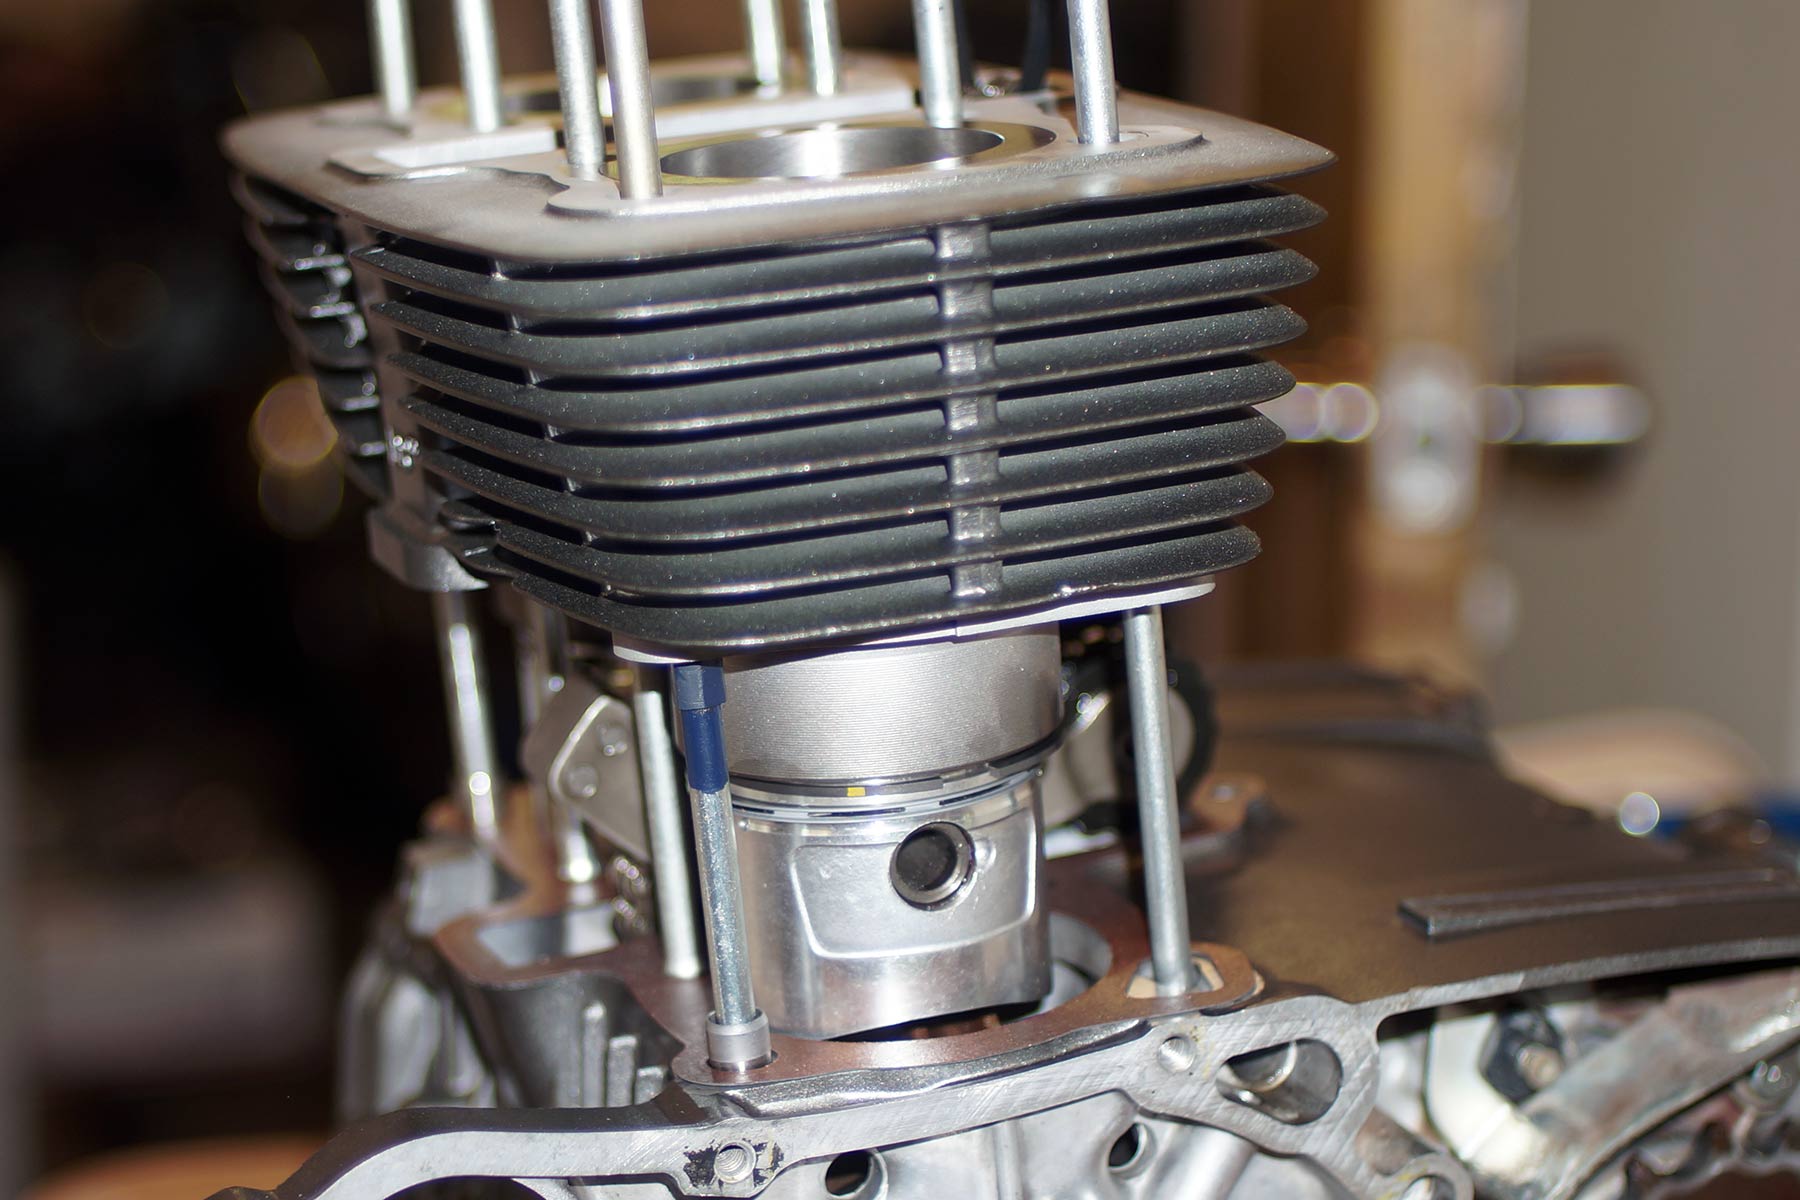
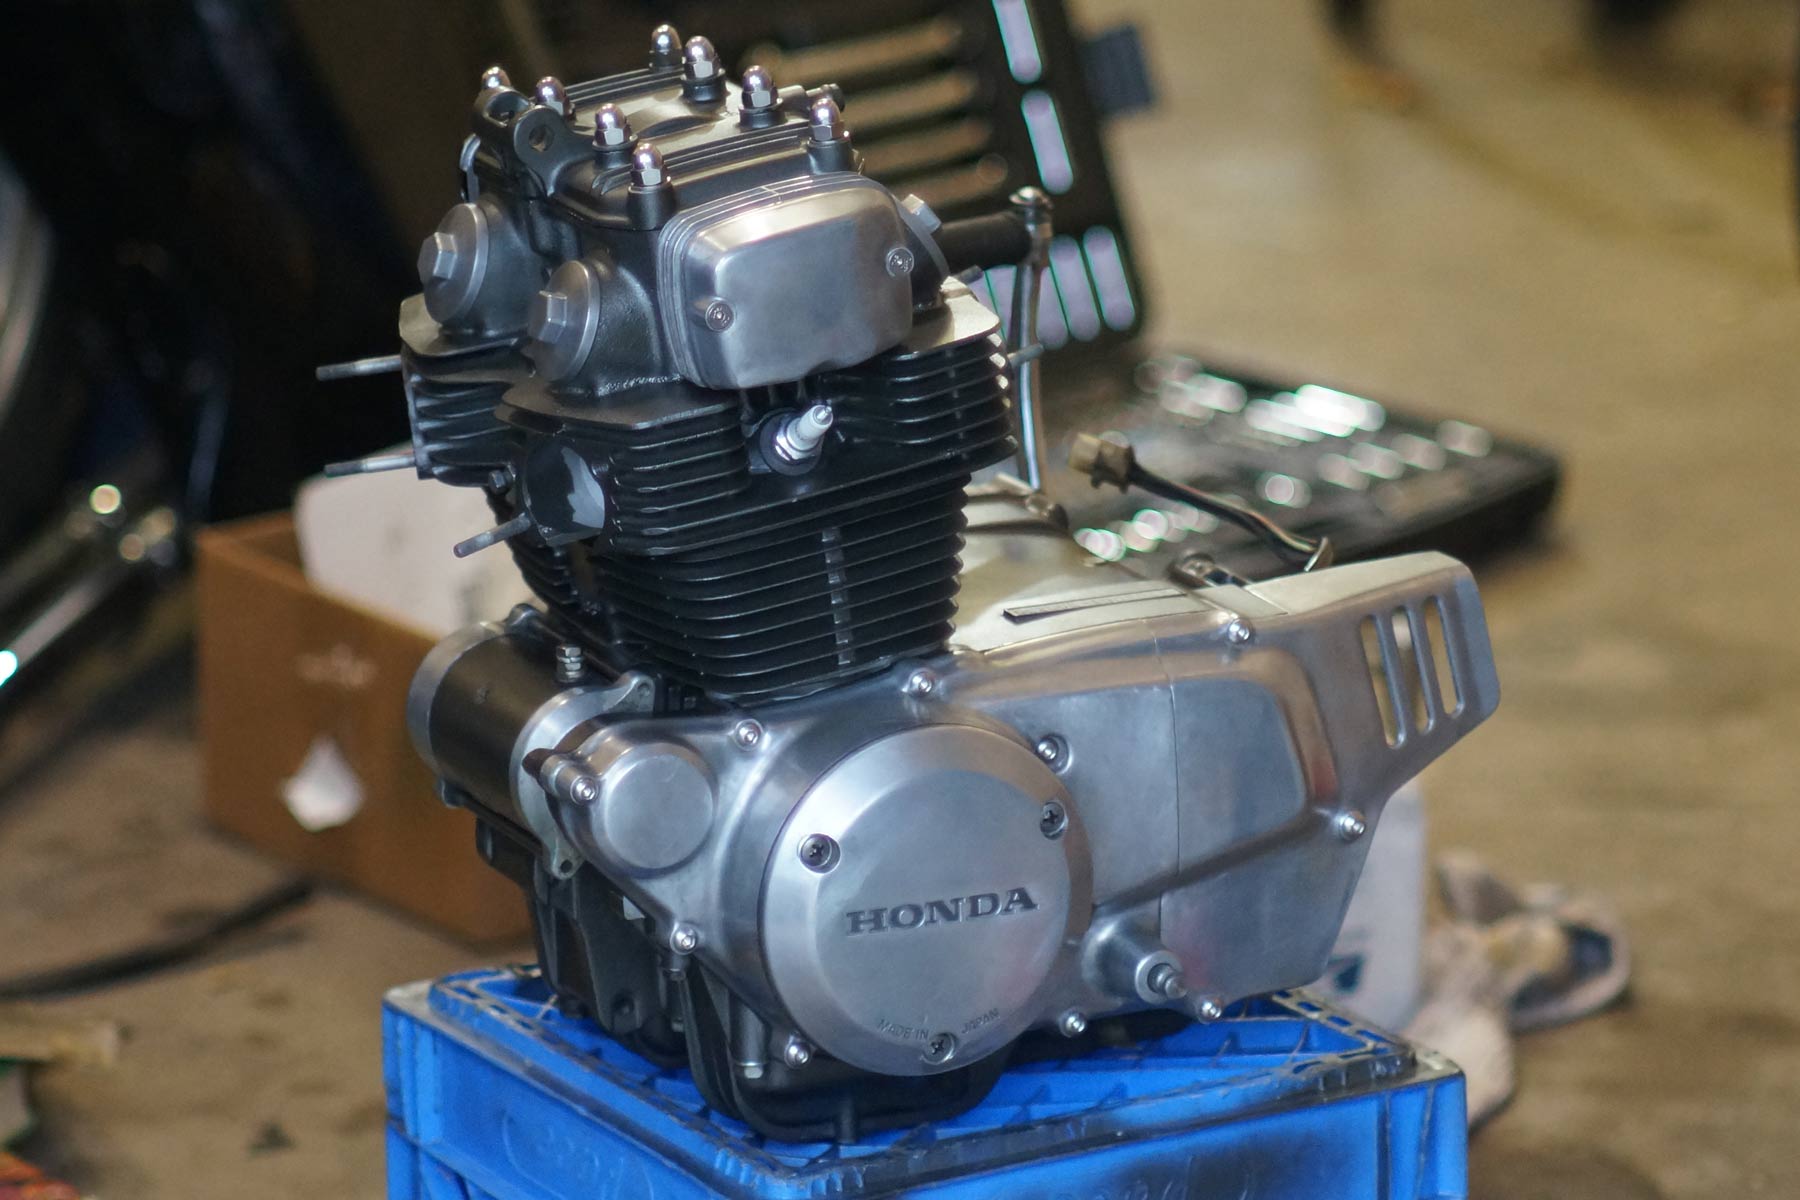
The paint I used was VHT Engine Enamel in the Cast Iron color. With the head back from the machine shop, I was ready to paint that now too. I attached the cylinders, head, and head cover together with the four of the long head bolts to bolt all three together, and then I covered all holes with masking tape.

Now the time has come to put it all back together! Checked ring gap clearances first, they're good. Oiled up the rings and installed them on the piston - made sure to install in correct order and with the right-side-up indicator facing up. With the pistons somewhere after TDC (so they're coming down) and a penny wedged in the clutch/oil filter gears so they won't move, I dropped on the cylinder jugs down on them. I thought that I would have to pinch the rings with my fingers all the way (remember, this is my first time overhauling an engine) but the bottom of the cylinders sleeves are tapered I guess, so that wasn't really necessary. I just had to guide rings in (doing my best to keep them spaced 120 degrees) and give a good amount of steady forced down on the cylinders.
Now onto the head.
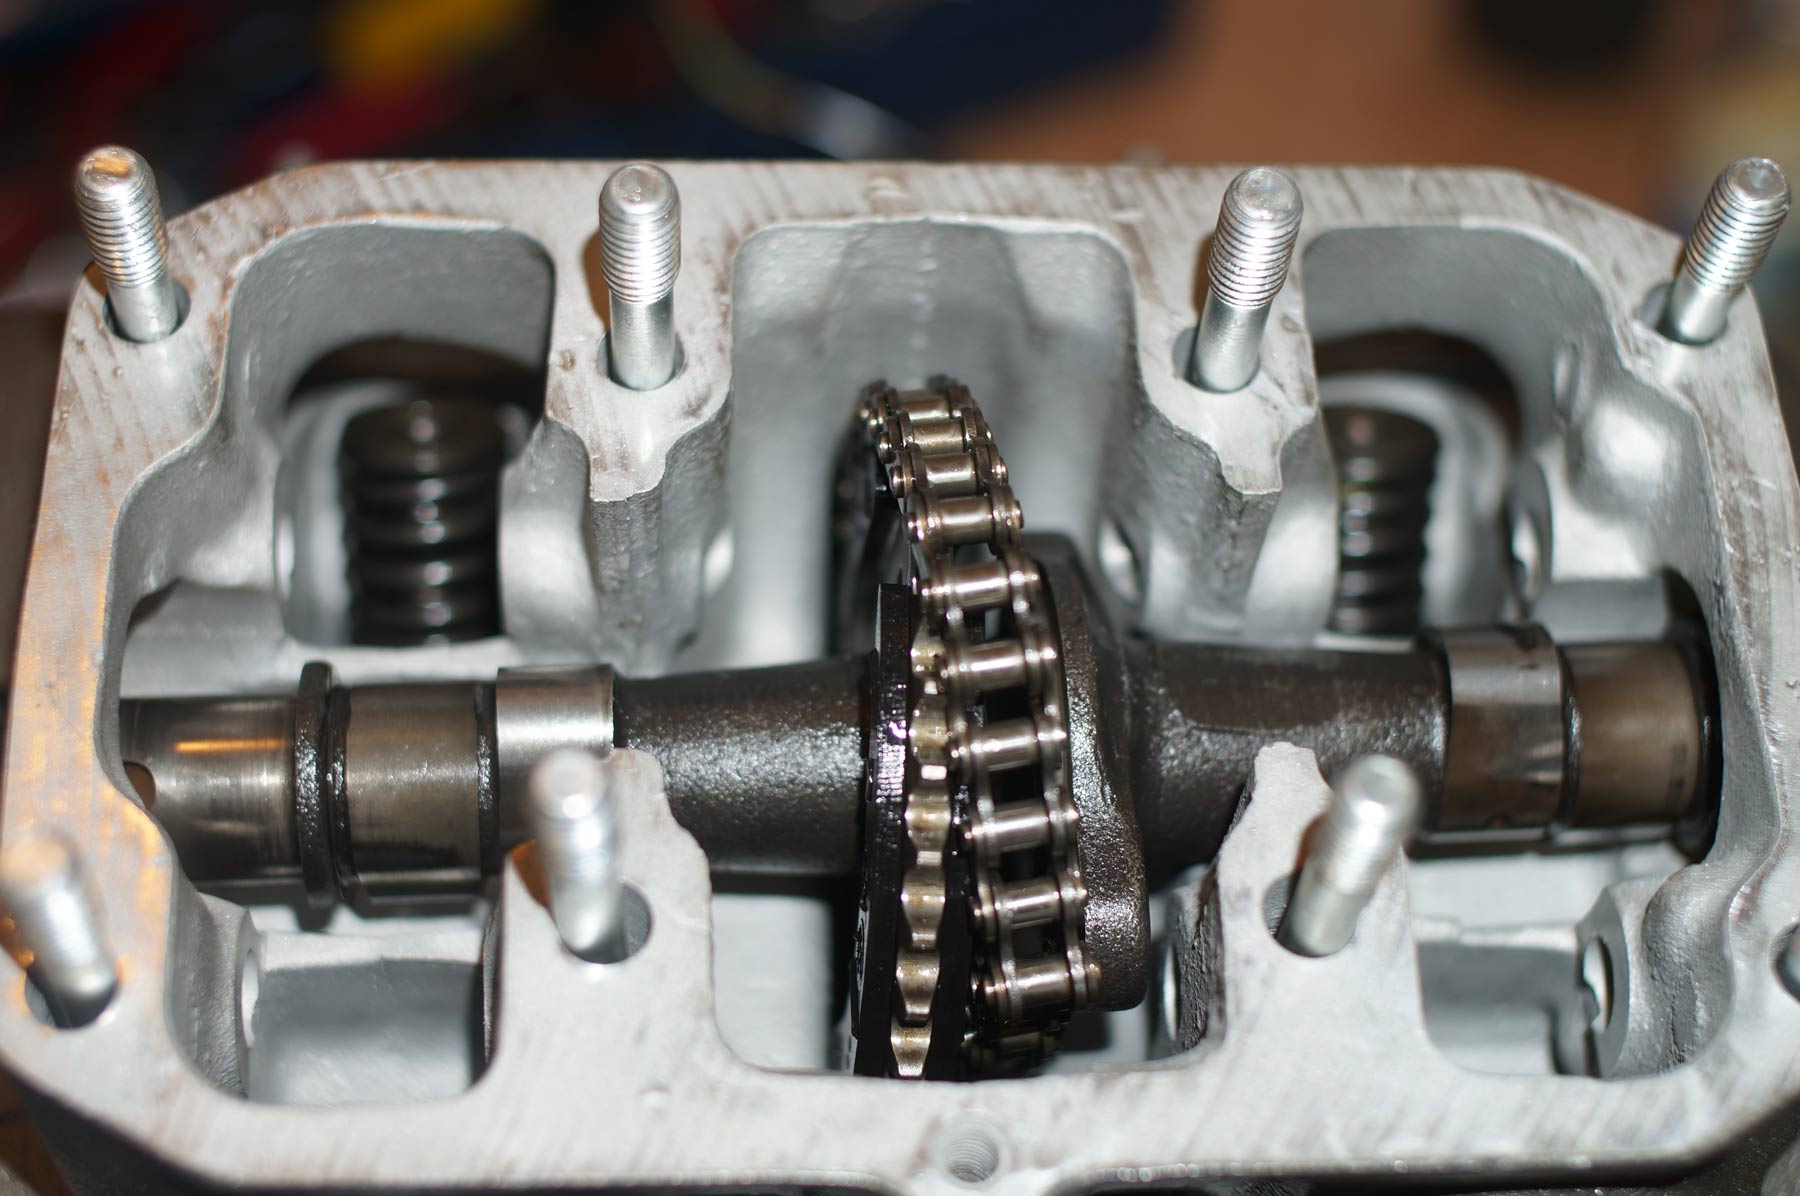
Here's some advice from HondaTwins.net member CB200T75 on setting the cam timing:
The pistons should be at TDC, and the the cam sprocket should have the little locator tab for the advancer facing UP, there are lines on the sprocket, they should be parallel with the surface of the head.
The only hangup I had here was getting the chain onto the sprocket. It wouldn't go with the chain in the middle between the sprocket and the cam flange, I couldn't get the chain onto the sprocket because the sprocket couldn't turn. I had to slip the sprocket under the chain and then I could get it on. Another thing that we must be very cautious with are the cam sprocket bolts. Order brand-new OEM ones if possible because they're single-use parts (not made any more by honda though, must find NOS). If you reuse them, then don't over tighten. Use red loc-tite and torque to the lower end of the range listed in the FSM (remember, any lube on the bolts means that number needs to be somewhere in the middle of the range, not at the top). The problem is that they can back-out if too loose, or shear if over-torqued. Both will be disastrous for the engine. Even if the sheared bolt is not shot hard enough to blow a hole in the head (it does happen), it's a one-in-a-million chance that a valve wouldn't bend. What happens is, the first bolt on the sprocket comes out, the sprocket moves out of time, the valves are now opening out of time, a piston slams into a valve bending it and also breaking the other cam sprocket bolt.

Done!
More advice for would-be engine rebuilders:
- Everything I say is to be considered suplemental to the FSM. Always consult the FSM on every move!
- When putting the case backtogether, the kickstarter must be installed in a unique way. There is a metal bar that extends from the kickstarter gear shaft that must go into a grove in the case, or else it won't engage the engine.
- Don't loose any of those dowels and retaining rings for the crank bearings and transmission, and the locating pins for the head!
- After it's back together and on the bike, resist the urge to fire it up for a second and then run to the pub to celebrate. Follow this break-in procedure instead: http://www.ntnoa.org/enginebreakin.htm Failure to do so will (read: can) result in glazed-over cylinders walls and poorly-seated piston rings, which will be a big hit to horse power and oil consumption.
- Some recommend to install the pistons completely dry, this forces the piston rings to seat quicker
- Don't forget the o-rings between the head and cylinders. There's some debate as to how many there are–the parts fitch shows two but my engine only had one when opening it up. I don't think there's any harm in having one more in there. Check the exploded parts diagram for the locations.
- Be aware of cheapo gasket kits. They're known for not being compatable with modern oils.
- Don't ever use liquid gasket sealer where a paper gasket should be used. What can happen is little gasket "buggers" can break off in the engine, get into the oil, and plug things up. Only use Hondabond for when paper gaskets aren't used, namely for sealing the two case halves.
- Use copper gasket sealer for the cylinder gasket and head gasket. For all other gaskets, condition them by smearing them in a little oil. This pre-soaks them to prevent any initional oil leaks and also makes it easier to re-use them if you have to fix something. This is just one man's opinion though.
Check out the complete bike! -> http://dannix.net/node/30