Wiring is underway, I'm about half way done, if you only include essentials to get the wheels running. The Resolve wiring harness, ignition, F/N/R switches, throttle pedal, water pump, brakes lights, etc. Horn, headlights, wipers, reverse lights, etc. can wait until I have more time. (Wipers will be a whole ordeal, but I think I can use a 1990 Jeep wiper motor, if it can be adapted to the FoMoCo linkage).

I was able to cram the VCU, two fuse boxes, a large relay box, the main relay, and the OBD-II port all into the glove box and still leave room for the heater/air-con box.

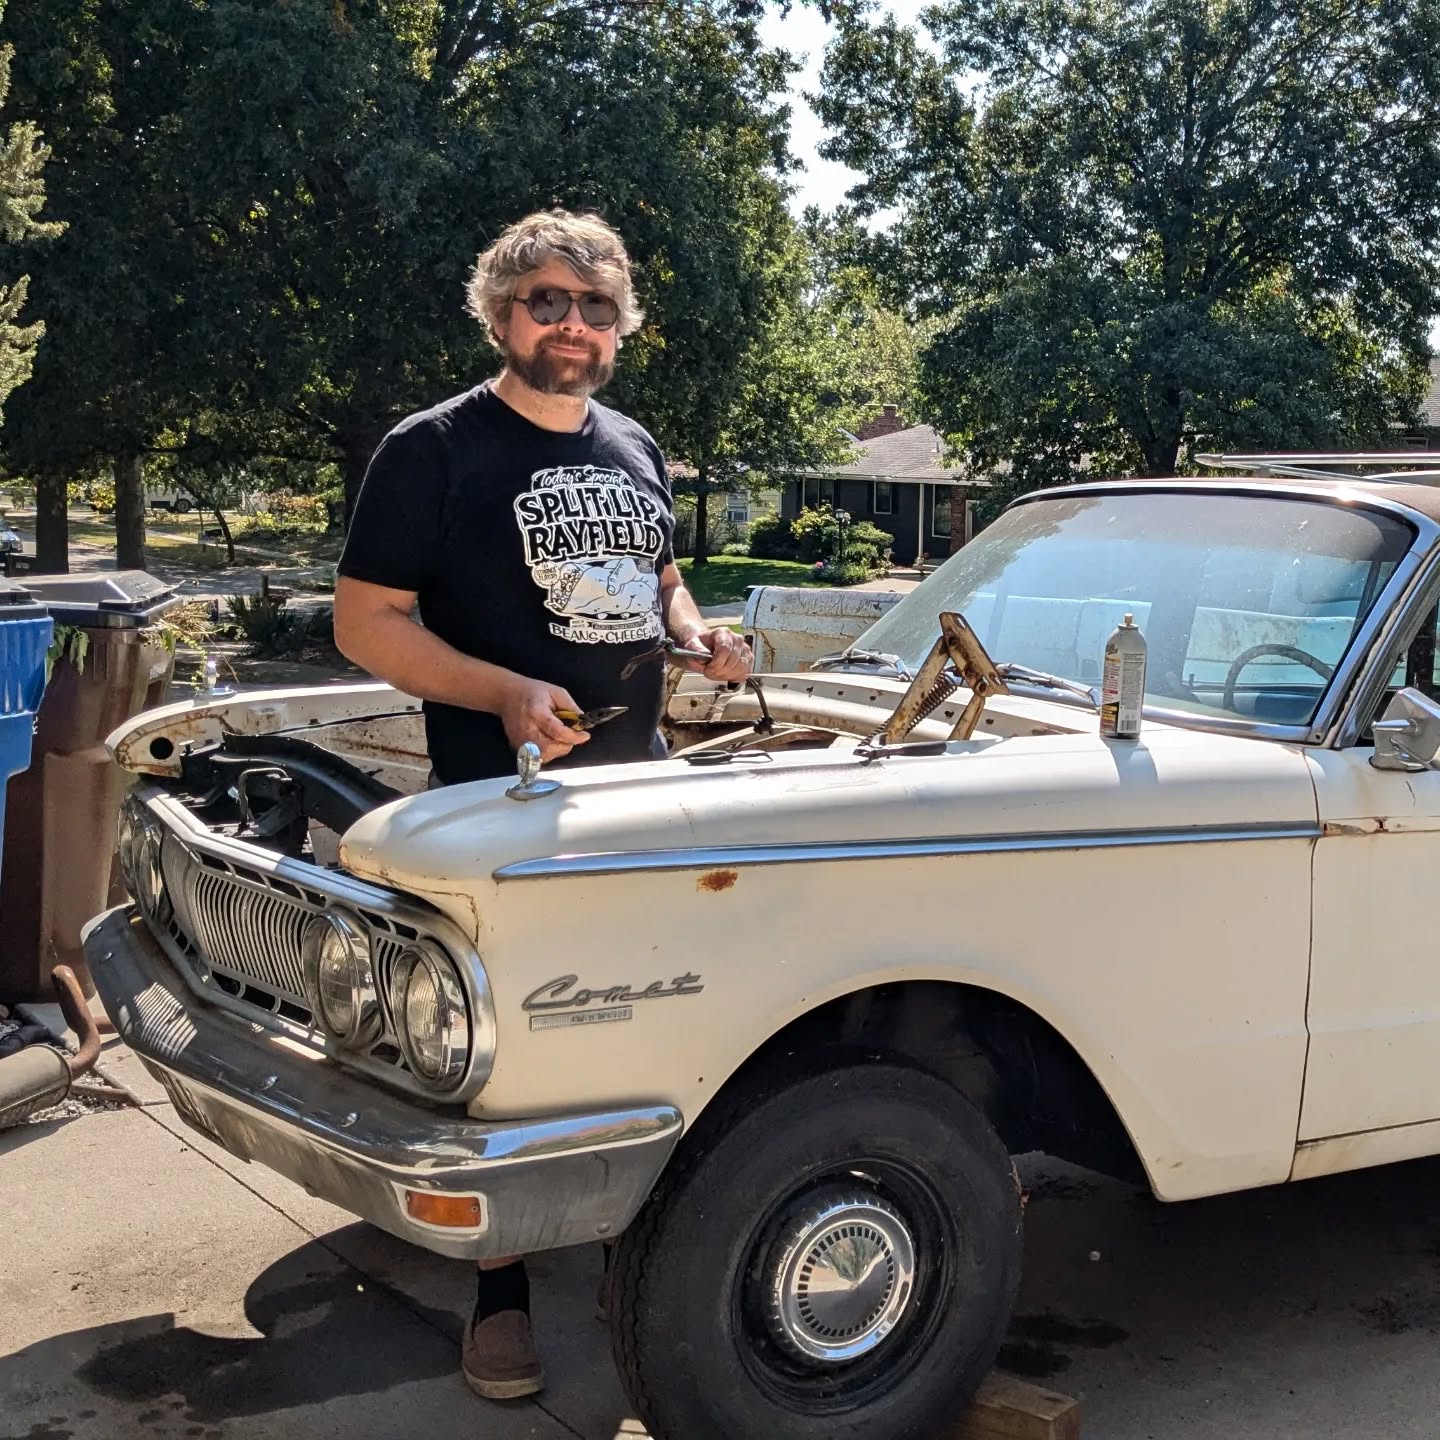
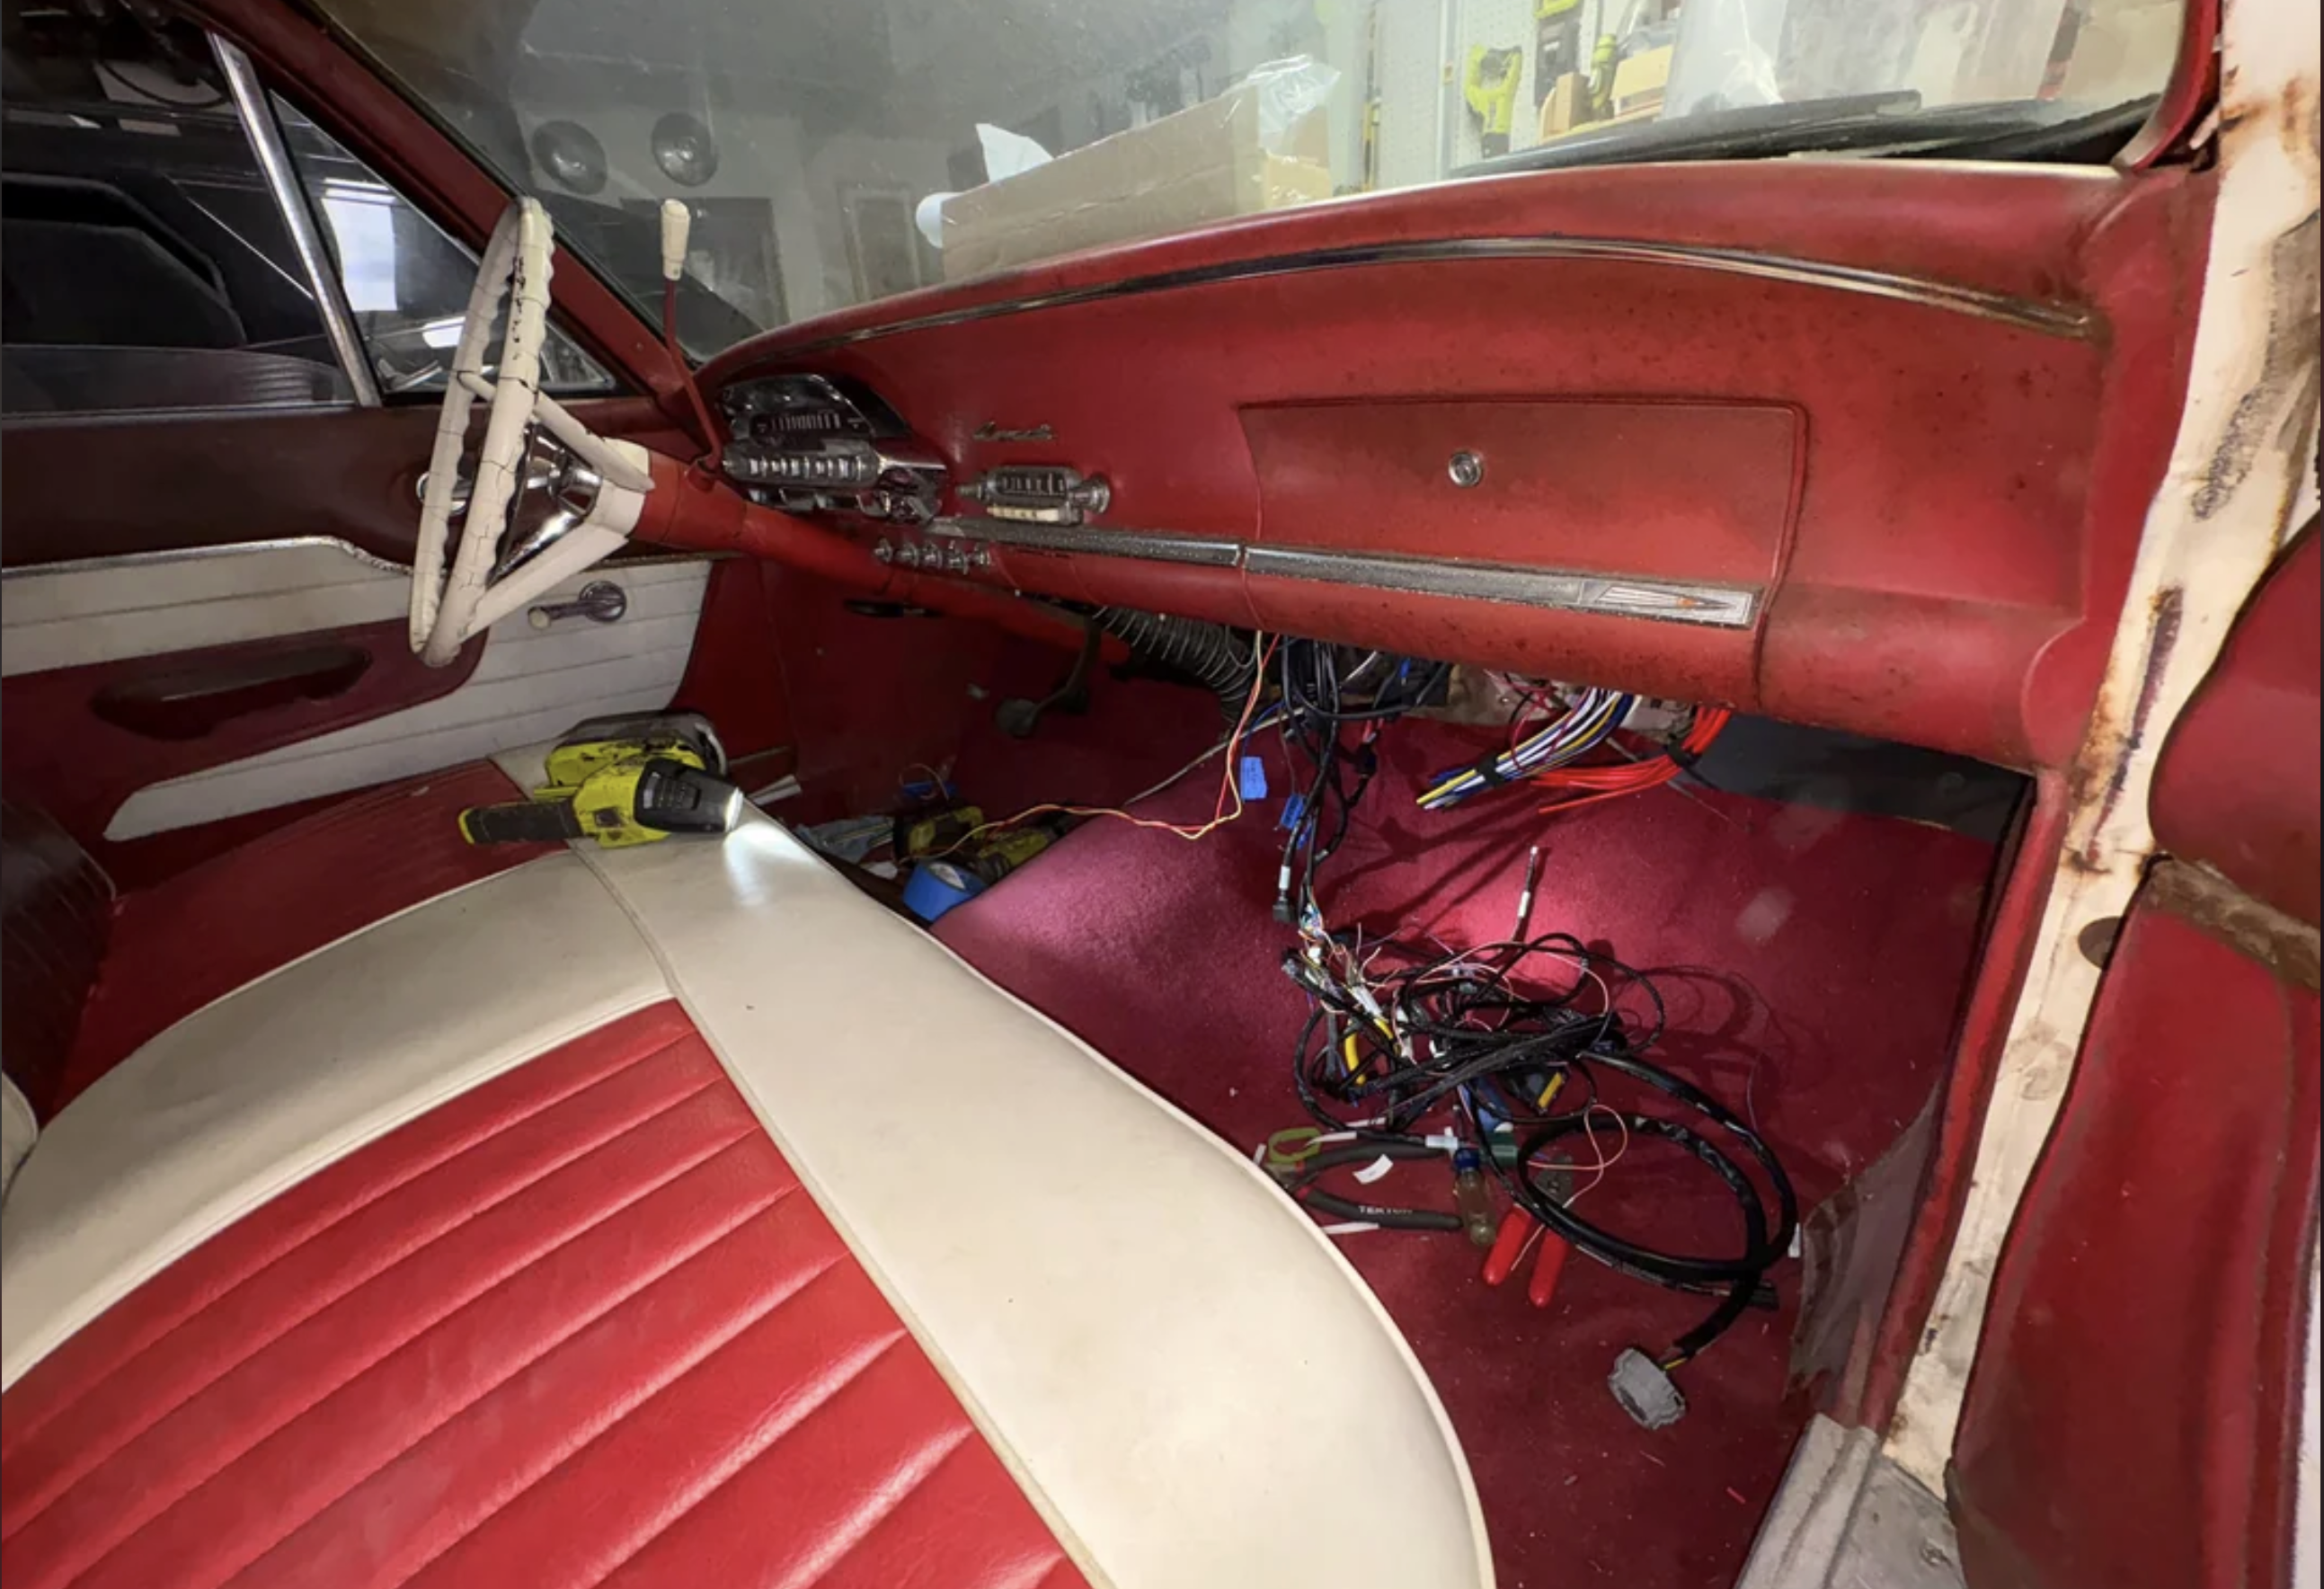
I love doing the wiring, especially compared to replacing rust-seized leaf springs or rebuilding drum brakes. For starters, I got the bench seat to lay down on while I do much of the work. Which is really nice, usually I'm dealing with bucket seats and center console so the only way to do it is to be completely upside down with my ass up in the air, my back in an awkward angle, and my head crammed into the floorboards. Bench seats are a game changer, just give me a pillow and I could do it all day long. Plus it's nice because I'm not re-using any of the old wiring harness. And that just makes everything easier to deal with in my head.
Another cool thing about wiring up my own car from scratch is I get to decide how I want everything to work. I've decided that there will be no headlight switch, instead the headlights and tail lights will always be on when the car is on. That way I don't have to worry about the mess of wires surrounding the light switch, which back in the day also doubled as the fuse box. There was no relays back then either, apparently.
And I'm also change the rear lights. Originally, each side had one red lens for brake lights, tail lights and turn signals, and a white lens for reverse lights. I've instead put two red lenses on each side and now I can have brake lights and turn signals on separate lenses. I'll have to add an aftermarket reverse light somewhere.
The question is, should brake lights be on the inner or outer lenses? Hmm....
[edit: fast forward, umm, an unknown period of time. Months? I'm just now getting around to writing this and I'm not sure what I've logged here on this website and what I still need to add. ]
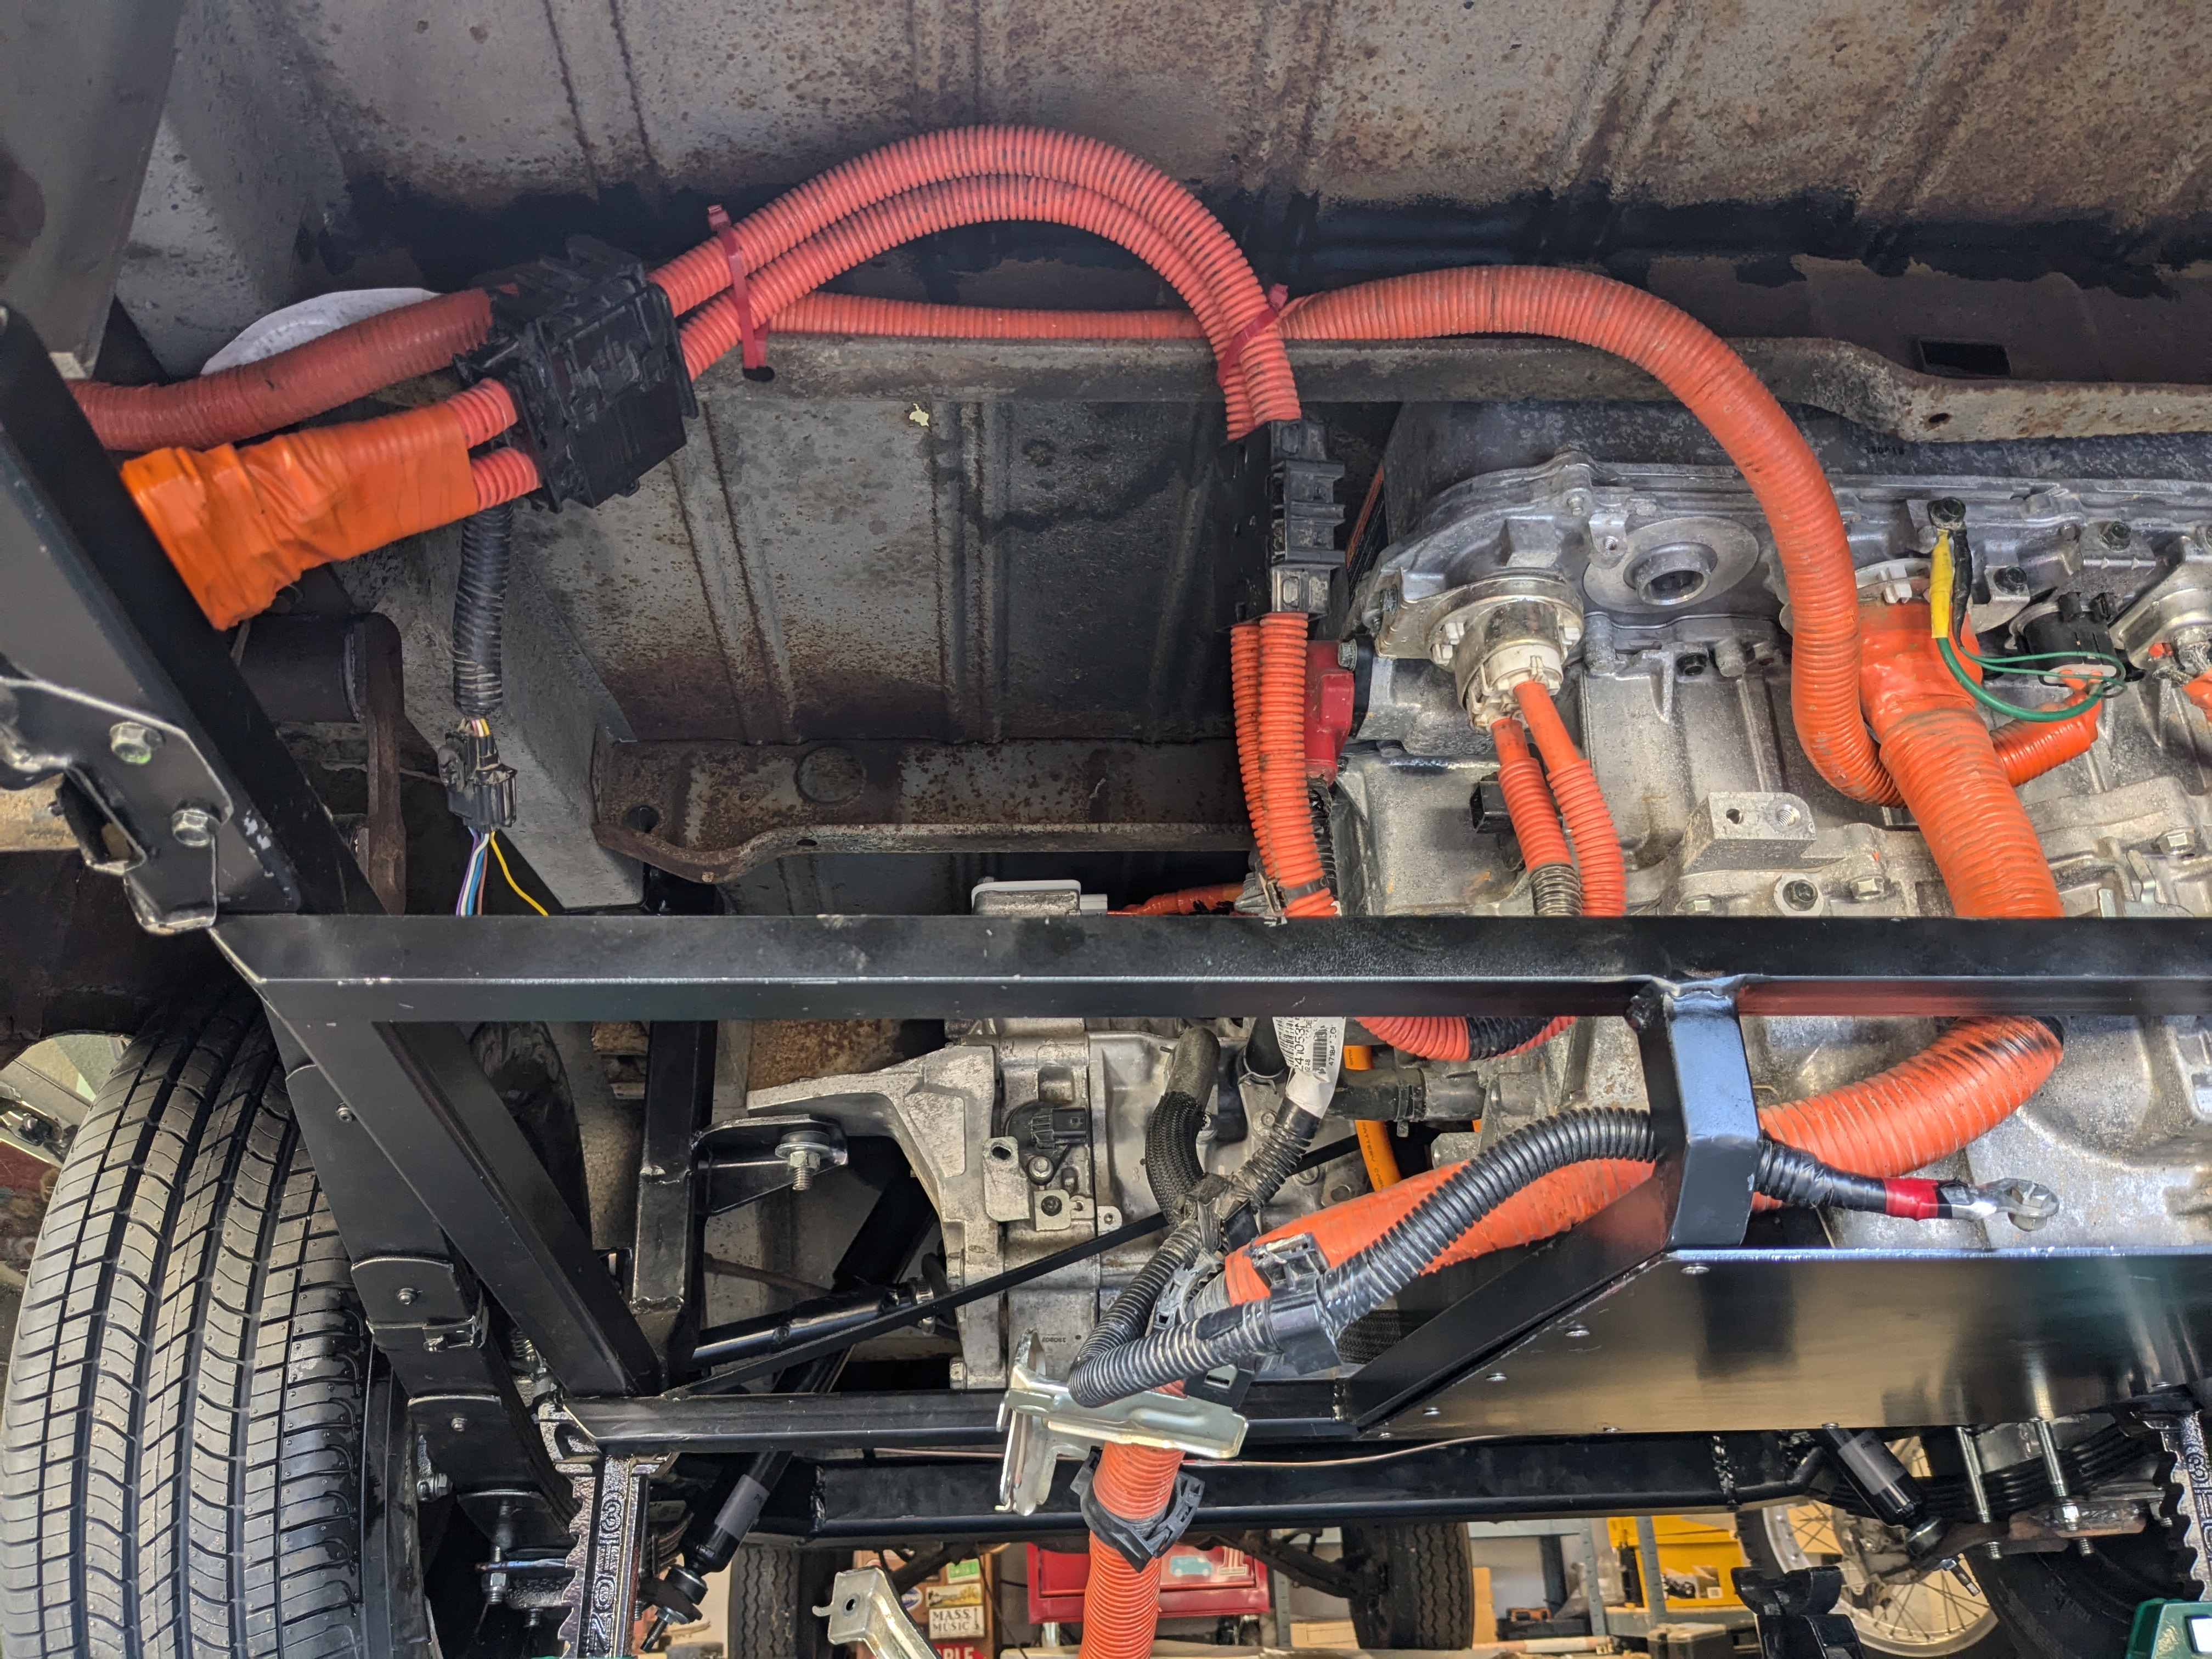
So it was in the middle of this wiring job that things went FUBAR. After I finished installing the Resolve wiring harness, the last thing to do was hook up the battery pack (unmodified and still in the Nissan enclosure) to the PDM, but to do this I need to extend the high-voltage battery cable. That's where my mistake was made, and I mixed up the positive and negative wires (nissan had these both wrapped in orange sheathing).
I'm writing this several months after the fact and my memory is a little hazy, so maybe you should just watch my youtube video on this chapter of the build:
I first suspected a problem when I checked the error codes using LeafSpy pro (it works great with the Resolve VCU but you have to go into the LeafSpy settings and select INV/BAT/MOTR mode instead of the model year of the car).
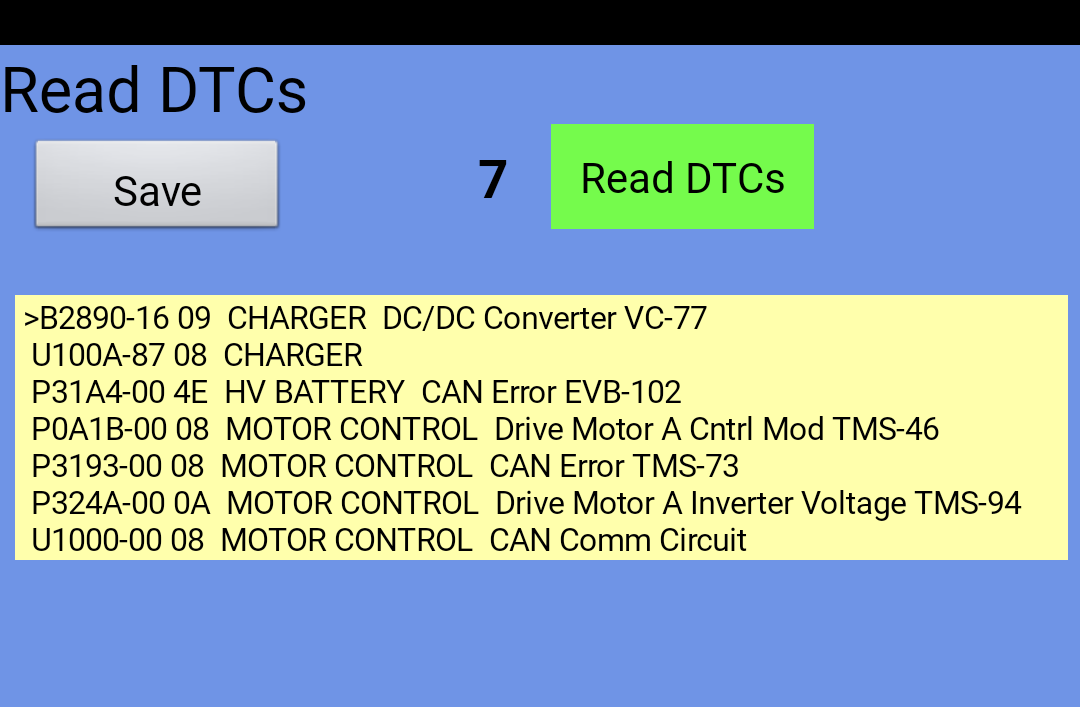
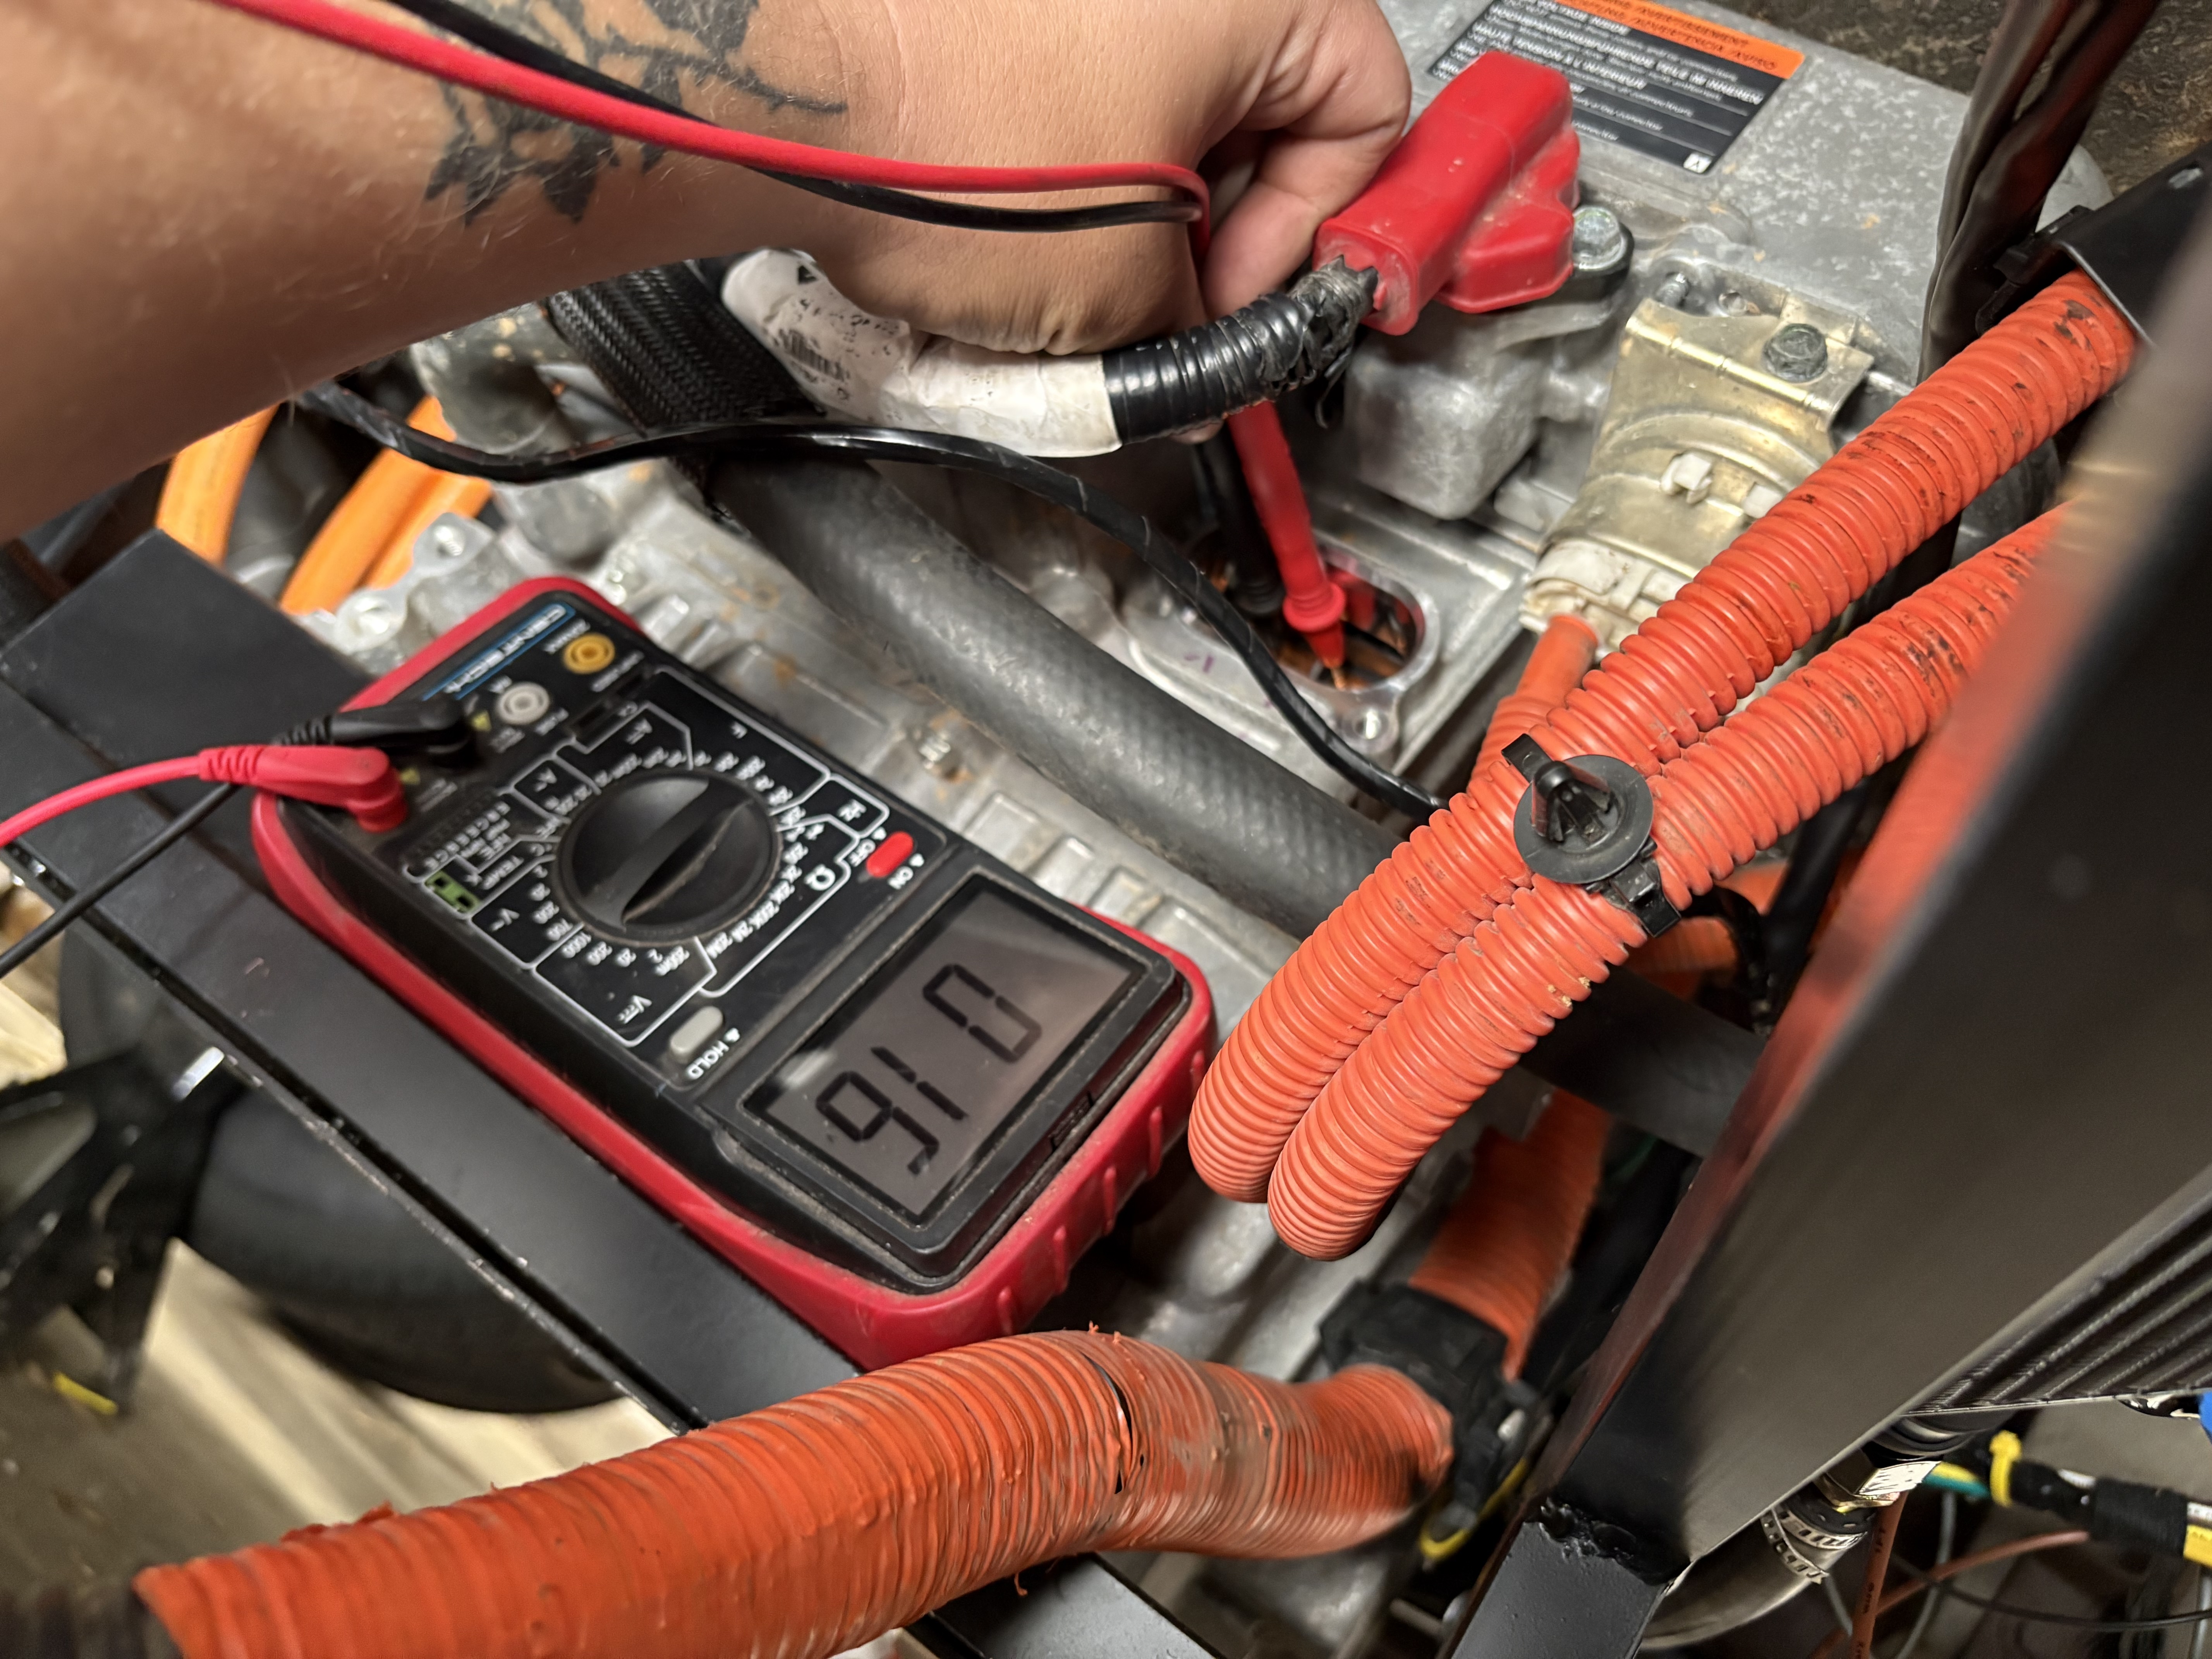
I discovered the problem after some testing with a multimeter. I corrected the HV wires and tried to turn the car on again but no luck.
I measured the voltage at the PDM and it was only something like 17 volts. Should have been over 350v. The low voltage means there's a short.
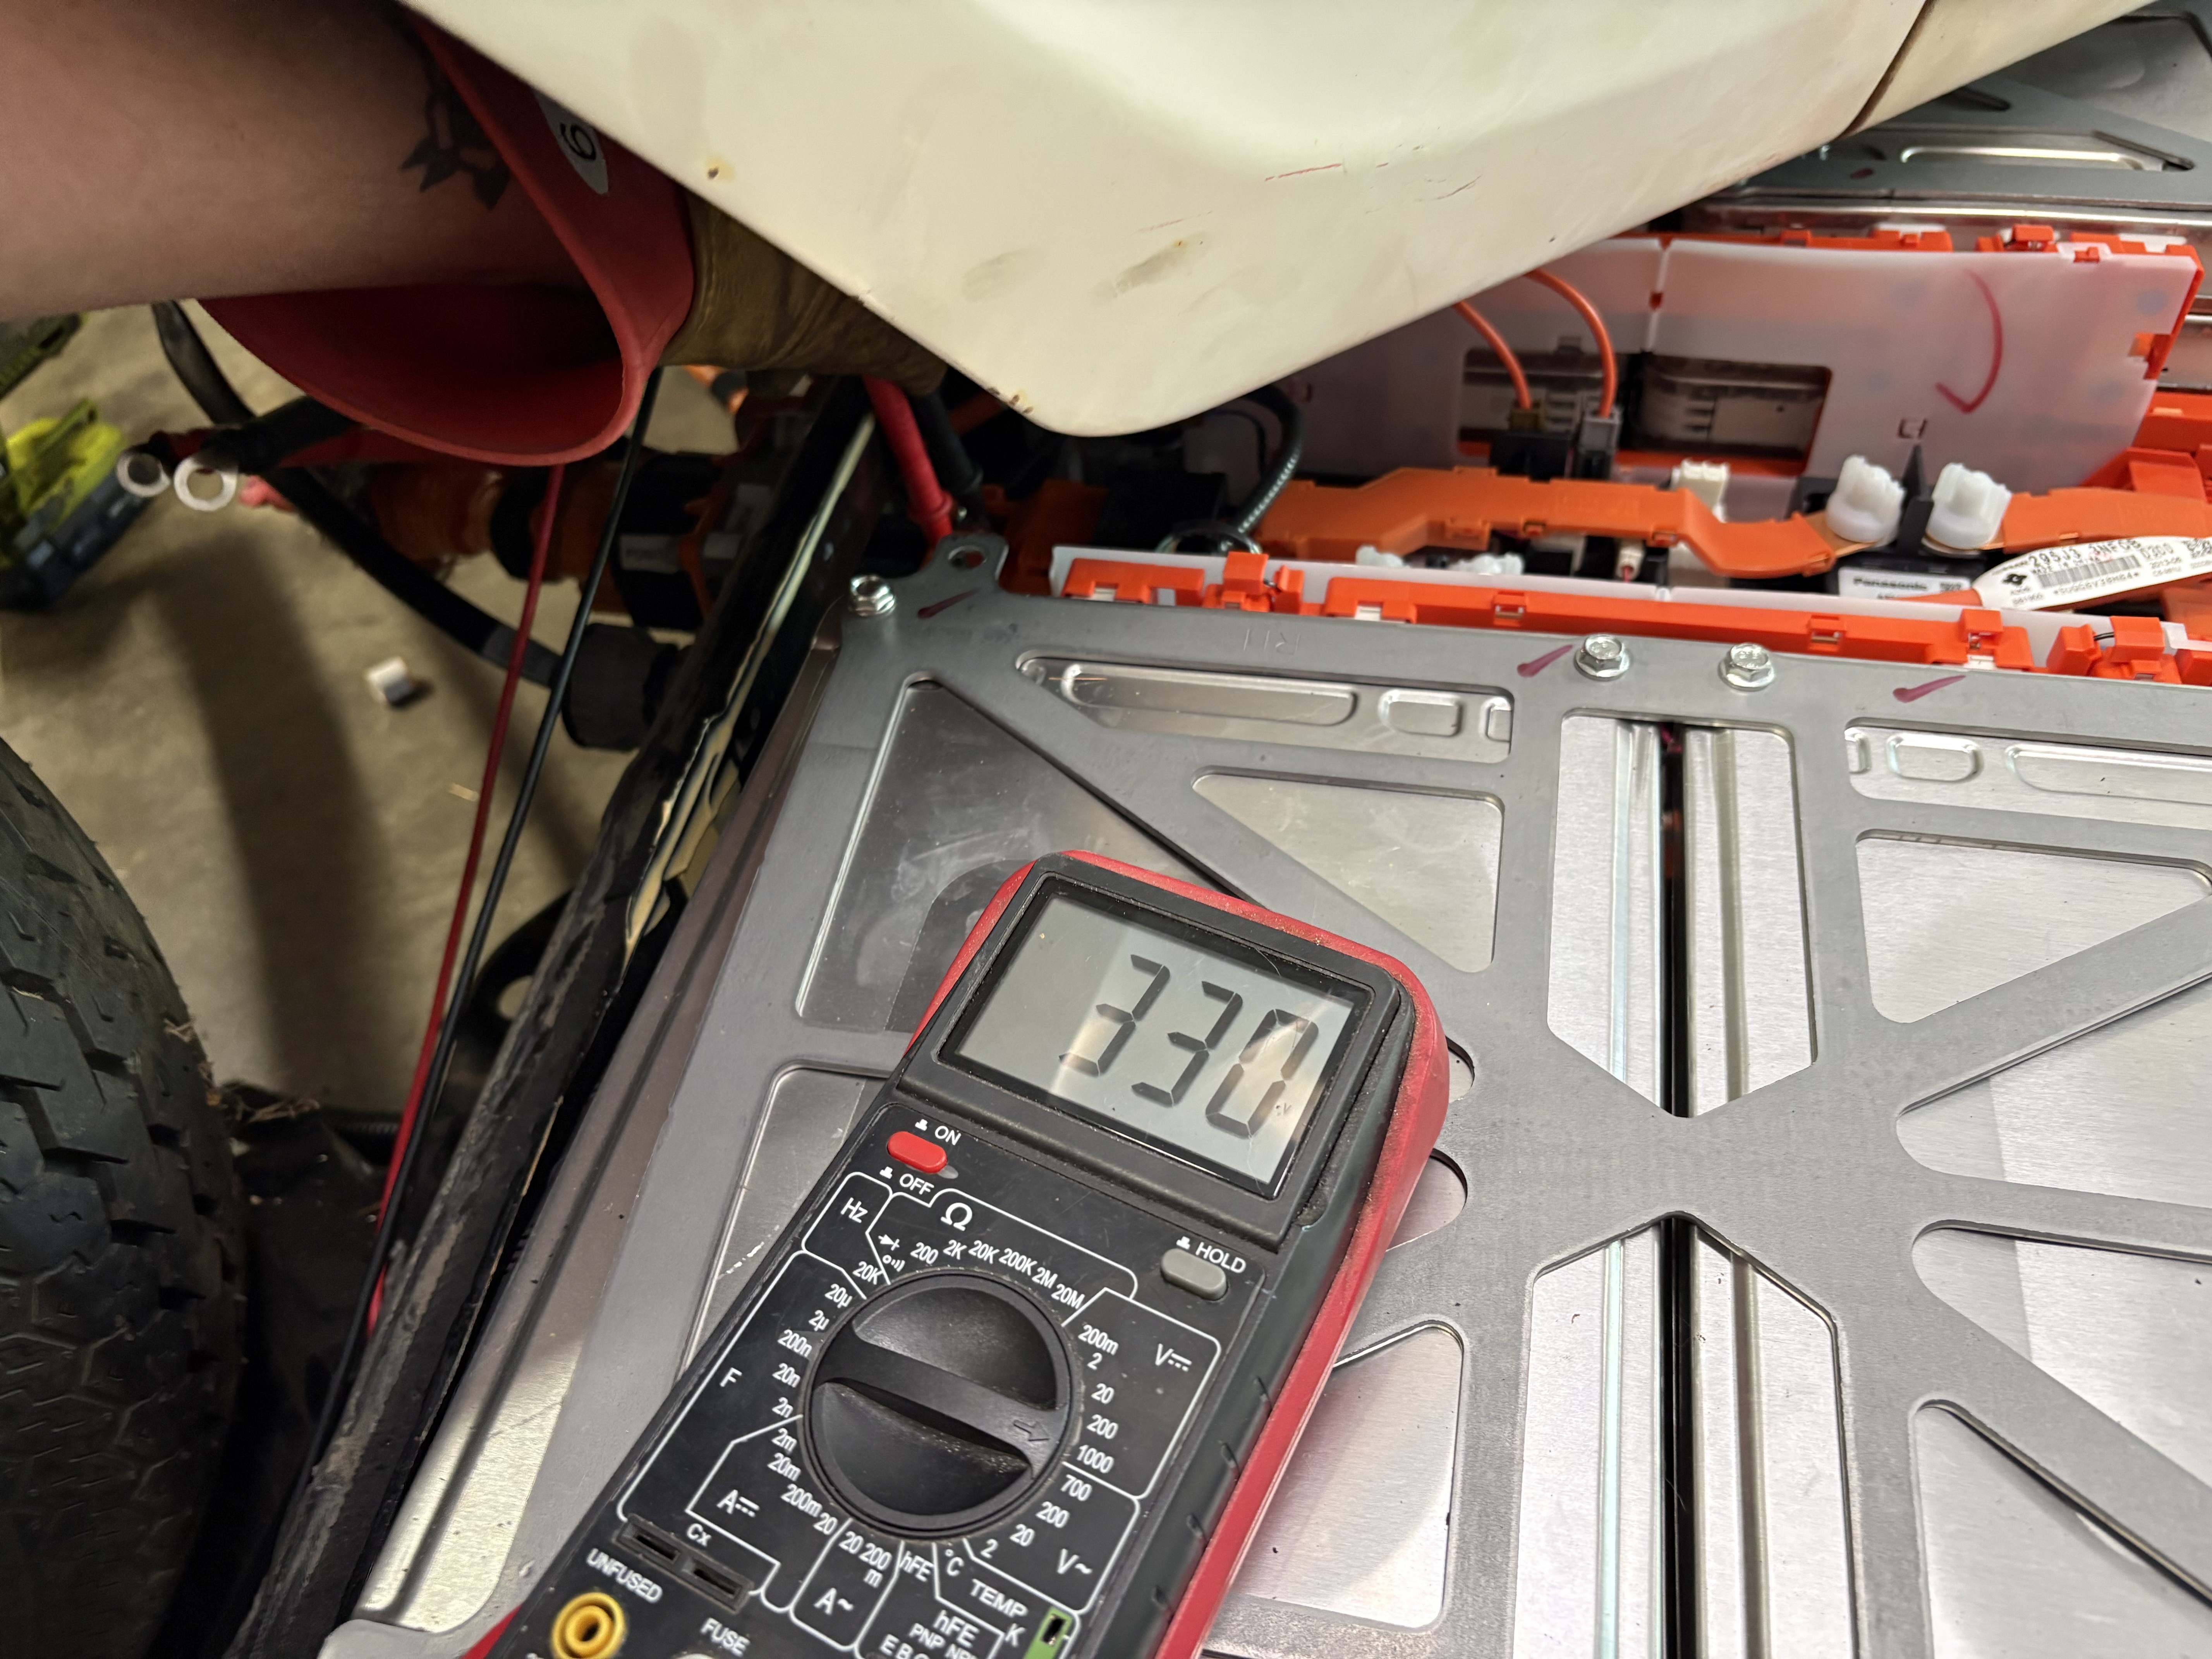
However, I knew the pre-charge resistor was good because, with the HV wires disconnected but the LV harness still plugged into the pack and the car turned on, the pre-charge resistor was correctly providing 330v.
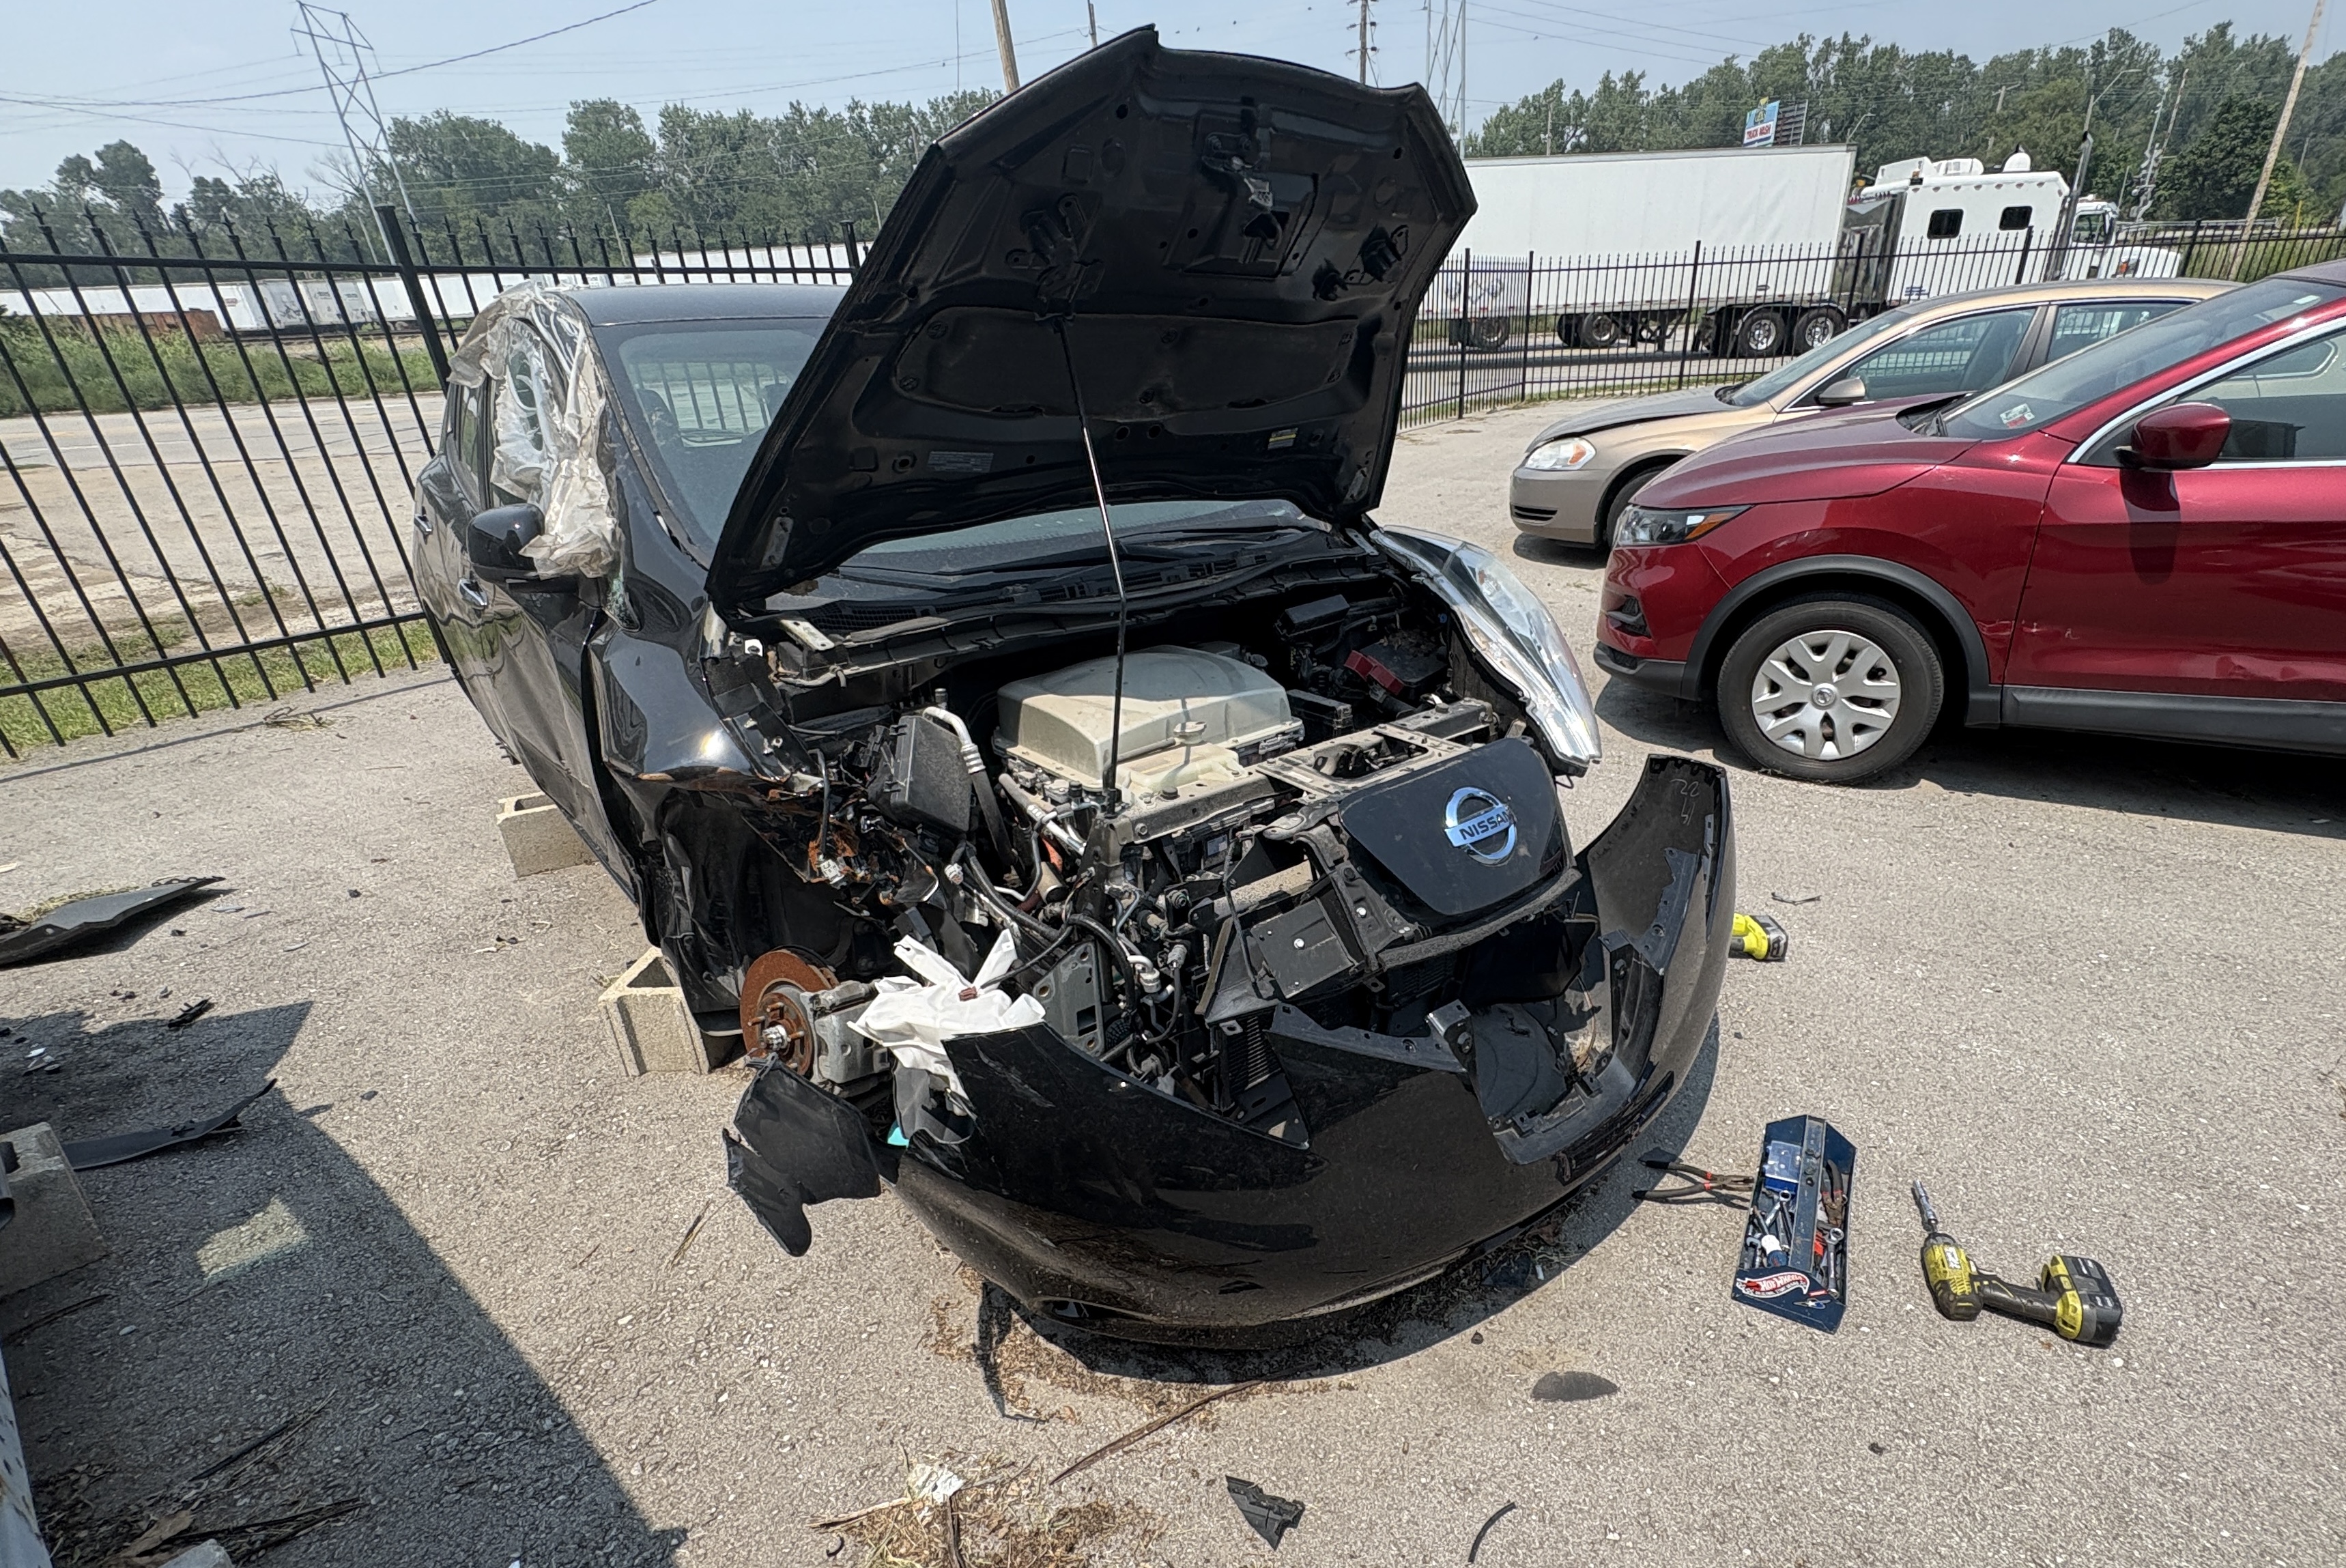
I confirmed with Isak at Resolve that, because the pre-charge resistor did not blow (and act like a fuse) then the PDM and Inverter were likely toast, especially the diodes if not much more.
I ended up buying a new PDM and an new inverter to replace the old one that were likely fried. I got them from a wrecked 2016 Leaf.
It took a while but with those installed, I could finally get the car started and try to spin the wheels.
Once again, I have a YouTube video that goes through this whole procedure and shows all the trials and tribulations involved.
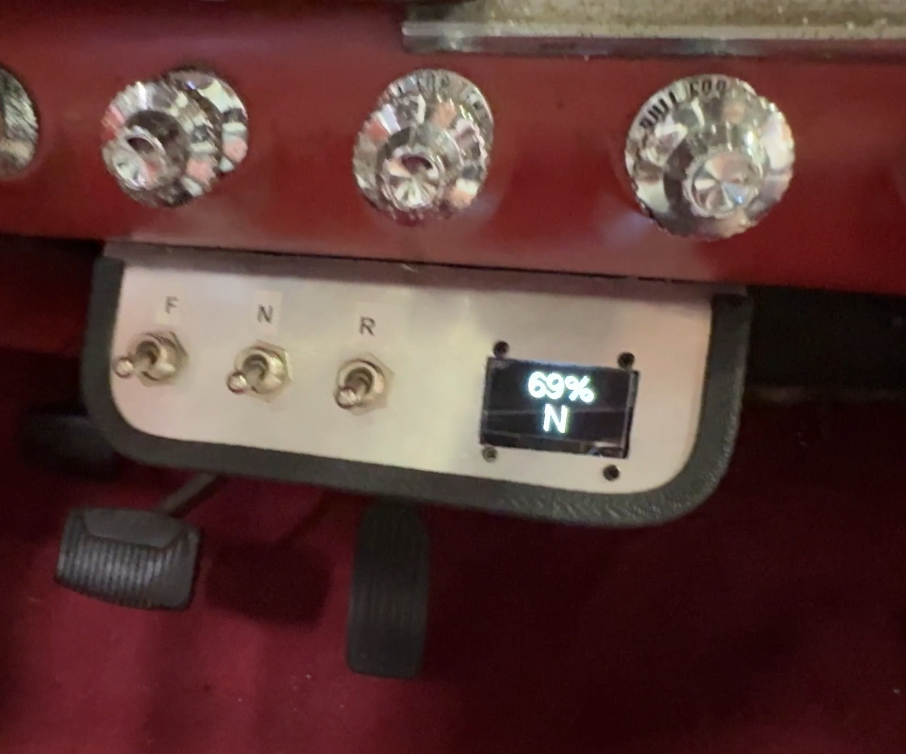
Success!! The LCD screen is on which means the Resolve VCU is happy. In truth, there was a series of minor mistakes I had to sort through first, like grounding the battery enclosure to the car and closing the interlock circuit on the HV plug that I was no longer using.
But I wasn't out of the woods yet!
Remember when I swapped some of the HV phase wires between the inverter and motor to get it to spin in the other direction? I had to do this because I mounted the motor backwards so it would fit better. But I swapped the wrong phase wires. So at first the wheels wouldn't spin in either forward or reverse. Then I tried again, and this made it so the wheels would not spin in forward, but they would spin forward when in reverse...!
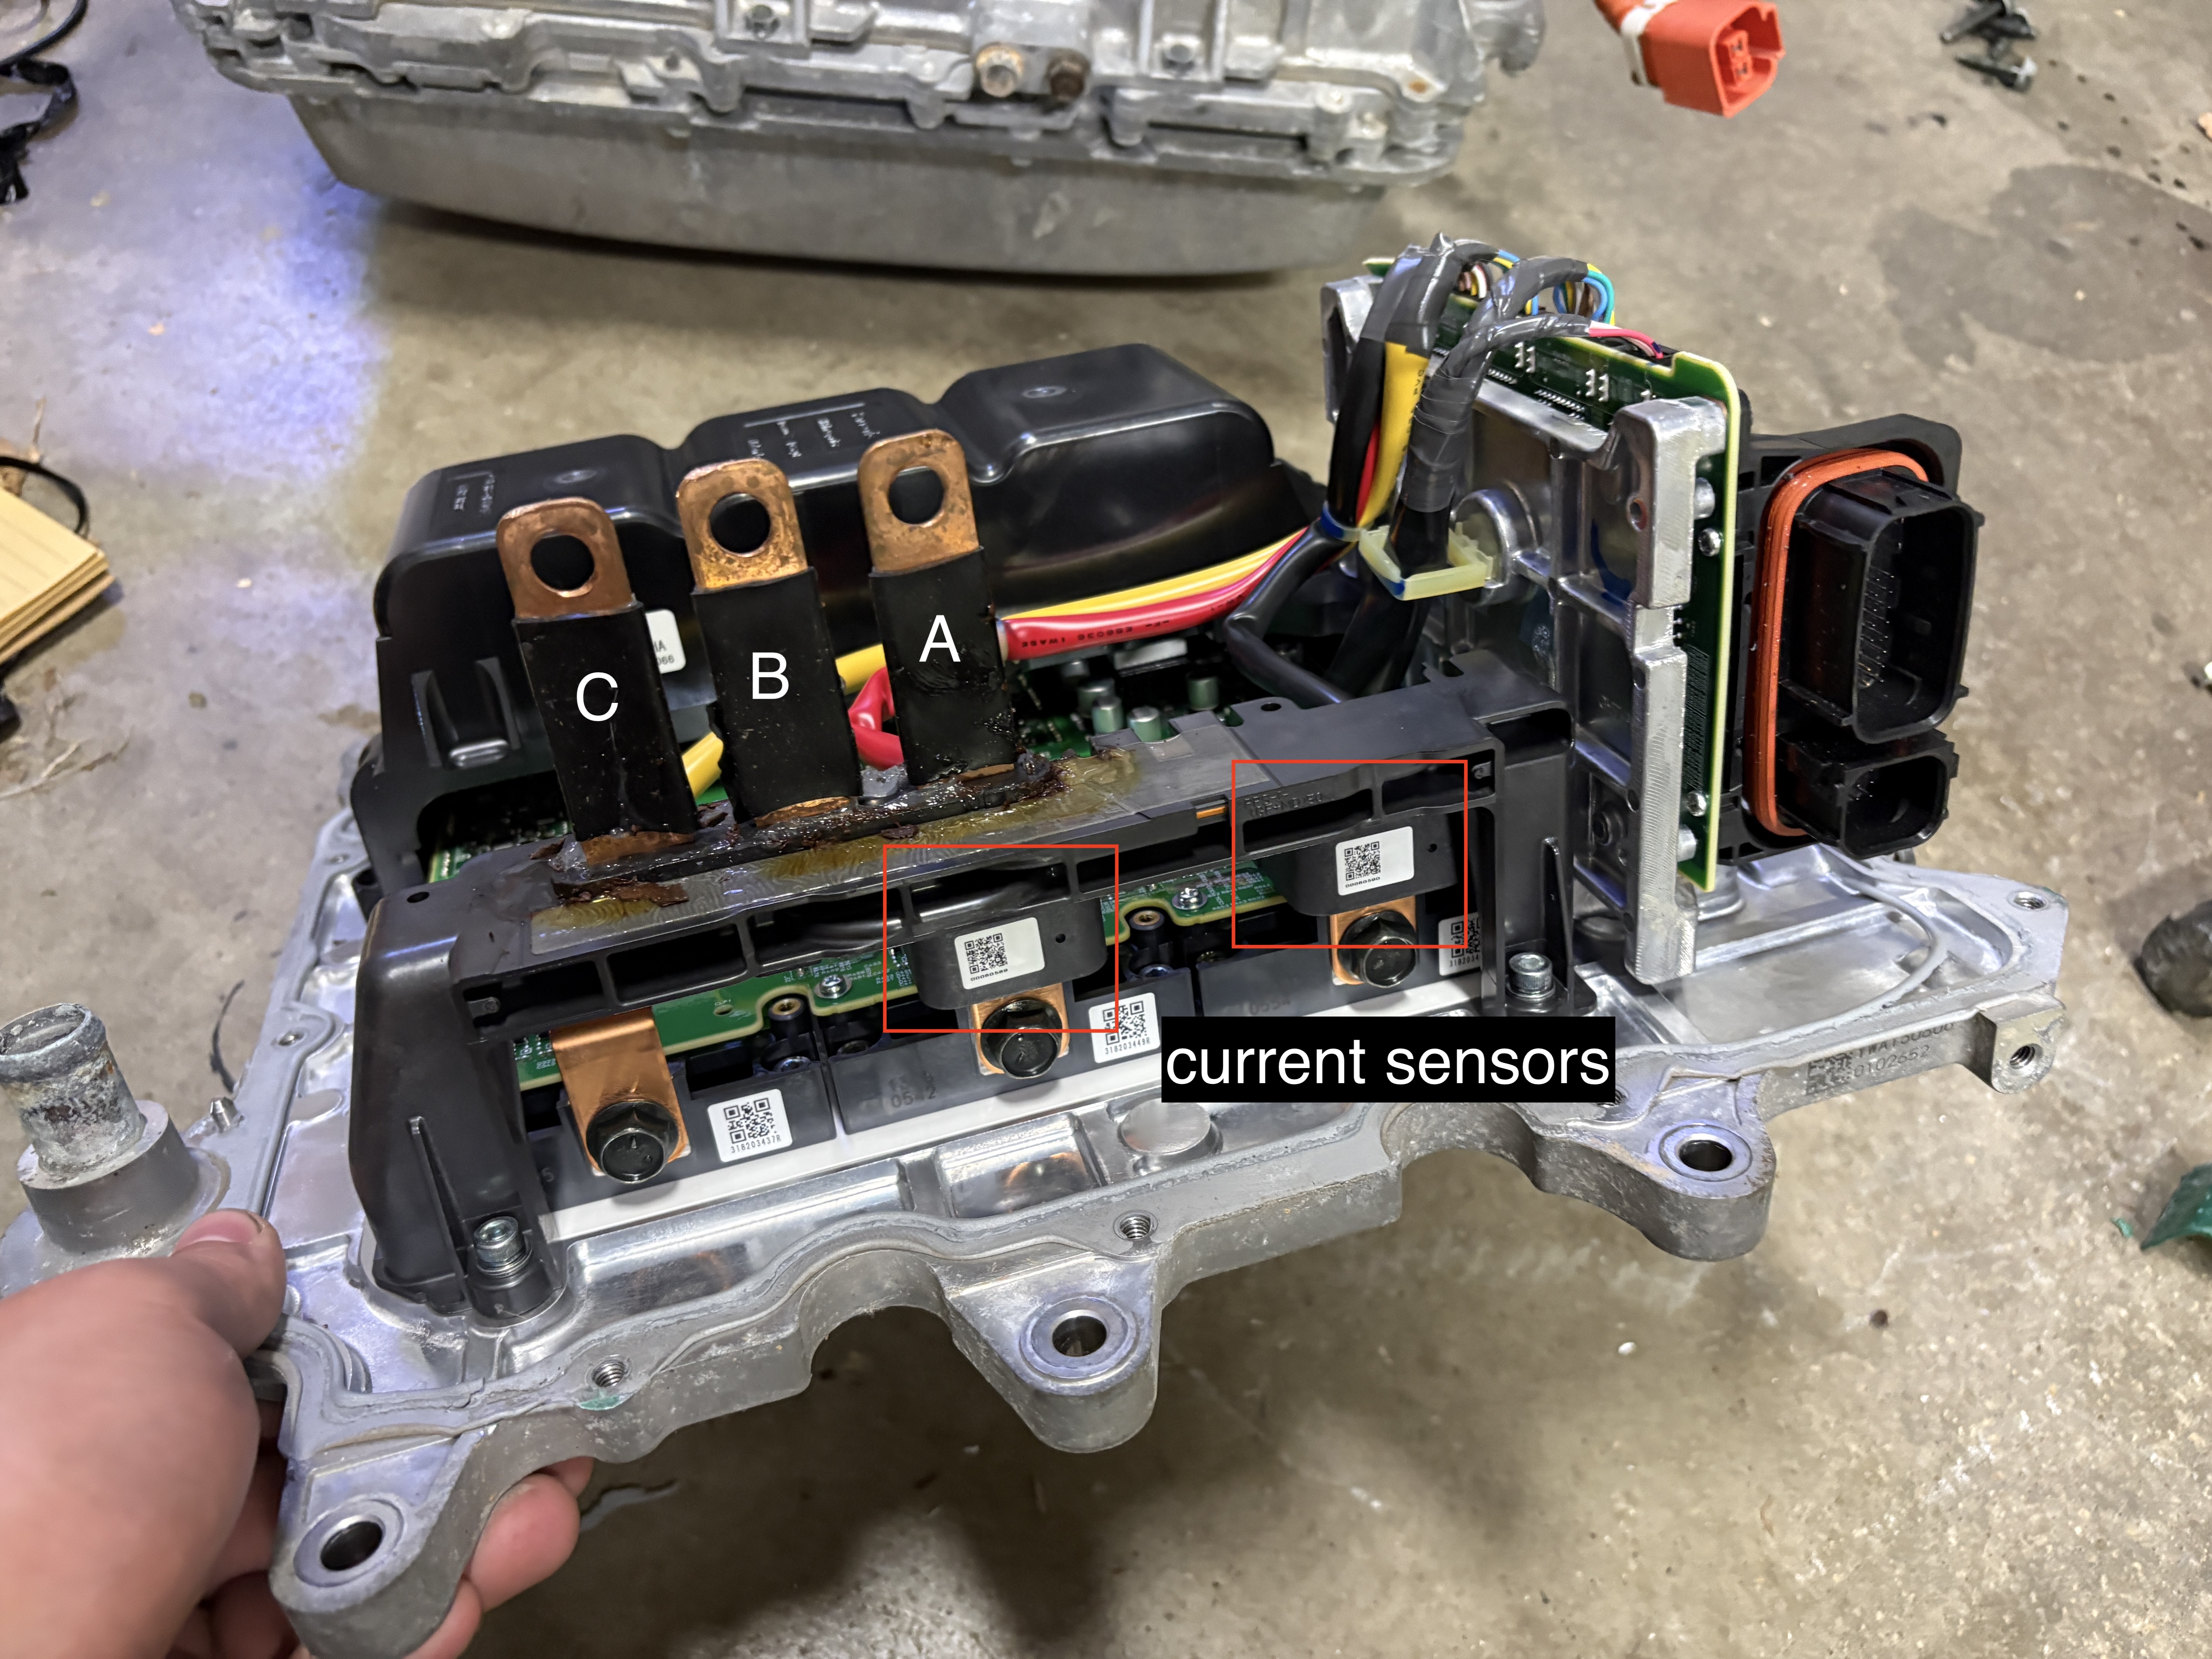
At this point I decided to stop playing wack-a-mole, so I took the old inverter and cracked it open to see where the
The trick to getting the motor to spin in the other direction is to take the wire that does not have a current sensor, and swap it with either of the two wires which do have current sensors. So in the bellow photo (which shows the inverter upside down, don't make a mistake!) the busbar labeled C can be swapped with either B or A. This is in addition to the two small wires that need to be swapped inside the motor's resolver. See the Resolve VCU documentation.
Once I had that solved, I had forward and backwards working perfectly!
Next up: Battery pack building.
| Attachment | Size |
|---|---|
| 12v circuit diagram.png122.19 KB | 122.19 KB |
| 12v circuits.png265.35 KB | 265.35 KB |
| Comet wiring diagram left.jpg319.67 KB | 319.67 KB |
| comet wiring diagram right.jpg314.97 KB | 314.97 KB |
| leaf wiring diagram.pdf8.49 MB | 8.49 MB |